Share or unshare a folder
Discover how folder sharing works through folder permissions, and grant only the correct roles access to your data
Now that you have decided to organize your data with folders, you may wish to learn more about folder sharing. In this topic, you’ll learn about folder sharing on a conceptual level, but you will also discover how to apply it in practice.
Prerequisites:
- You know what folders are
- You understand folder privacy settings and folder sharing
- You have one or many folders from which you would like to control their data access.
Read more about:
Folder access
After creating a folder, you can assign roles to it by editing the folder. The roles you decide on will be able to operate on the contents within the folder. Meaning that your chosen roles can either add, view, edit, or delete data, depending on their permissions. We call this role authorization.
You can check on what your roles can do by viewing their permissions. Look for these permissions specifically as they determine CRUD (create, read, update, delete) operations:
- Renders.Create
- Renders.Retrieve
- Renders.Update
- Renders.Delete
By double-checking the permissions of your assigned roles, you avoid giving more access and authorization than you intend.
If necessary, you may want to create a new role specifically for handling the data within your designated folder. For example, if you store generated patient data that should not be modified, you shouldn’t let your generic ‘data writer/reader’ role operate on this folder. So, you may decide to create a ‘Patient data reader’ role instead.
Before you share a folder
You can either assign folder permissions with the "share" dropdown option or while you edit them. The process is similar. However, consider how changing permissions could lock active systems out – halting processes within your organization and causing critical downtime.
For starters, ensure you are signed into a user with the folders.create or folders.update permission. You can have both or one, depending on whether or not you want to create a new private folder or edit an existing one.
Use your default admin user if you have not yet set up roles and permissions.
Proceed by creating a folder, as is shown in the creating a folder topic. You must have a folder before you can share it.
Sharing folders
- Navigate to your folders by clicking on the "Documents" tab.
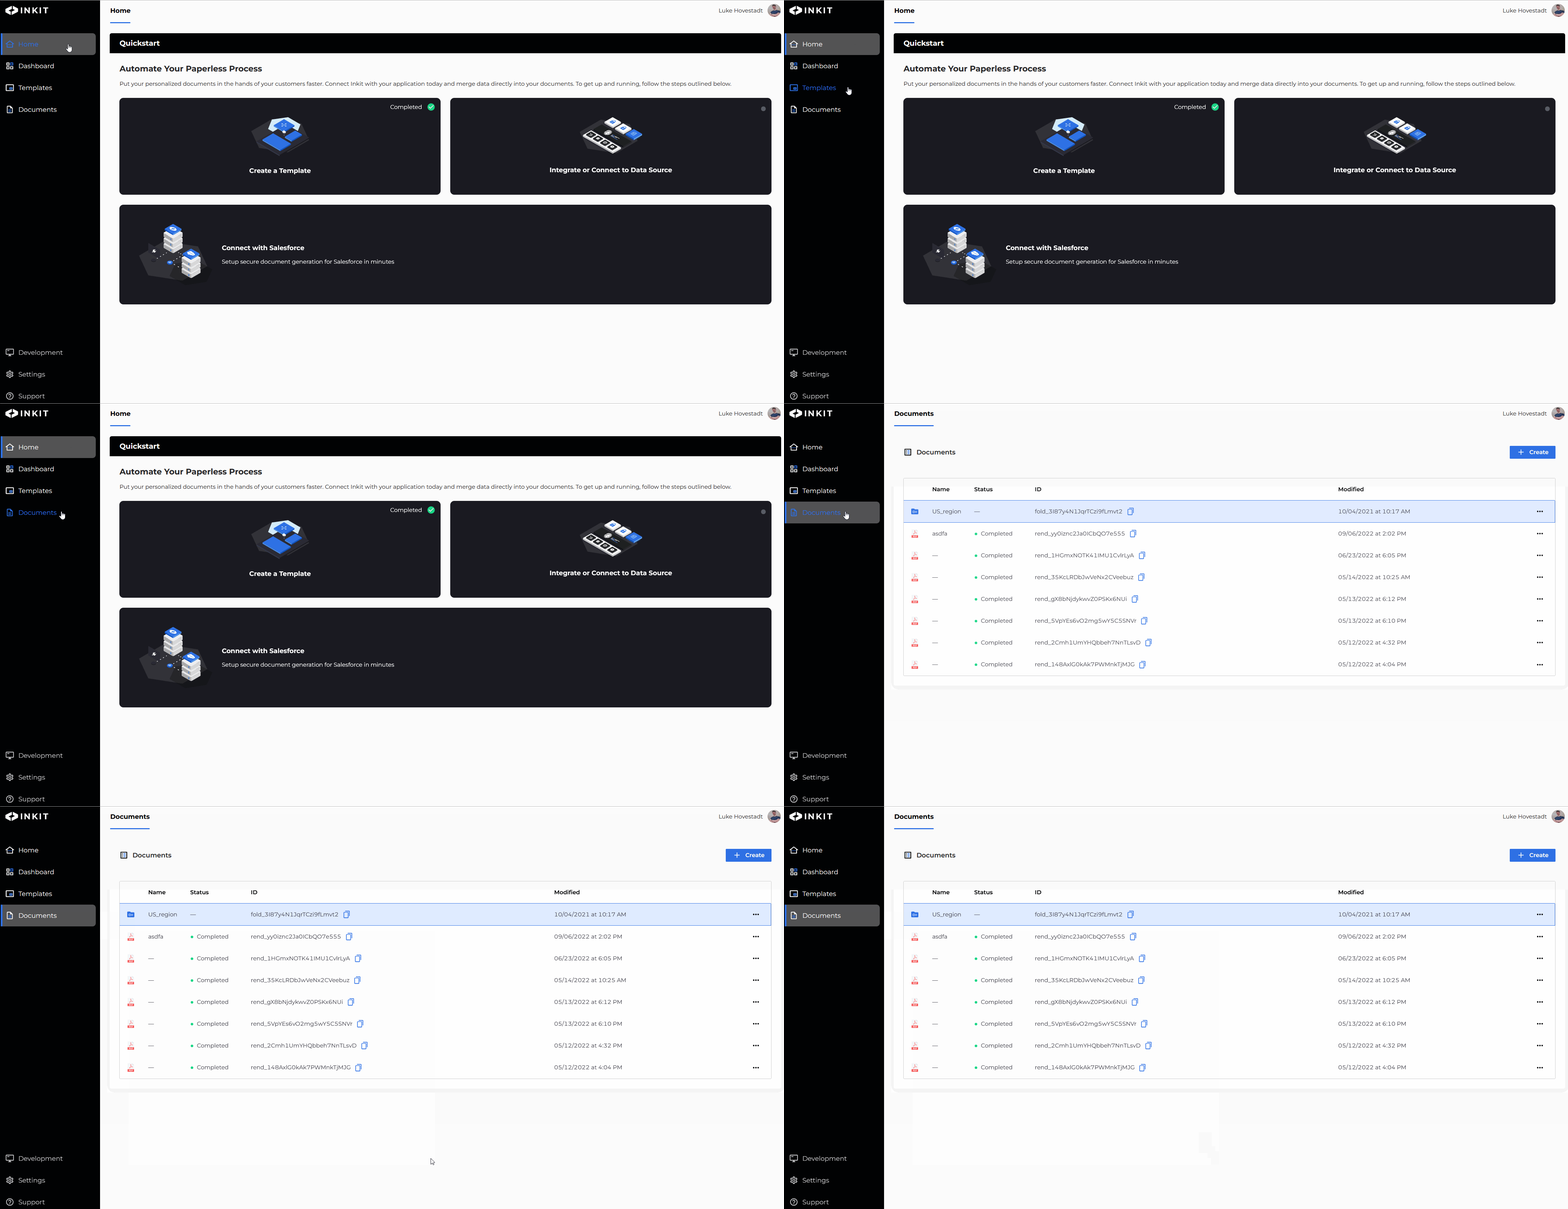
- Hover over the three dots "..." next to your folder and press on share.
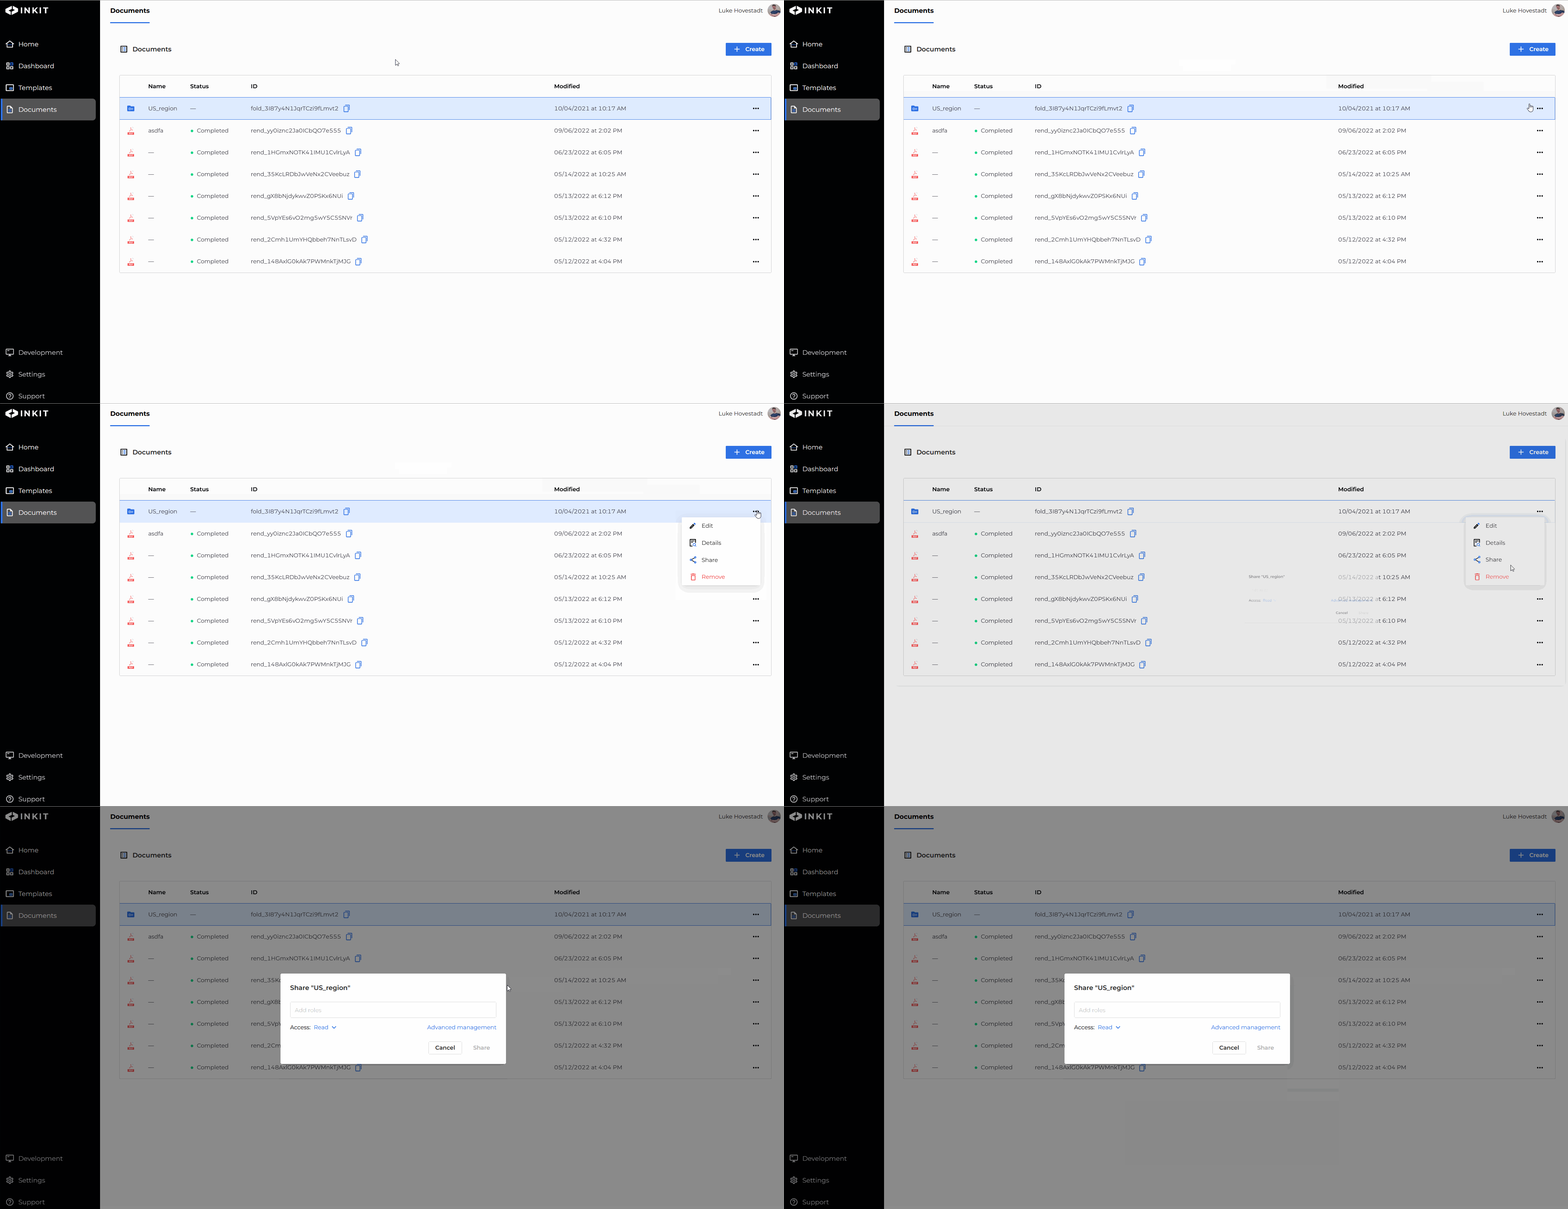
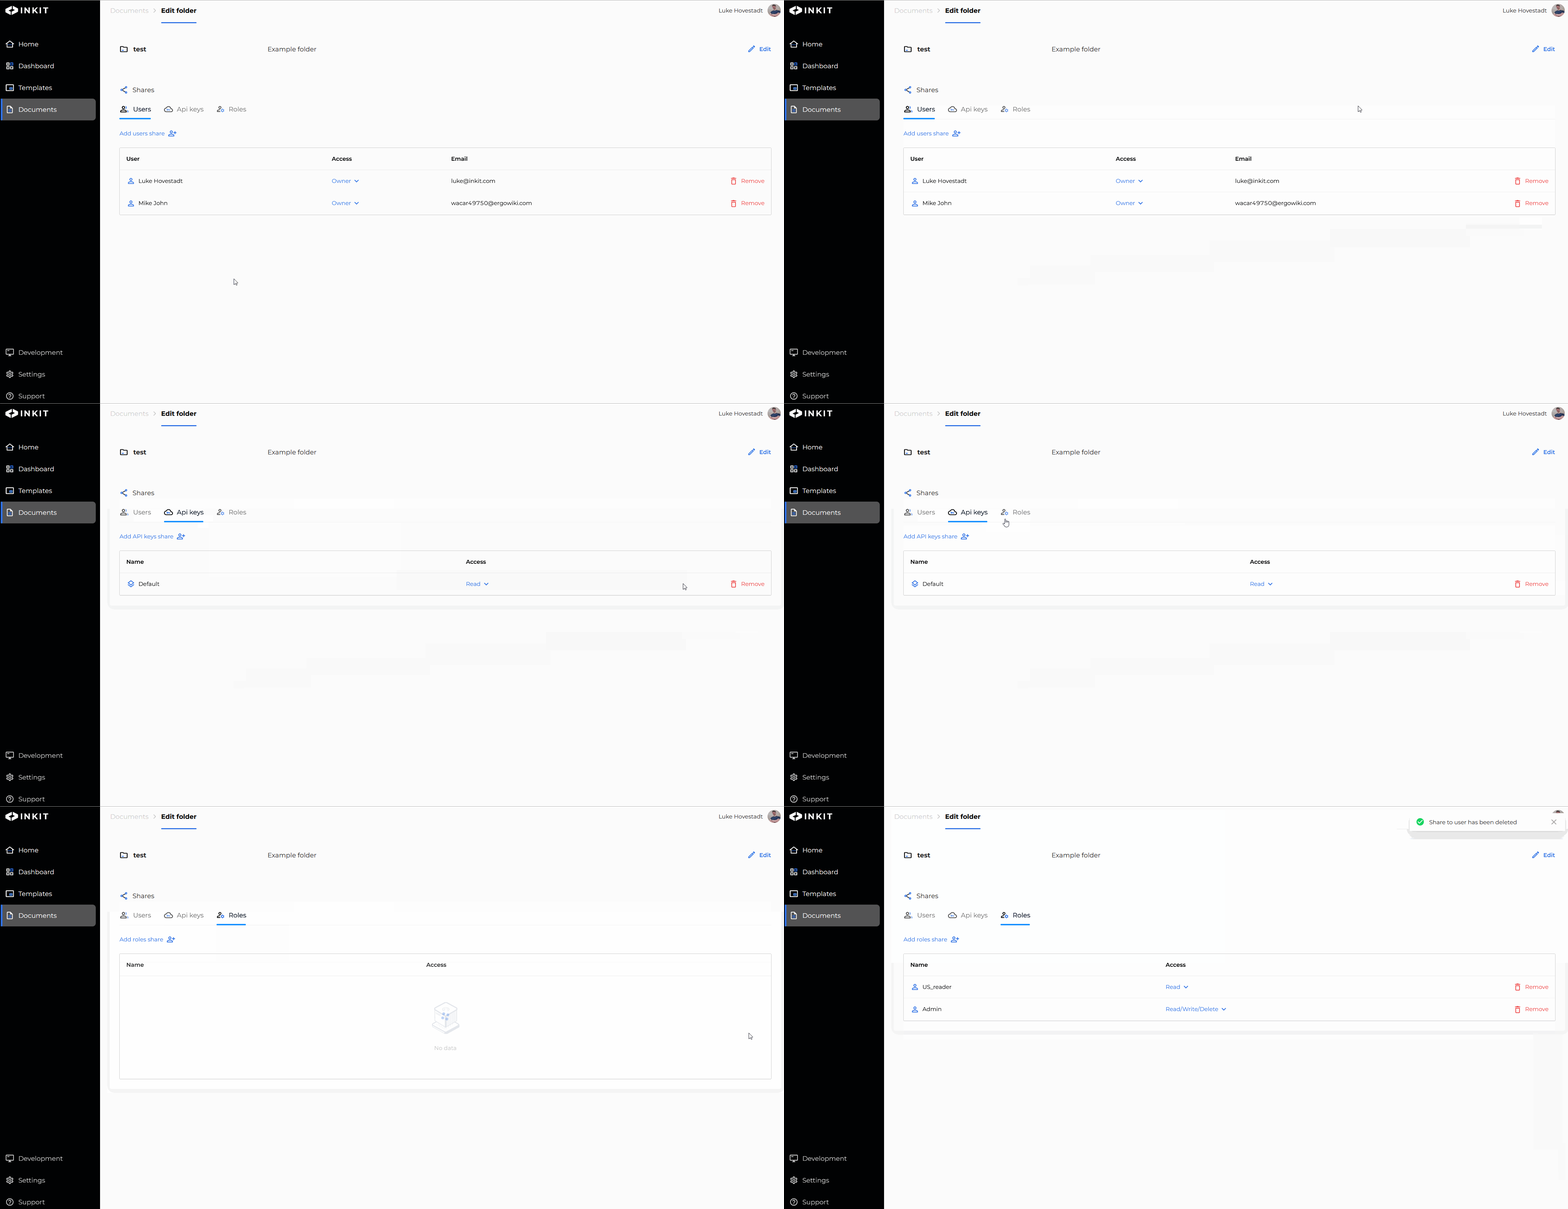
- Select the roles you want to share this folder with and choose access options in the dropdown. You can share with users, roles, or API keys.
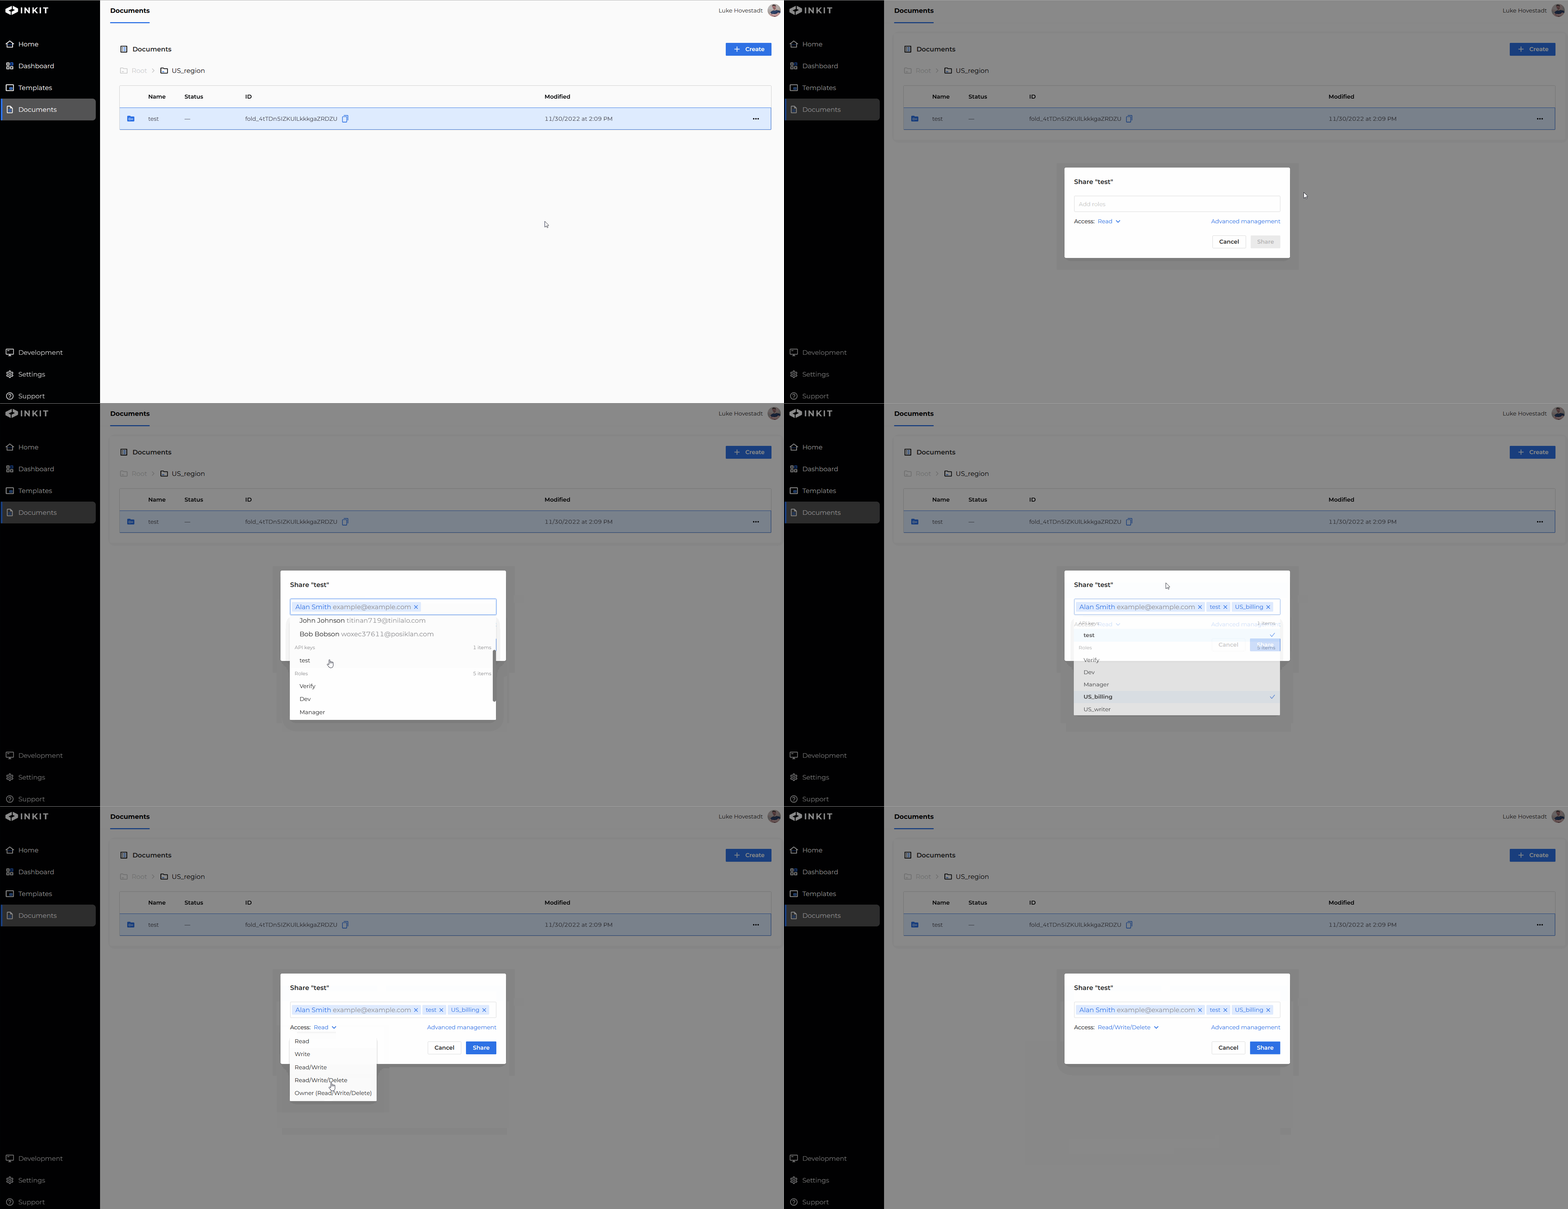
Well done. You have now successfully share or edited your folder its sharing settings. To edit sharing settings, you go through the same process.
Press "Edit" in the dropdown instead of share, and you can update permissions in the editing dashboard.
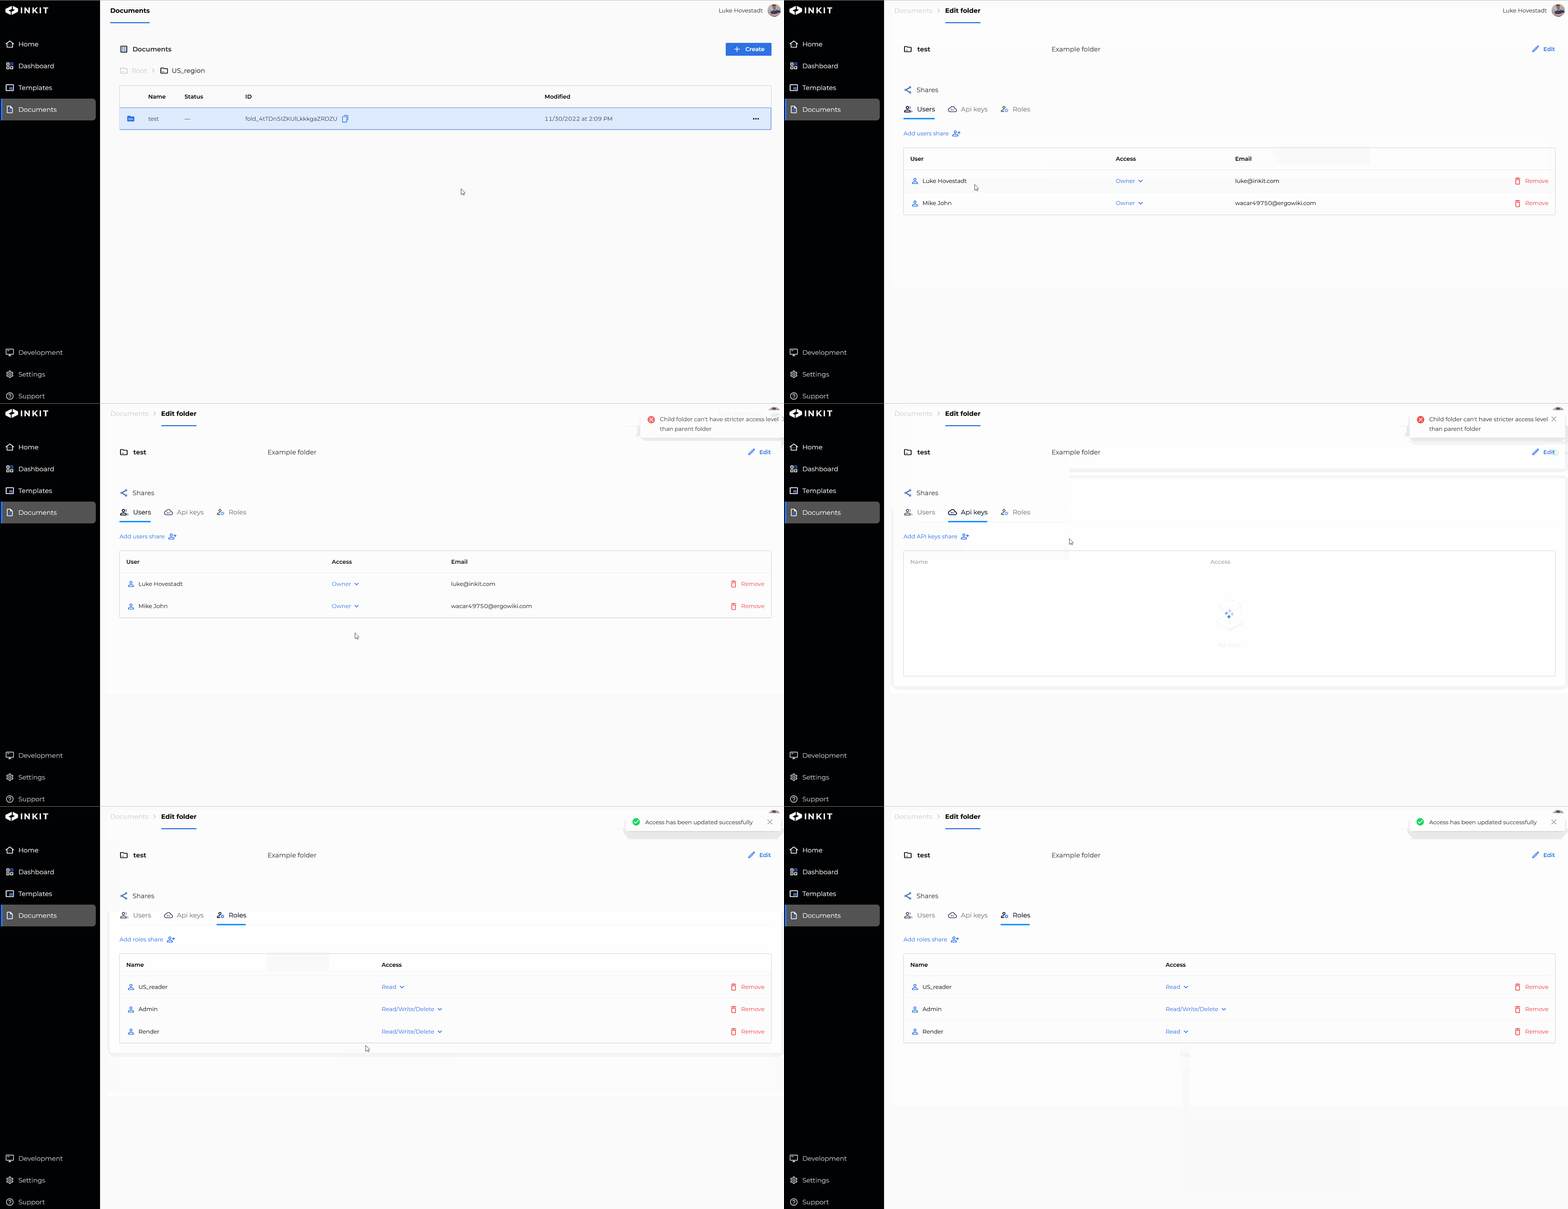
If you want to read more about role authorization and permissions, refer to this section:
Unsharing a folder
Typically, you would unshare a folder by editing your existing folder. However, you could also delete the folder to remove all data and access. But, because deleting a folder is a somewhat drastic measure, we recommend you unshare by editing your folder instead.
When editing folders, you need the folders.update permission.
Follow these steps:
- Determine which role you want to remove from your private folder
- Select the user/role/API key you want to remove and press the "Remove" option in the edit folder form
- Save your changes
Note: A private folder must have at least one role assigned to it. If you have no roles for this folder, consider giving only your admin access.
Updated 5 months ago