Generating documents using the API
You can generate documents in your own applications at scale by using the Inkit API.
If you want to use one of our SDKs, install either our Python SDK or Node.js SDK. Otherwise you can call the API through a cURL command or use our API reference. You can also make REST calls to our API in a language of your choice.
You can generate a single document or generate multiple documents in a batch for efficiency.
Generating a single document in the API
To generate a single document from the Inkit API, do the following:
-
Add an API key and copy it to some place safe.
Do not publicly expose your API keys. They act much like passwords, and anyone with access to them can make Inkit requests on your behalf. You should store them securely. -
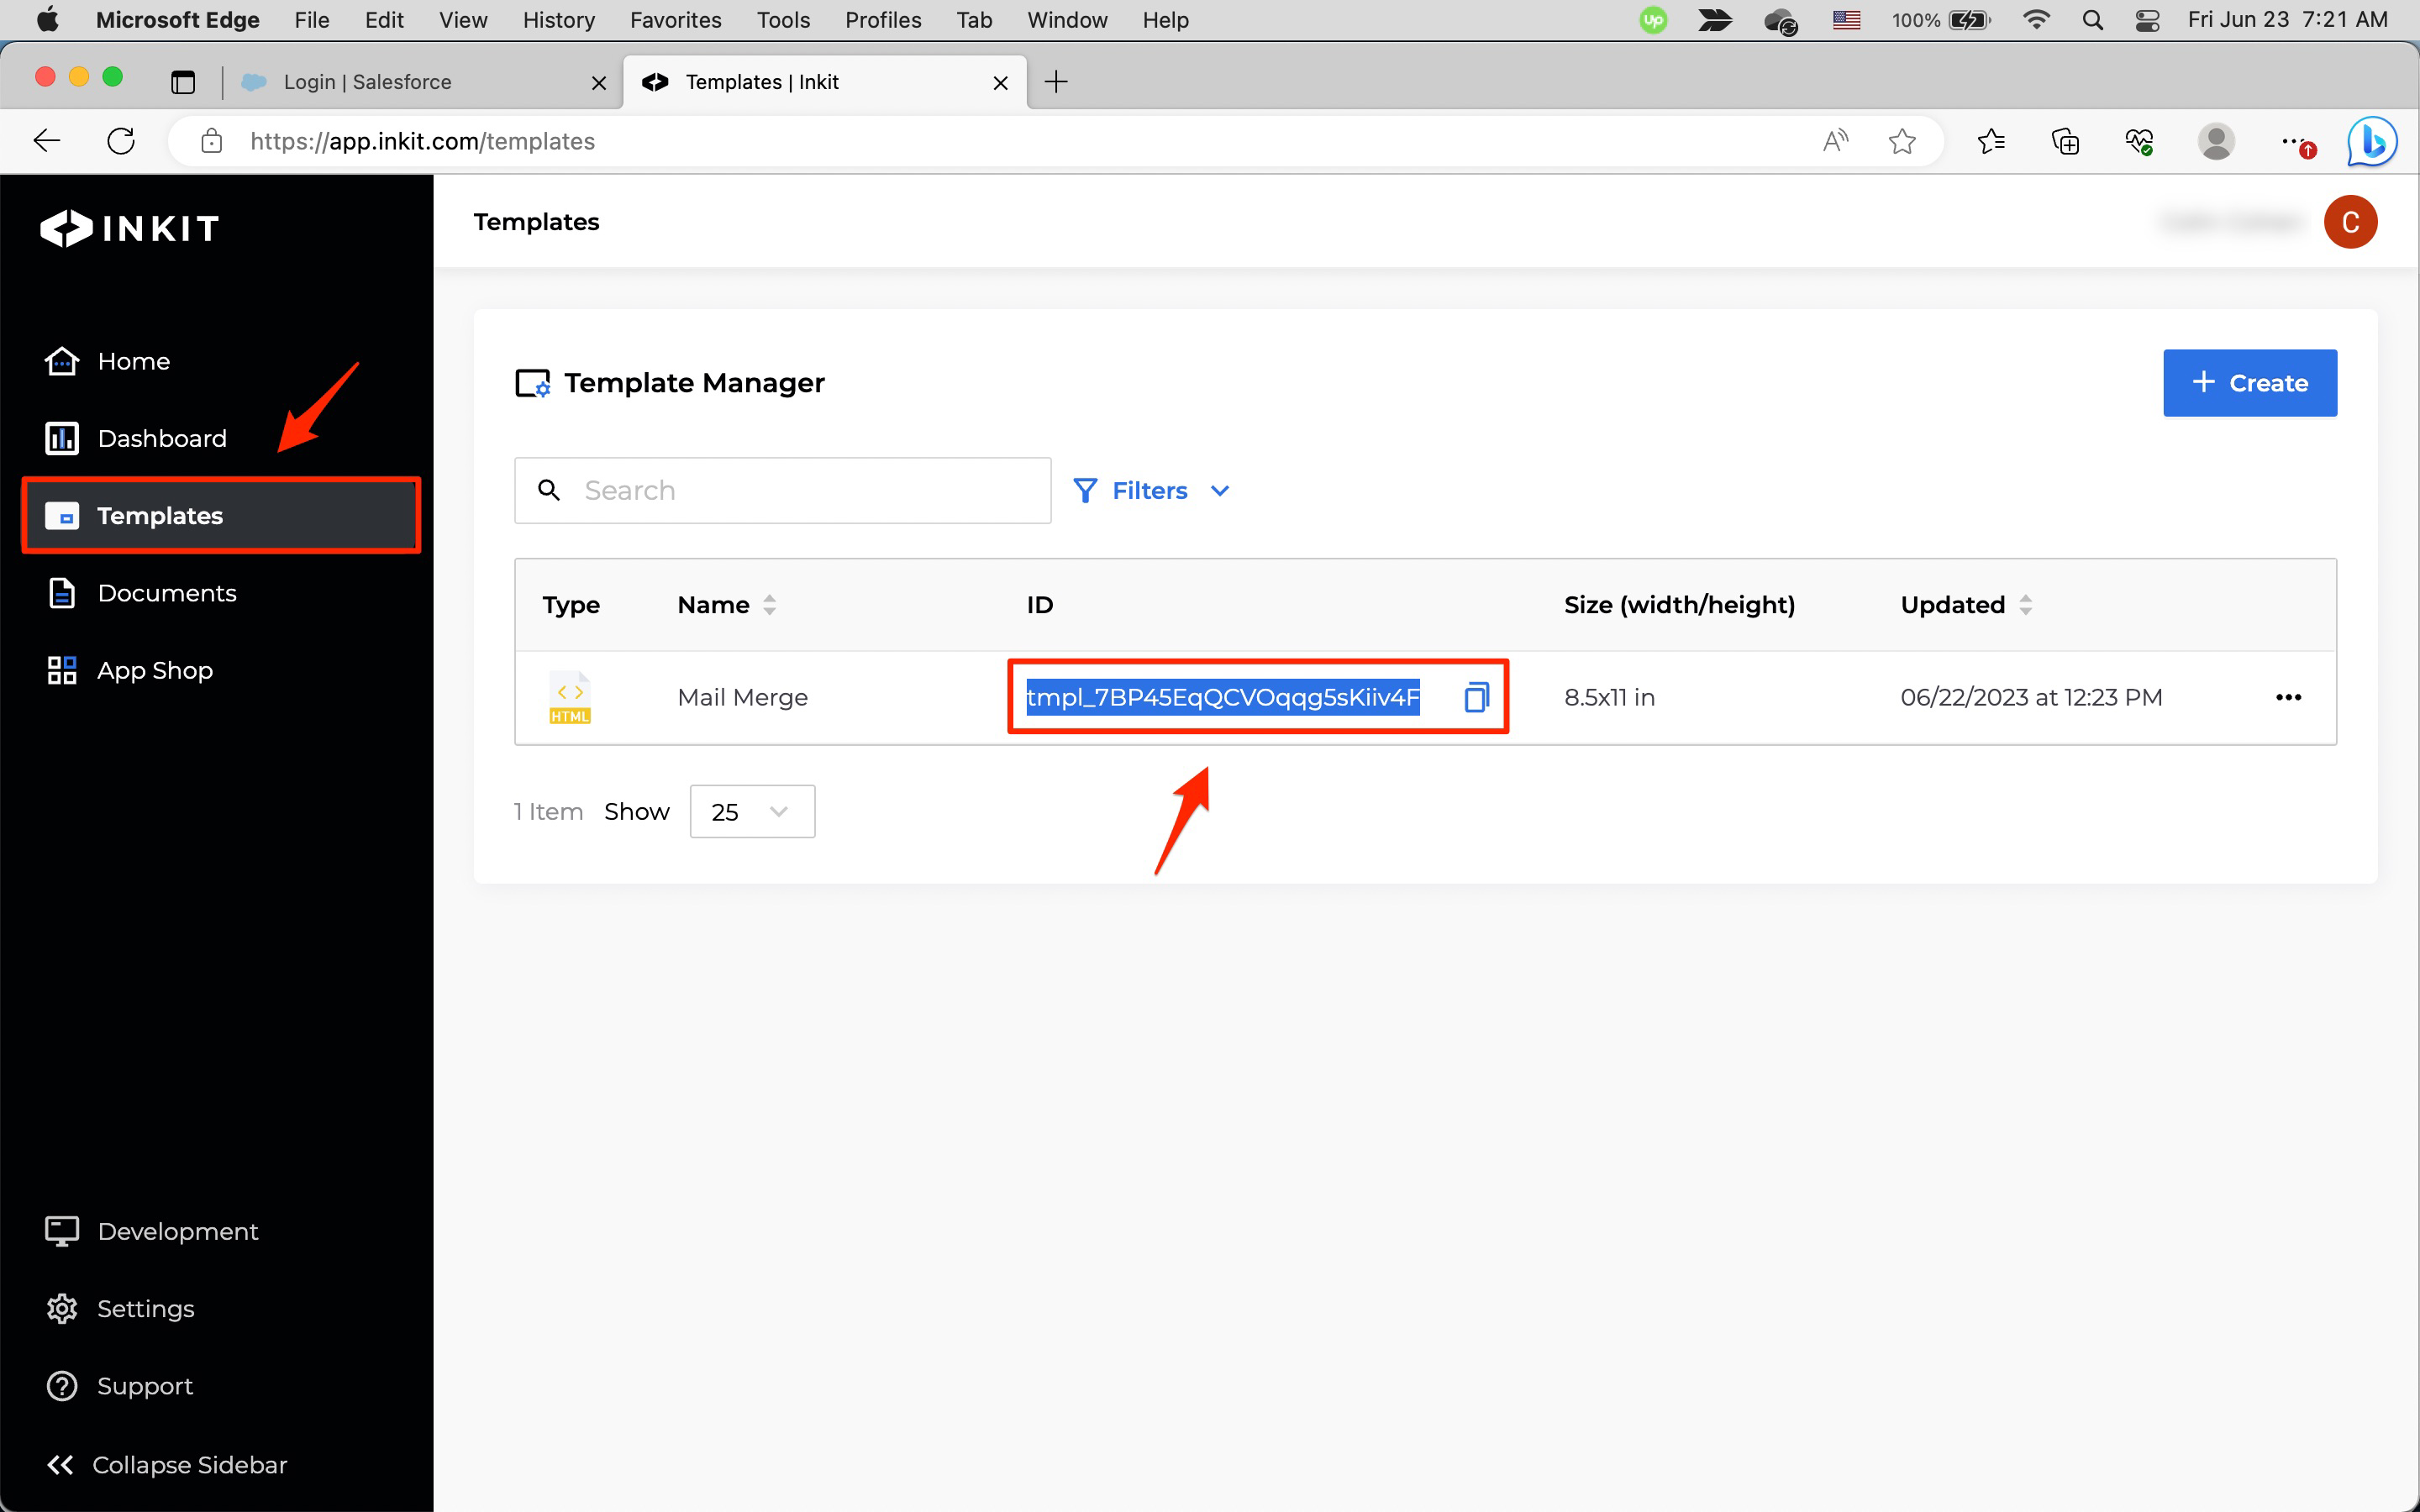
In the Inkit web app, select Templates in the left sidebar and find the template that you want to generate the document from. Then copy its ID to some place safe.

-
In a text editor, make an API request that will generate the document from the template.
# Import the Inkit Python package
import inkit
from inkit.exceptions import InkitResponseException
# Import json package
import json

# Replace the string below with your API key
inkit.api_token = "ENTER YOUR API KEY"

try:
  # Create a PDF document from a template
  resp = inkit.Render.create(
    # Specify the ID of the template
    template_id = "ENTER YOUR TEMPLATE ID",
    # Specify the data for the Name field
    merge_parameters = {"Name": "John"},
    # Specify the name of the PDF file
    destinations = {"inkit_storage": {"name": "Mail Merge Python SDK"}}
  )
  # Print the JSON repsonse of the API call
  print(json.dumps(resp.data, indent = 3))
except InkitResponseException as err:
  # Print any error
  print(err.response.data)
// Import the Inkit Node.js package const Inkit = require("inkit"); // Replace the string below with your API key Inkit.apiToken = "ENTER YOUR API KEY"; // Call the PDF renderer createRender(); // Create a PDF document from a template async function createRender() { try { const result = await Inkit.Render.create({ // Specify the ID of the template templateId: 'ENTER YOUR TEMPLATE ID', // Specify the data for the Name field mergeParameters: {"Name": "John"}, // Specify the name of the PDF file destinations: {"inkit_storage": {"name": "Mail Merge Node.js SDK"}} }); // Print the JSON response of the API call console.log(JSON.stringify(result.data, null, 3)); } catch (error) { // Print any error console.error(error.response.status, error.response.statusText); } }curl --request POST \ --url https://api.inkit.com/v1/generate \ --header 'Content-Type: application/json' \ --header 'X-Inkit-API-Token: ENTER YOUR API KEY' \ --header 'accept: application/json' \ --data ' { "merge_parameters": { "Name": "John" }, "destinations": { "inkit_storage": { "name": "Mail Merge cURL" } }, "template_id": "ENTER YOUR TEMPLATE ID" } ' -
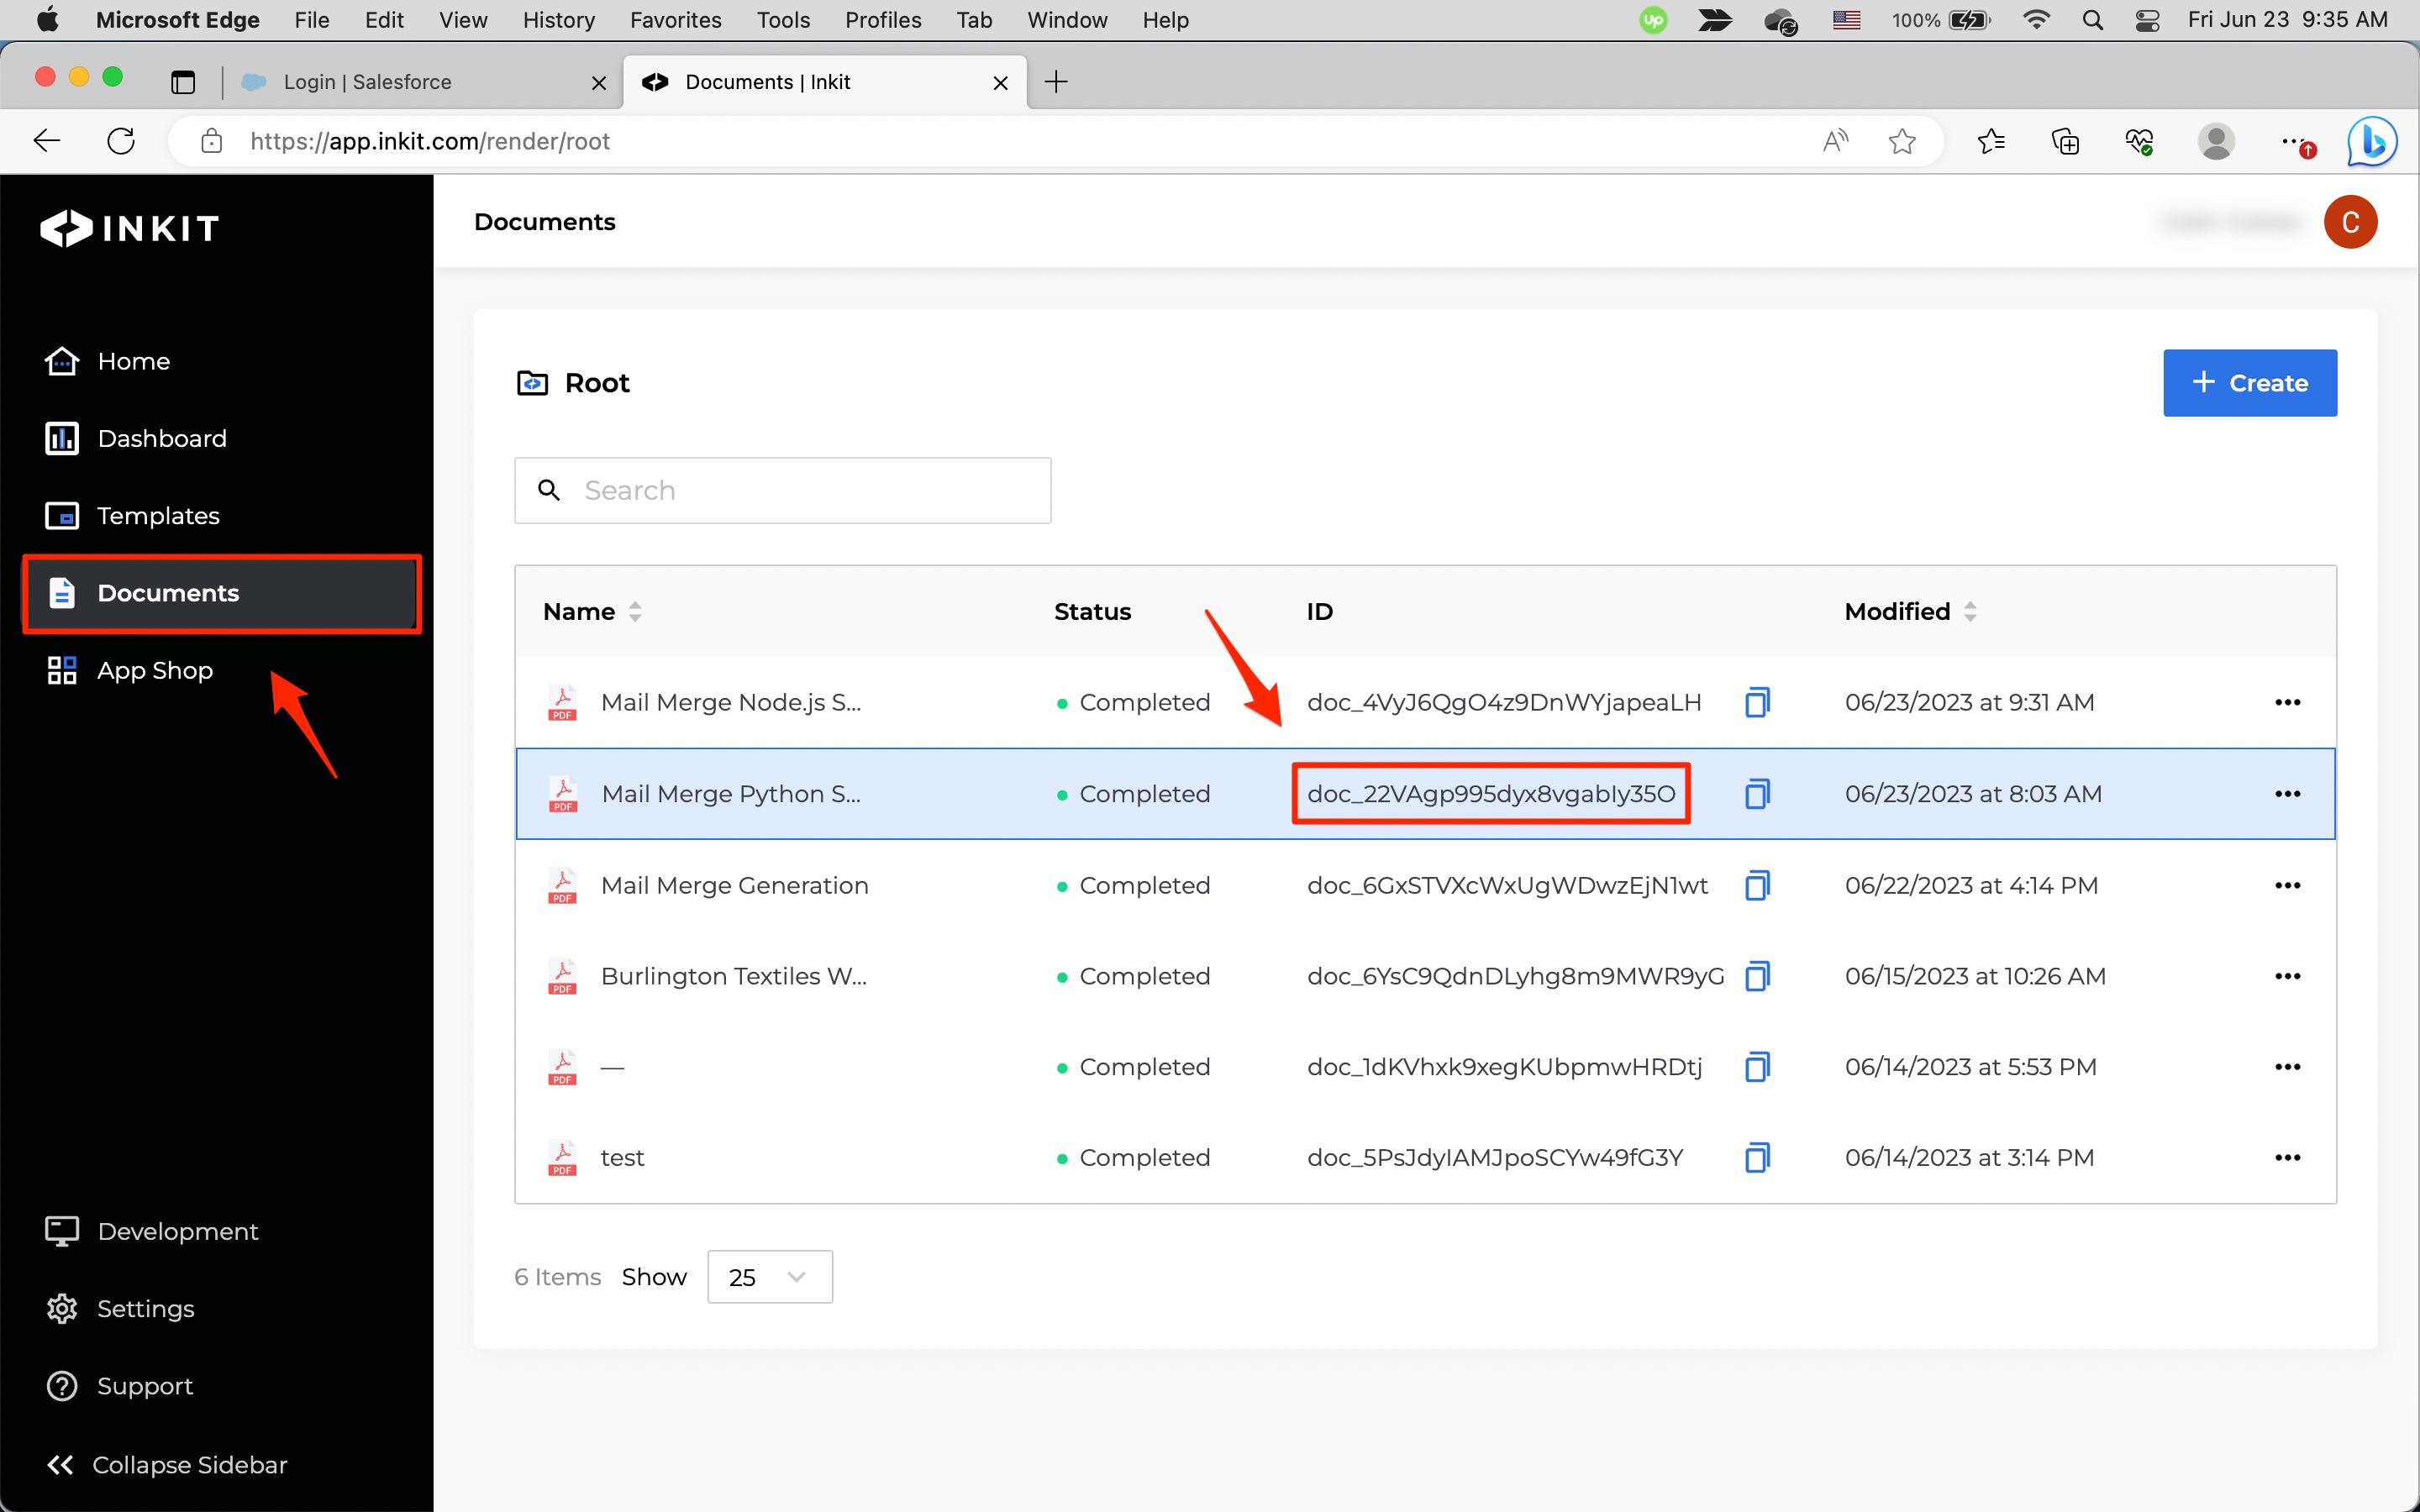
After executing the above code, in the Inkit web app select Documents in the left sidebar. You should see the document that you just generated in the list of documents and can confirm that its ID matches the
document_idin the response object.To view the document, double-click on it.

-
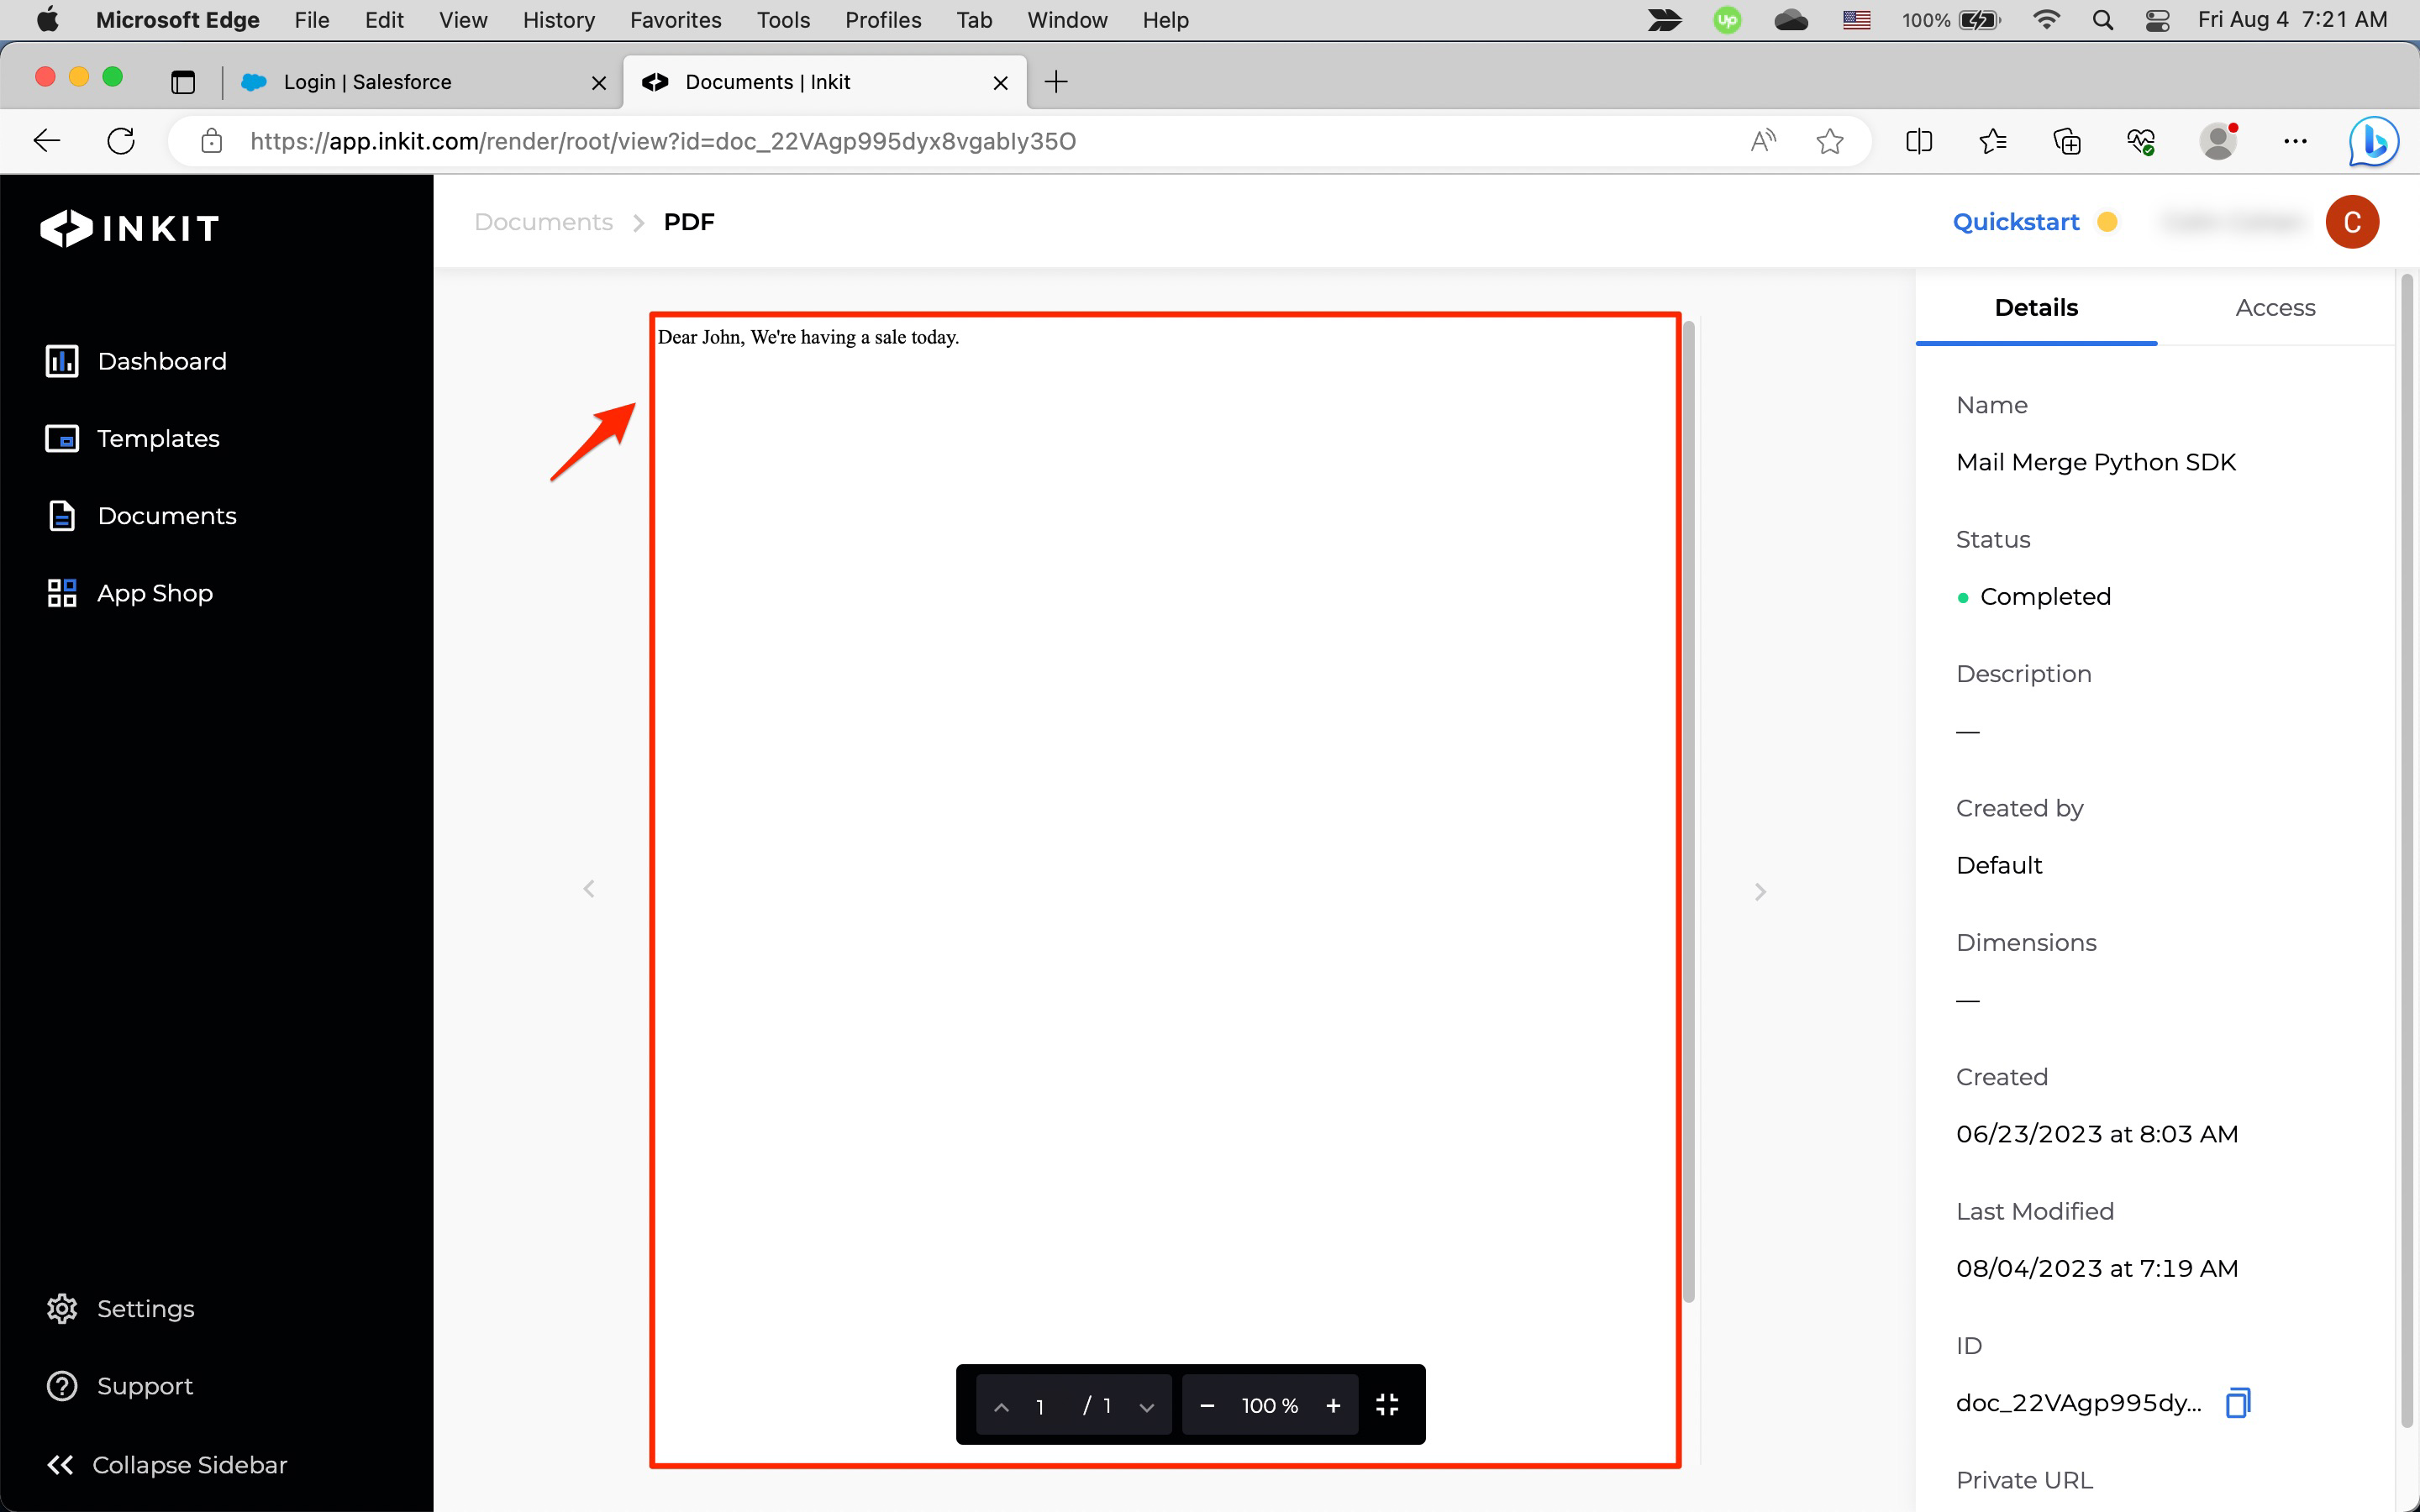
Your generated document will display in the document viewer.

Generating multiple documents in the API
To generate multiple documents using the API, you can either make multiple API calls or you can generate multiple documents through a single call by using the Launch Workflow Batch endpoint, specifying the set of workflows you want to invoke and the merge parameters for each.
For example:
curl --request POST \
     --url https://api.inkit.com/v1/invoke/batch \
     --header 'Content-Type: application/json' \
     --header 'X-Inkit-API-Token: ENTER YOUR API KEY' \
     --header 'accept: application/json' \
     --data '
{
  "name": "Batch Name",
  "description": "Batch description",
  "flows": [
    {
      "merge_parameters": {
        "name": "John"
      },
      "flow_id": "flow_n4ir7mMl3AgXEkmucqYjq",
      "name": "Job 1"
    },
    {
      "merge_parameters": {
        "name": "Jane"
      },
      "flow_id": "flow_qh4xsEbVgGPKMU8lWNqpi",
      "name": "Job 2"
    }
  ]
}
'
Updated 5 months ago