Quickstart: Generating your first document
This tutorial shows you how to generate your first document in Inkit. You do this by creating a template and then by generating a document from it using the web app or the API.
In this tutorial, we will show you how to get up and running with Inkit quickly by generating your first document. We will do the following:
- Create a simple HTML template.
- Generate a document from the template using the Inkit web app.
- Generate a document from the template using the Inkit API.
Creating a simple HTML template
Before you can generate a document in Inkit through either our web app or API, you need to create a template.
A template consists of the static elements of your document (the parts that will never change) and the dynamic elements that will by injecting your data. You create dynamic elements by embedding fields between double-curly brackets ({{}}) that Inkit will replace with your data when you generate the document.
In the following example, we will create a simple mail merge template using an HTML document:
-
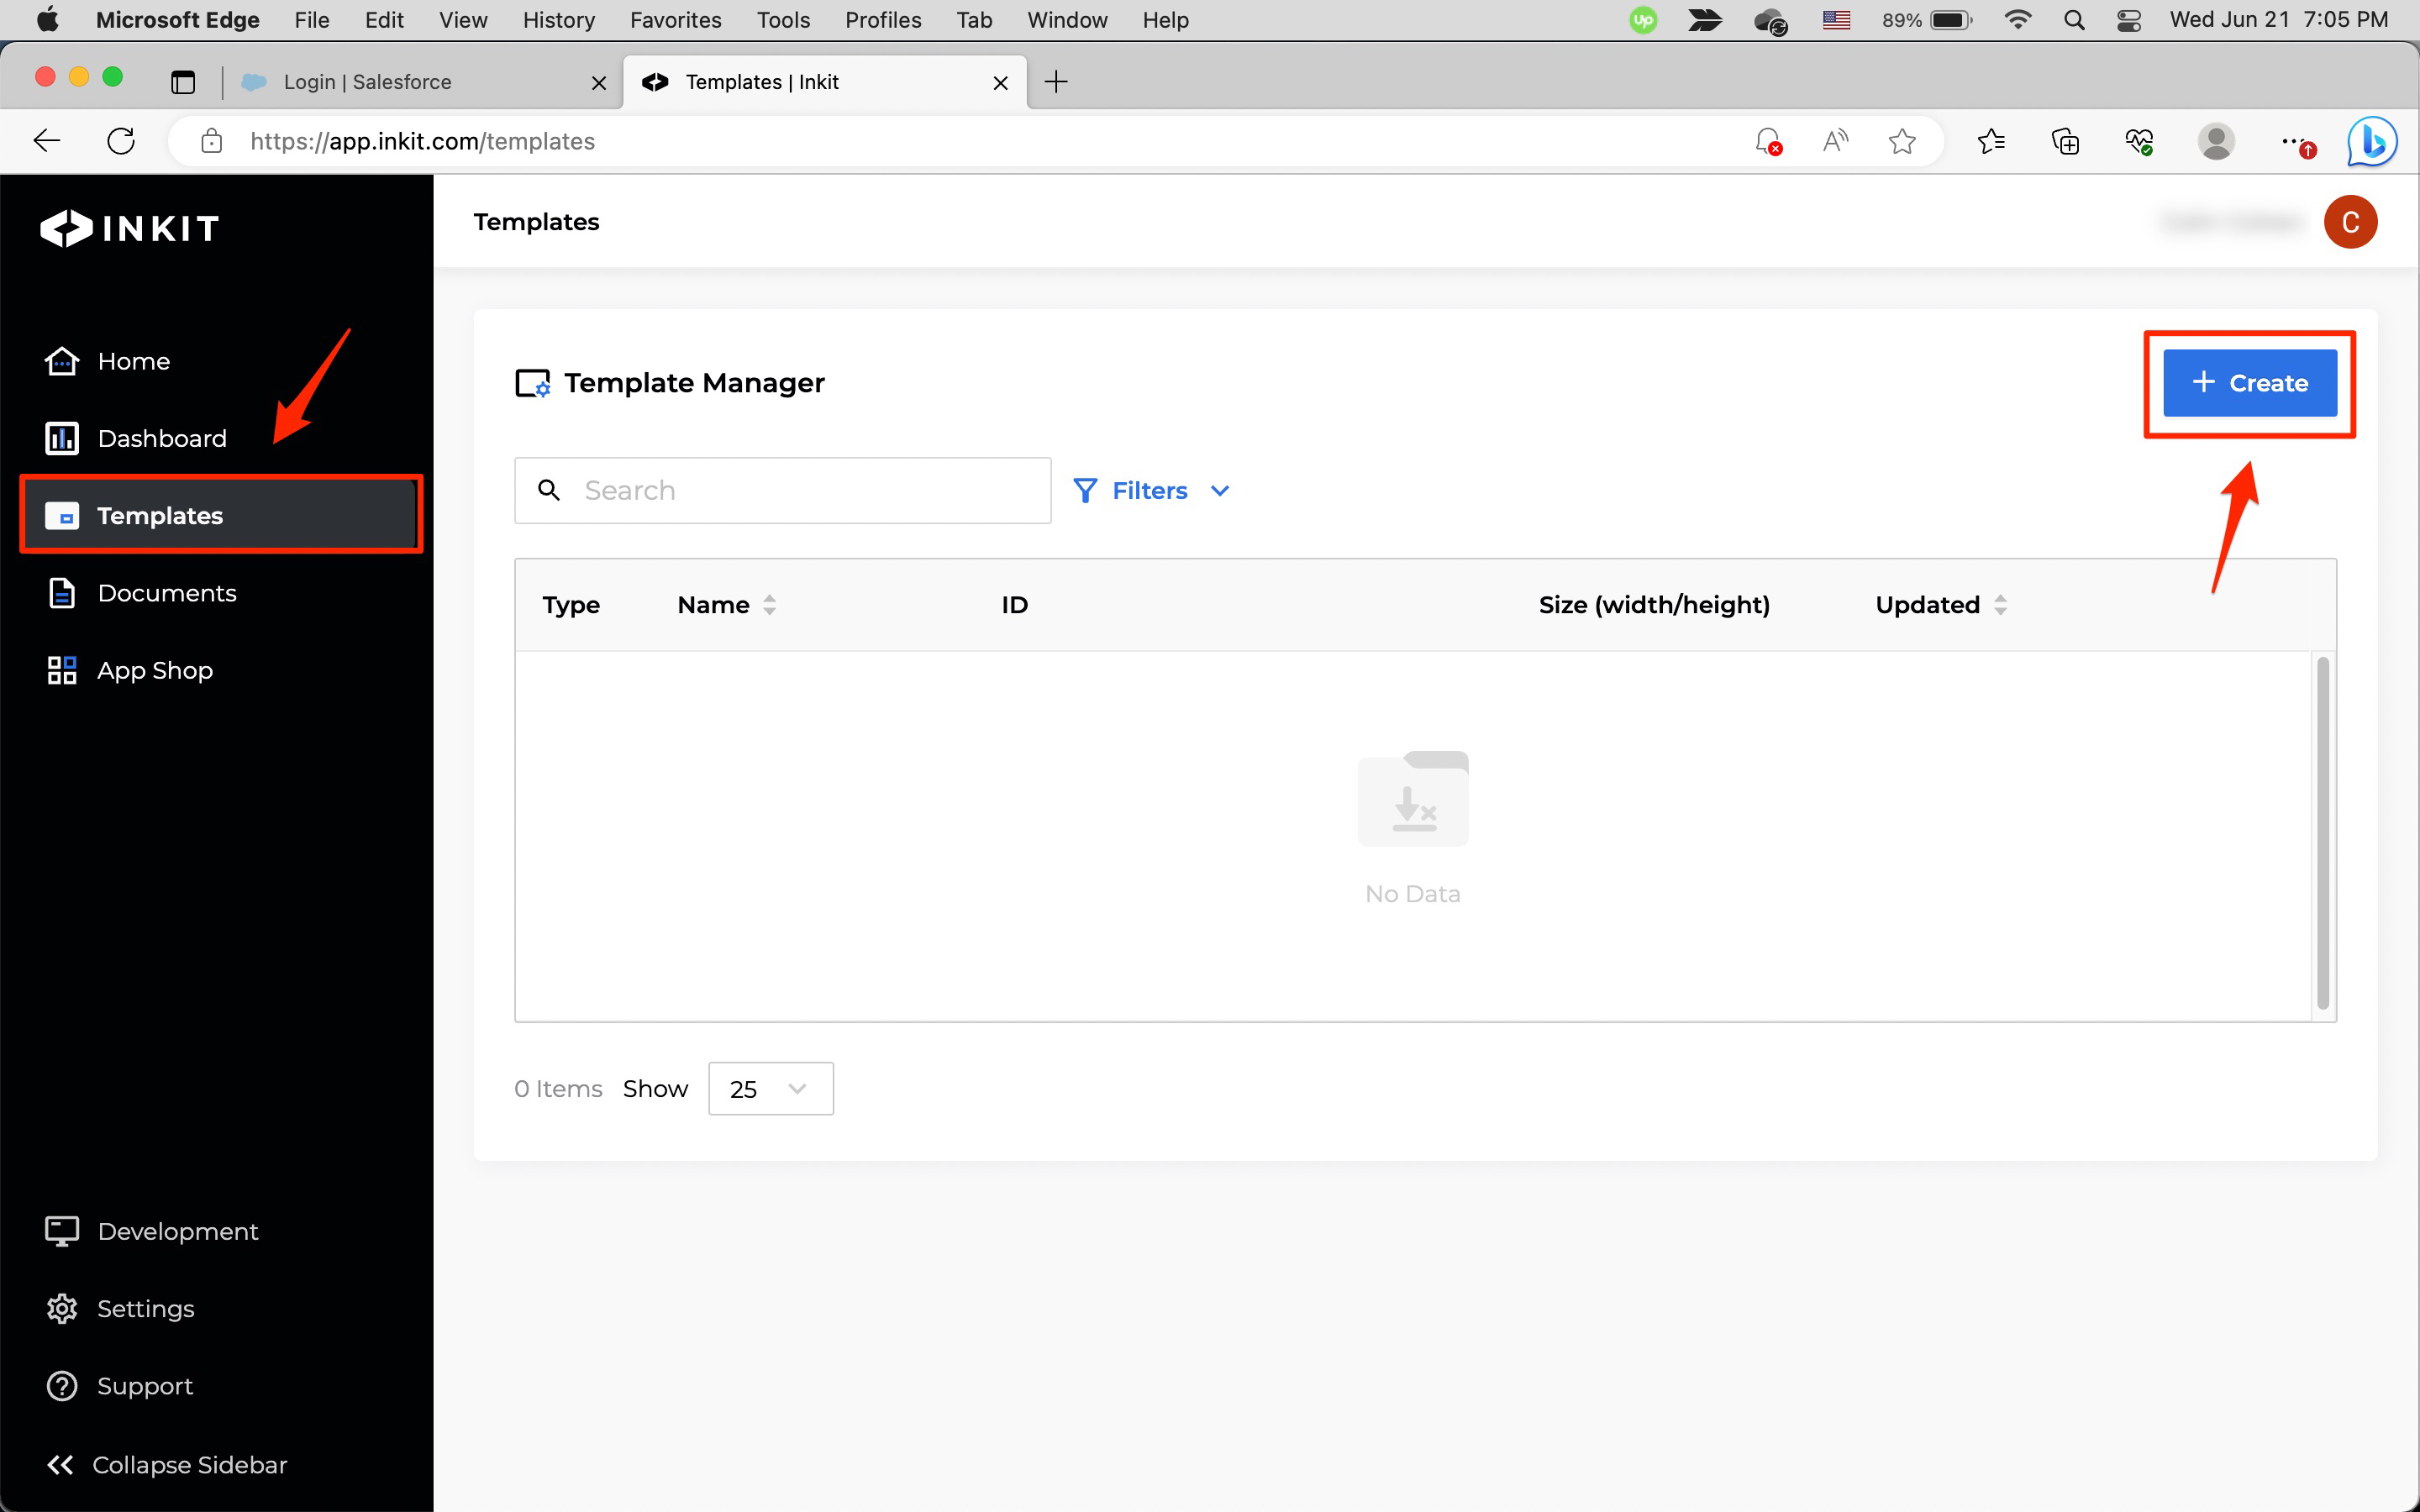
In the Inkit web app, select Templates in the left sidebar and then click + Create.
-
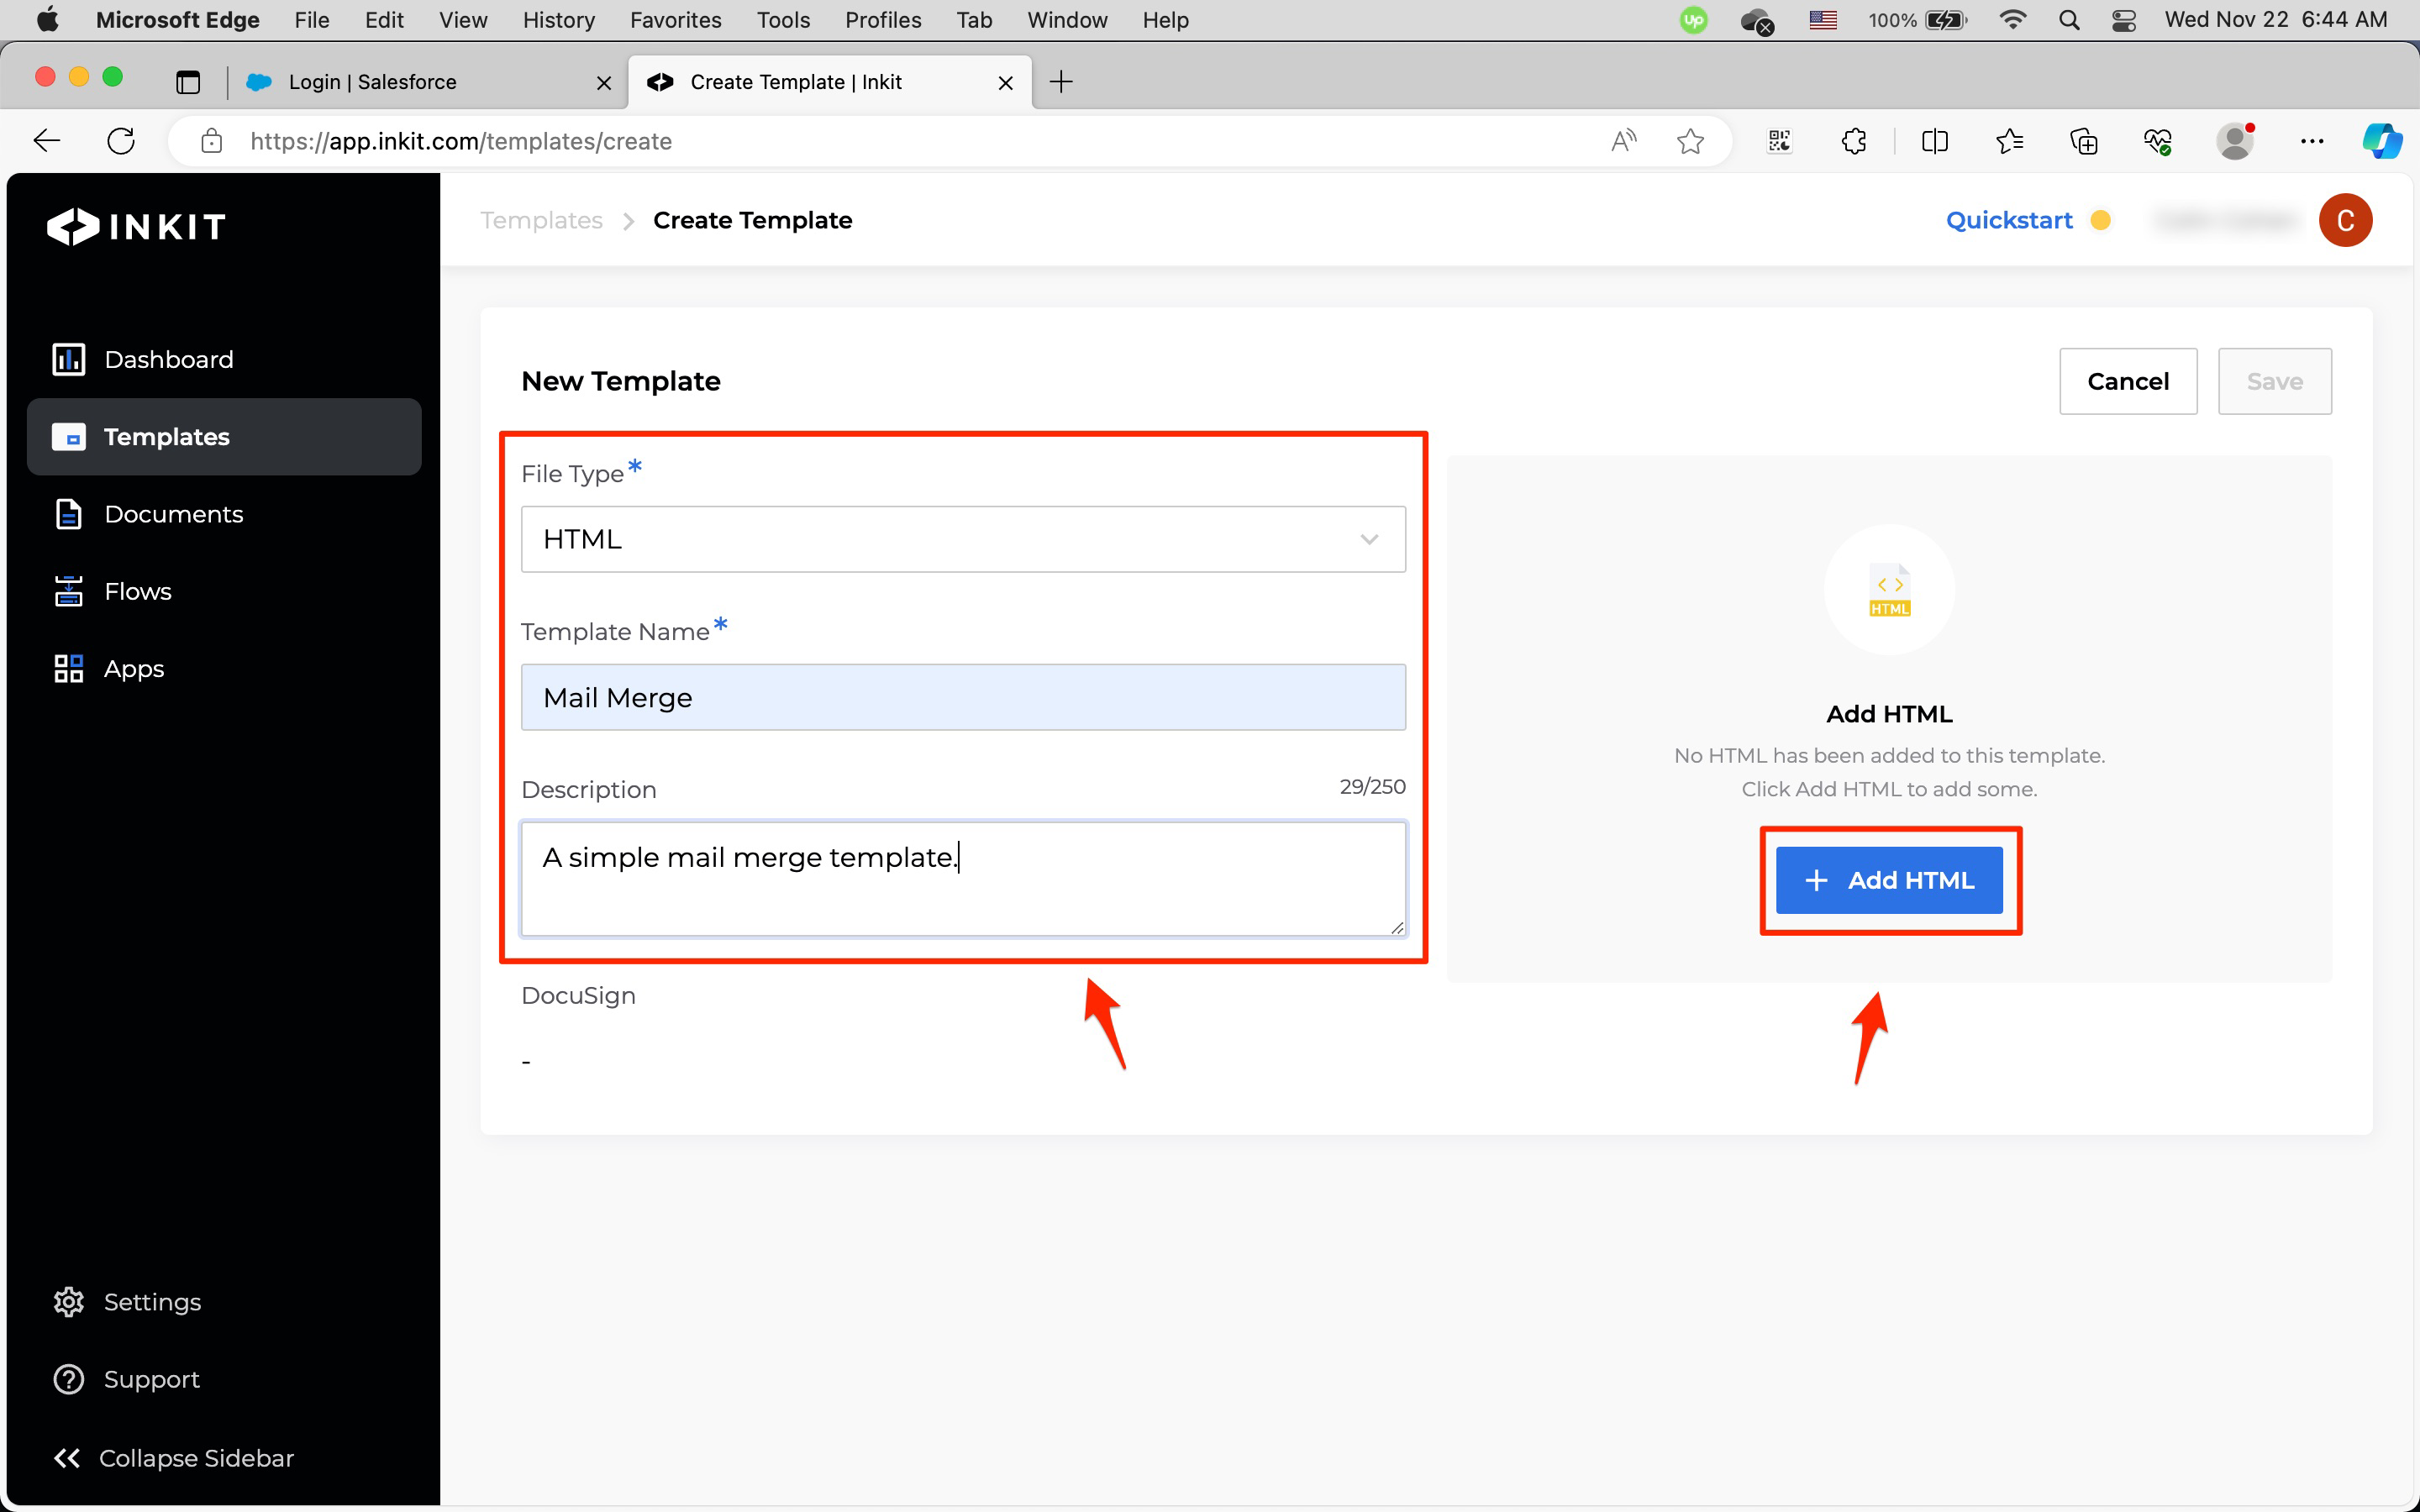
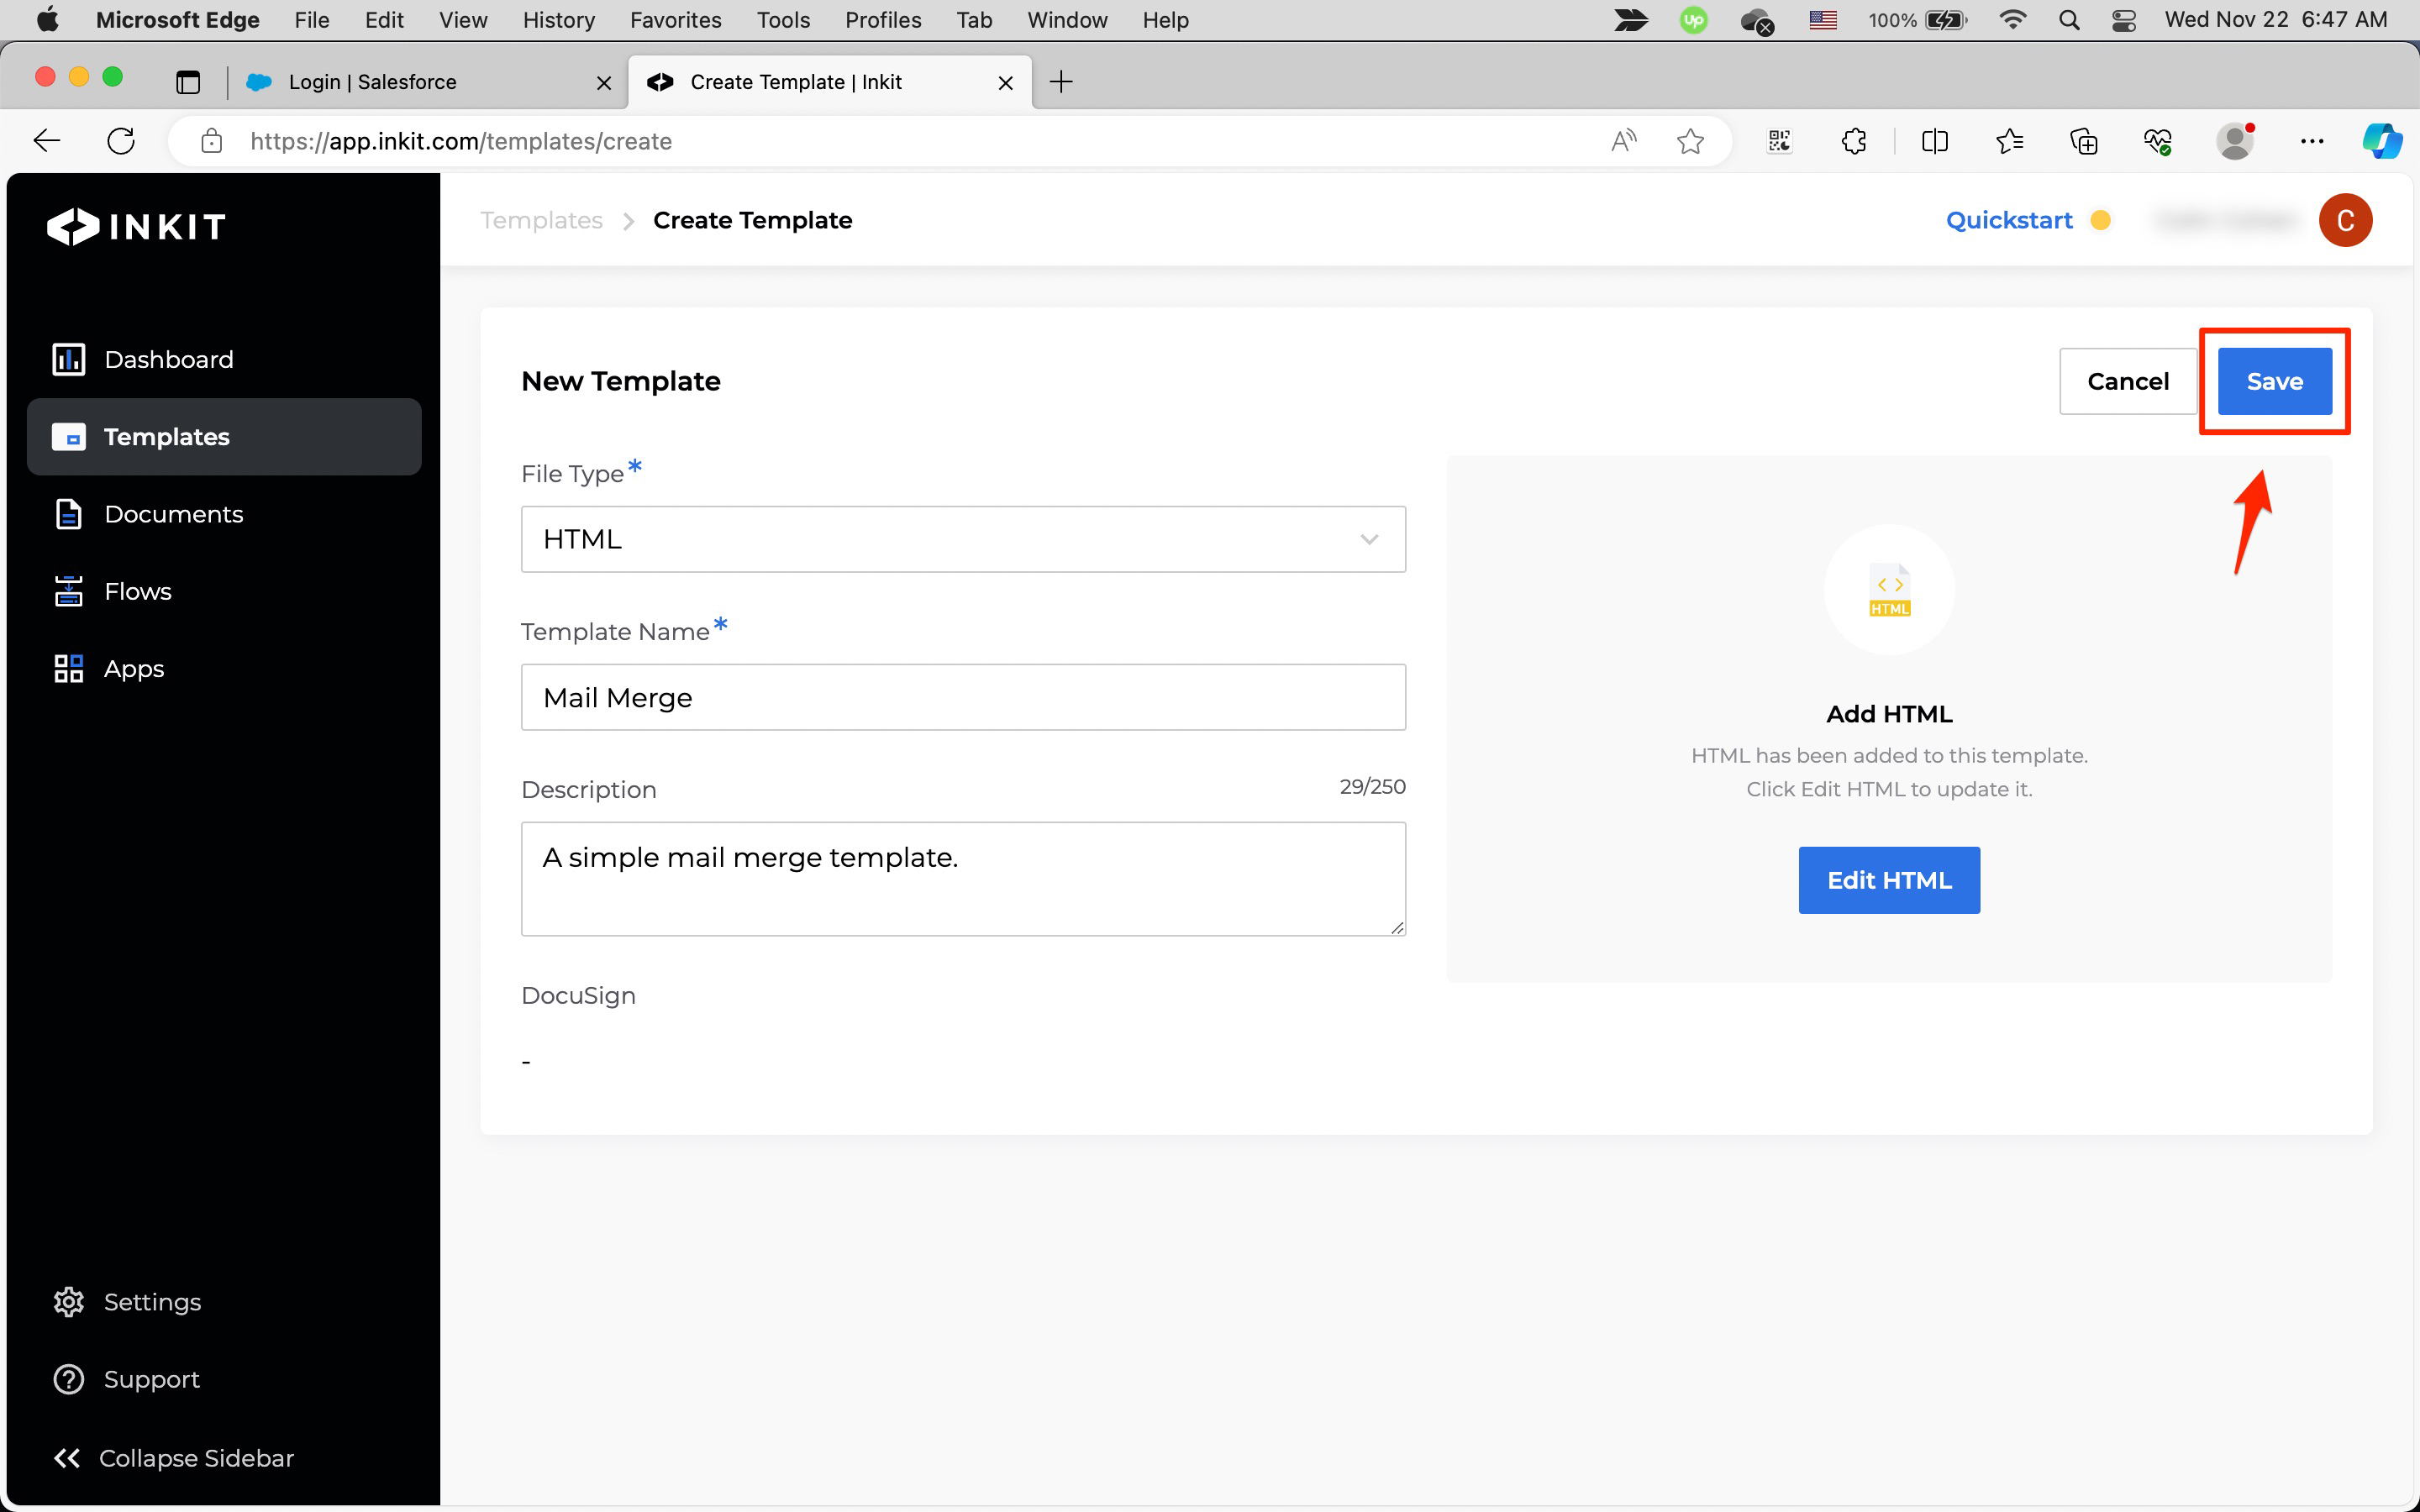
In the Create Template page, select HTML from the File Type dropdown box. Then enter Mail Merge in Template Name and an optional description of the template in Description.
Finally, click + Add HTML.
-
In the HTML editor, enter
<html>Dear {{Name}}, We're having a sale today.</html>in the Editor View panel and click Preview.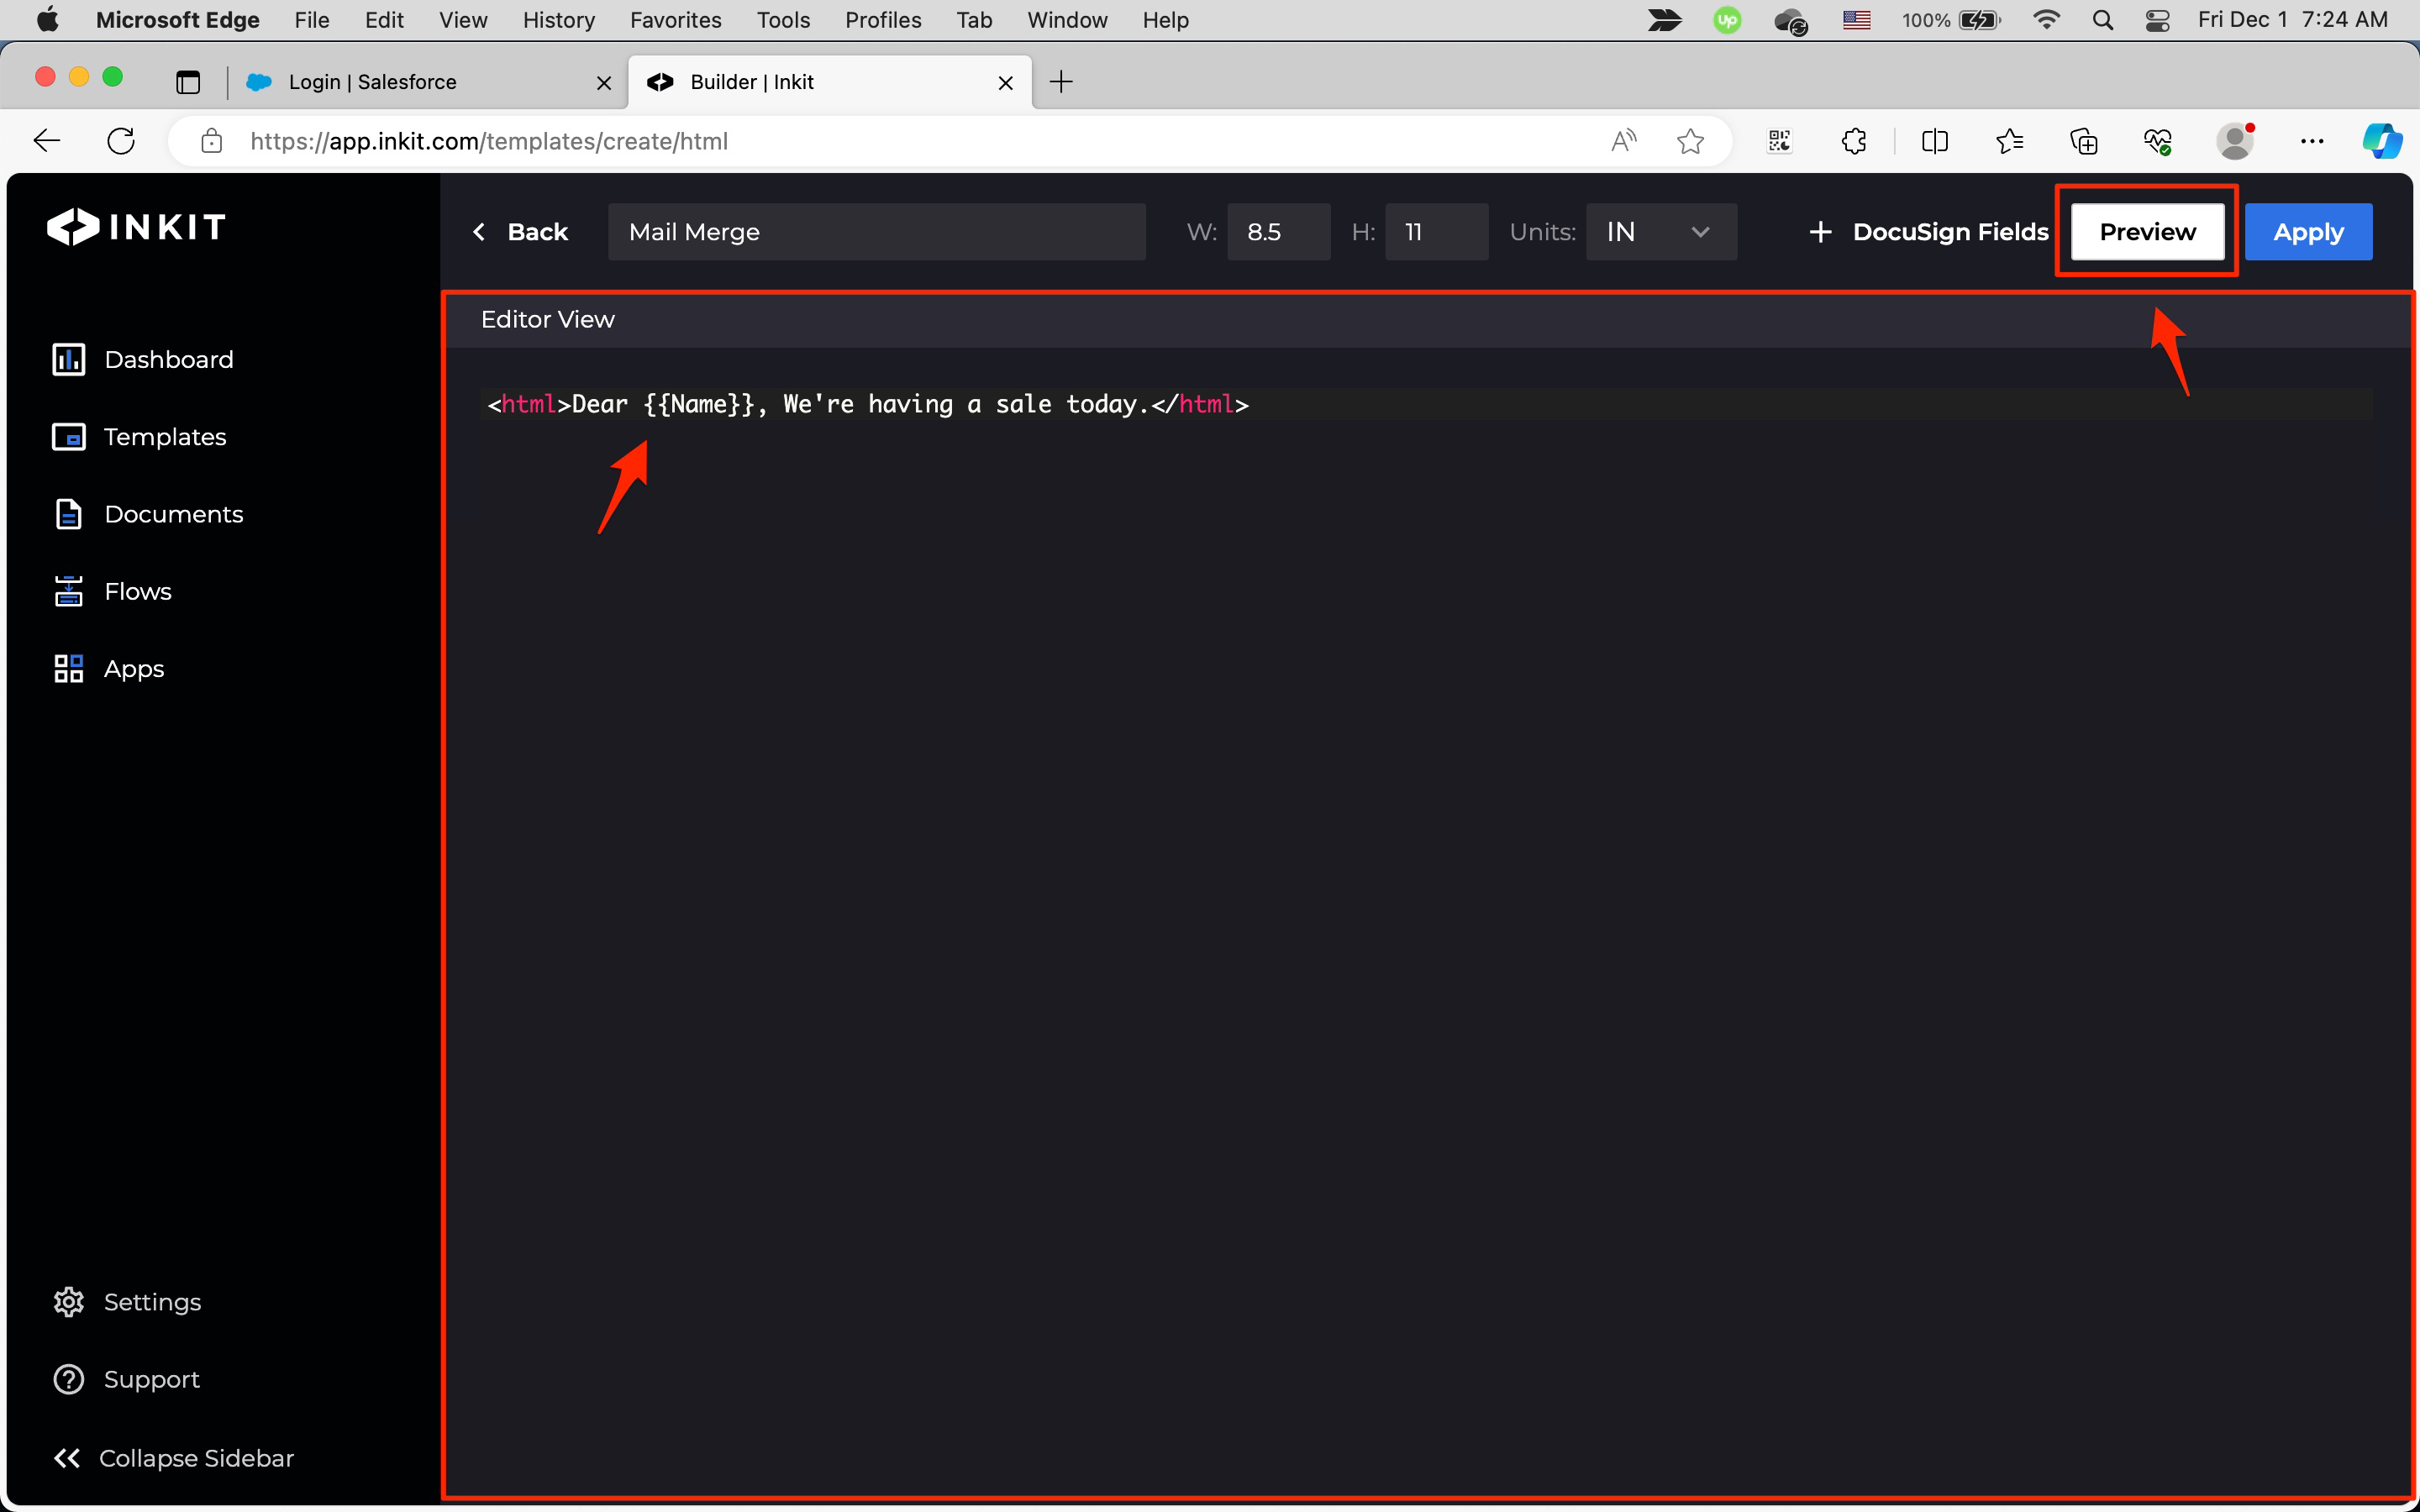
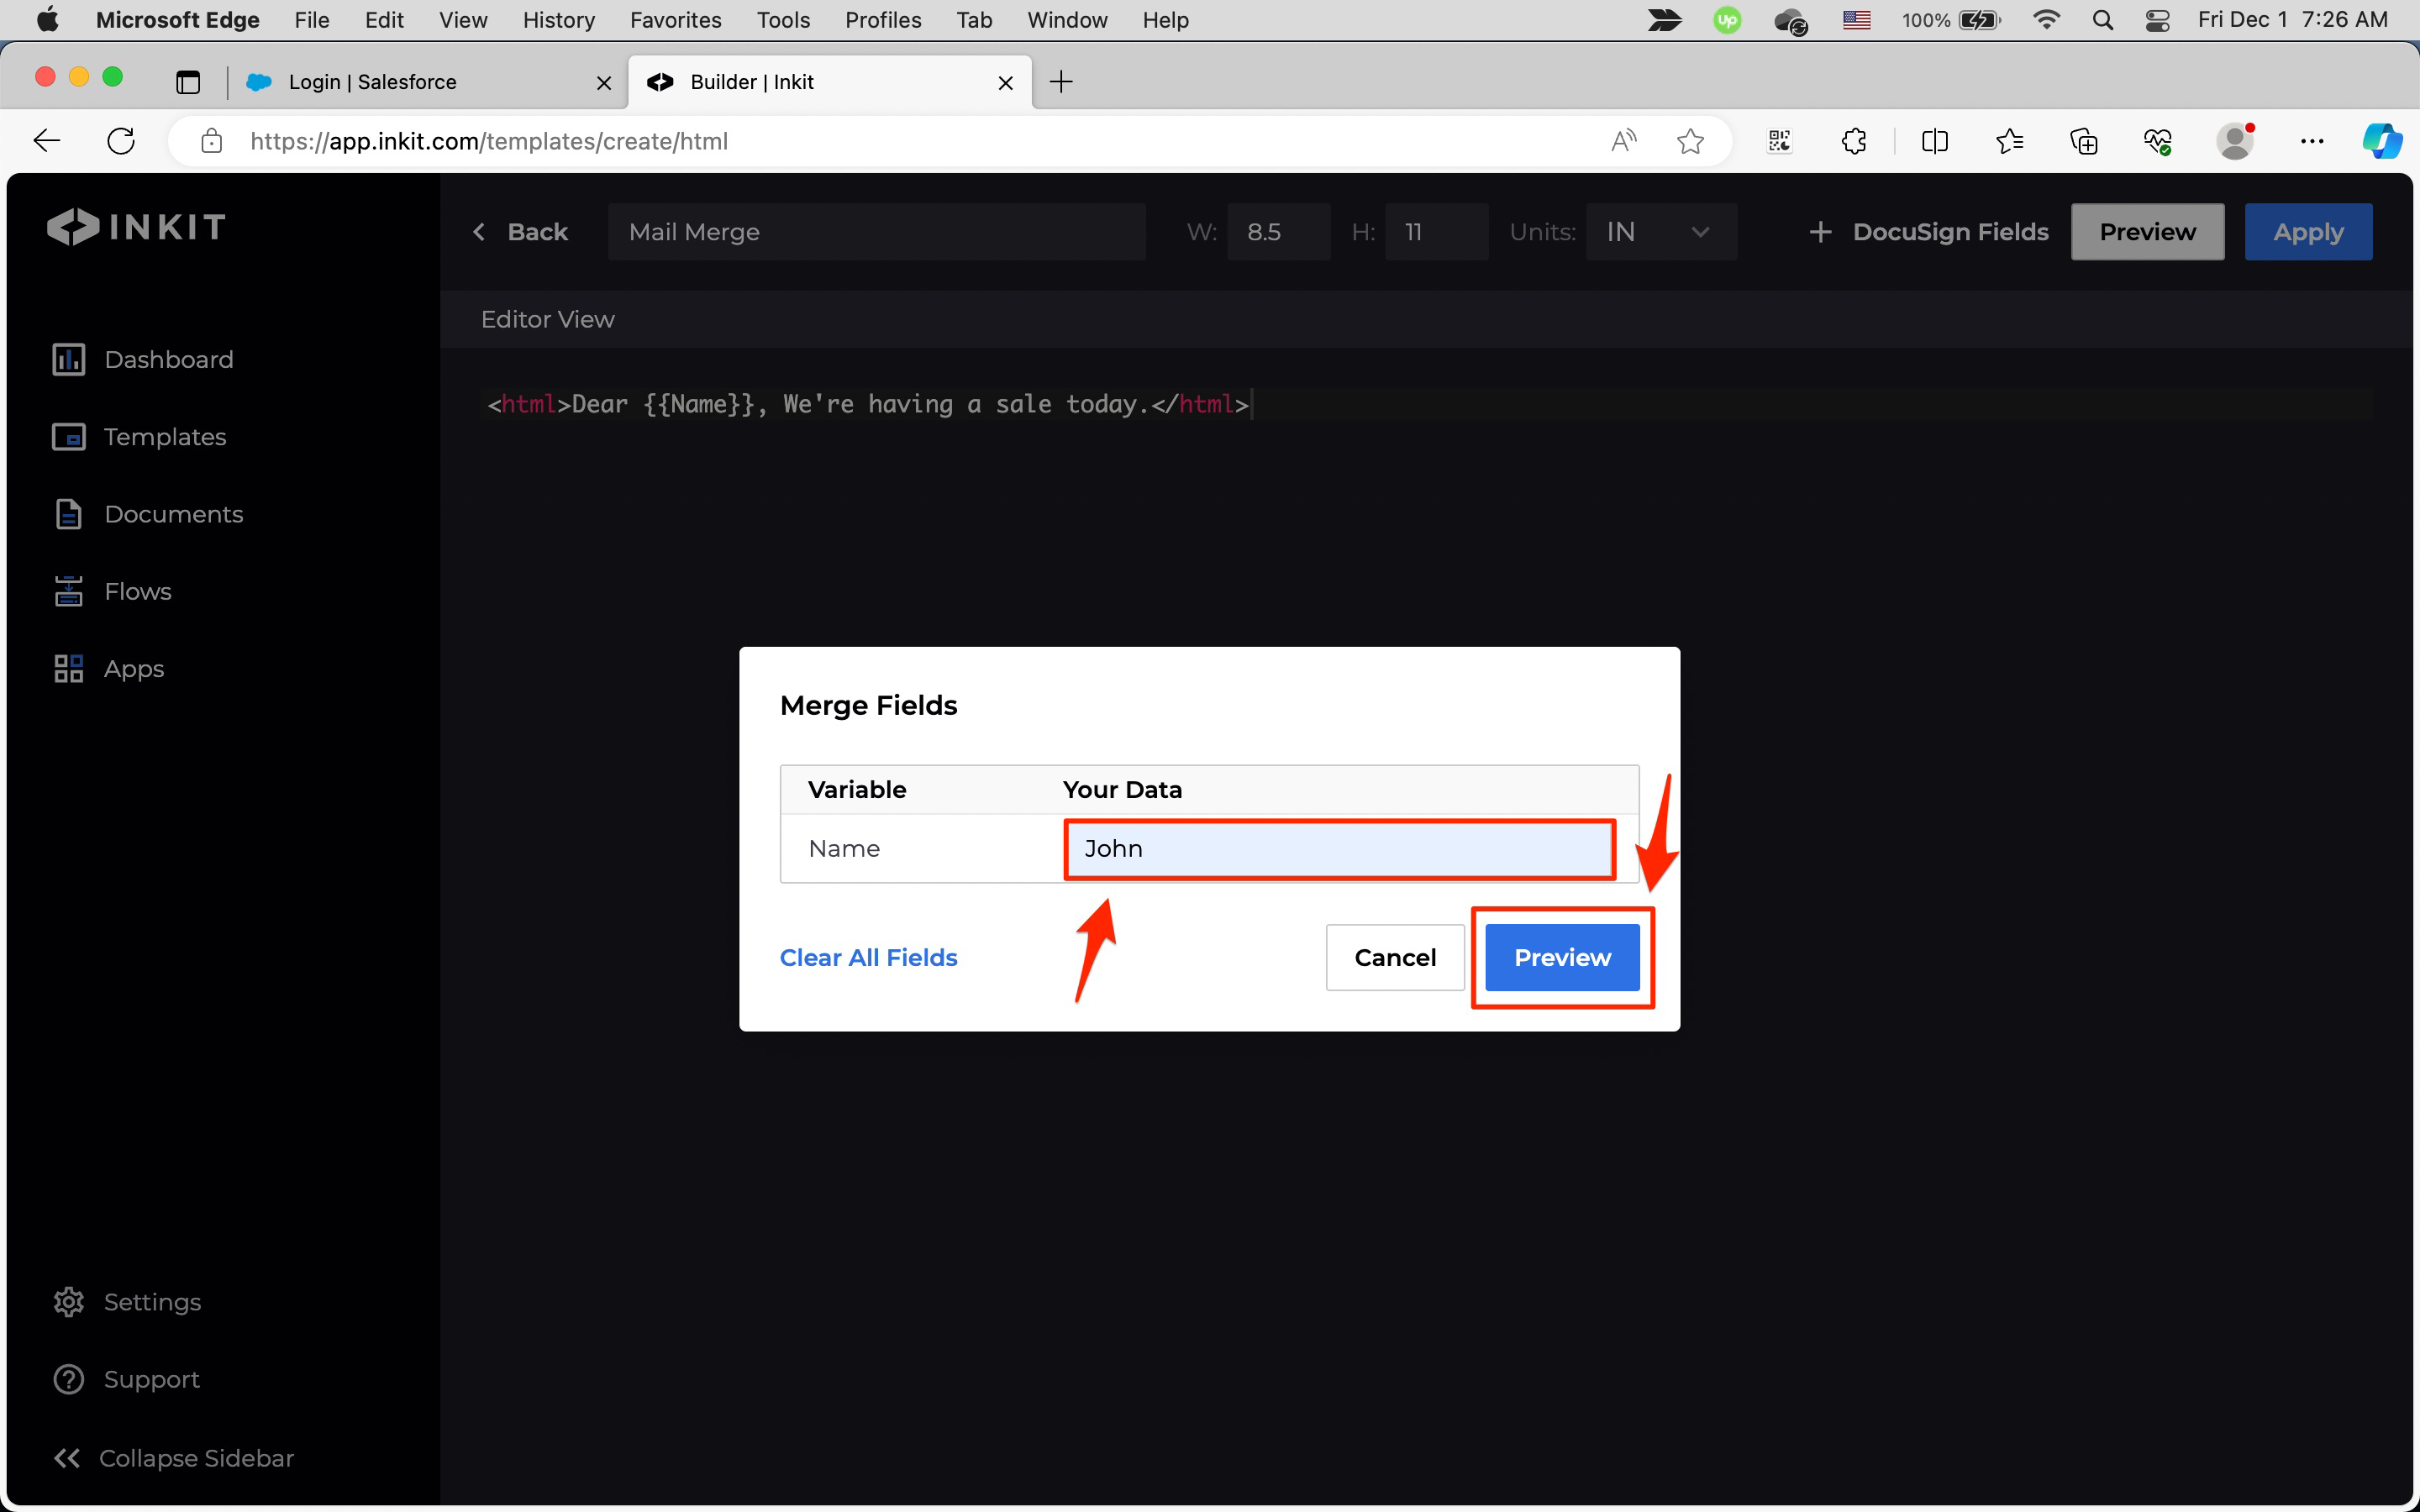
In the Merge Fields dialog box, enter John in Your Data and click Preview.
In the Preview panel, you will now see a preview of the merged document.
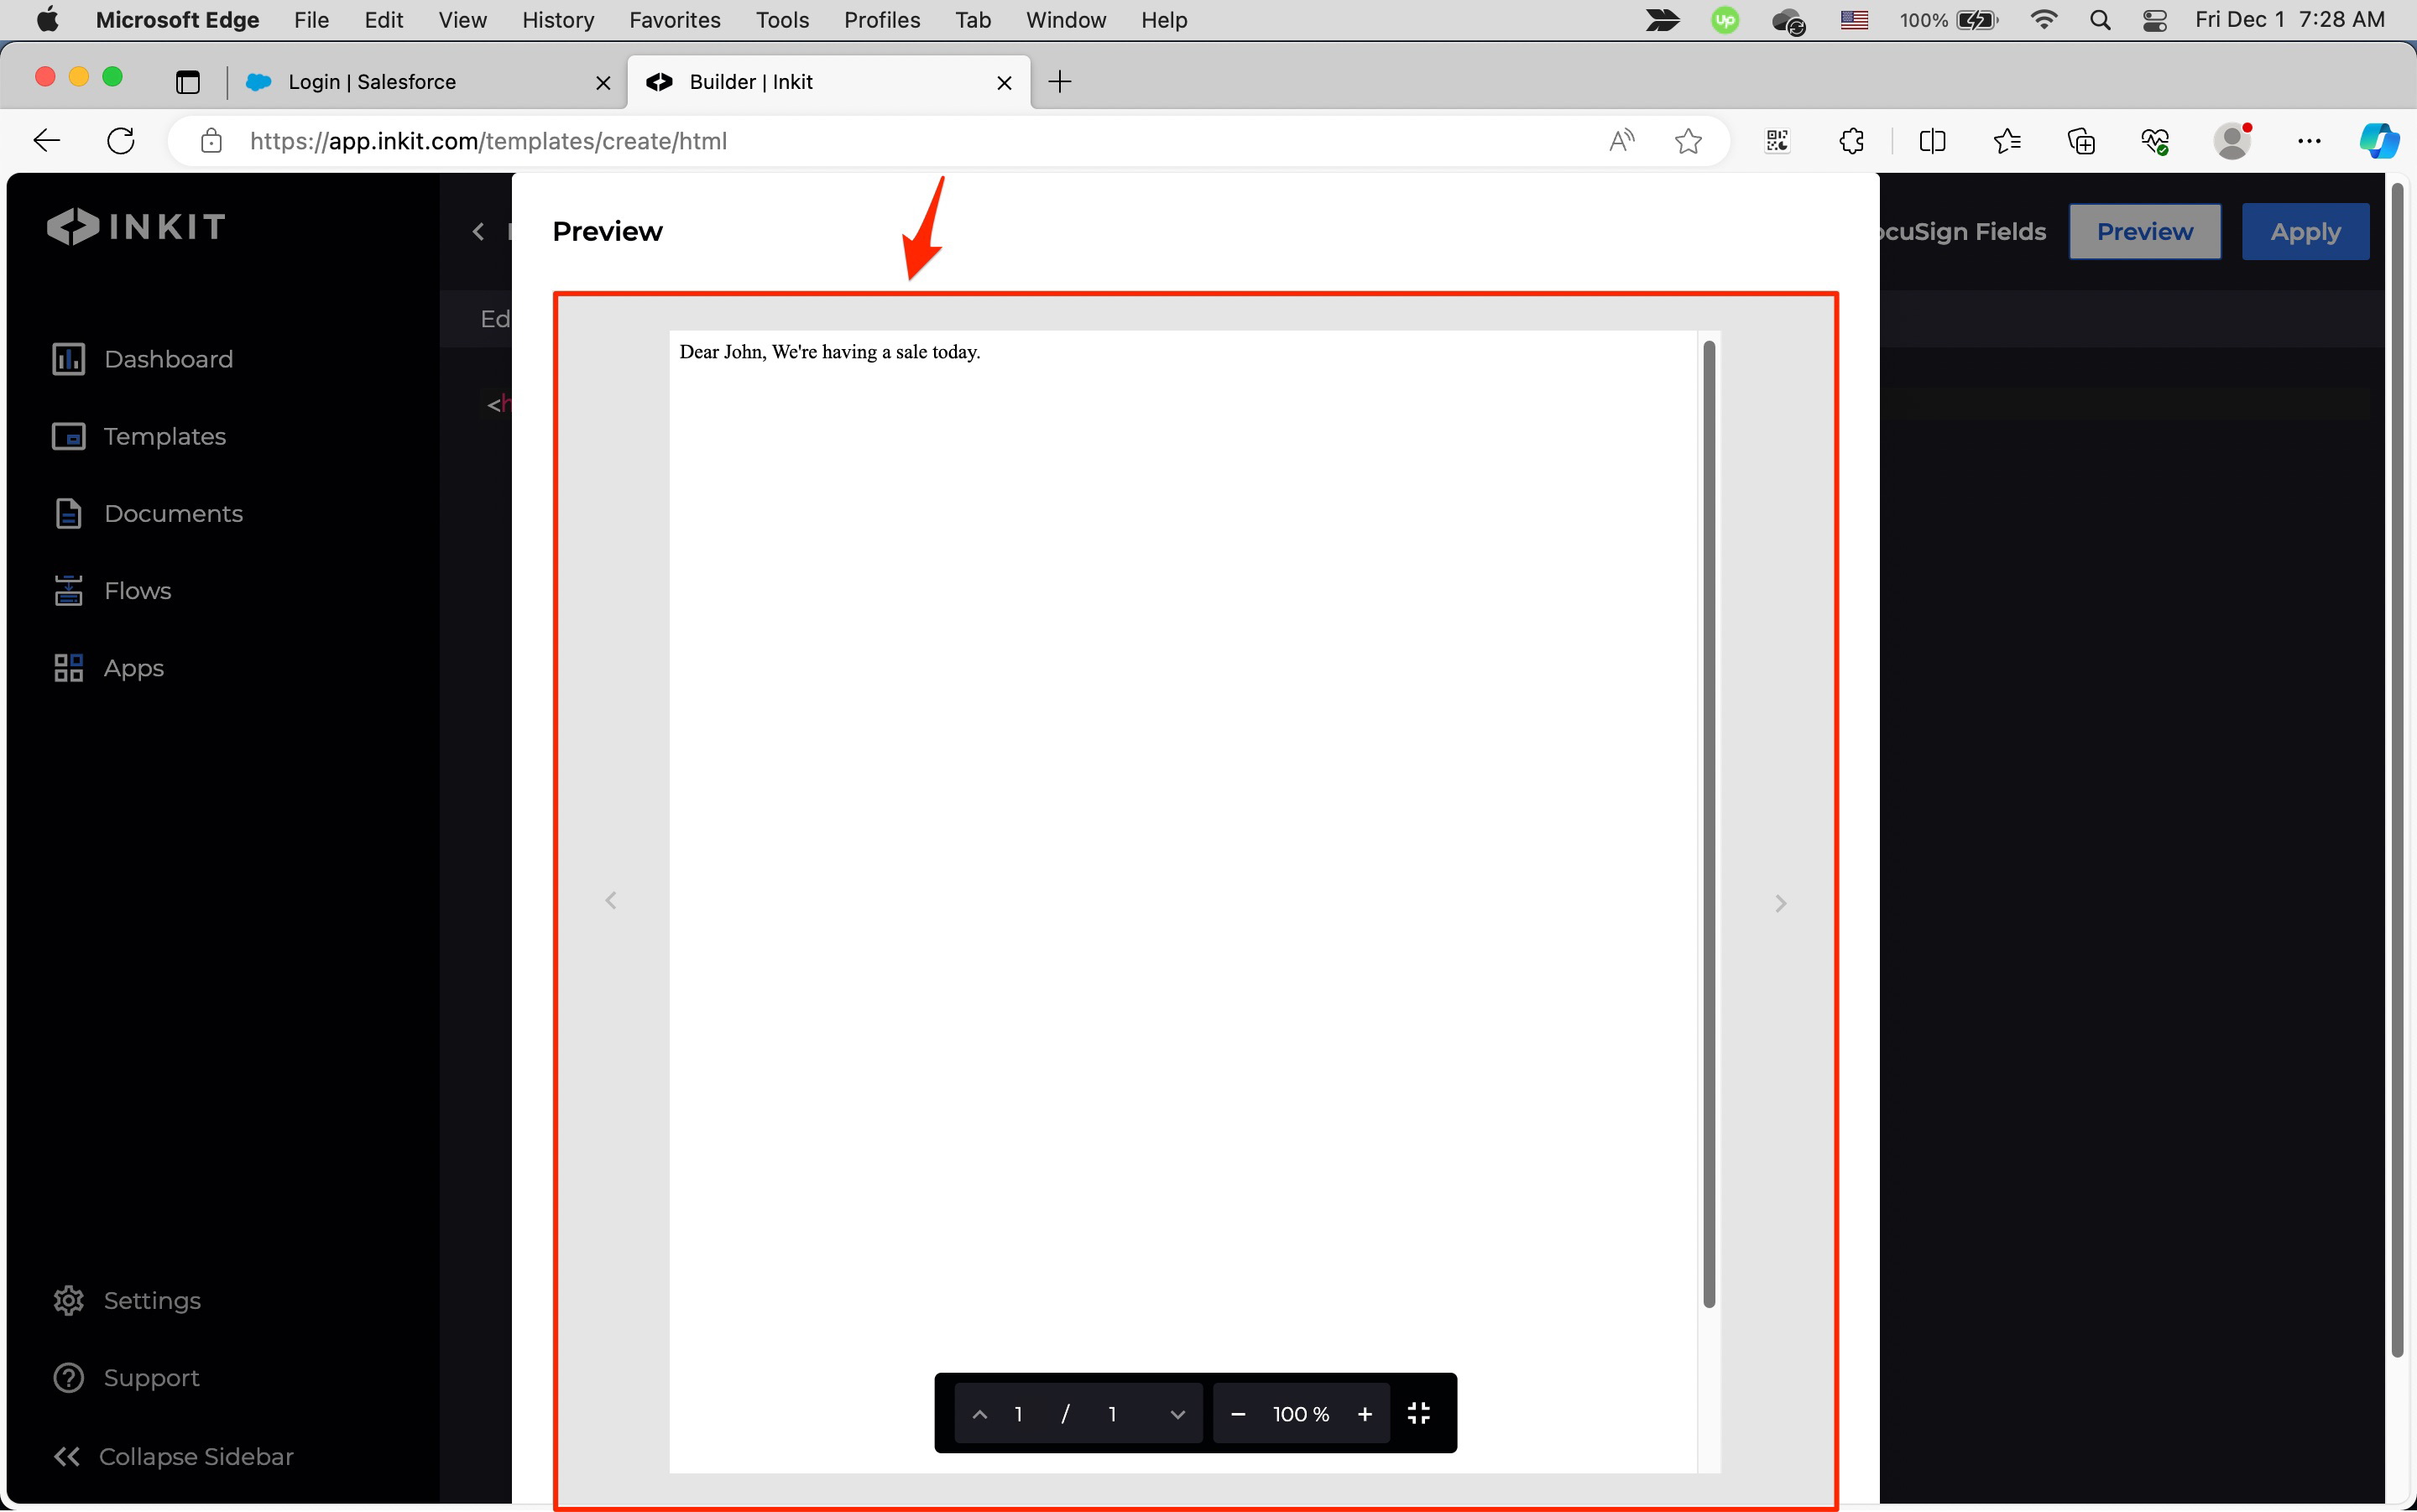
Press
[Esc]to exit the preview and click Apply to apply the HTML to template.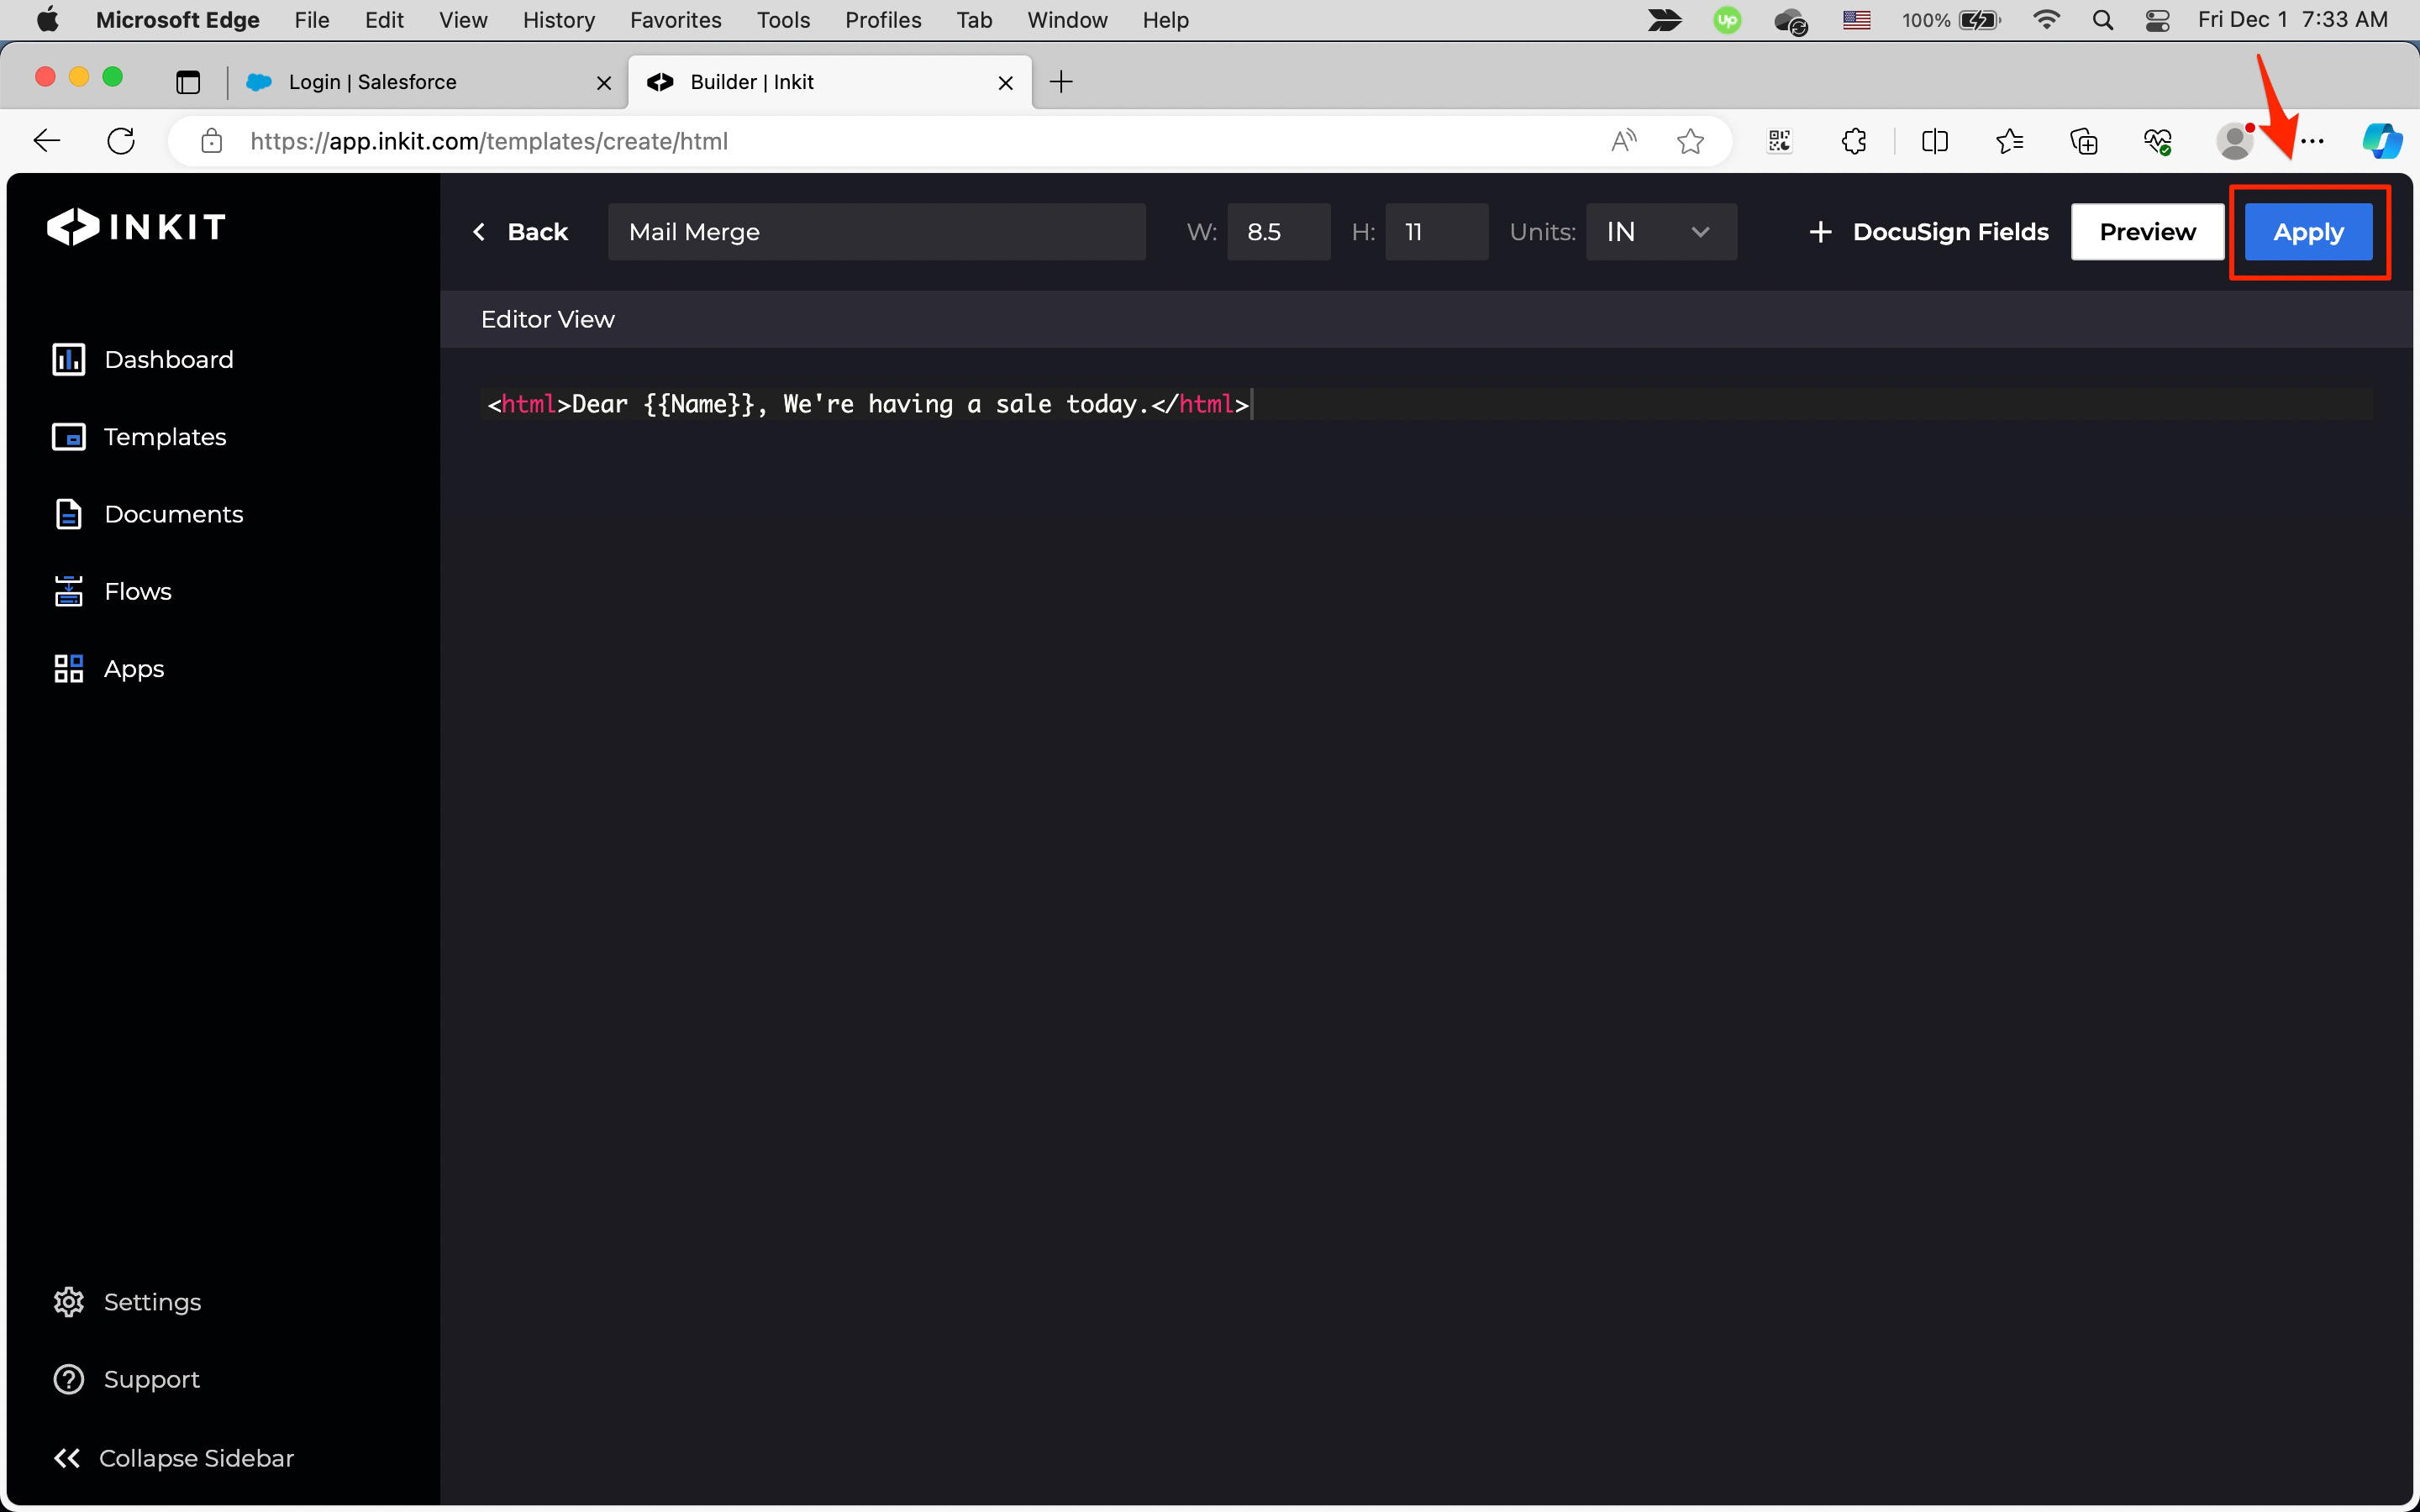
-
In the Create Template page, click Save to save the template.
Generating a document using the Inkit web app
We will now generate a document from the template that we previously created using the Inkit web app, which is a good way of generating a single document or testing a template that you created.
To generate a document, do the following:
-
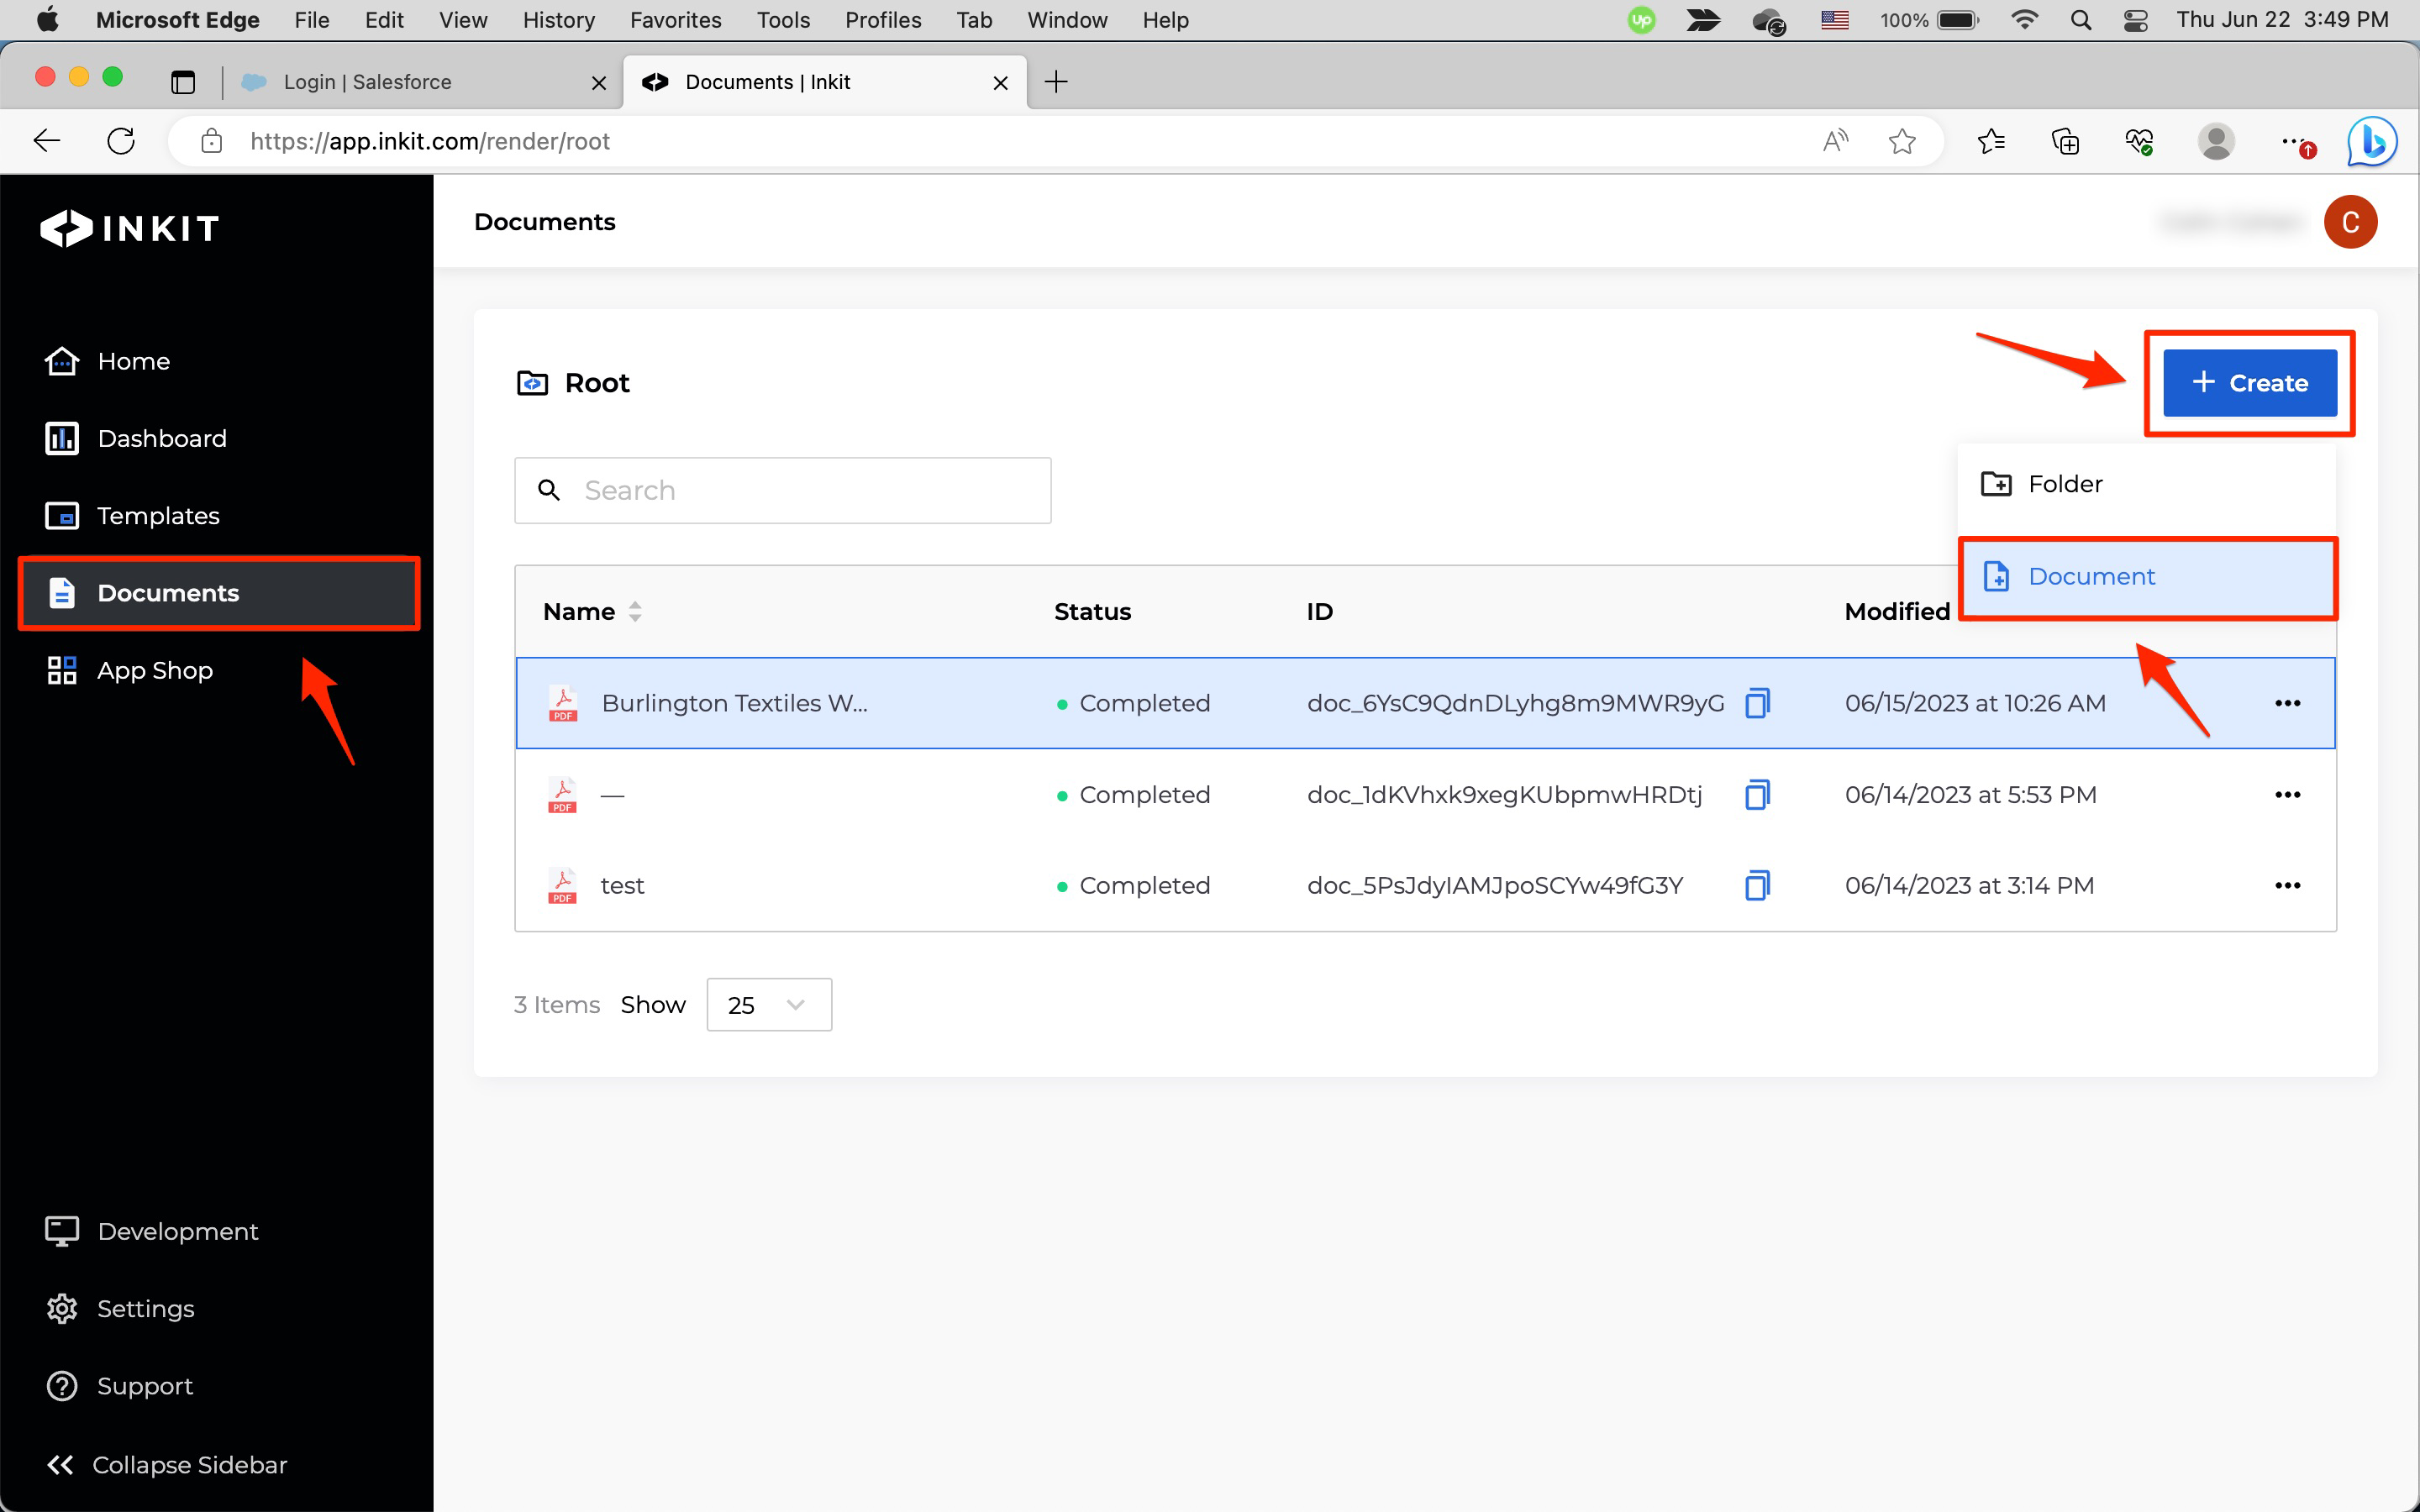
In the Inkit web app, select Documents in the left sidebar. Then click + Create and select Document from the dropdown list.
-
In the Create Document page, select the mail merge template that you created in the previous step and click Continue.

-
In the New Document panel, enter a Name of the document and an optional Description and click Continue.

-
In the Fill Out Destinations panel, Enter John into Your Data as the Name that you will inject into your generated document and click Generate Document.
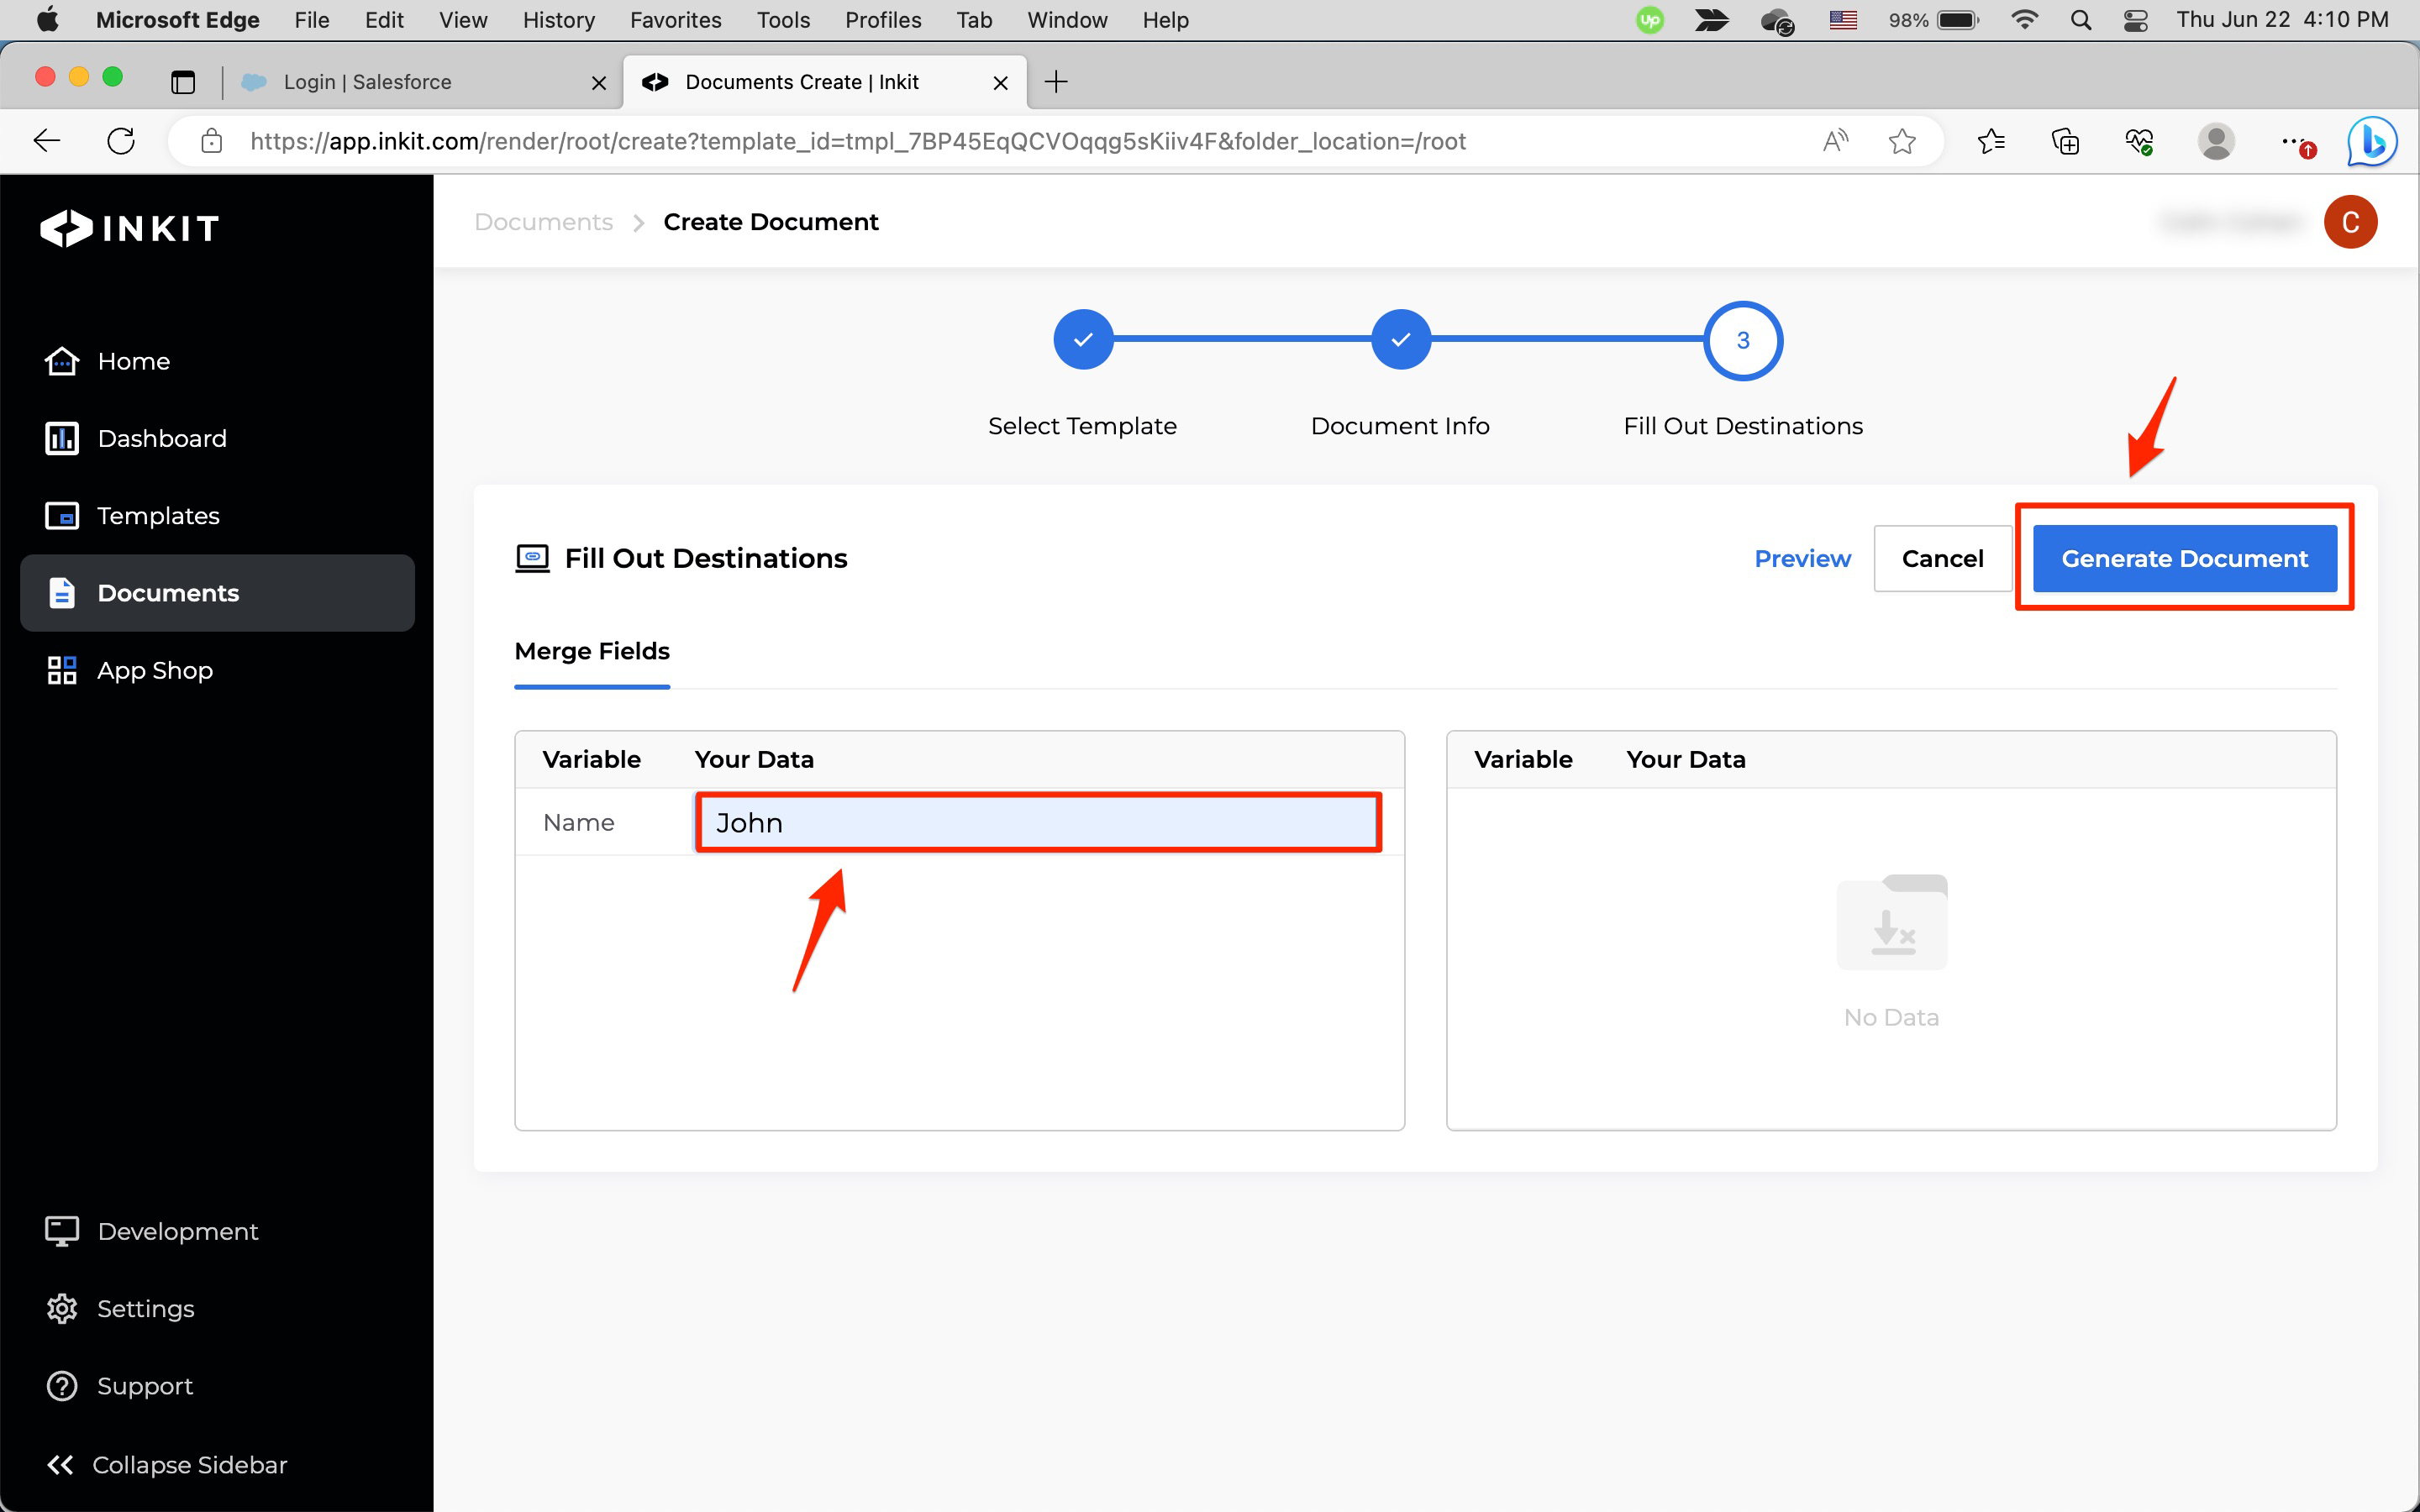
The document job will then enter the Inkit queue. Wait a few seconds for it to complete and refresh the page.
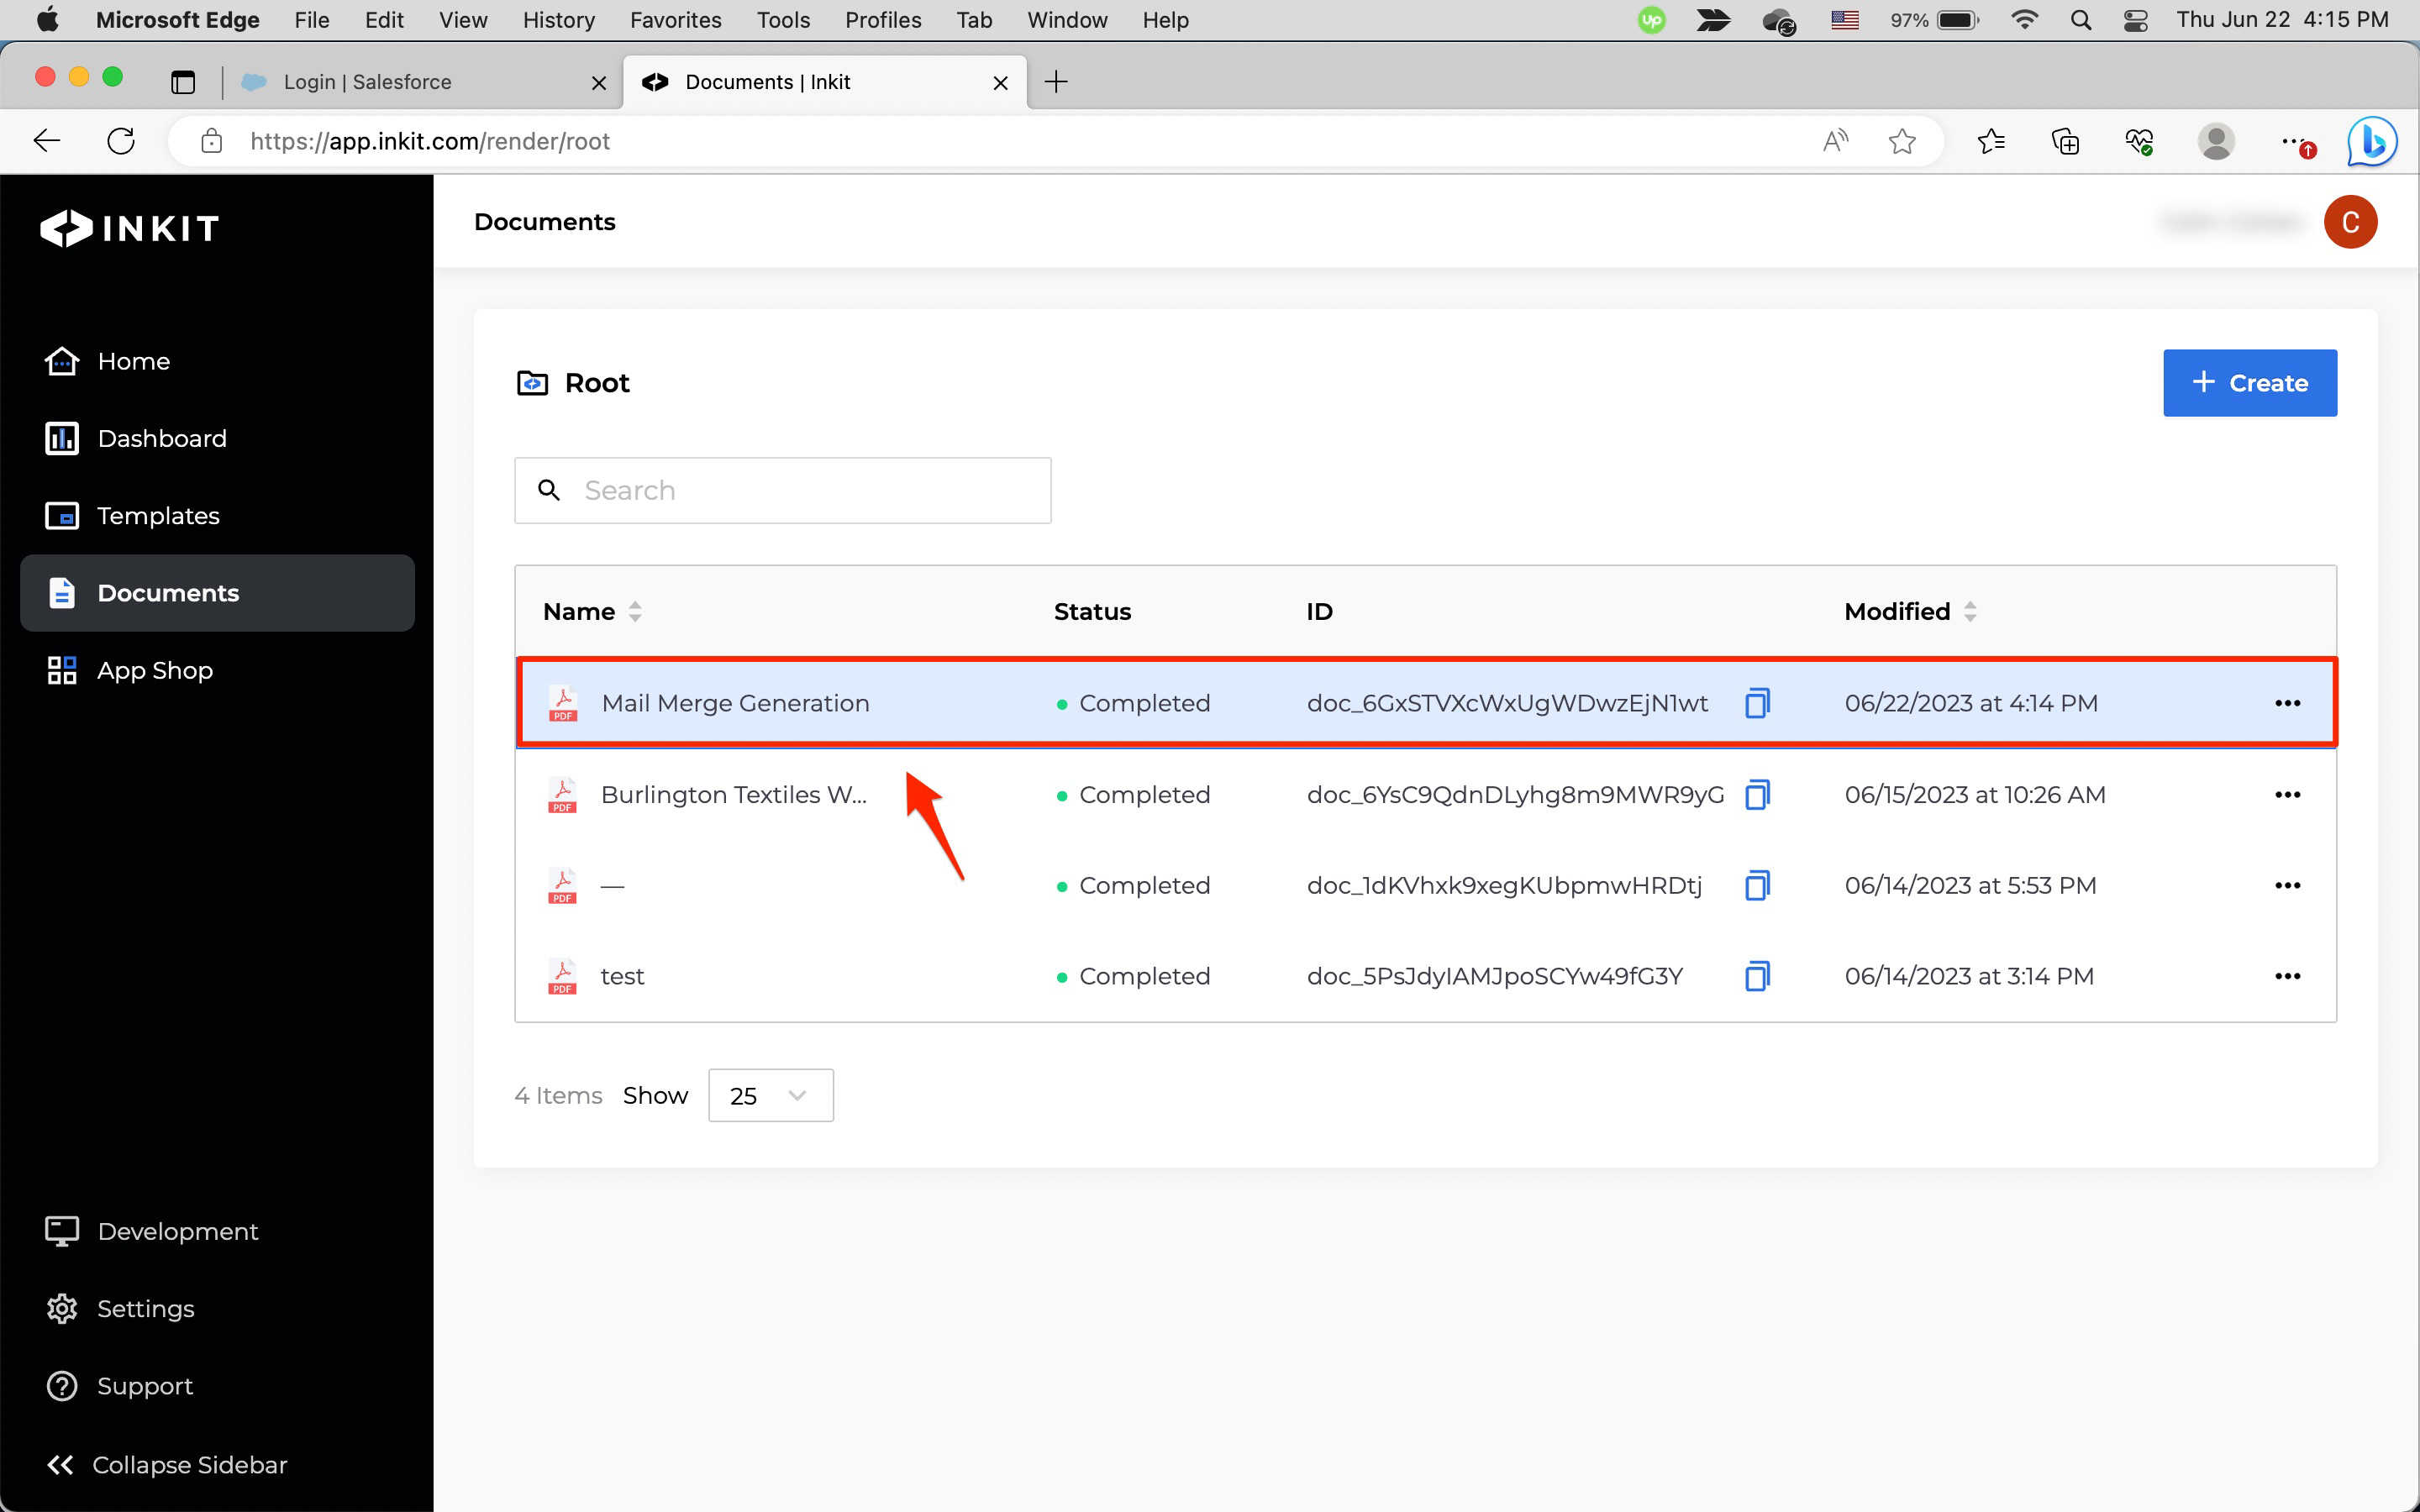
-
To view your generated document, double-click on it.
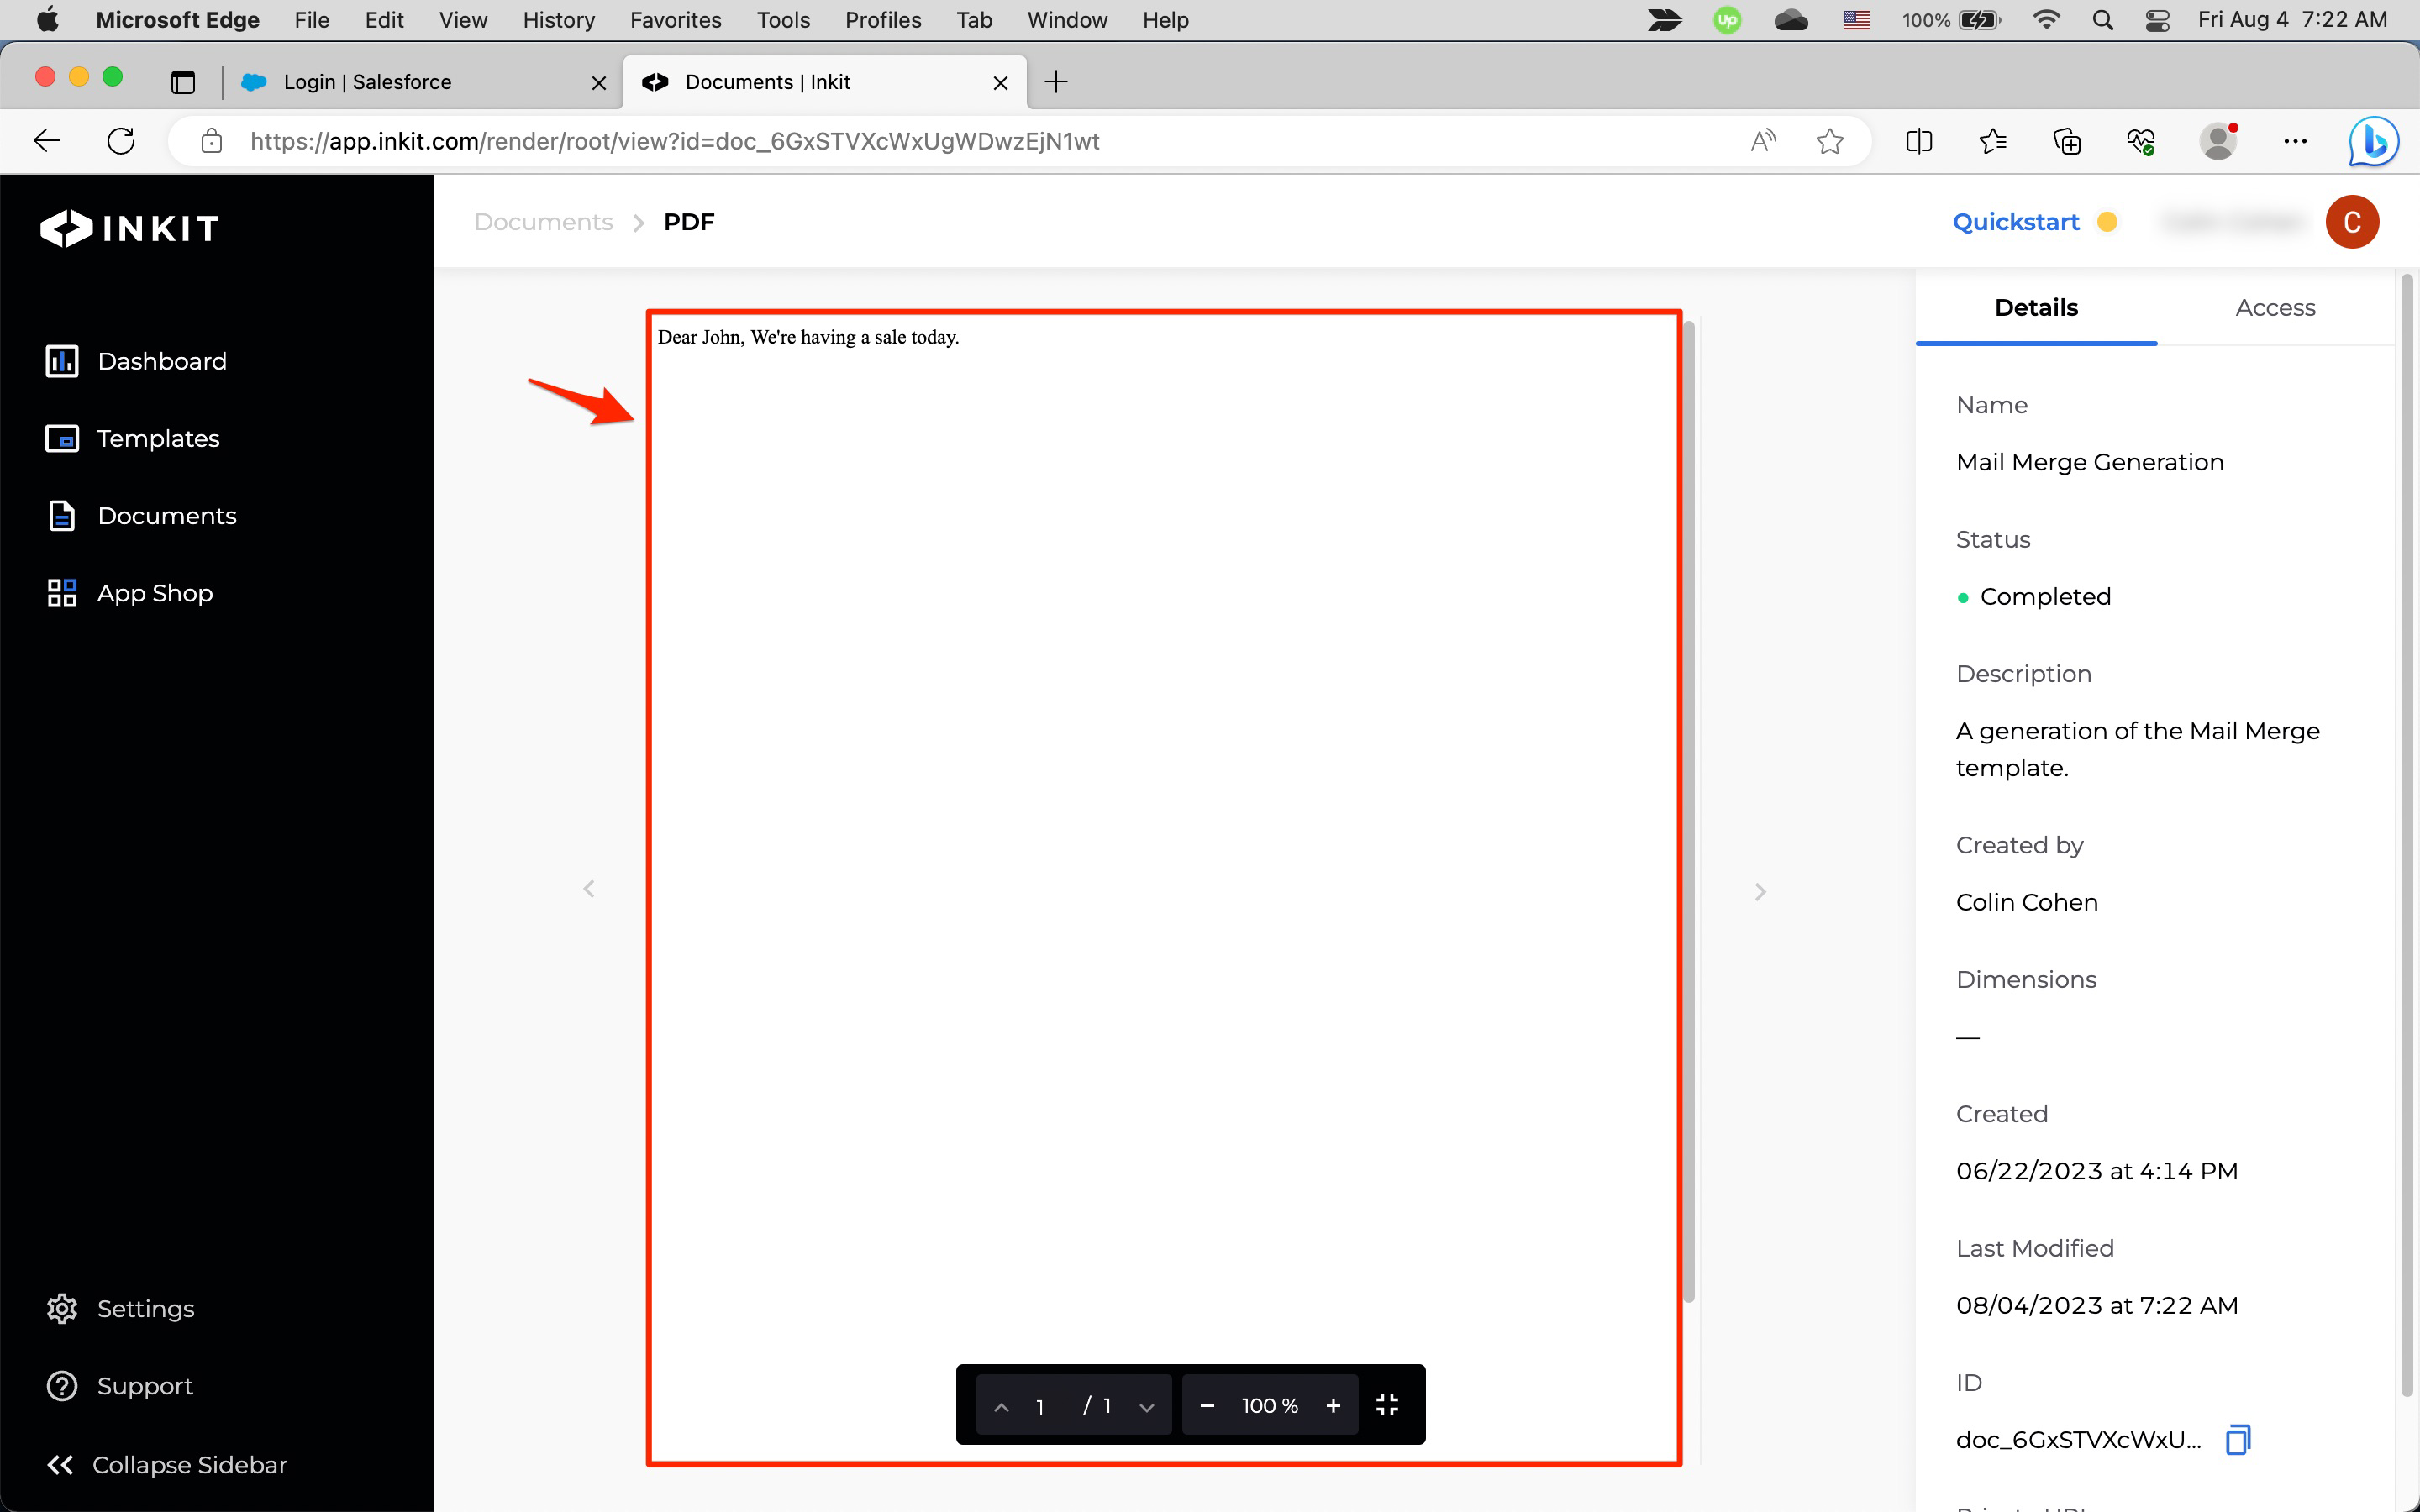
-
Your generated document will display in the document viewer.
Generating a document using the Inkit API
Generating a document using the Inkit API is more complicated than using the Inkit web app (and it requires some programming skills to take full advantage of it), but it is also more powerful. It allows you to generate documents at scale and employ all the functionality of Inkit within your own applications. The only limitation is your imagination.
To generate a document from the template that we previously created using the Inkit API, do the following:
-
If you want to use one of our SDKs, install either our Python SDK or Node.js SDK. Otherwise you can call the API through a cURL command.
-
Add an API key and copy it to some place safe.
Do not publicly expose your API keys. They act much like passwords, as anyone with access to them can make Inkit requests on your behalf. You should store them securely. -
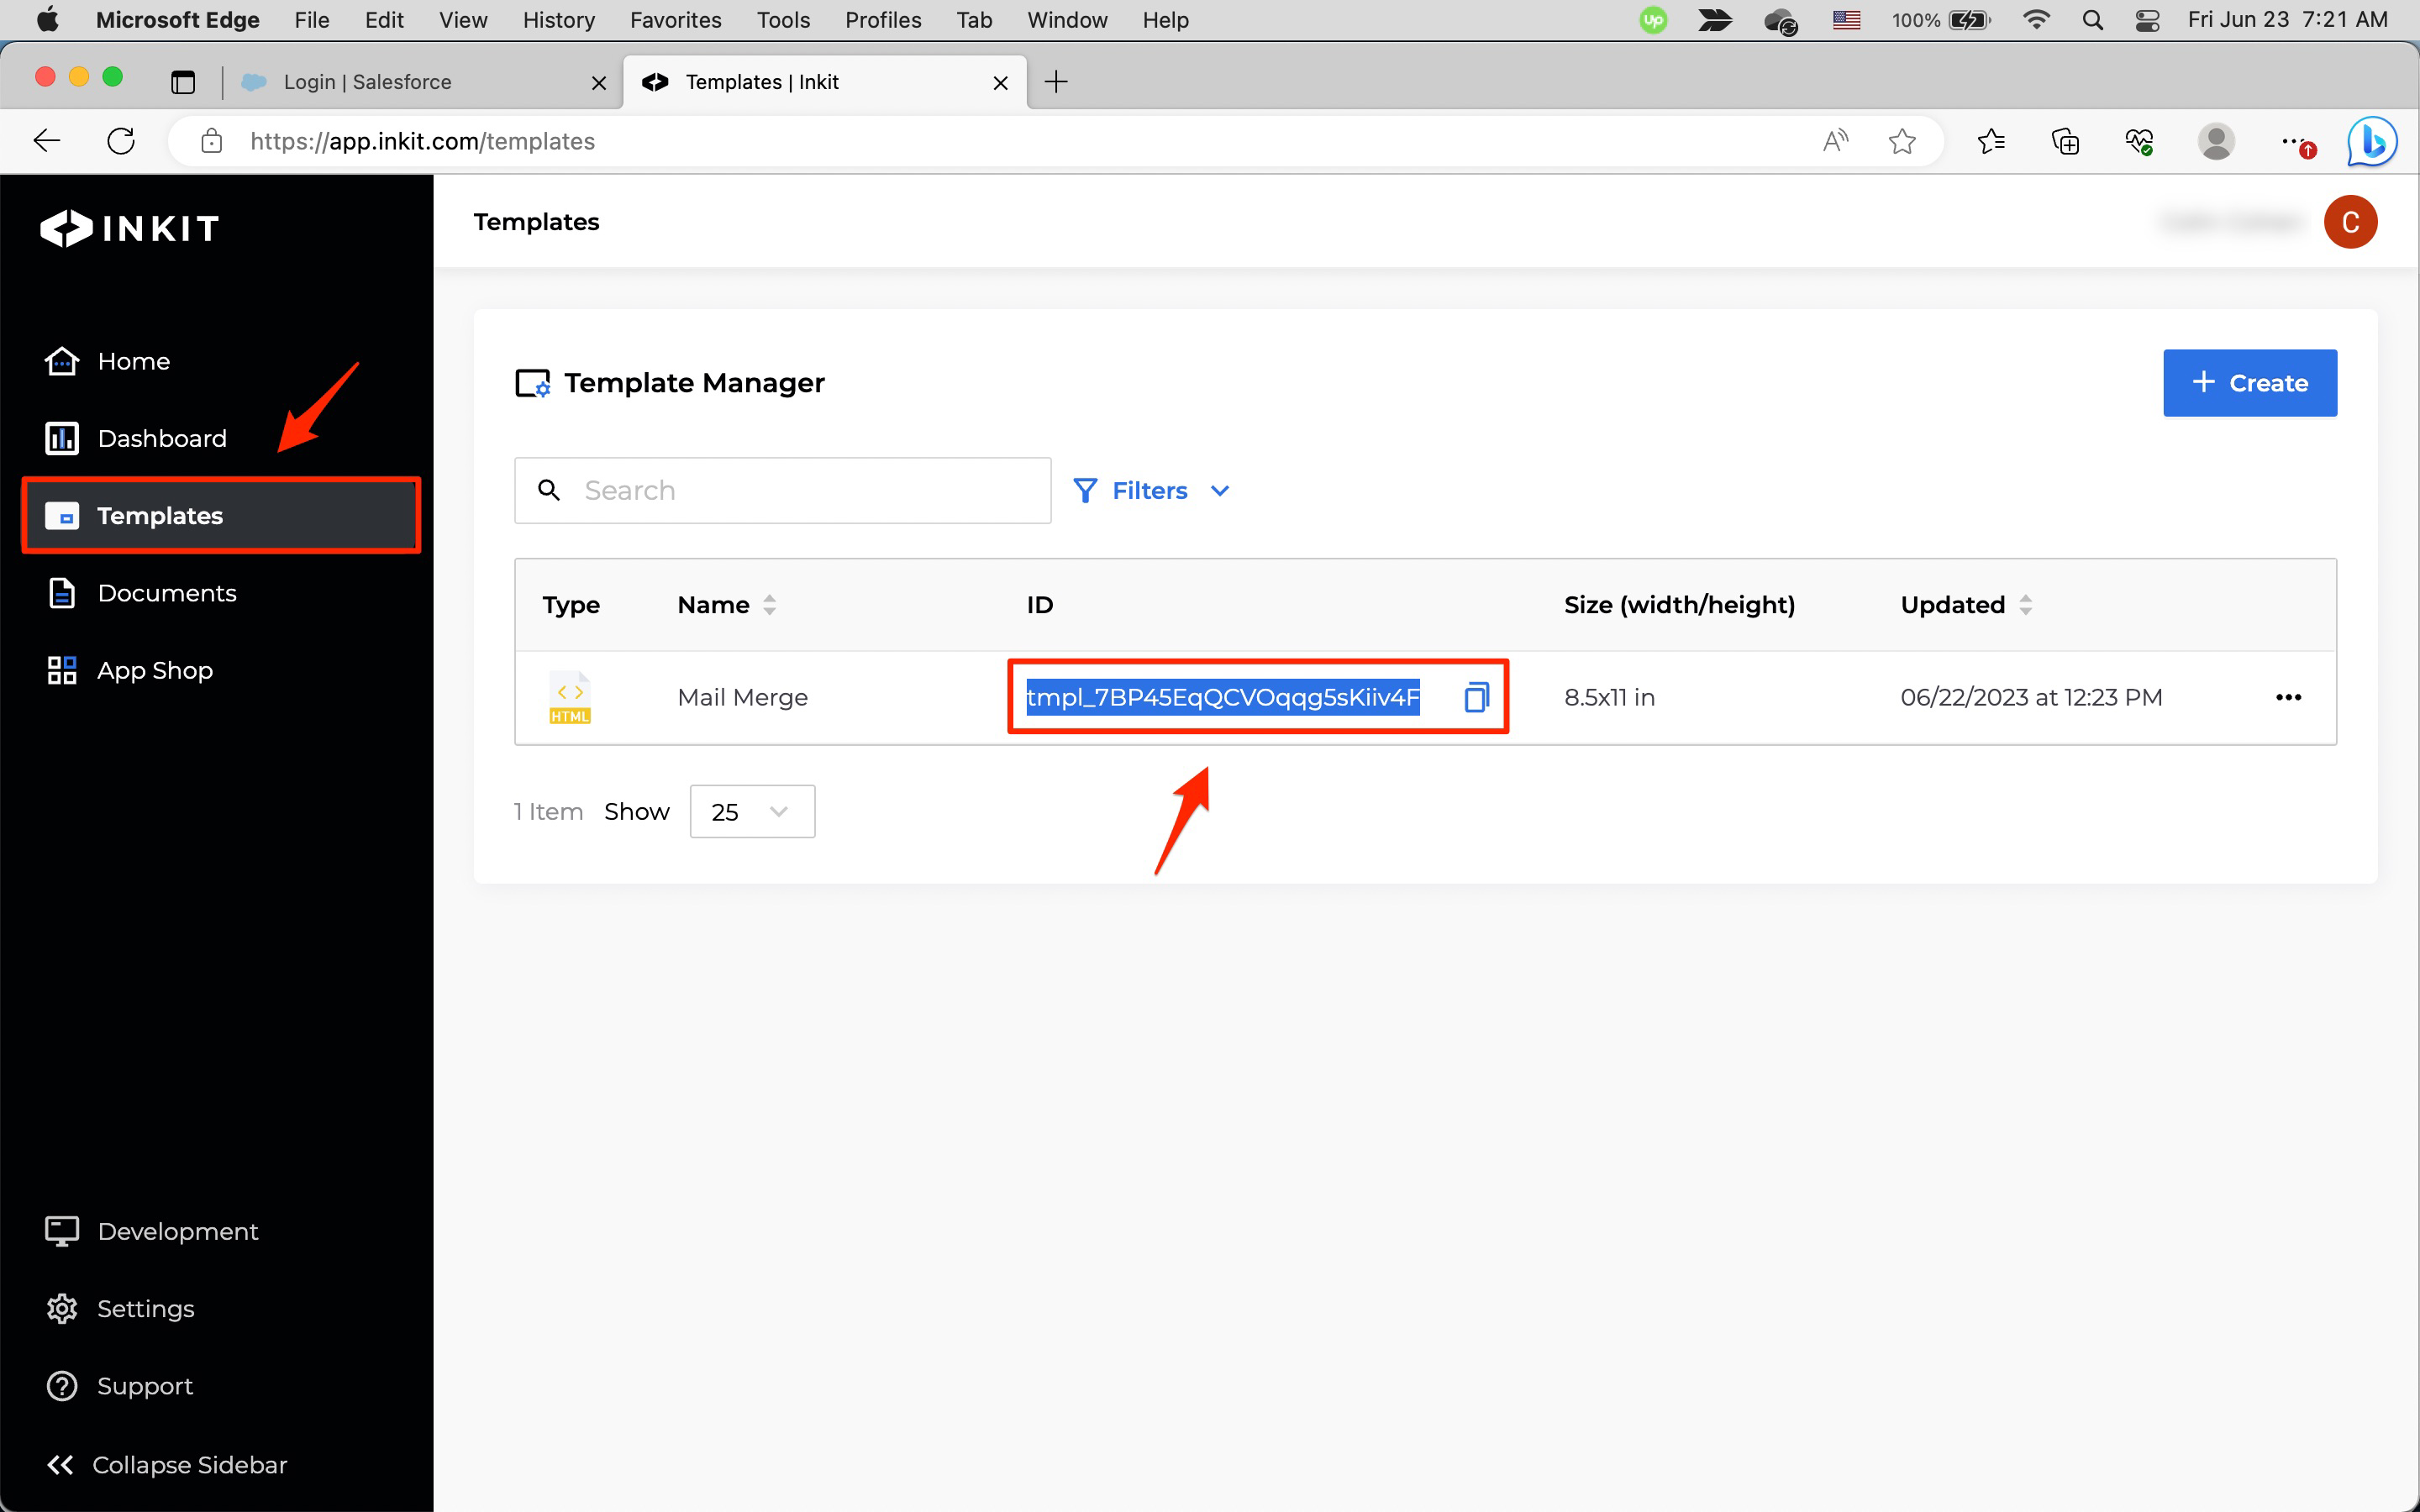
In the Inkit web app, select Templates in the left sidebar and find the mail merge template that you previously created. Then copy its ID to a place safe.
-
In a text editor, copy and paste the Python, Node.js or cURL code below that will generate the document from the template.
If you are using the Python sample, replace
inkit.api_tokenbelow with your API key andtemplate_idwith your template ID, and save the file as test.py.If you are using the Node.js sample, replace
inkit.apiTokenbelow with your API key andtemplateIdwith your template ID, and save the files as test.js.If you are using the cURL sample, replace
X-Inkit-API-Tokenbelow with your API key andtemplate_idwith your template ID.Note: You can also generate the document through the API by using the API reference.
# Import the Inkit Python package
import inkit
from inkit.exceptions import InkitResponseException
# Import json package
import json

# Replace the string below with your API key
inkit.api_token = "ENTER YOUR API KEY"

try:
  # Create a PDF document from a template
  resp = inkit.Render.create(
    # Specify the ID of the template
    template_id = "ENTER YOUR TEMPLATE ID",
    # Specify the data for the Name field
    merge_parameters = {"Name": "John"},
    # Specify the name of the PDF file
    destinations = {"inkit_storage": {"name": "Mail Merge Python SDK"}}
  )
  # Print the JSON repsonse of the API call
  print(json.dumps(resp.data, indent = 3))
except InkitResponseException as err:
  # Print any error
  print(err.response.data)
// Import the Inkit Node.js package const Inkit = require("inkit"); // Replace the string below with your API key Inkit.apiToken = "ENTER YOUR API KEY"; // Call the PDF renderer createRender(); // Create a PDF document from a template async function createRender() { try { const result = await Inkit.Render.create({ // Specify the ID of the template templateId: 'ENTER YOUR TEMPLATE ID', // Specify the data for the Name field mergeParameters: {"Name": "John"}, // Specify the name of the PDF file destinations: {"inkit_storage": {"name": "Mail Merge Node.js SDK"}} }); // Print the JSON response of the API call console.log(JSON.stringify(result.data, null, 3)); } catch (error) { // Print any error console.error(error.response.status, error.response.statusText); } }curl --request POST \ --url https://api.inkit.com/v1/generate \ --header 'Content-Type: application/json' \ --header 'X-Inkit-API-Token: ENTER YOUR API KEY' \ --header 'accept: application/json' \ --data ' { "merge_parameters": { "Name": "John" }, "destinations": { "inkit_storage": { "name": "Mail Merge cURL" } }, "template_id": "ENTER YOUR TEMPLATE ID" } ' -
In a terminal or command prompt, run one of the following commands:
python test.py(Python)node test.js(Node.js)- The above cURL command
A JSON response object similar to the following will print out.
{ "document_id": "doc_22VAgp995dyx8vgabIy35O", "id": "rend_5oGScGXBnDpKJbXnm4u6J7" } -
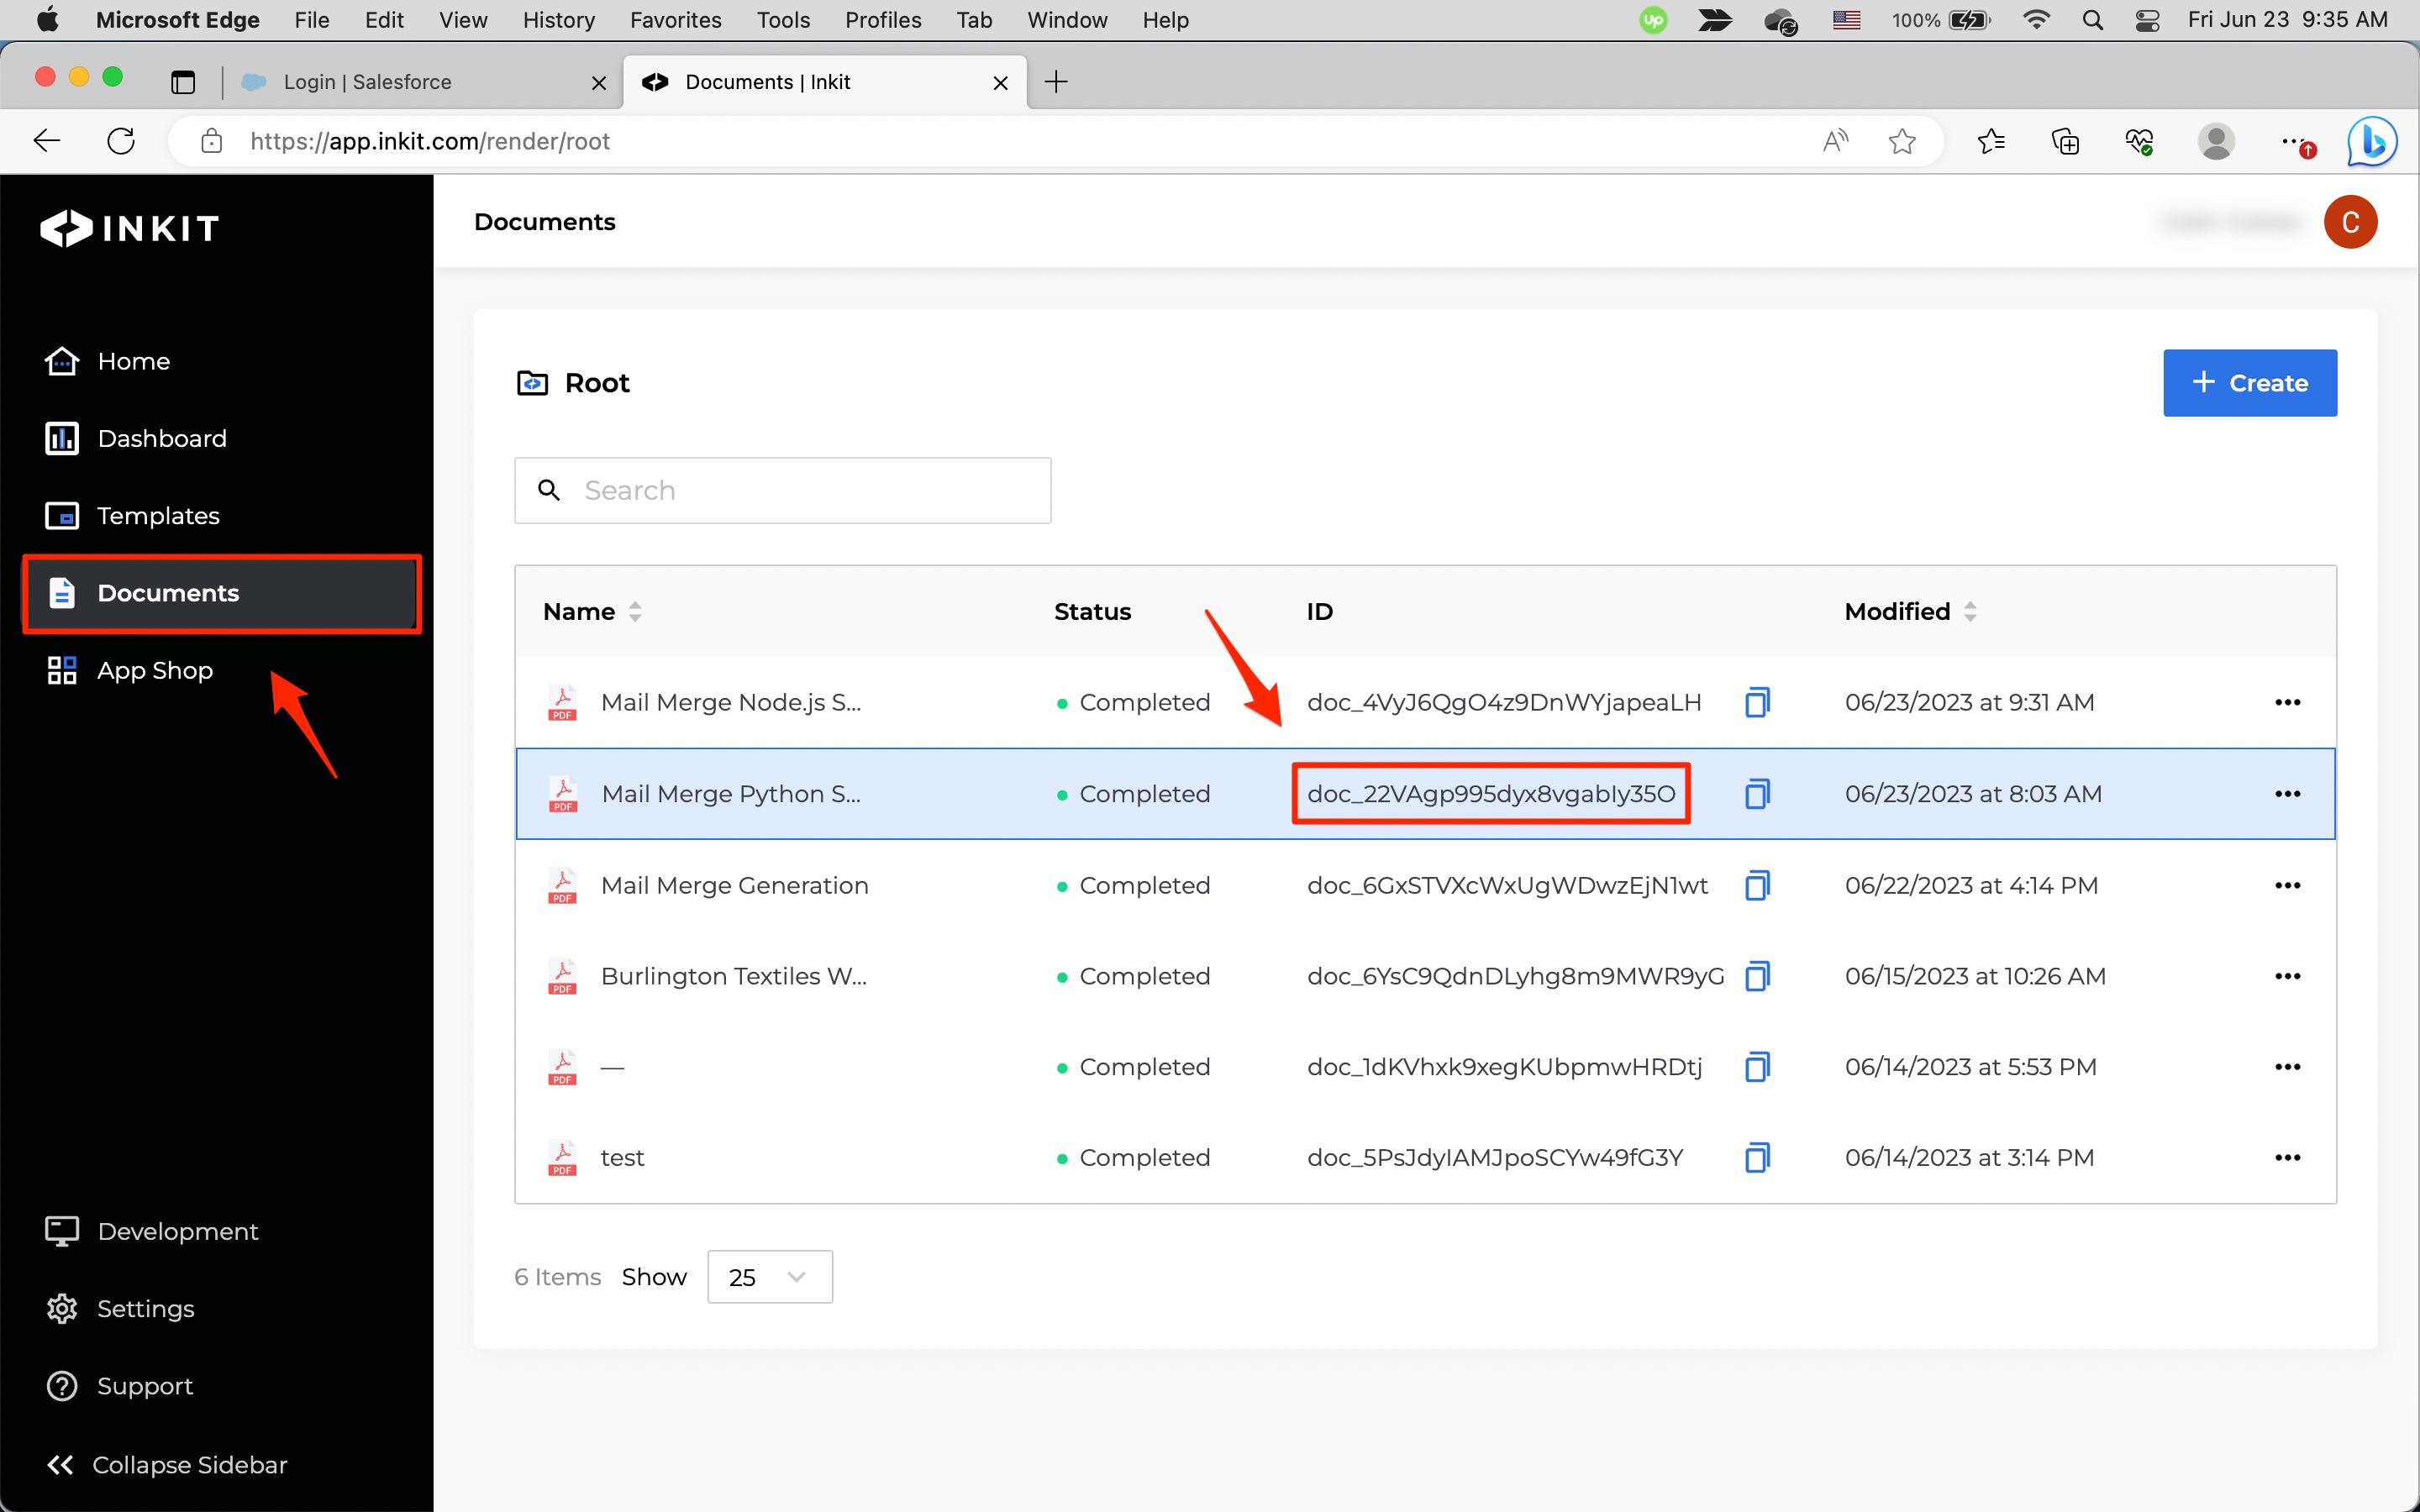
In the Inkit web app, select Documents in the left sidebar. You should see the document that you just generated in the list of documents and can confirm that its ID matches the
document_idin the above response object.To view the document, double-click on it.
-
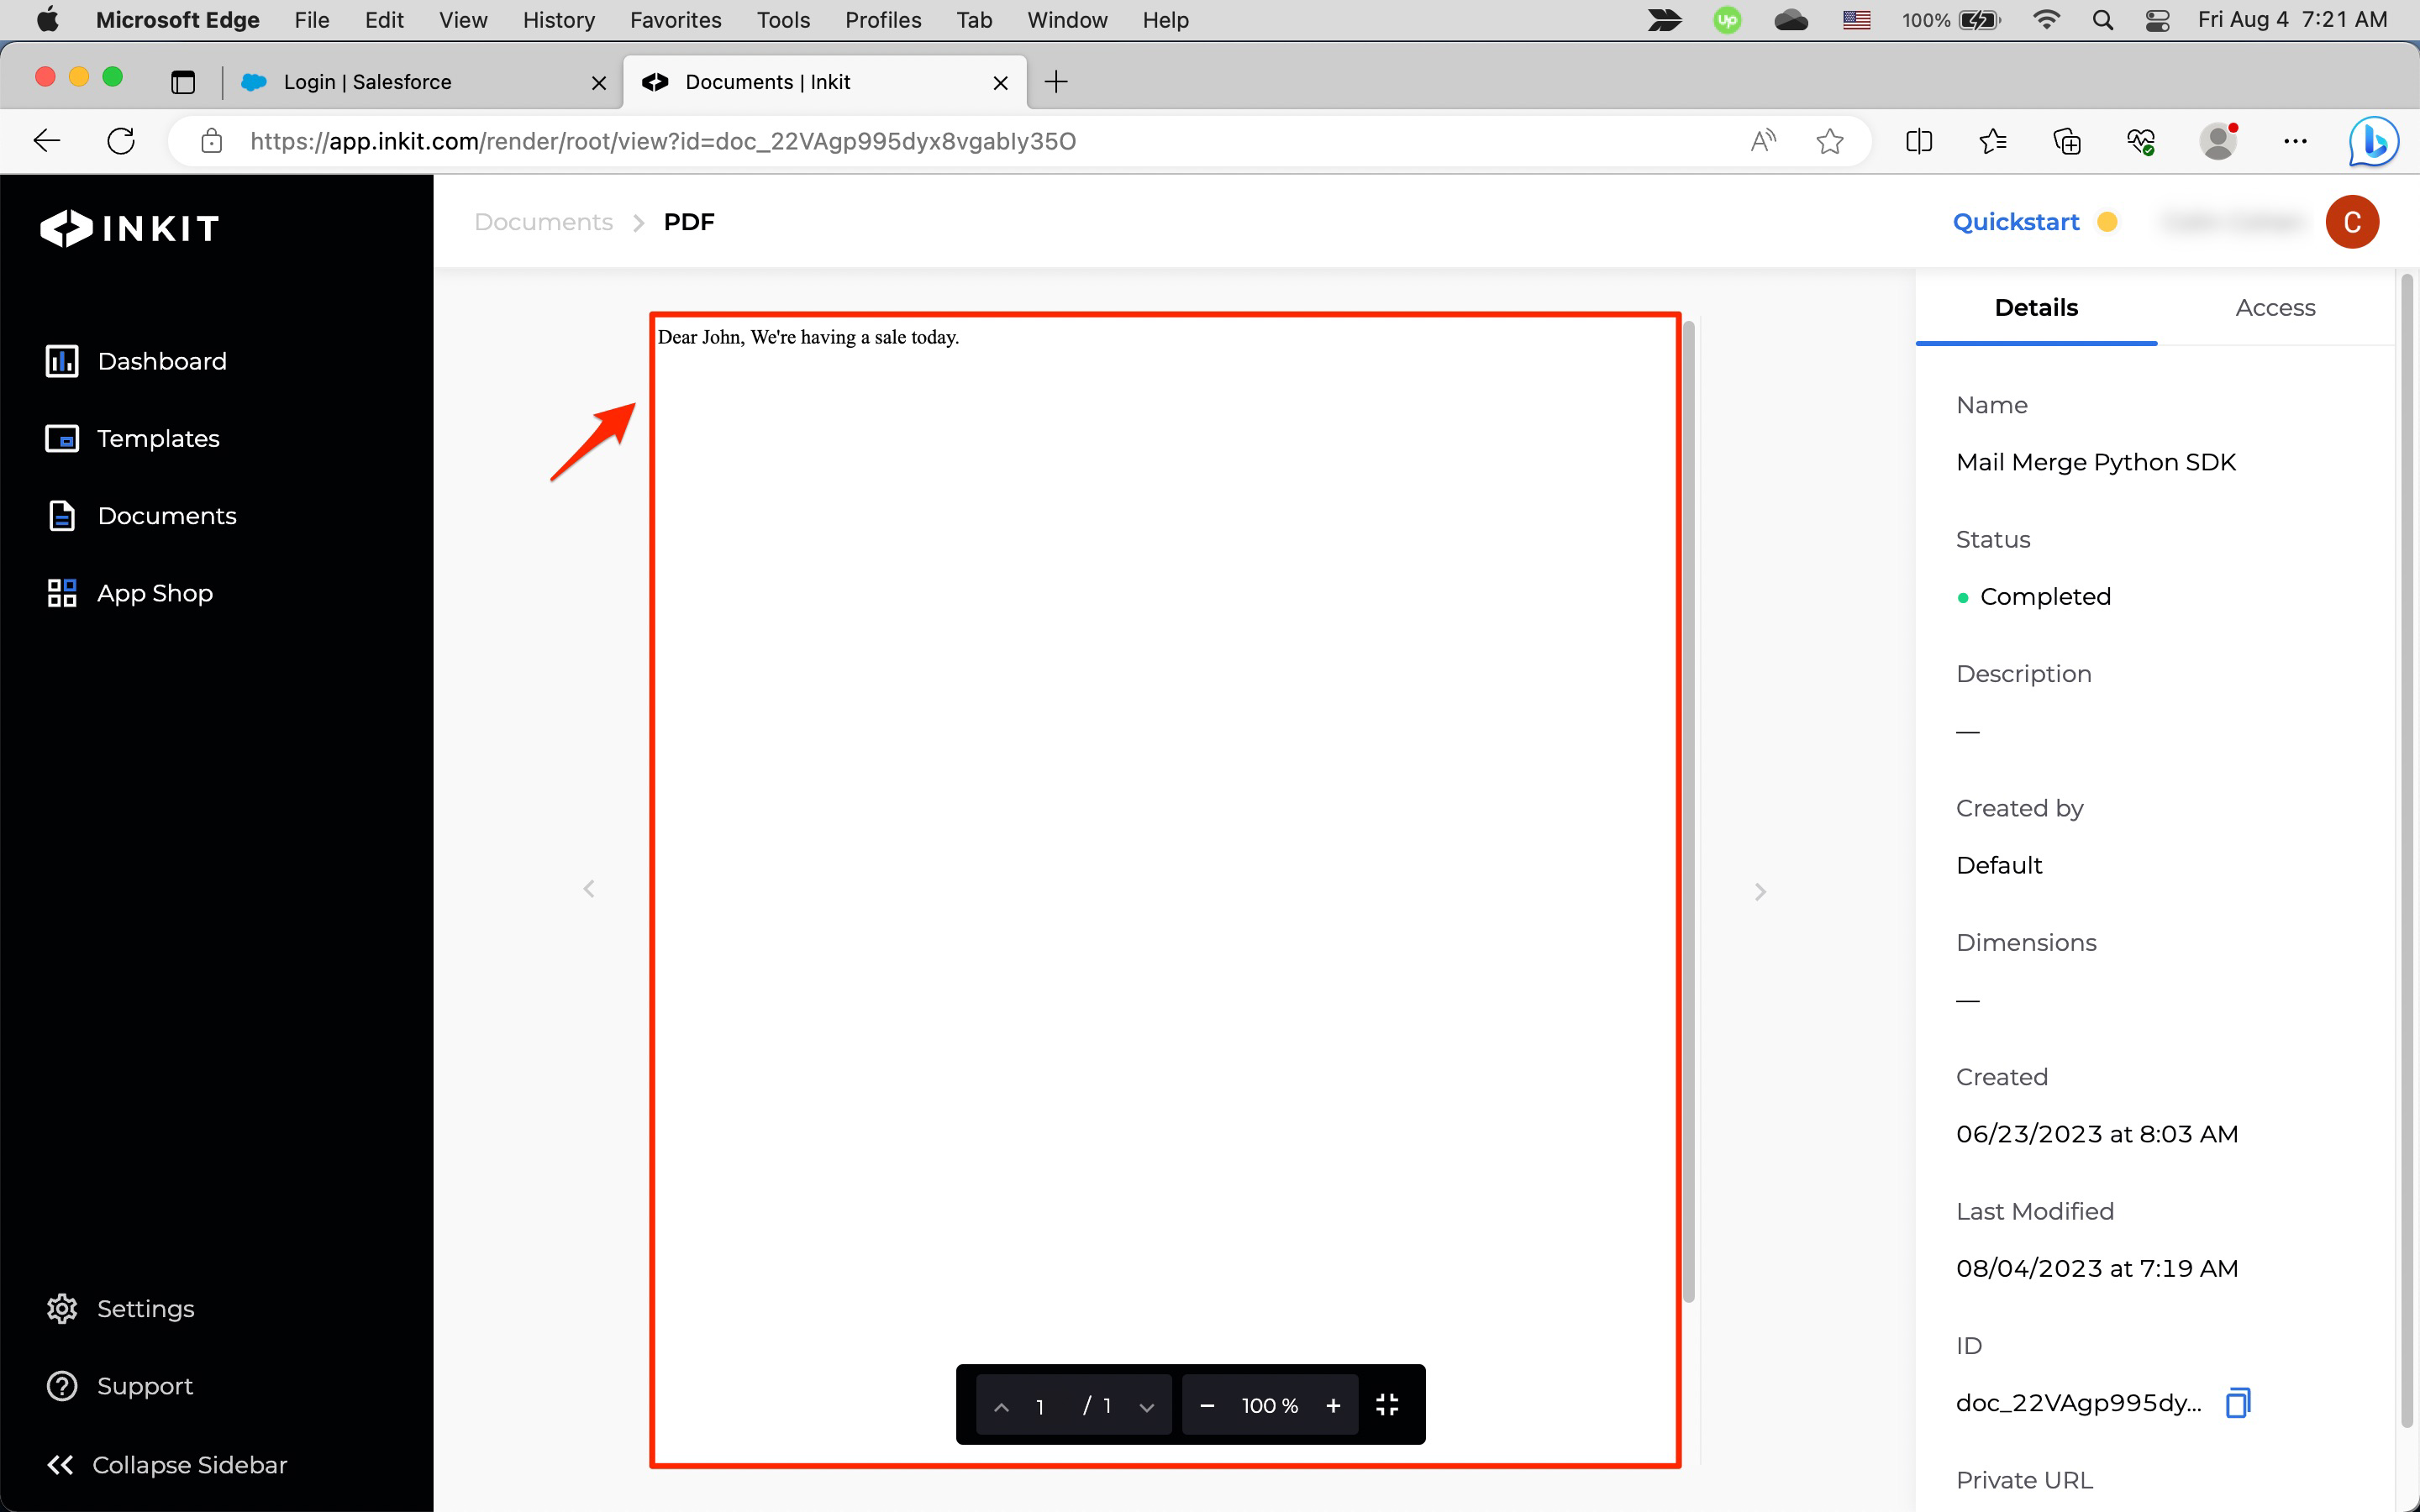
Your generated document will display in the document viewer.
Note: If you are new to programming, the following code recipe will guide you on how to do this in Python:
Once you've generated your document, you are ready to display it to your users.
Updated 10 months ago