Creating and editing templates
Inkit templates are forms through which you generate documents by injecting a set of data into them. A template consists of the static elements of your document (the parts that will never change), and the dynamic elements that will by injecting your data. You create a dynamic element by embedding a field between double-curly brackets ({{}}) that Inkit will replace with your data when you generate the document.
Think of the classic mail merge many of us have used to generate a set of letters. The body of your letter is static. It never changes no matter who it is addressed to. But the name and the address elements are dynamic. They change with each letter through the injection of data.
Creating templates
The instructions for creating a template are specific to whether you're creating a PDF, a DOCX or an HTML template.
Editing templates
Editing basic template information
To edit basic information about a template, do the following:
-
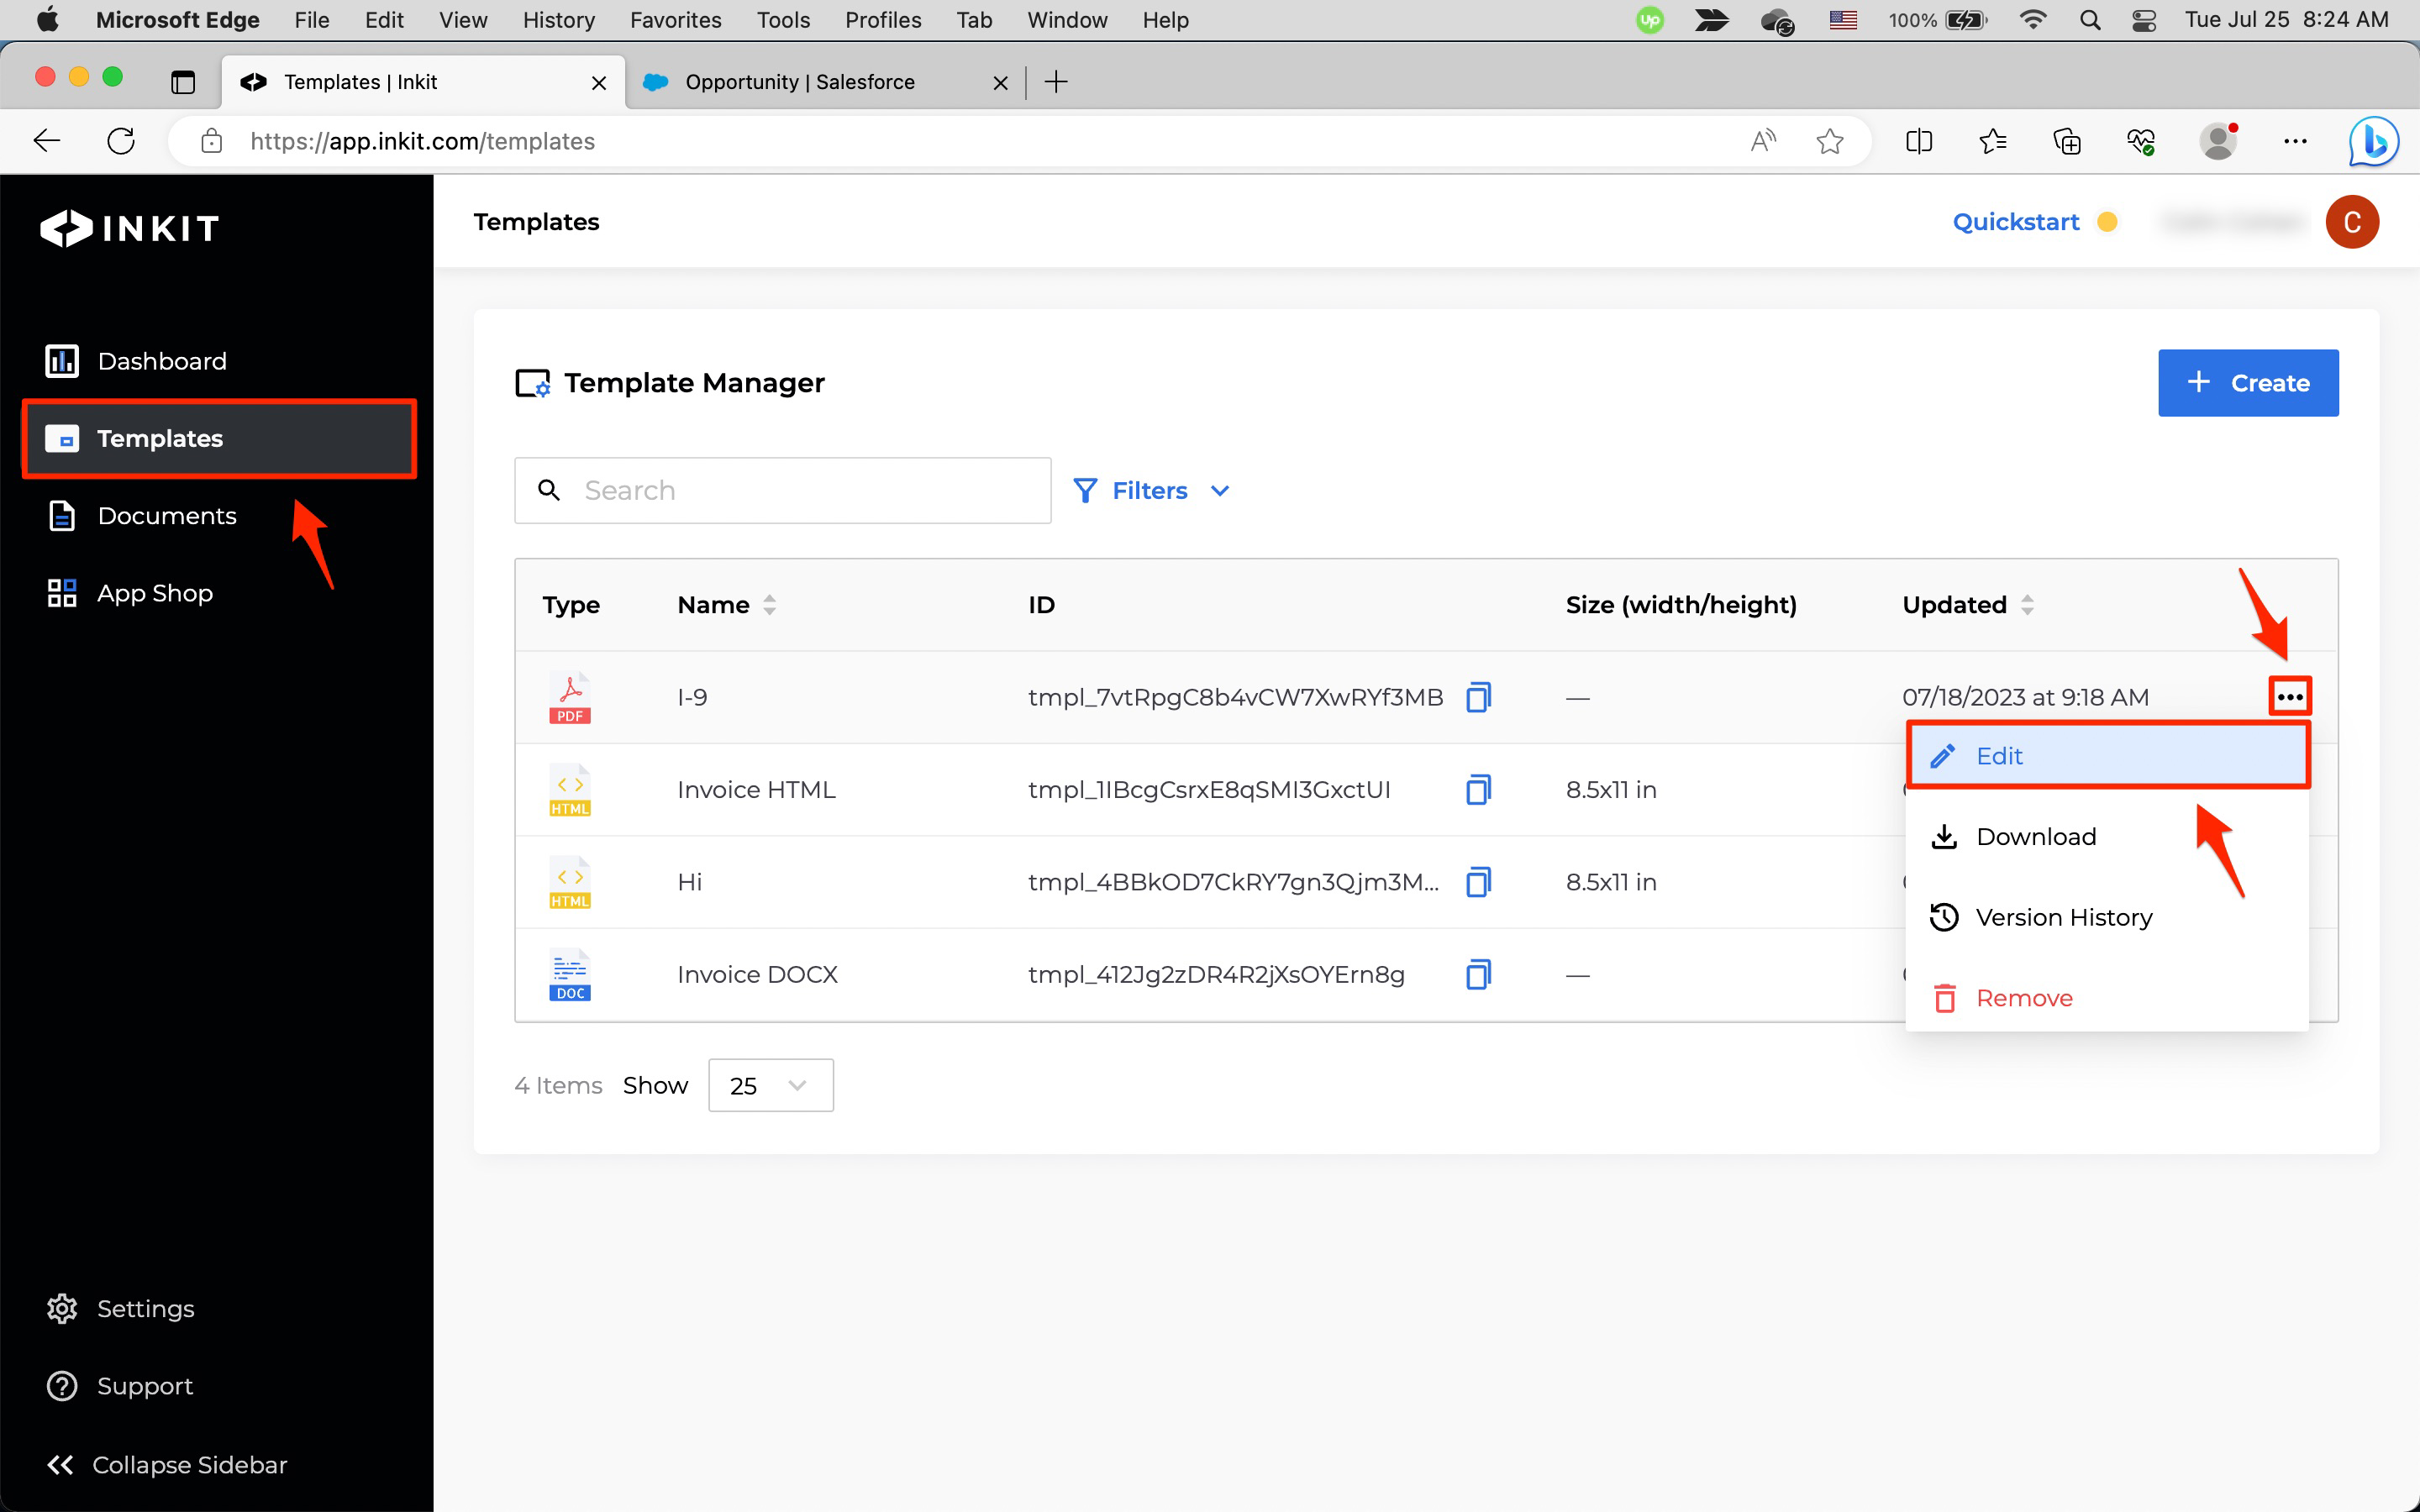
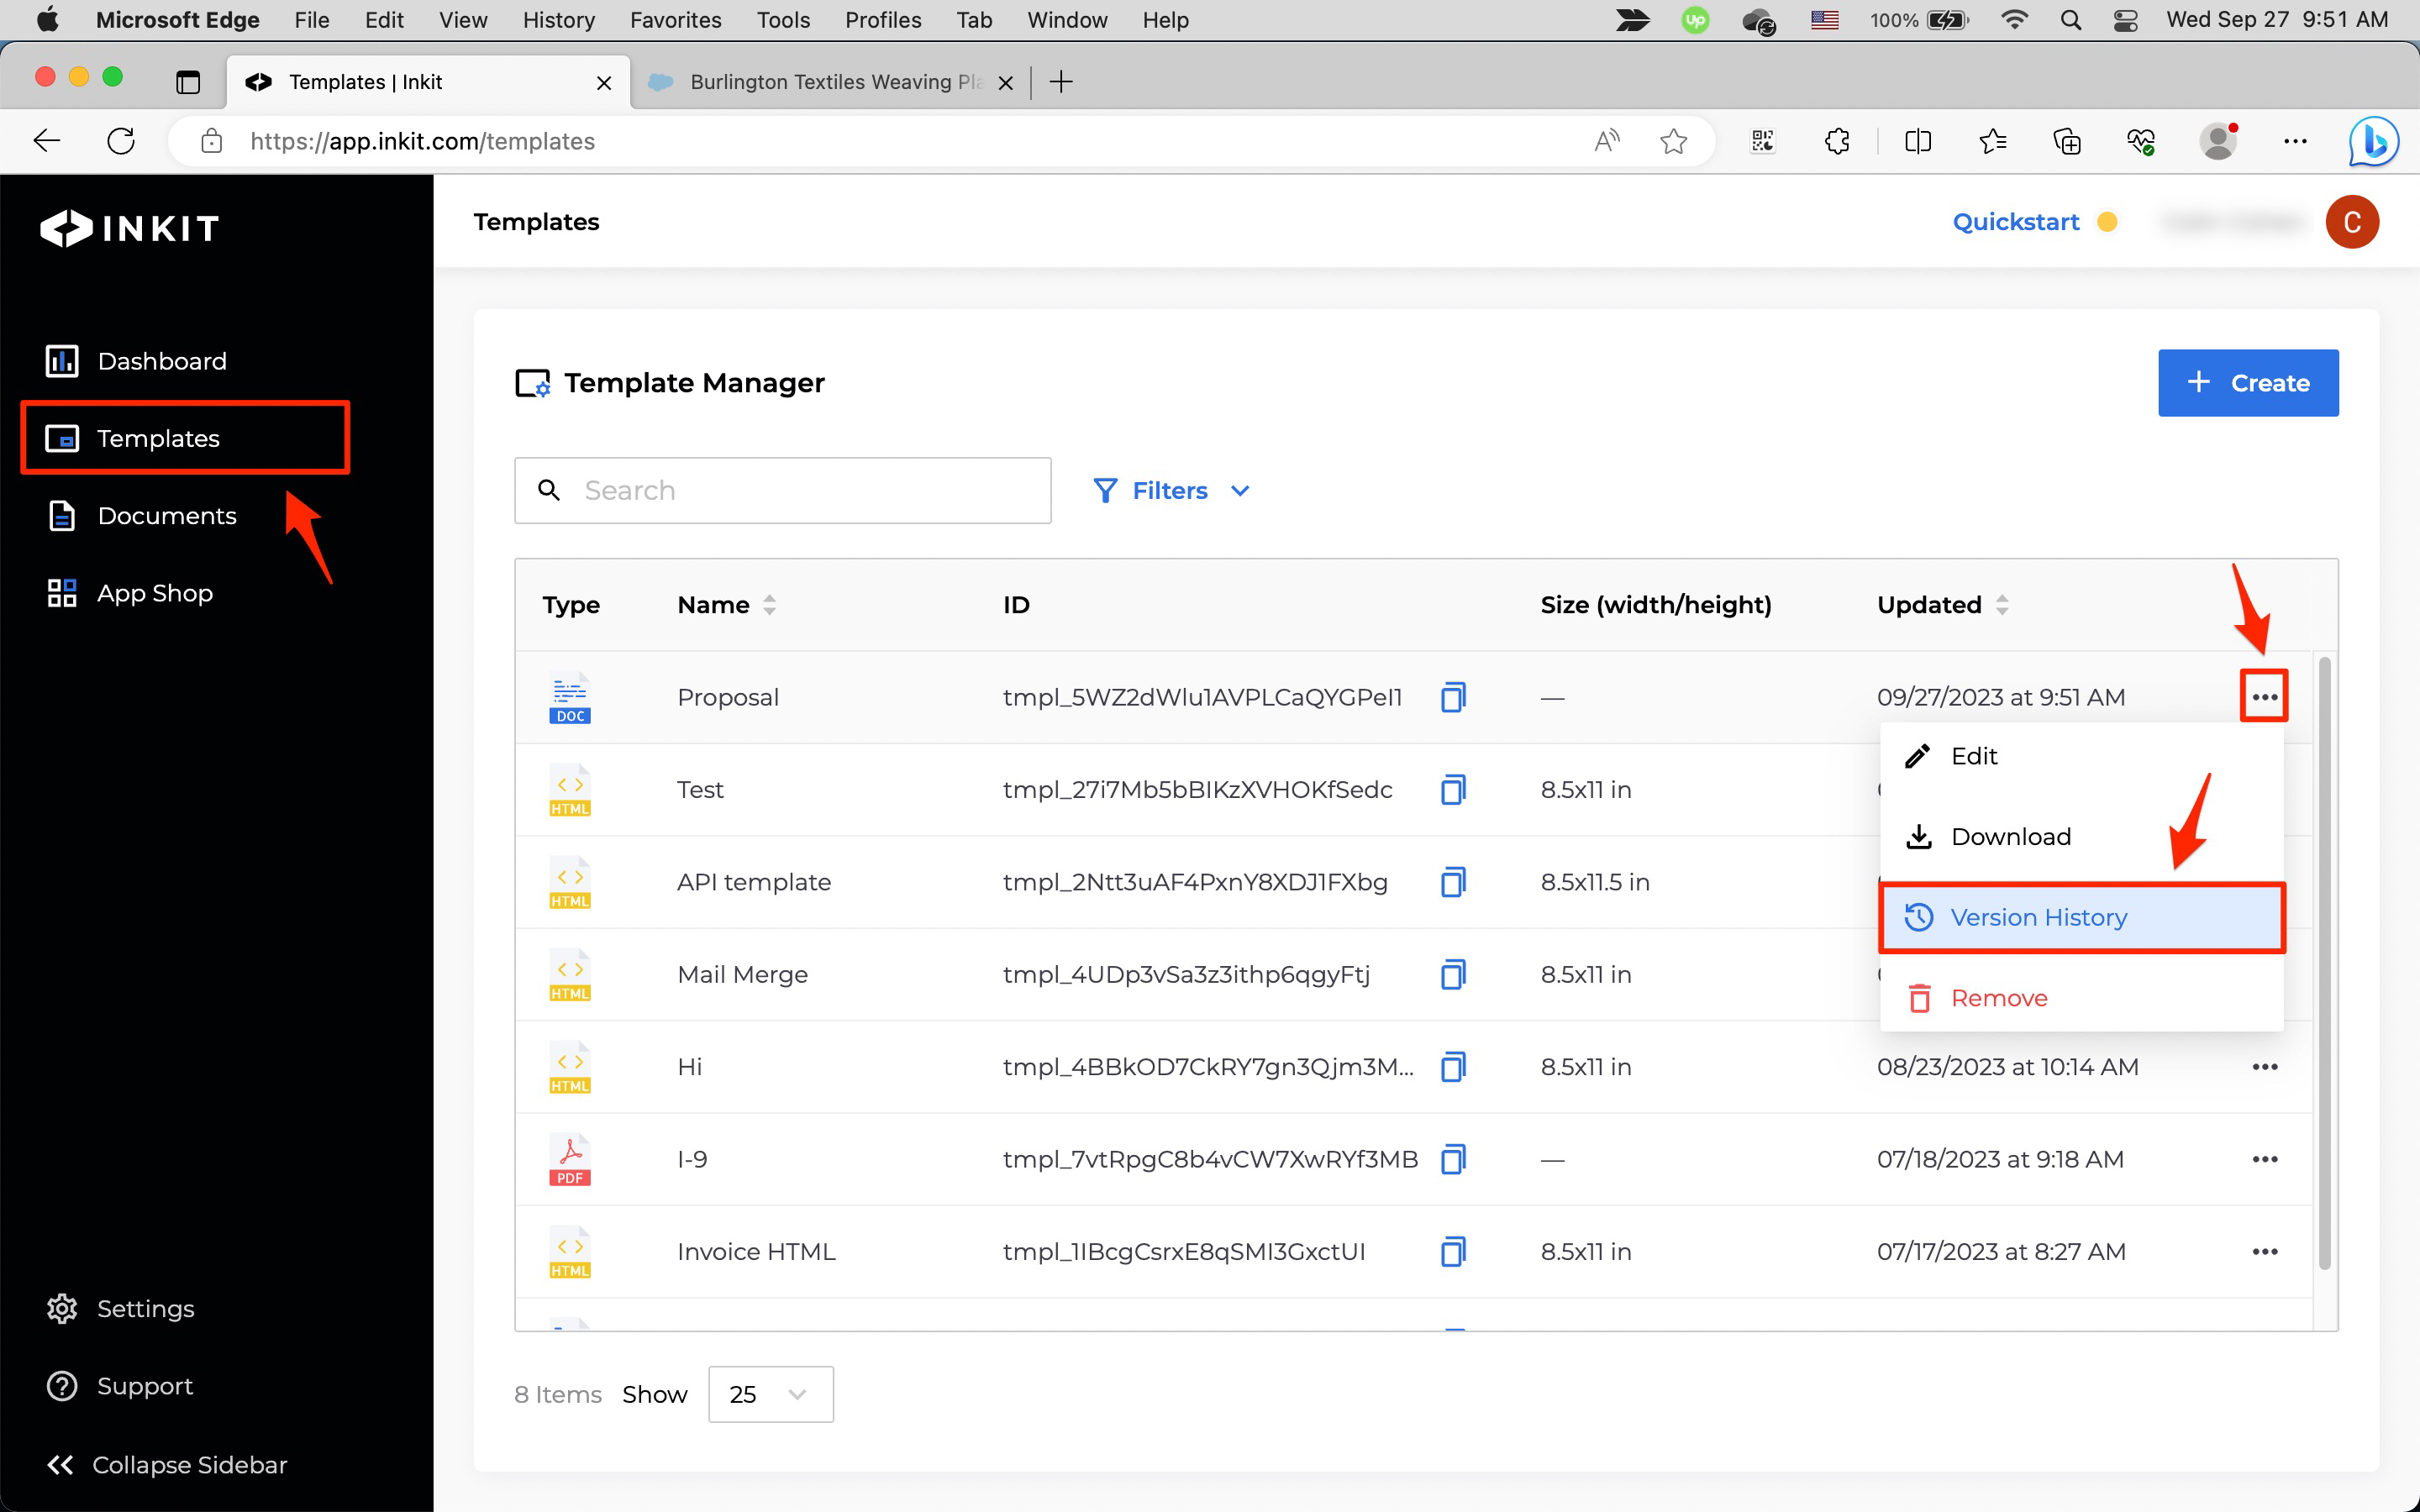
In the Inkit web app, select Templates in the left sidebar, then click on the ... menu button beside the template you want to edit and click Edit. You can also edit a template by double-clicking on it.
-
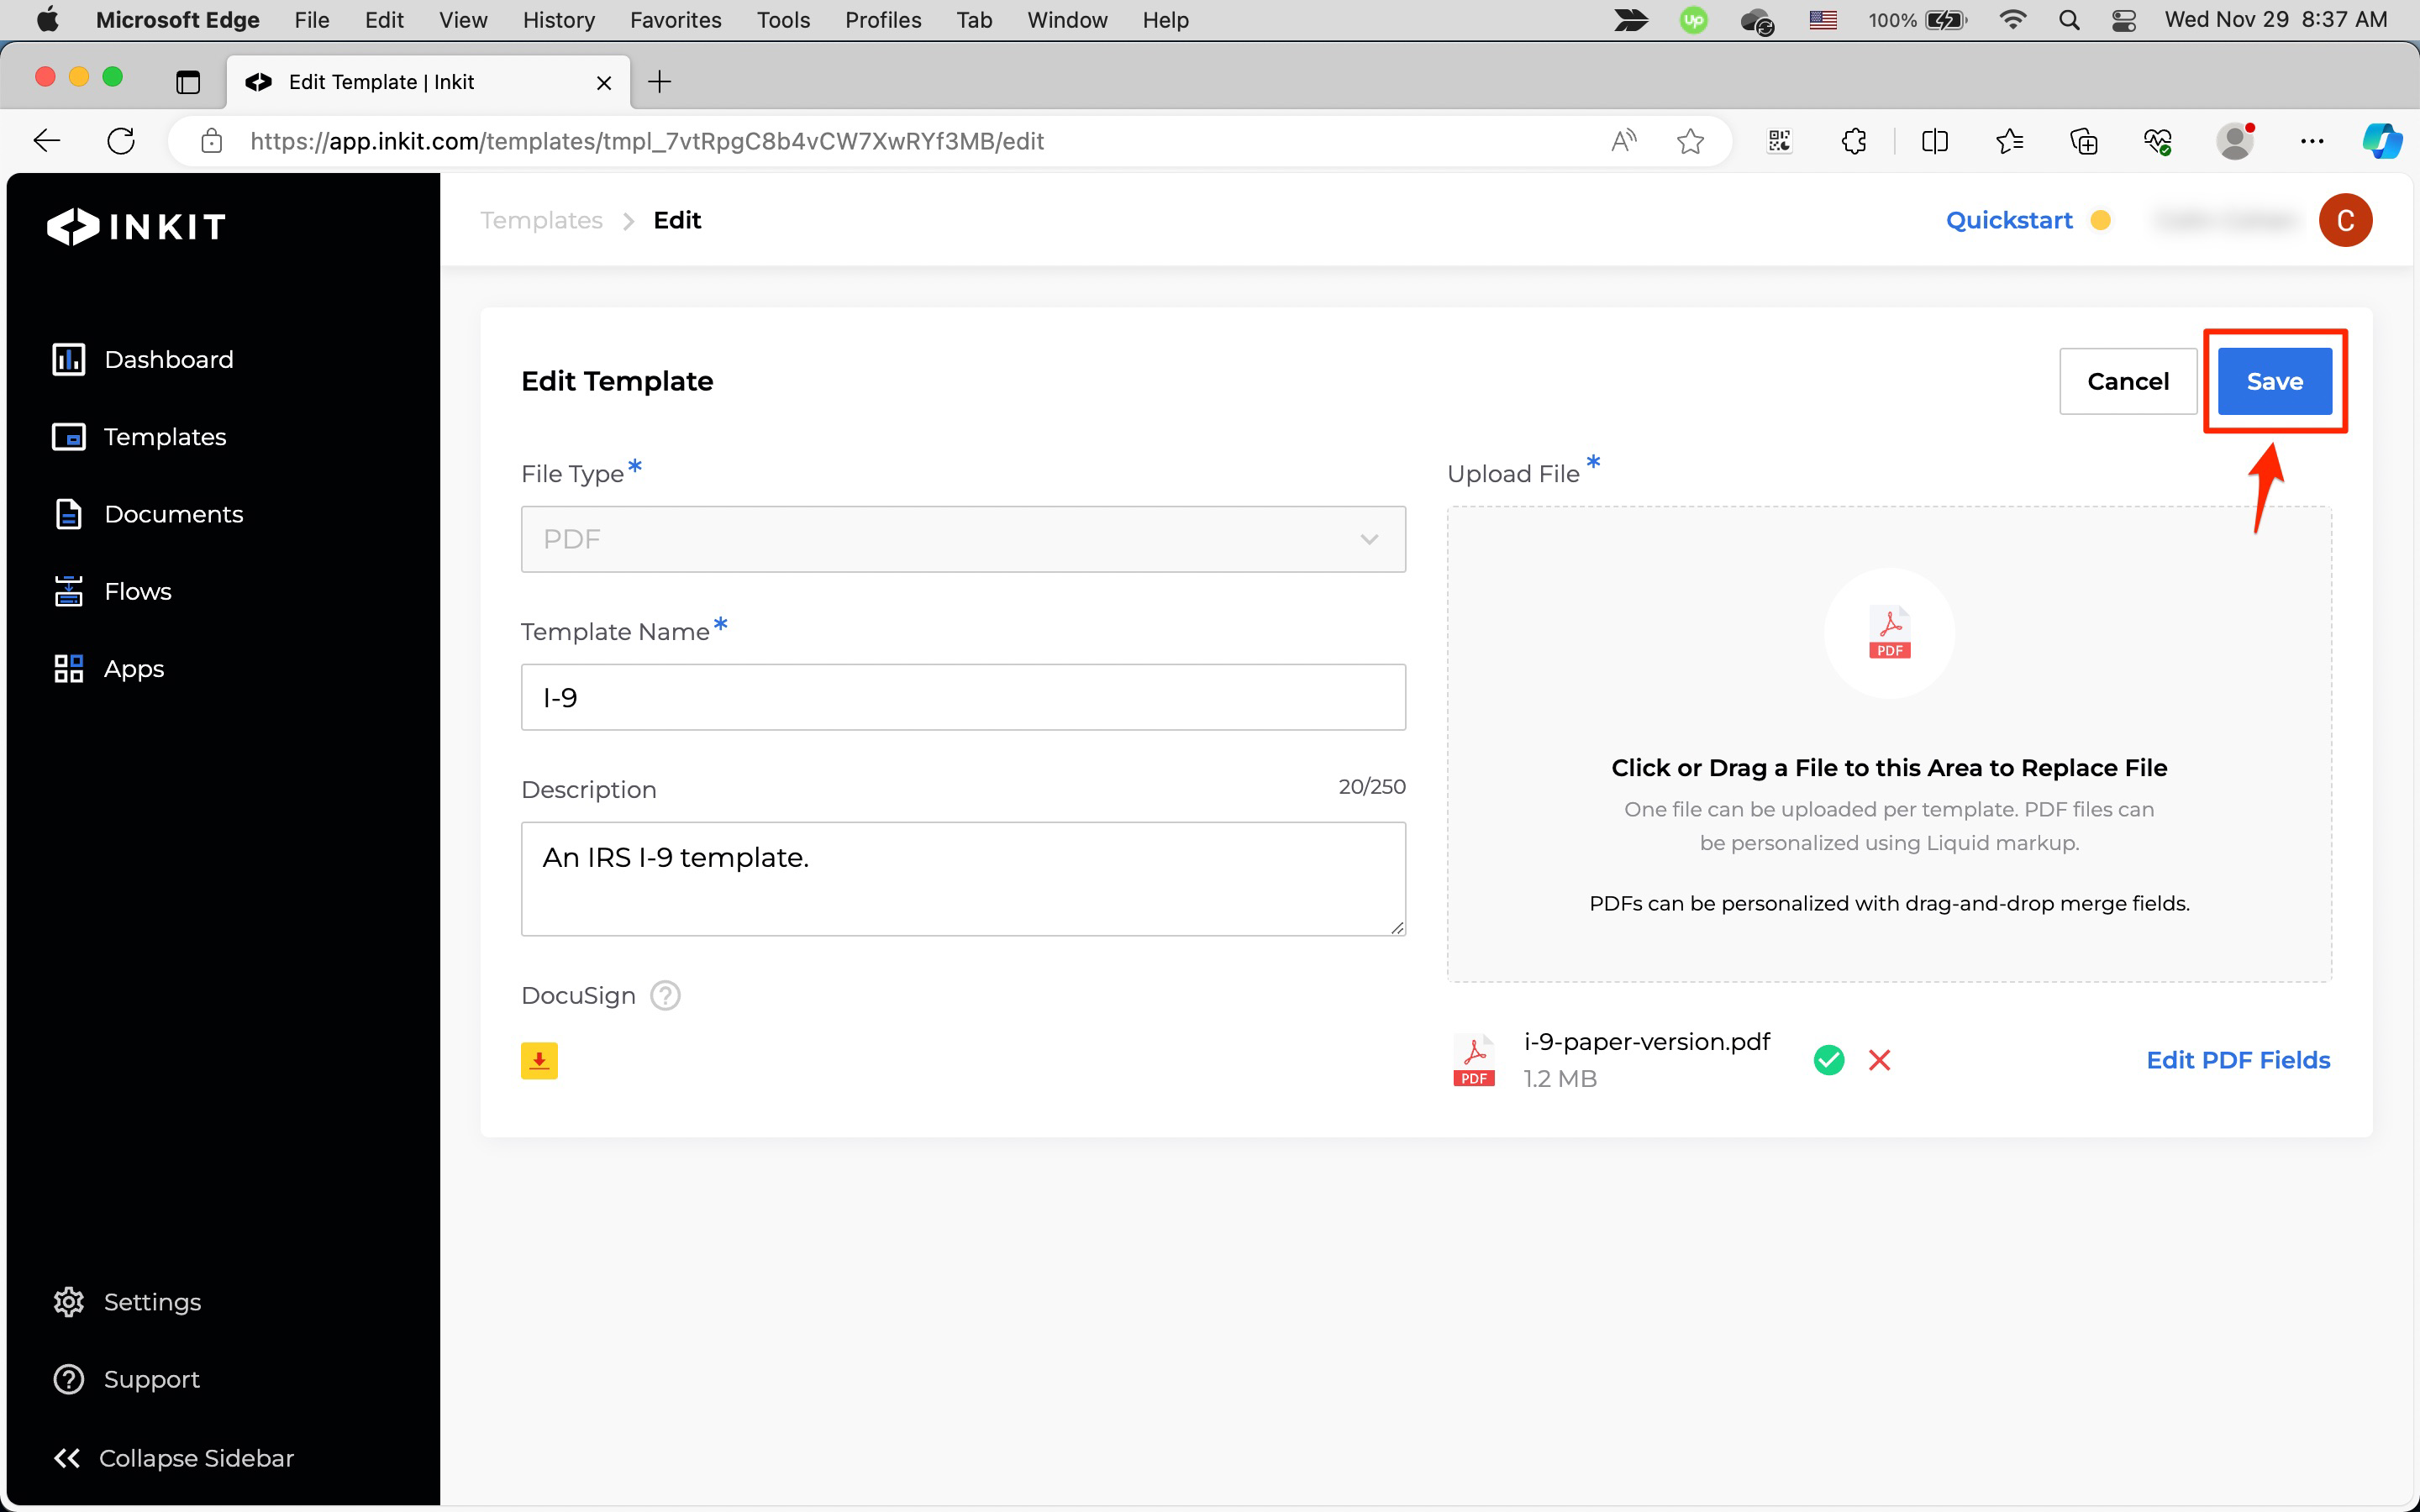
In the Edit Template page, you can edit the Template Name and its Description.
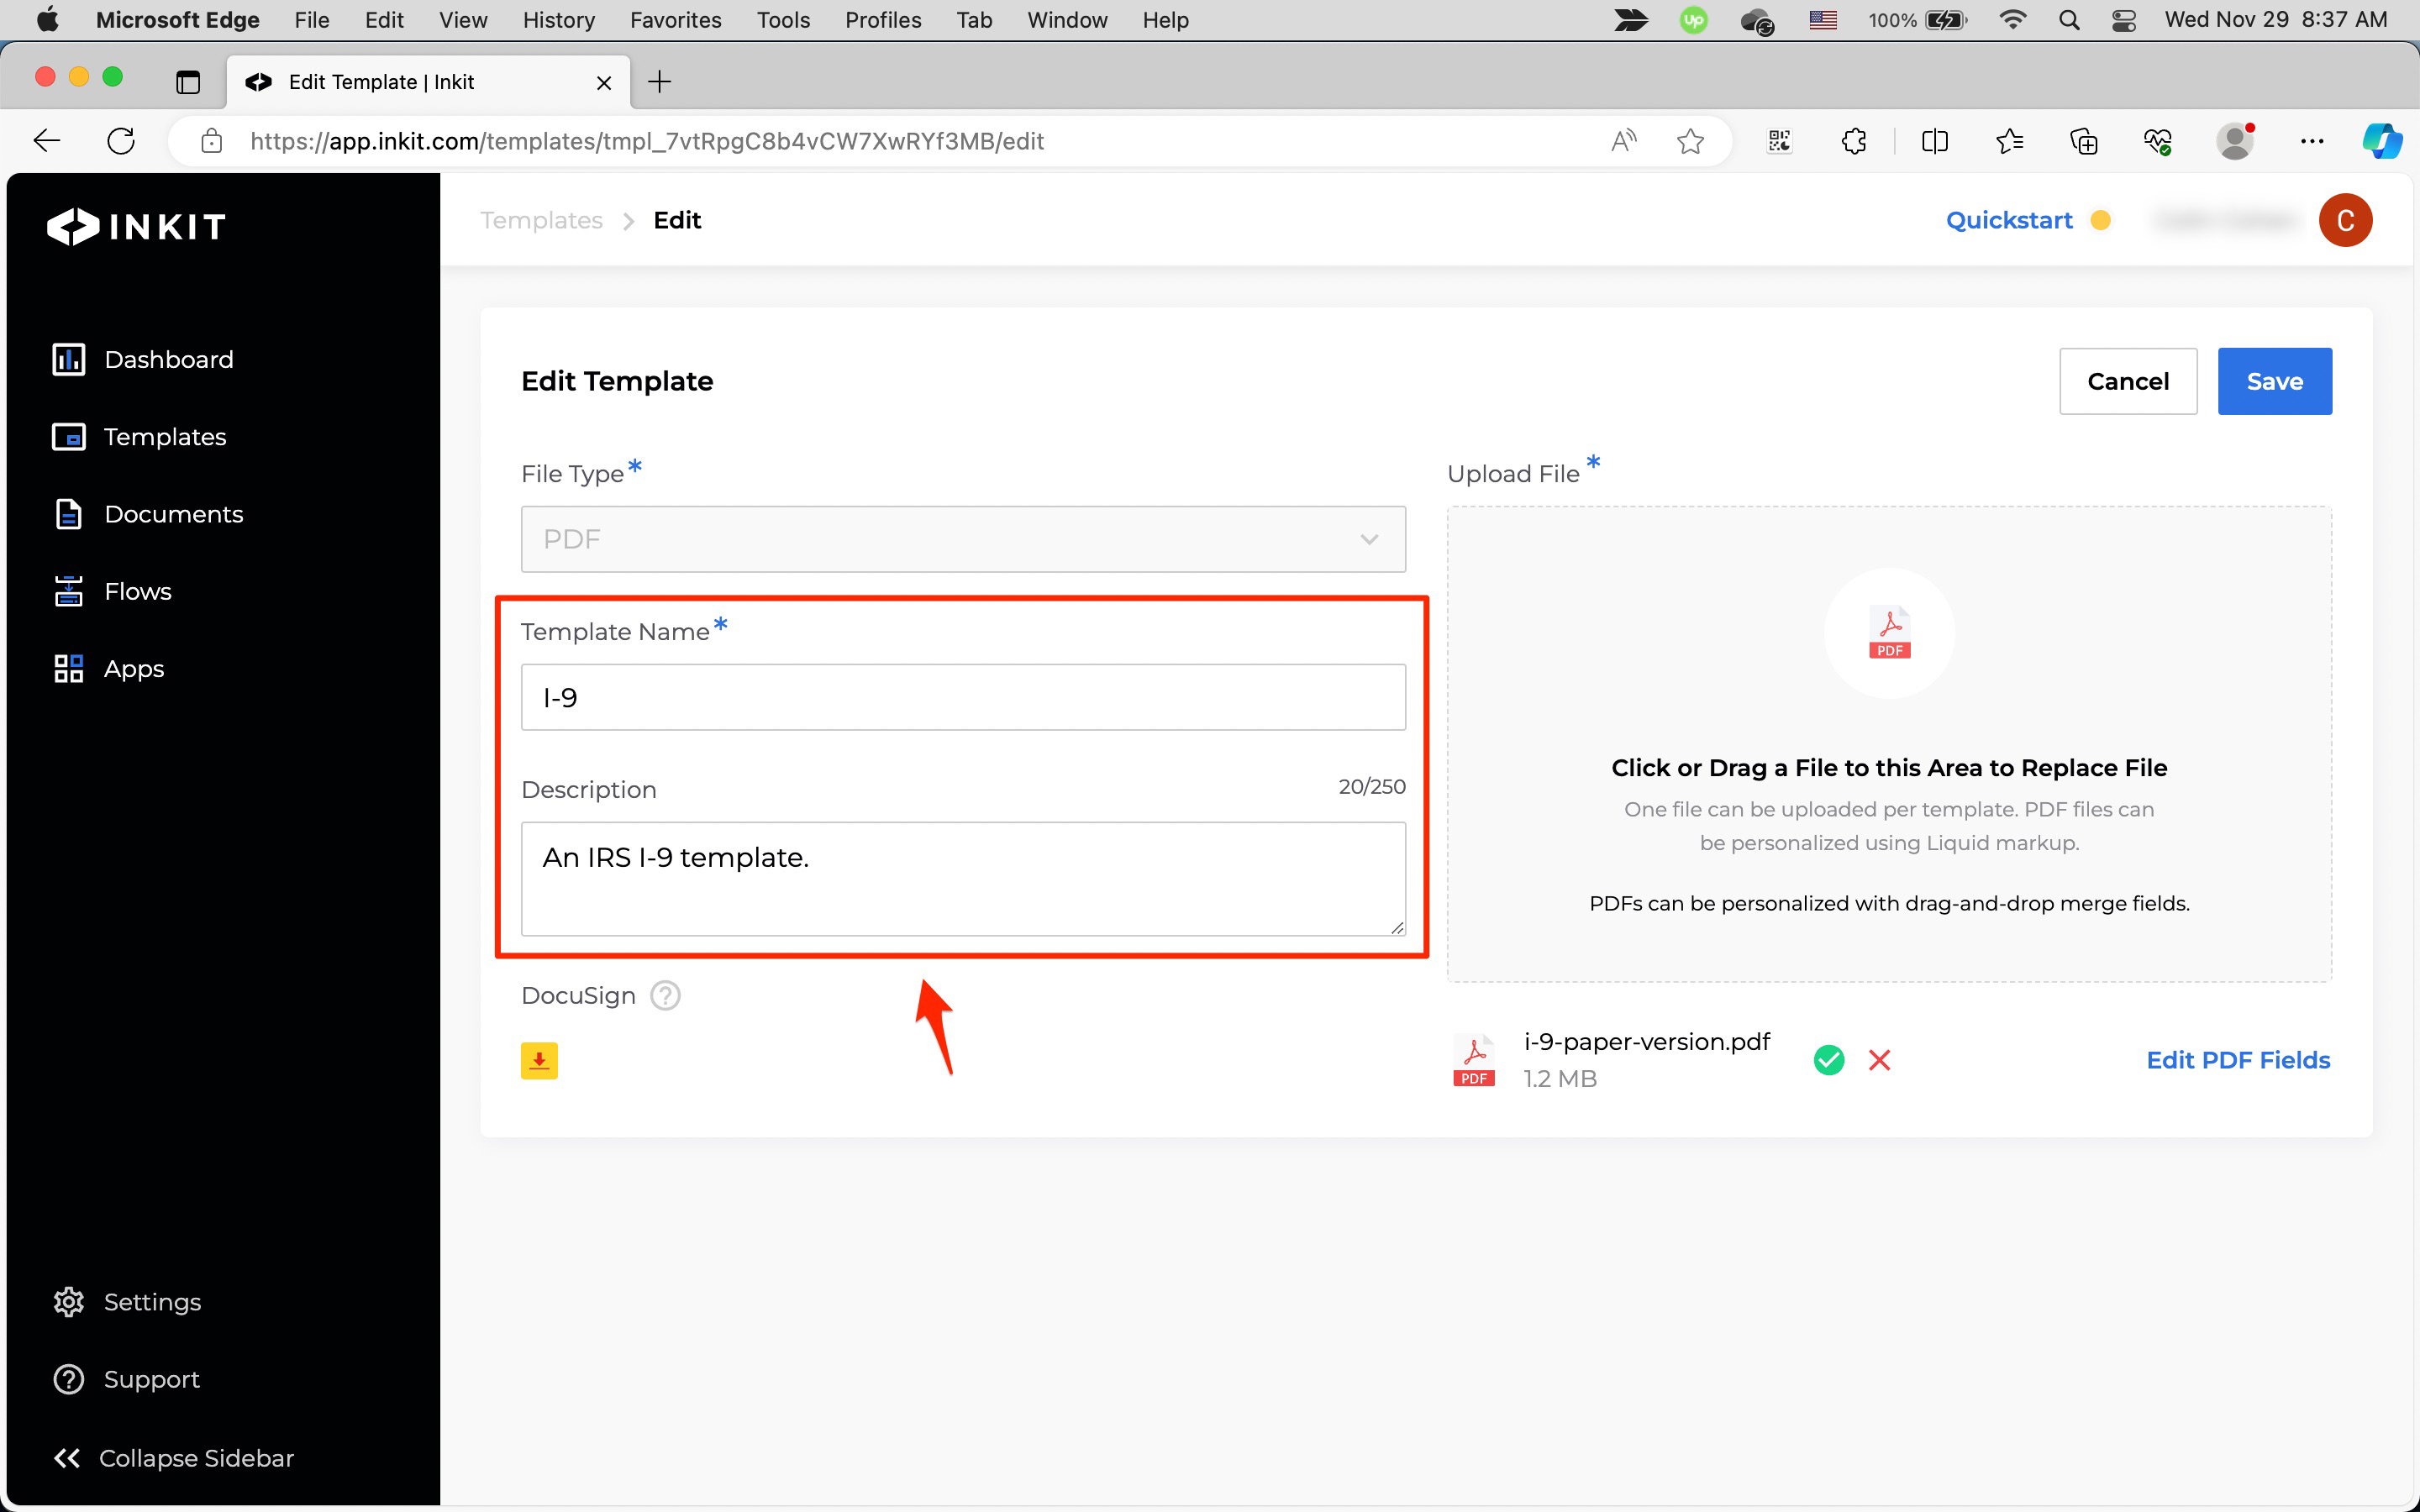
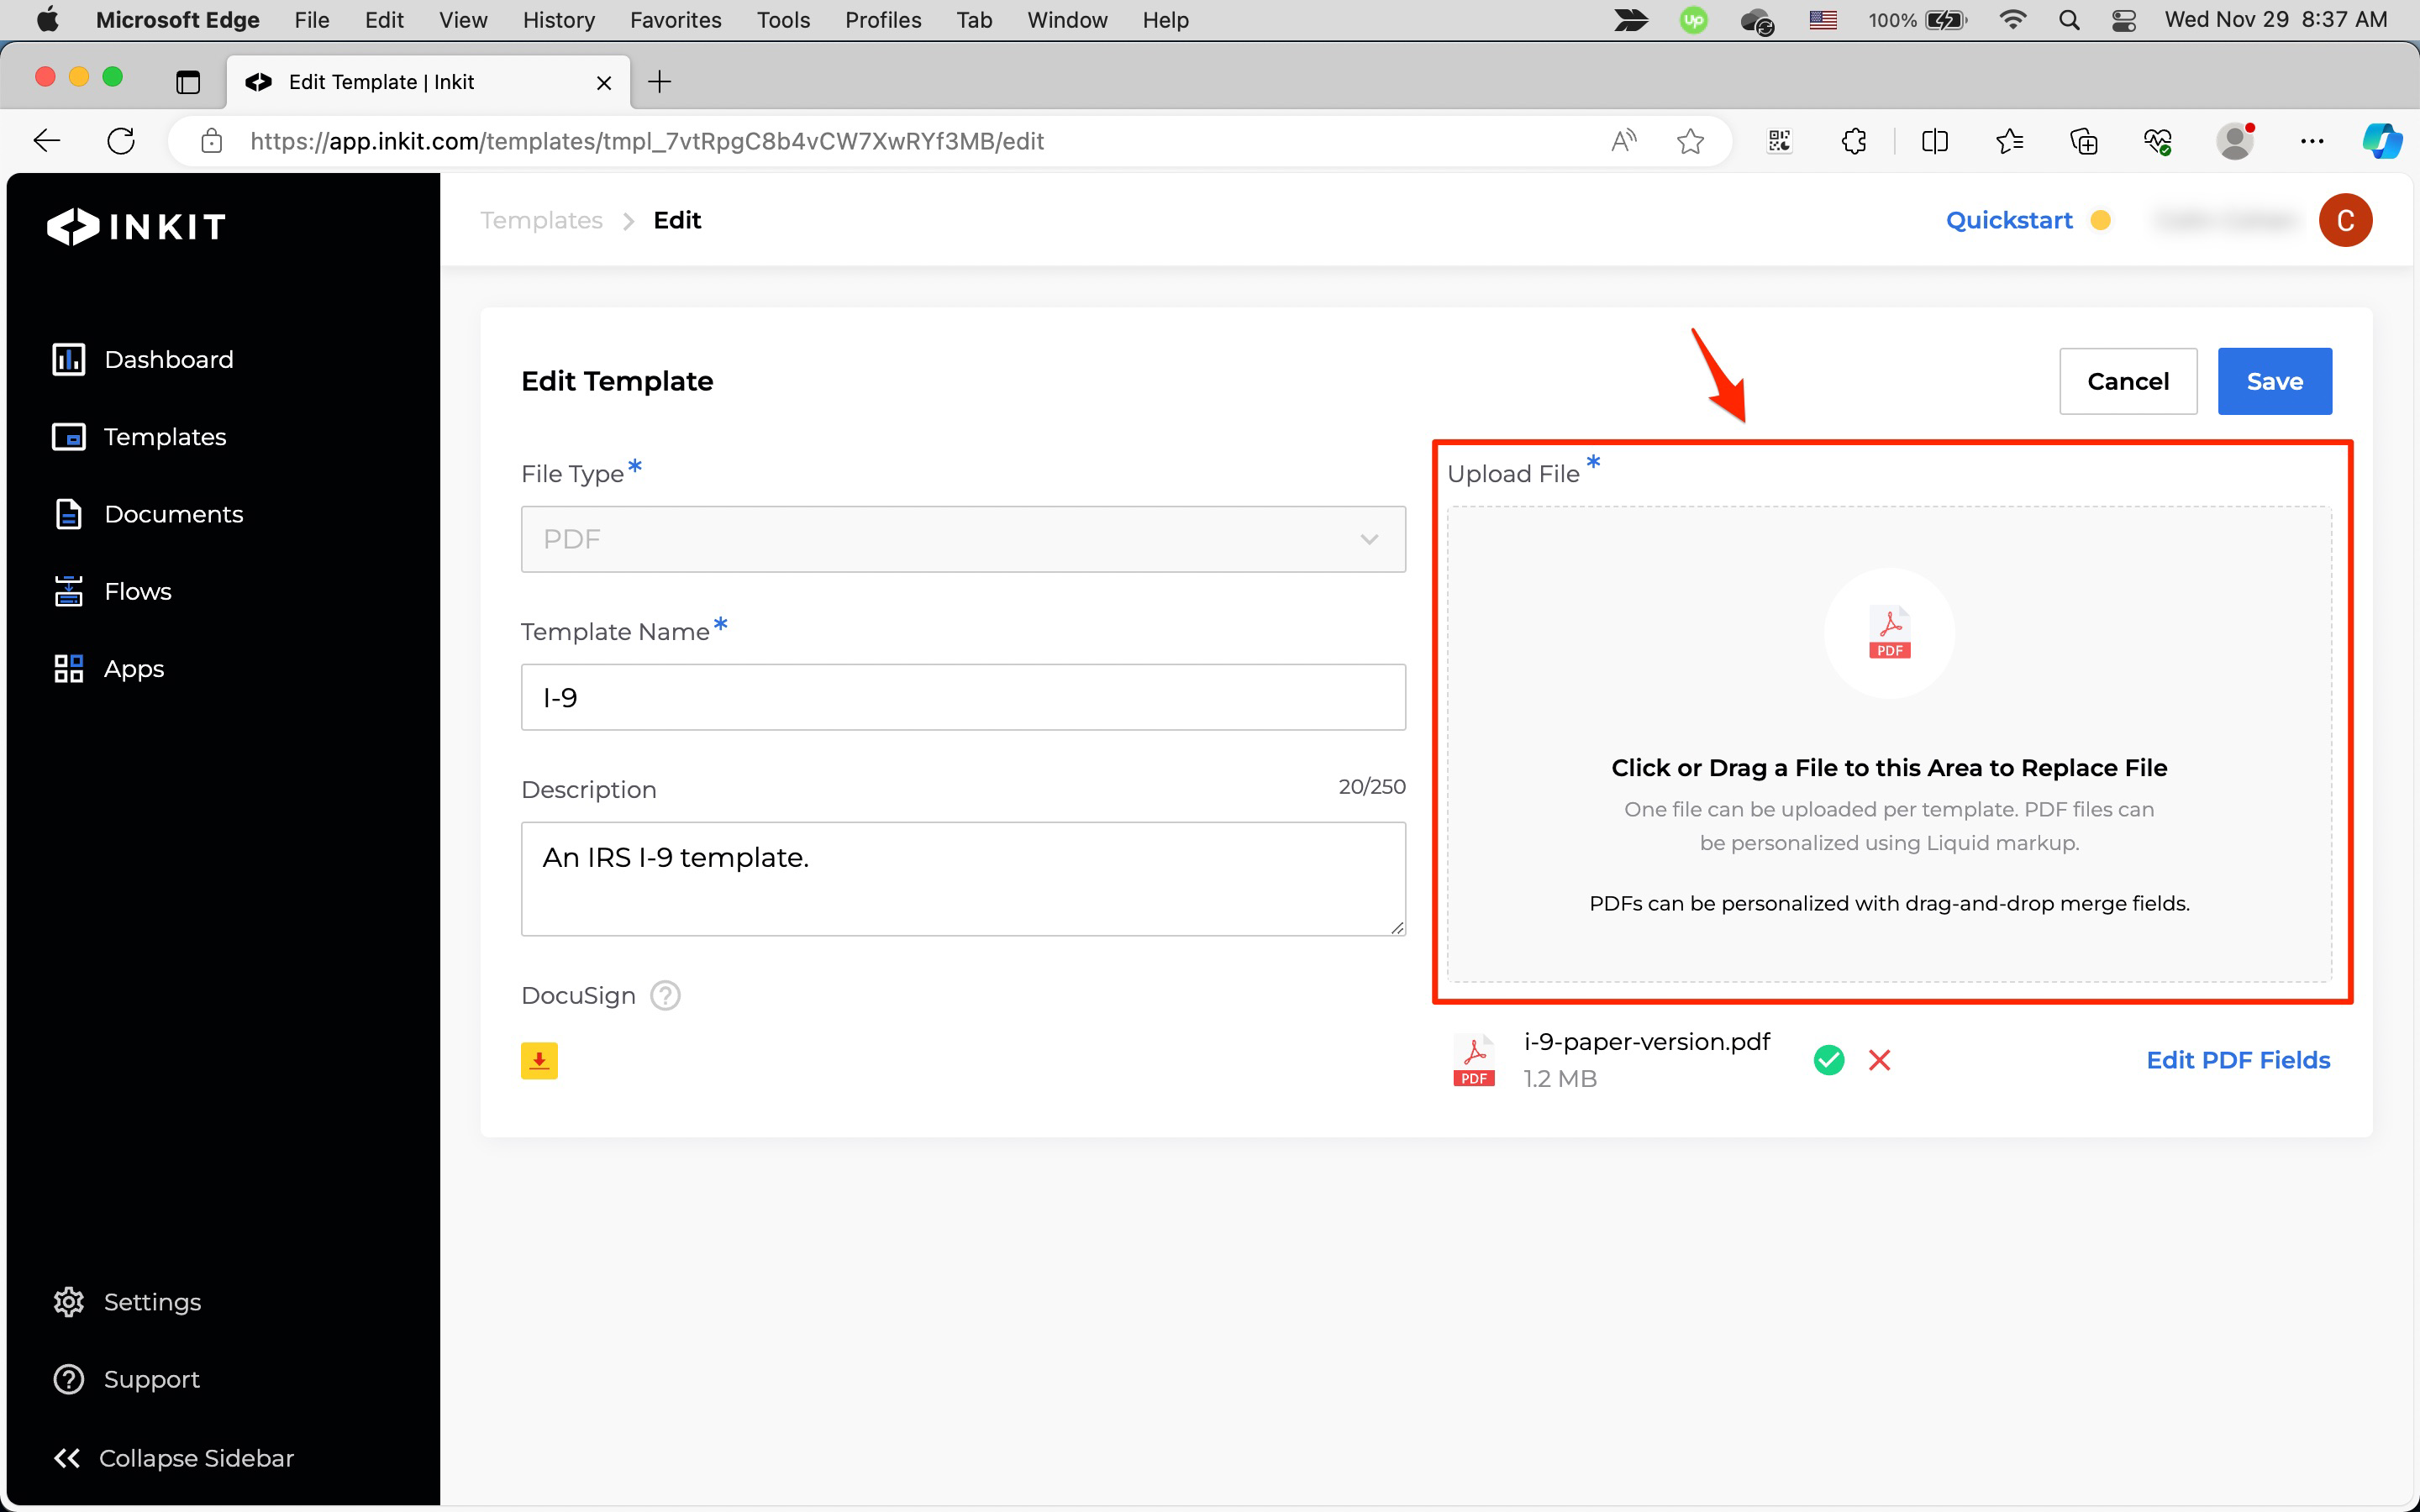
If you are editing a PDF or DOCX template, you can change the template source by clicking Click or Drag a File to this Area to Replace File and selecting a new file or by dragging a new file onto it.
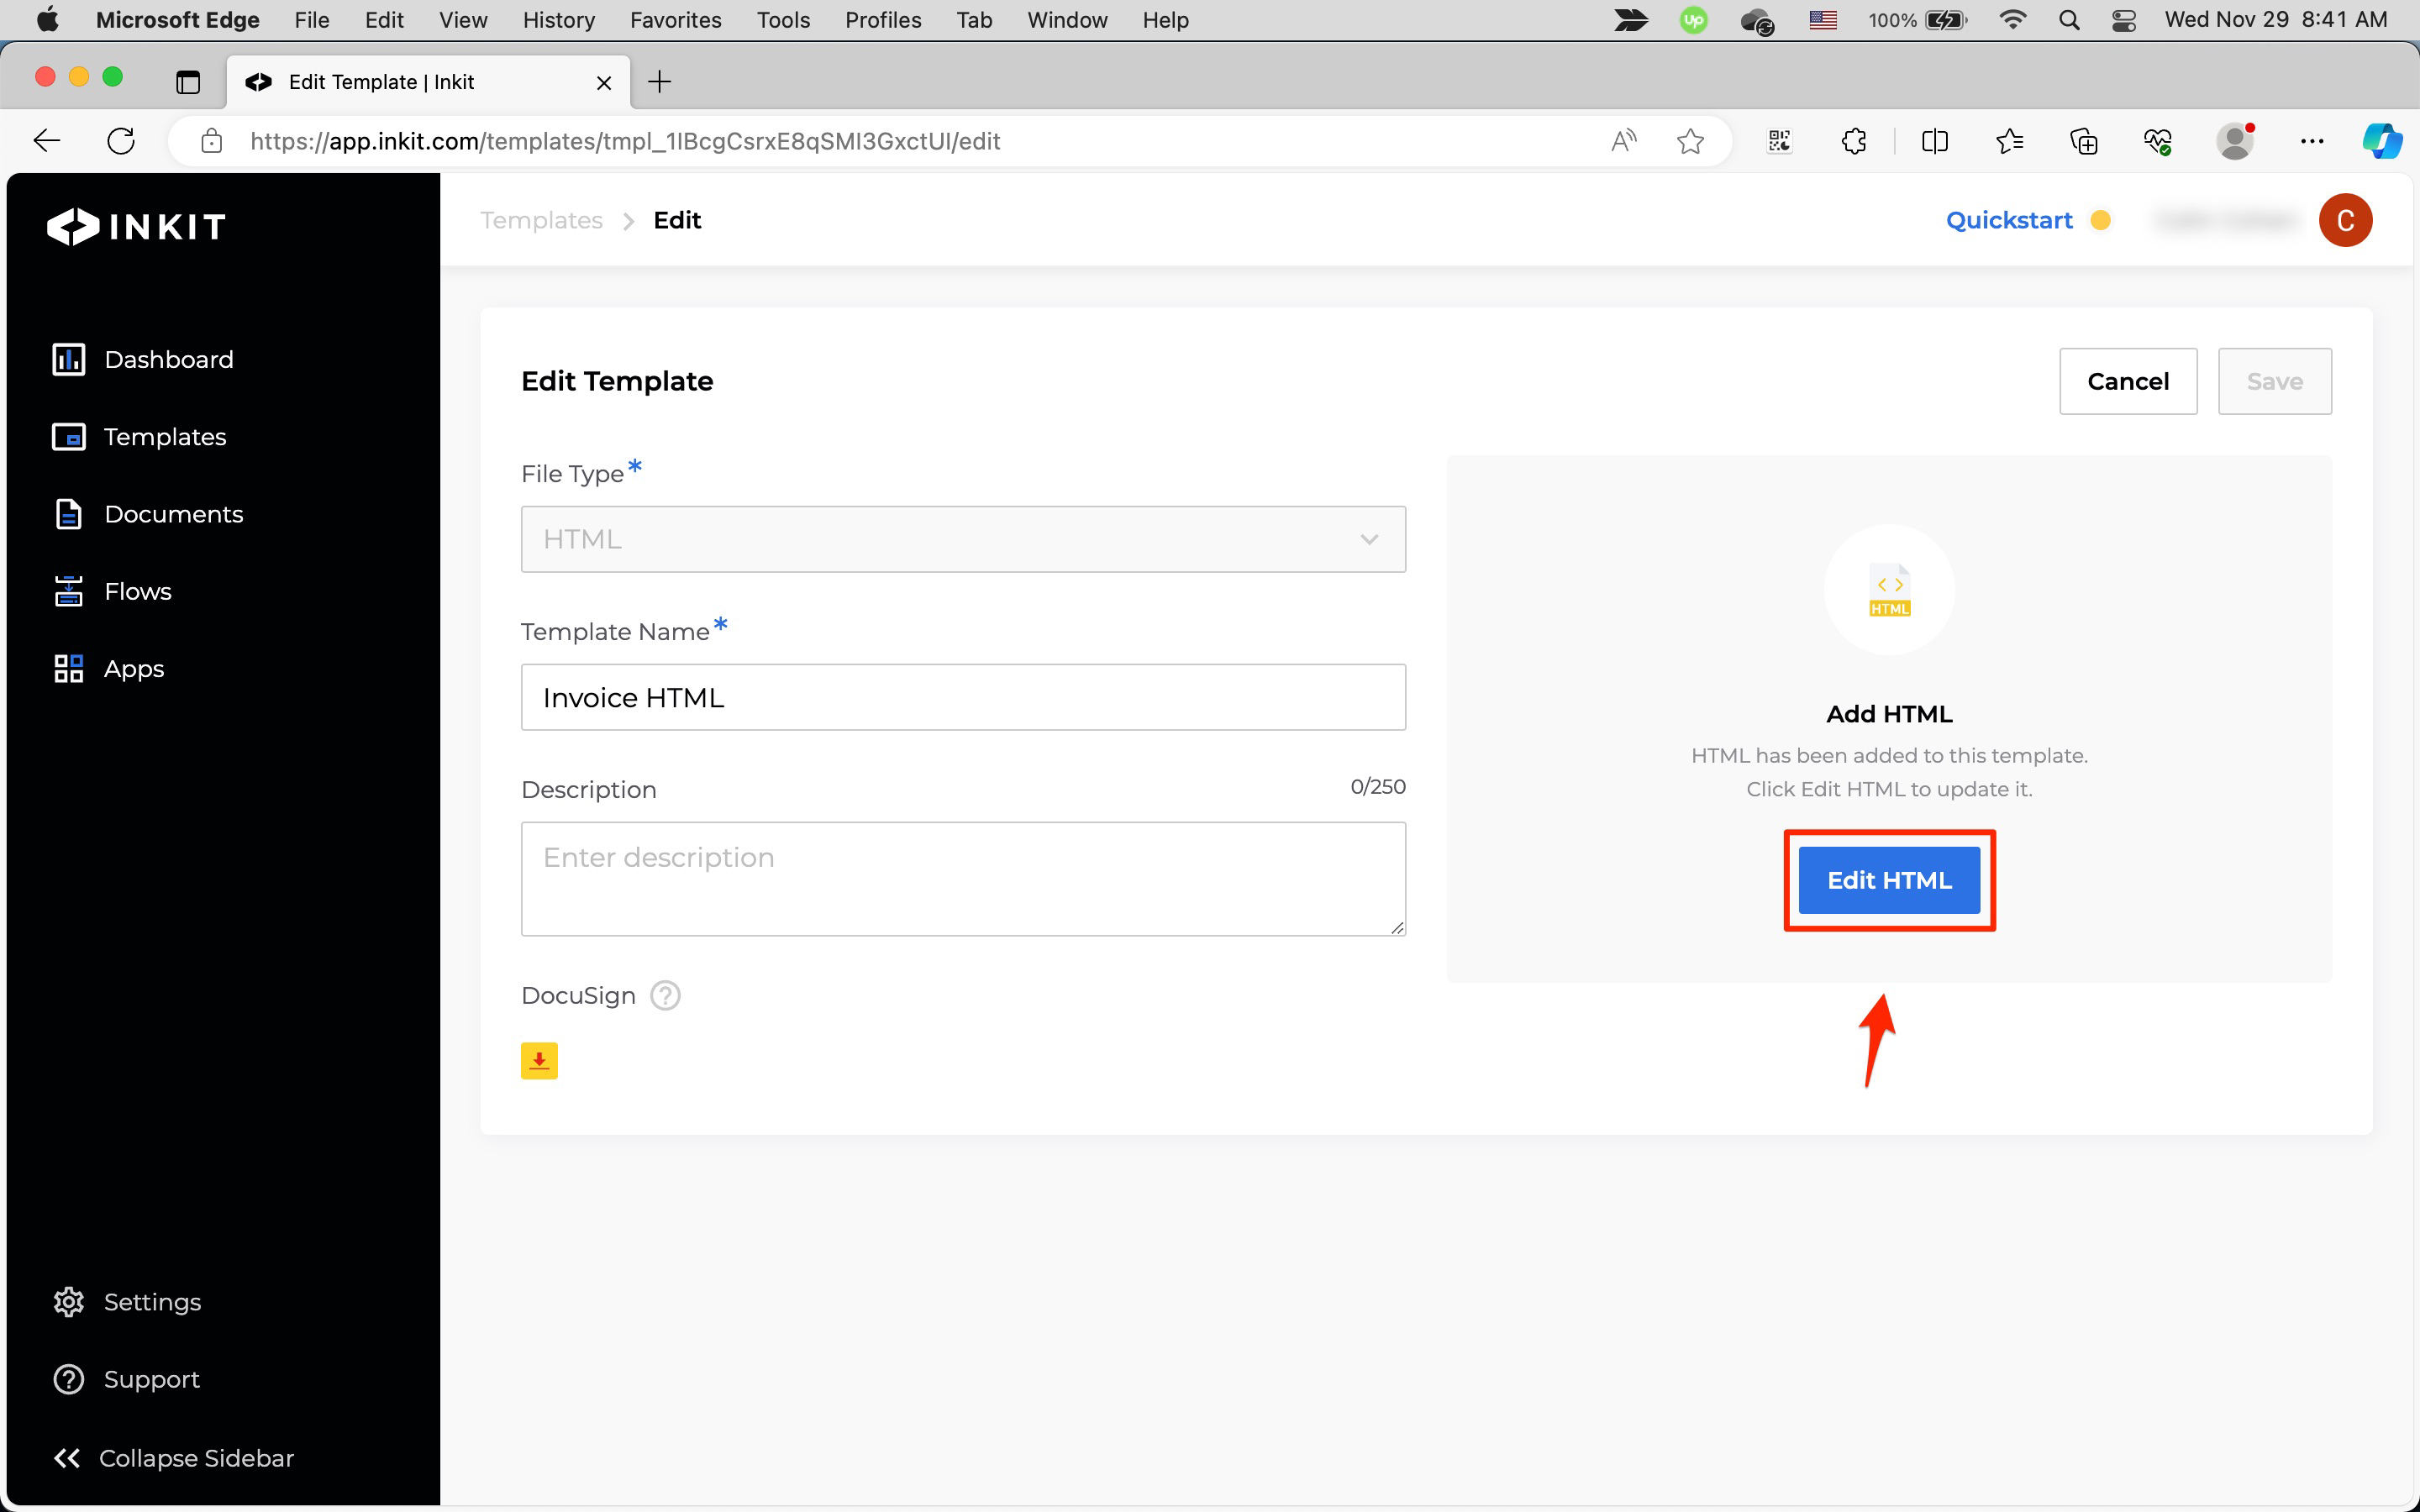
If you are editing an HTML template, you can edit the HTML by clicking Edit HTML.
To save any changes you make, click Save.
Changing the template version
To change the template version, do the following:
-
In the Inkit web app, select Templates in the left sidebar, then click on the ... menu button beside the template you want to edit and click Version History.
-
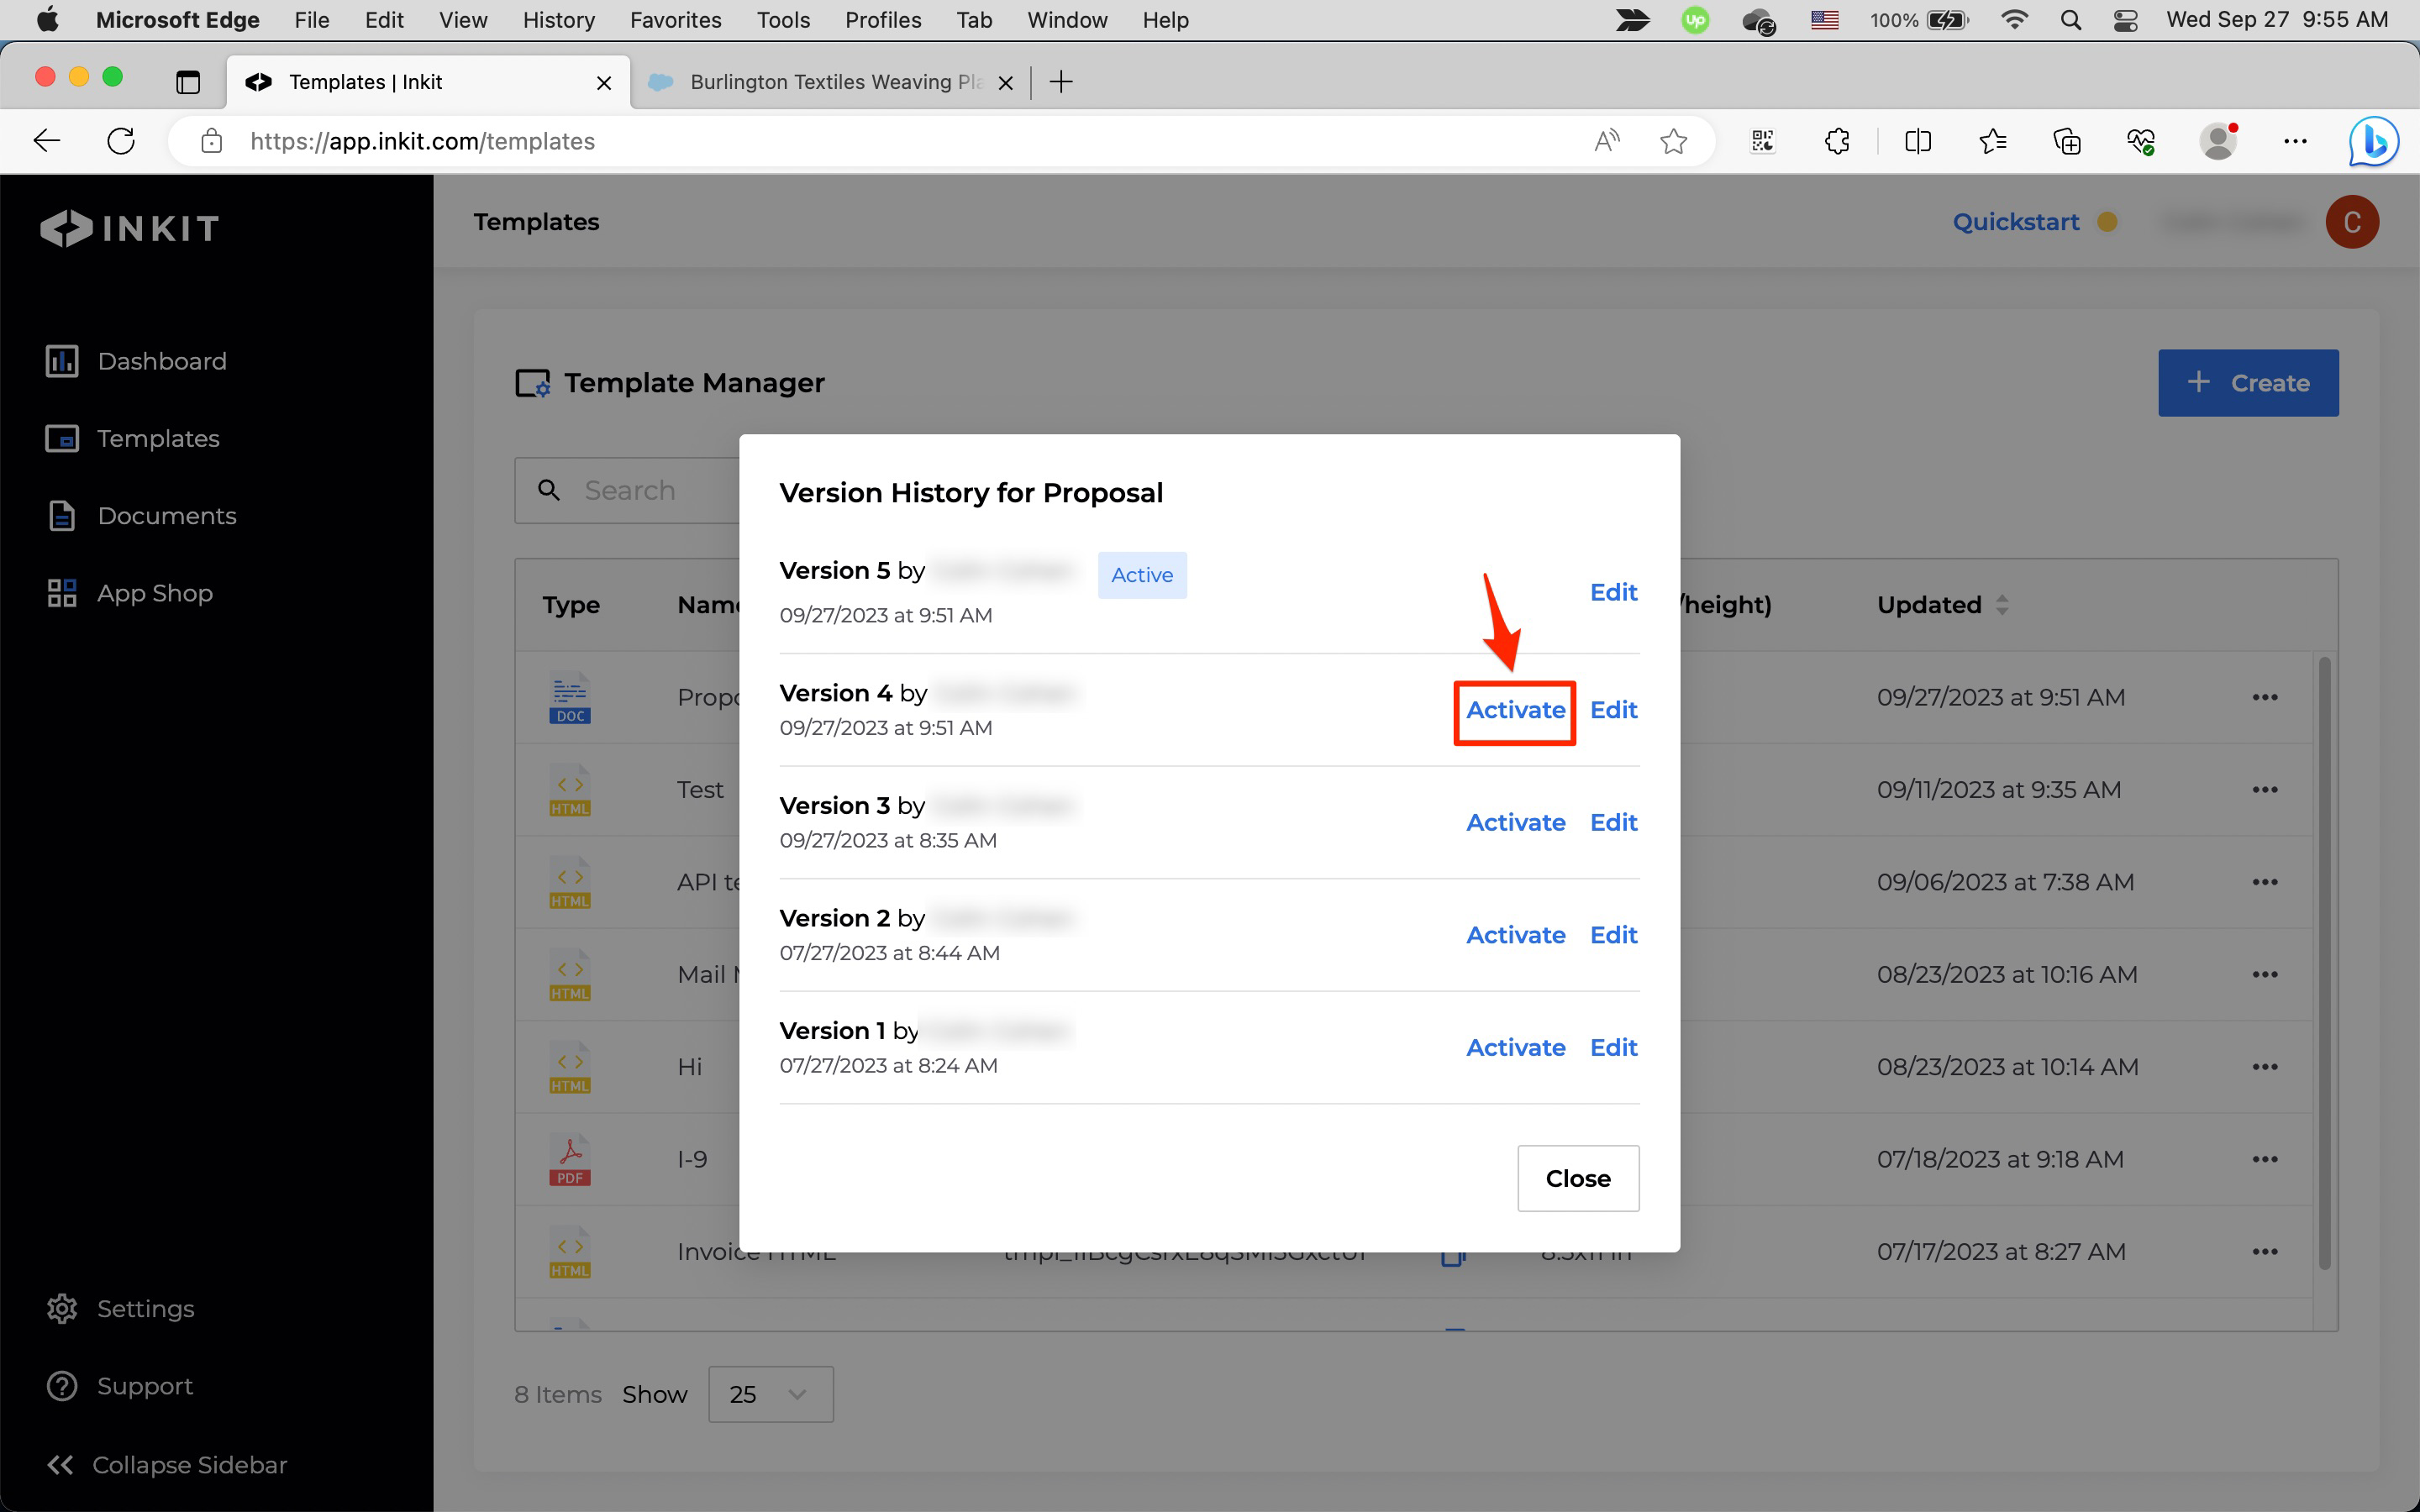
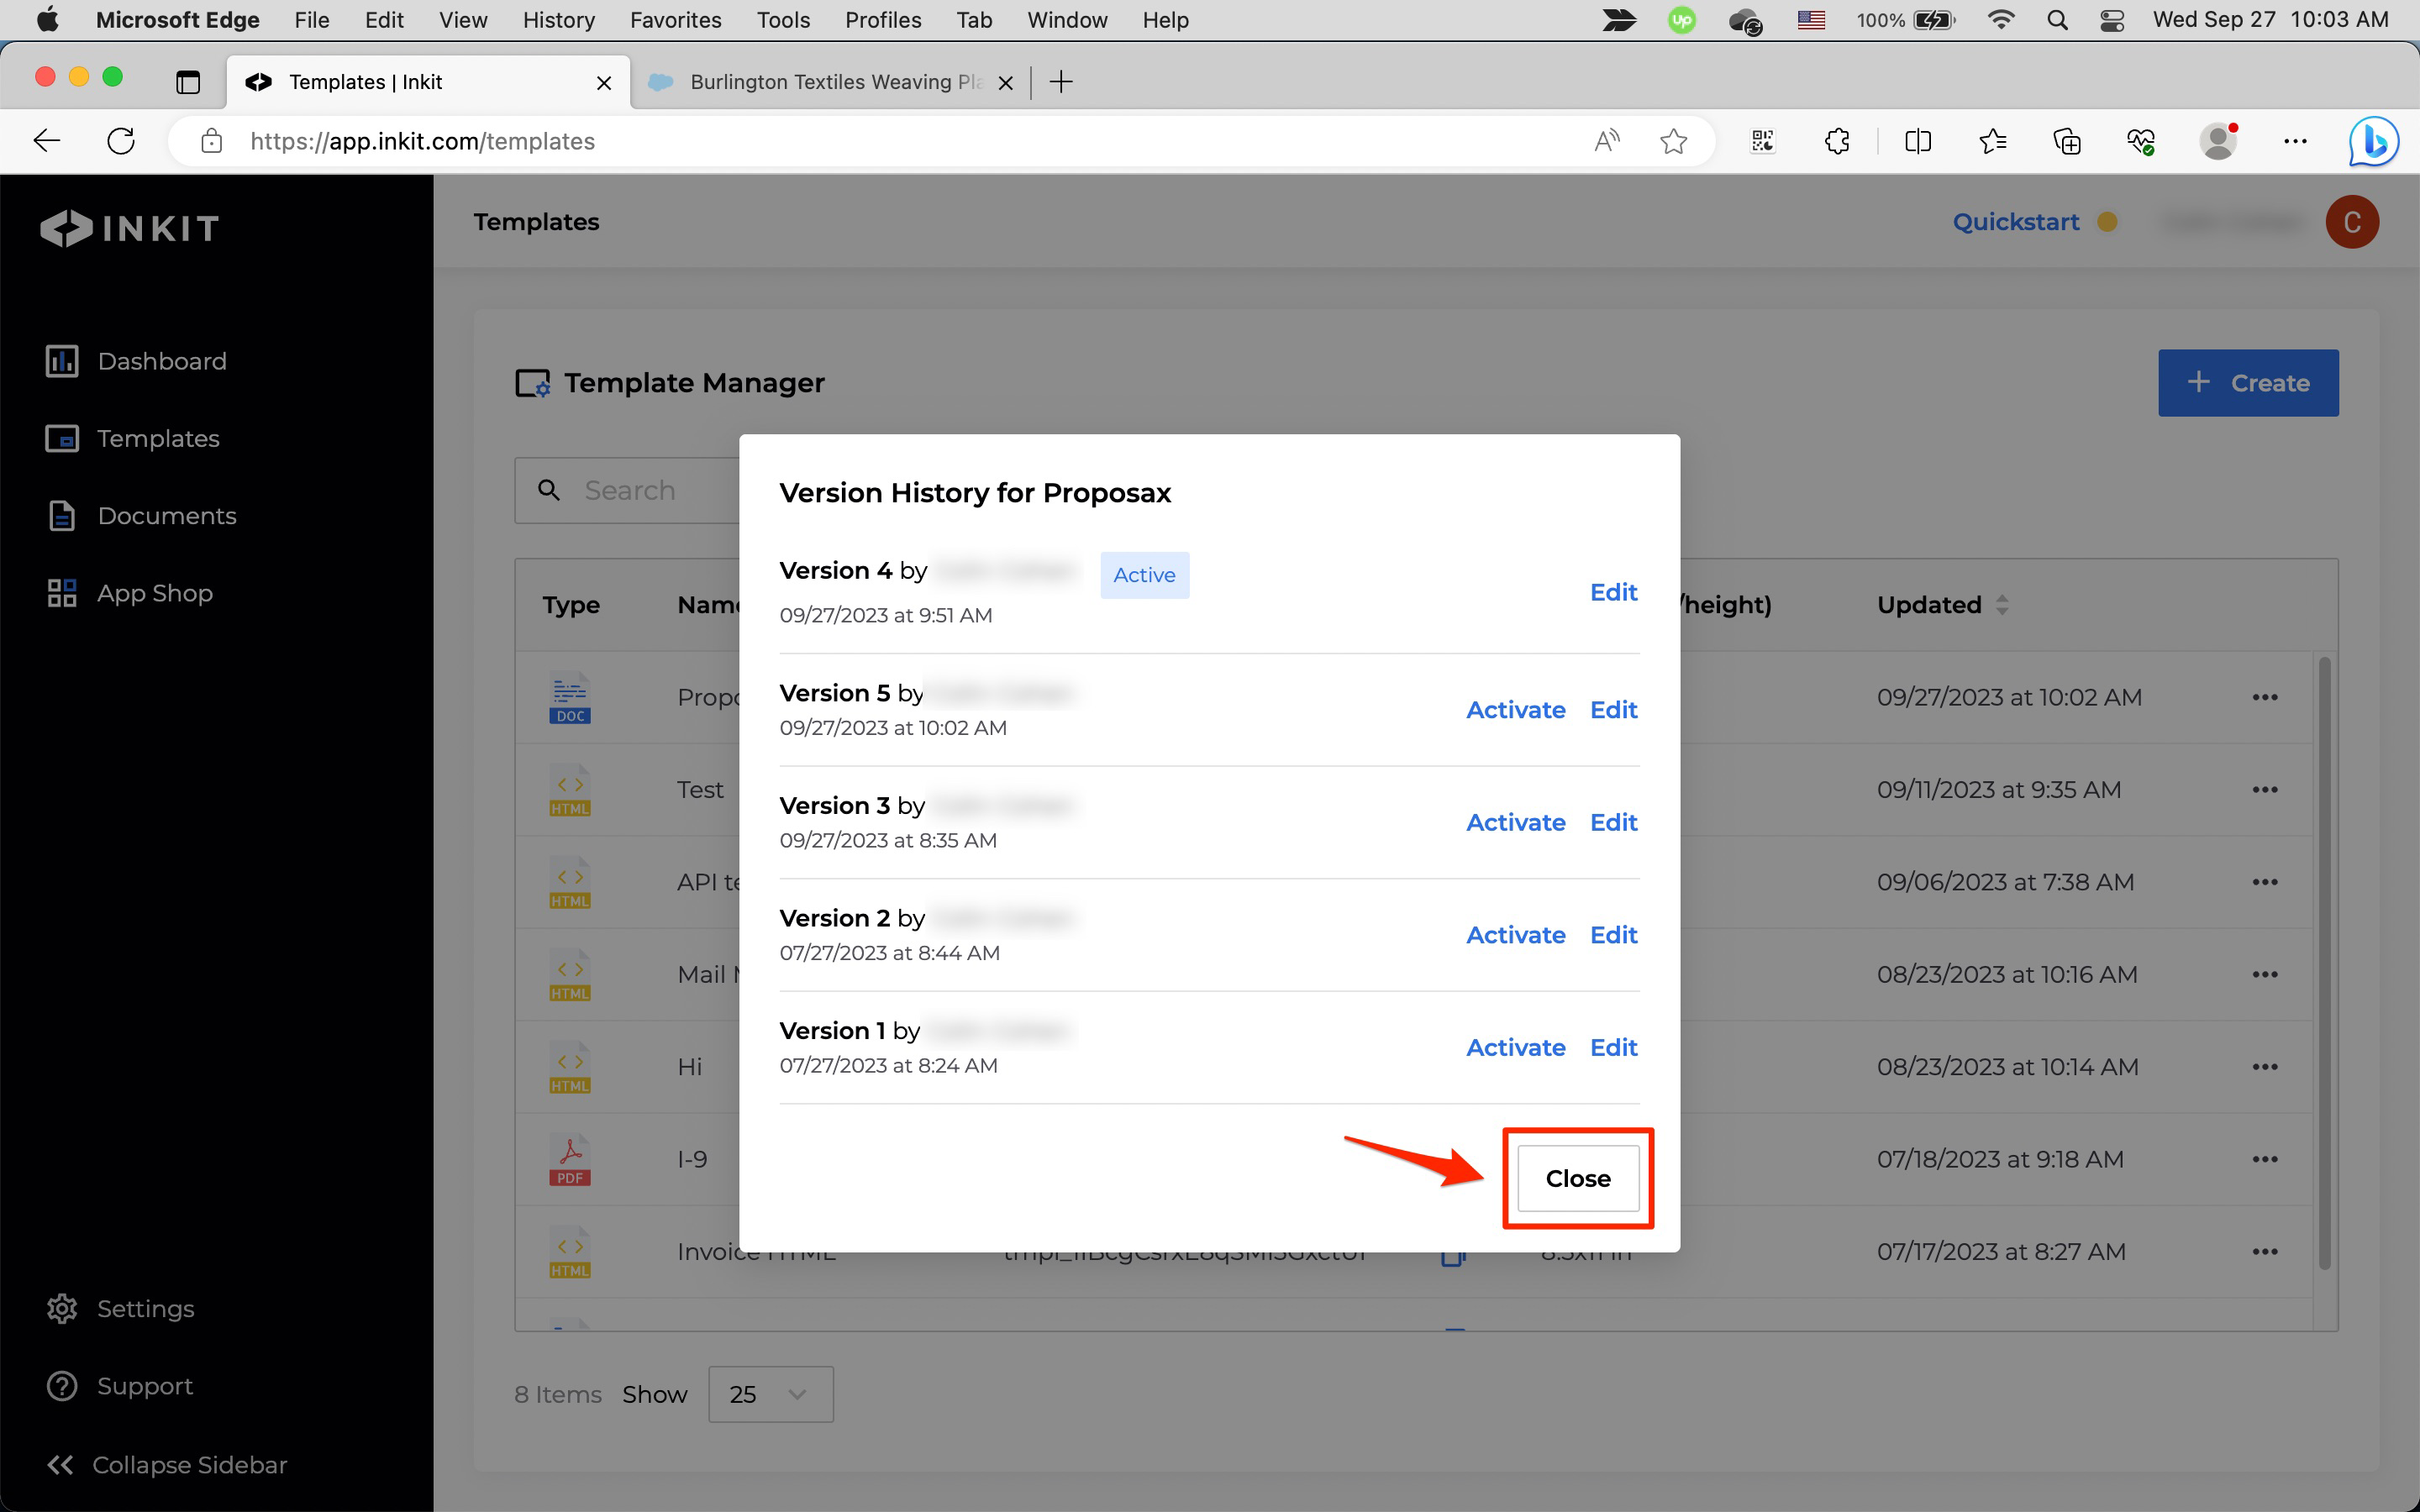
In the Version History forr [Templat dialog box, click Activate by the template version that you want to make active.
-
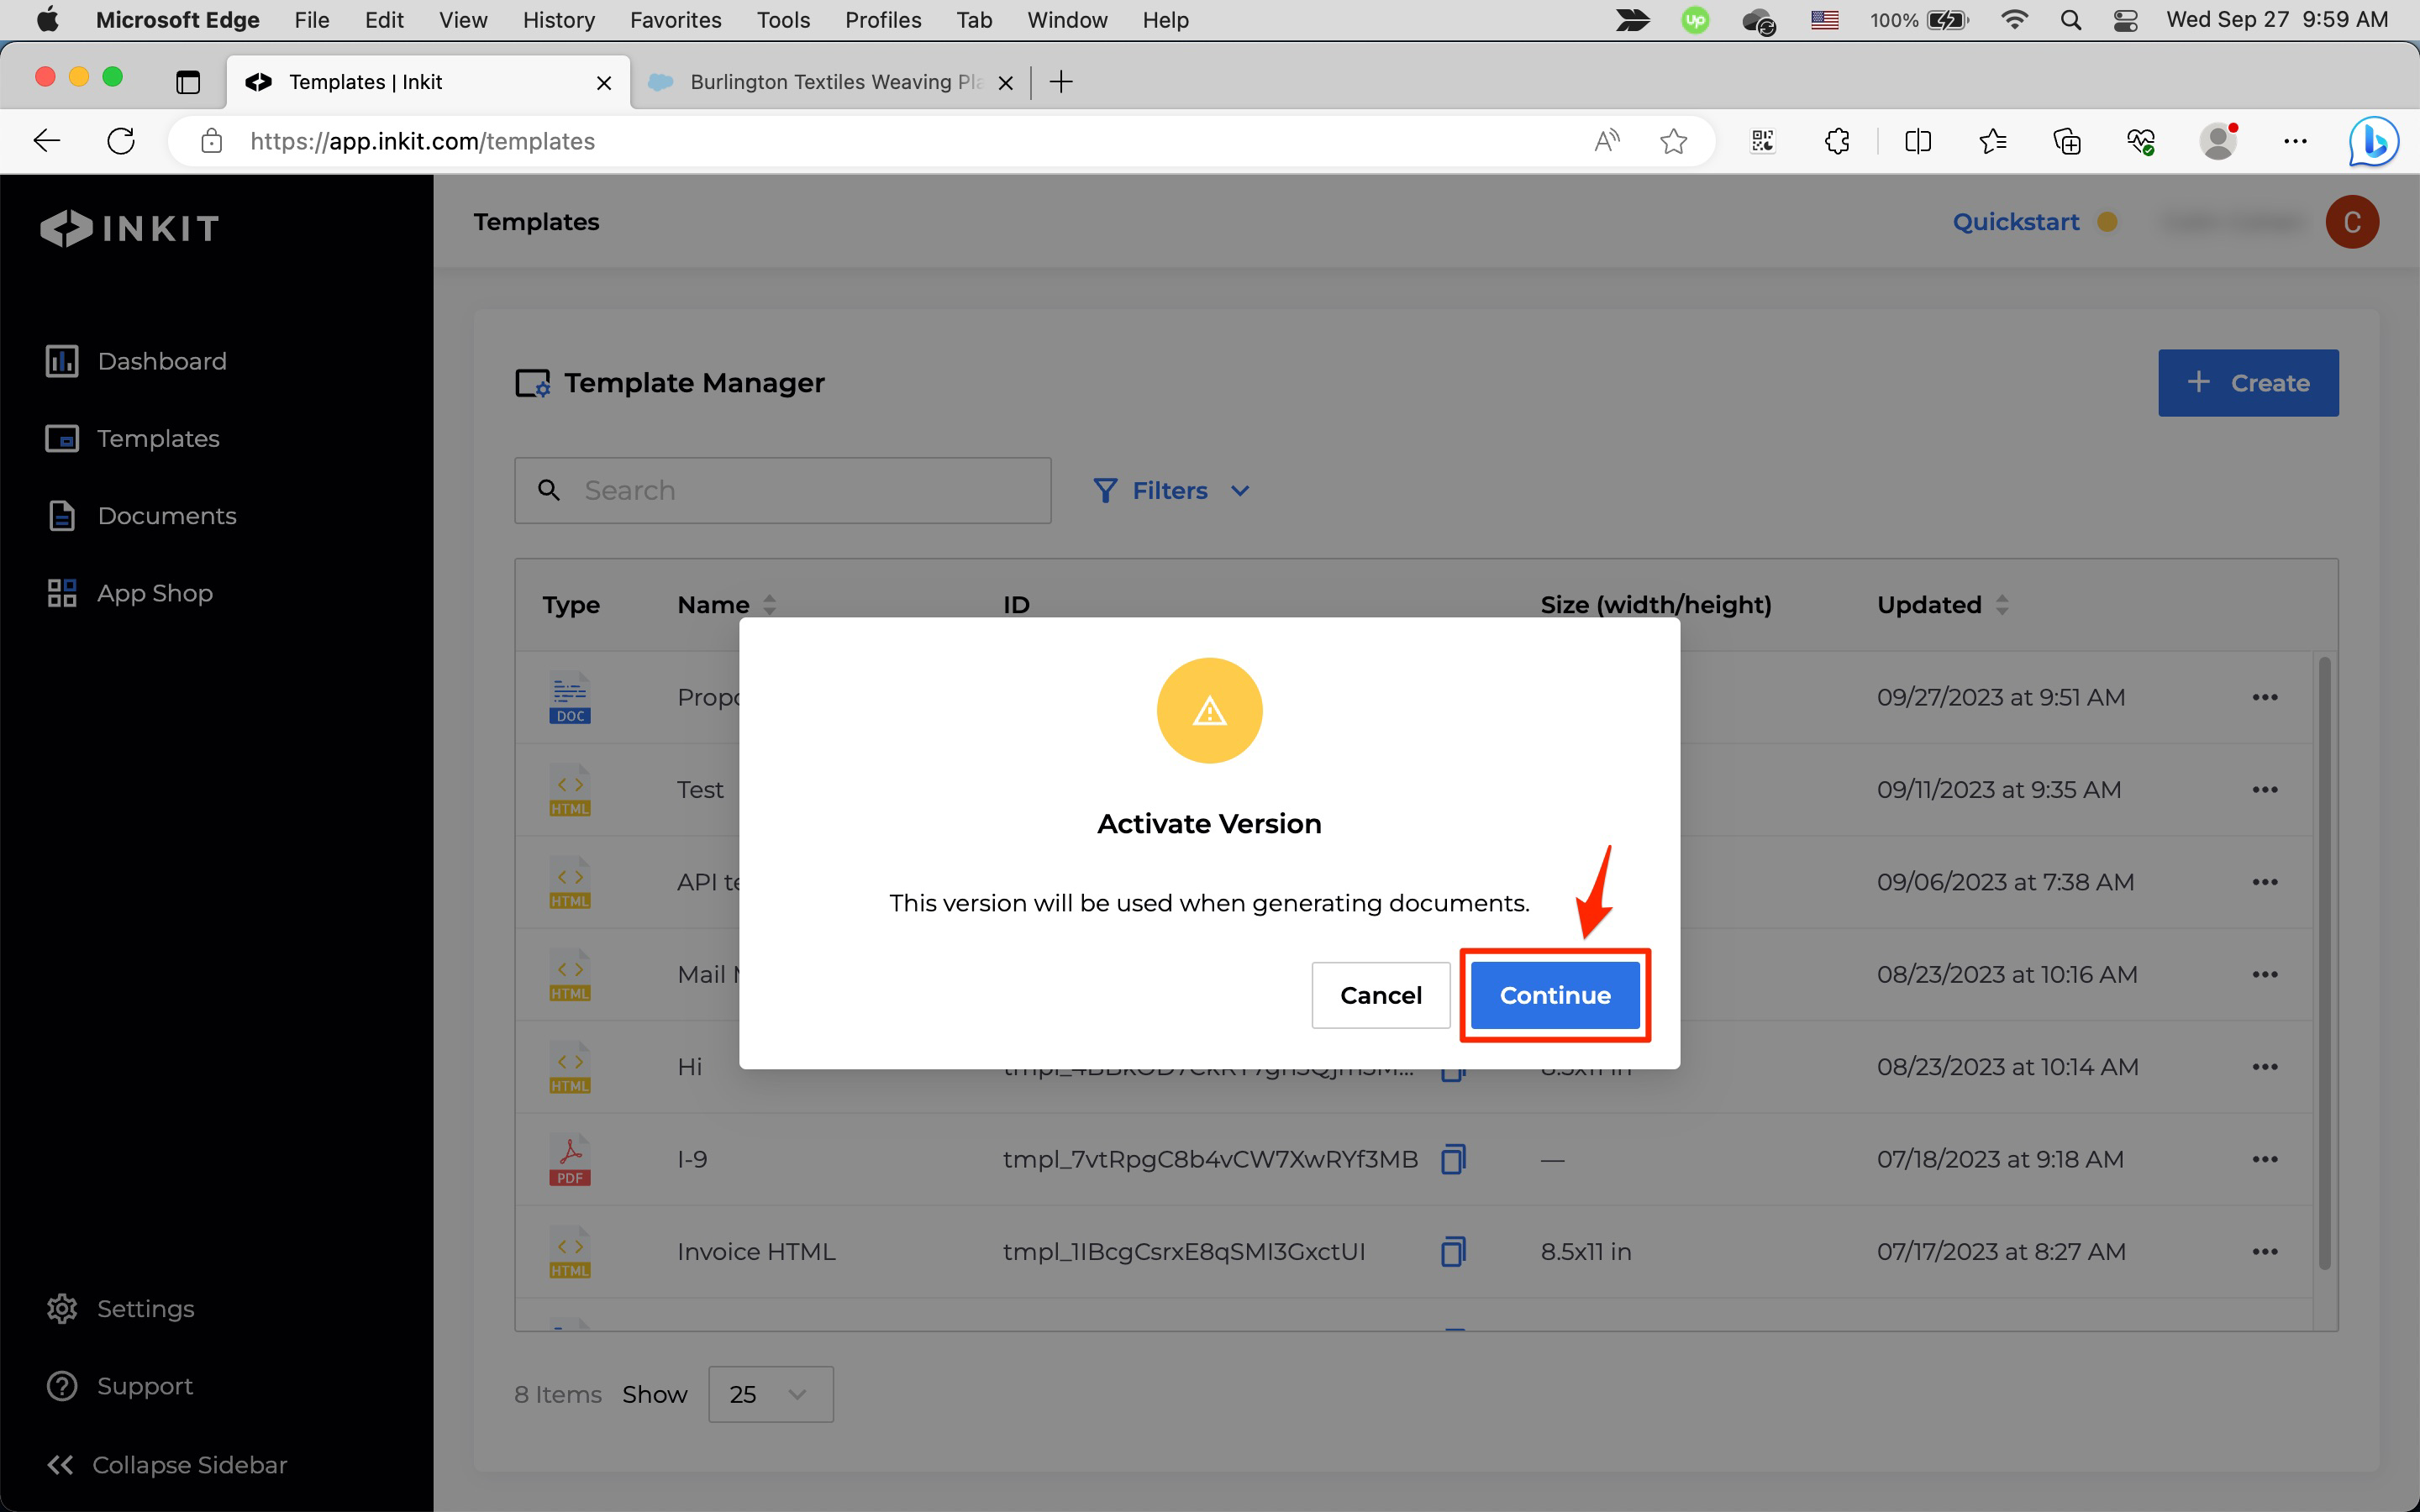
In the Activate Version dialog box, click Continue.
-
In the Version History forr [Templat dialog box, click Close.
Removing a template
To remove a template, do the following:
You cannot undo removing a template.
-
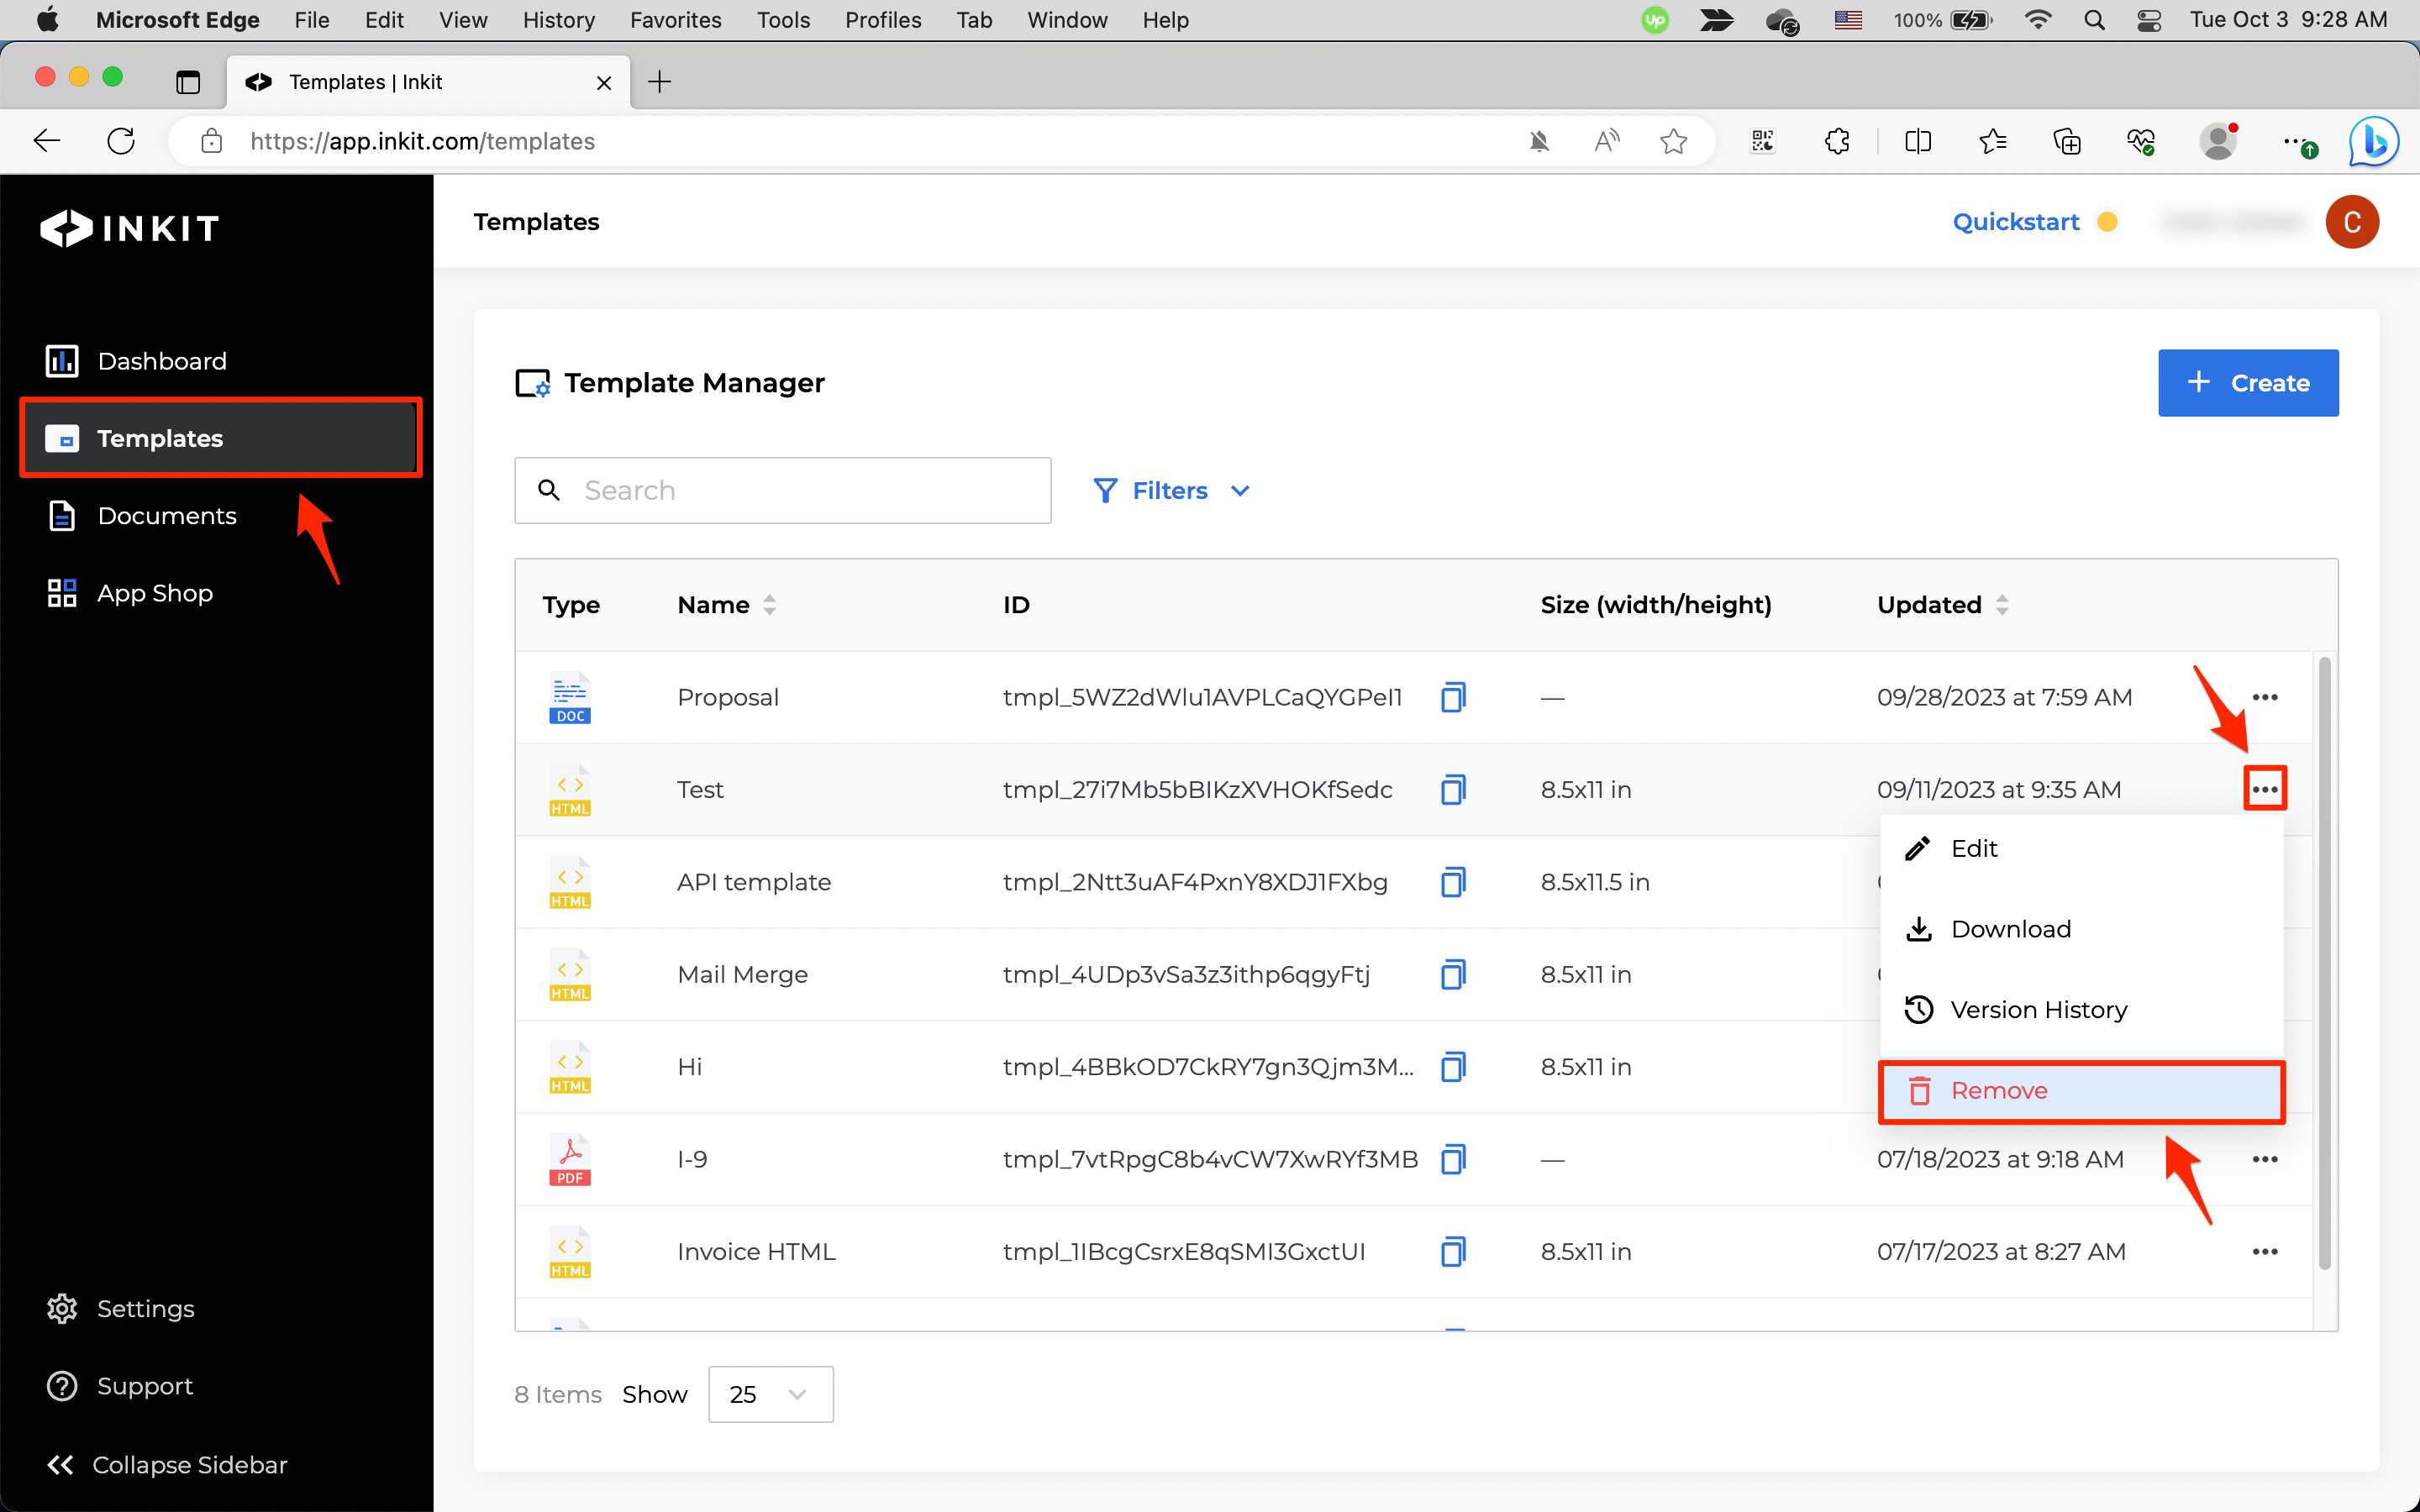
In the Inkit web app, select Templates in the left sidebar, then click on the ... menu button beside the template you want to delete and click Remove.
-
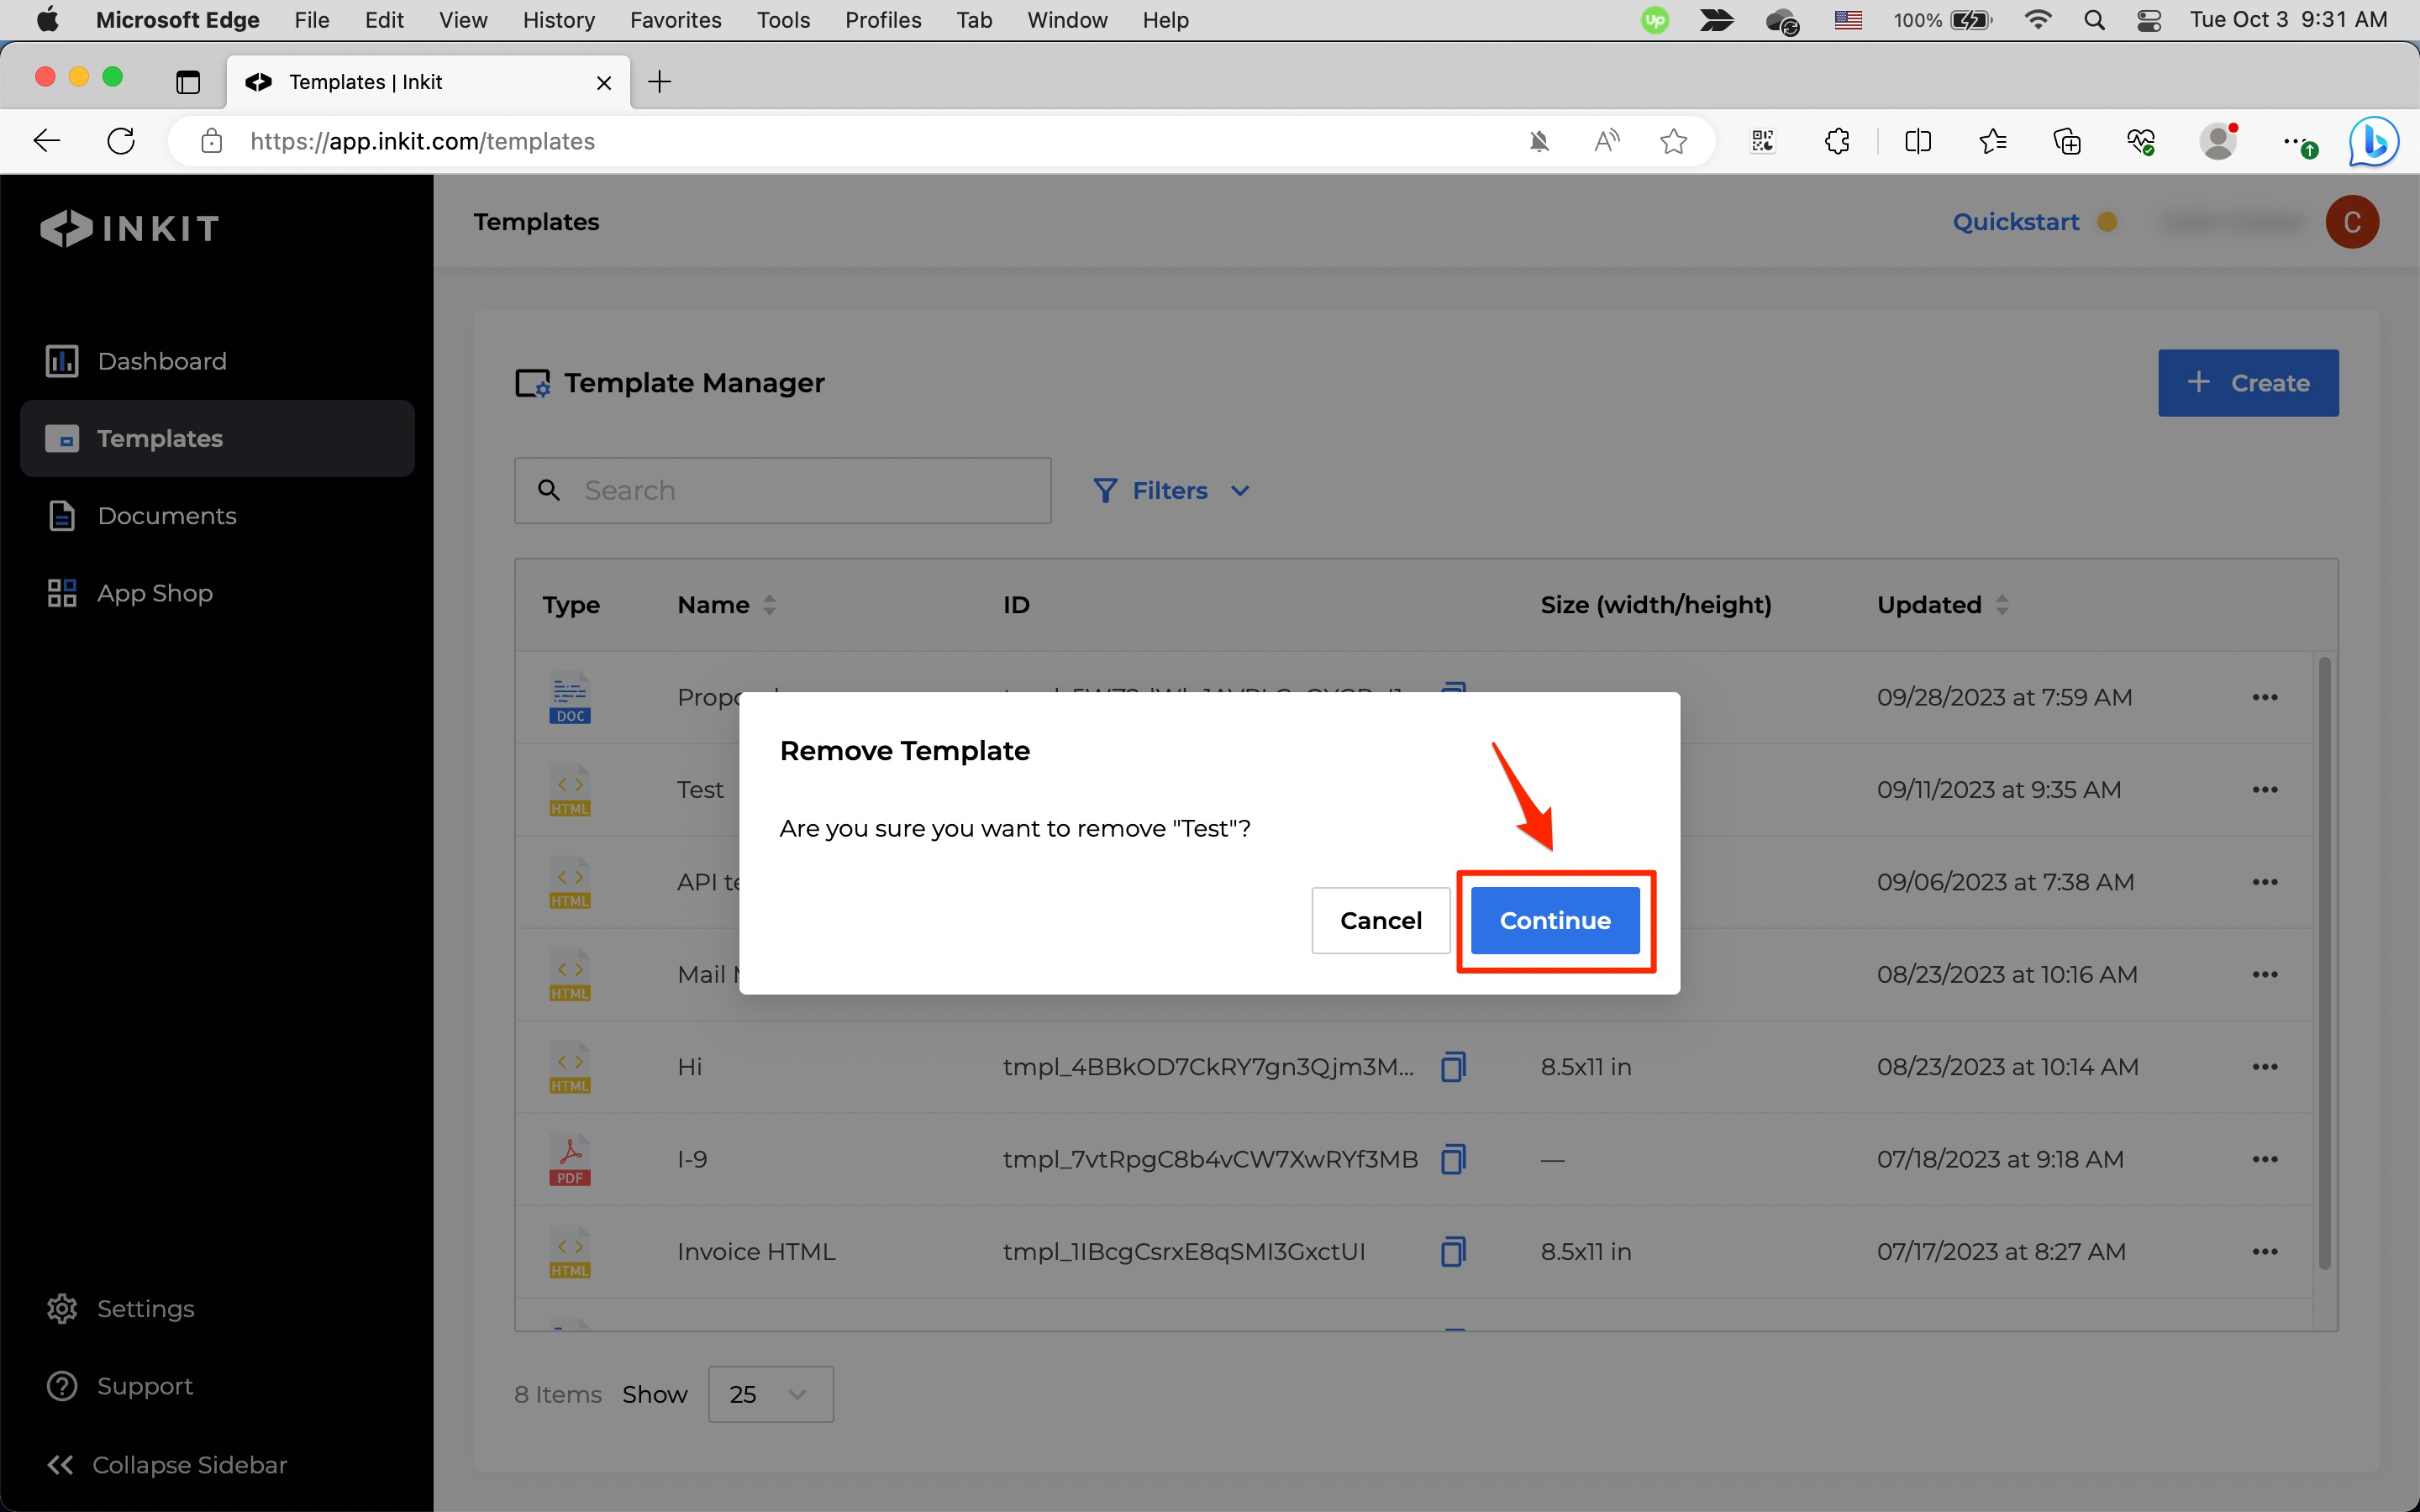
In the Remove Template dialog box, click Continue.
Filtering templates
If you have many templates, filtering them can help you manage them.
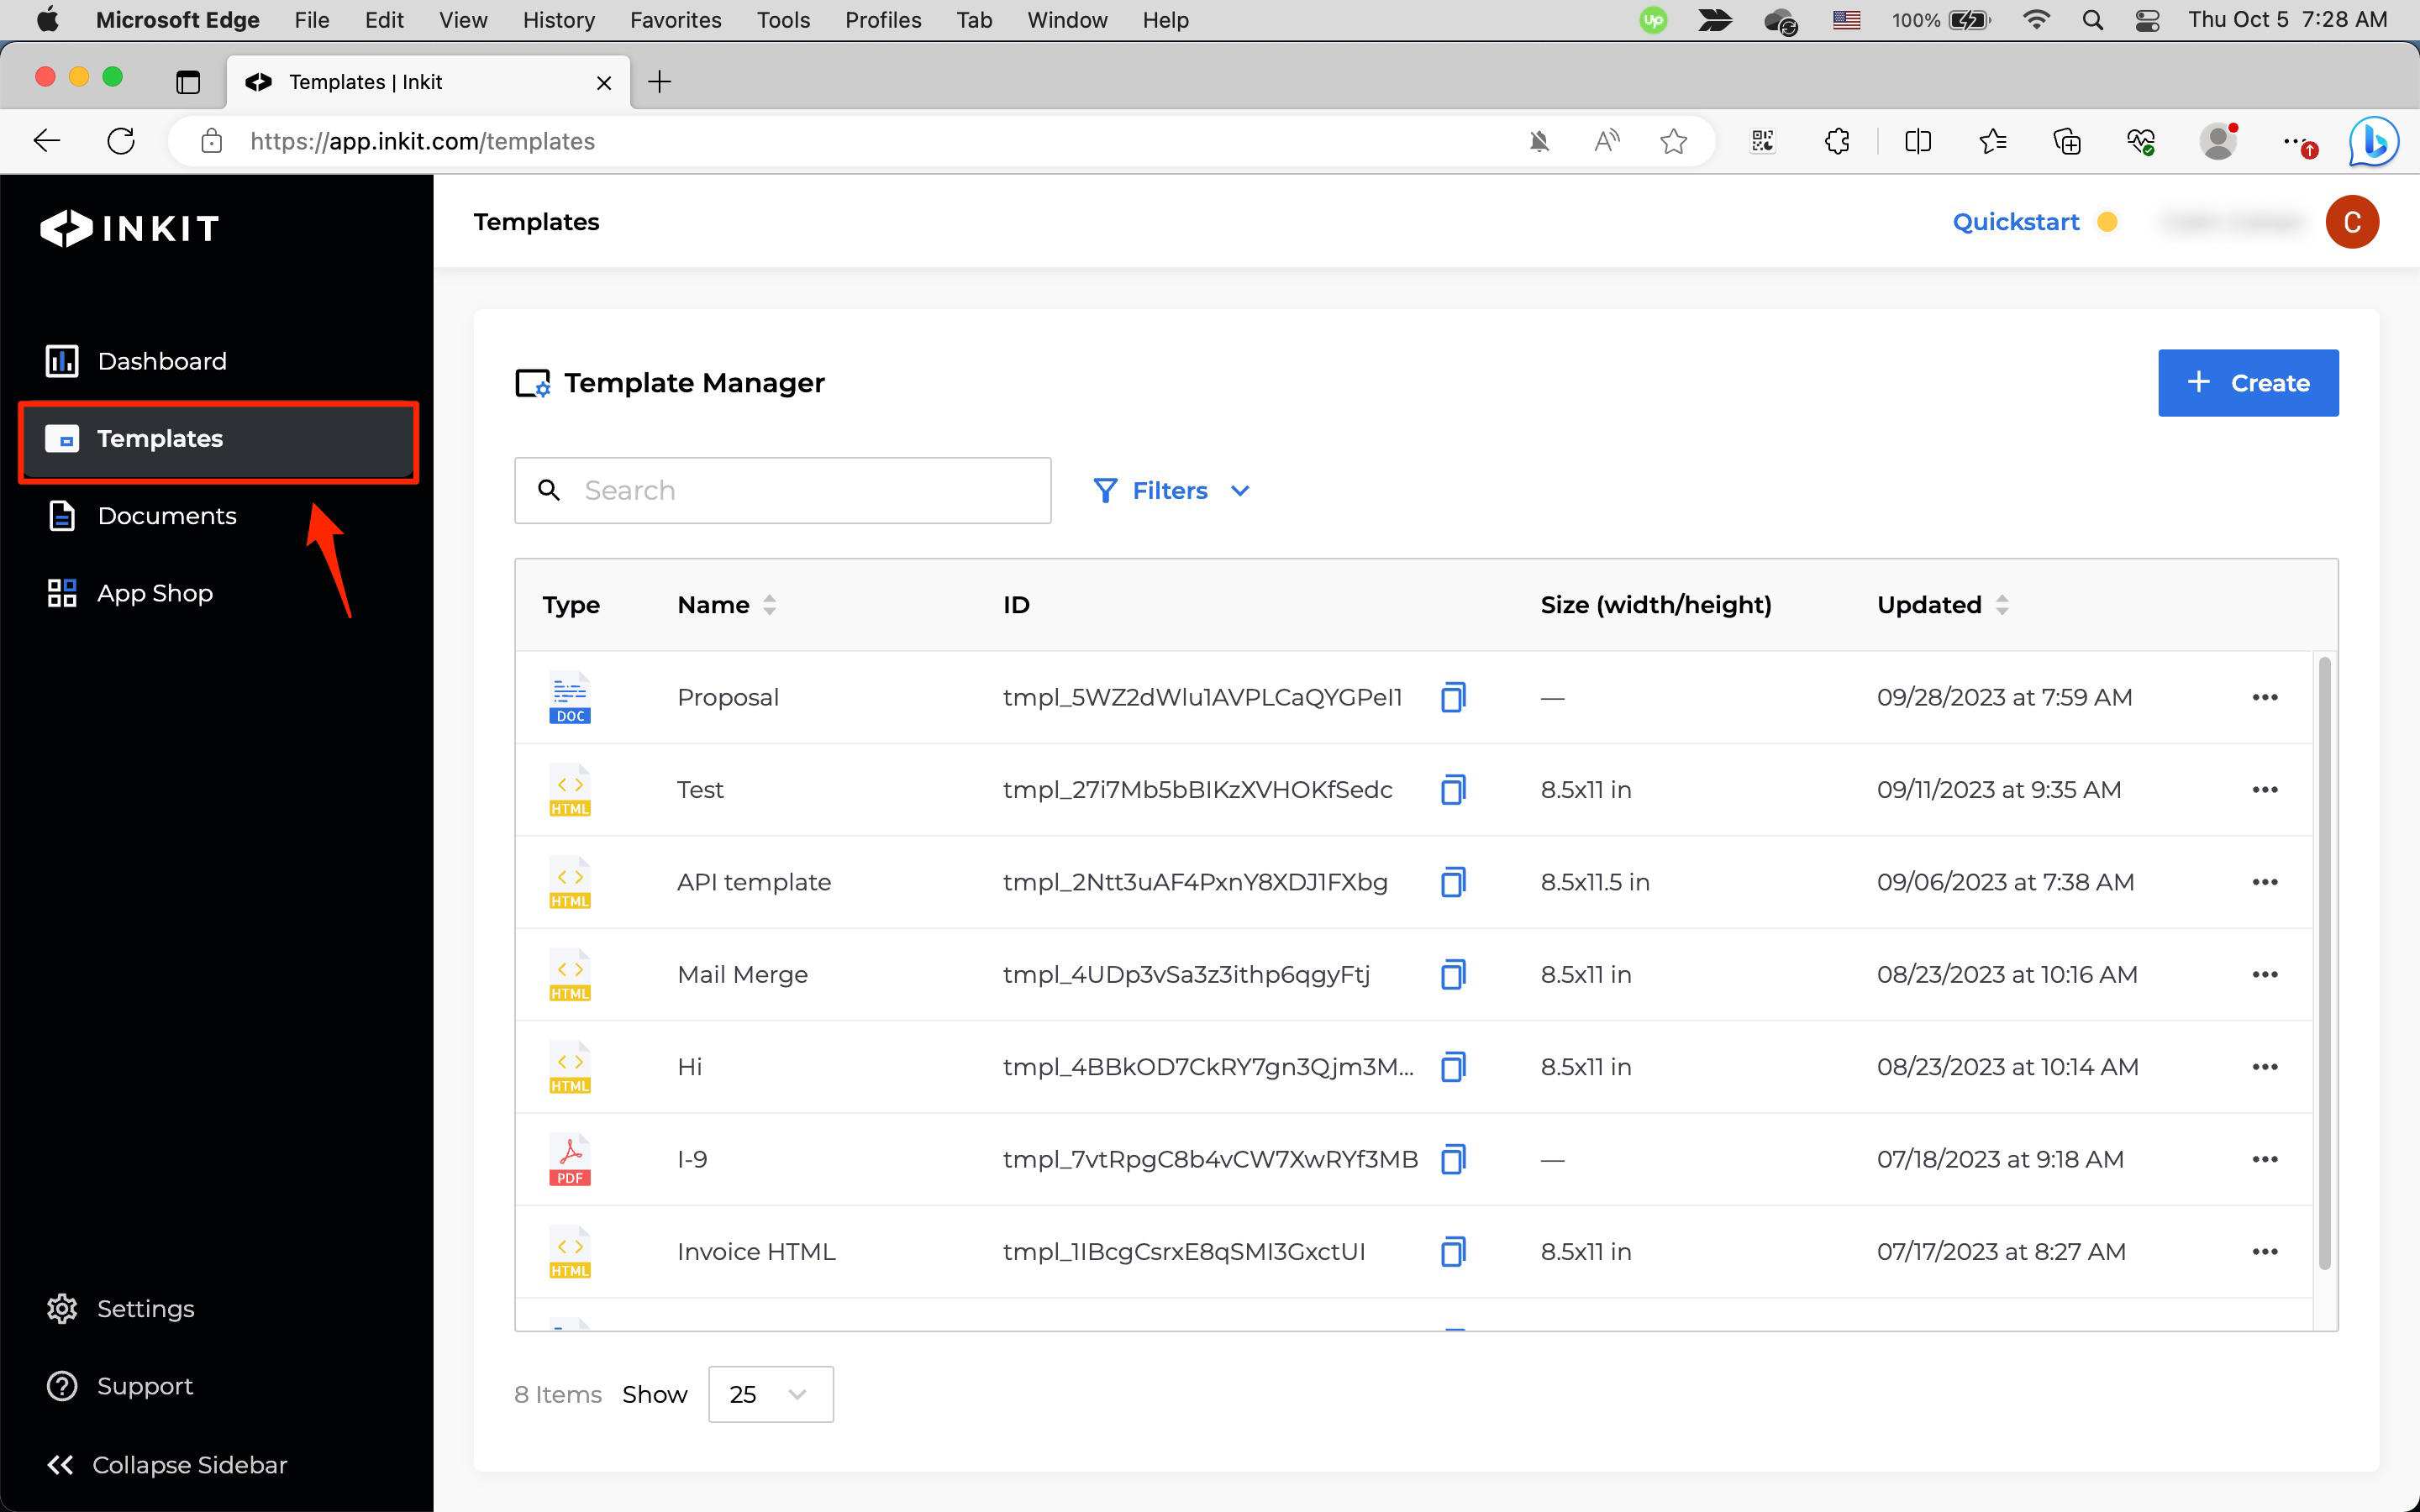
To filter templates, in the Inkit web app select Templates in the left sidebar.
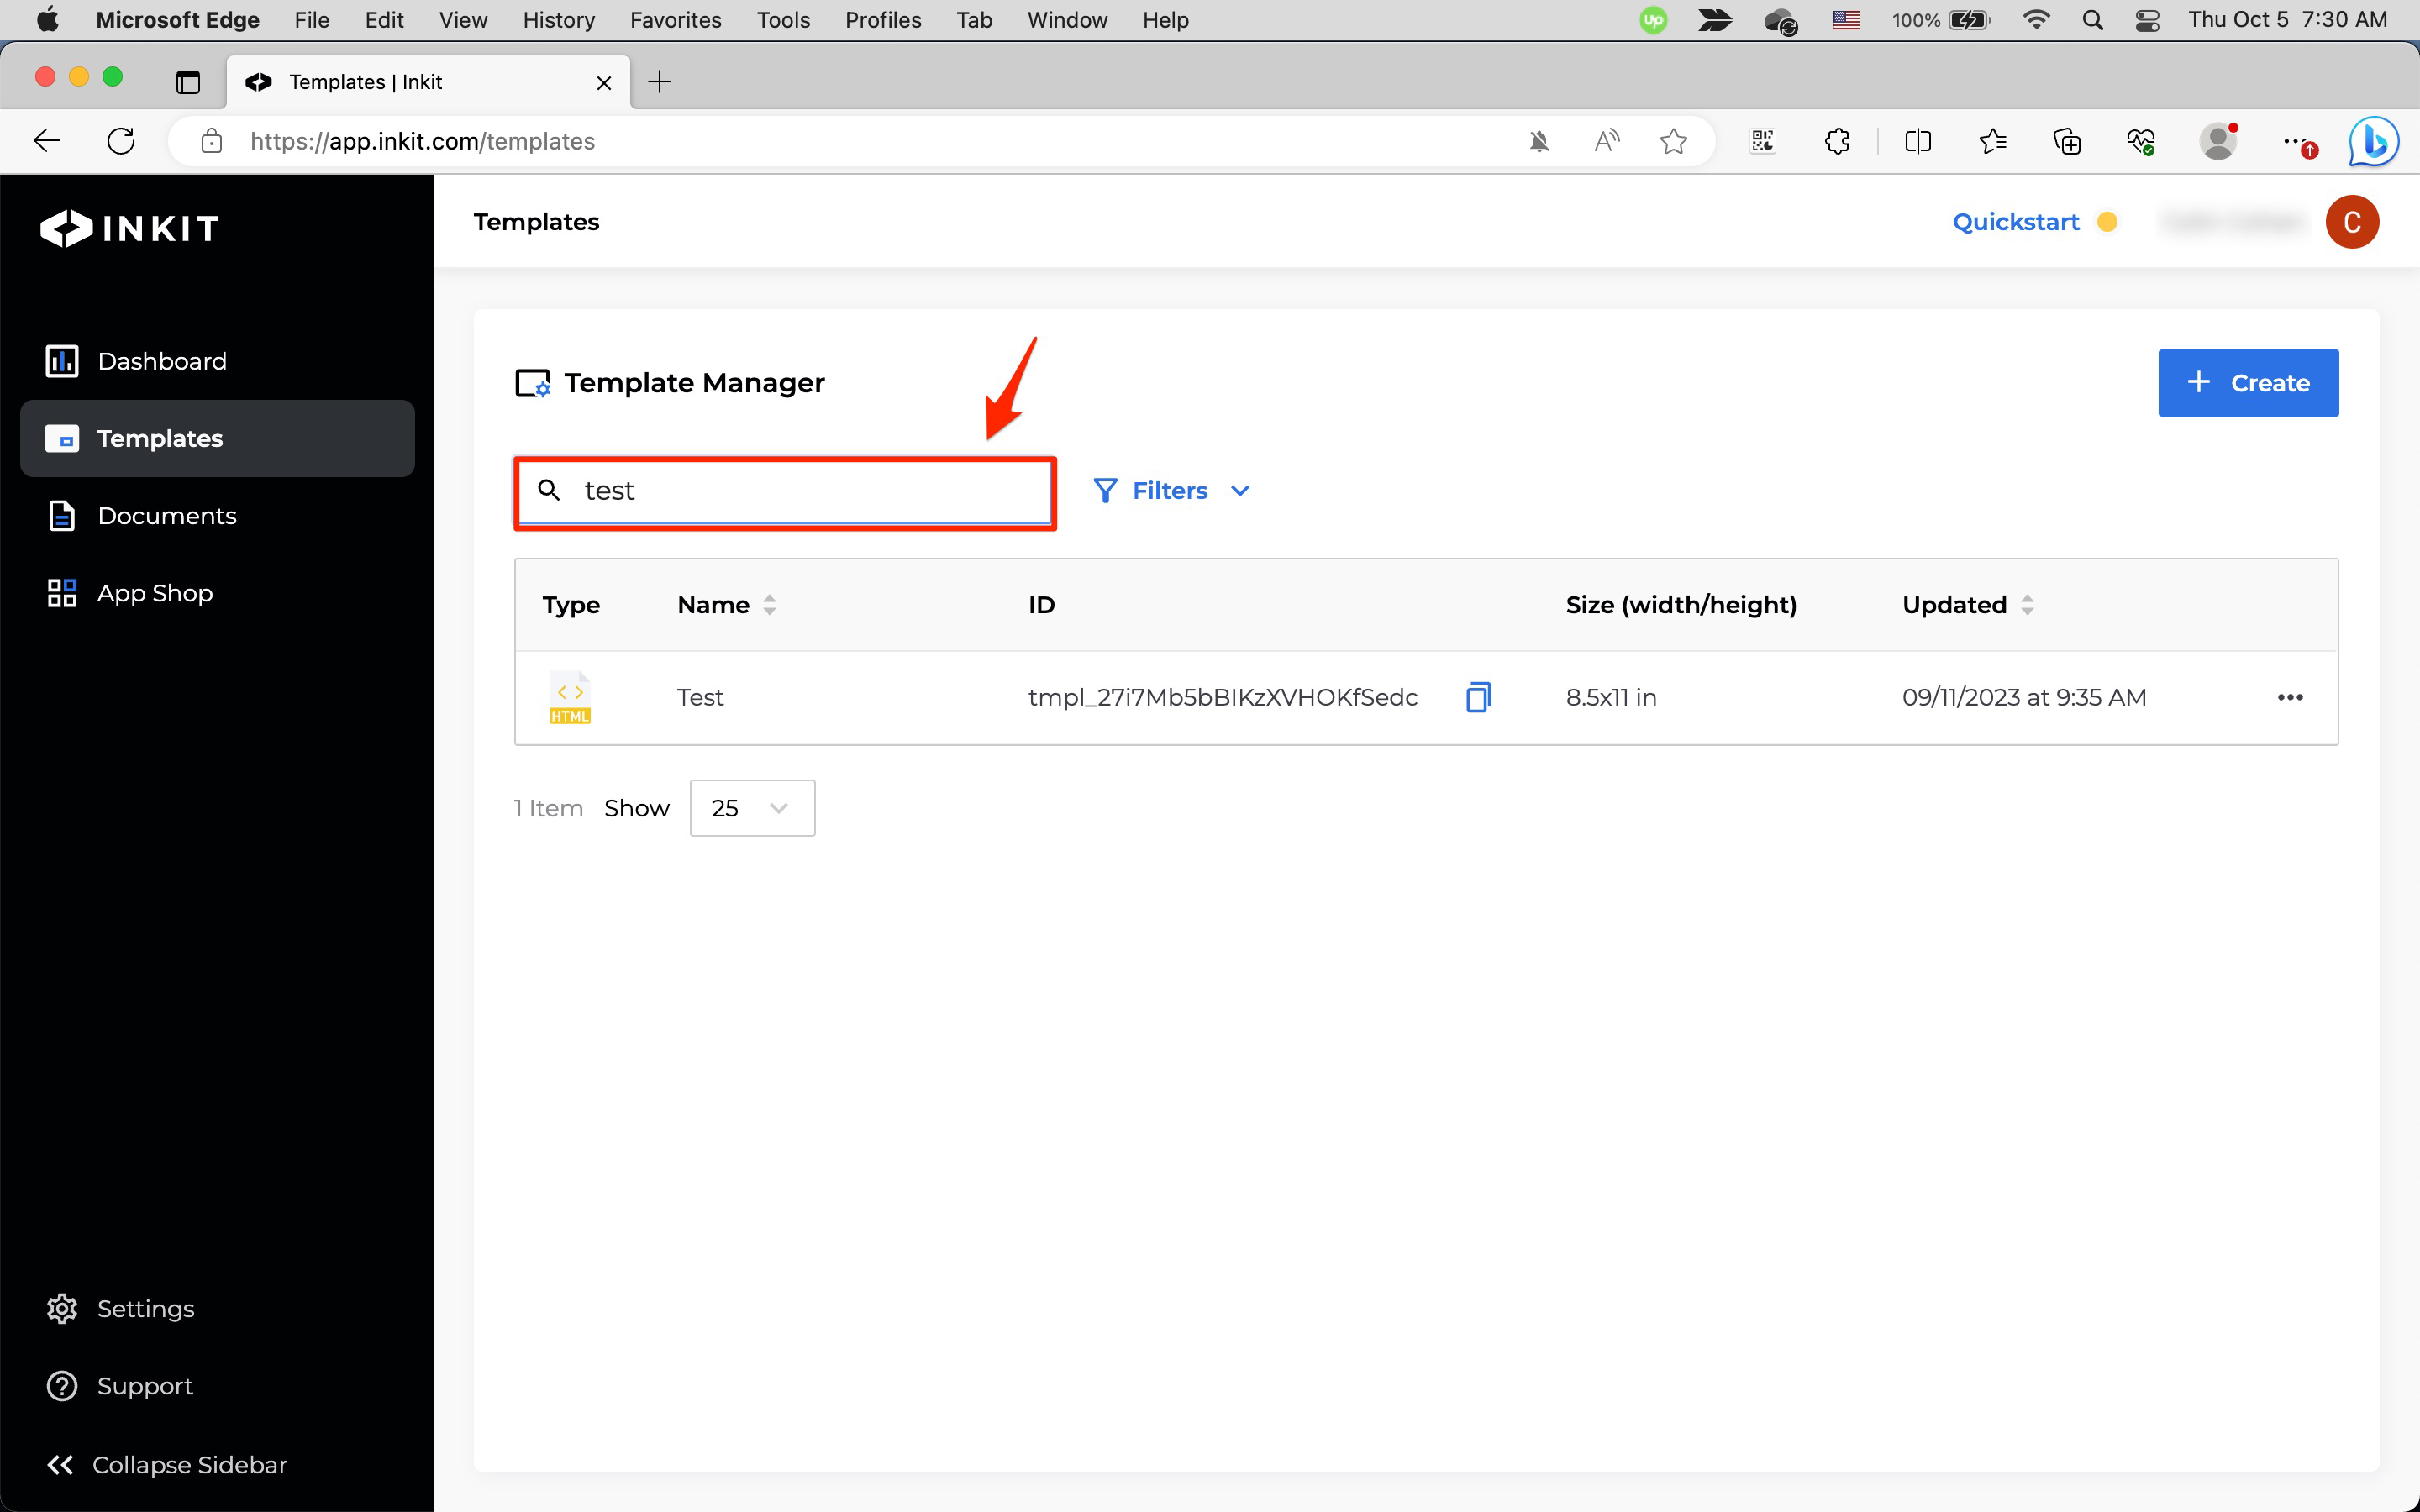
Filtering templates by keyword
To filter templates by keyword, enter the keyword in the Search box.
Filtering templates by ID
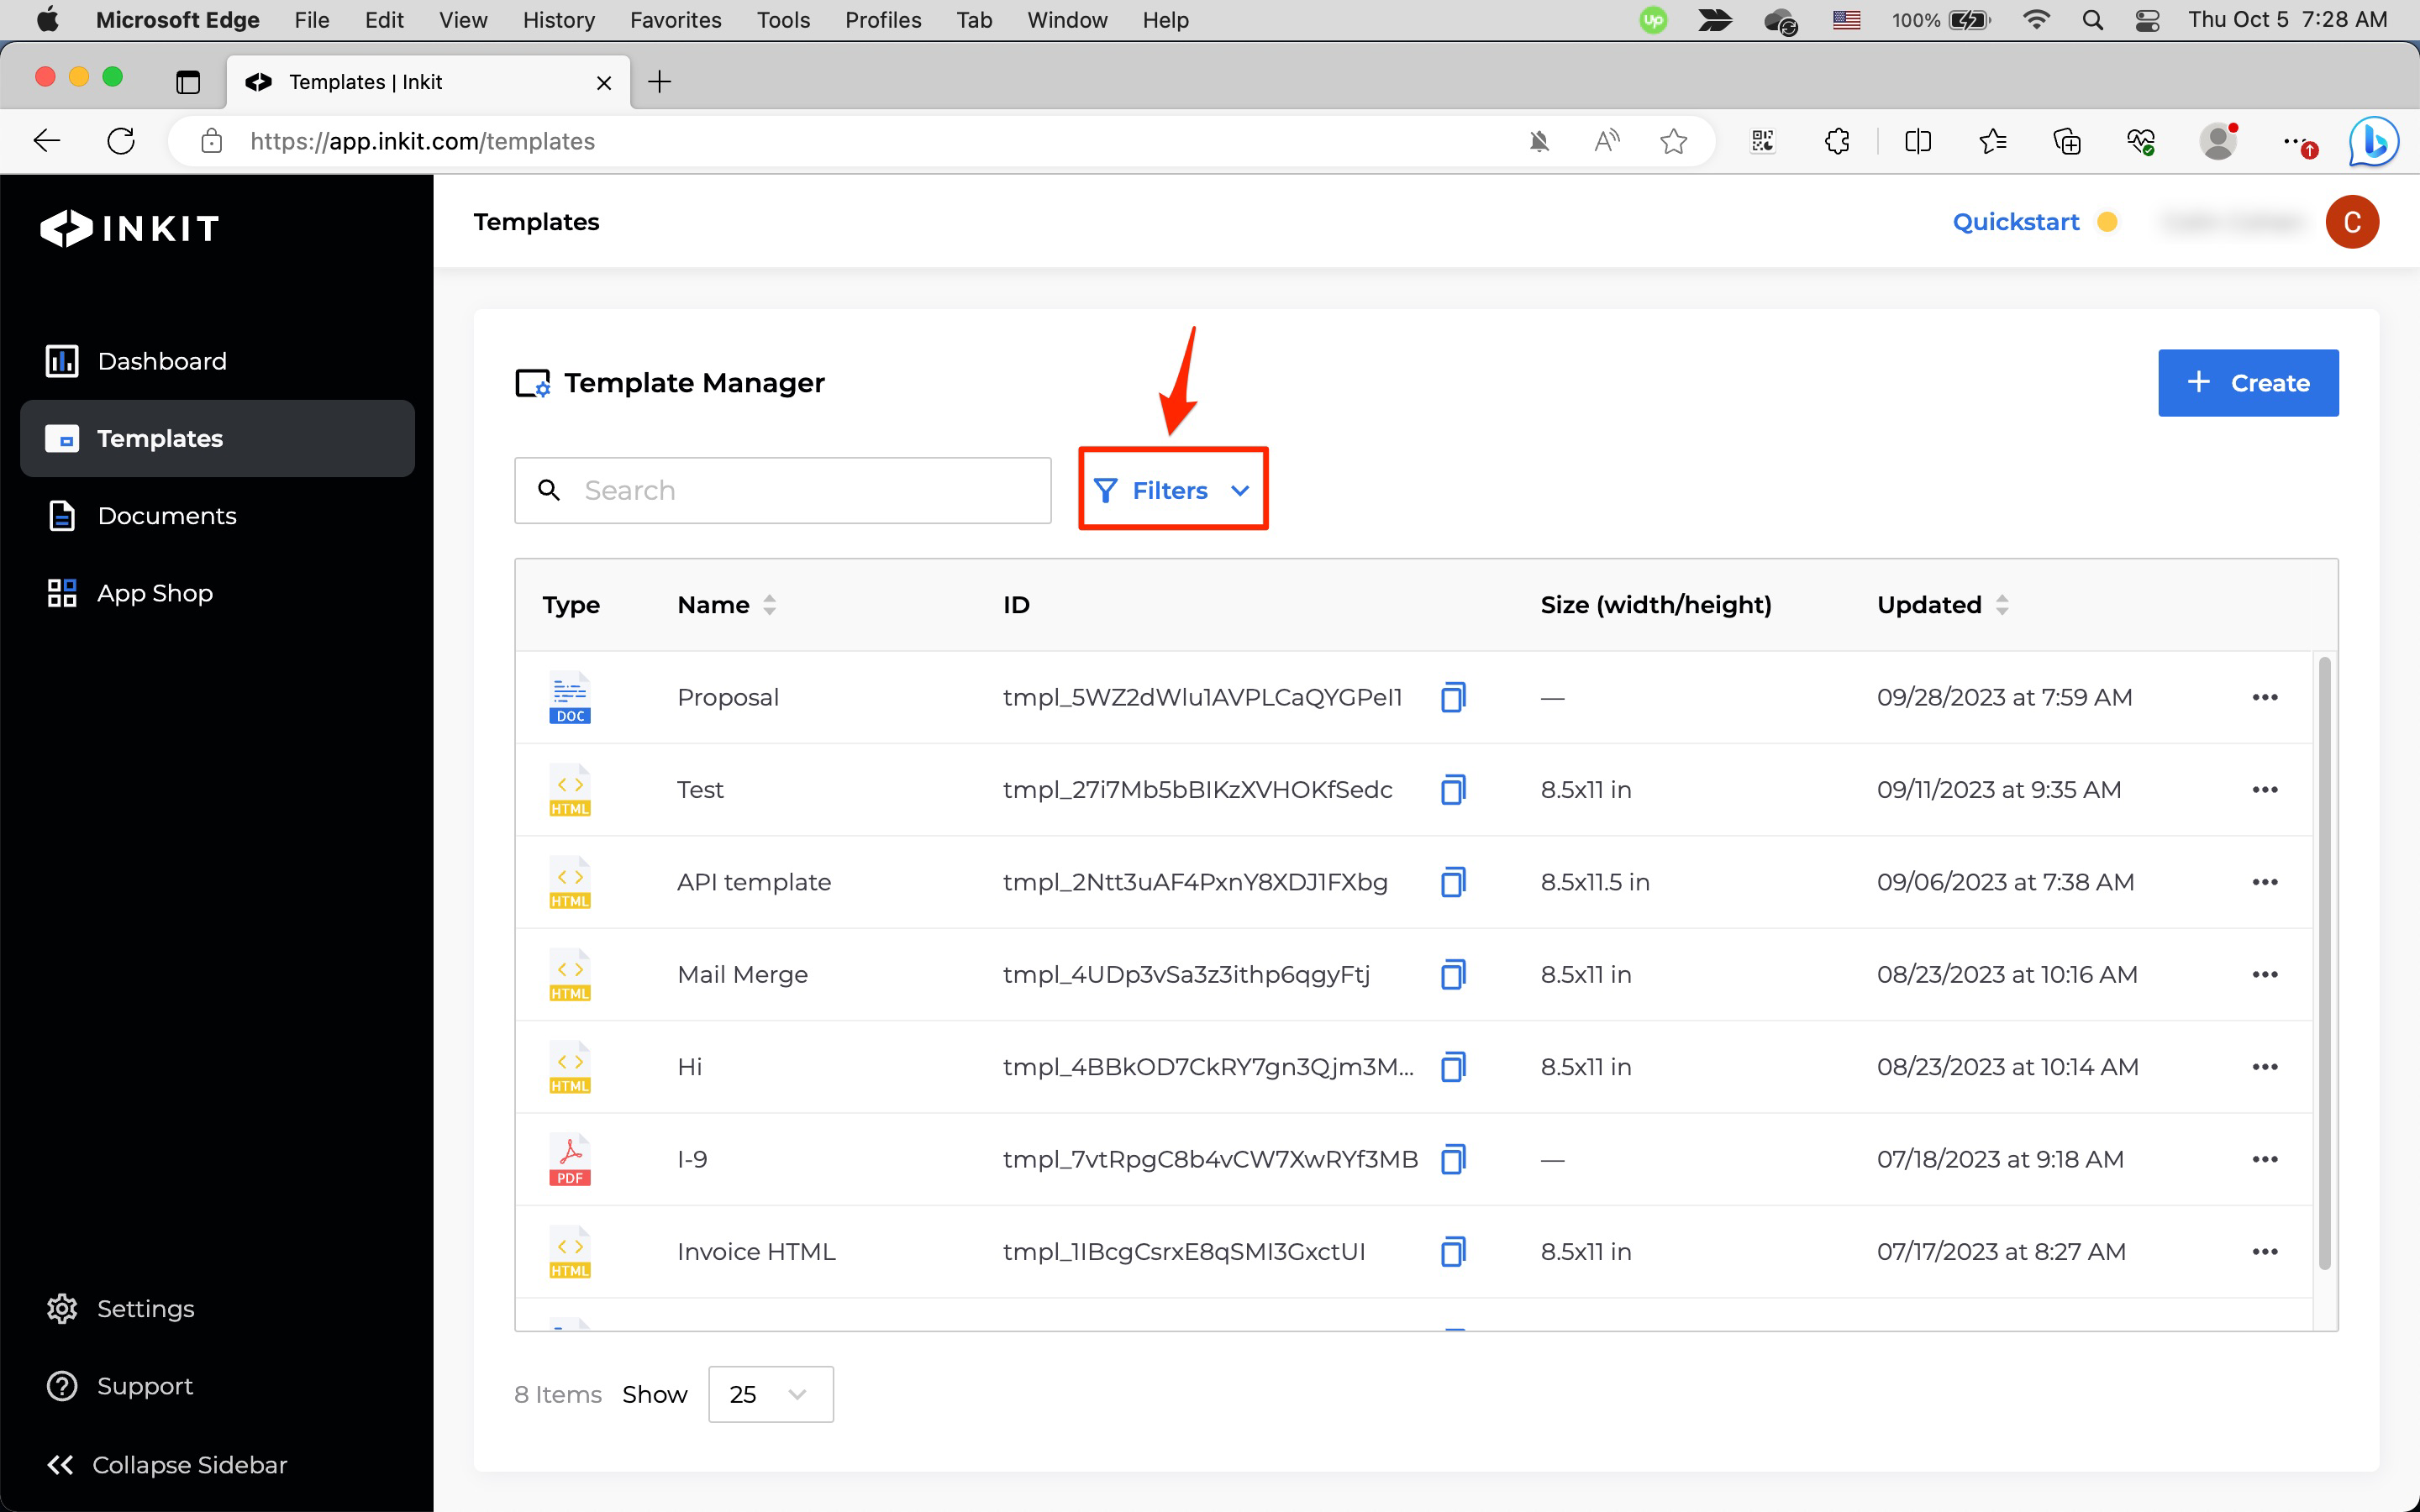
To filter templates by ID, click Filters.

Then click the + button by ID and enter the template ID. Finally, click Apply Filters.

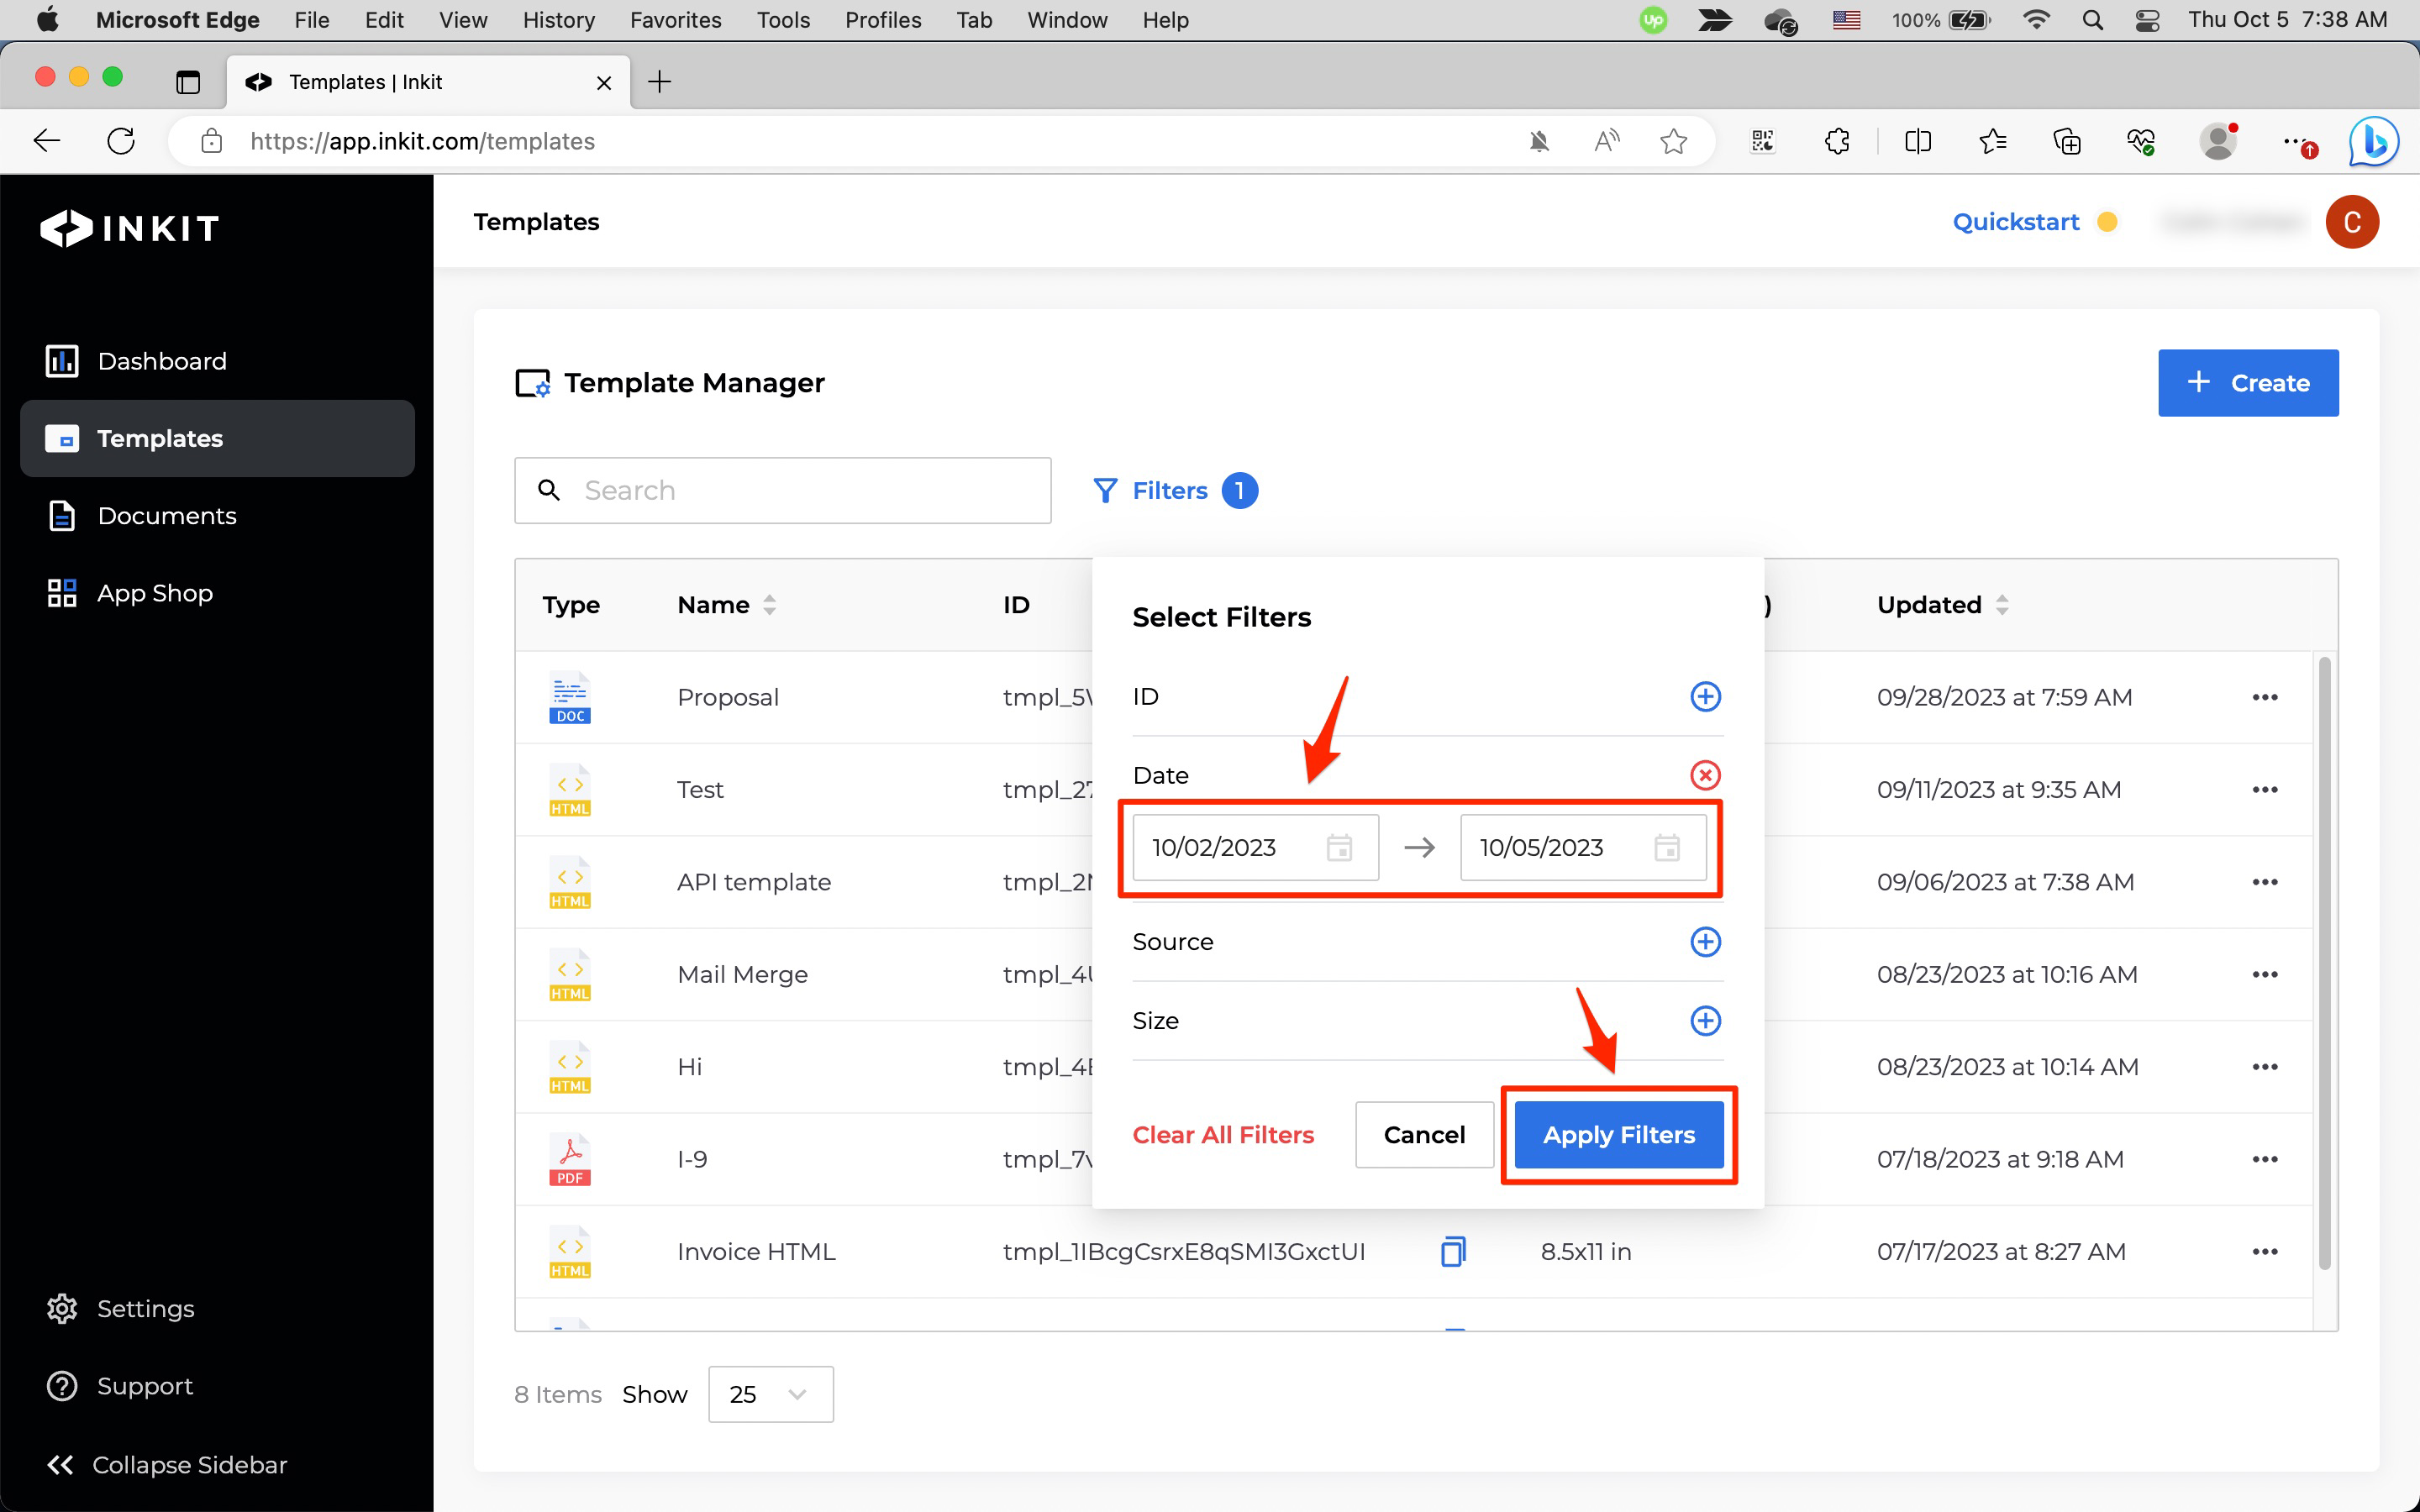
Filtering templates by date
To filter templates by date, click Filters.

Then click the + button by Date and enter a range of template modification dates. Finally, click Apply Filters.
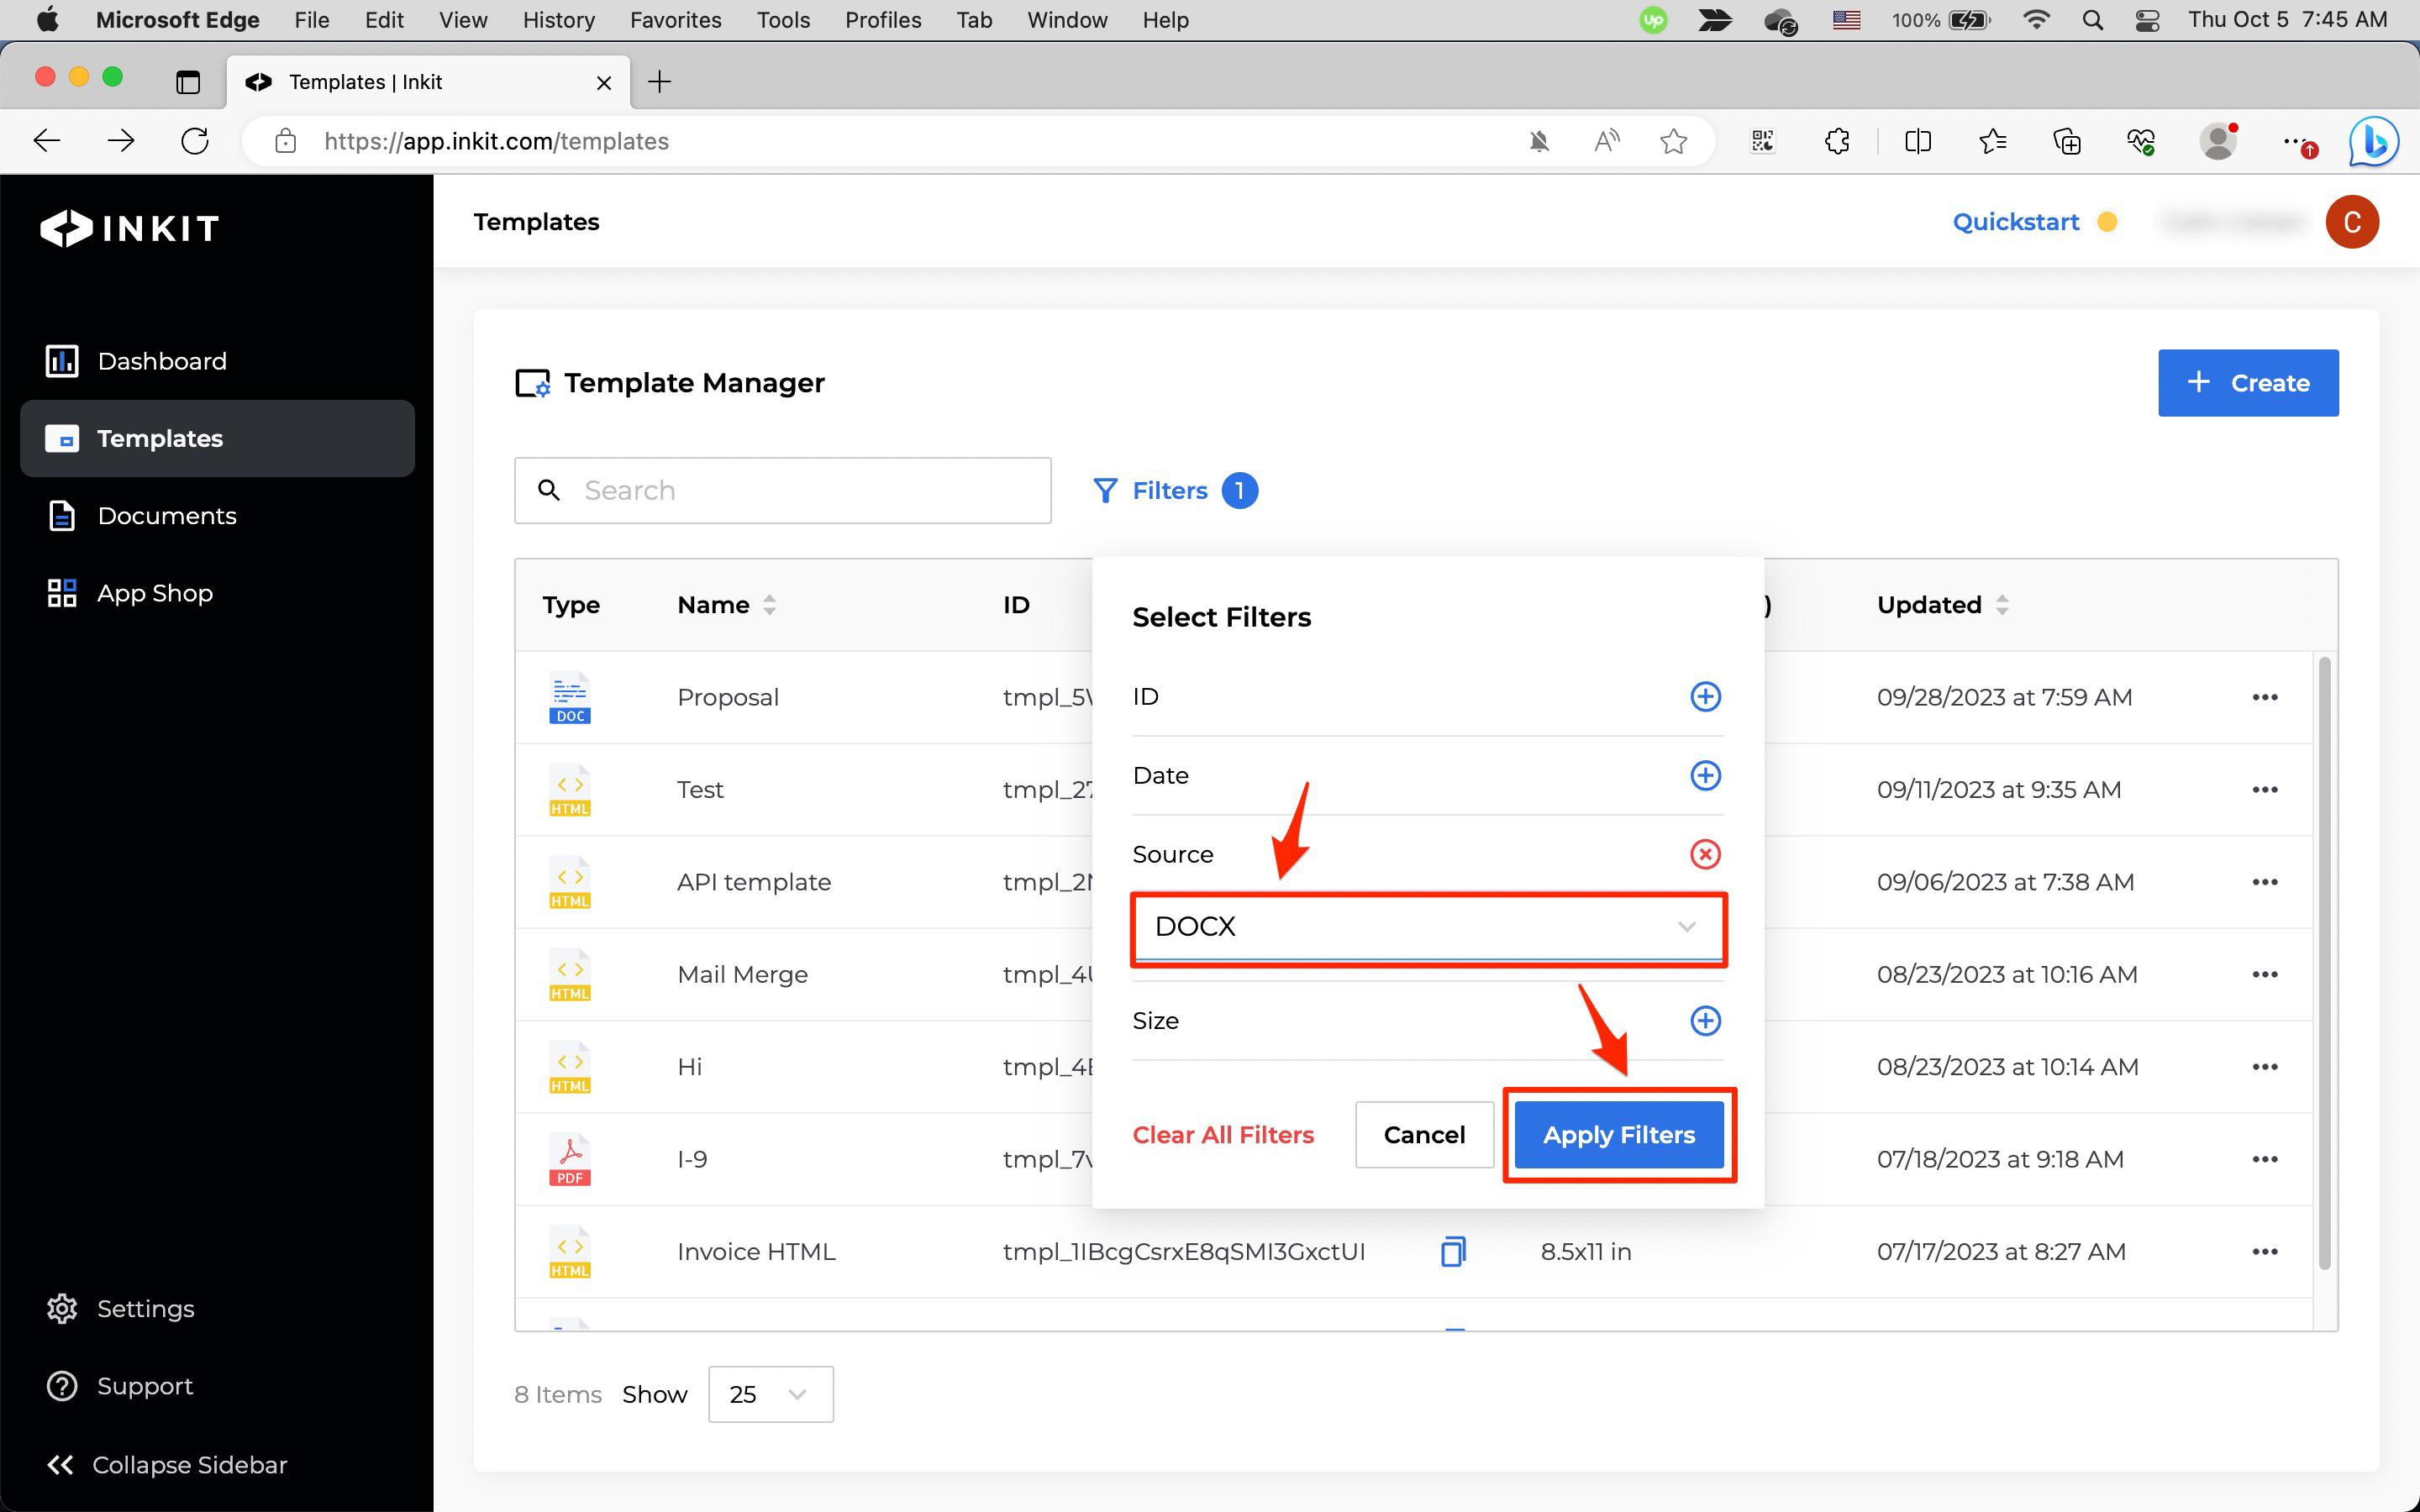
Filtering templates by source
To filter templates by source, click Filters.
Then click the + button by Source and select one of the following sources from the dropdown box:
- DOCX
- HTML
- PPTX
Finally, click Apply Filters.
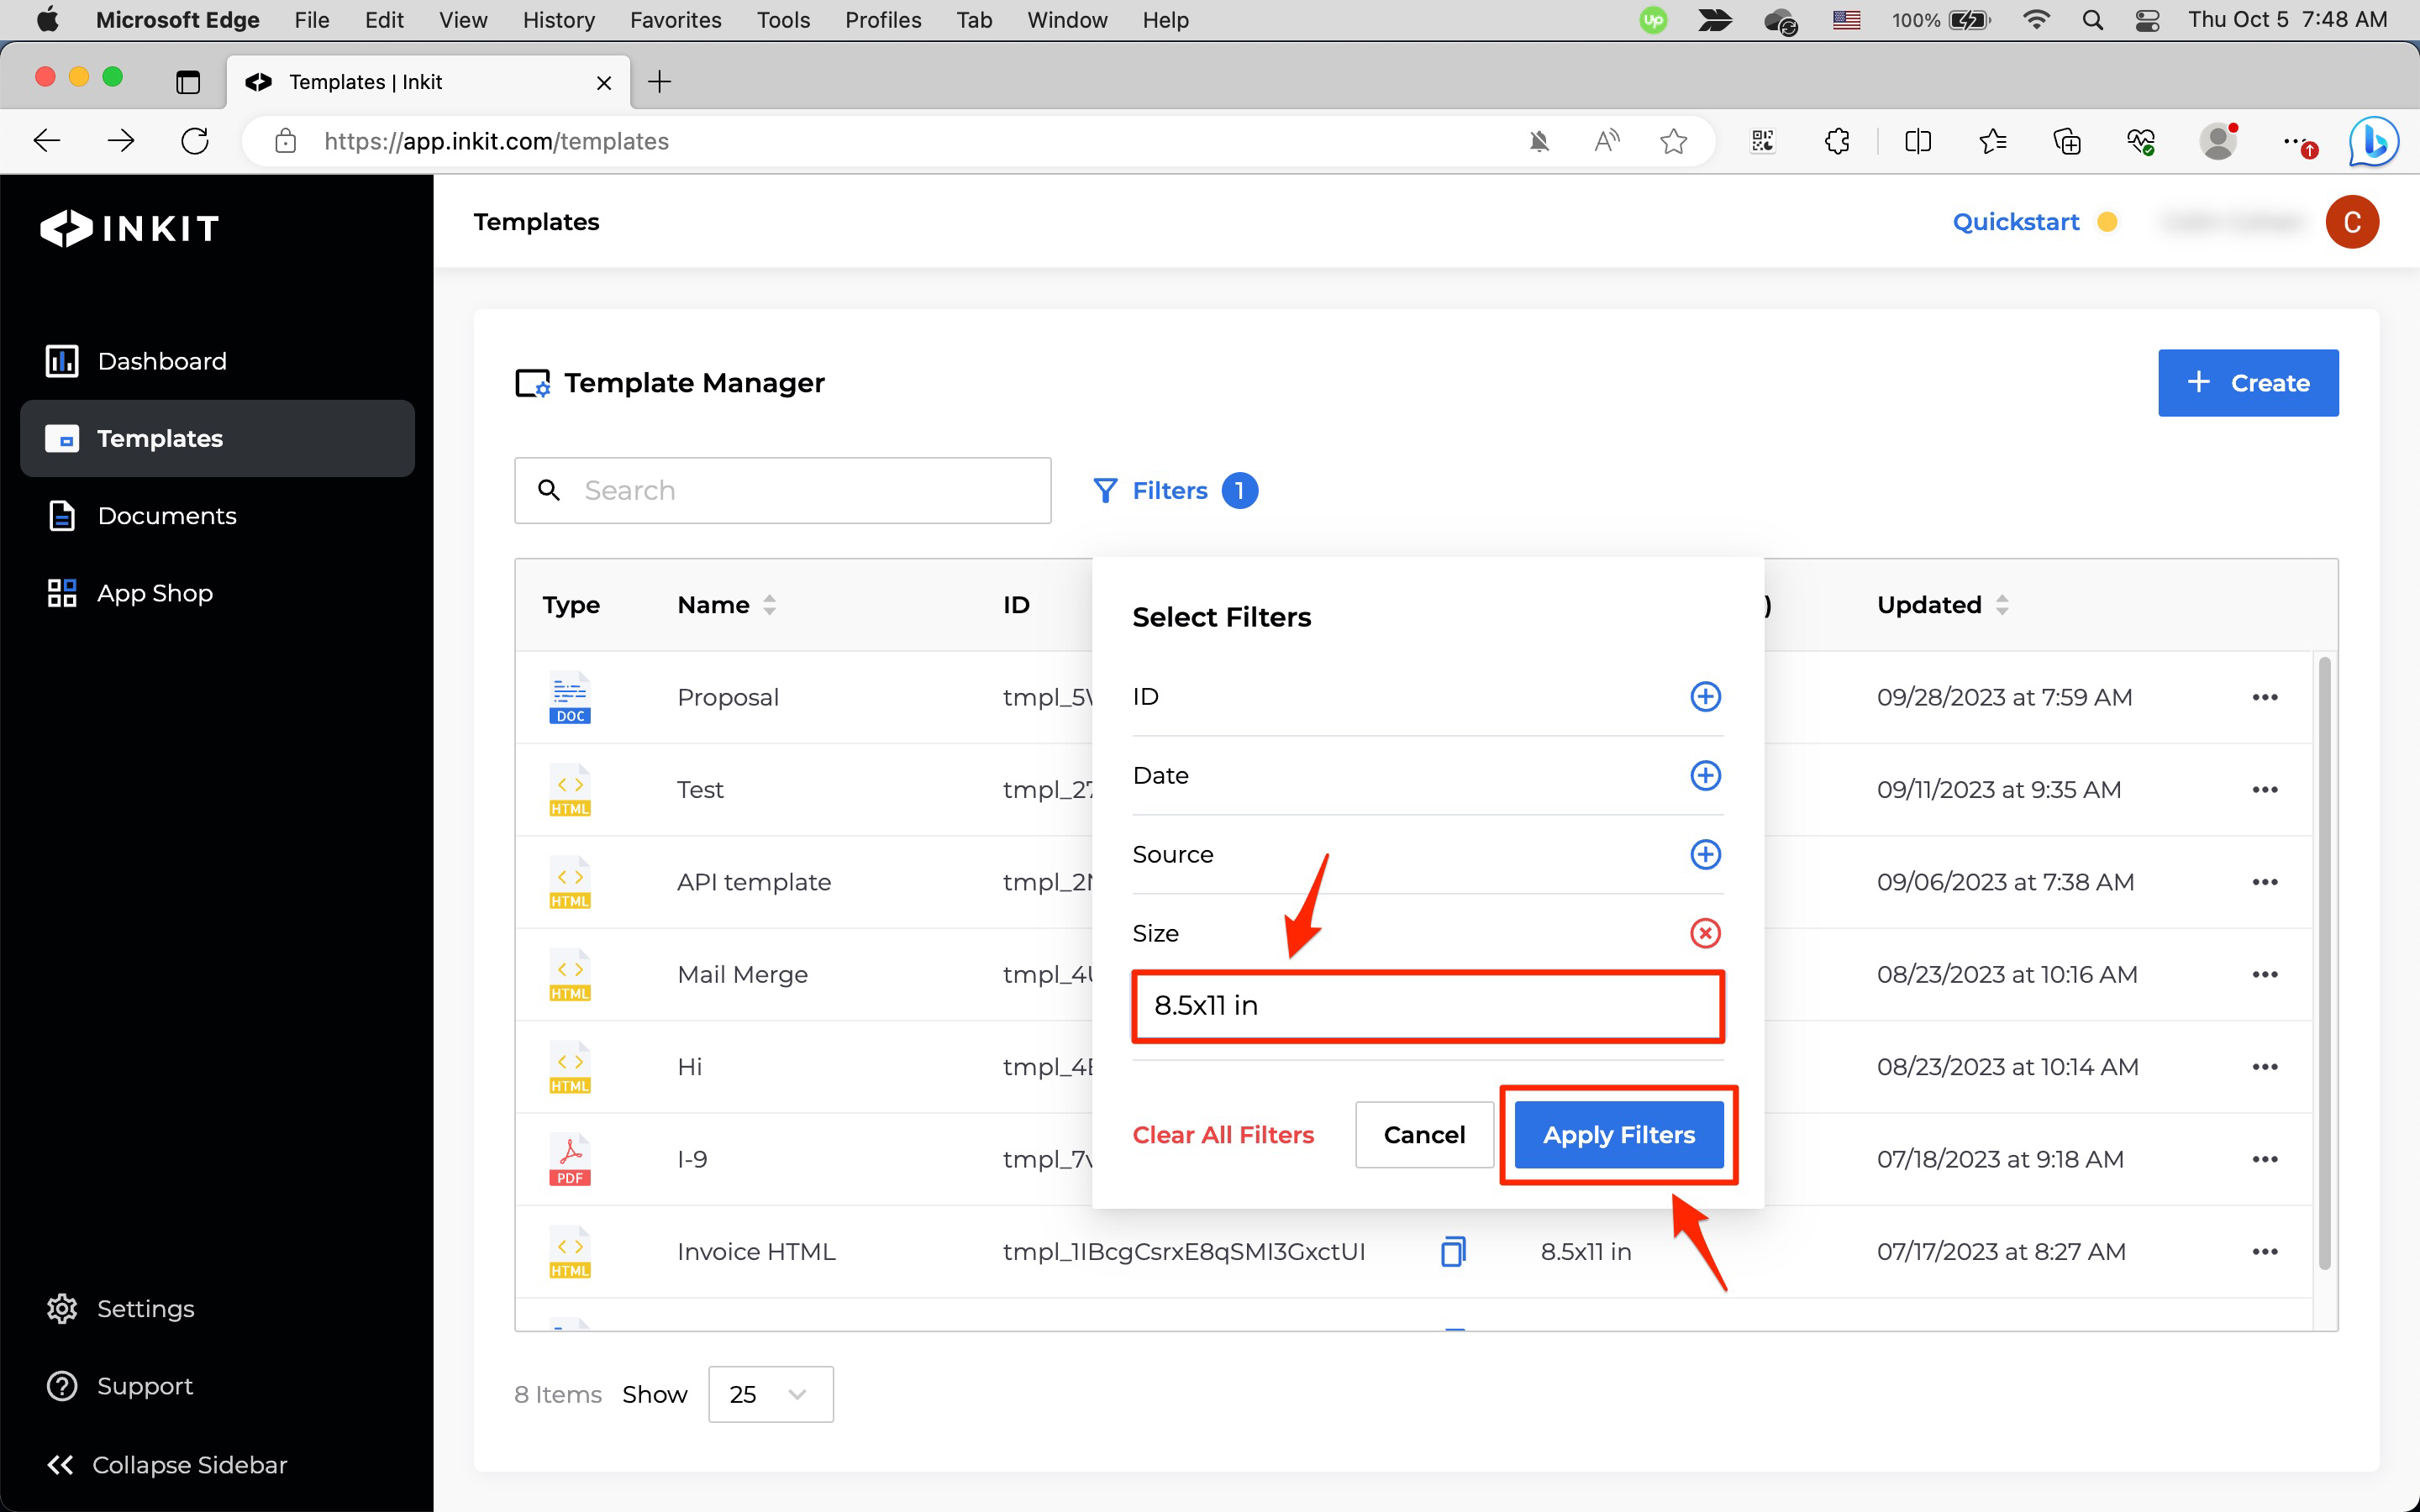
Filtering templates by size
To filter templates by size, click Filters.

Then click the + button by Size and enter a size. Finally, click Apply Filters.
Clearing filters
To clear all filters you've added, click Filters.
Then click Clear All Filters.
