Setting up the Amazon S3 app
The Amazon S3 app lets you send documents generated in Inkit to an Amazon S3 bucket. How you set it up depends on the AWS authorization type you employ.
Connecting to AWS
To set up the Amazon S3 app and connect to AWS, do the following:
-
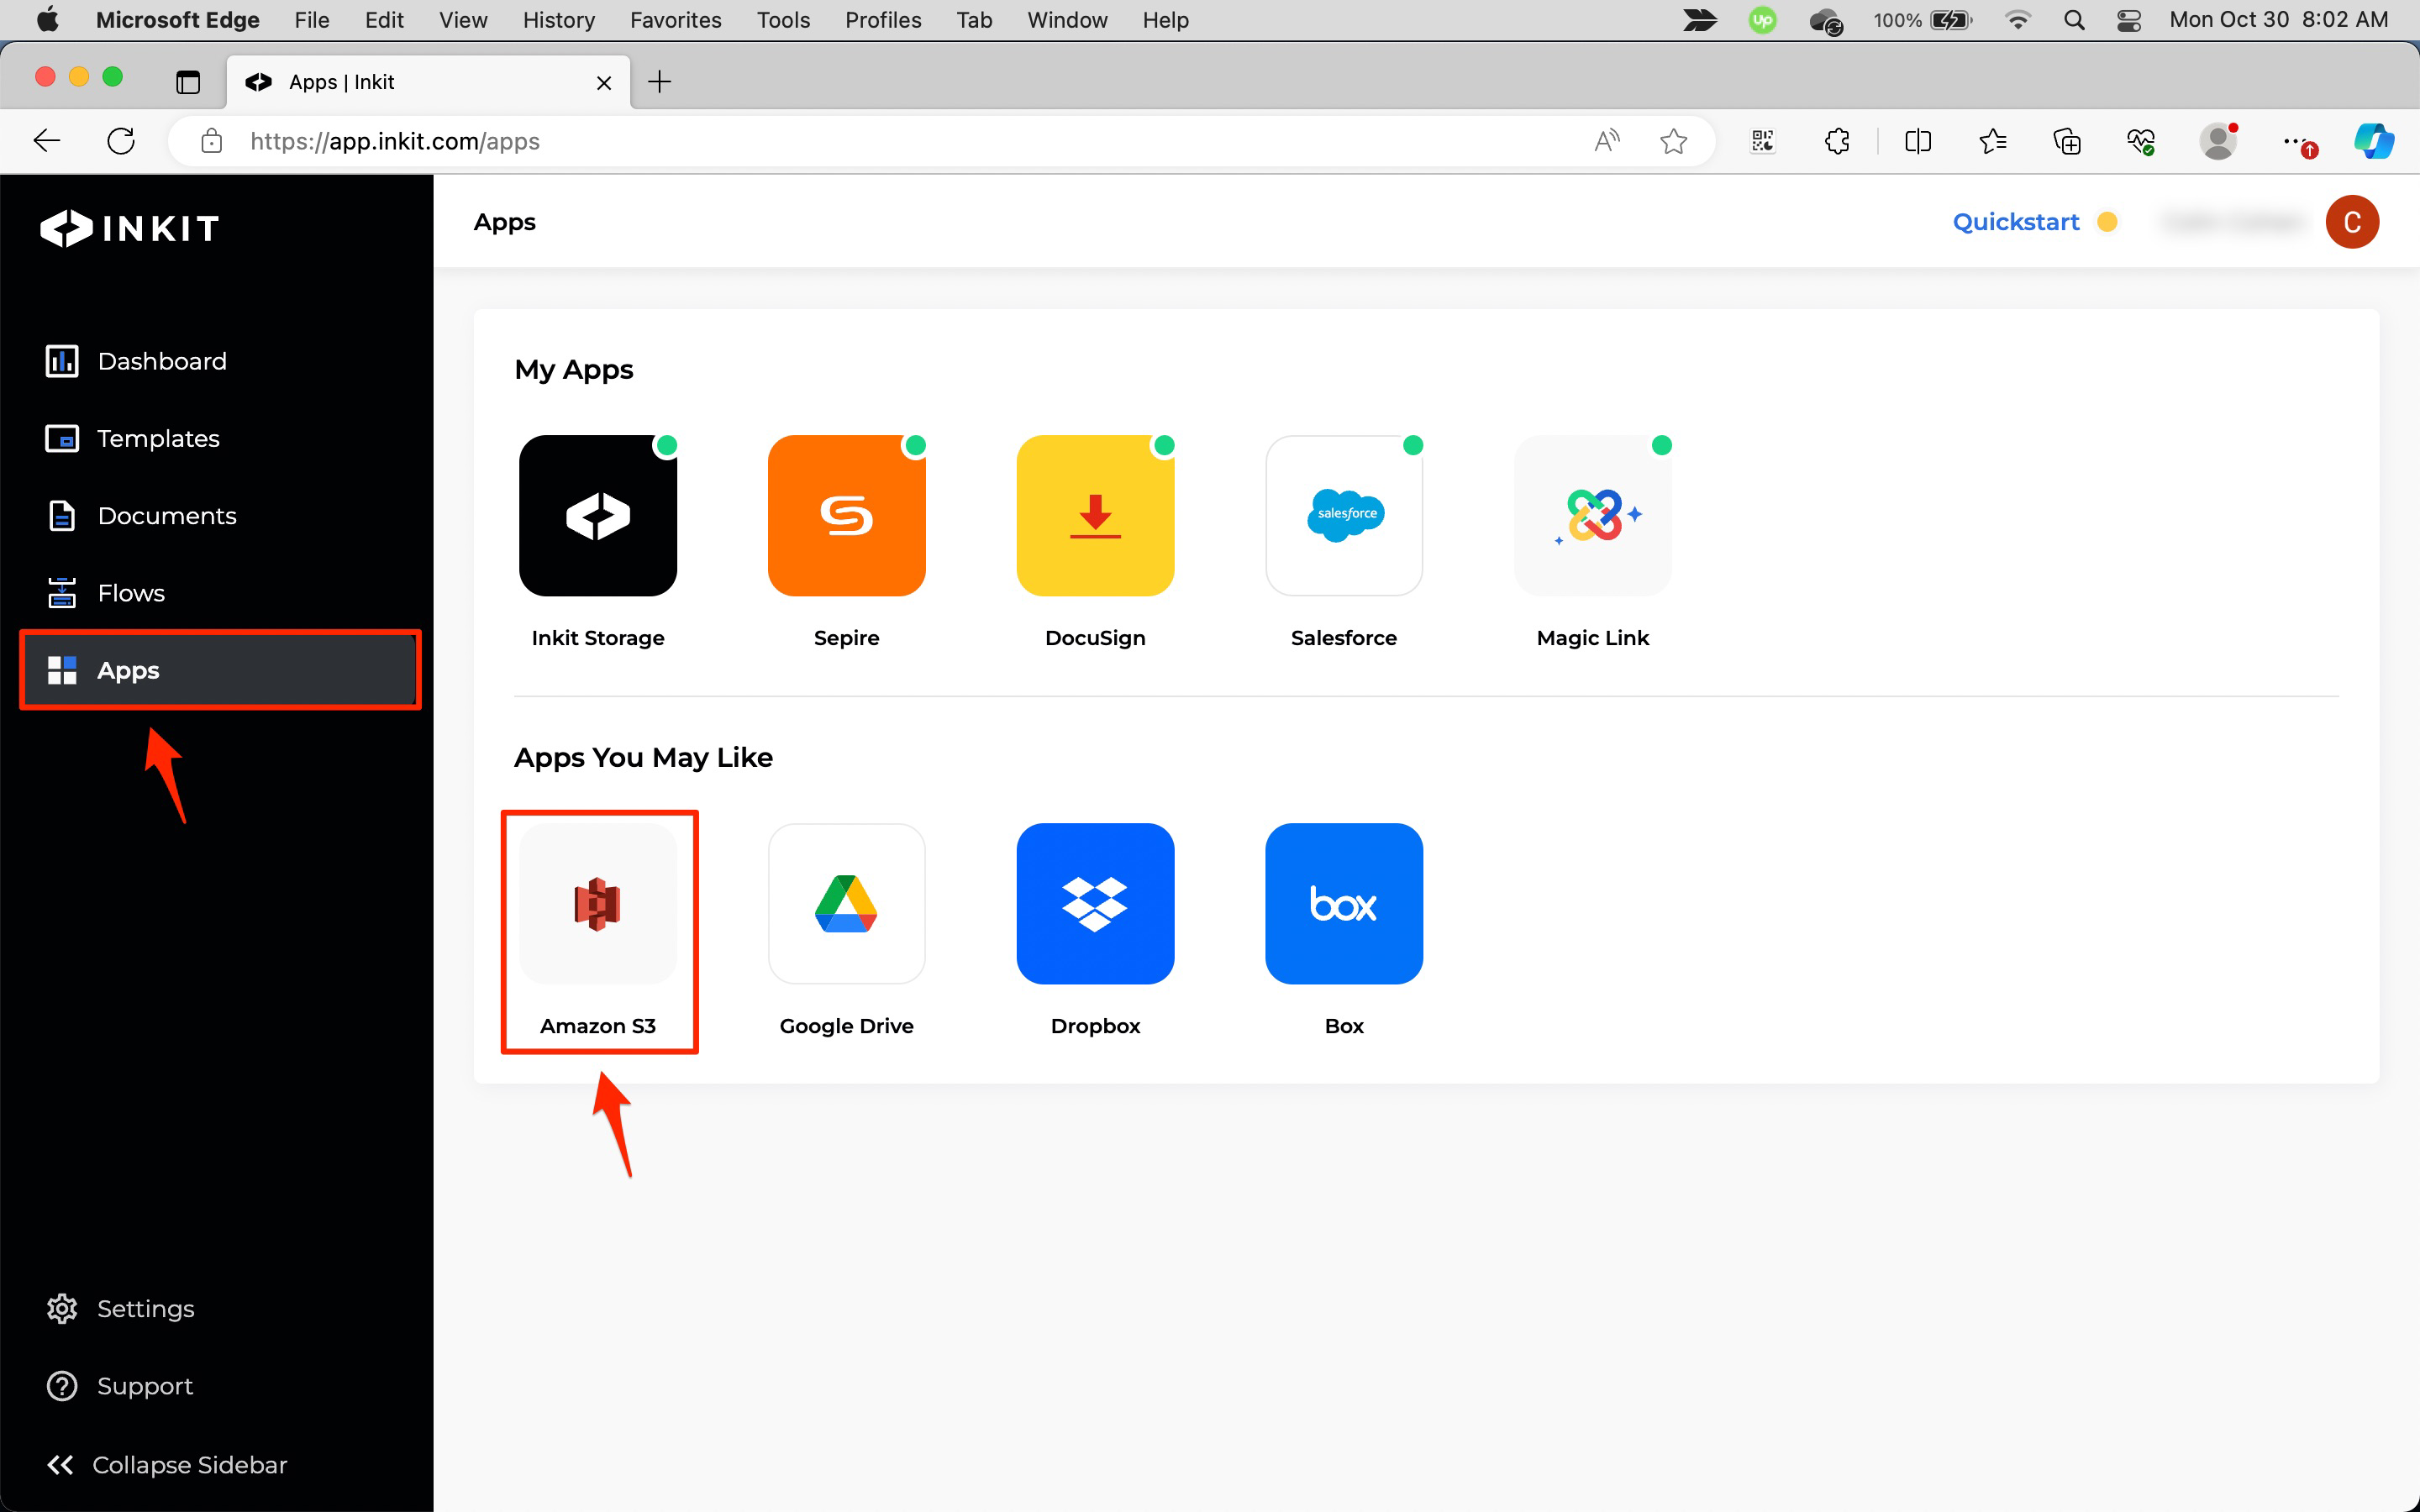
In the Inkit web app, select Apps from the left sidebar and click Amazon S3.
-
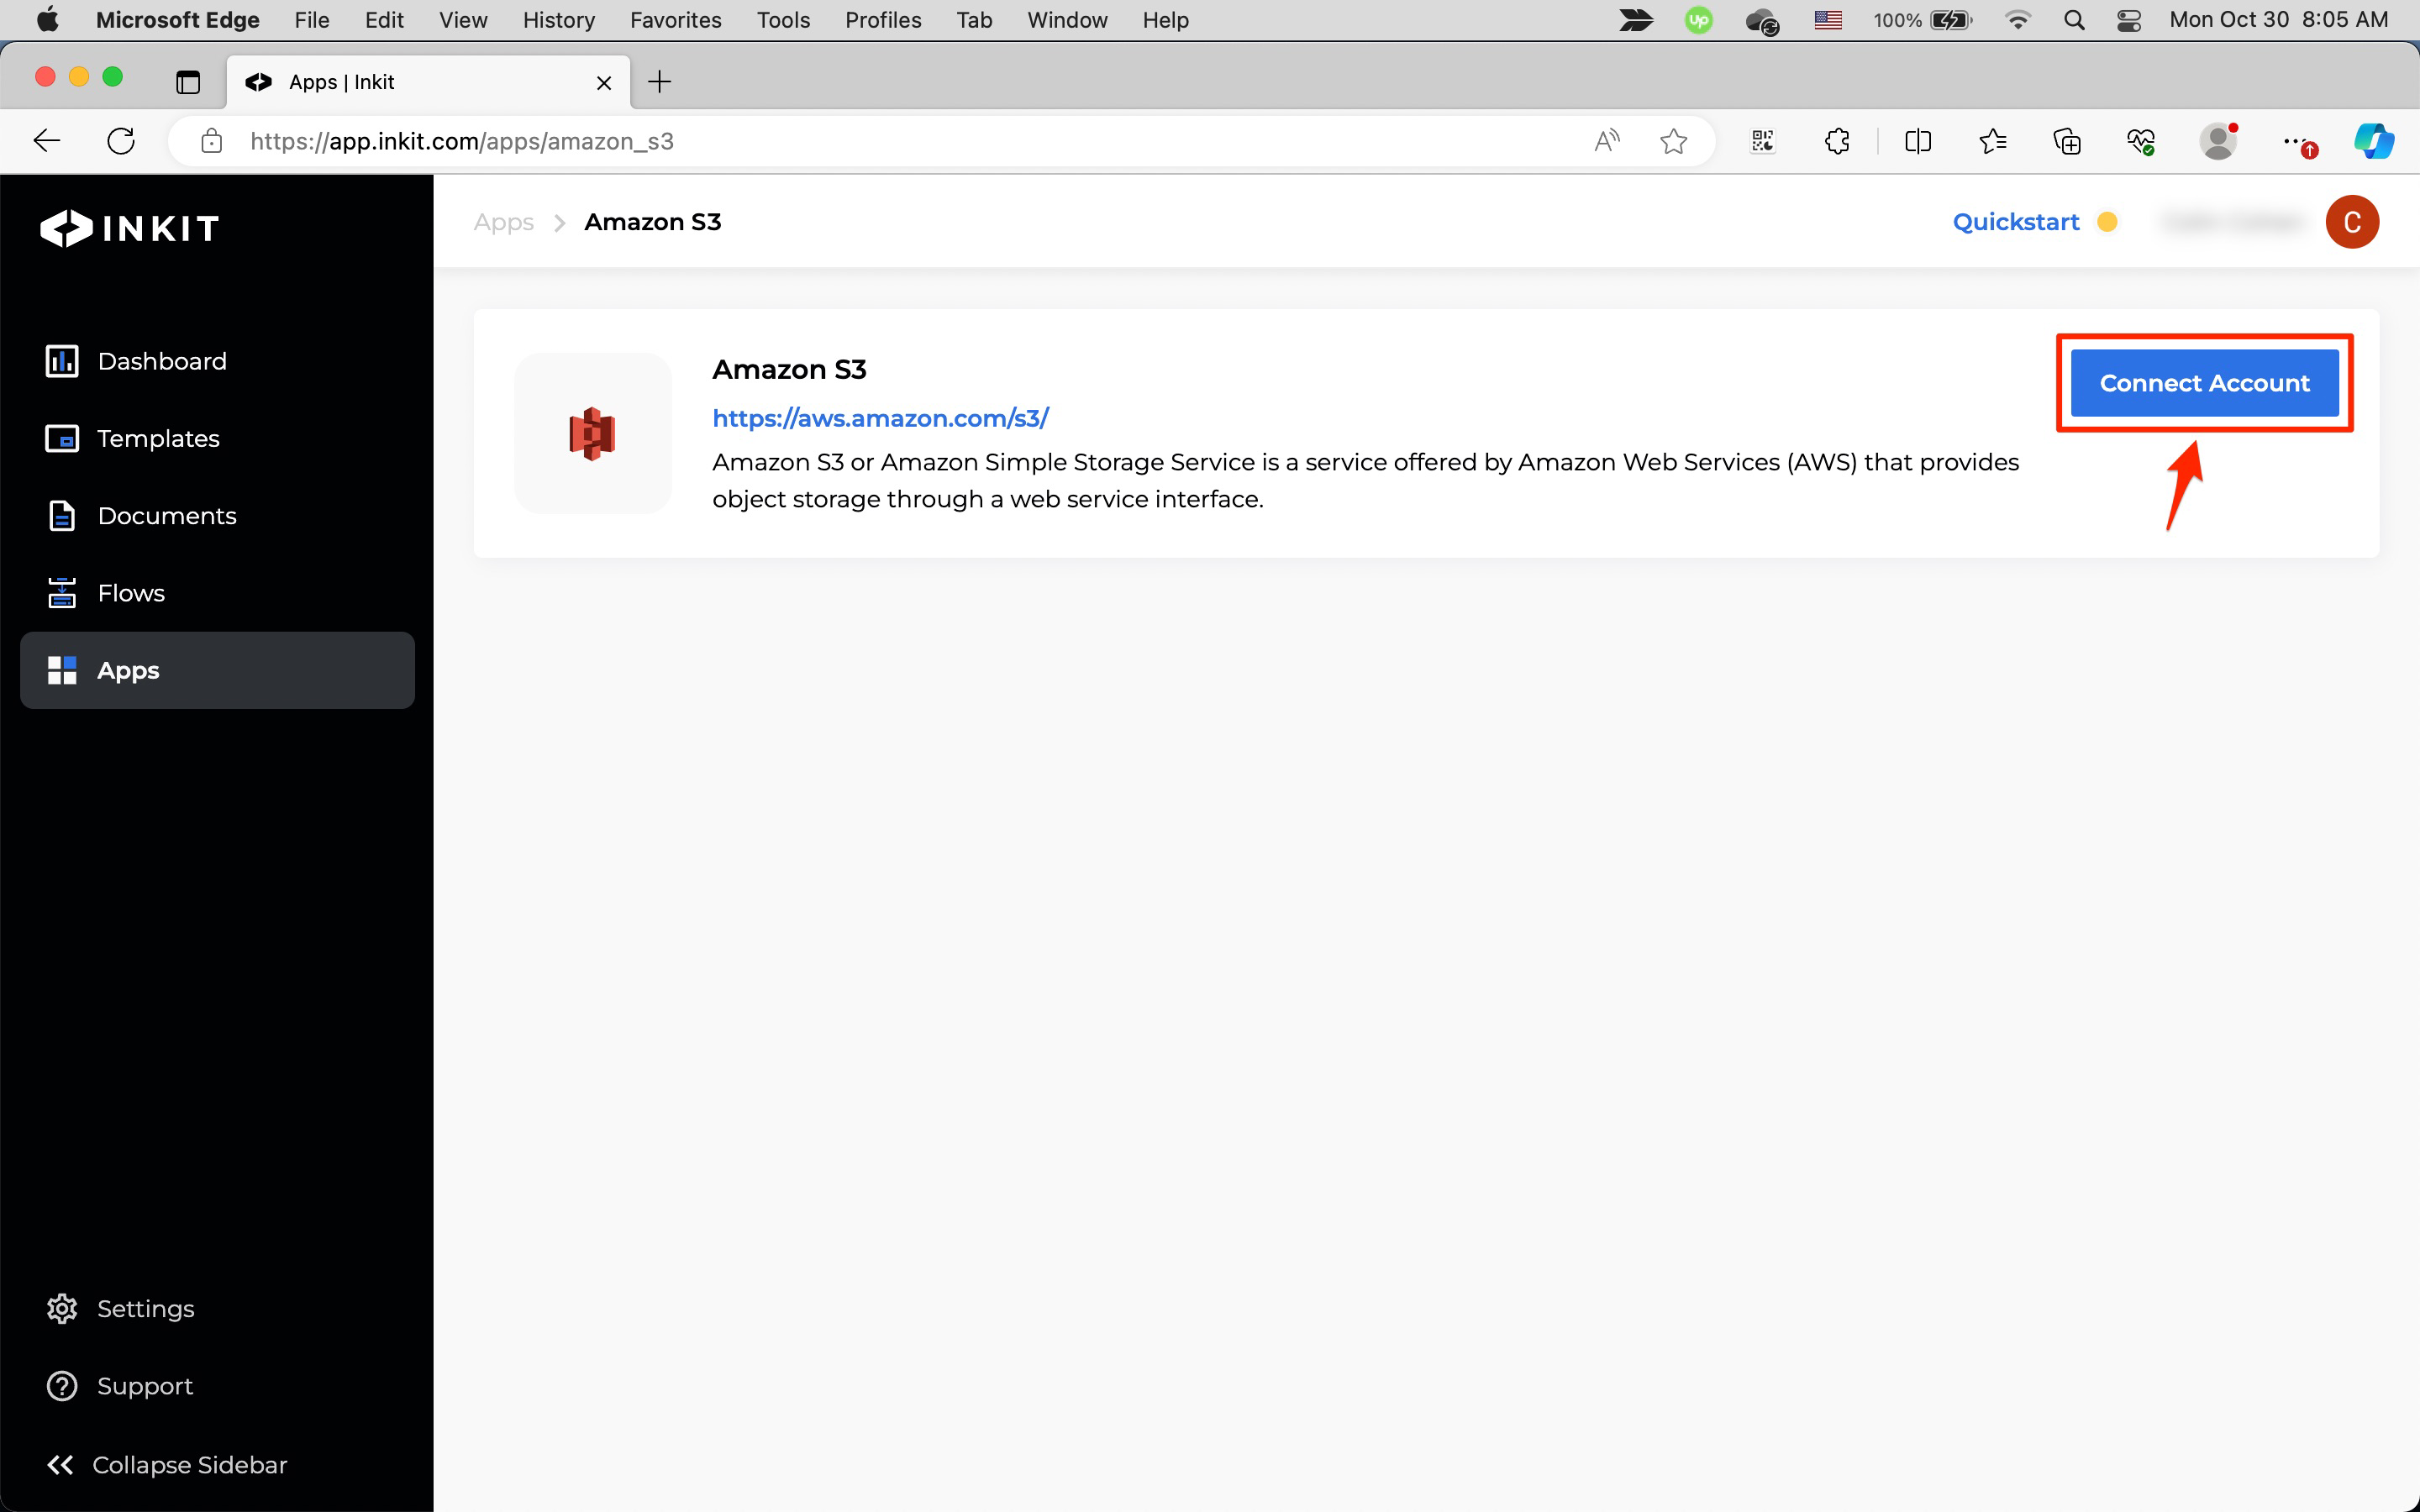
In the Amazon S3 page, click Connect Account.
-
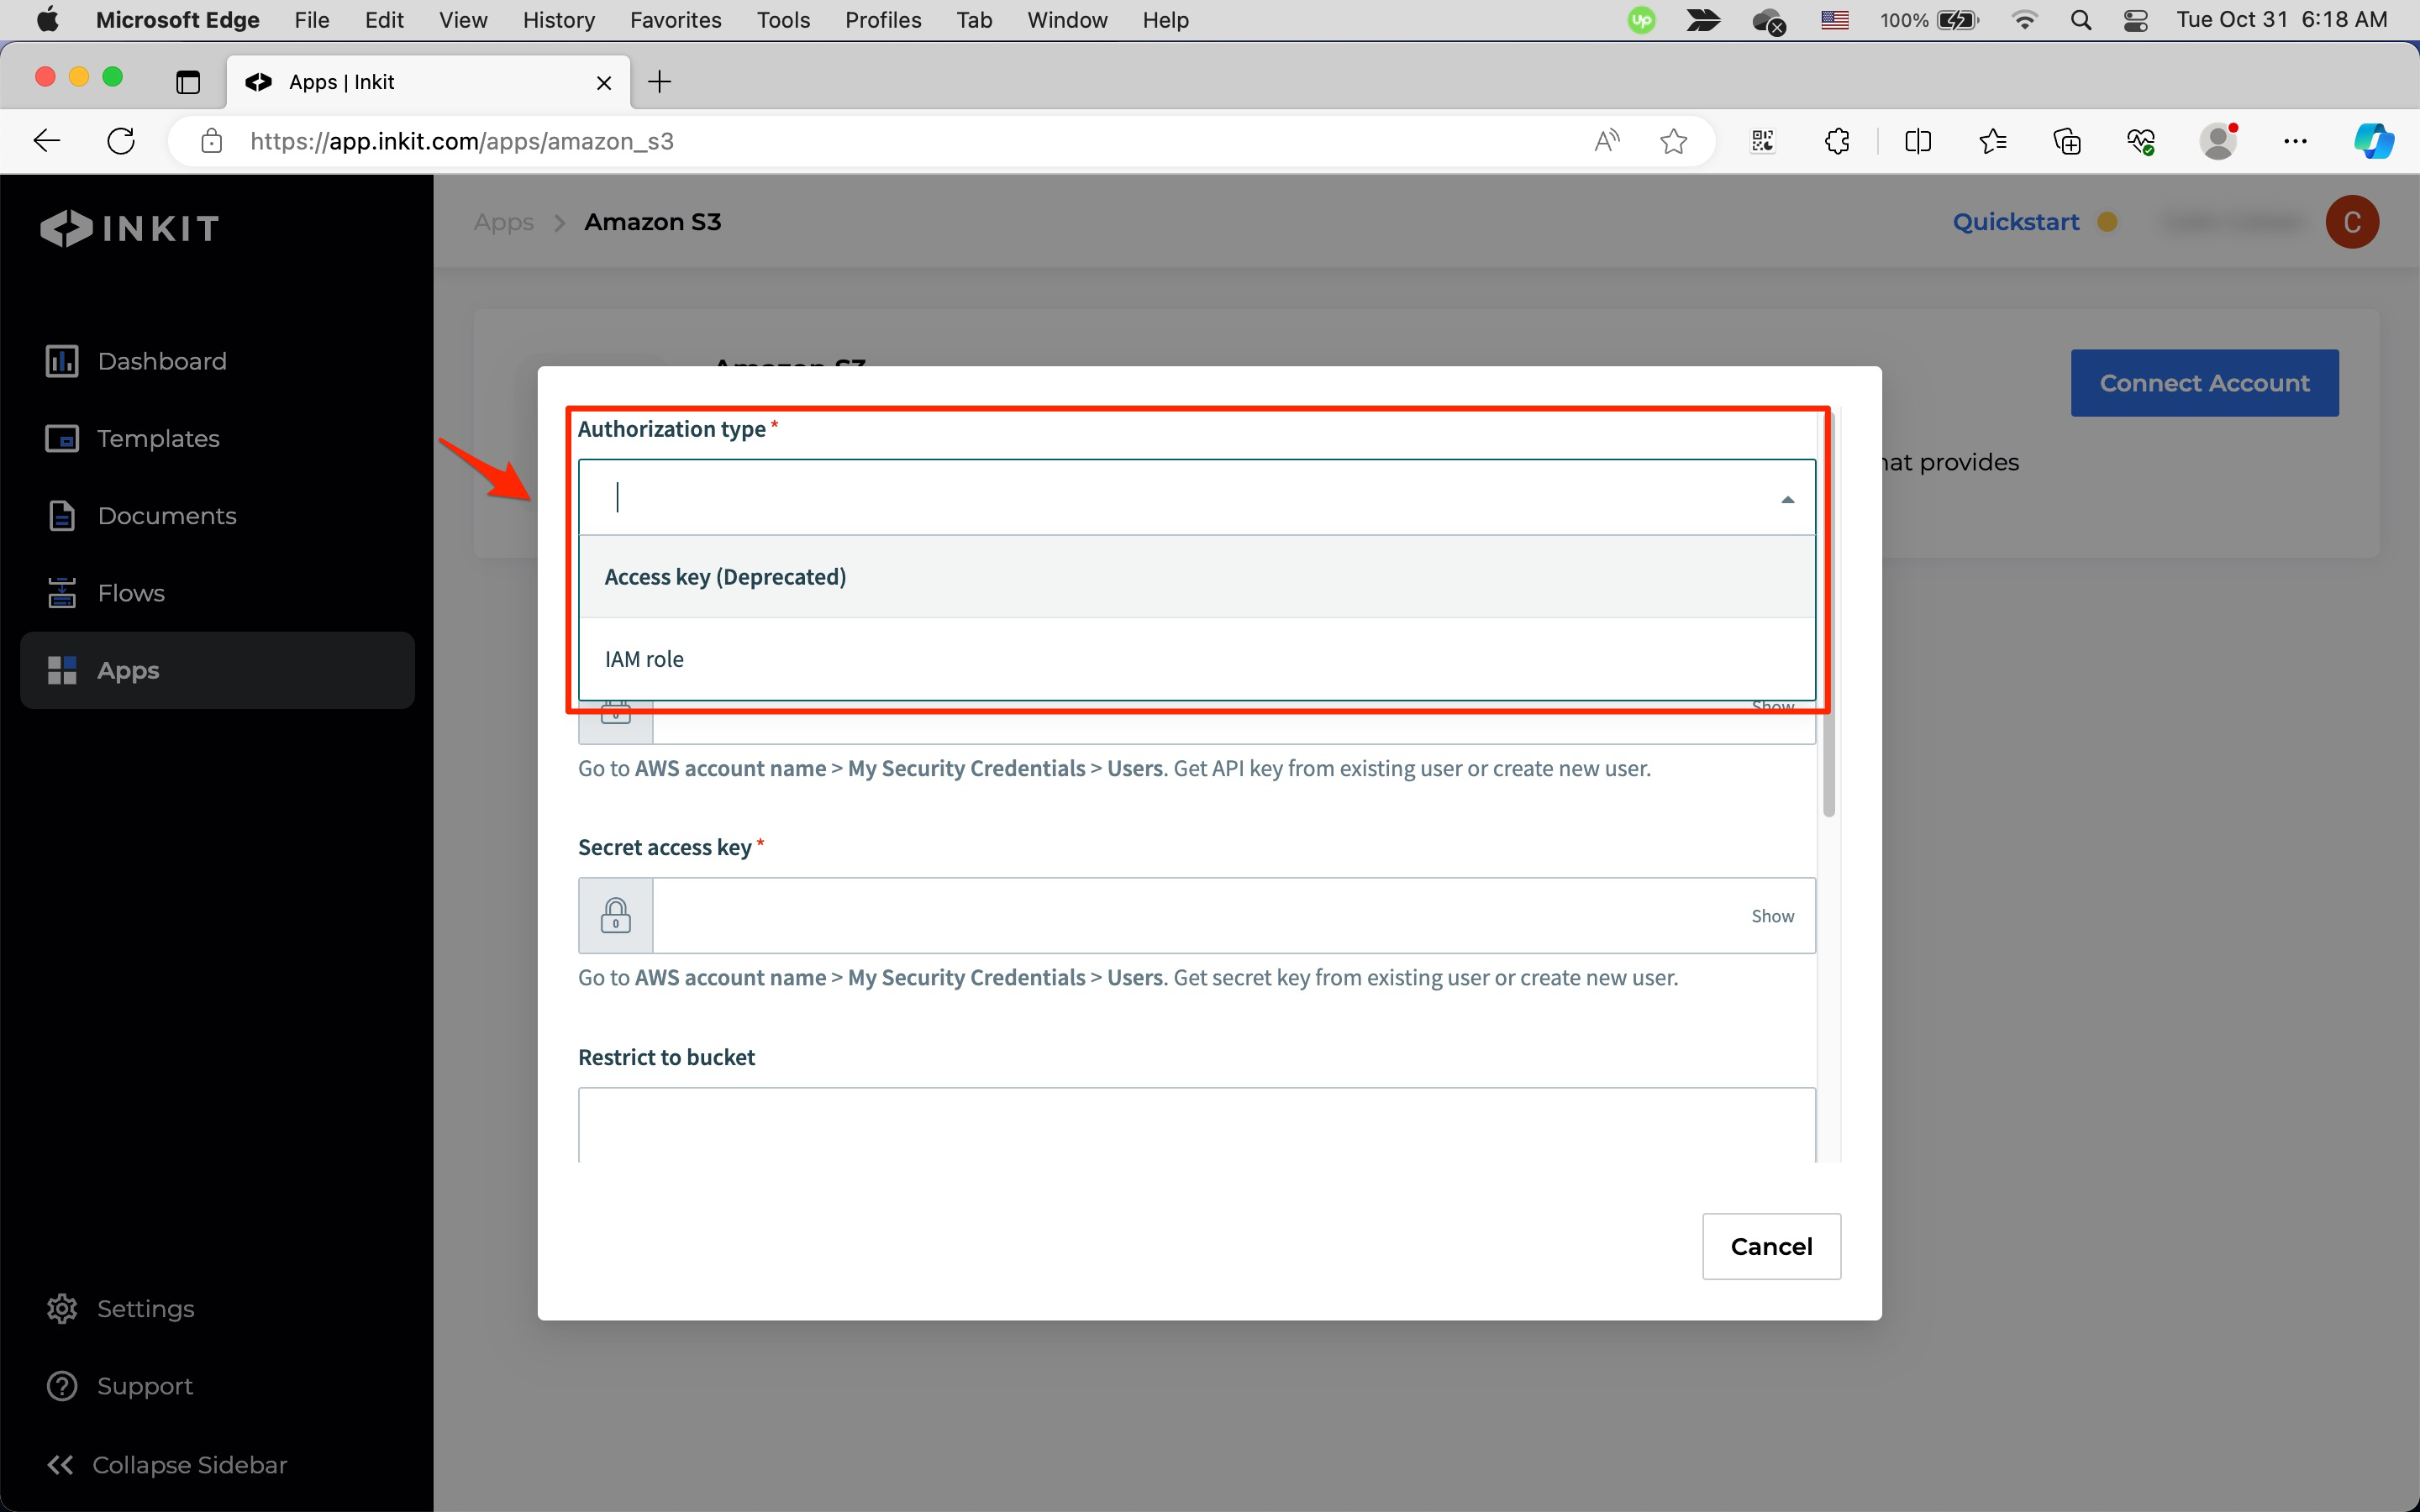
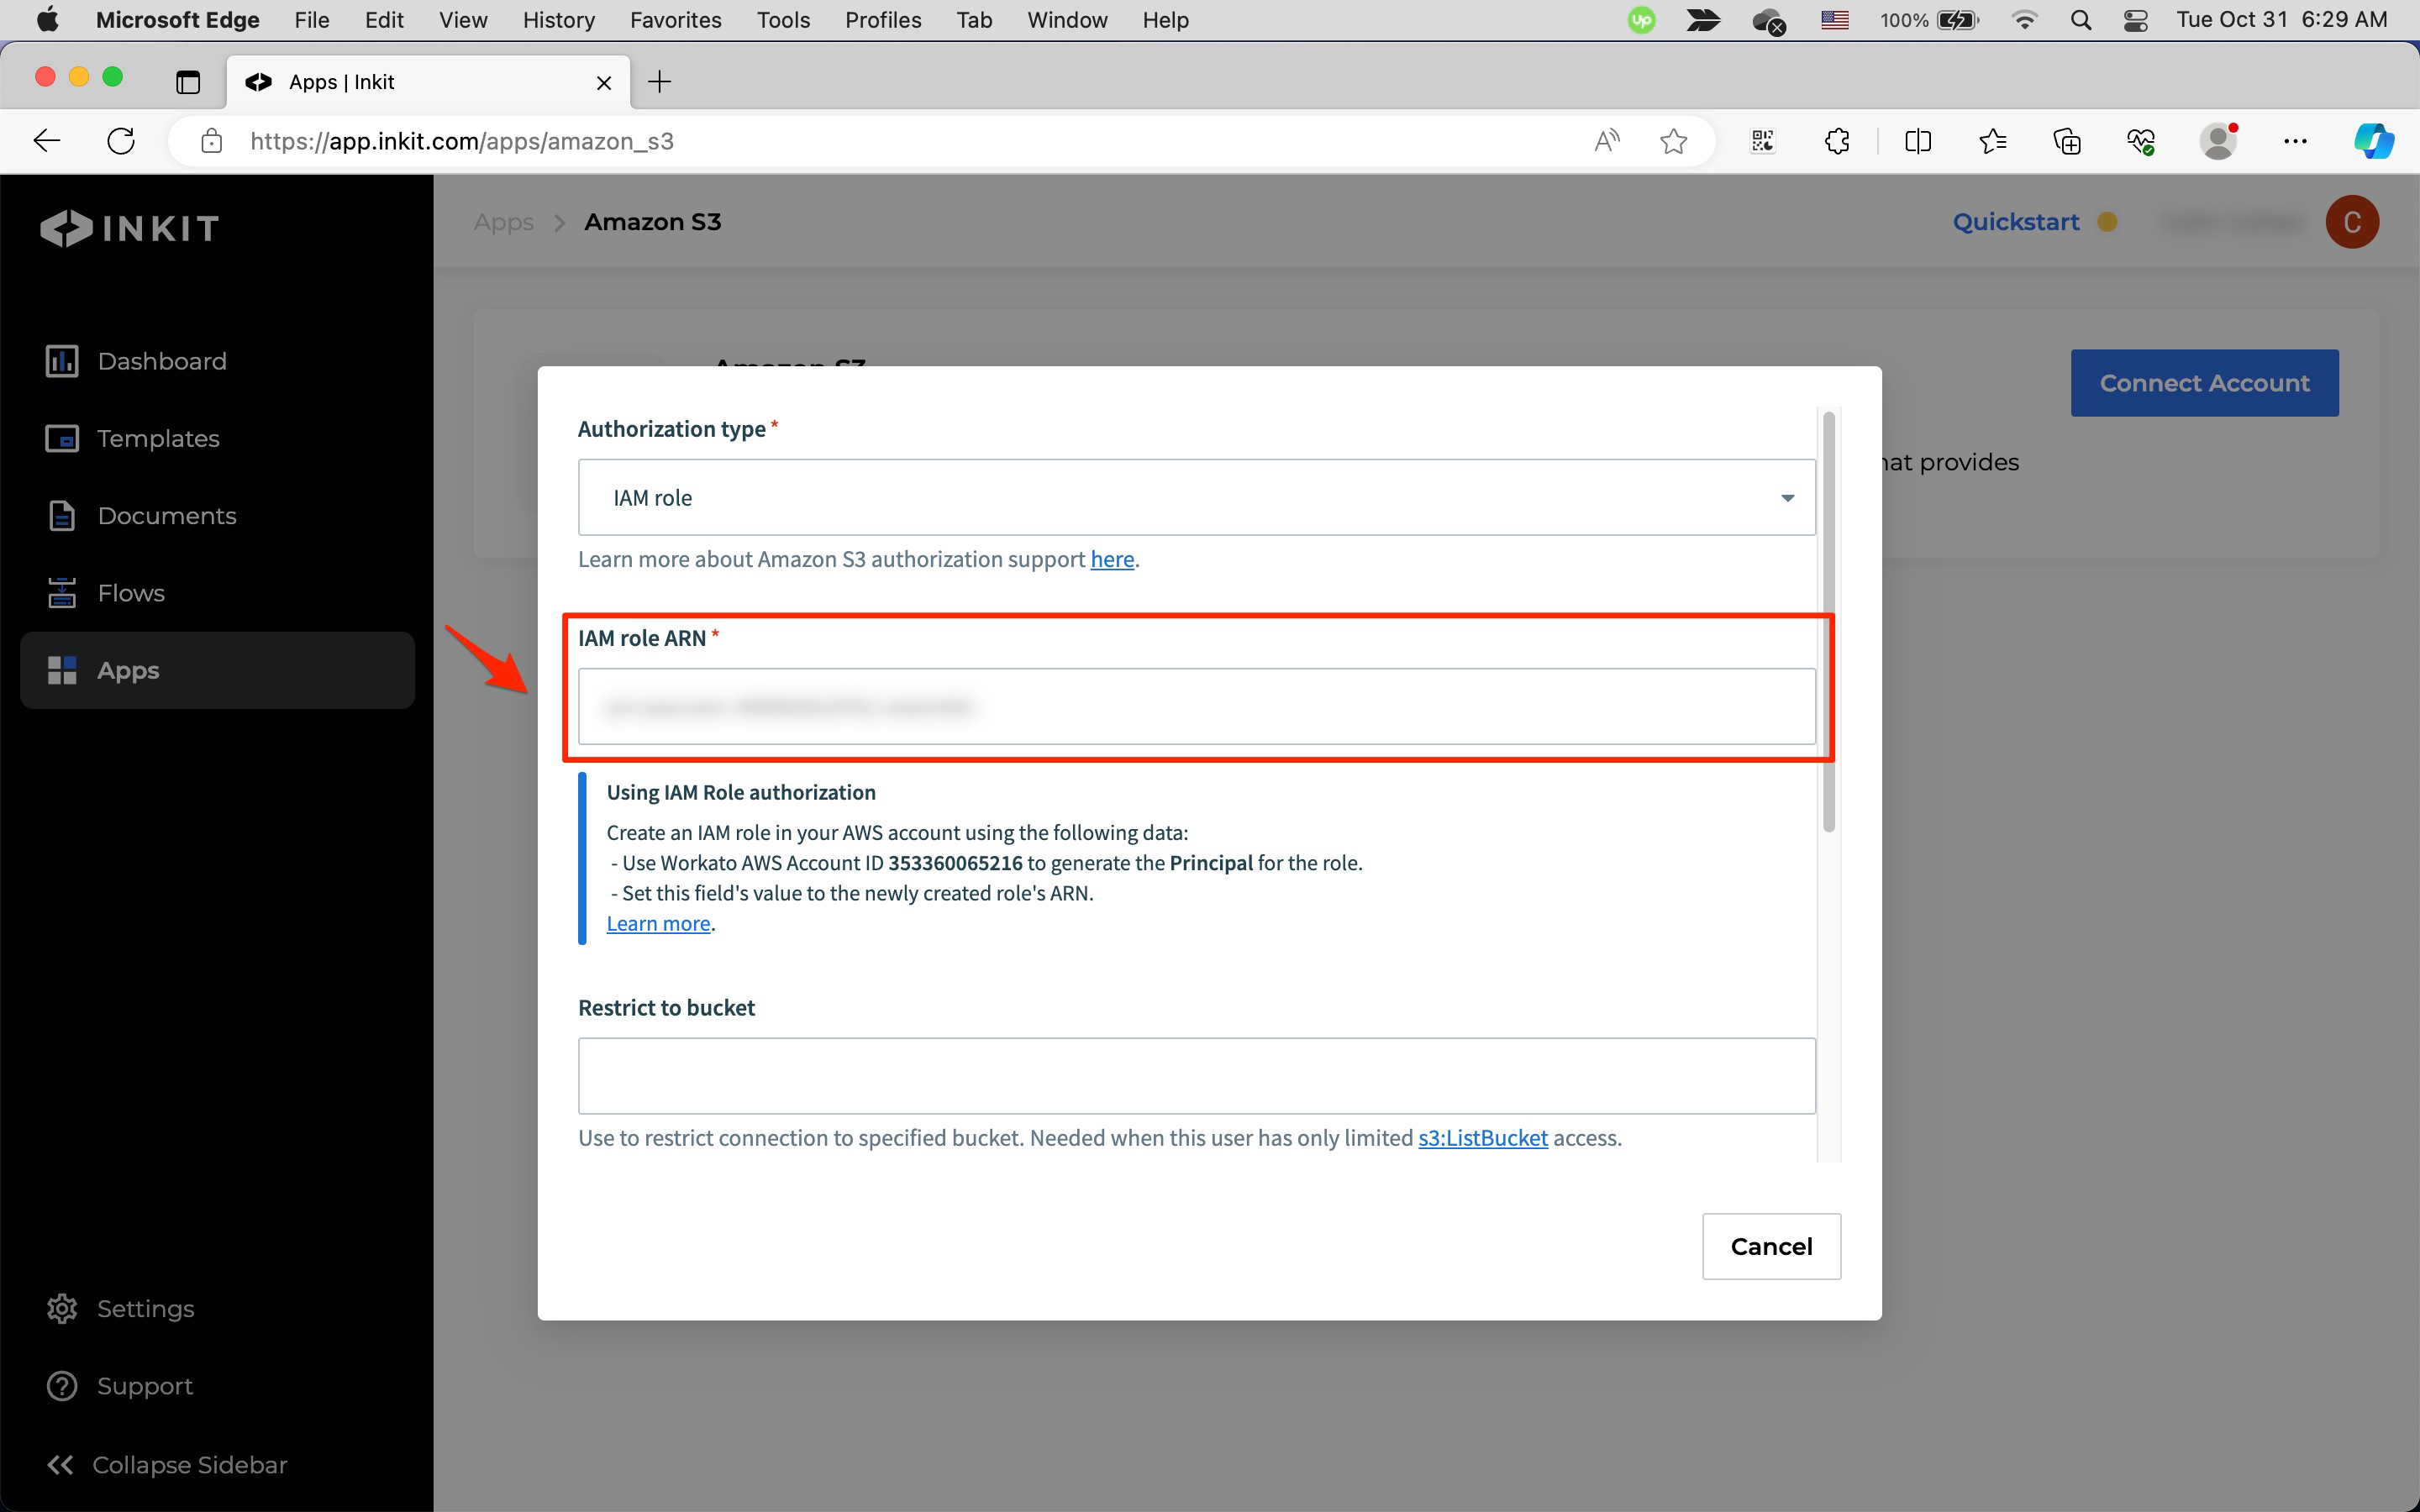
In the dialog box, select one of the following options from the Authorization type dropdown box:
- Access key (Deprecated)
- IAM role
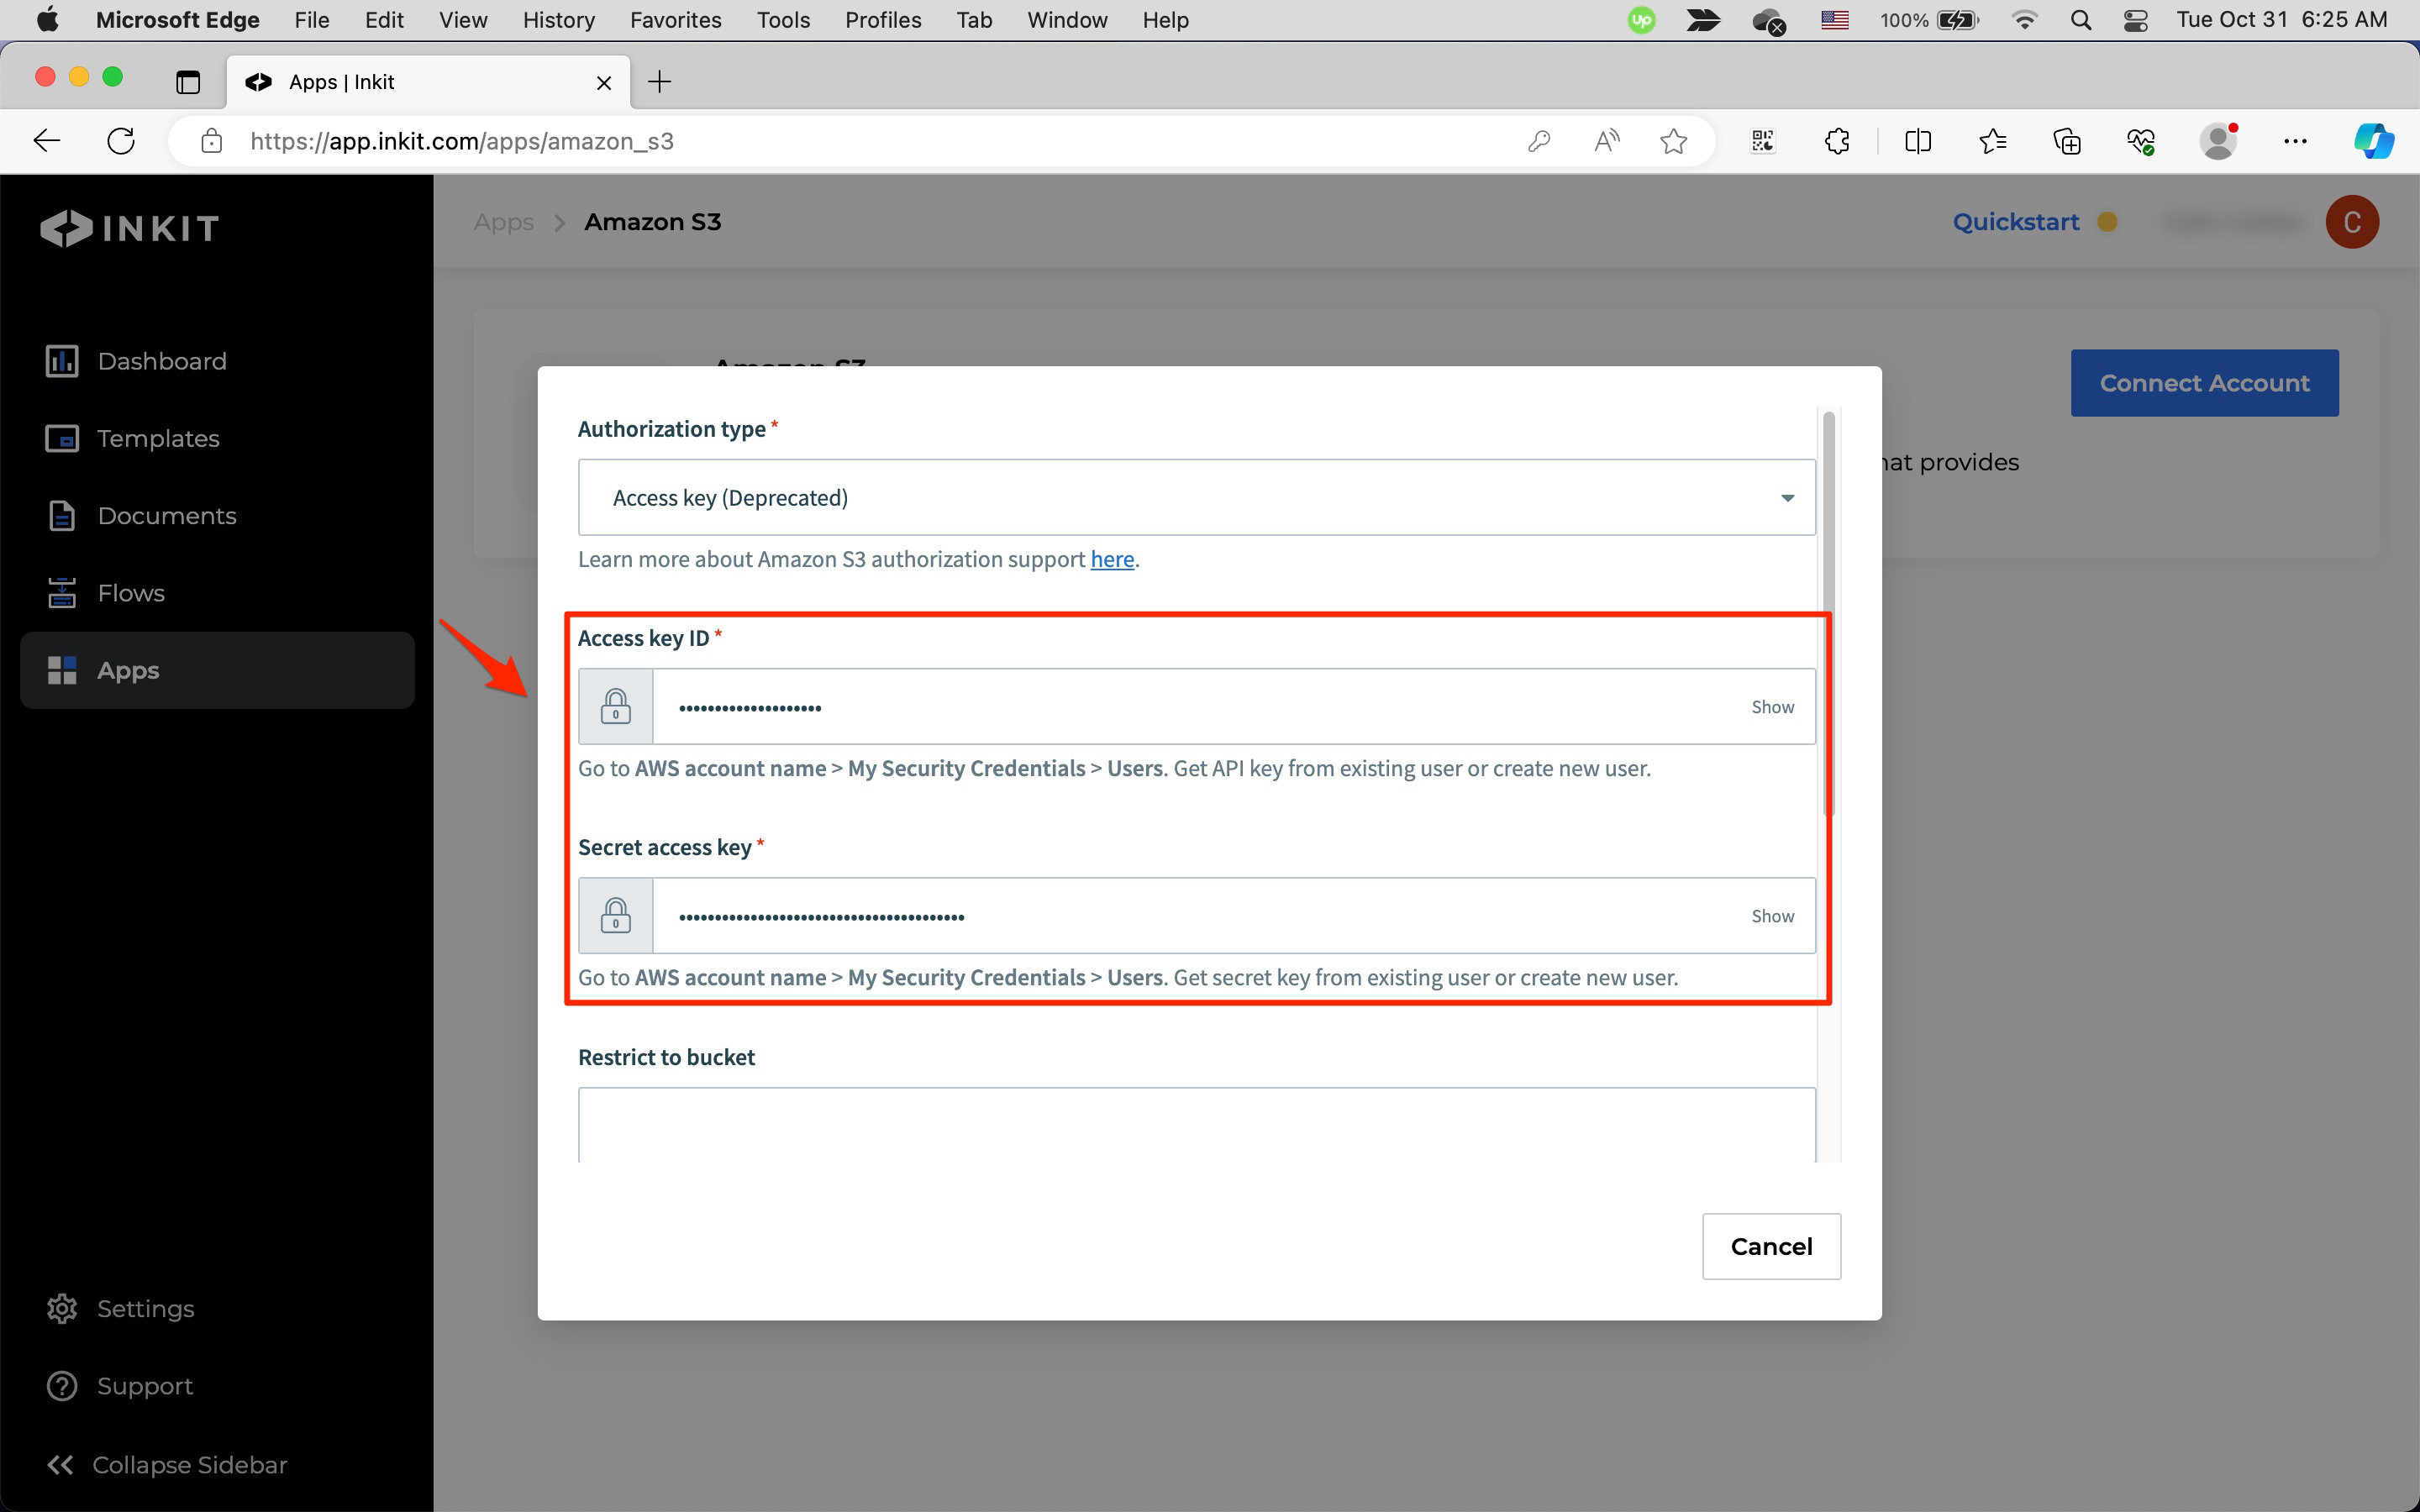
If you select Access key (Deprecated), create an AWS access key and enter its Access key ID and Secret access key.
If you select IAM role, create an IAM role and enter its IAM role ARN.
-
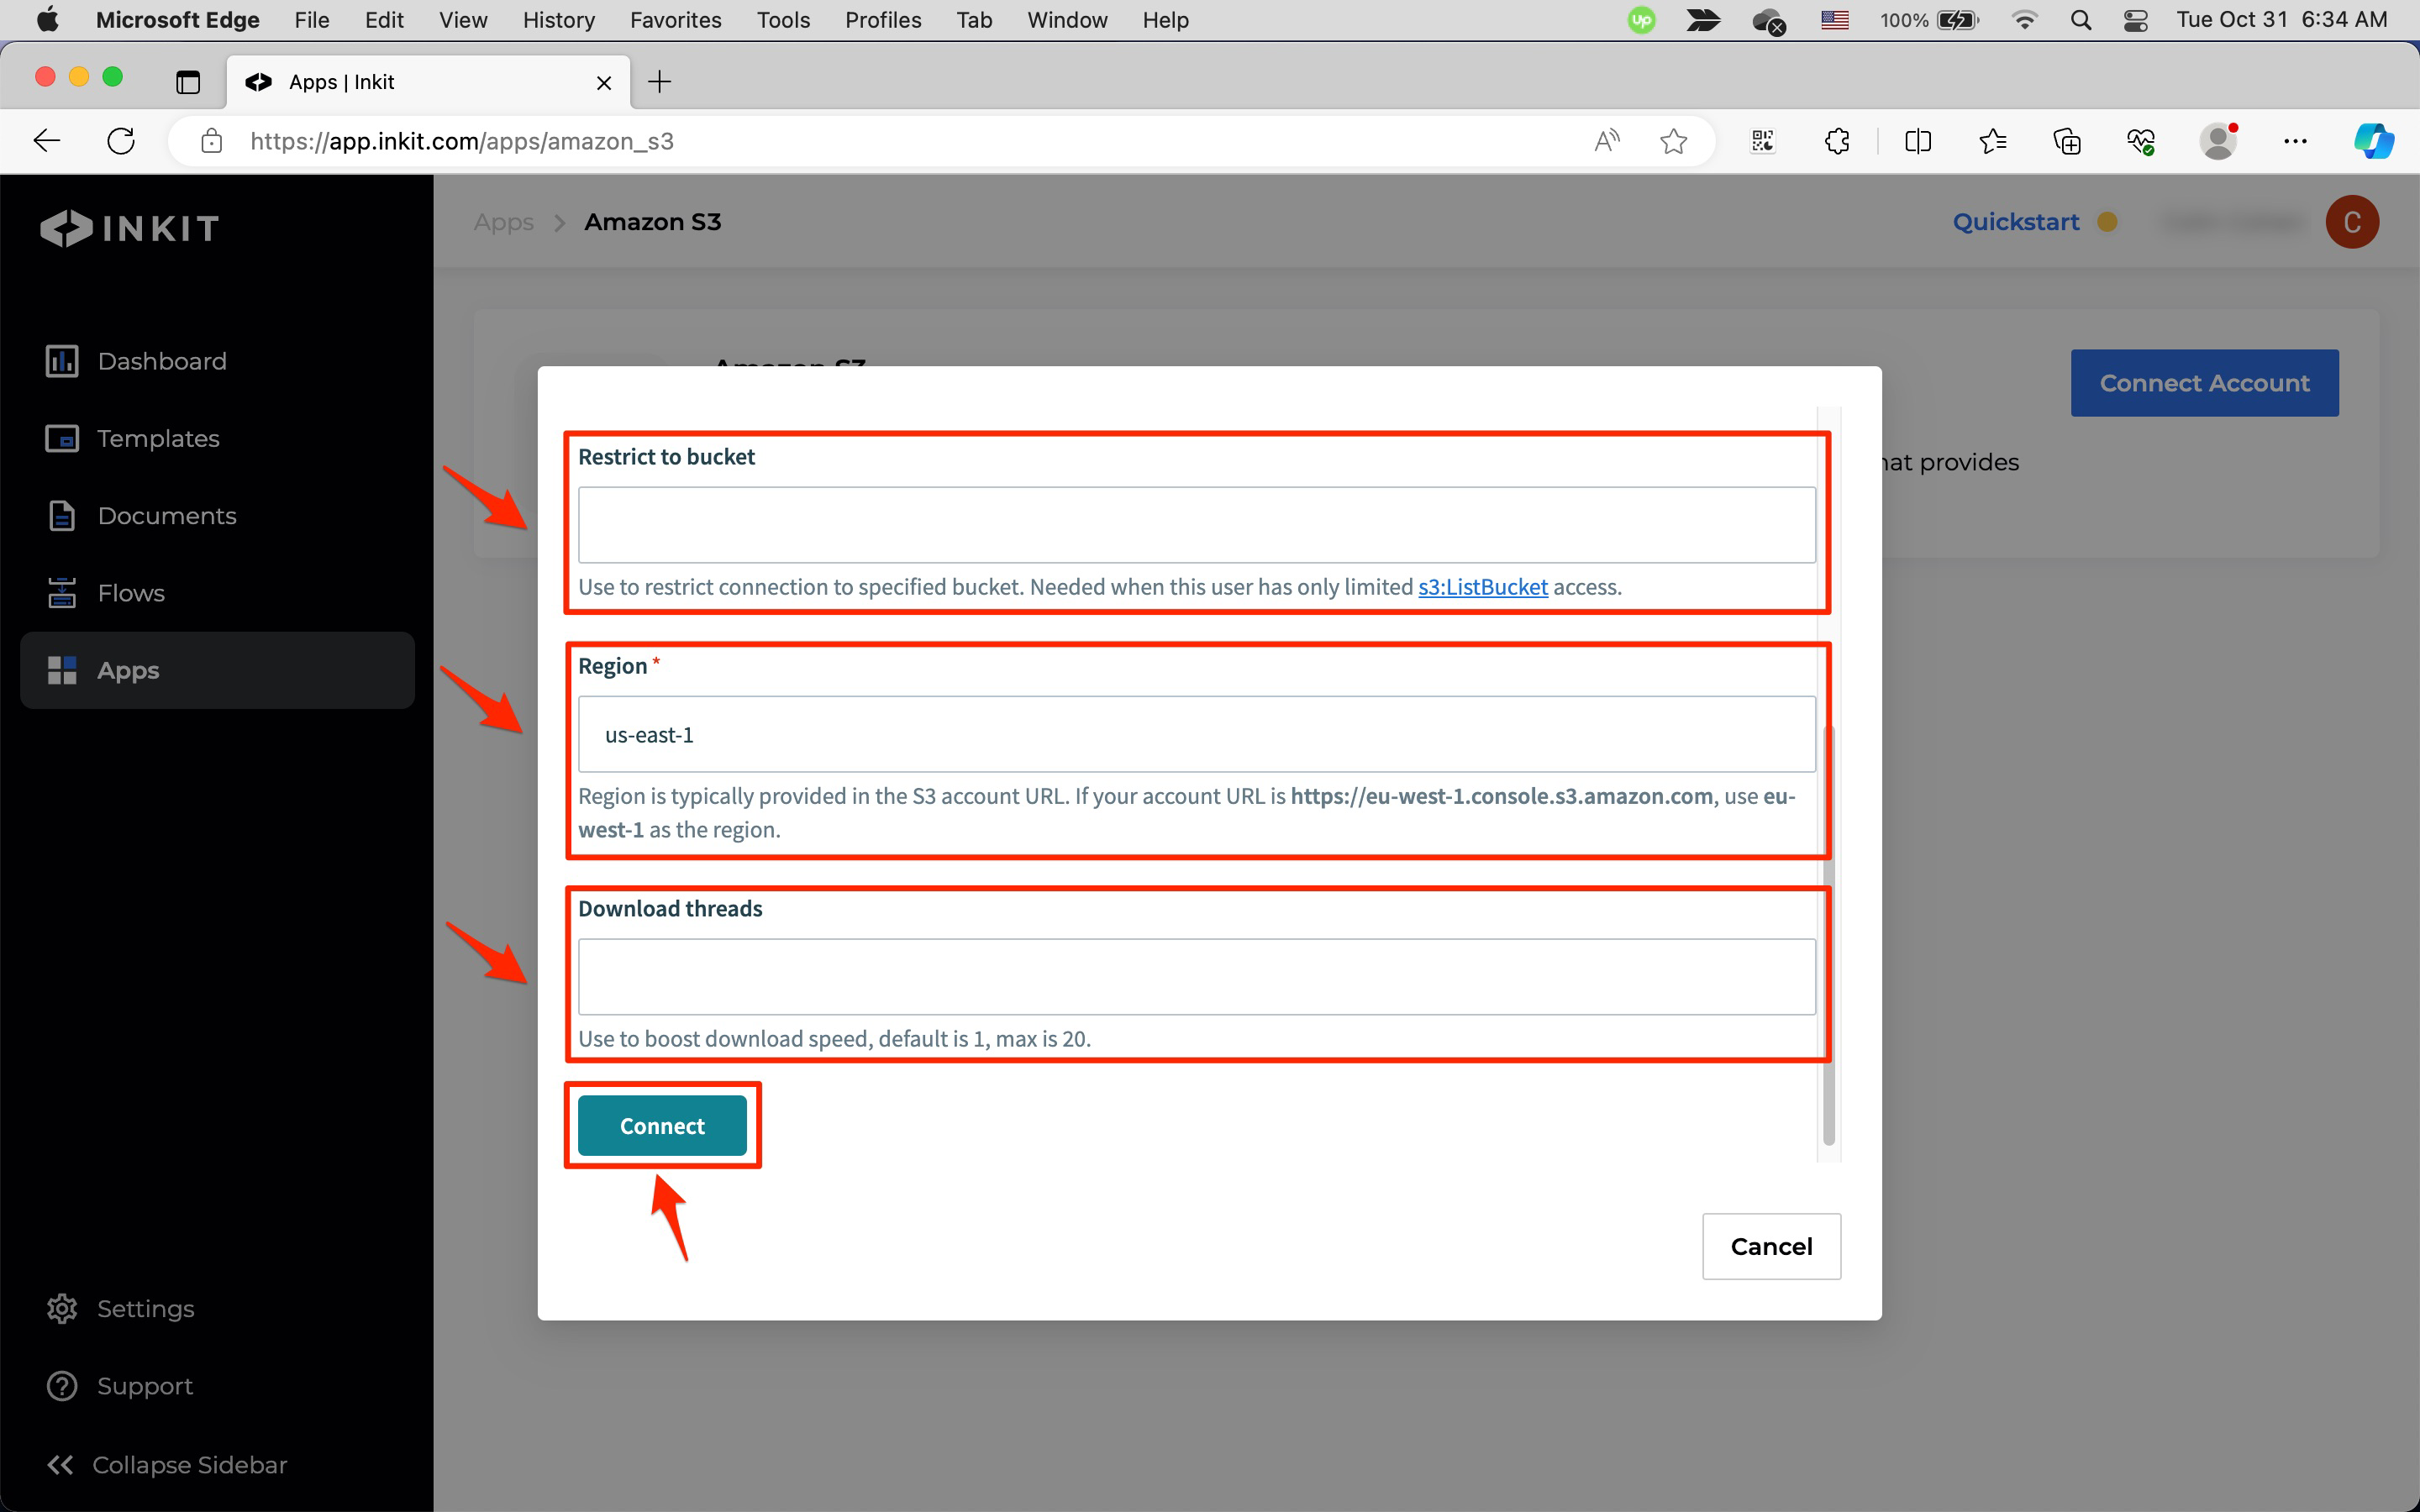
Enter your AWS region in Region. You can find this in the subdomain of your AWS account URL. For example, if your AWS account URL is
https://eu-west-1.console.s3.amazon.com, entereu-west-1.Optionally, if you want to restrict access to a specific S3 bucket, enter its address in Restrict to bucket.
You can also specify the number of download threads in Download threads. The default is
1, but you can increase it up to20, which will increase download speeds.Finally, click Connect.
Creating an AWS access key for use in Inkit
To create an AWS access key for use in Inkit, do the following:
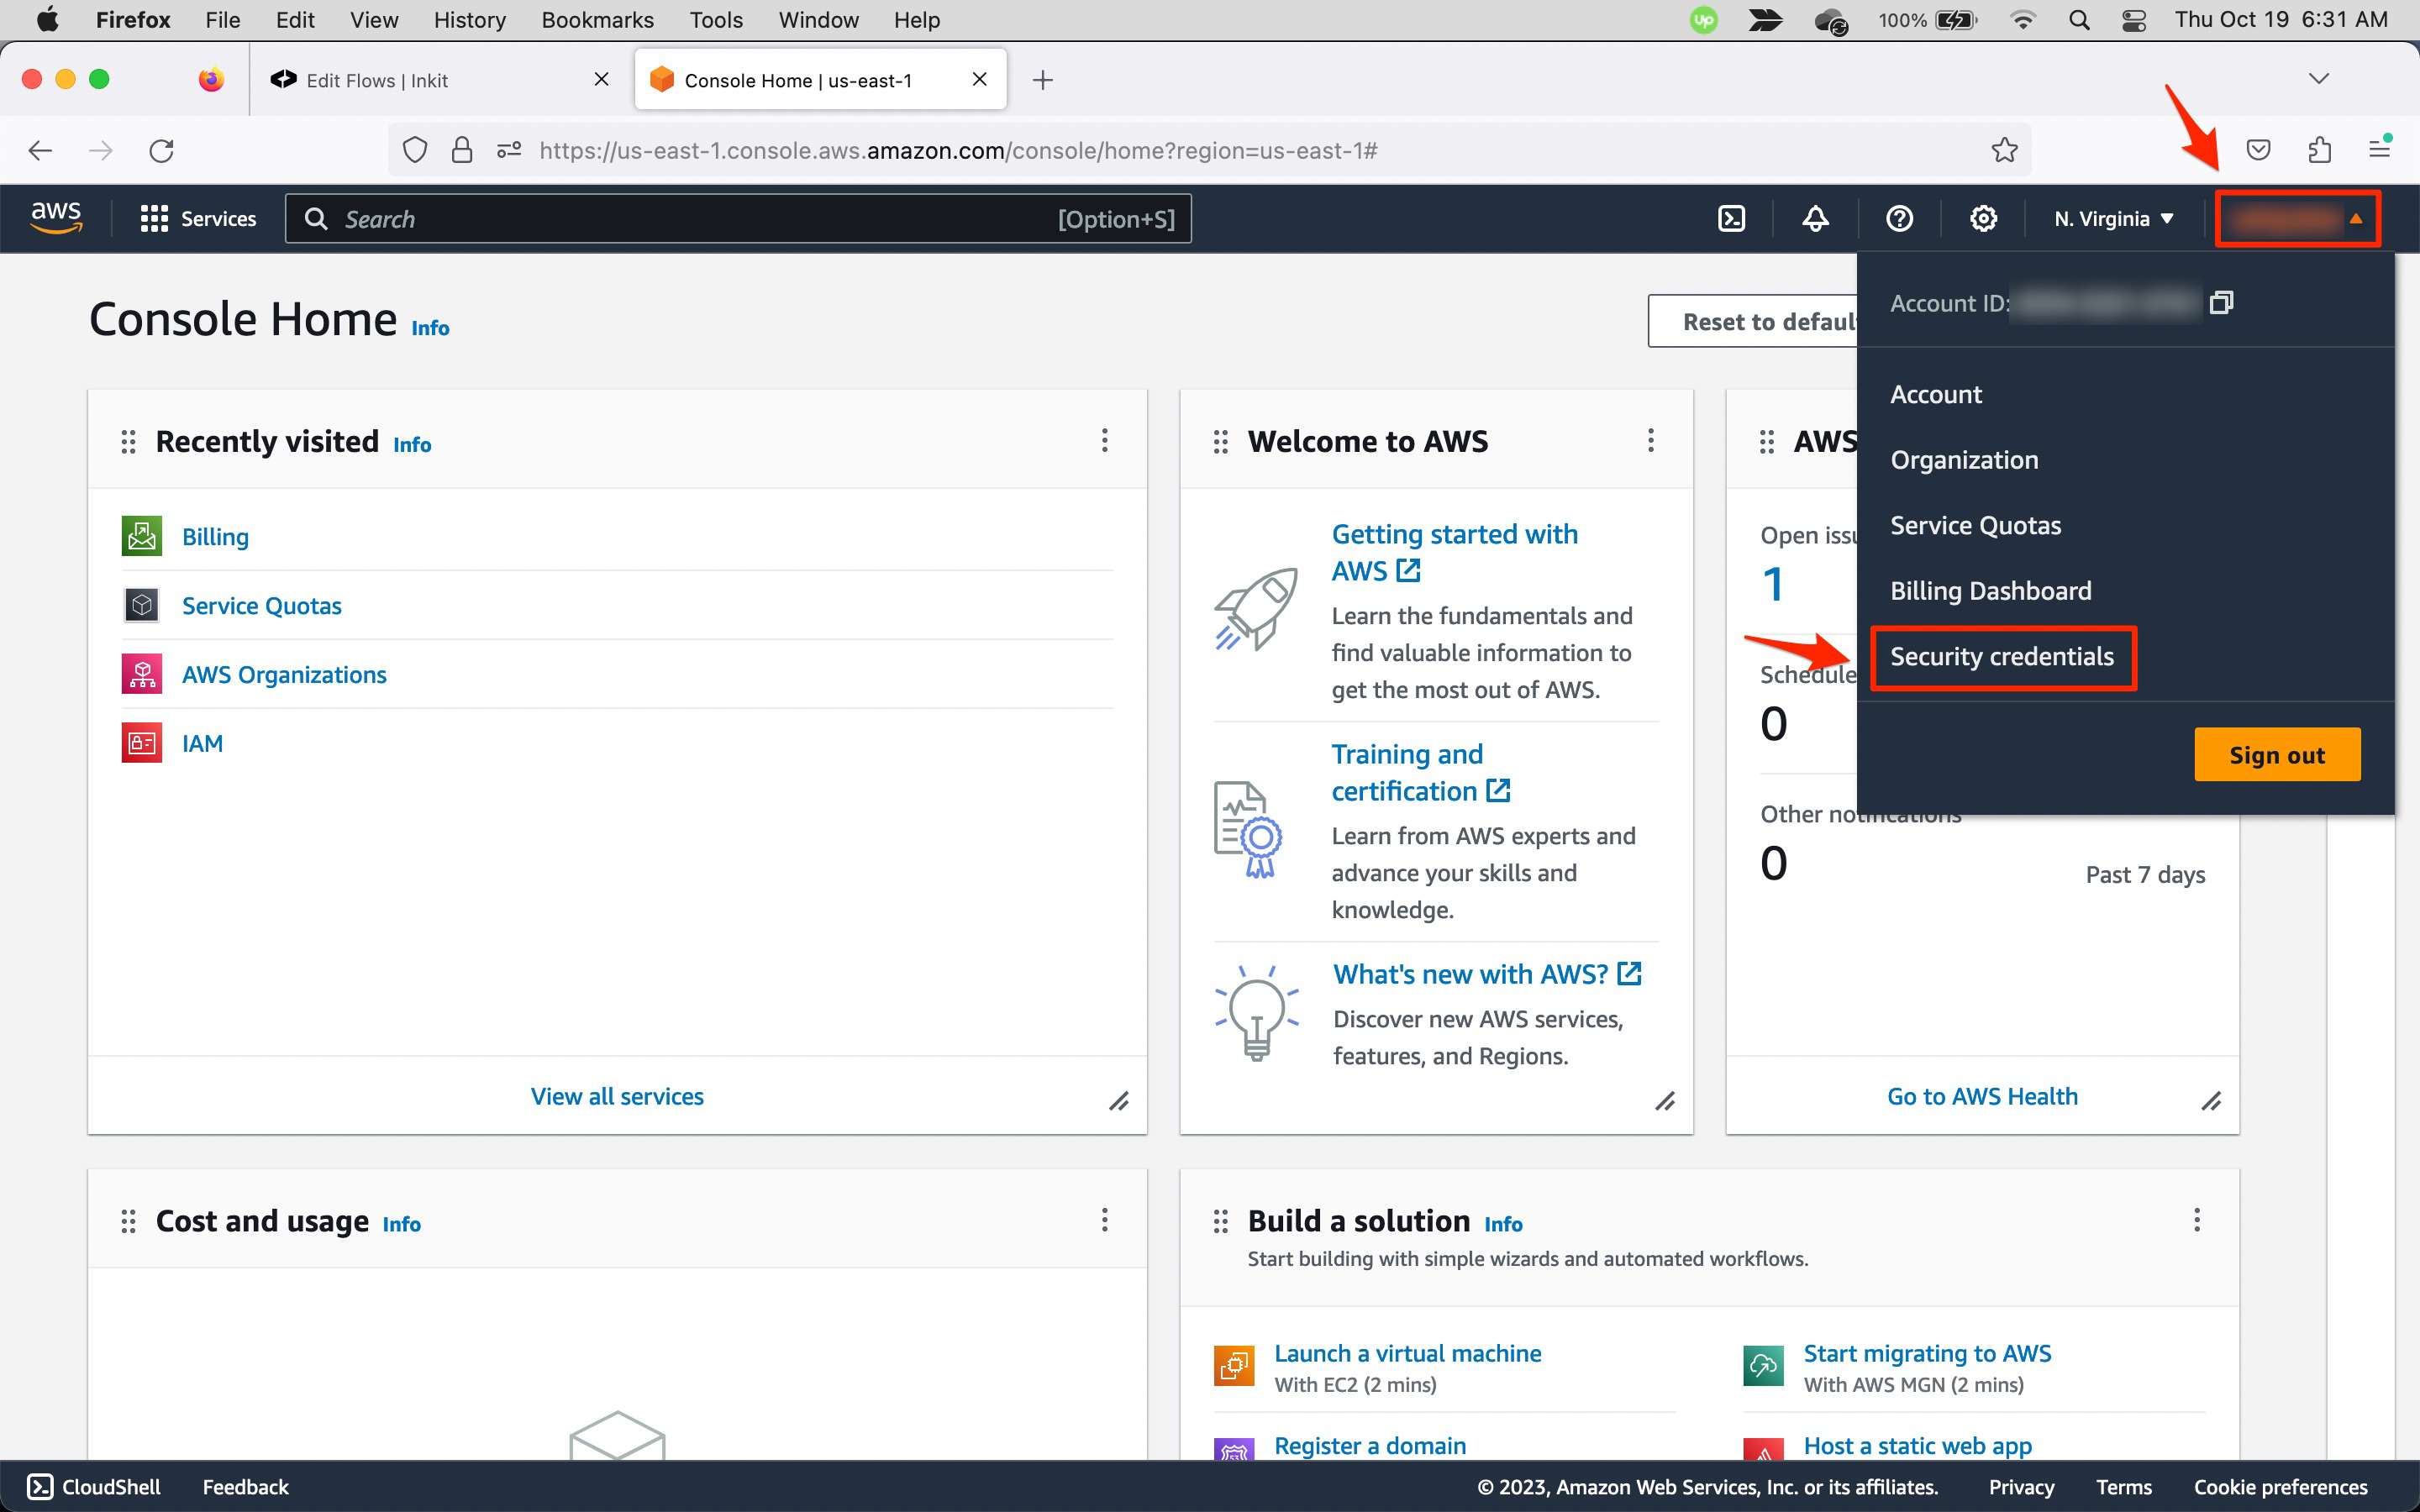
-
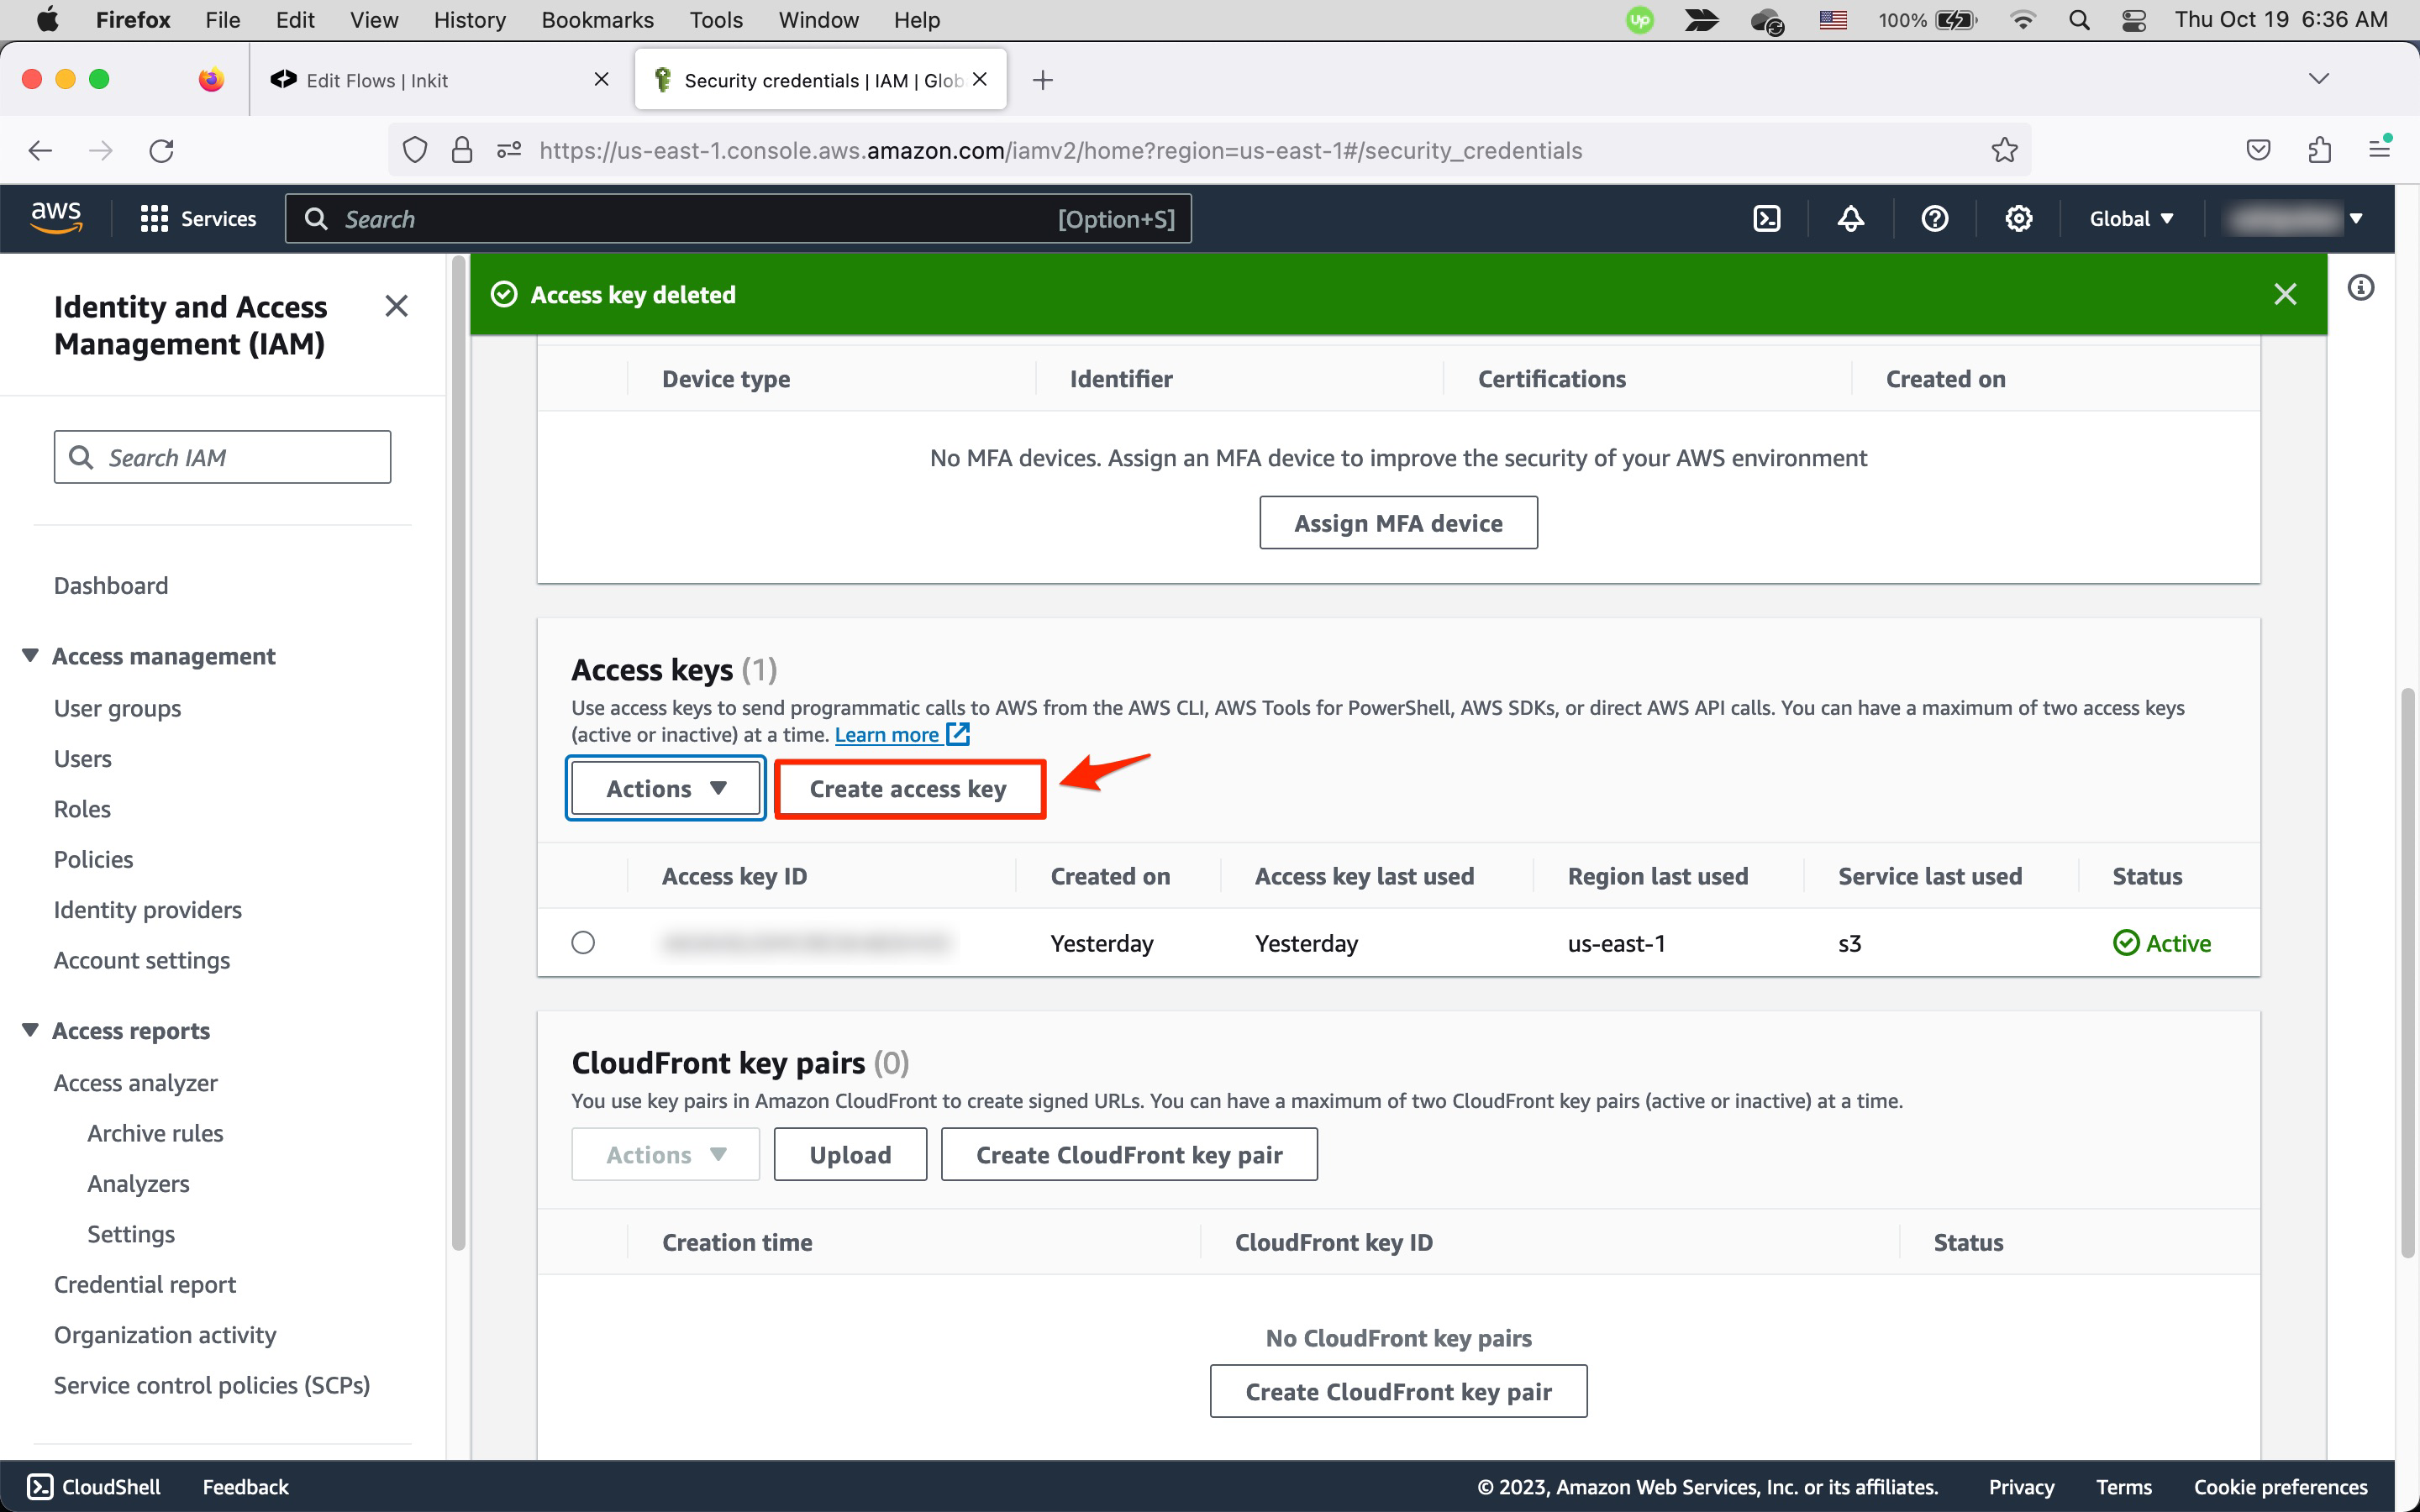
In your AWS console, click your profile and then click Security credentials.

-
In the My security credentials page, click Create access key in the Access keys panel.
-
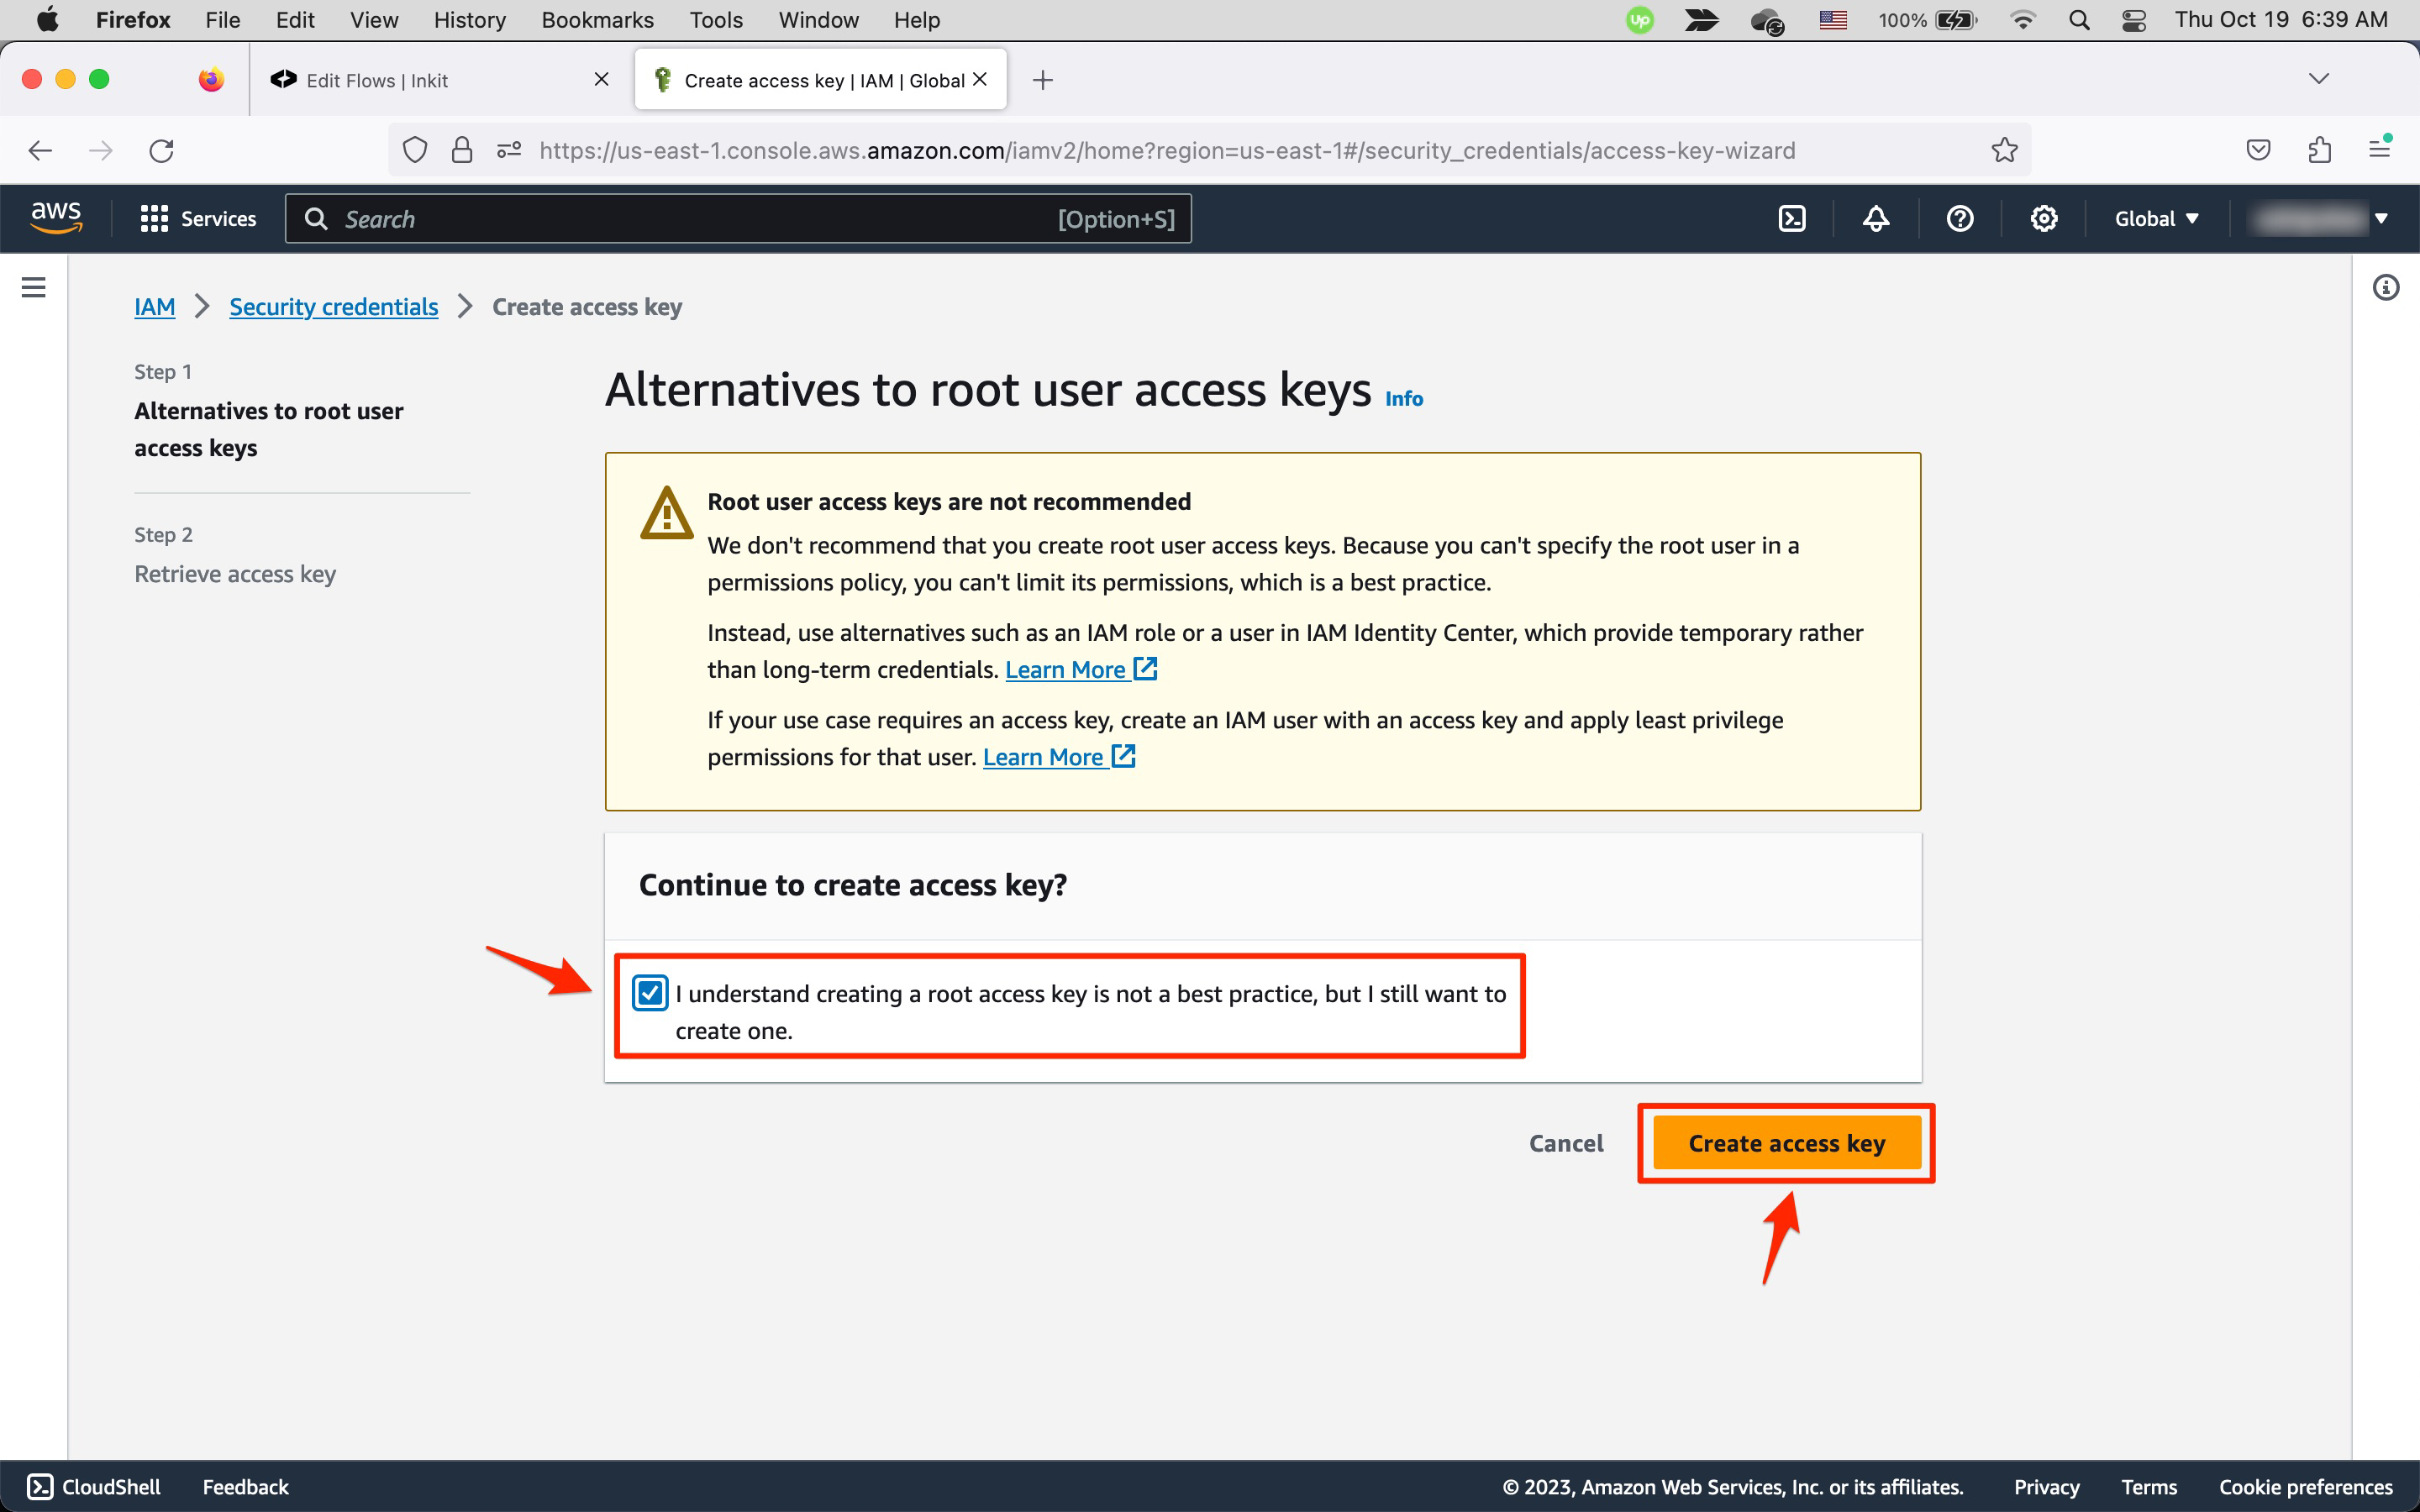
In the Alternatives to root user access keys page, click on I understand creating a root access key is not a best practice, but I still want to create one and then click Create access key.
-
In the Retrieve access key page, copy your Access key and Secret access key. You can also download them by clicking Download .csv file.
Finally, click Done.
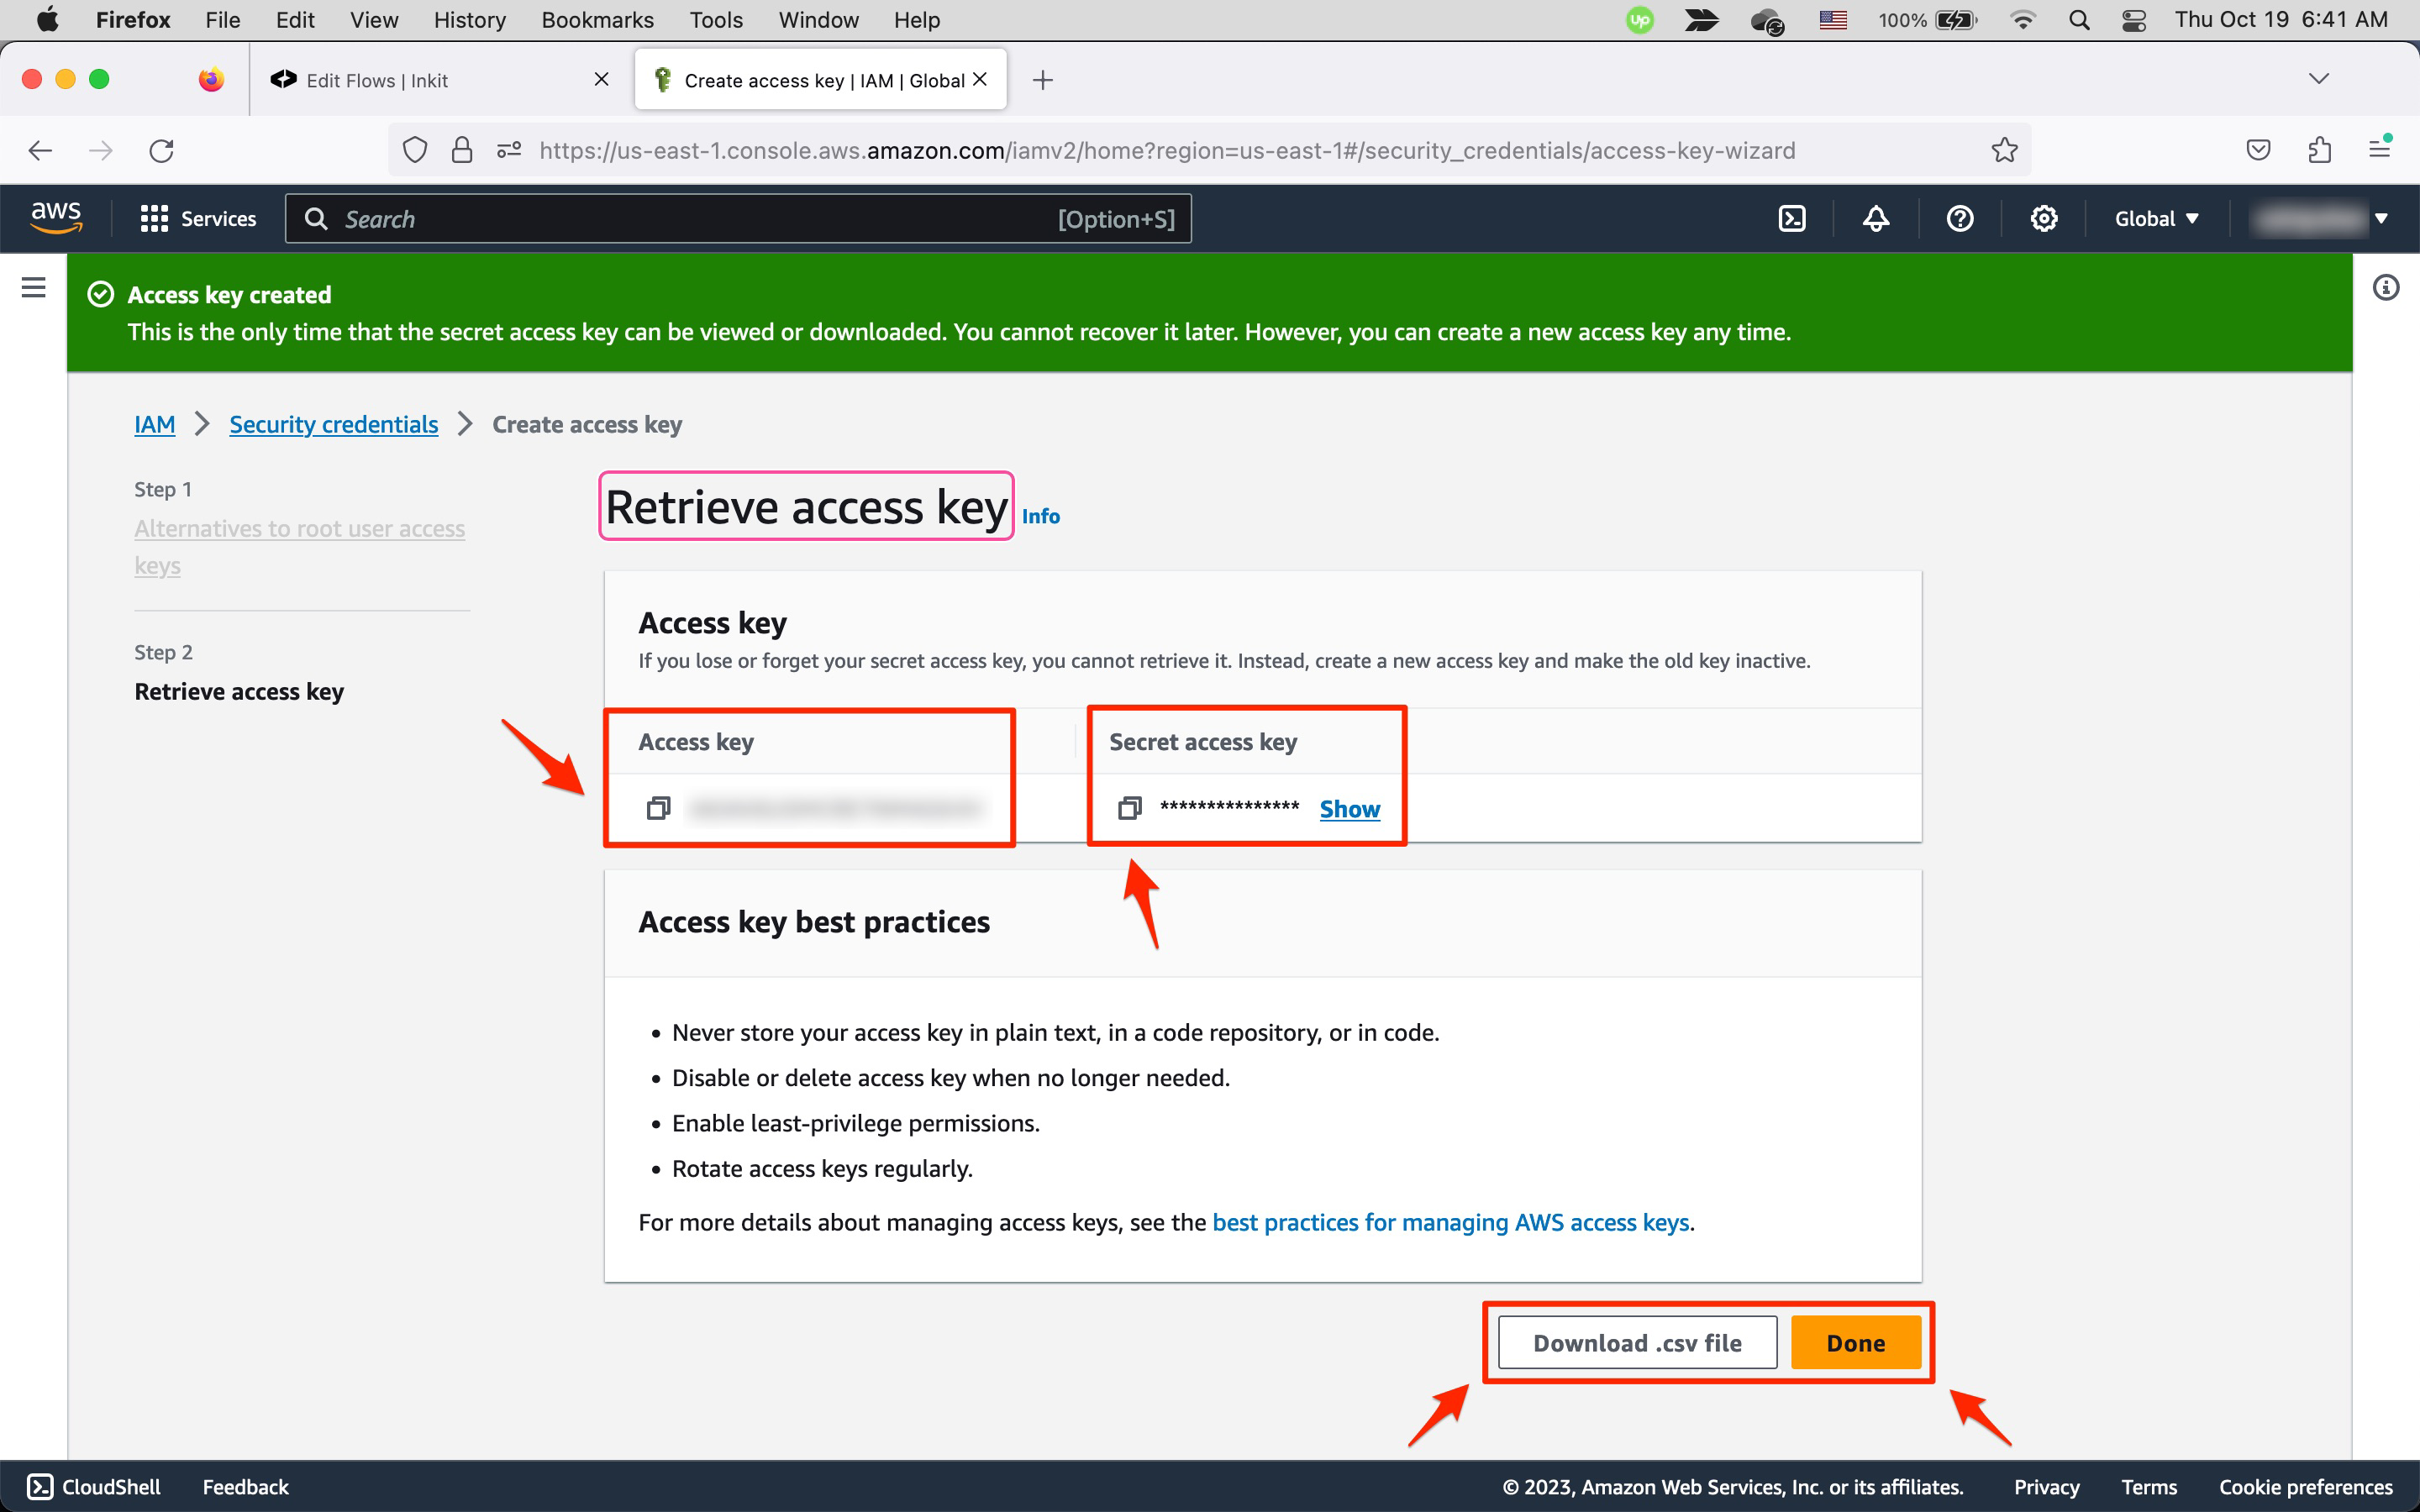
You can only retrieve your Secret access key once, so you should store it in a secure location. If you lose it, you will have to generate a new access key.
Creating an AWS IAM role for use in Inkit
To create an AWS IAM role for use in Inkit, do the following:
-
In your AWS console, click your profile and then click Security credentials.
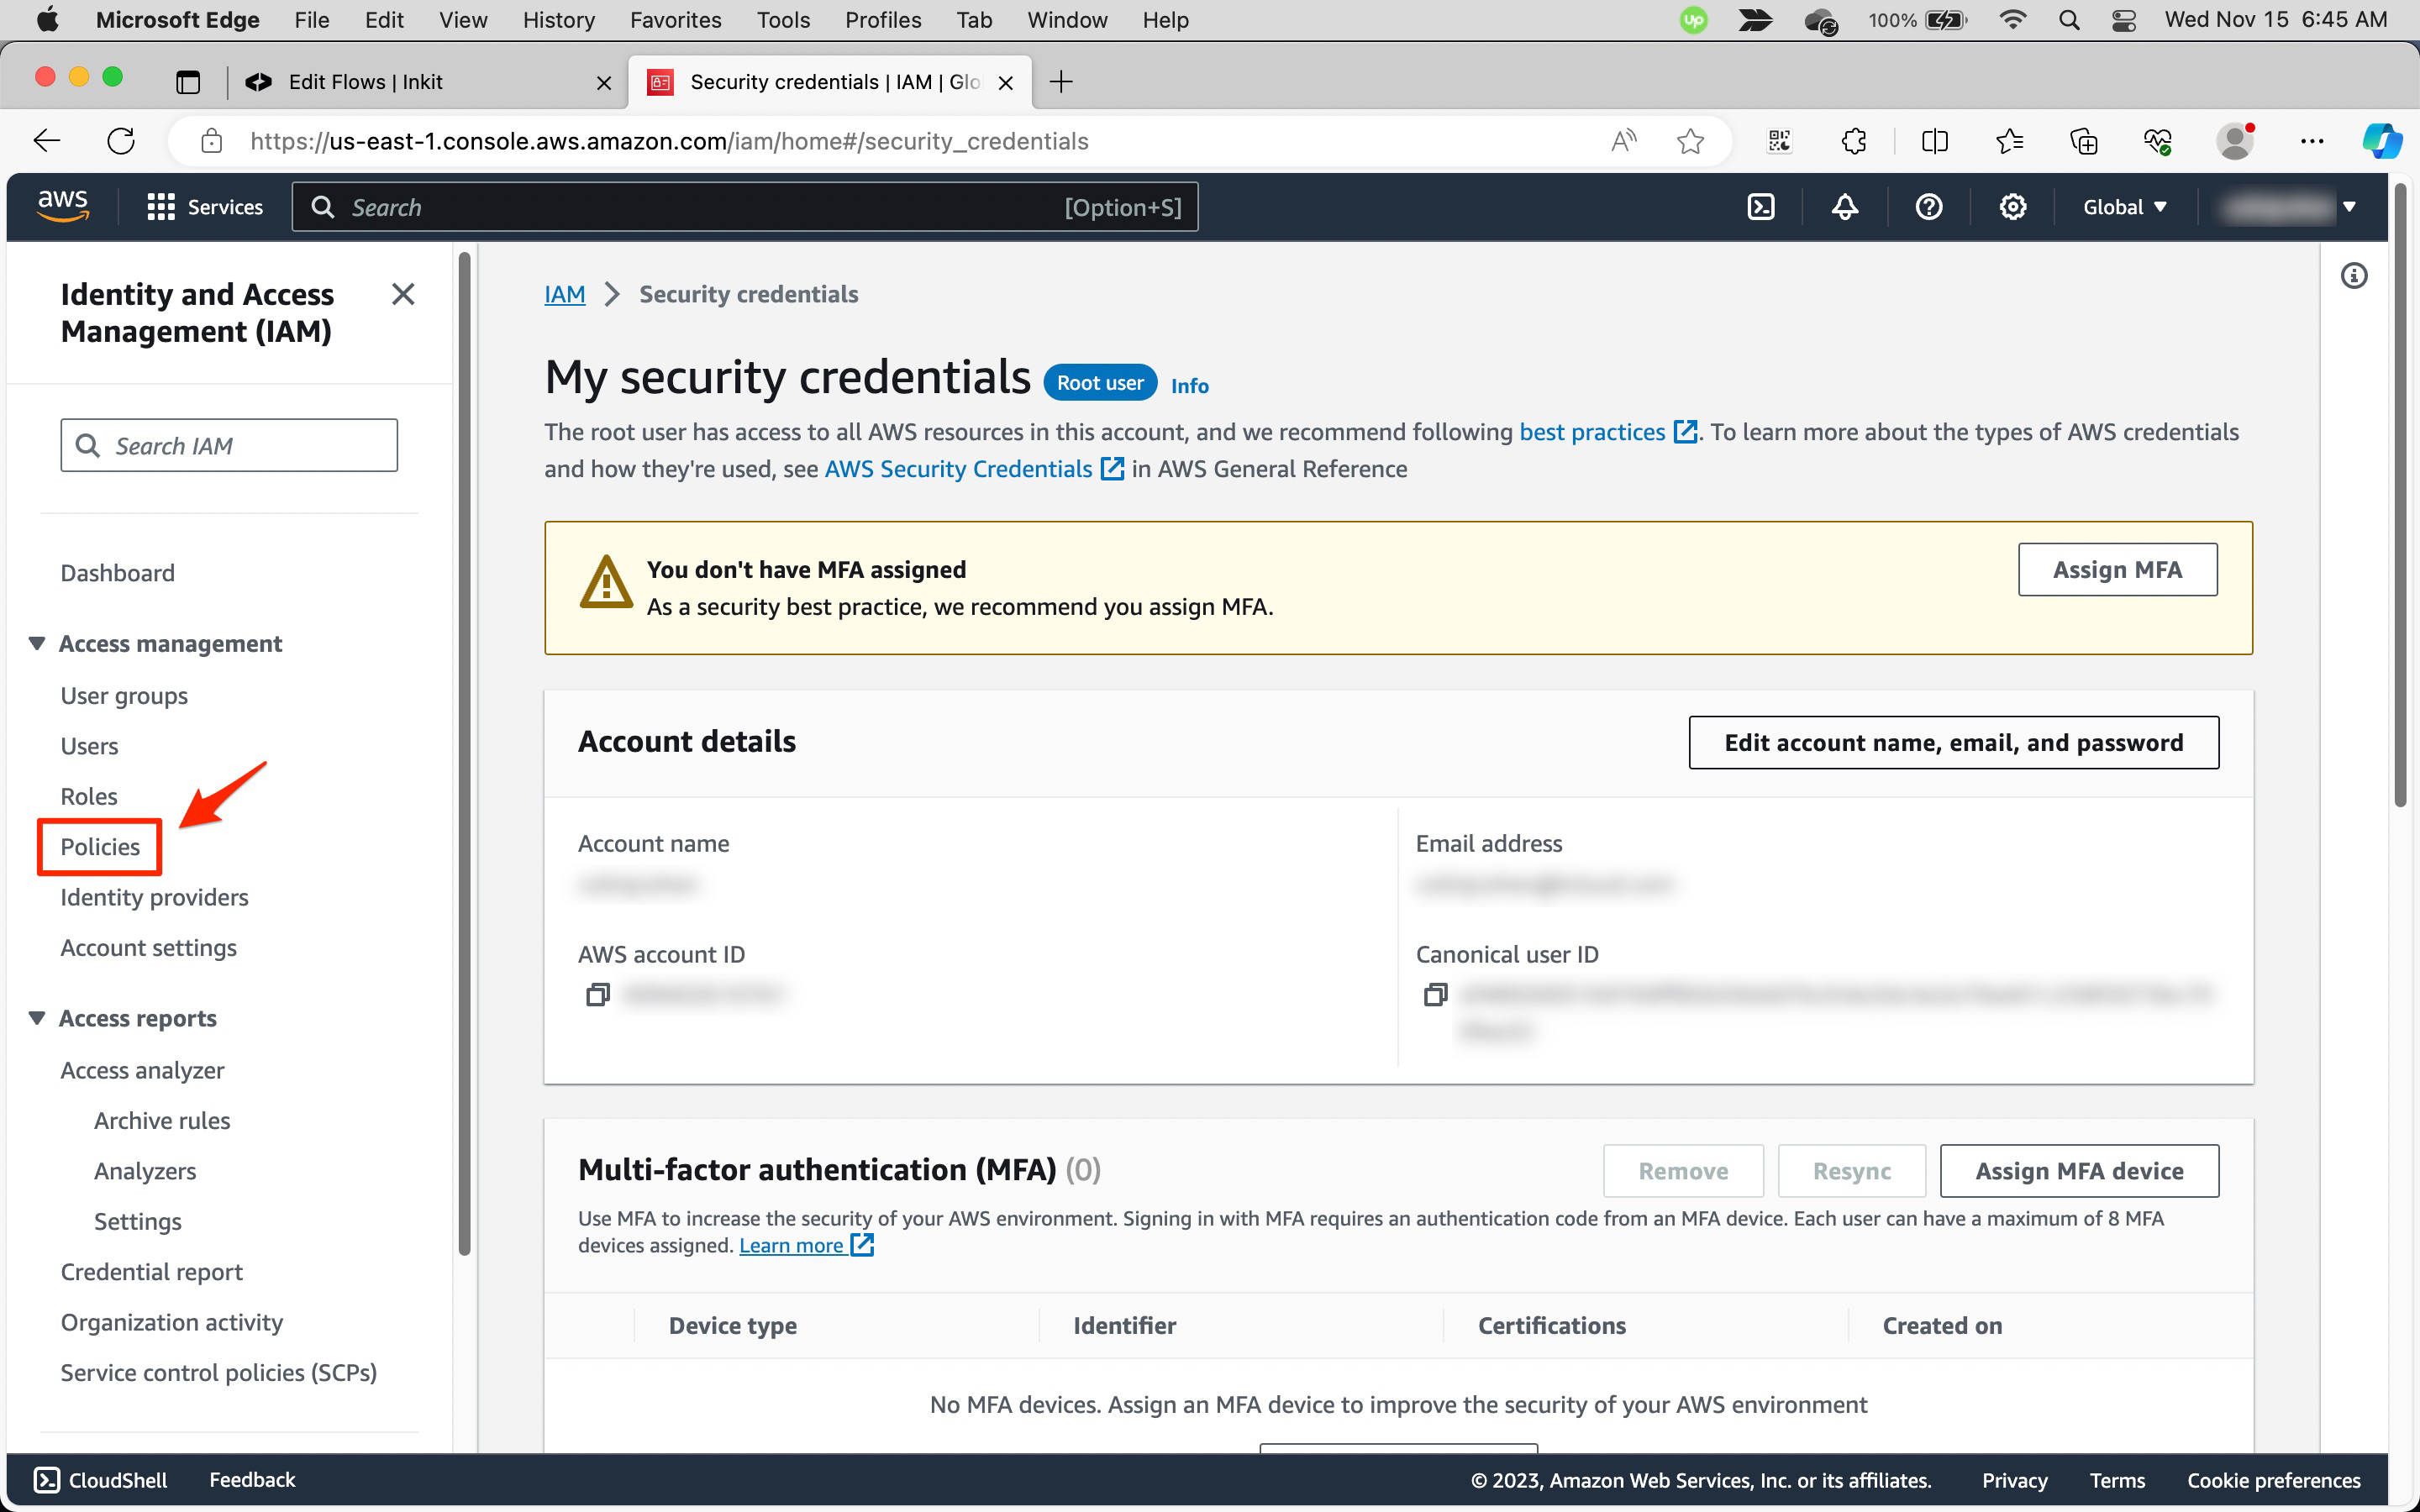
-
In the My security credentials page, select Policies in the left sidebar.
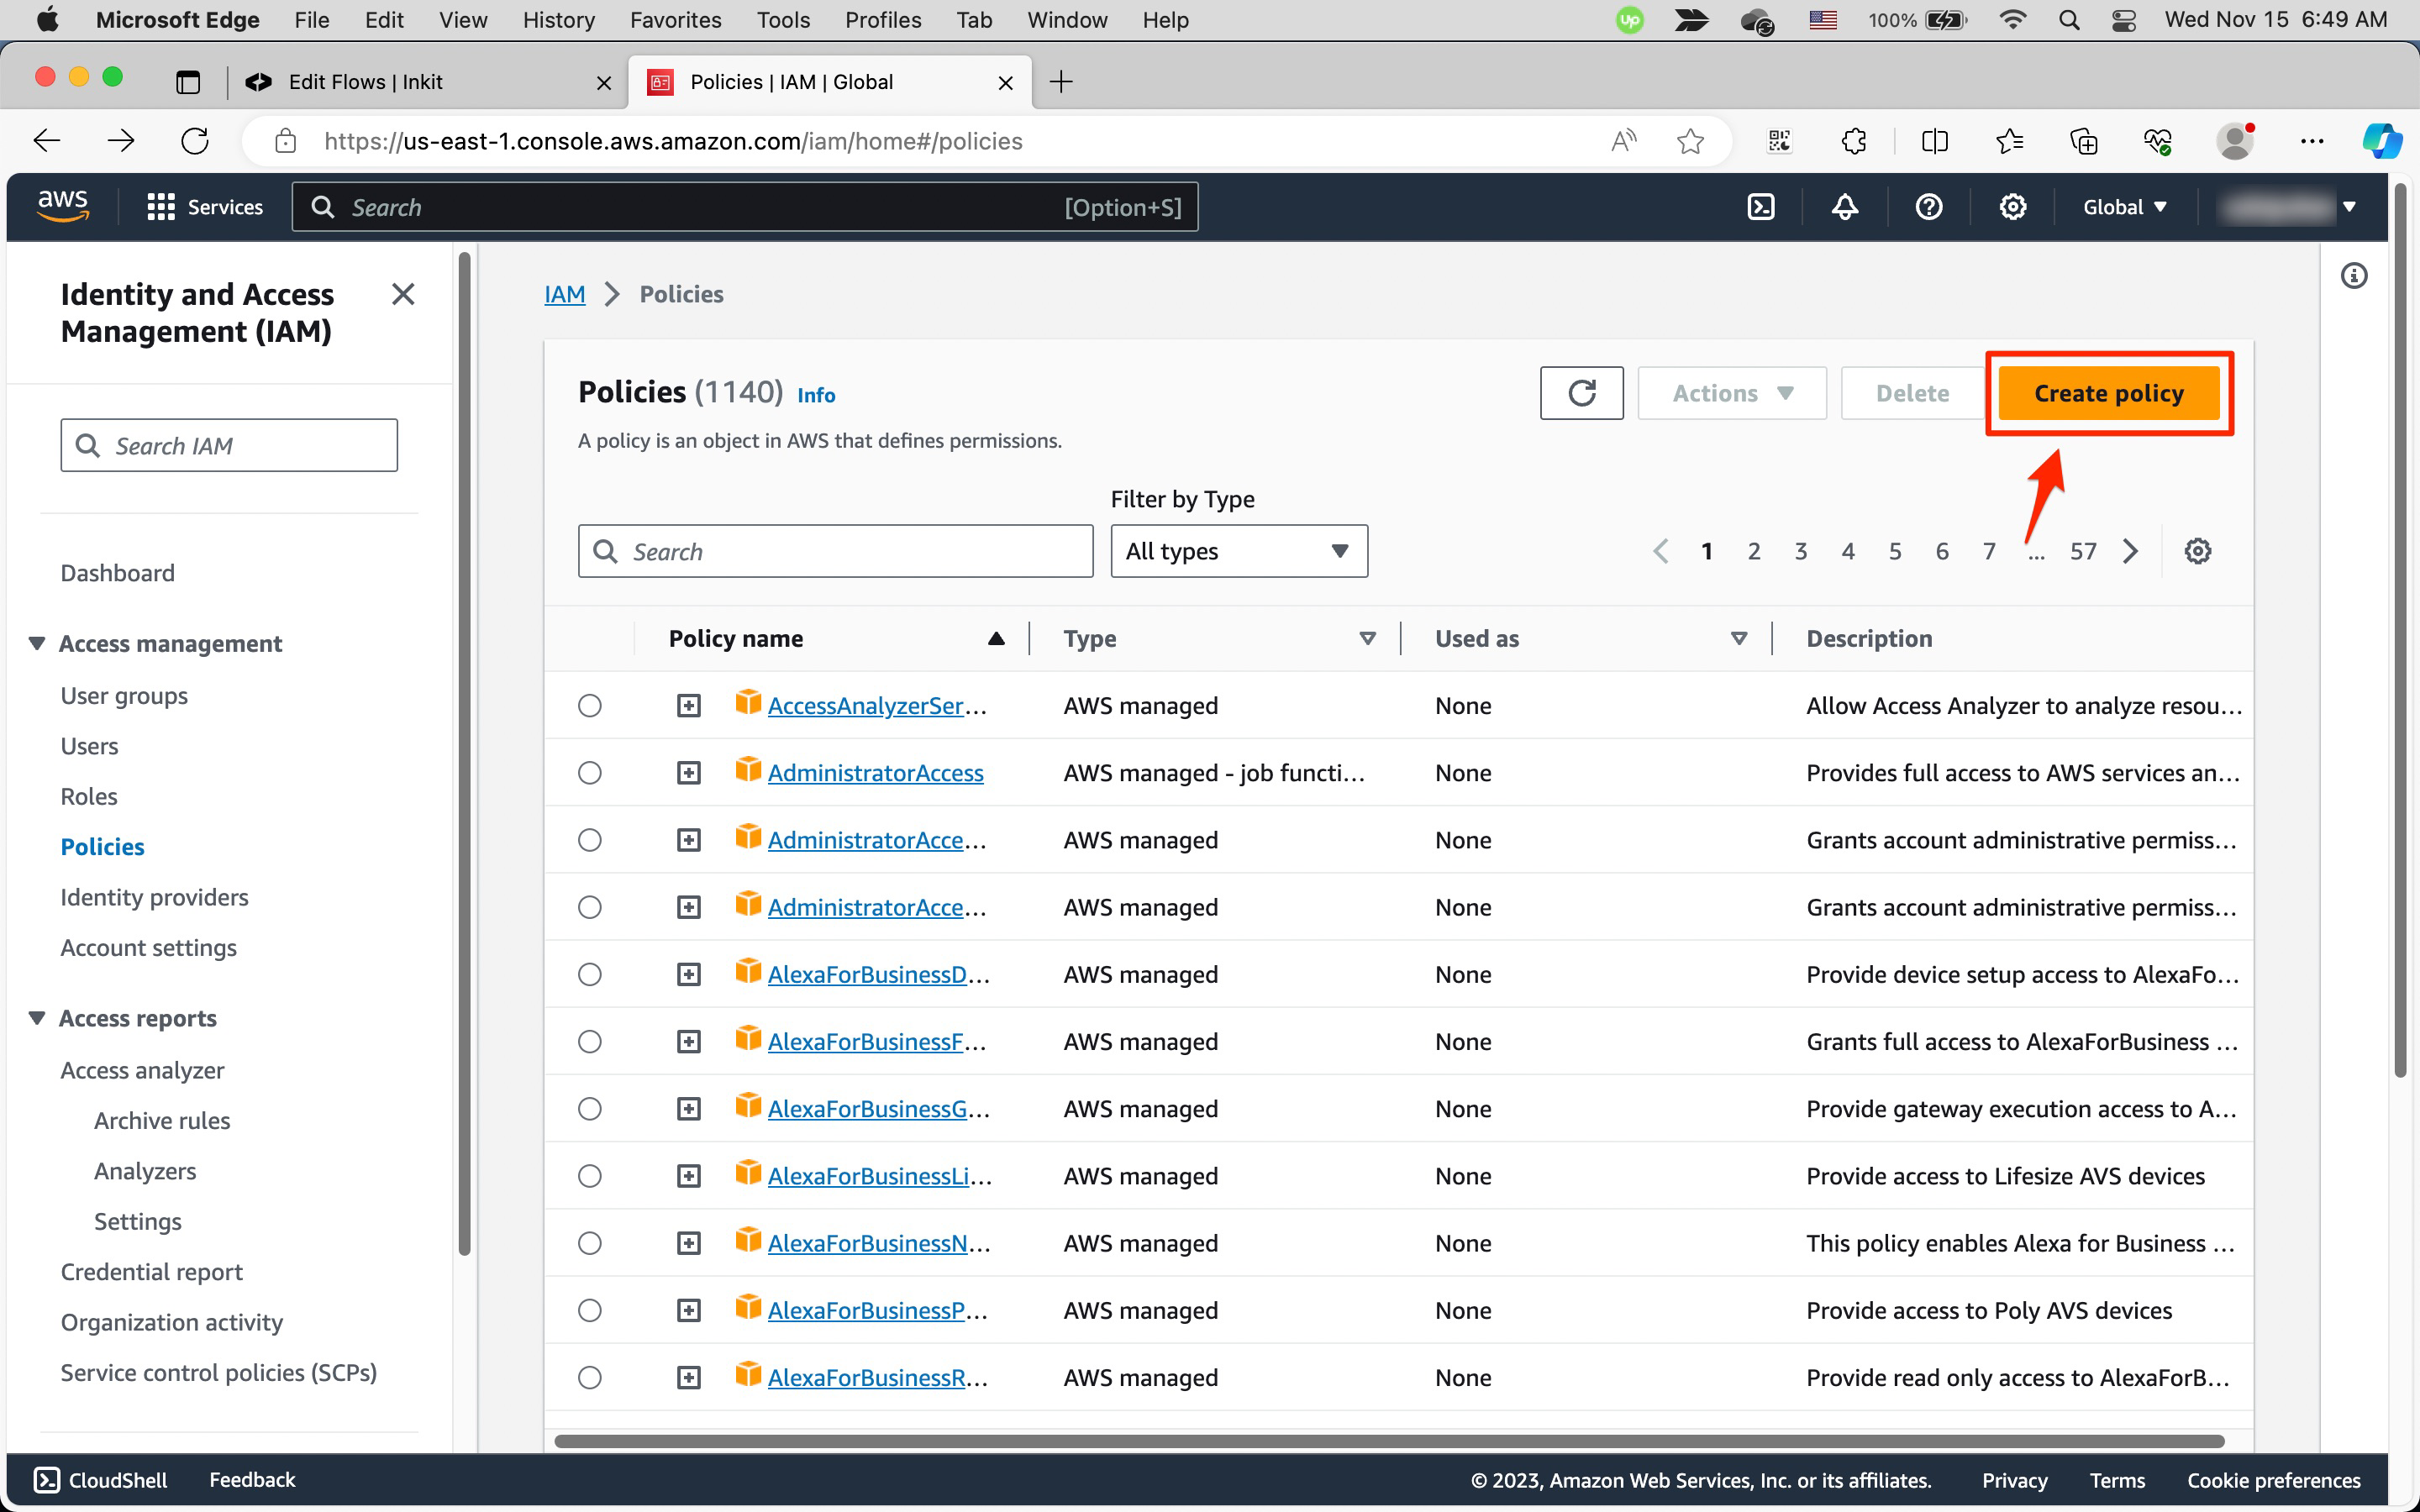
-
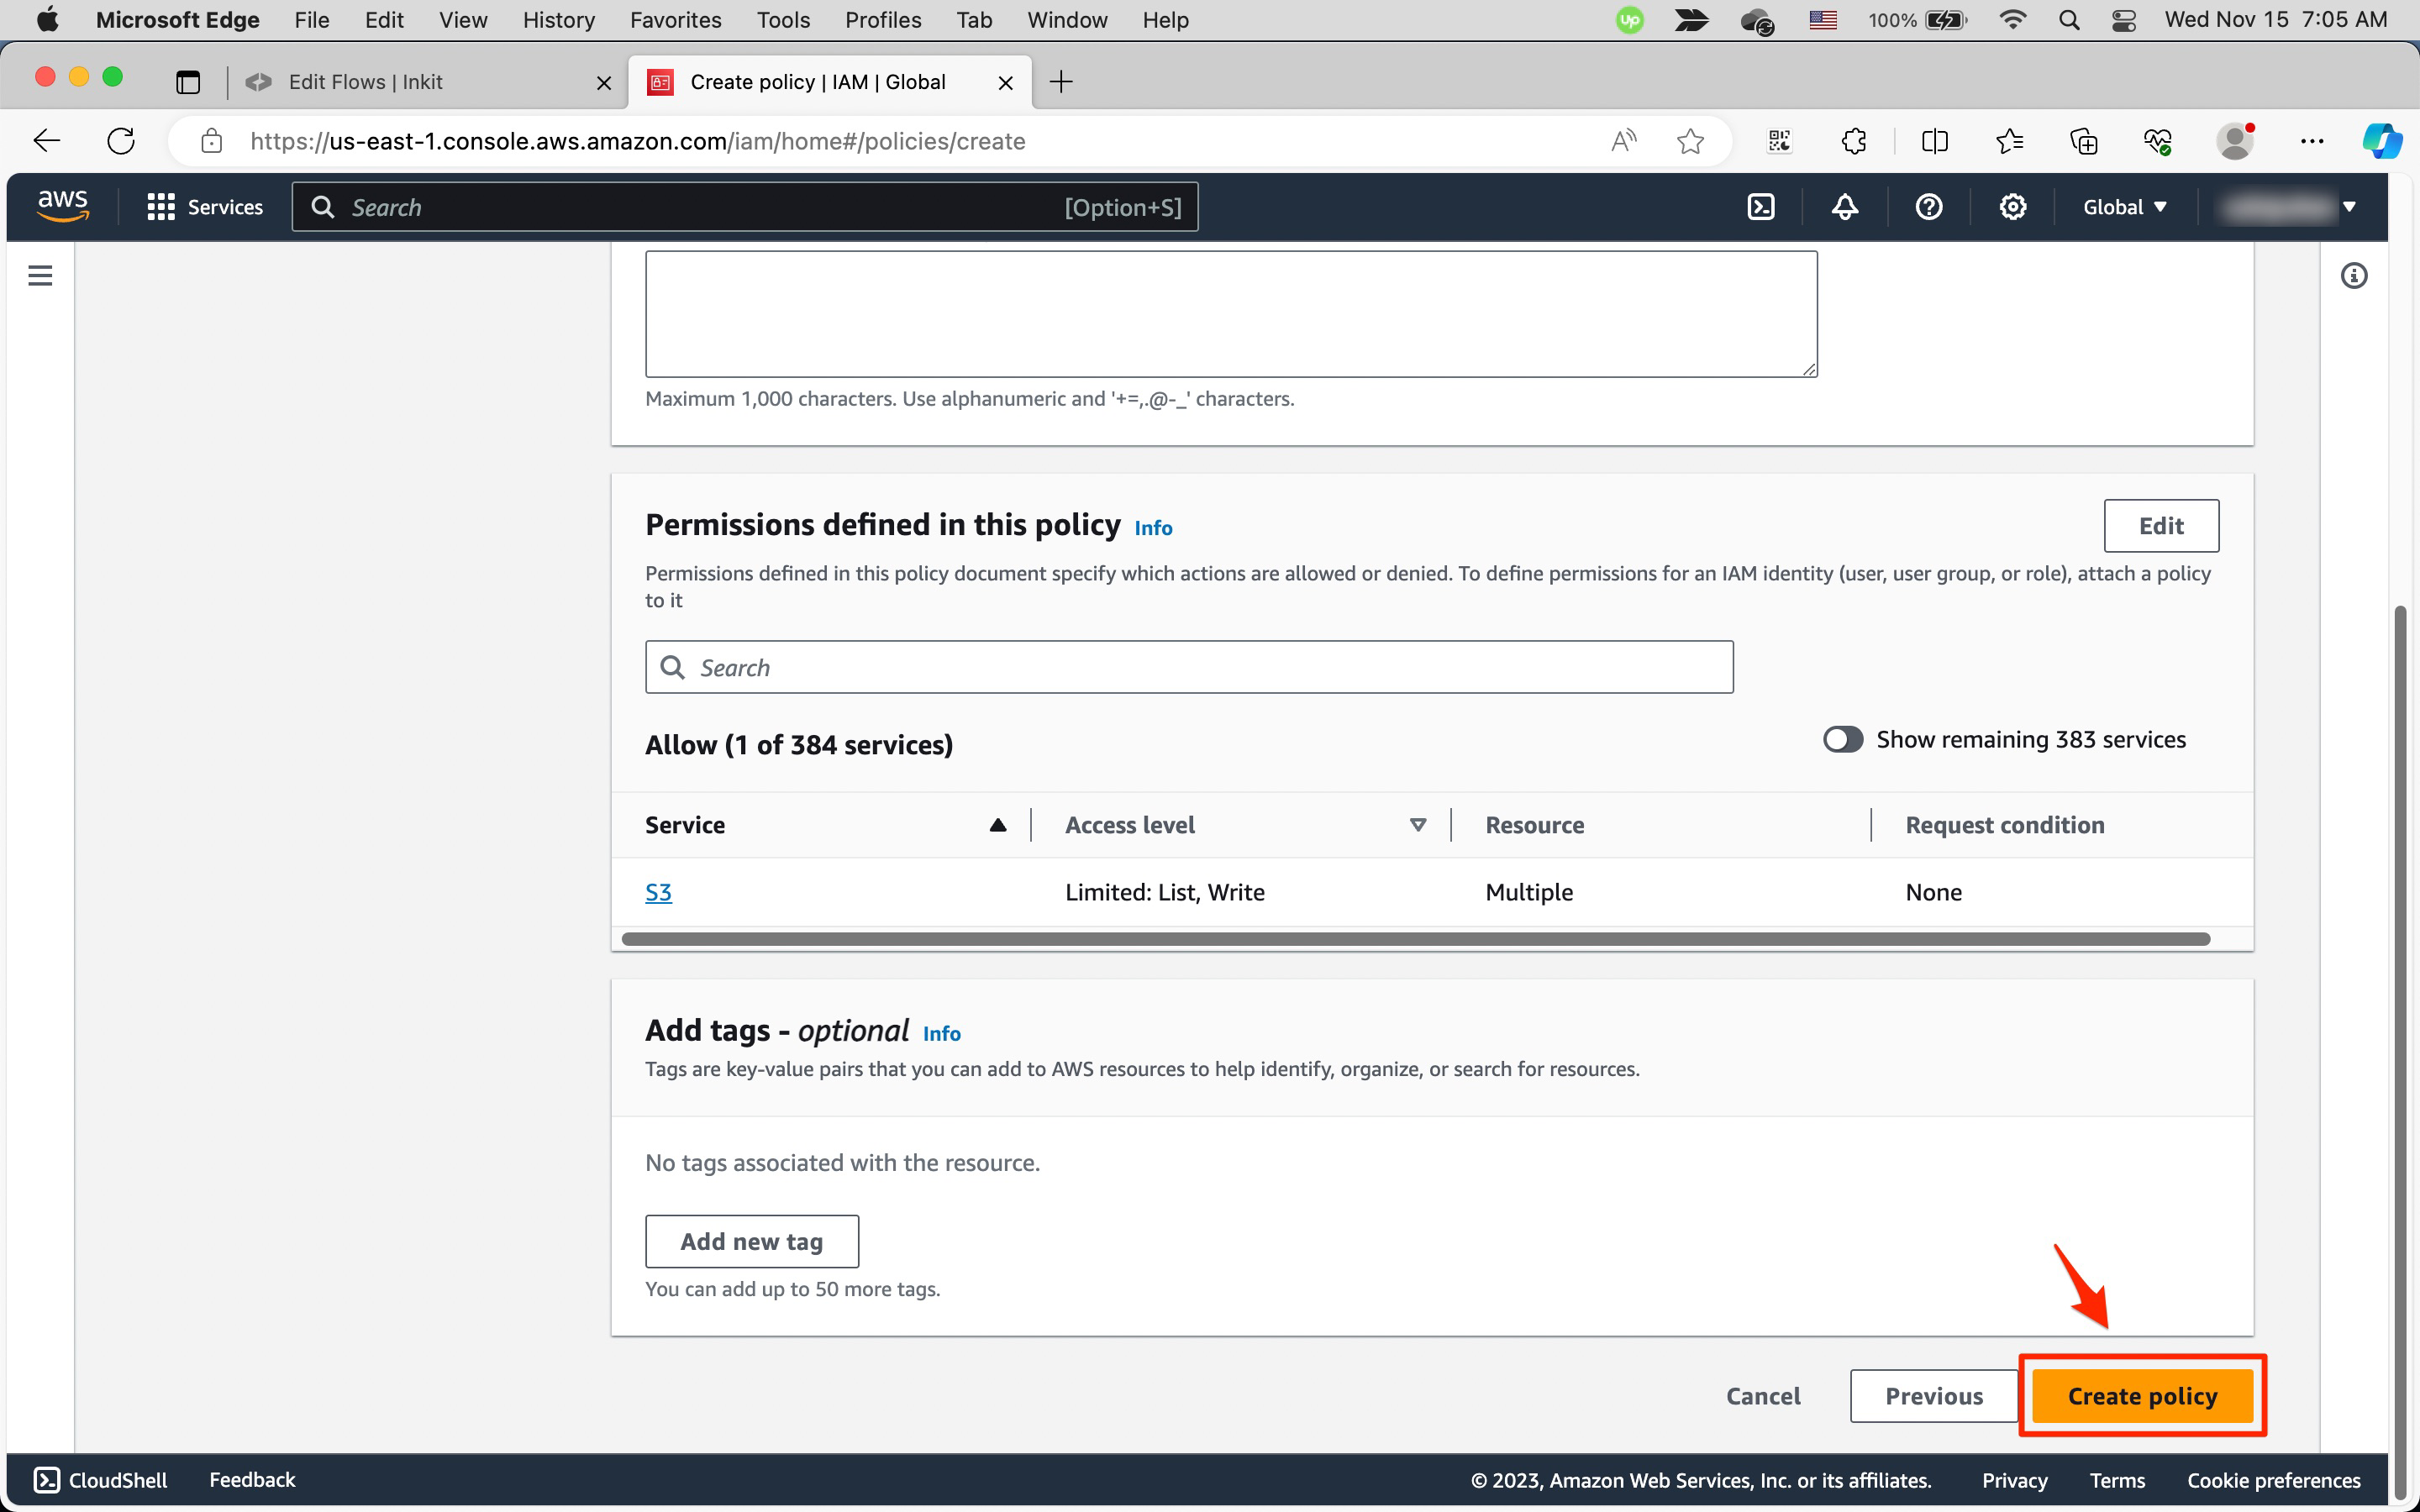
In Policies page, click Create policy.
-
In Specify permissions page, click JSON in the Policy editor panel.
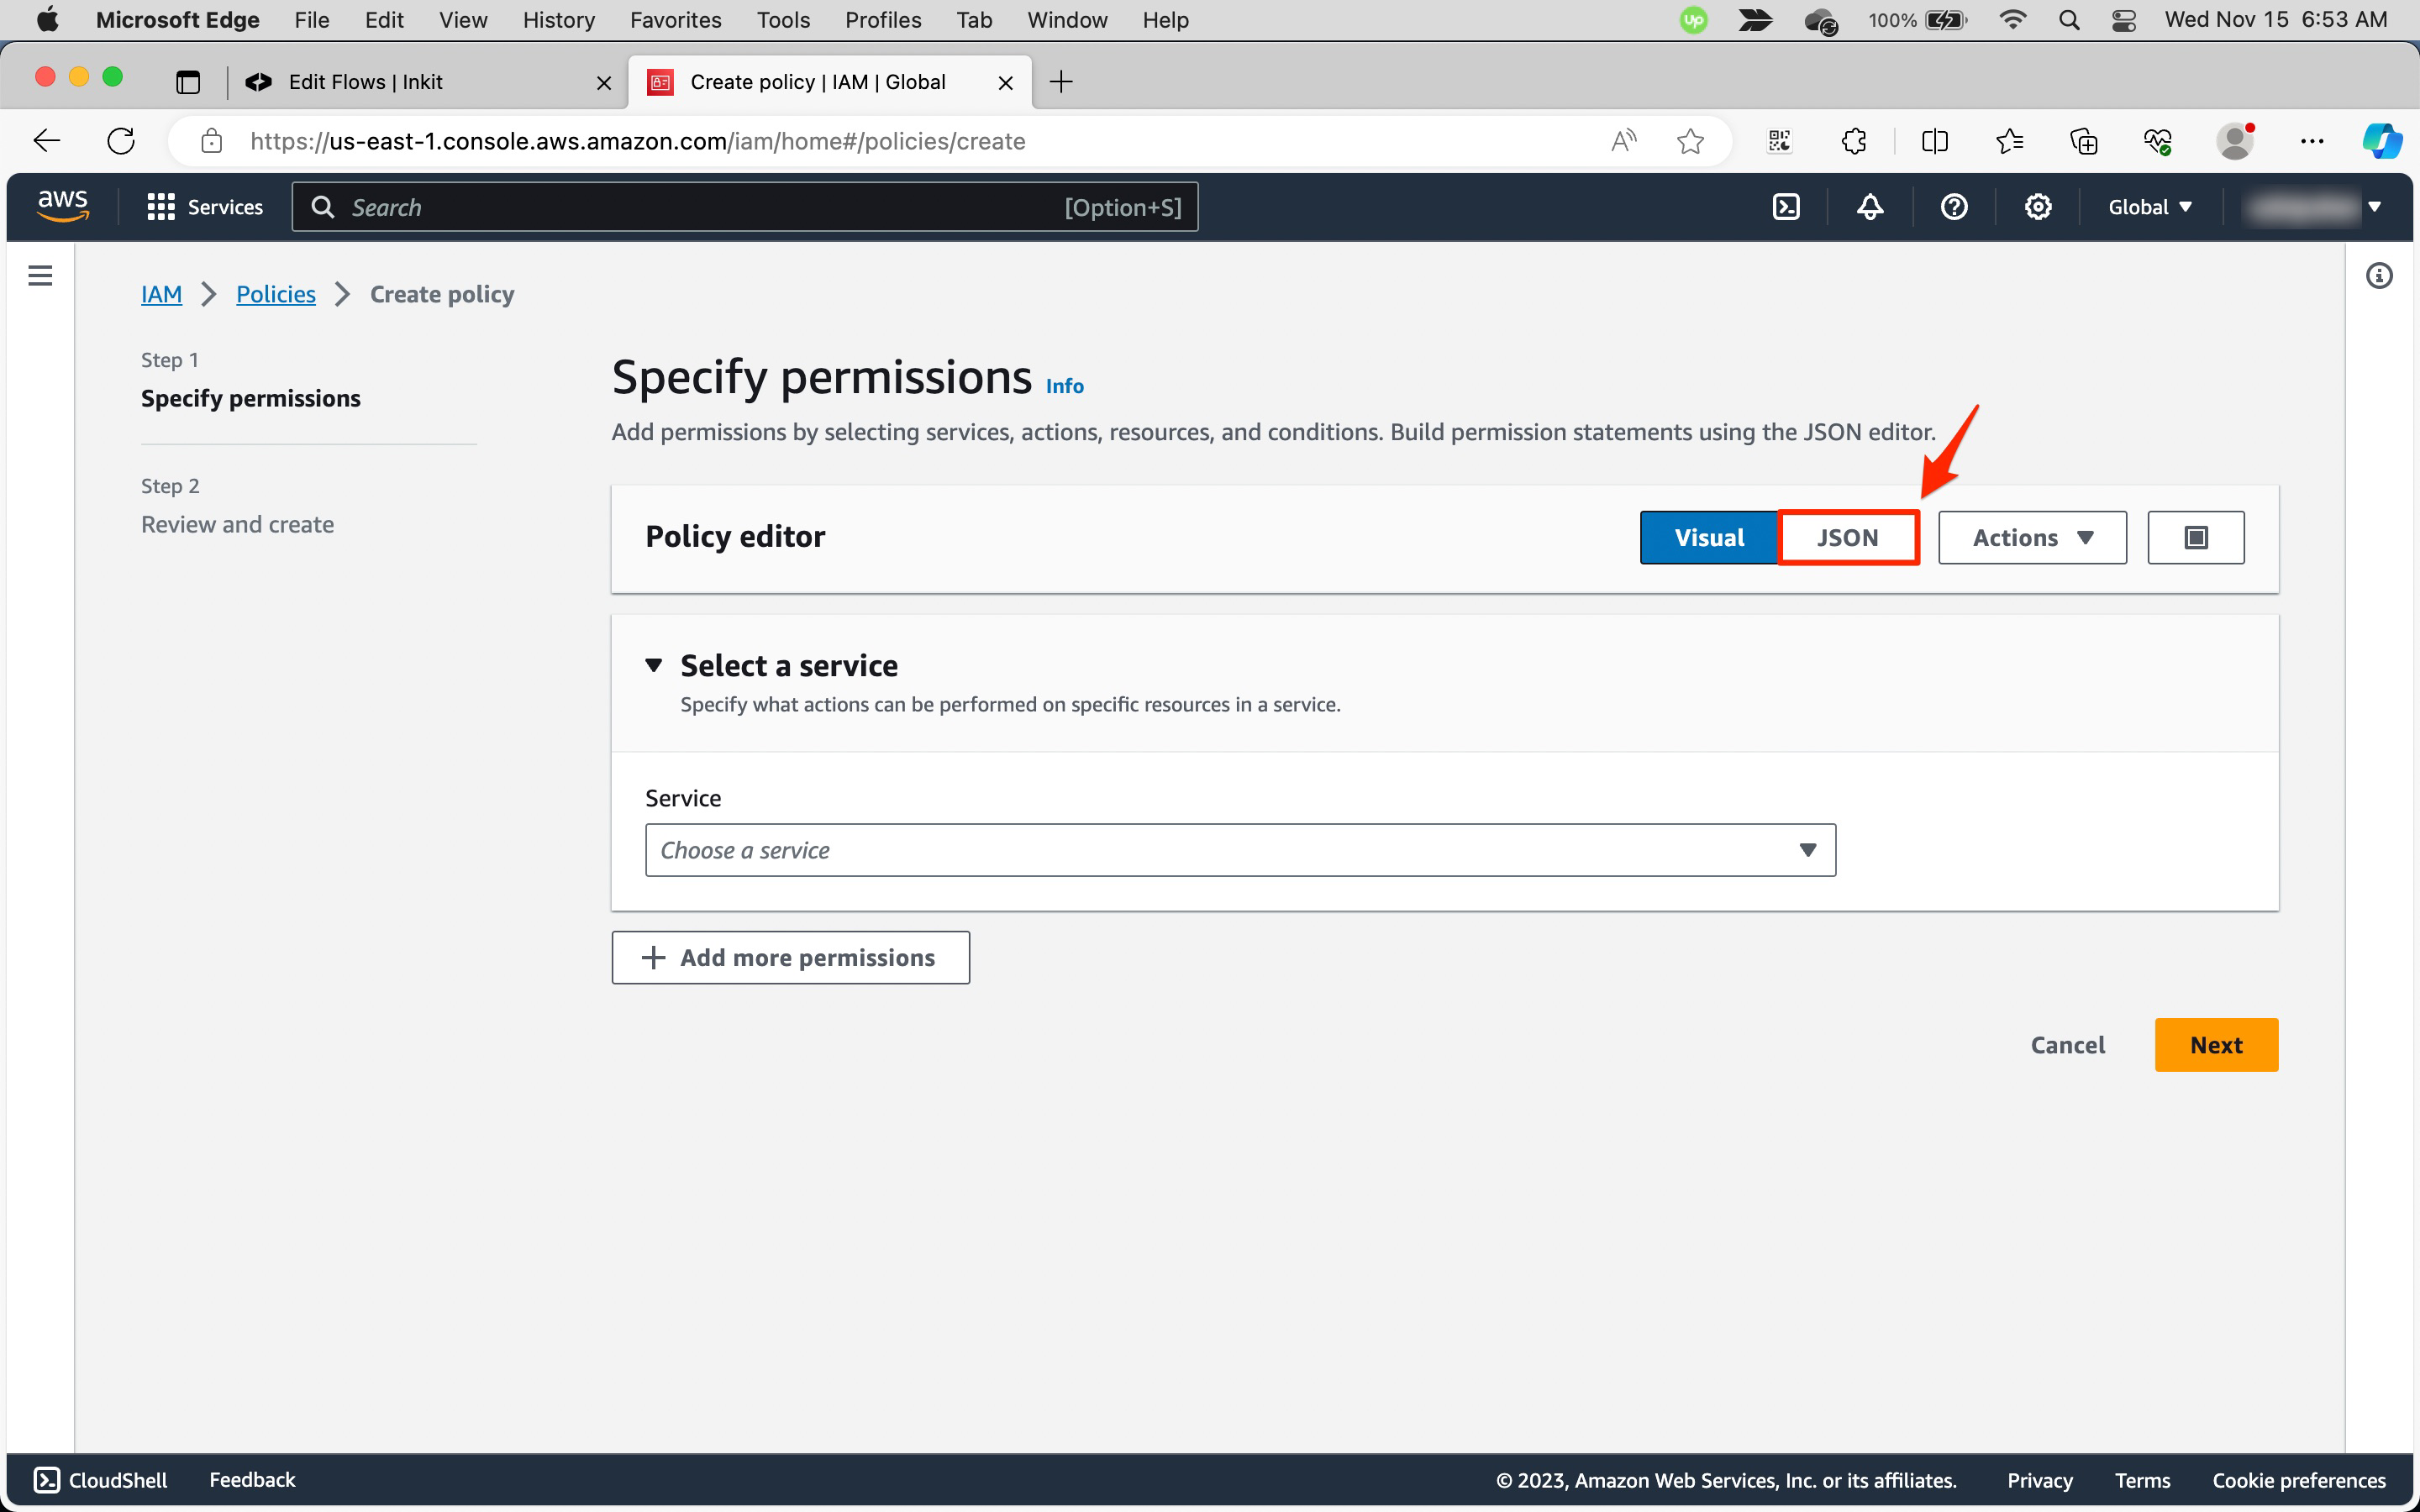
Then copy and paste the following JSON code into the Policy editor:
{
    "Version": "2012-10-17",
    "Statement": [
        {
            "Sid": "VisualEditor0",
            "Effect": "Allow",
            "Action": [
                "s3:PutObject"
            ],
            "Resource": "arn:aws:s3:::*/*"
        },
        {
            "Sid": "VisualEditor1",
            "Effect": "Allow",
            "Action": "s3:ListAllMyBuckets",
            "Resource": "*"
        }
    ]
}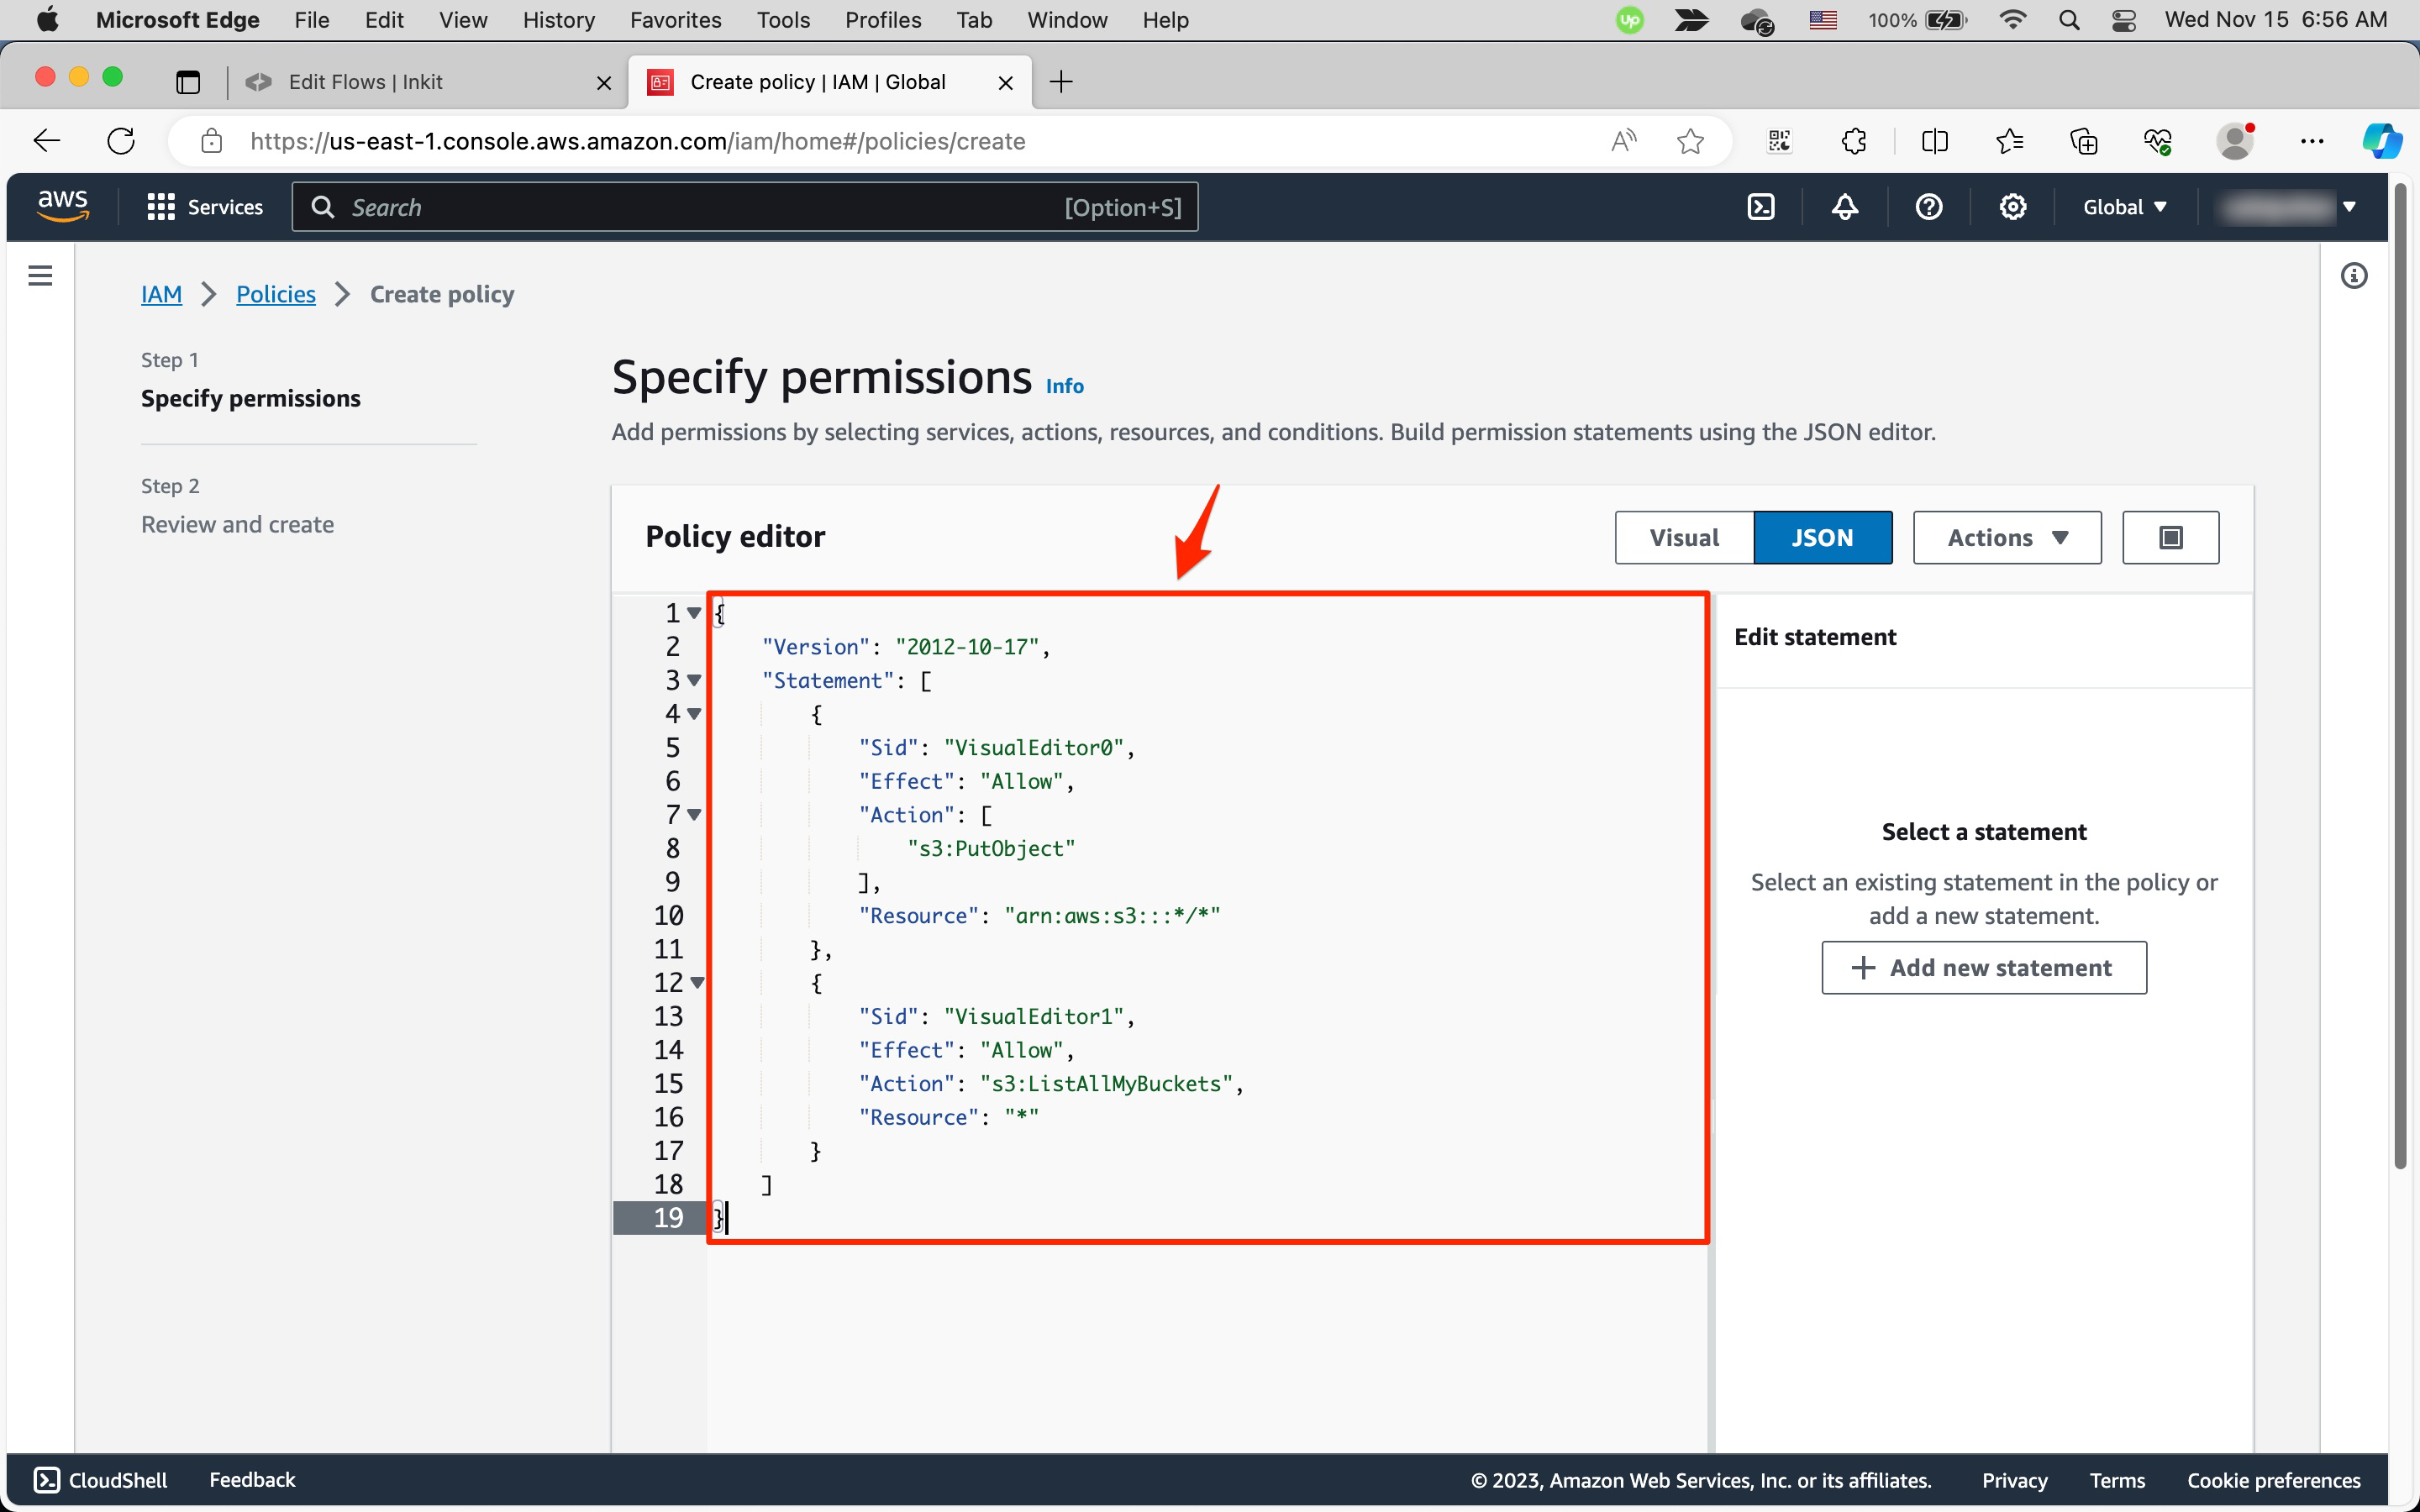
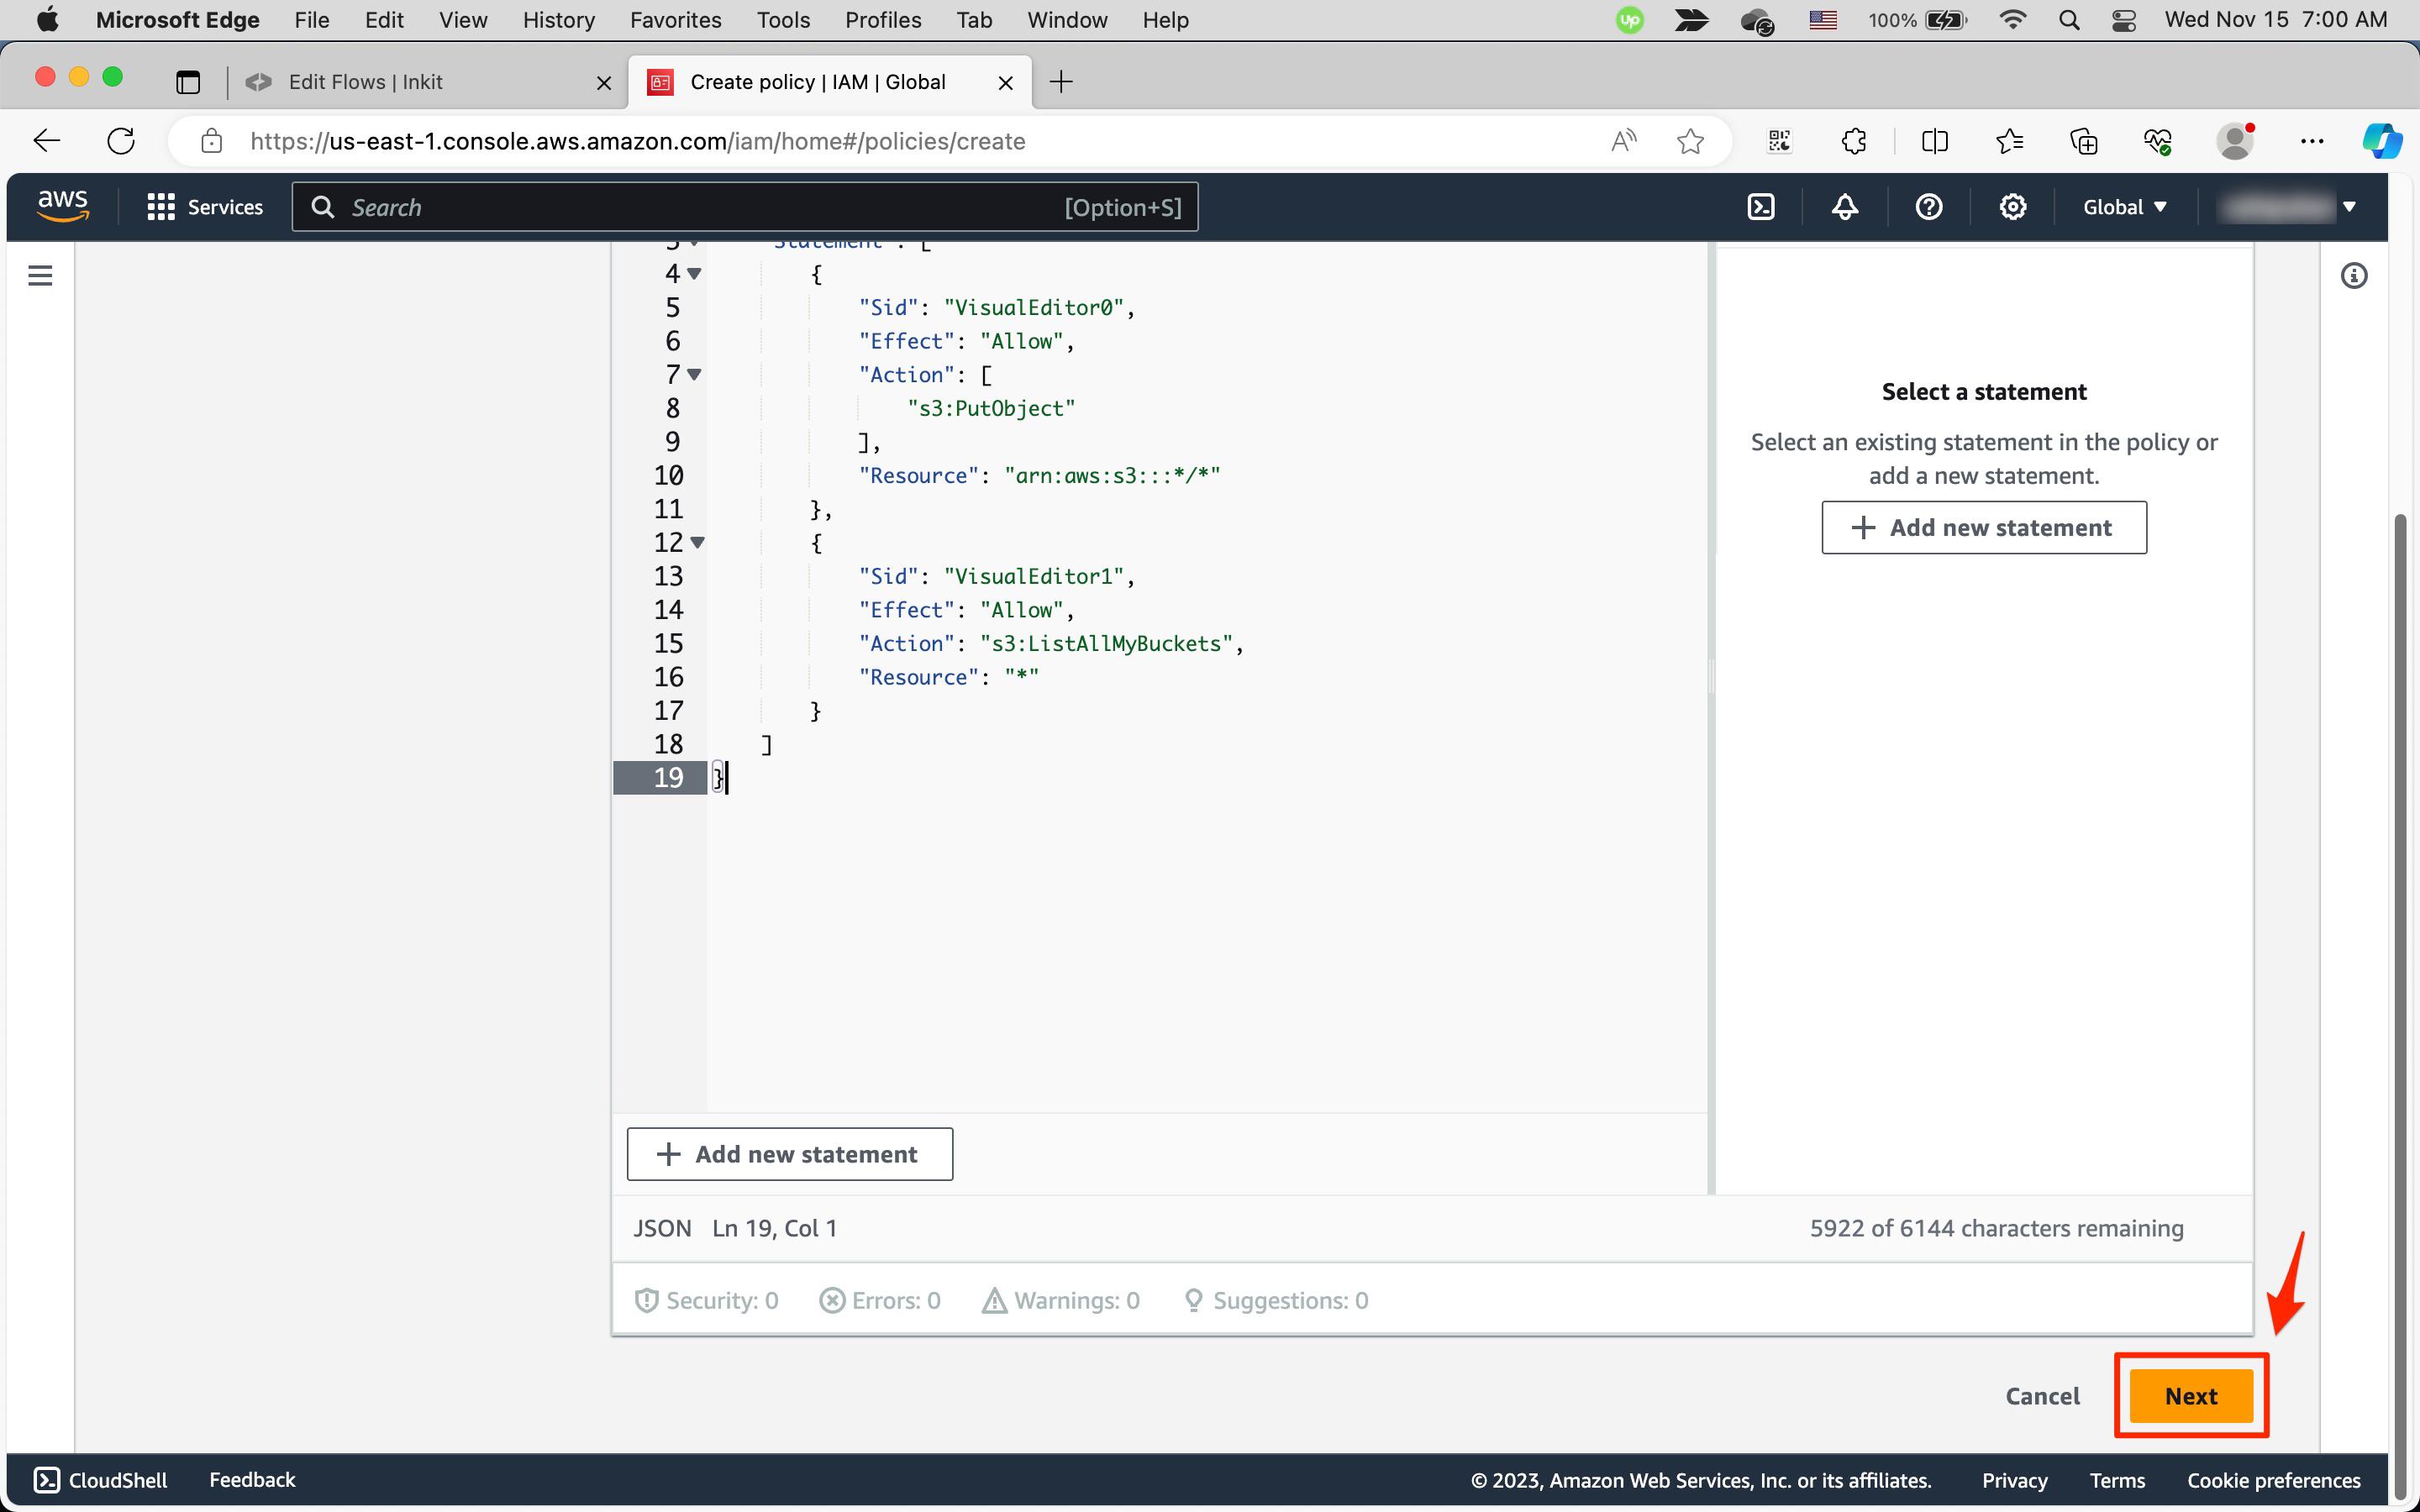
Finally, at the bottom of the page, click Next.
-
In the Review and create page, enter
Inkitas the Policy name.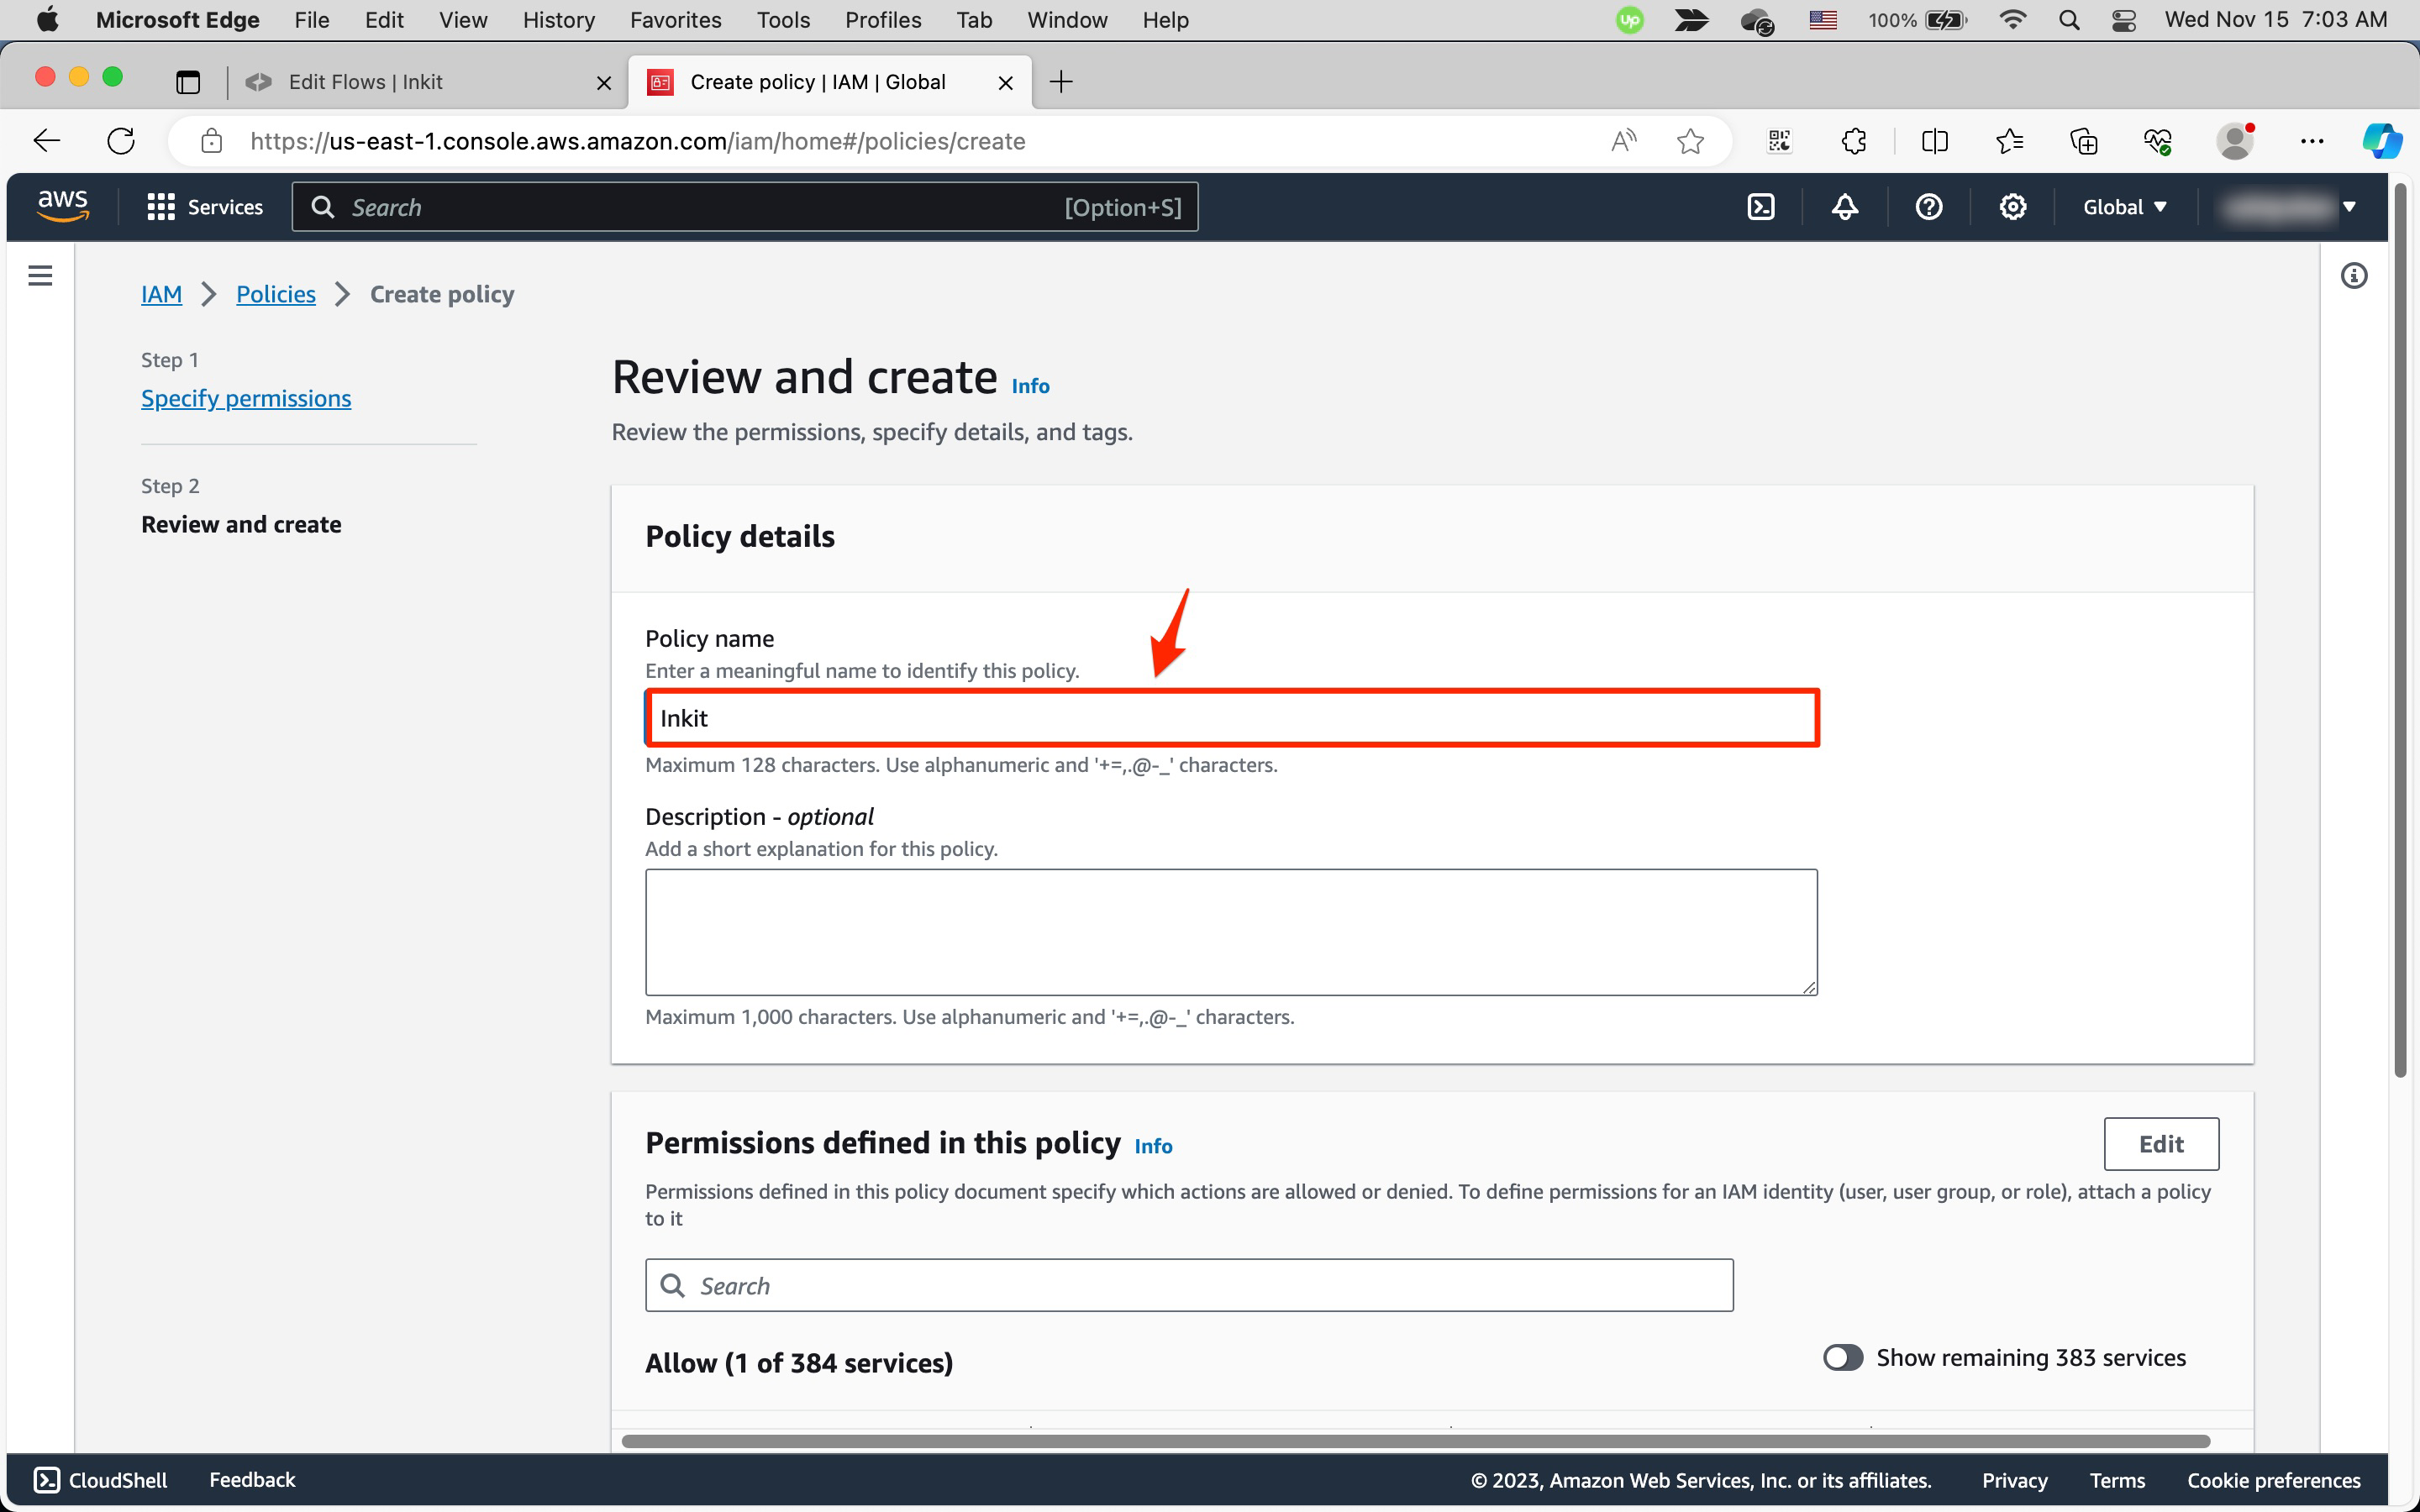
Then, at the bottom of the page, click Create policy.
-
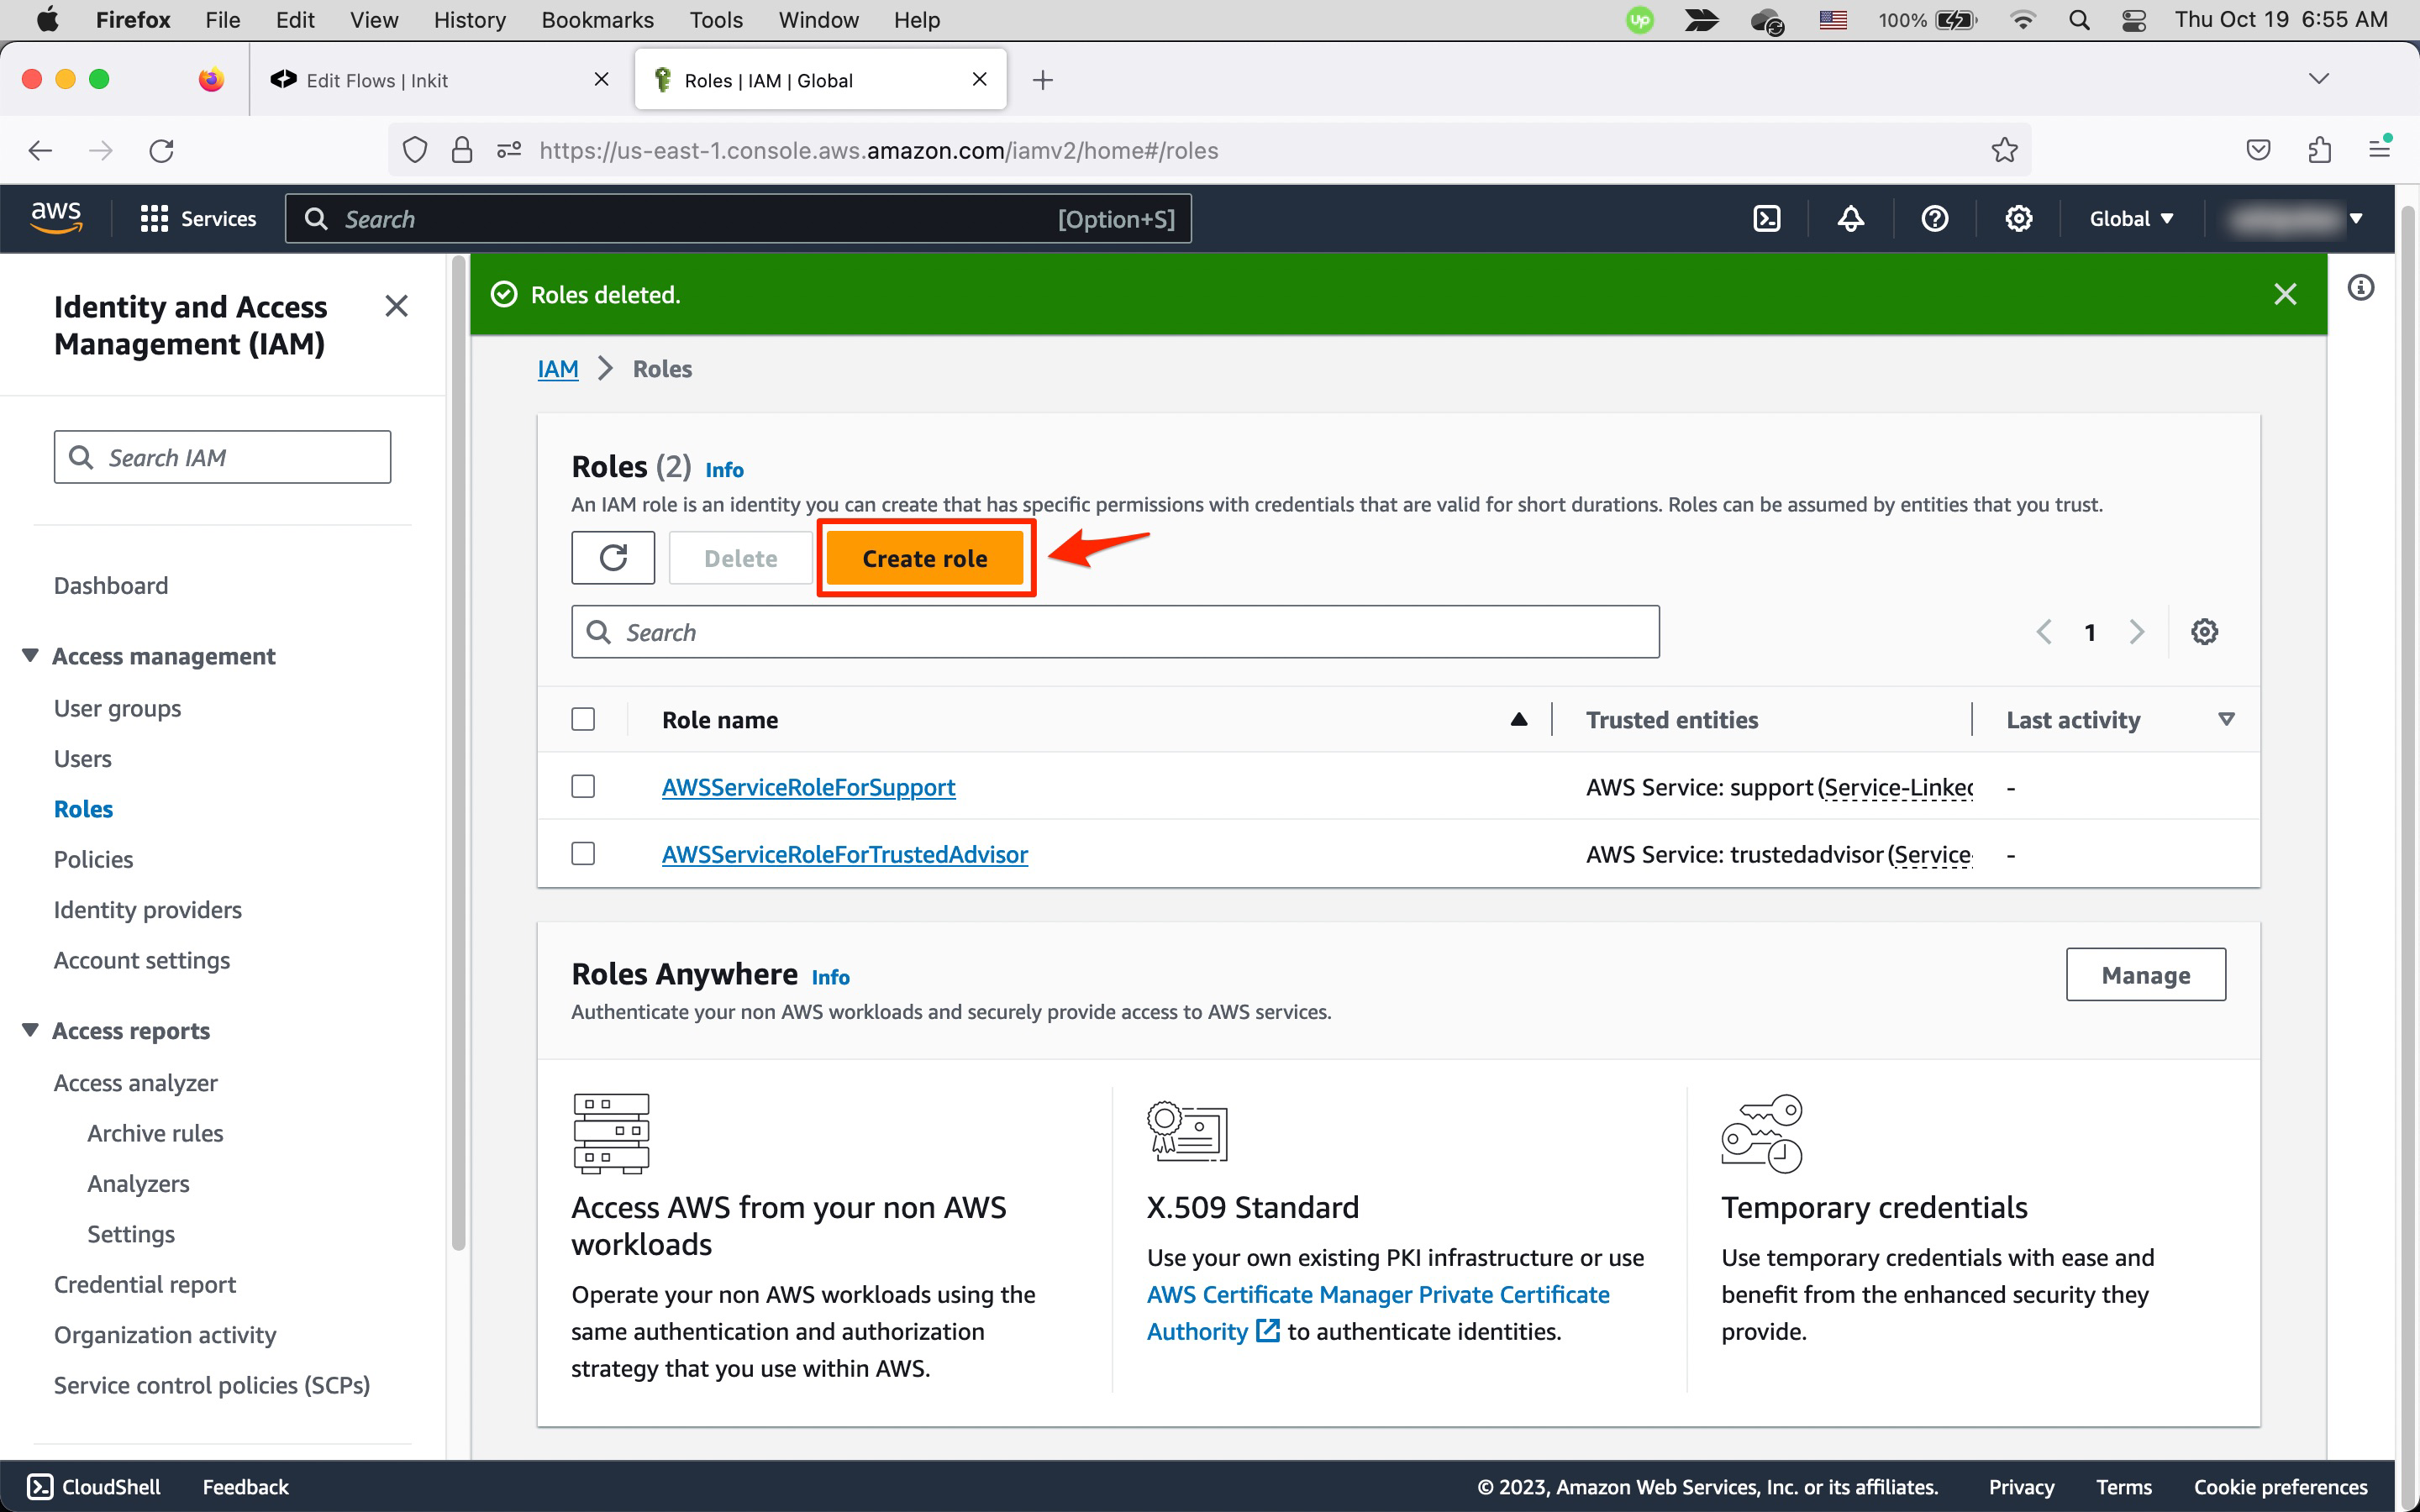
Select Roles in the left sidebar.

-
In the Roles page, click Create role in the Roles panel.
-
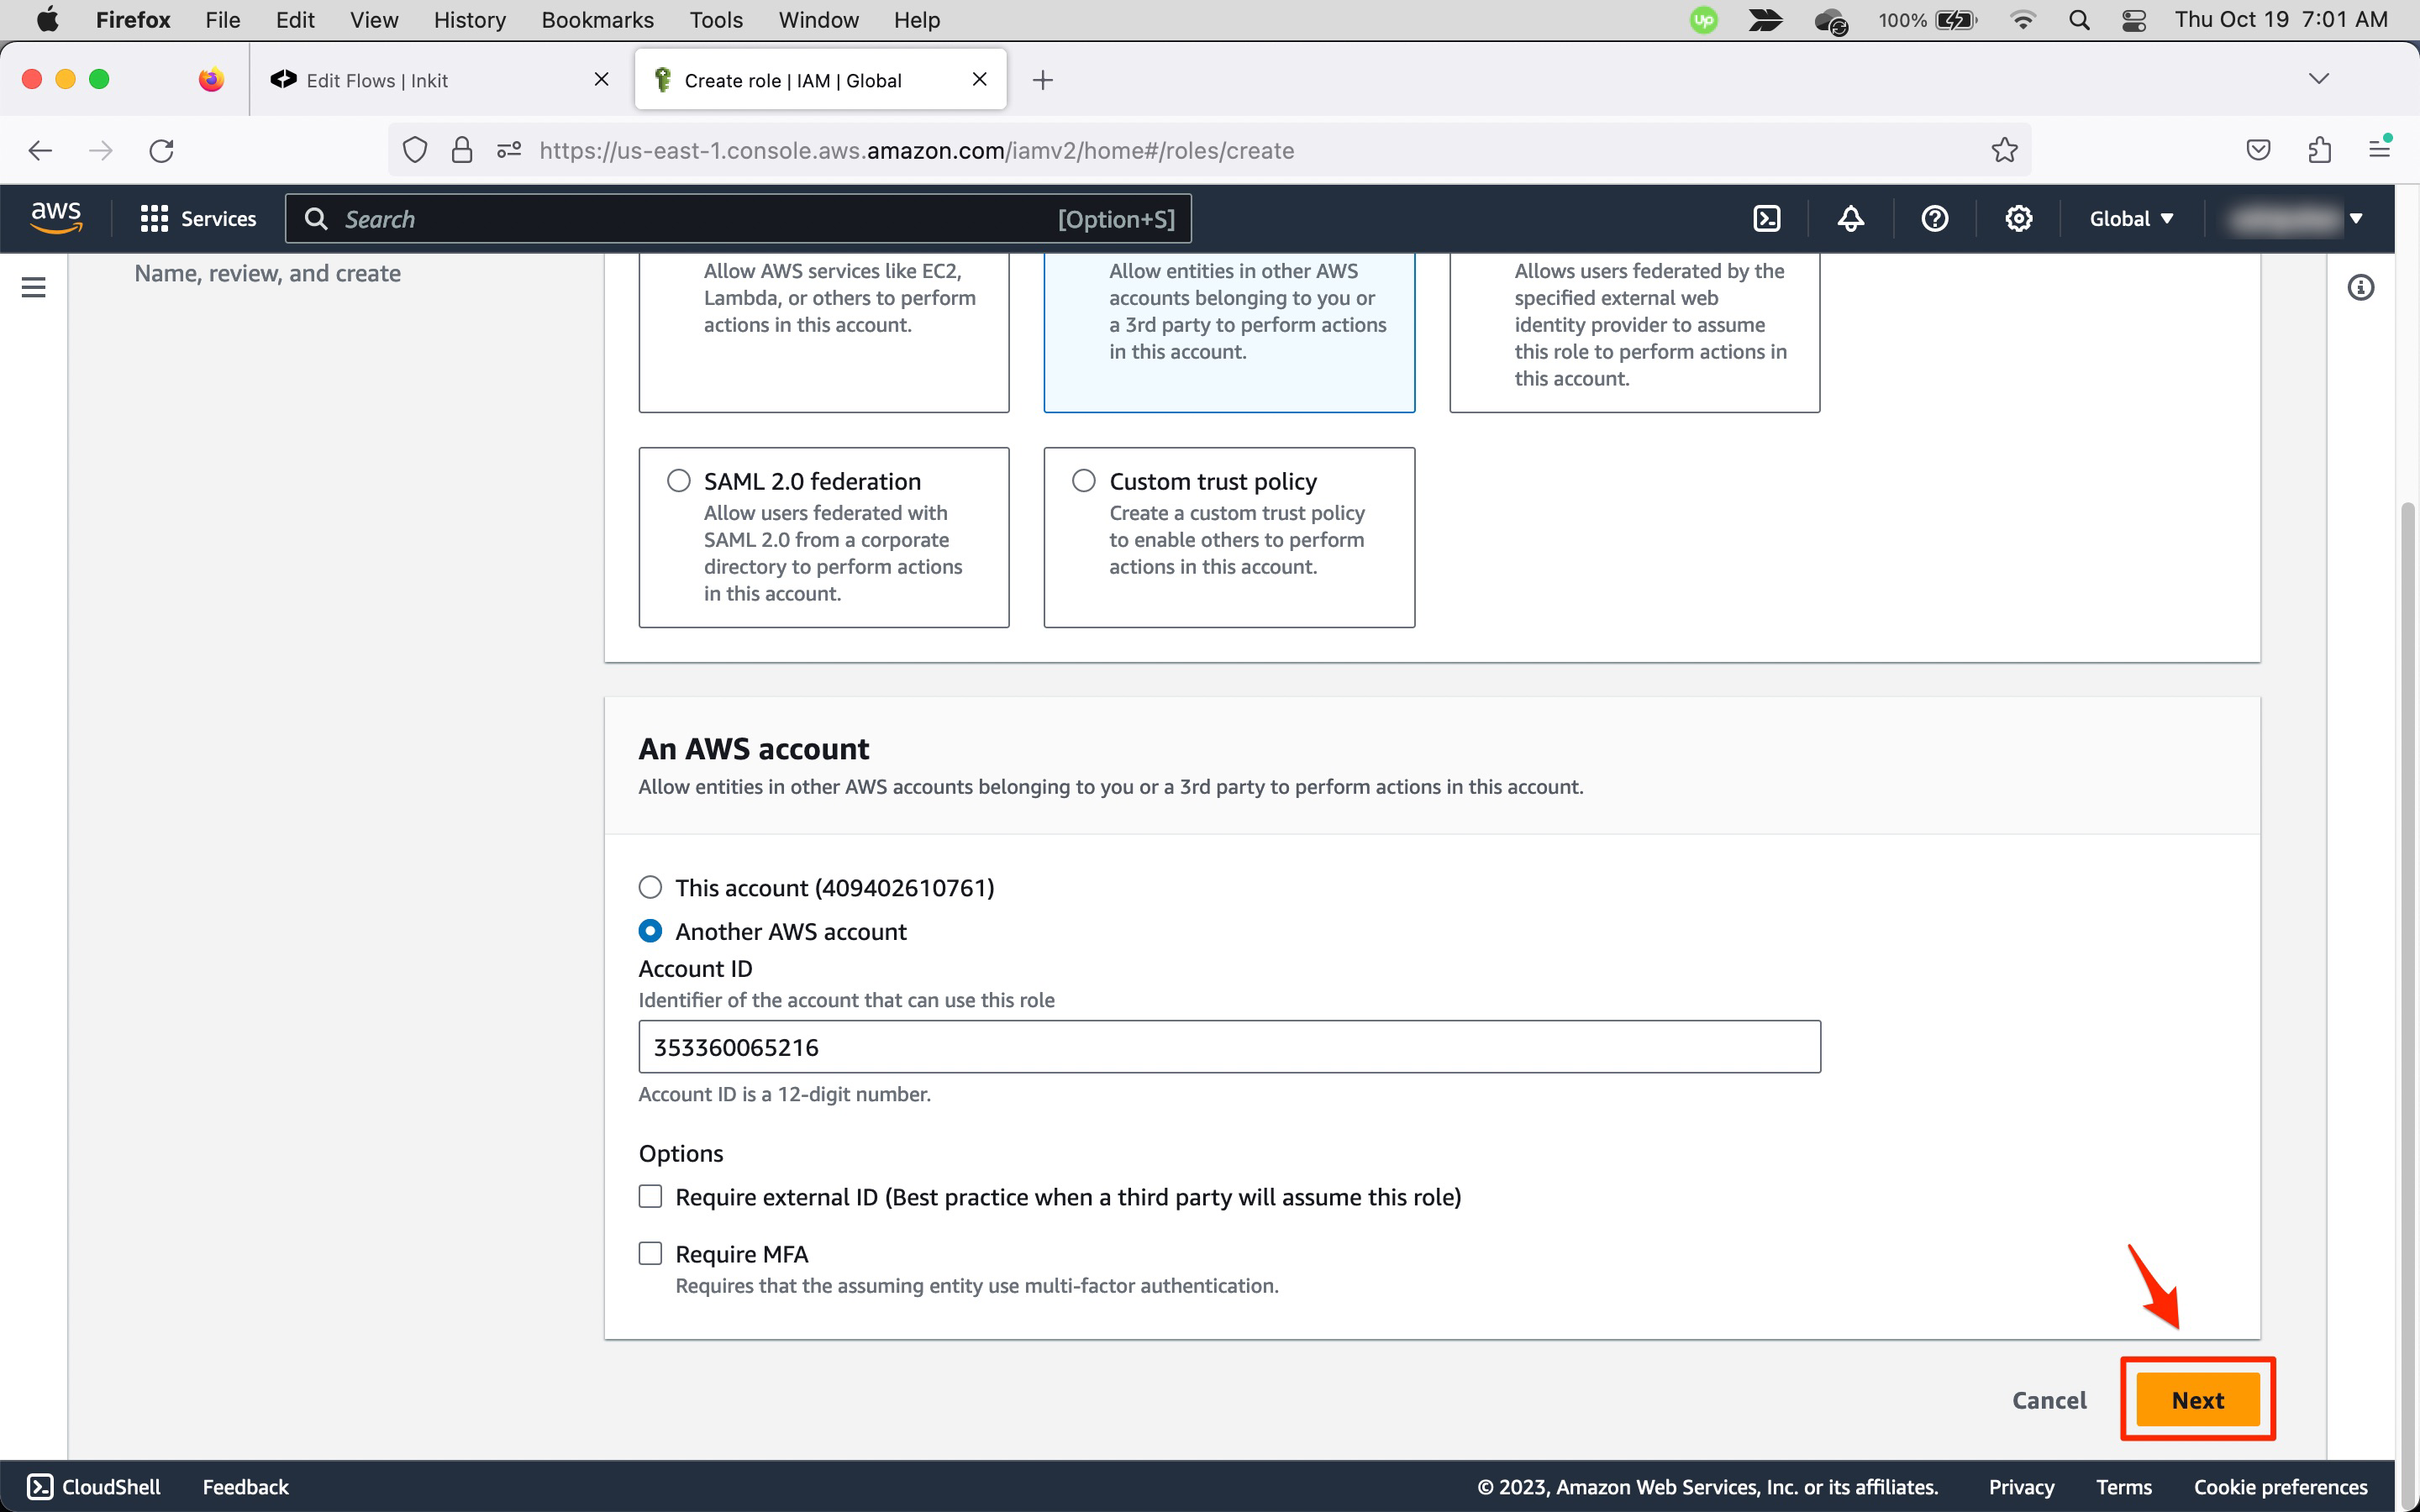
In the Select trusted entity page, select AWS account in the Trusted entity type panel. Then, in the An AWS account panel, select Another AWS account and enter the Workato AWS Account ID of 353360065216 in Account ID.
Note: Workato is a service that allows Inkit to integrate with S3.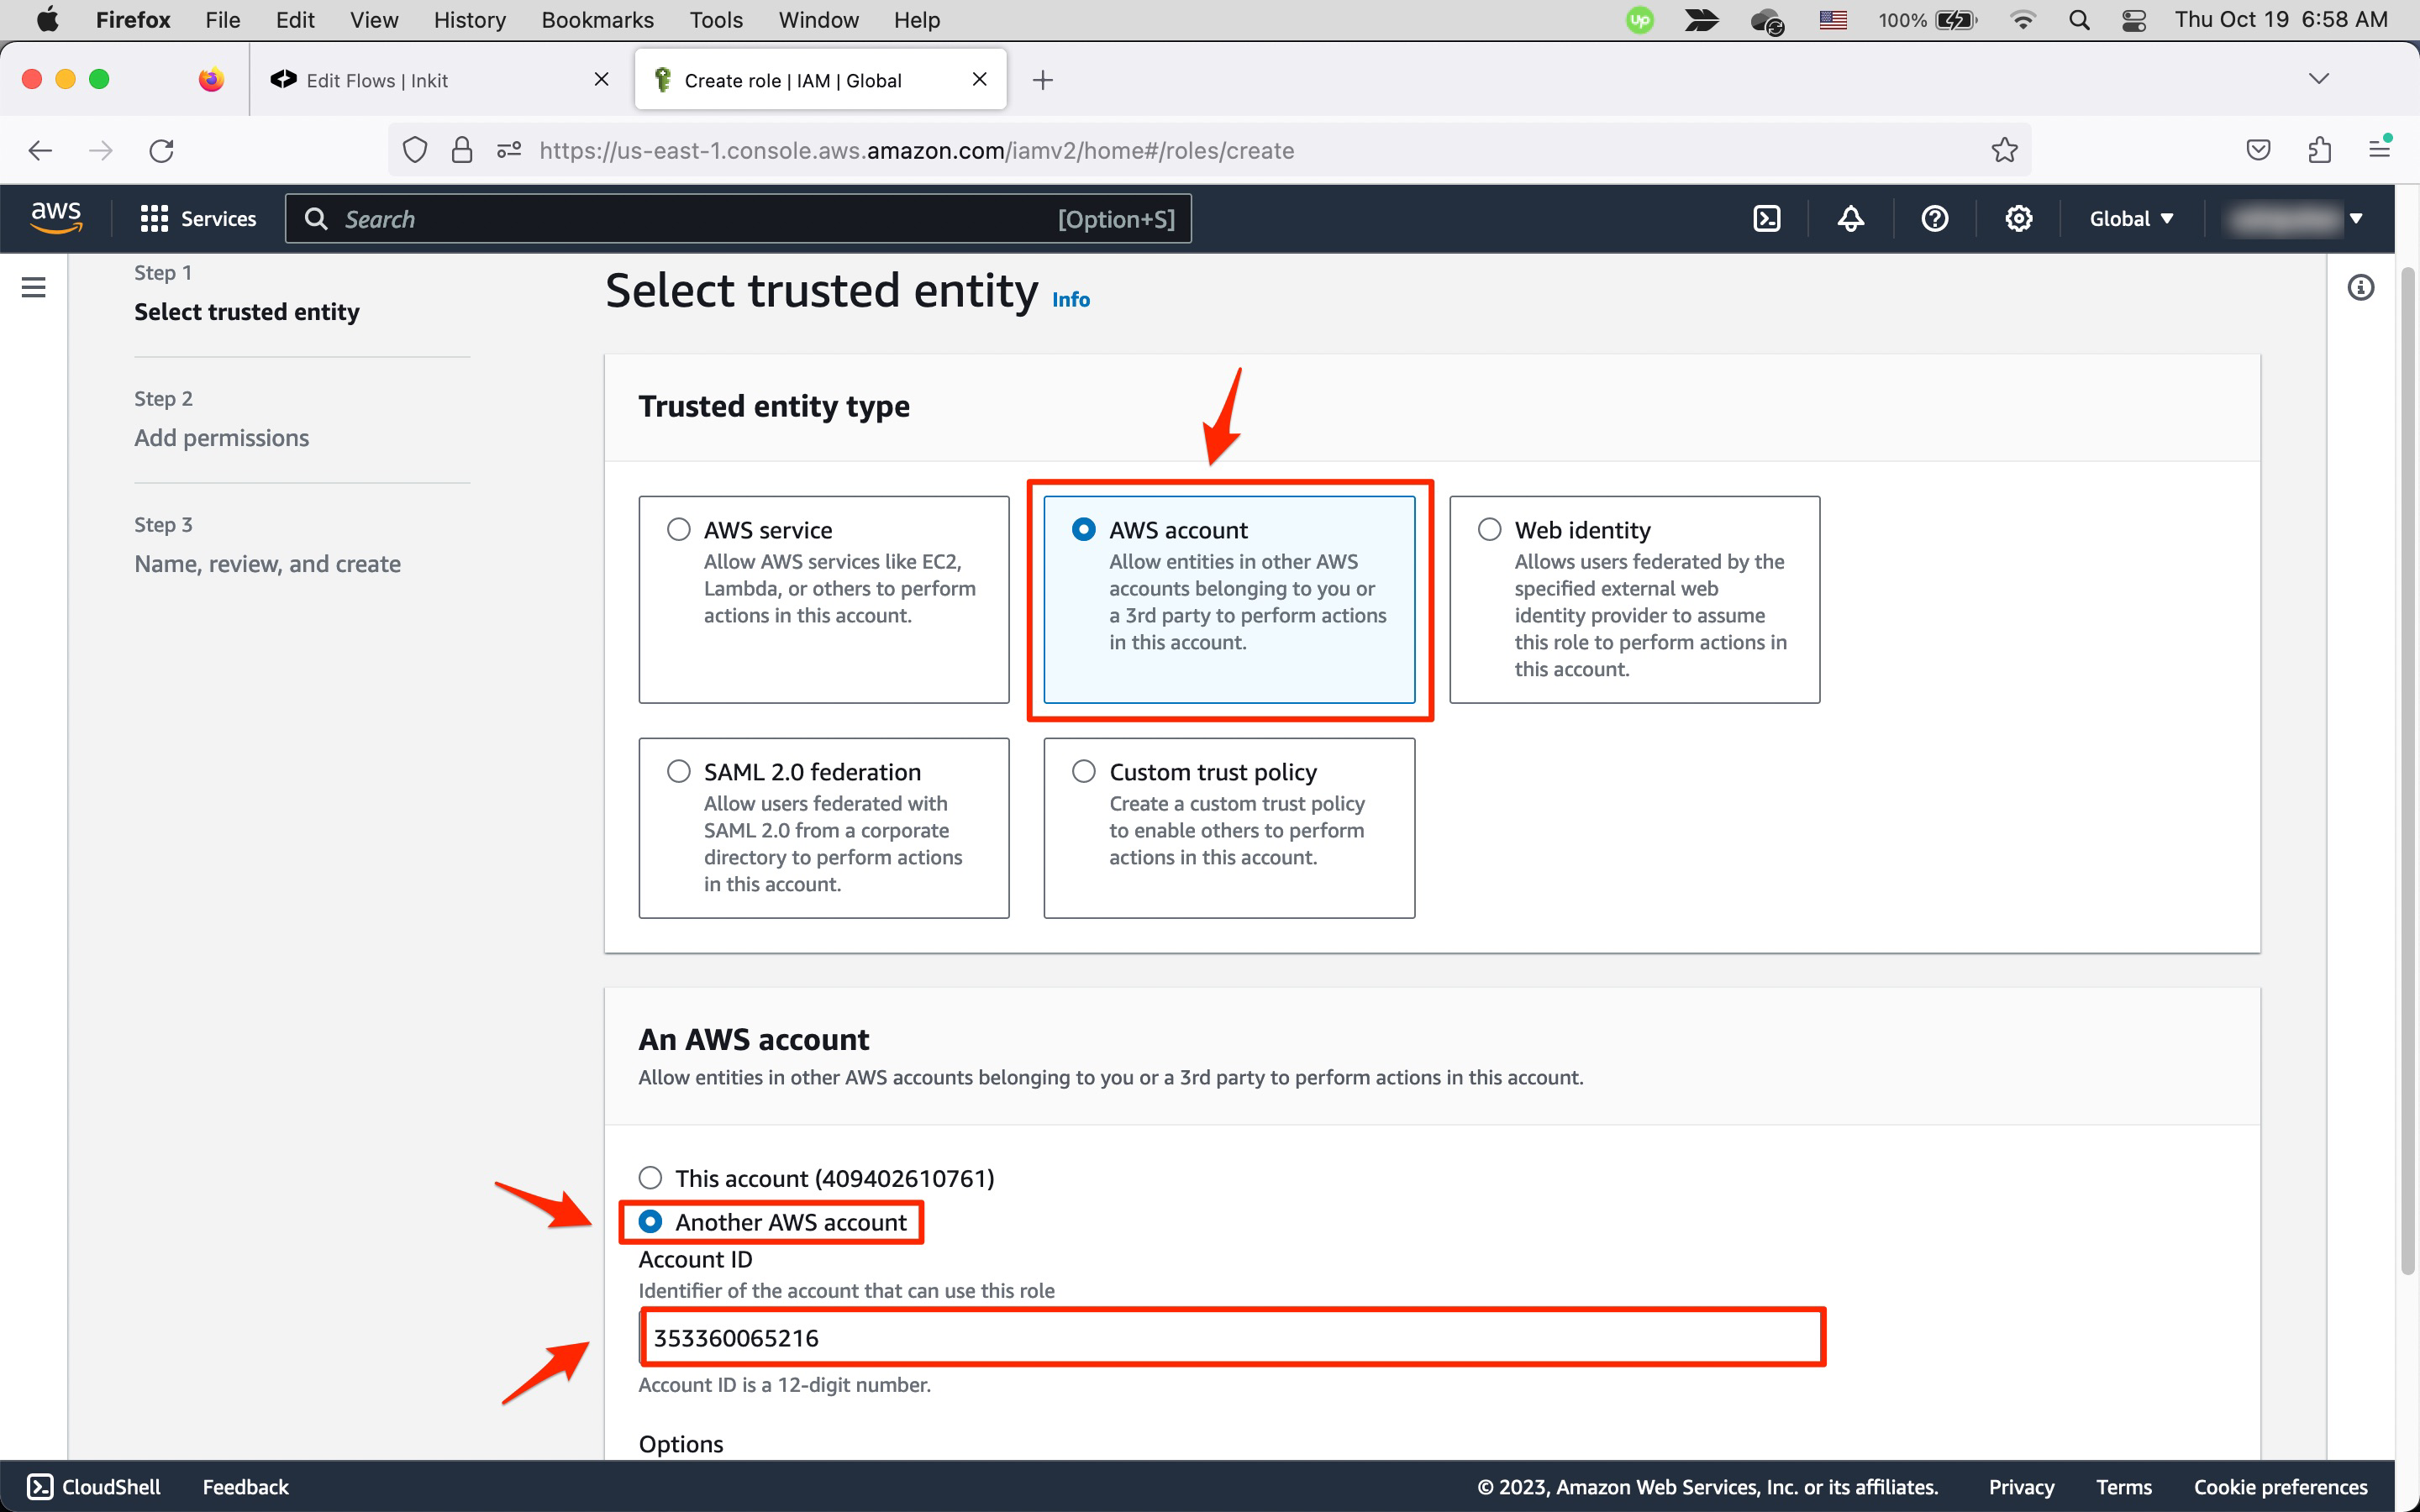
Then, at the bottom of the page, click Next.
-
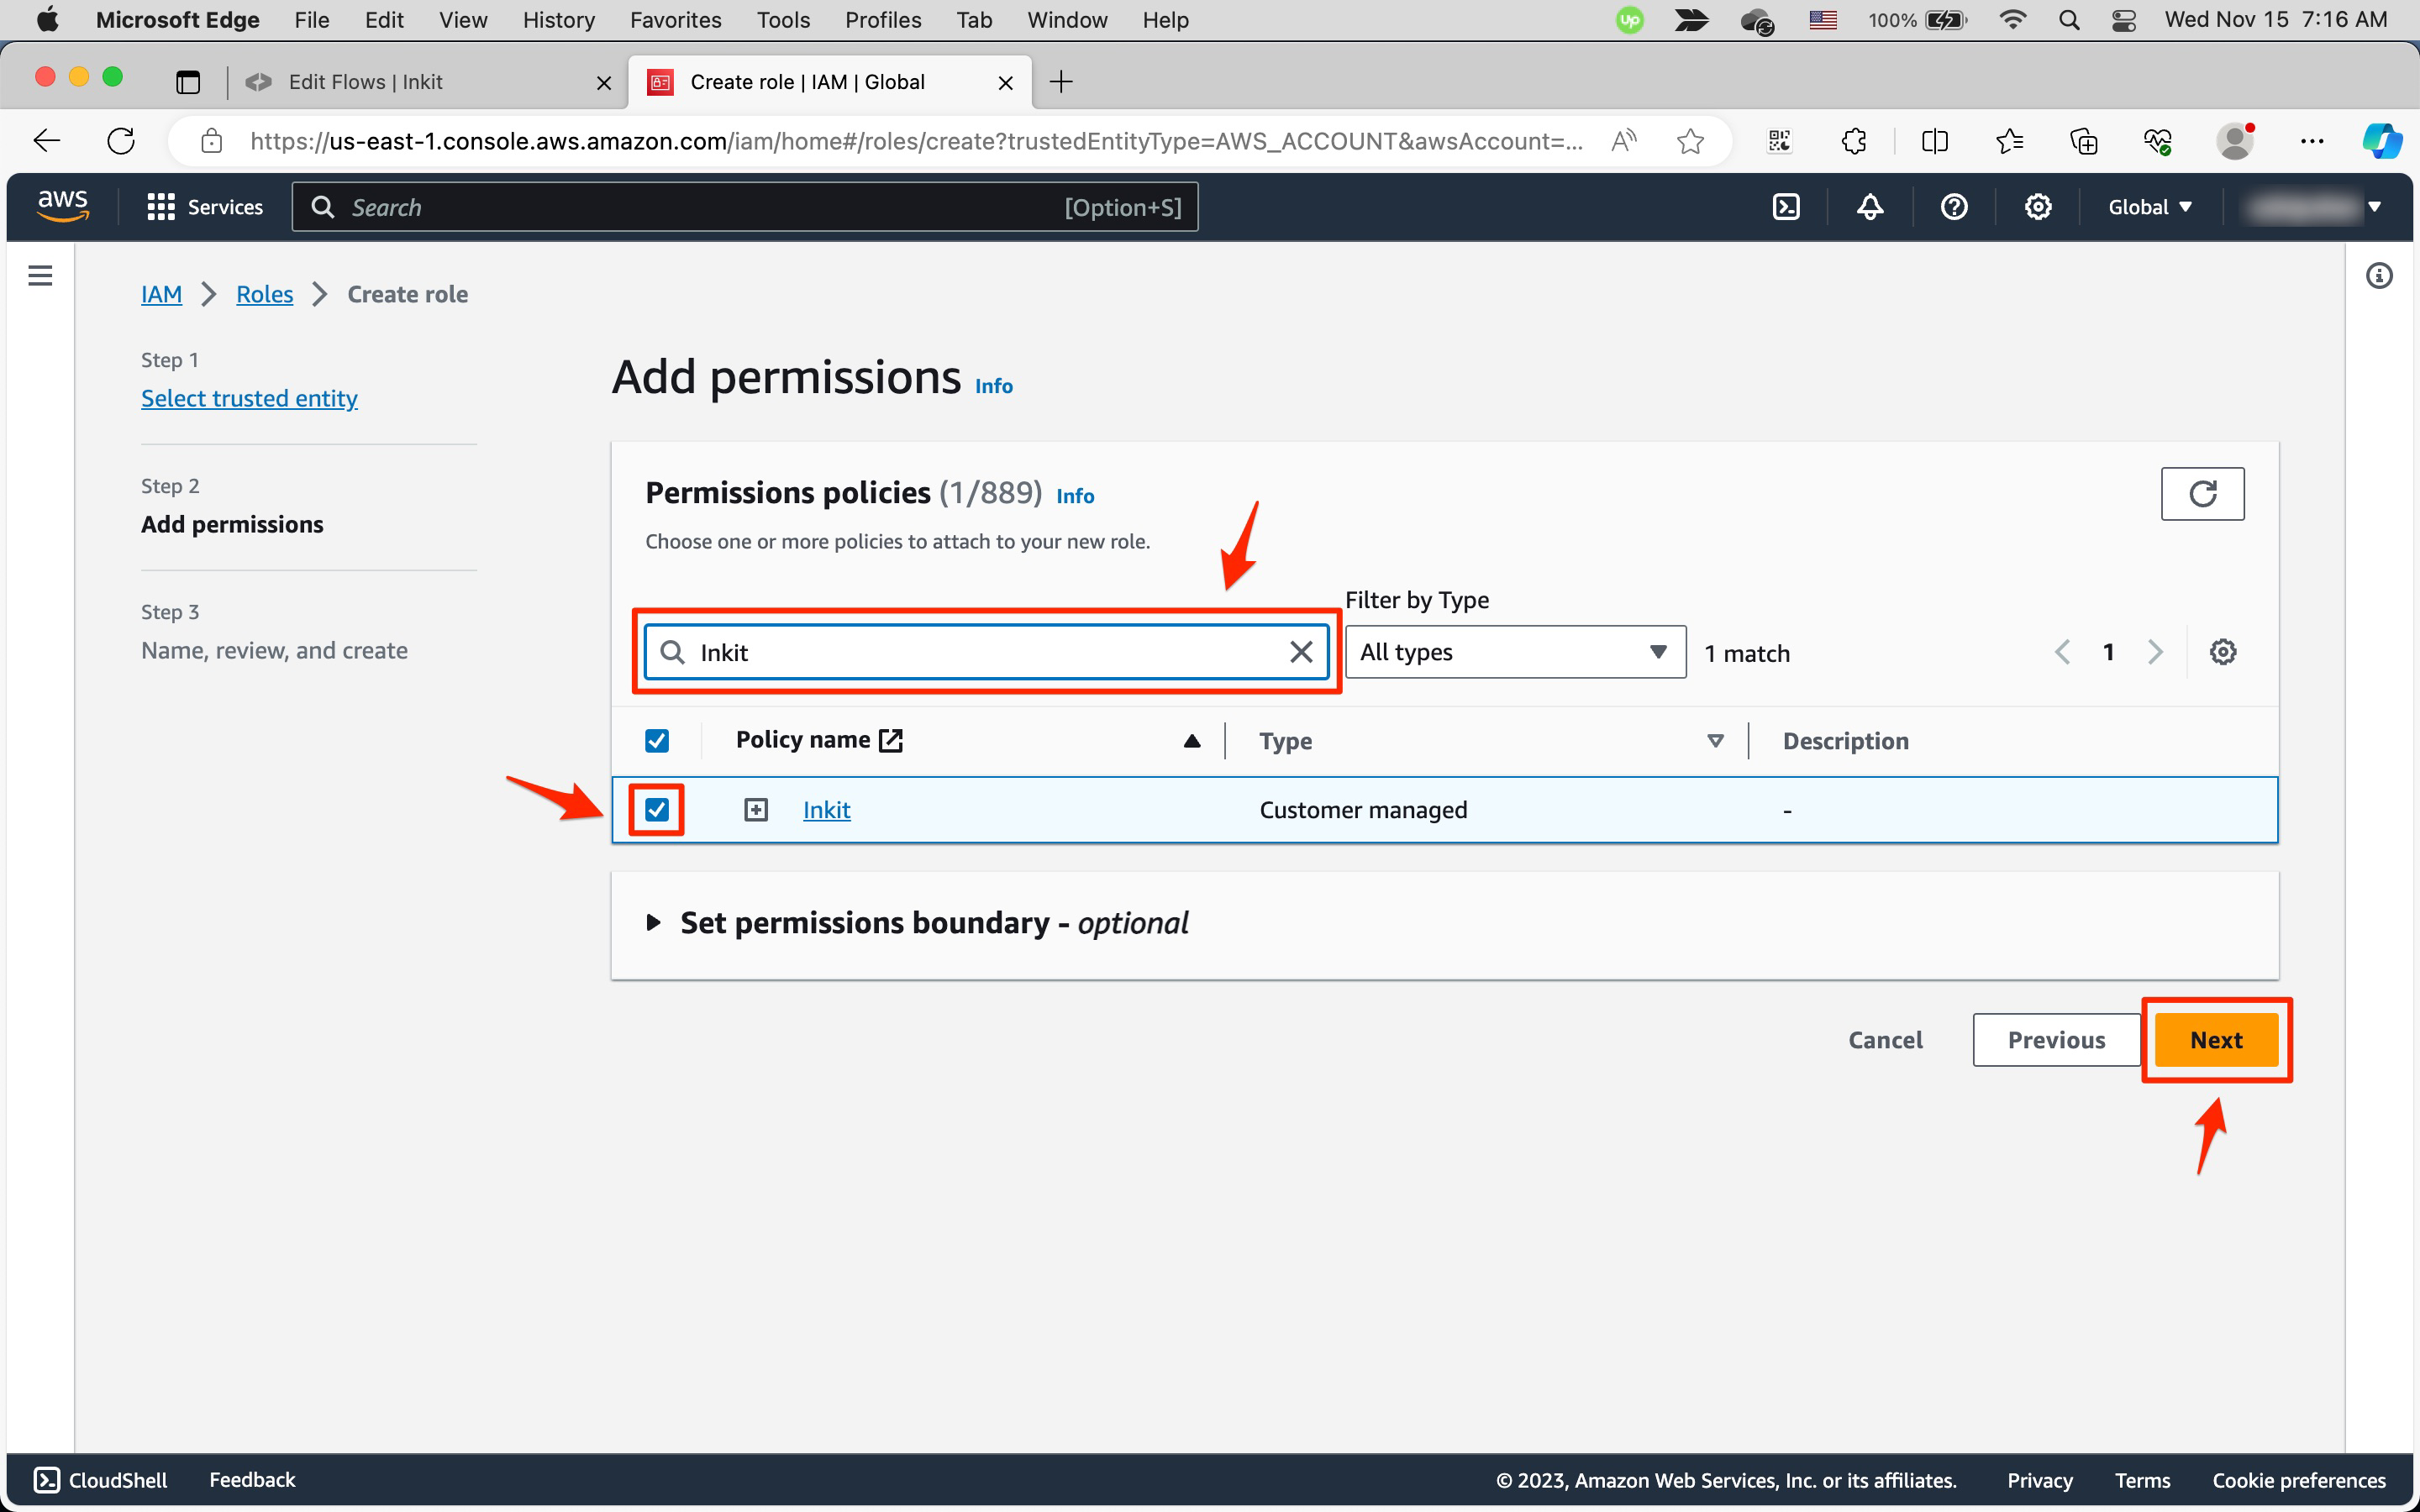
In the Add permissions page, enter
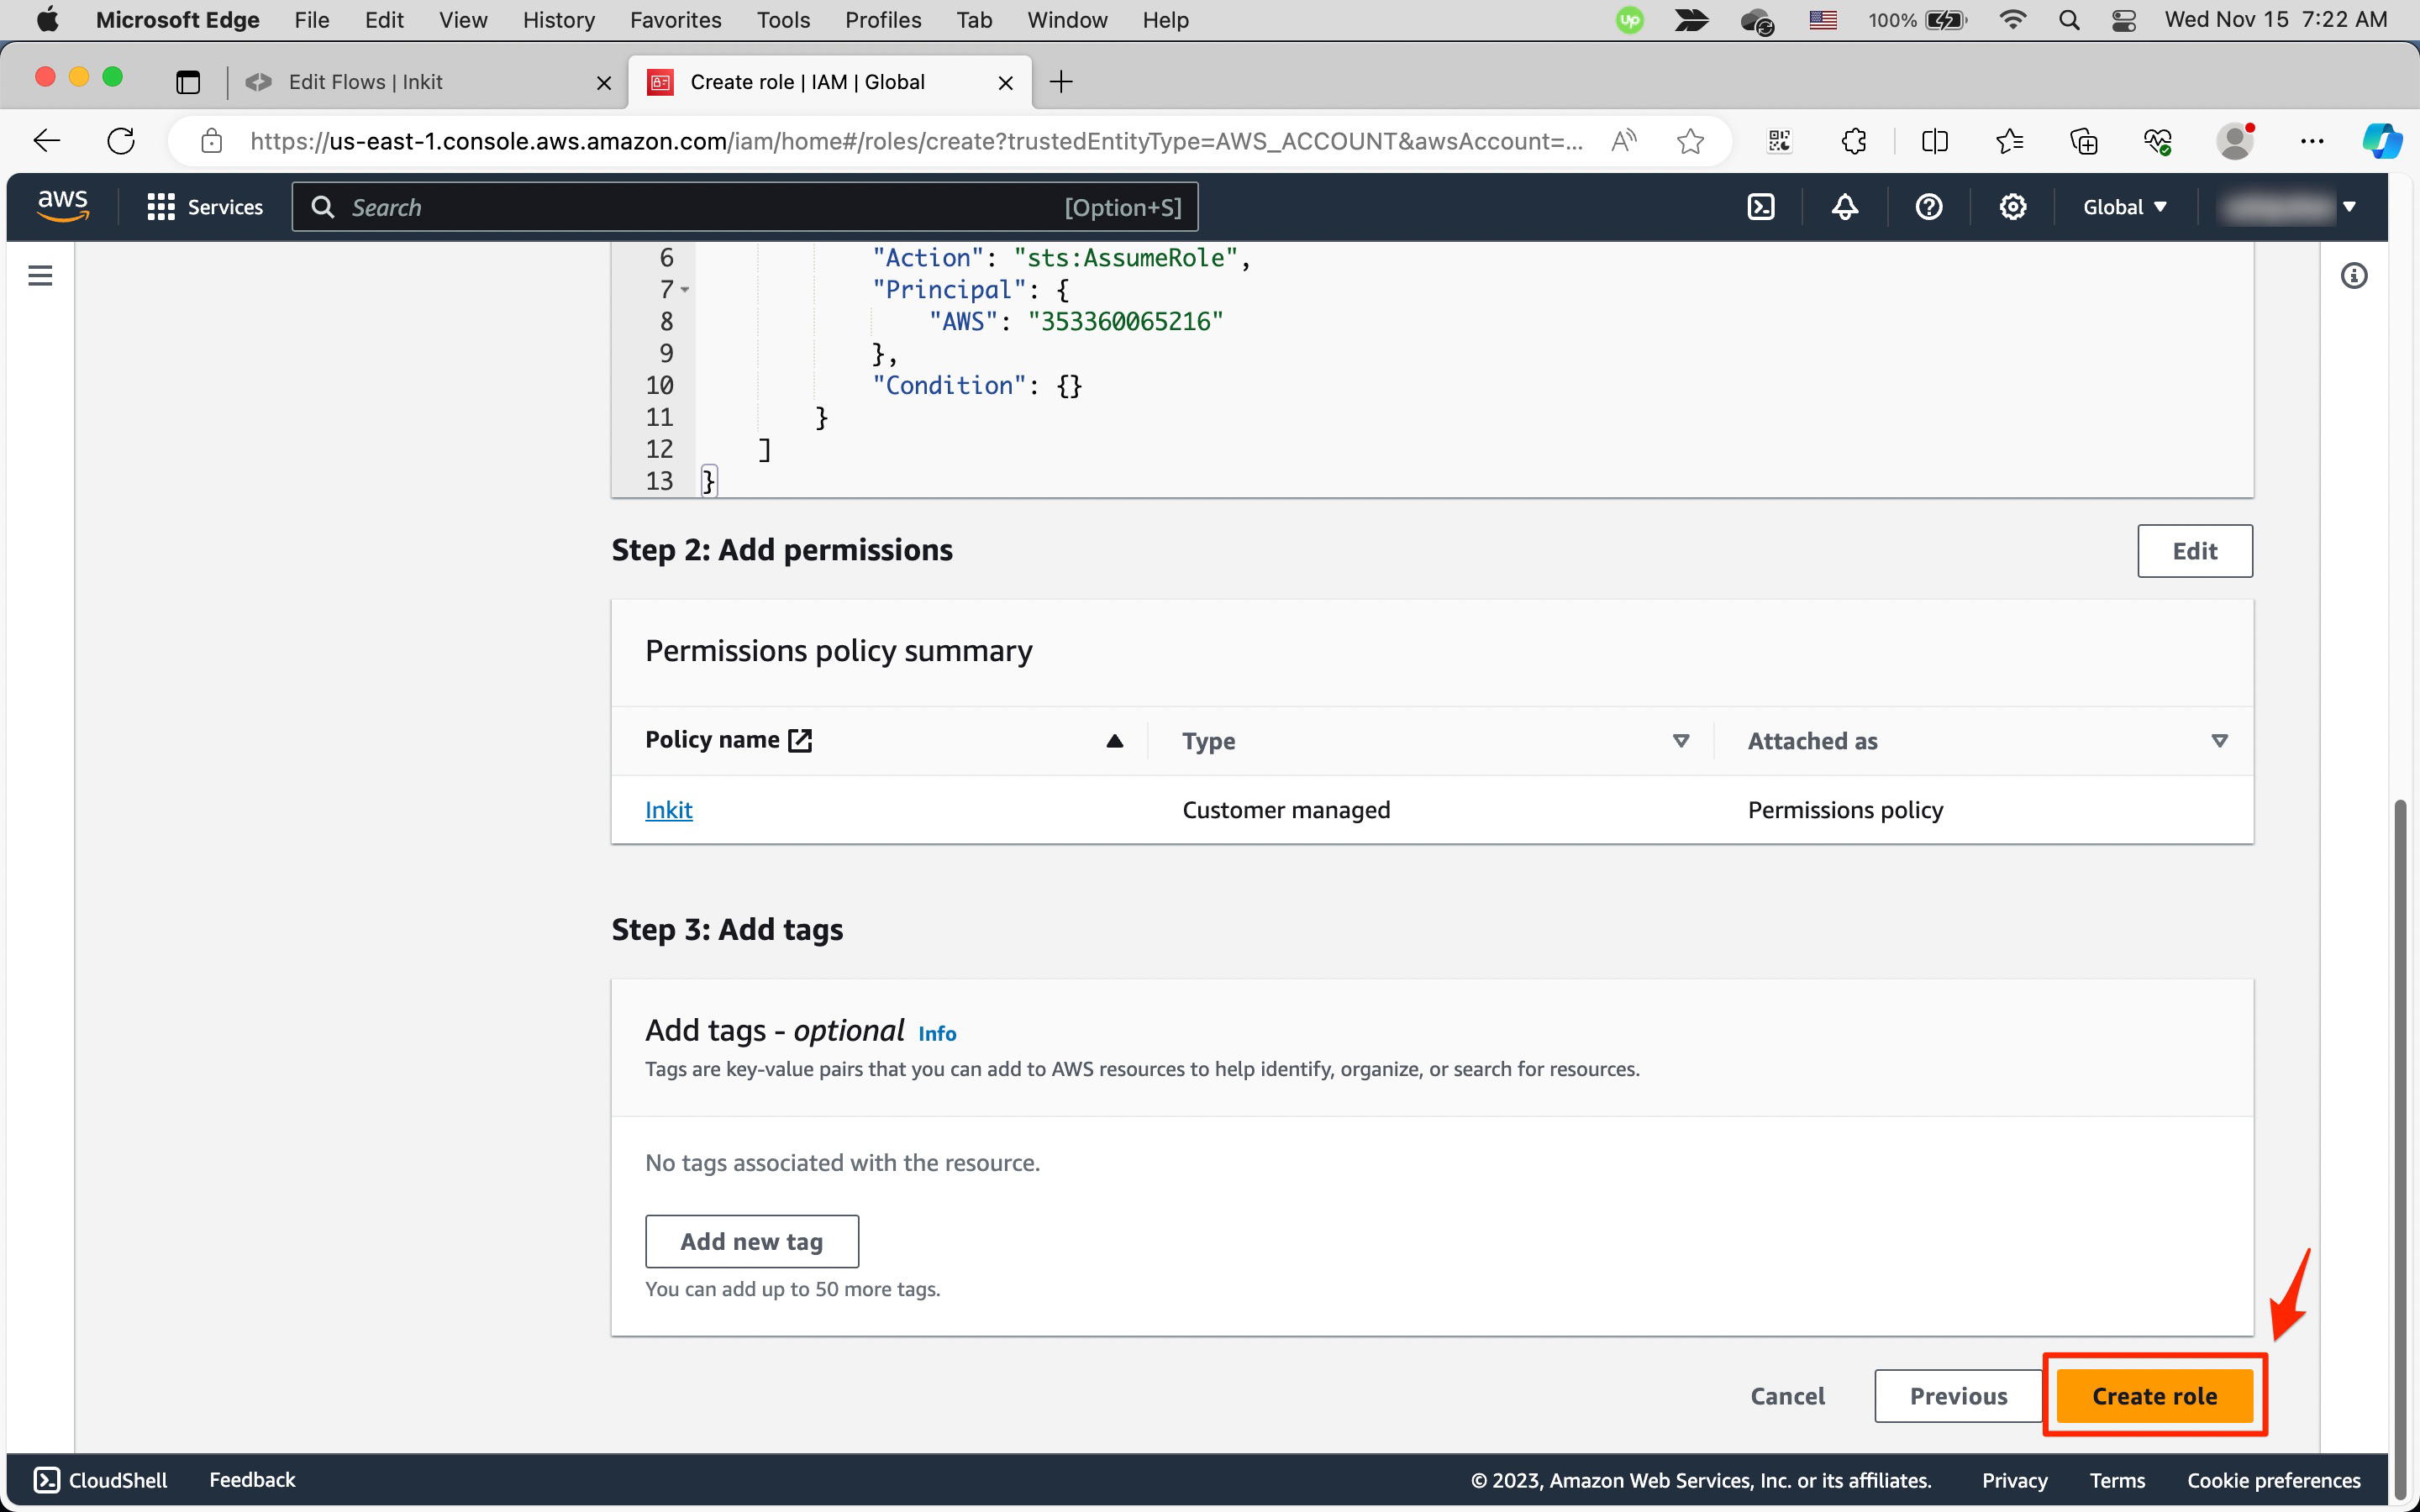
Inkitin the Search box and select Inkit as the policy.Then click Next.
-
In the Name, review, and create page, enter
Inkitas the Role name. You can also optionally enter a Description.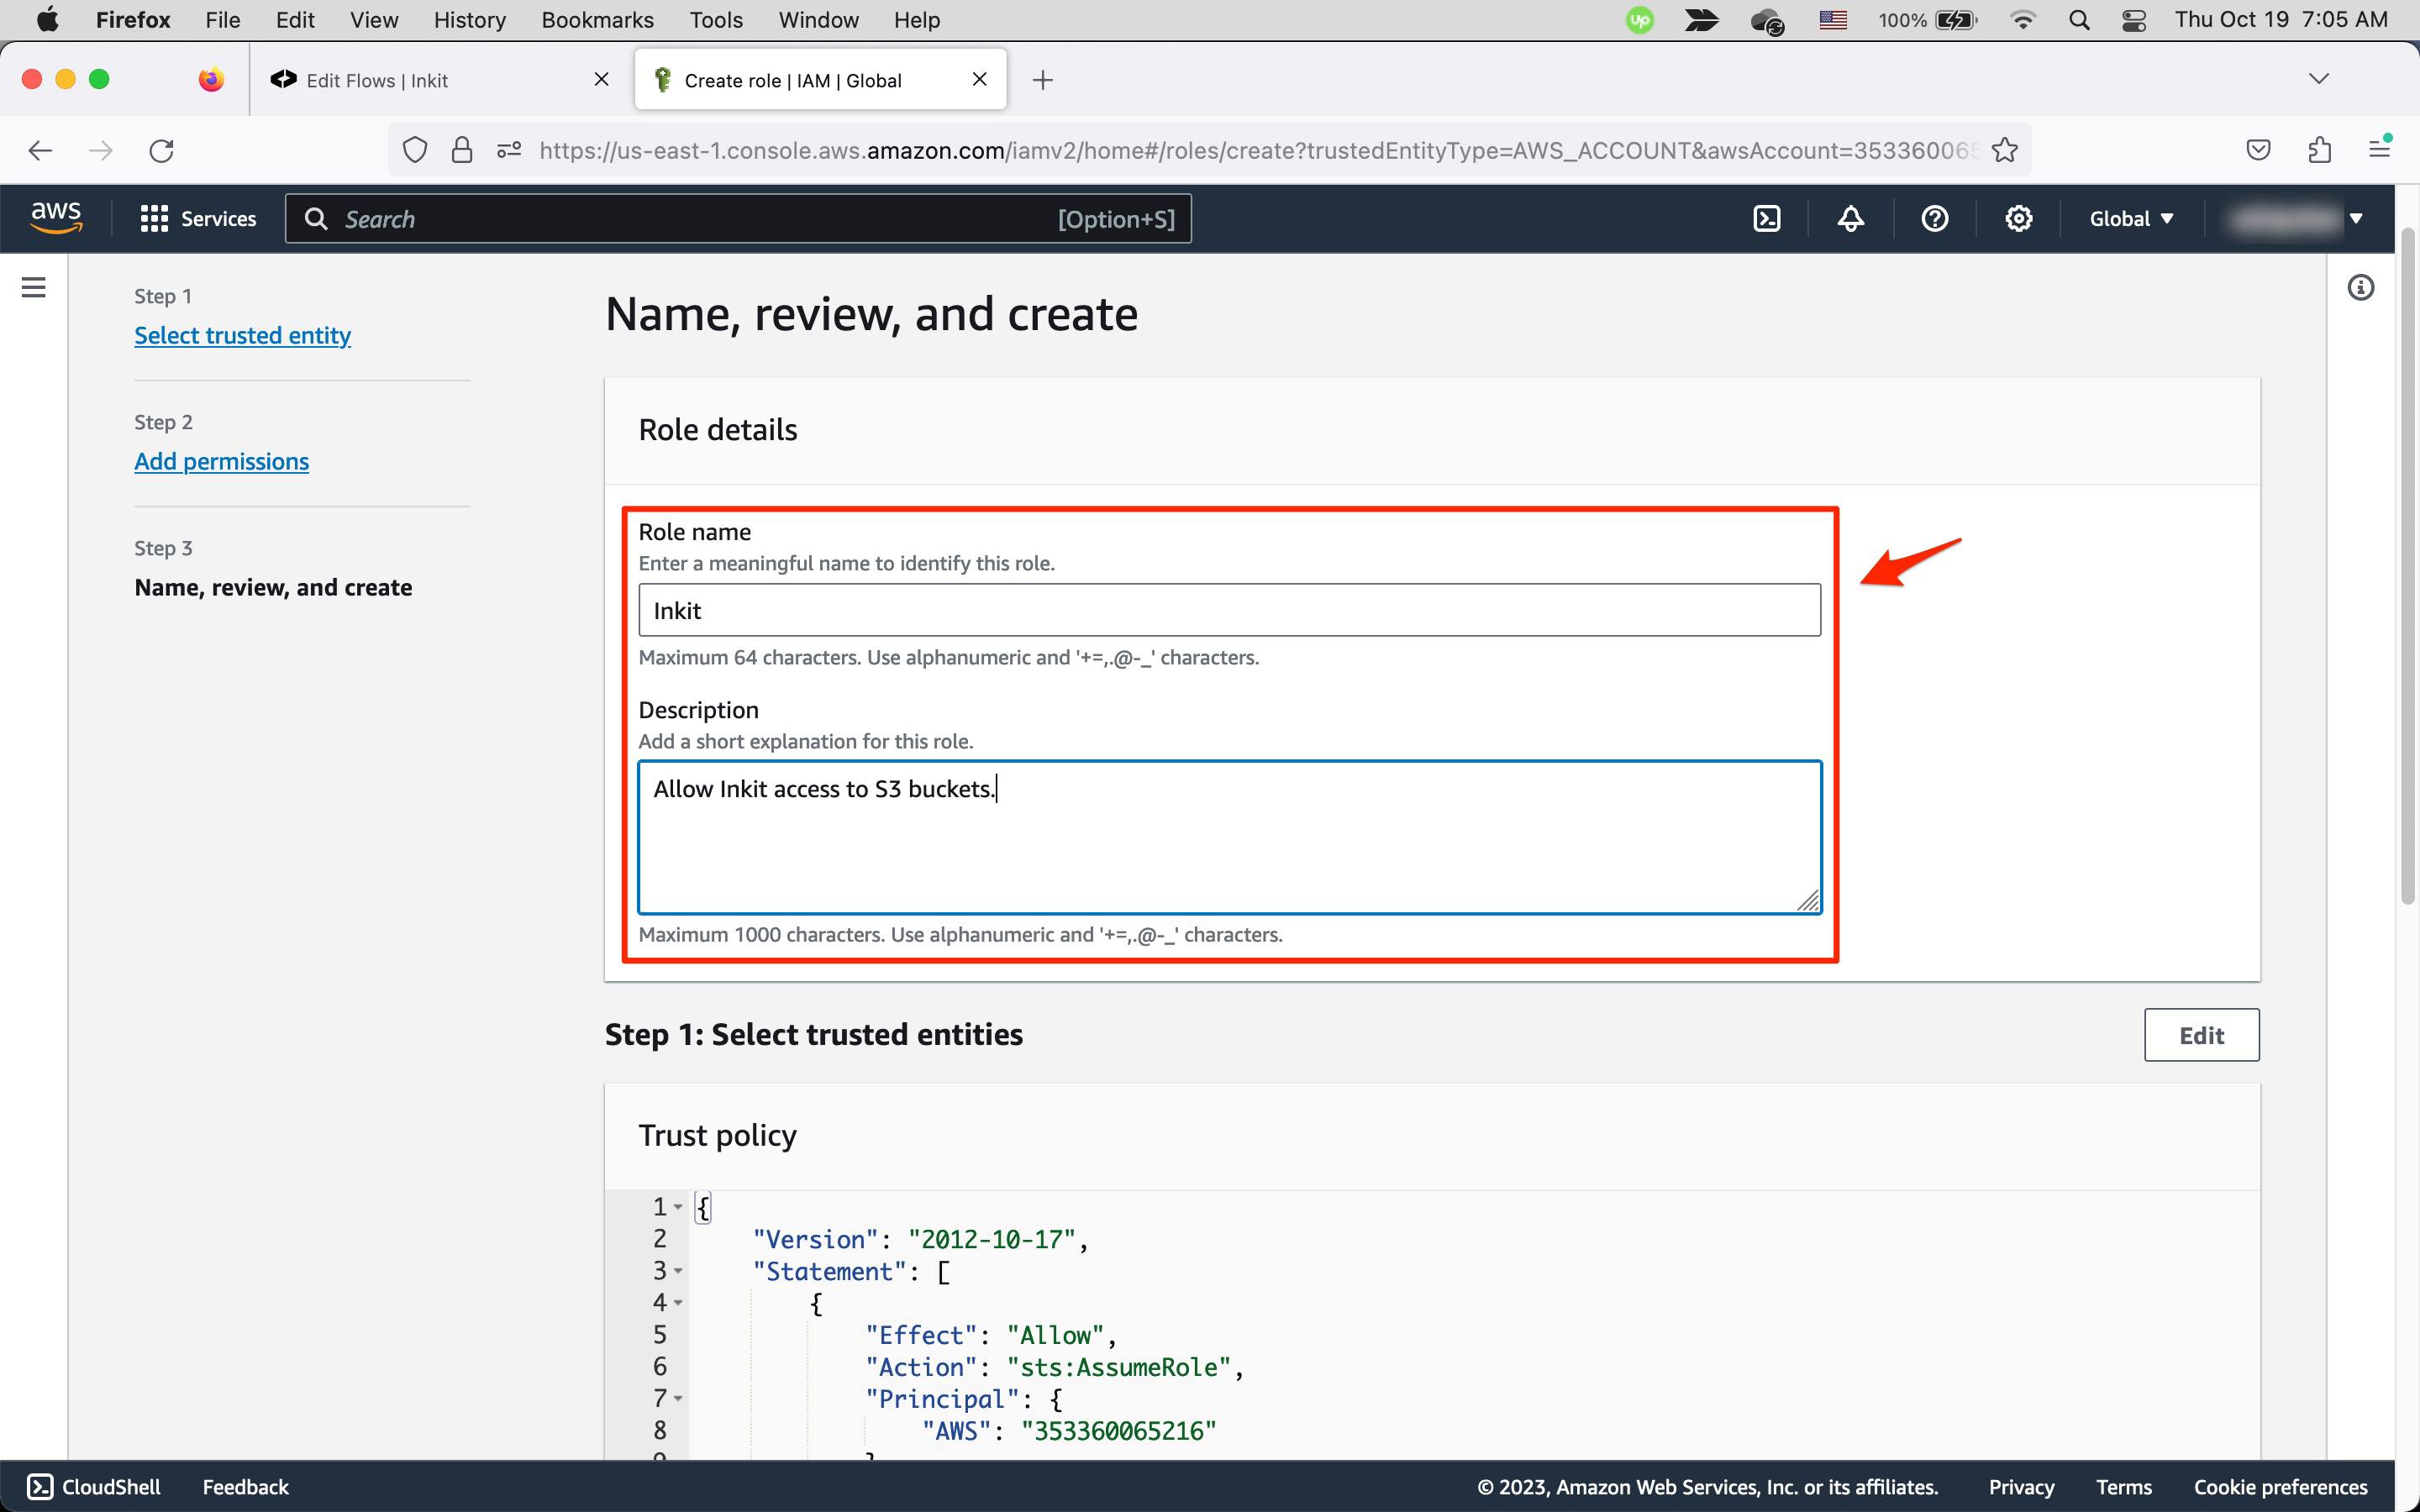
Then, at the bottom of the page, click Create role.
-
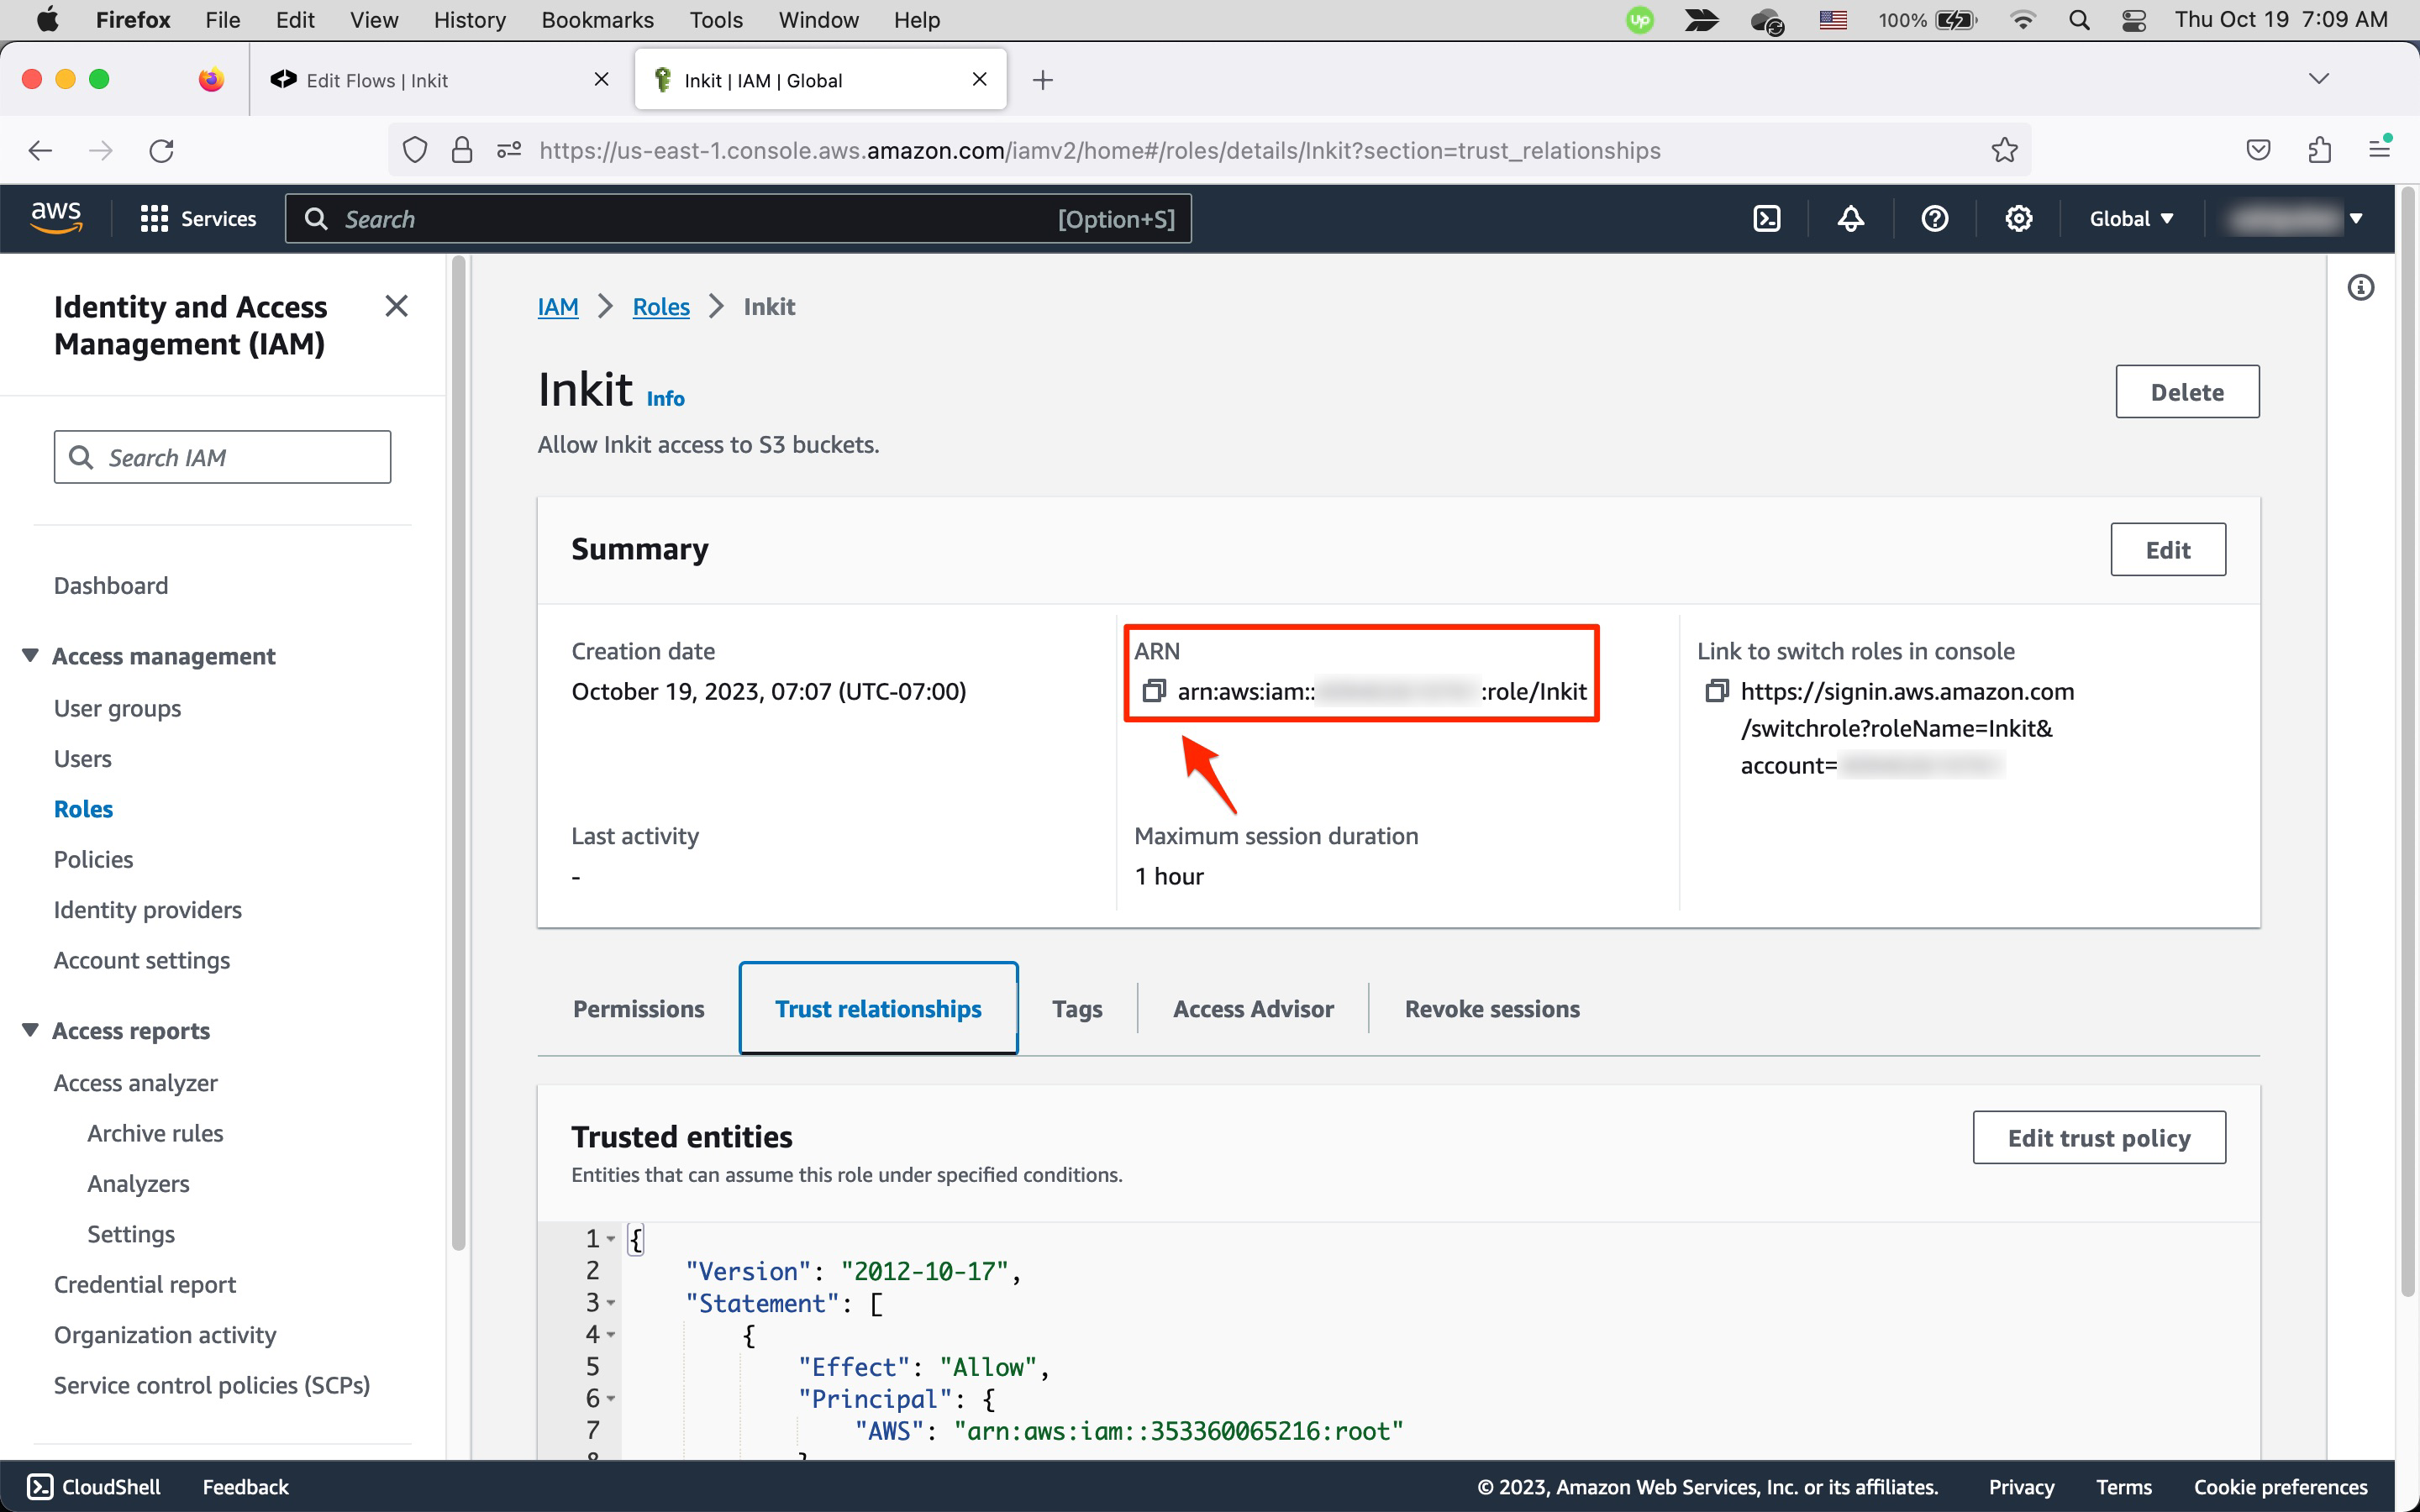
To get the IAM role ARN, click the role that you just created.
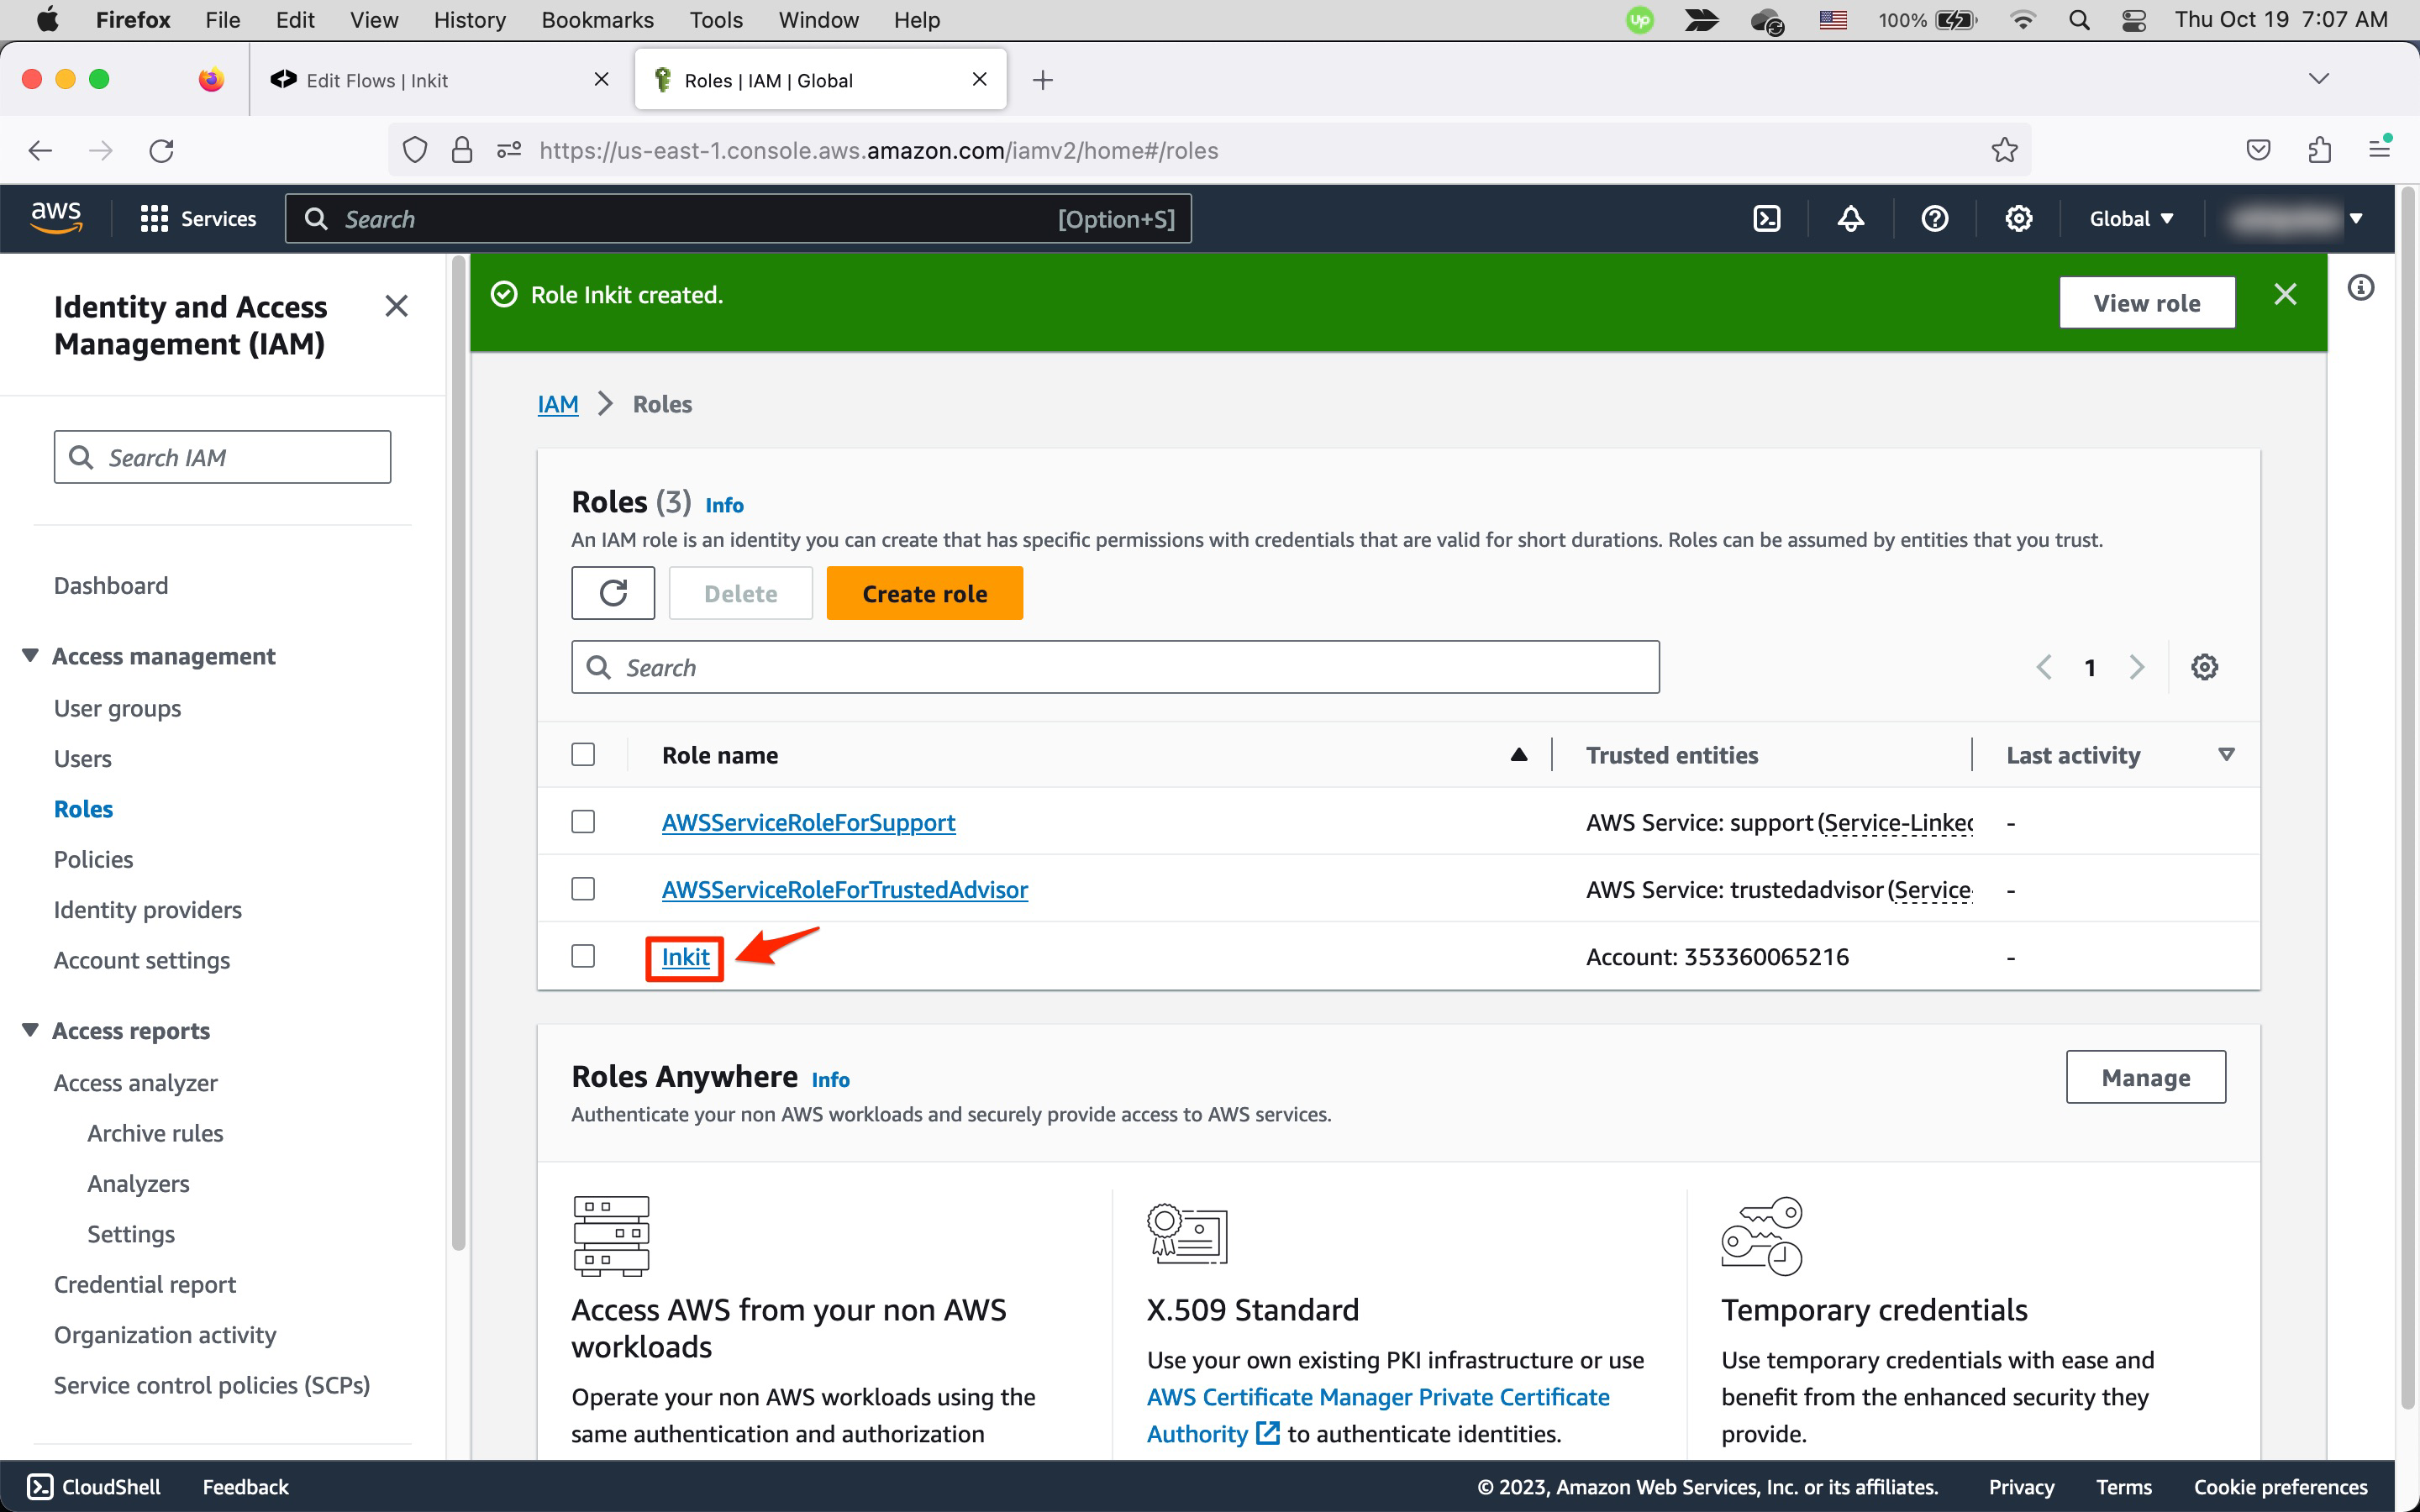
In the role page, you will find the ARN in the Summary panel. Click the copy button to copy it to the clipboard.
Updated 10 months ago