Create a folder
Learn how to create a folder in which you can store your generated documents by following this step-by-step guide
In this guide, you’ll learn how to create a folder on the Inkit platform. By the end, your organization will have a folder in which it can place its rendered documents. Let us proceed.
Prerequisites:
- You know what folders are
- You understand folder privacy settings and folder sharing
- You have decided on how you want to organize your data
Read more about:
Create a folder in the web environment
Before creating your folder in your organization’s Inkit web environment, make sure you are signed in to a user with the folders.create permission.
If you are signed in to an admin user, you have all permissions granted by default. Otherwise, you must create a new user role and give it the appropriate permission.
- Read more about default admin assignment
- Discover how to add a role to a user (coming soon)
Let's continue, follow along by performing the next steps:
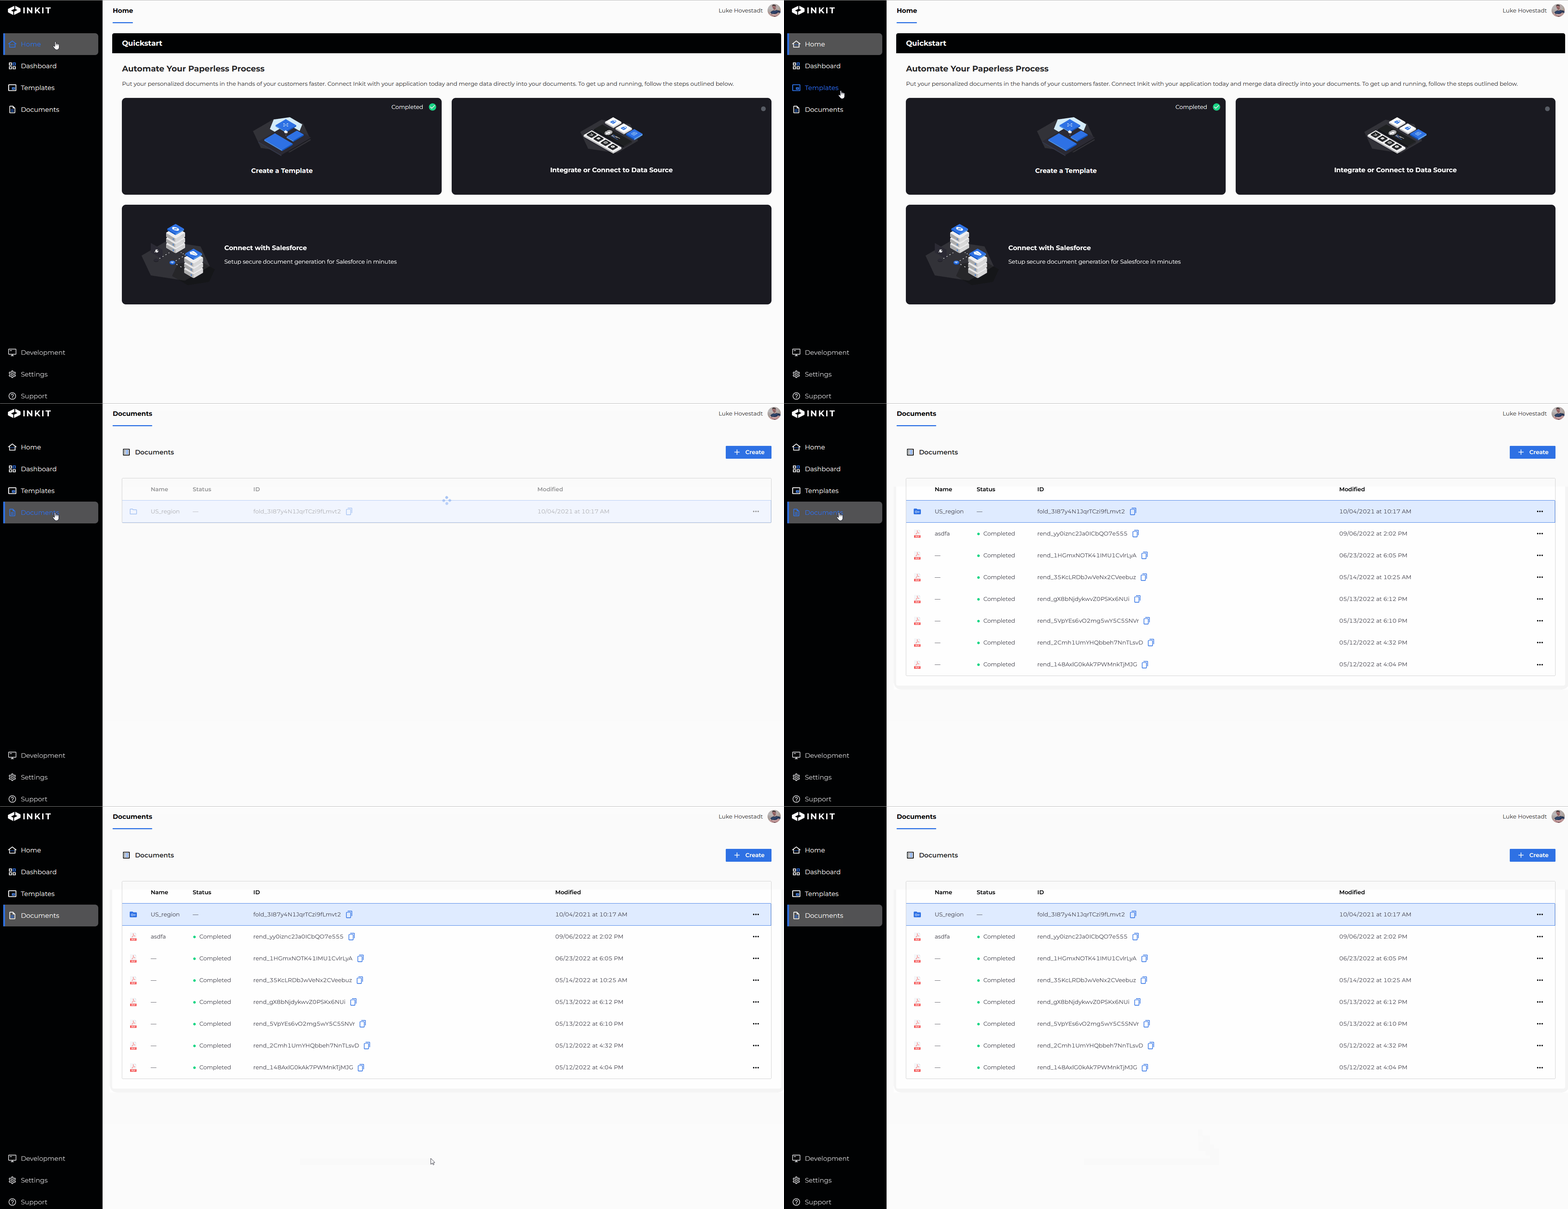
- Browse to the documents tab
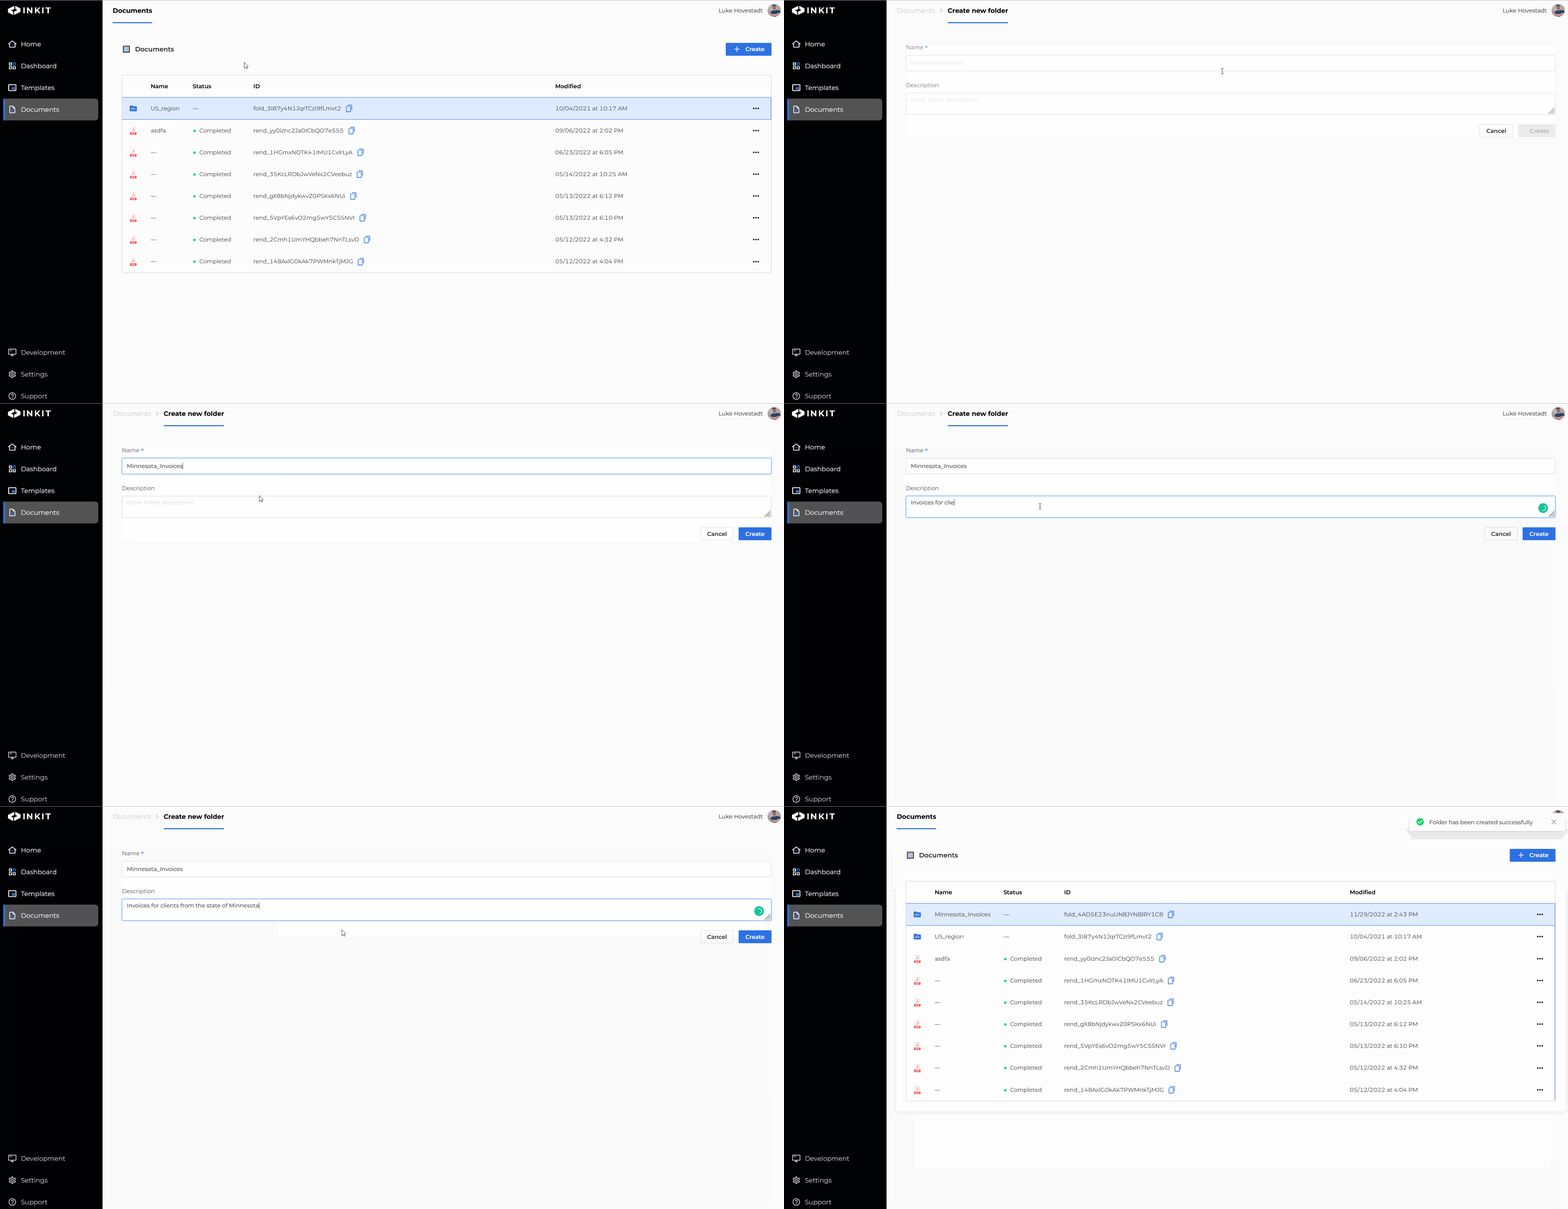
- Press Create button and select the "Folder" option from the drop-down.

- Fill in the folder form with a name and description and press create
Give your folder a clear, indicative name. For example, name a folder ‘Invoices_US’ instead of ‘Billing.’ The clearer you organize your data, the easier it is for your team to use the Inkit platform.

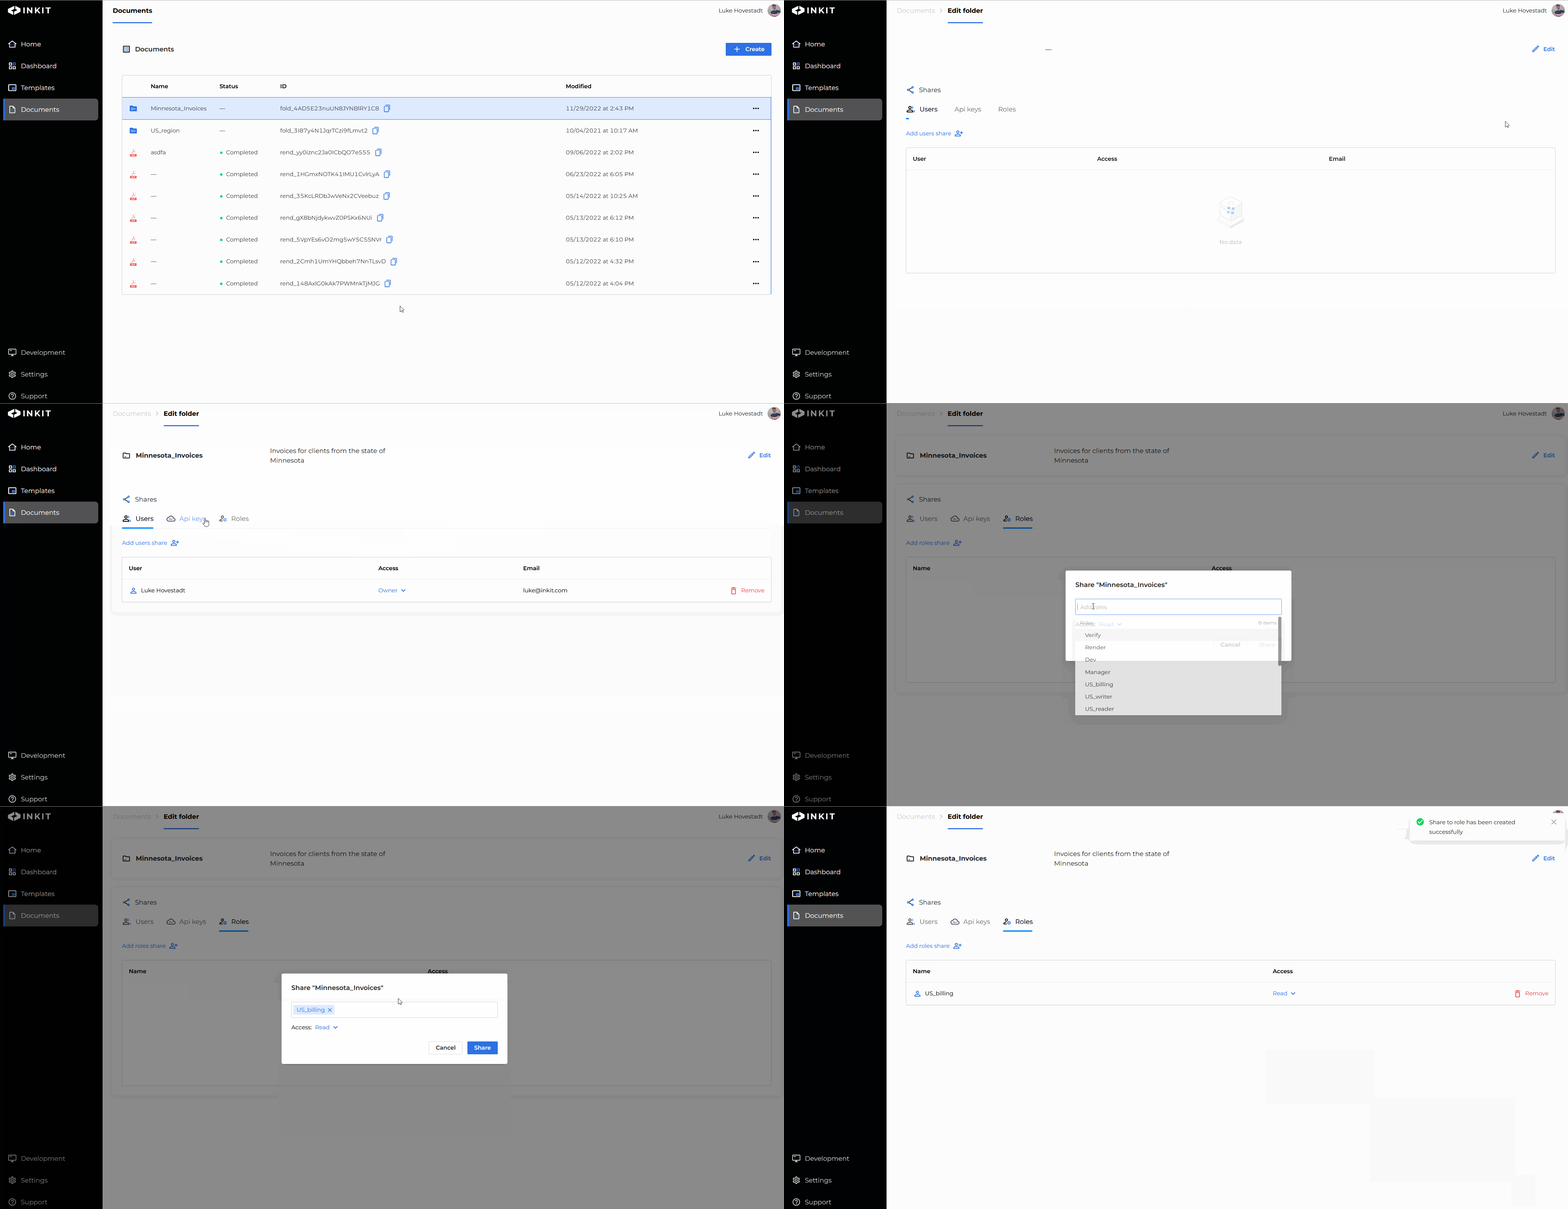
Note: You can edit which roles have access to your folder after you create it. Before creating a folder, you may wish to identify with whom you want to share the folder.
- (Optional): Open your folder again by pressing "edit" and assign roles, API keys, or users to it.

You have now successfully created a folder.
Tip: the Inkit platform aims to give you versatile data access customizability through folders. Do not only create public folders. Use private folders and folder sharing to hide confidential information.
Nested Folders
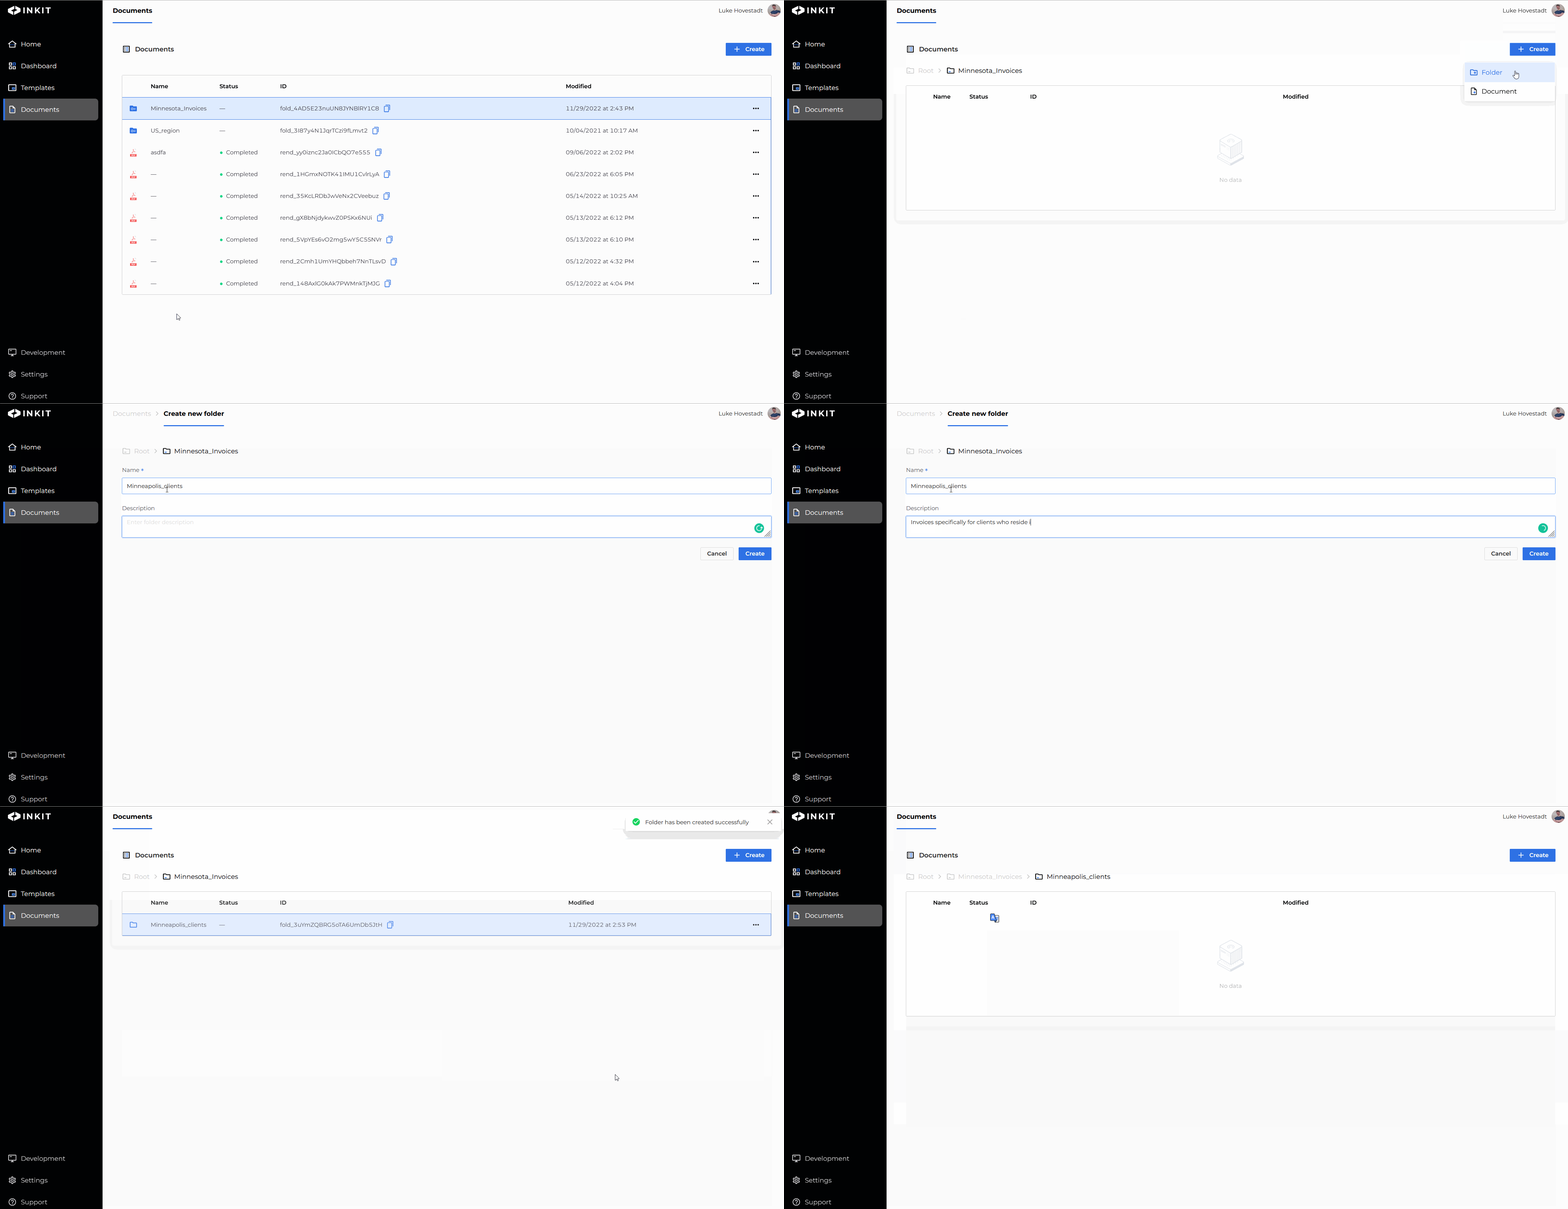
You can also create folders within folders. The process is almost exactly the same as creating a folder as you just learned. You can create as many nested folder "layers" as you like.
However, first, navigate into the folder you wish to create your nested folder in. After you are inside your folder, create the folder like you usually would.

Updated 5 months ago