Creating workflows
Creating a workflow from a set of templates
To create a workflow that will generate a document from a set of templates to a set of destinations, do the following:
Note: You have to create at least one template before you can create a workflow.
-
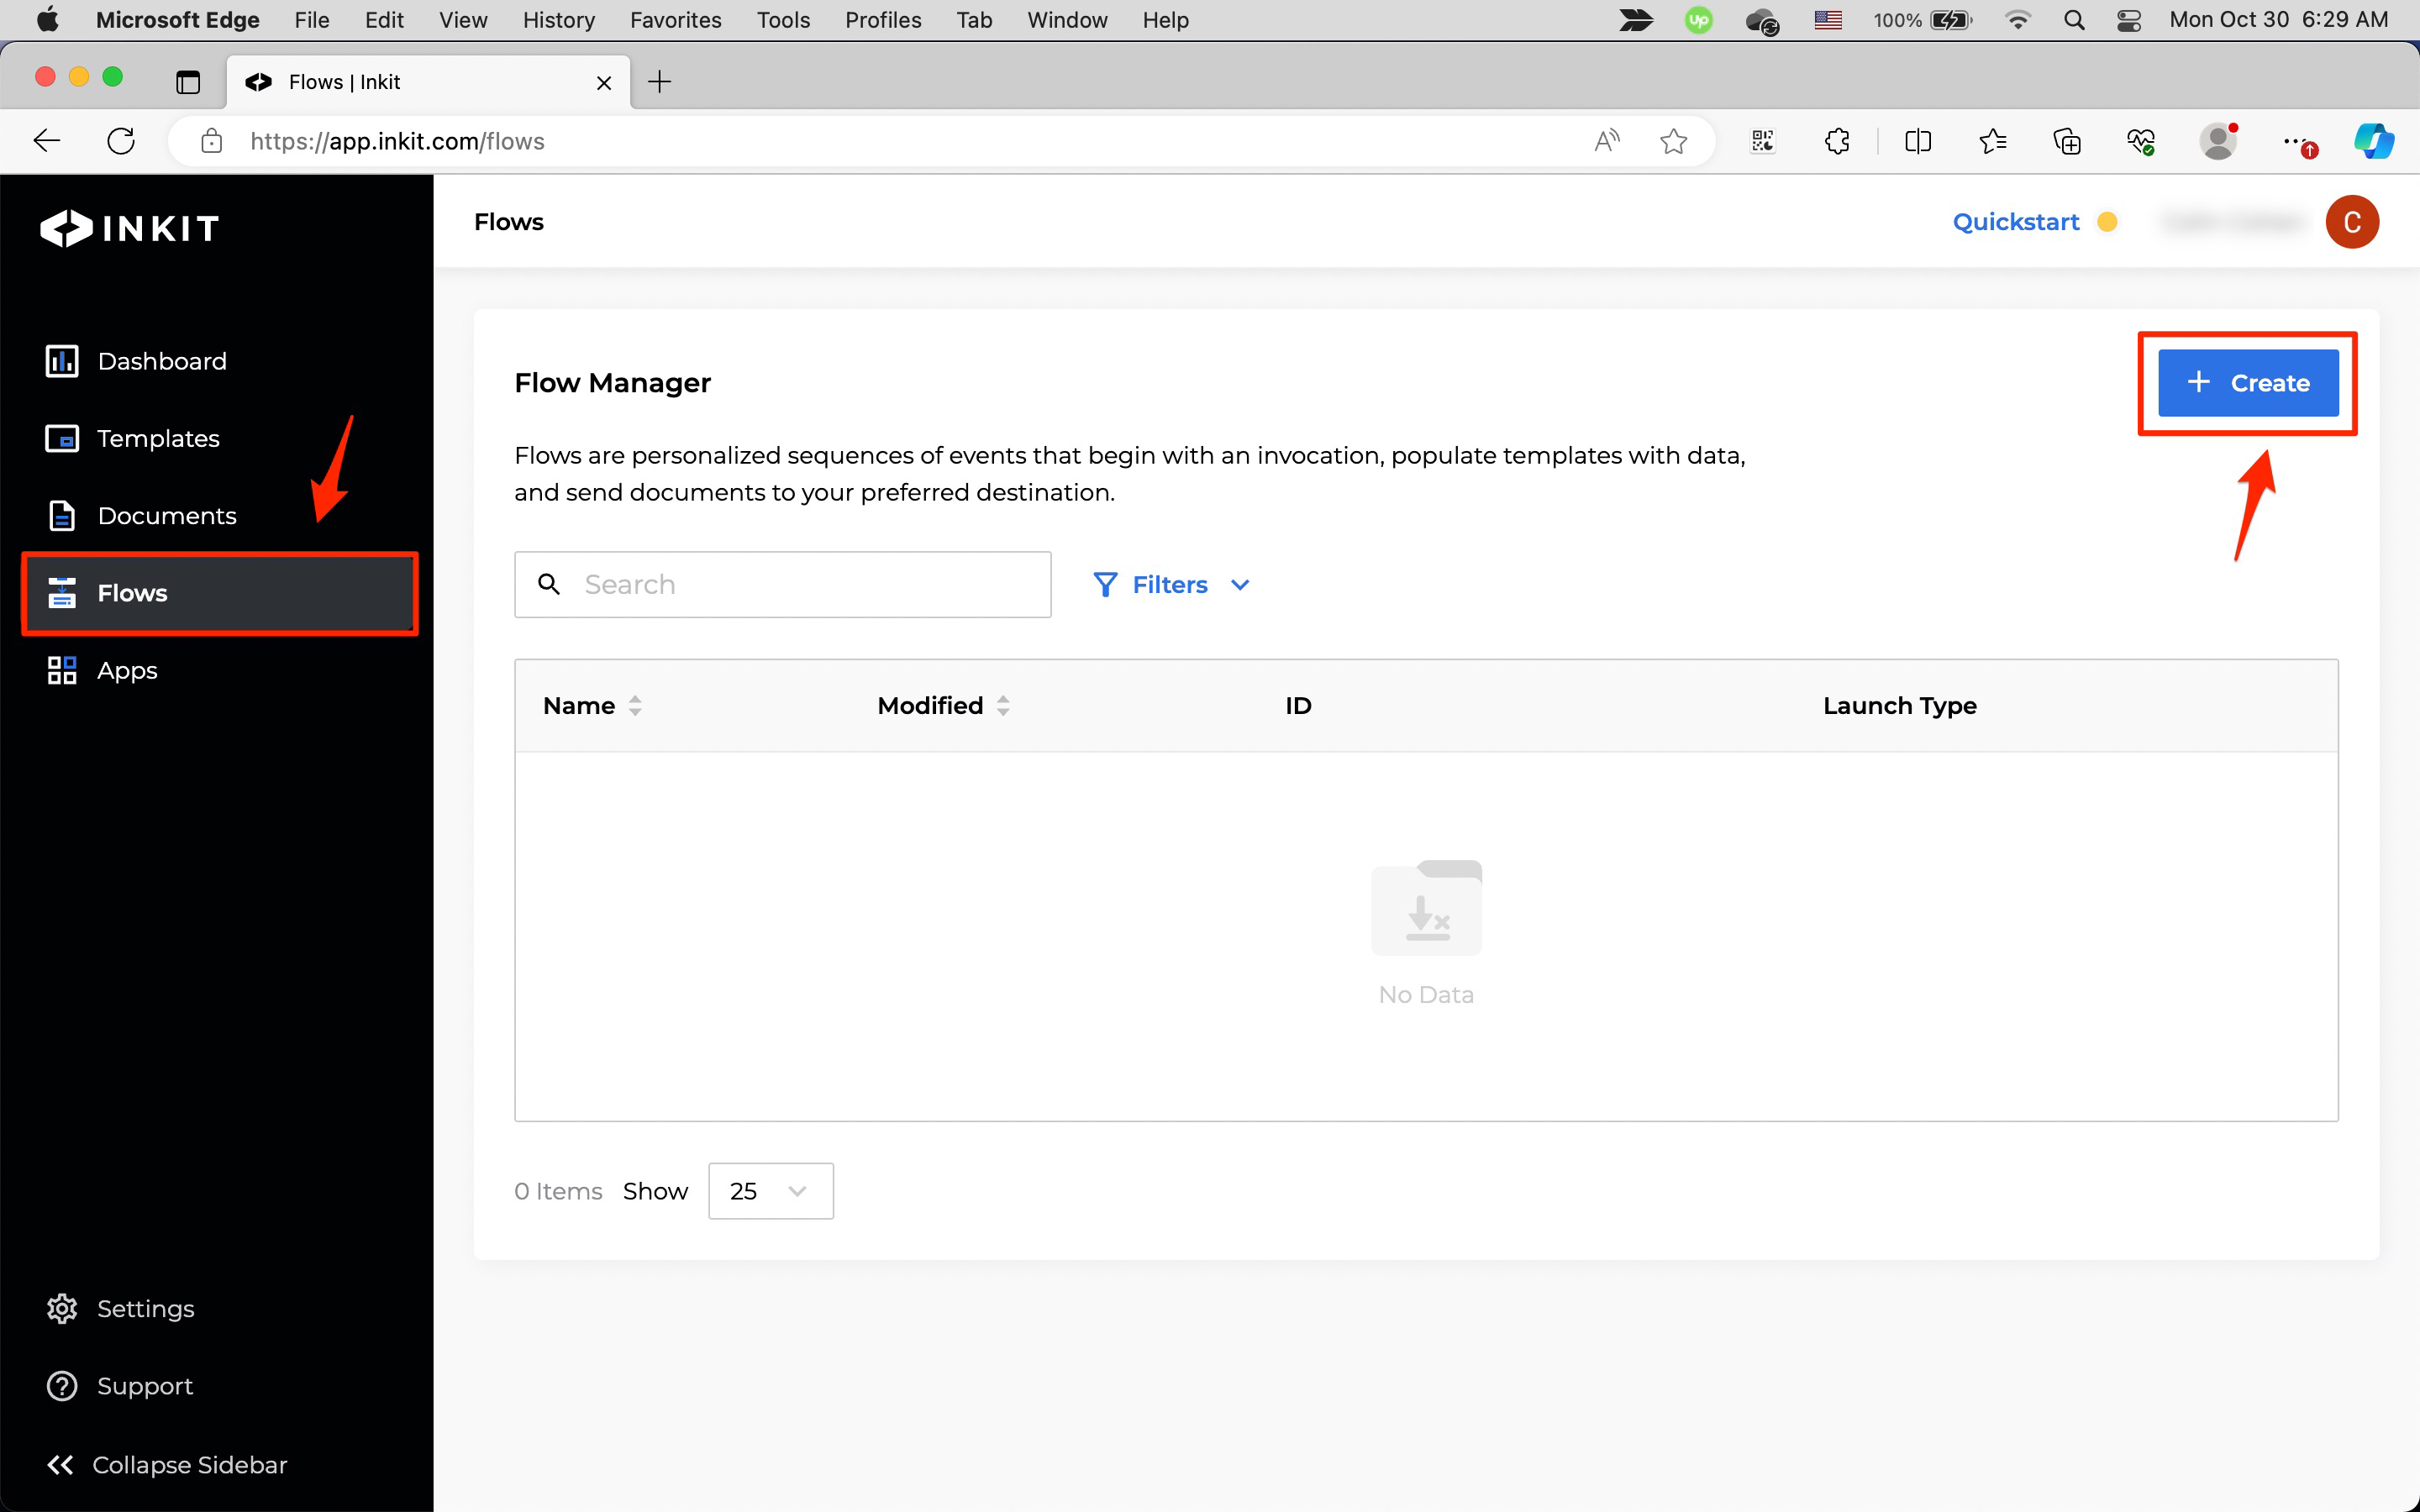
In the Inkit web app, select Flows in the left sidebar and then click + Create.
-
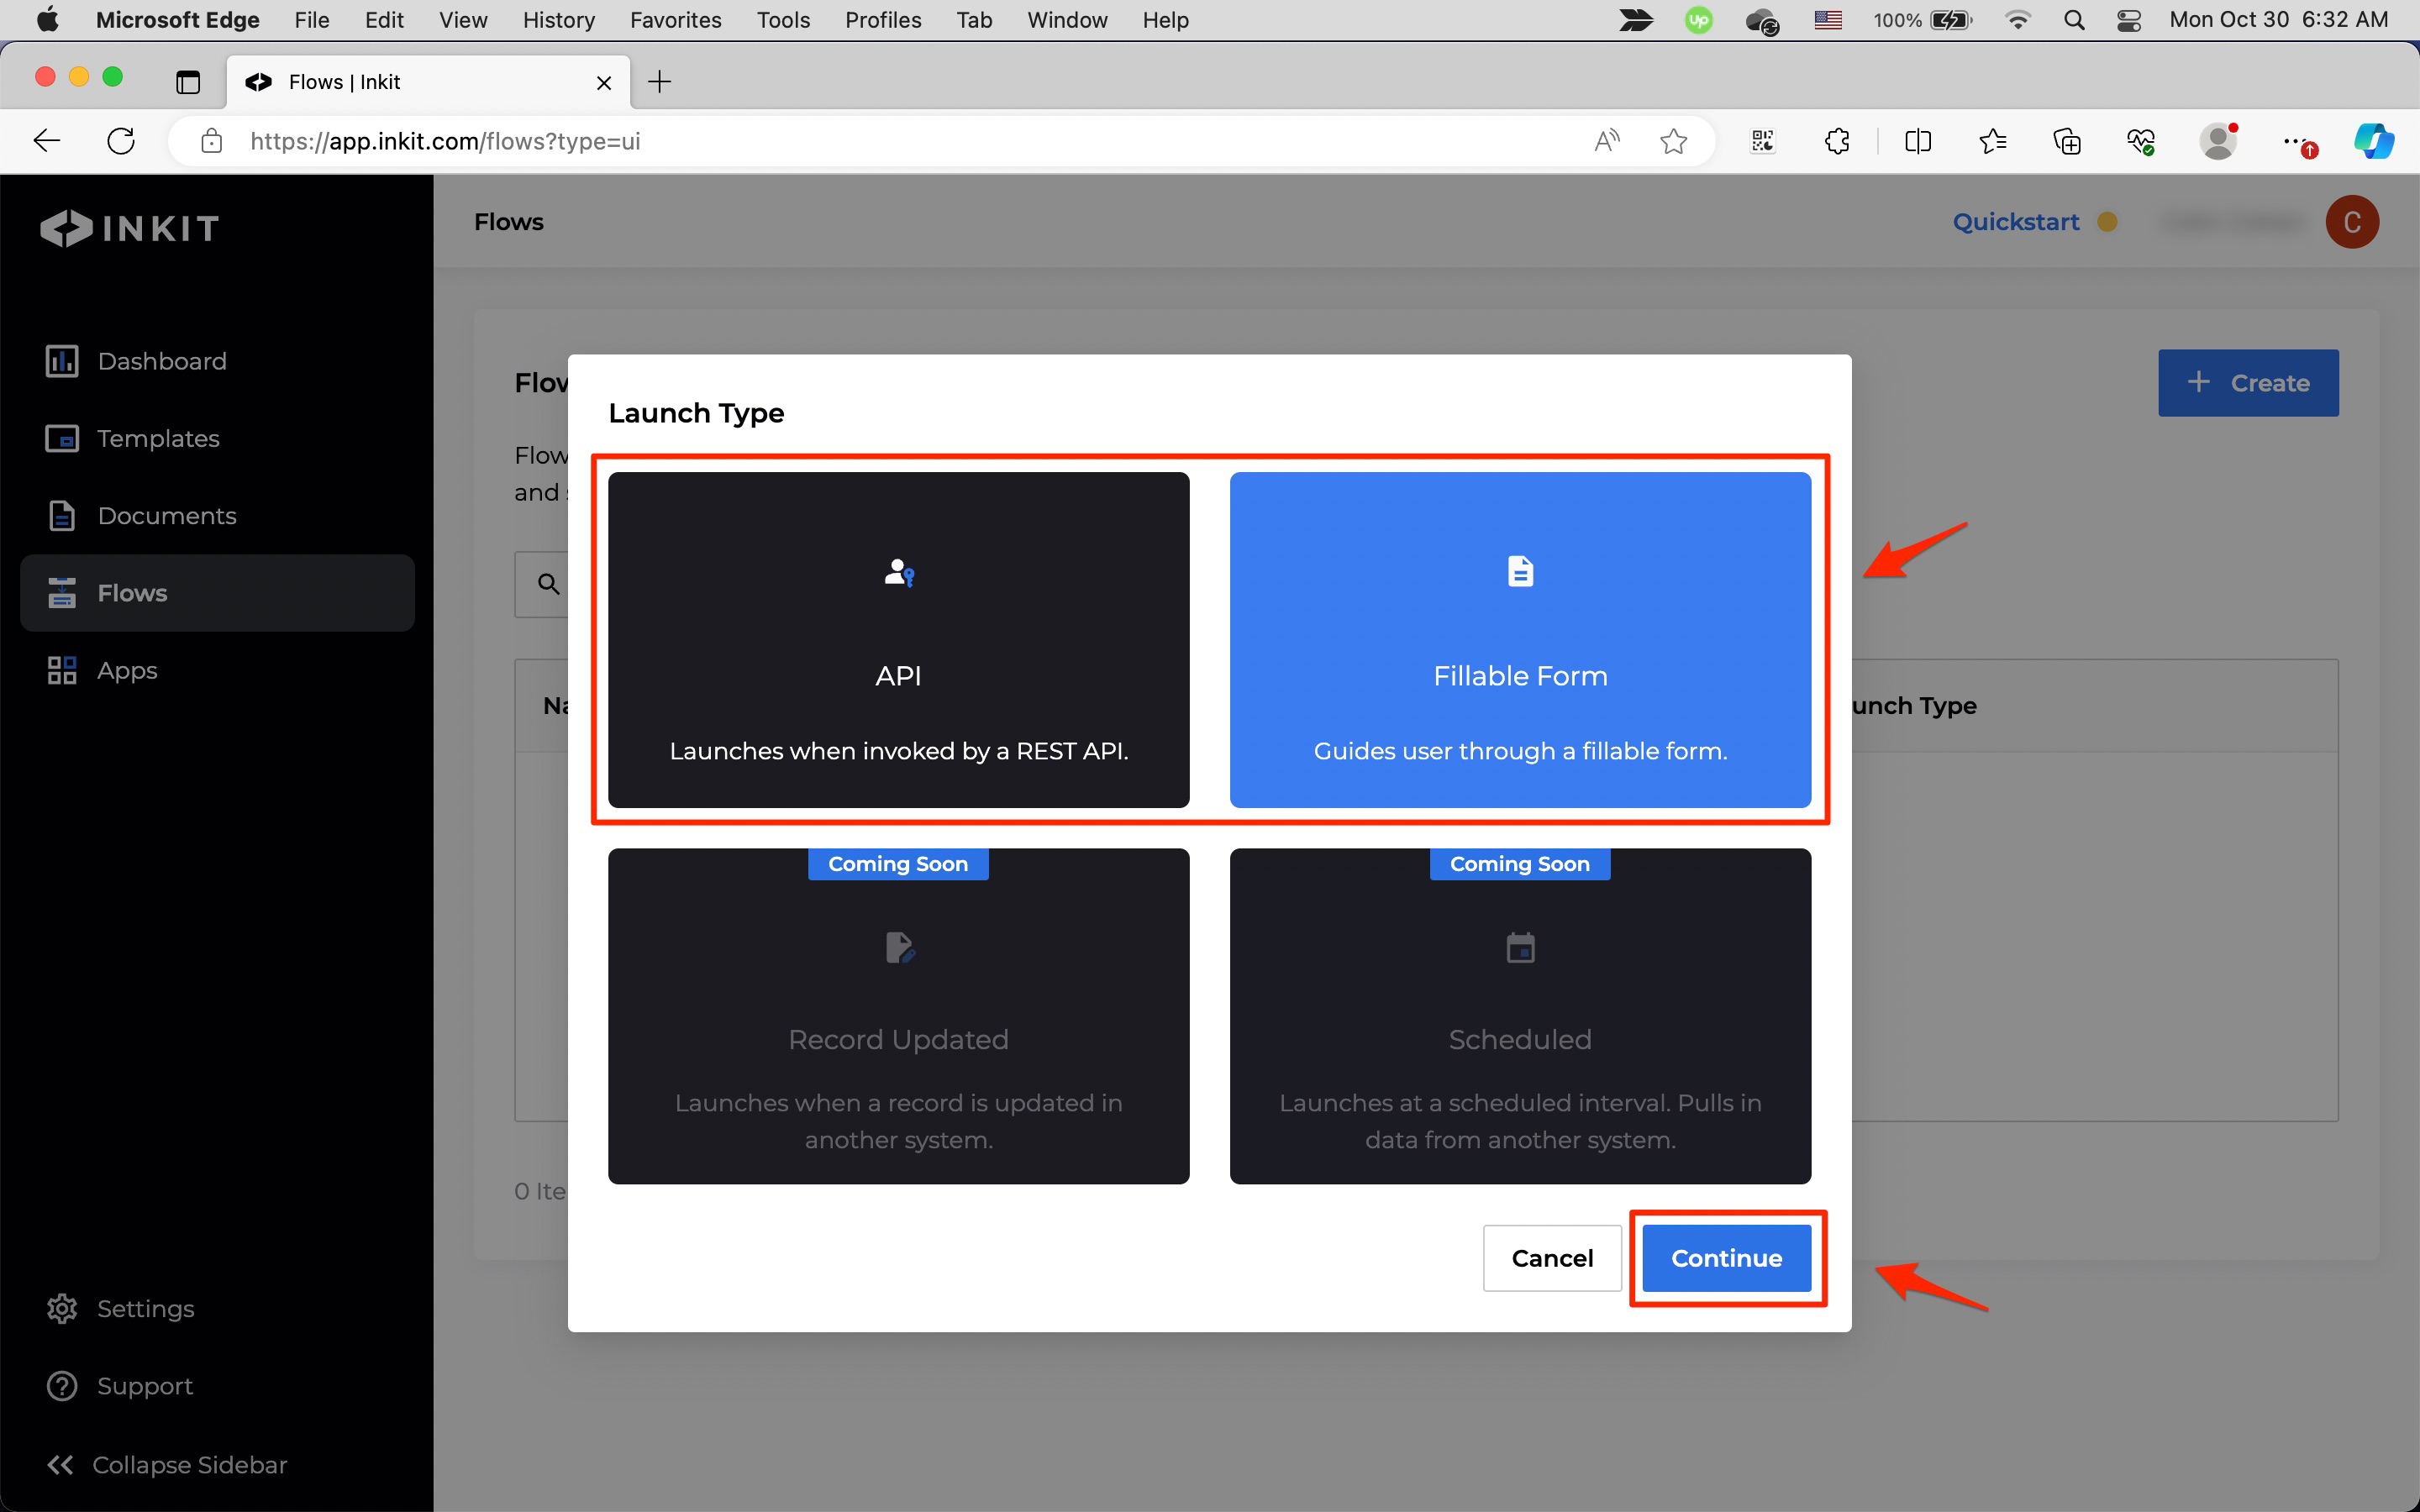
In the Launch Type dialog box, select one of the following workflow types:
- API (you launch the workflow through the Inkit API)
- Fillable Form (you launch the workflow through the Inkit web app)
Then click Continue.
-
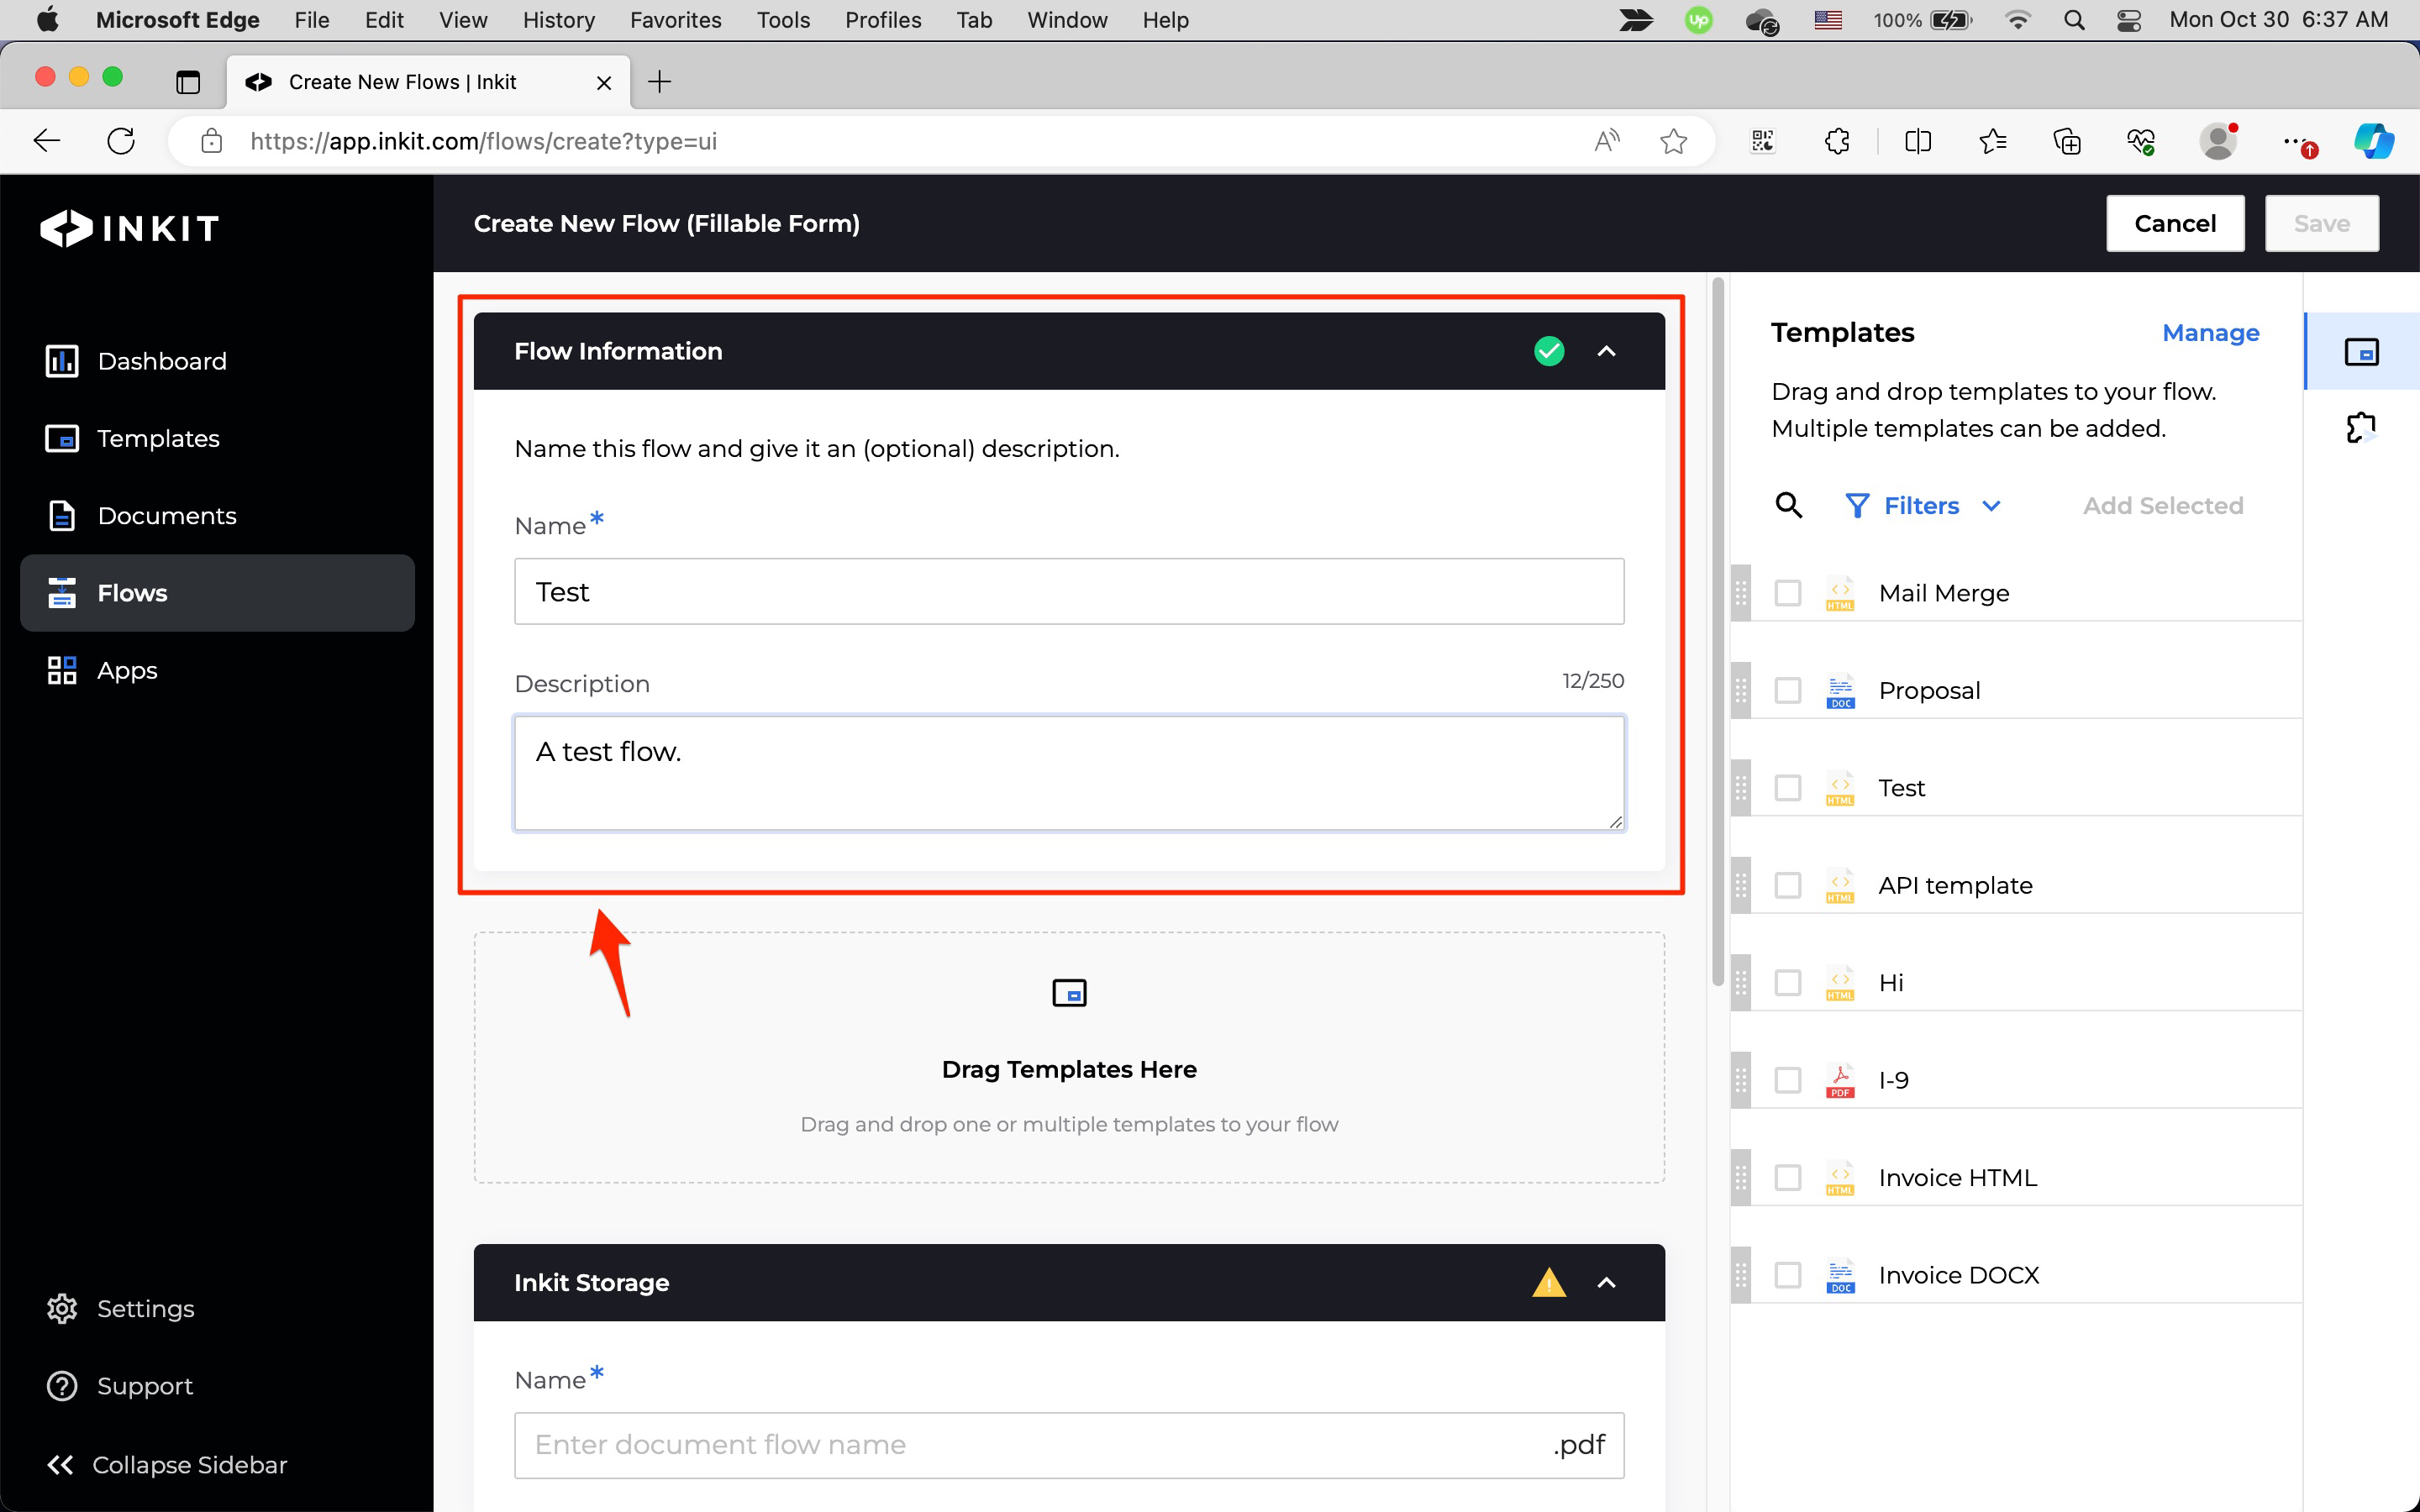
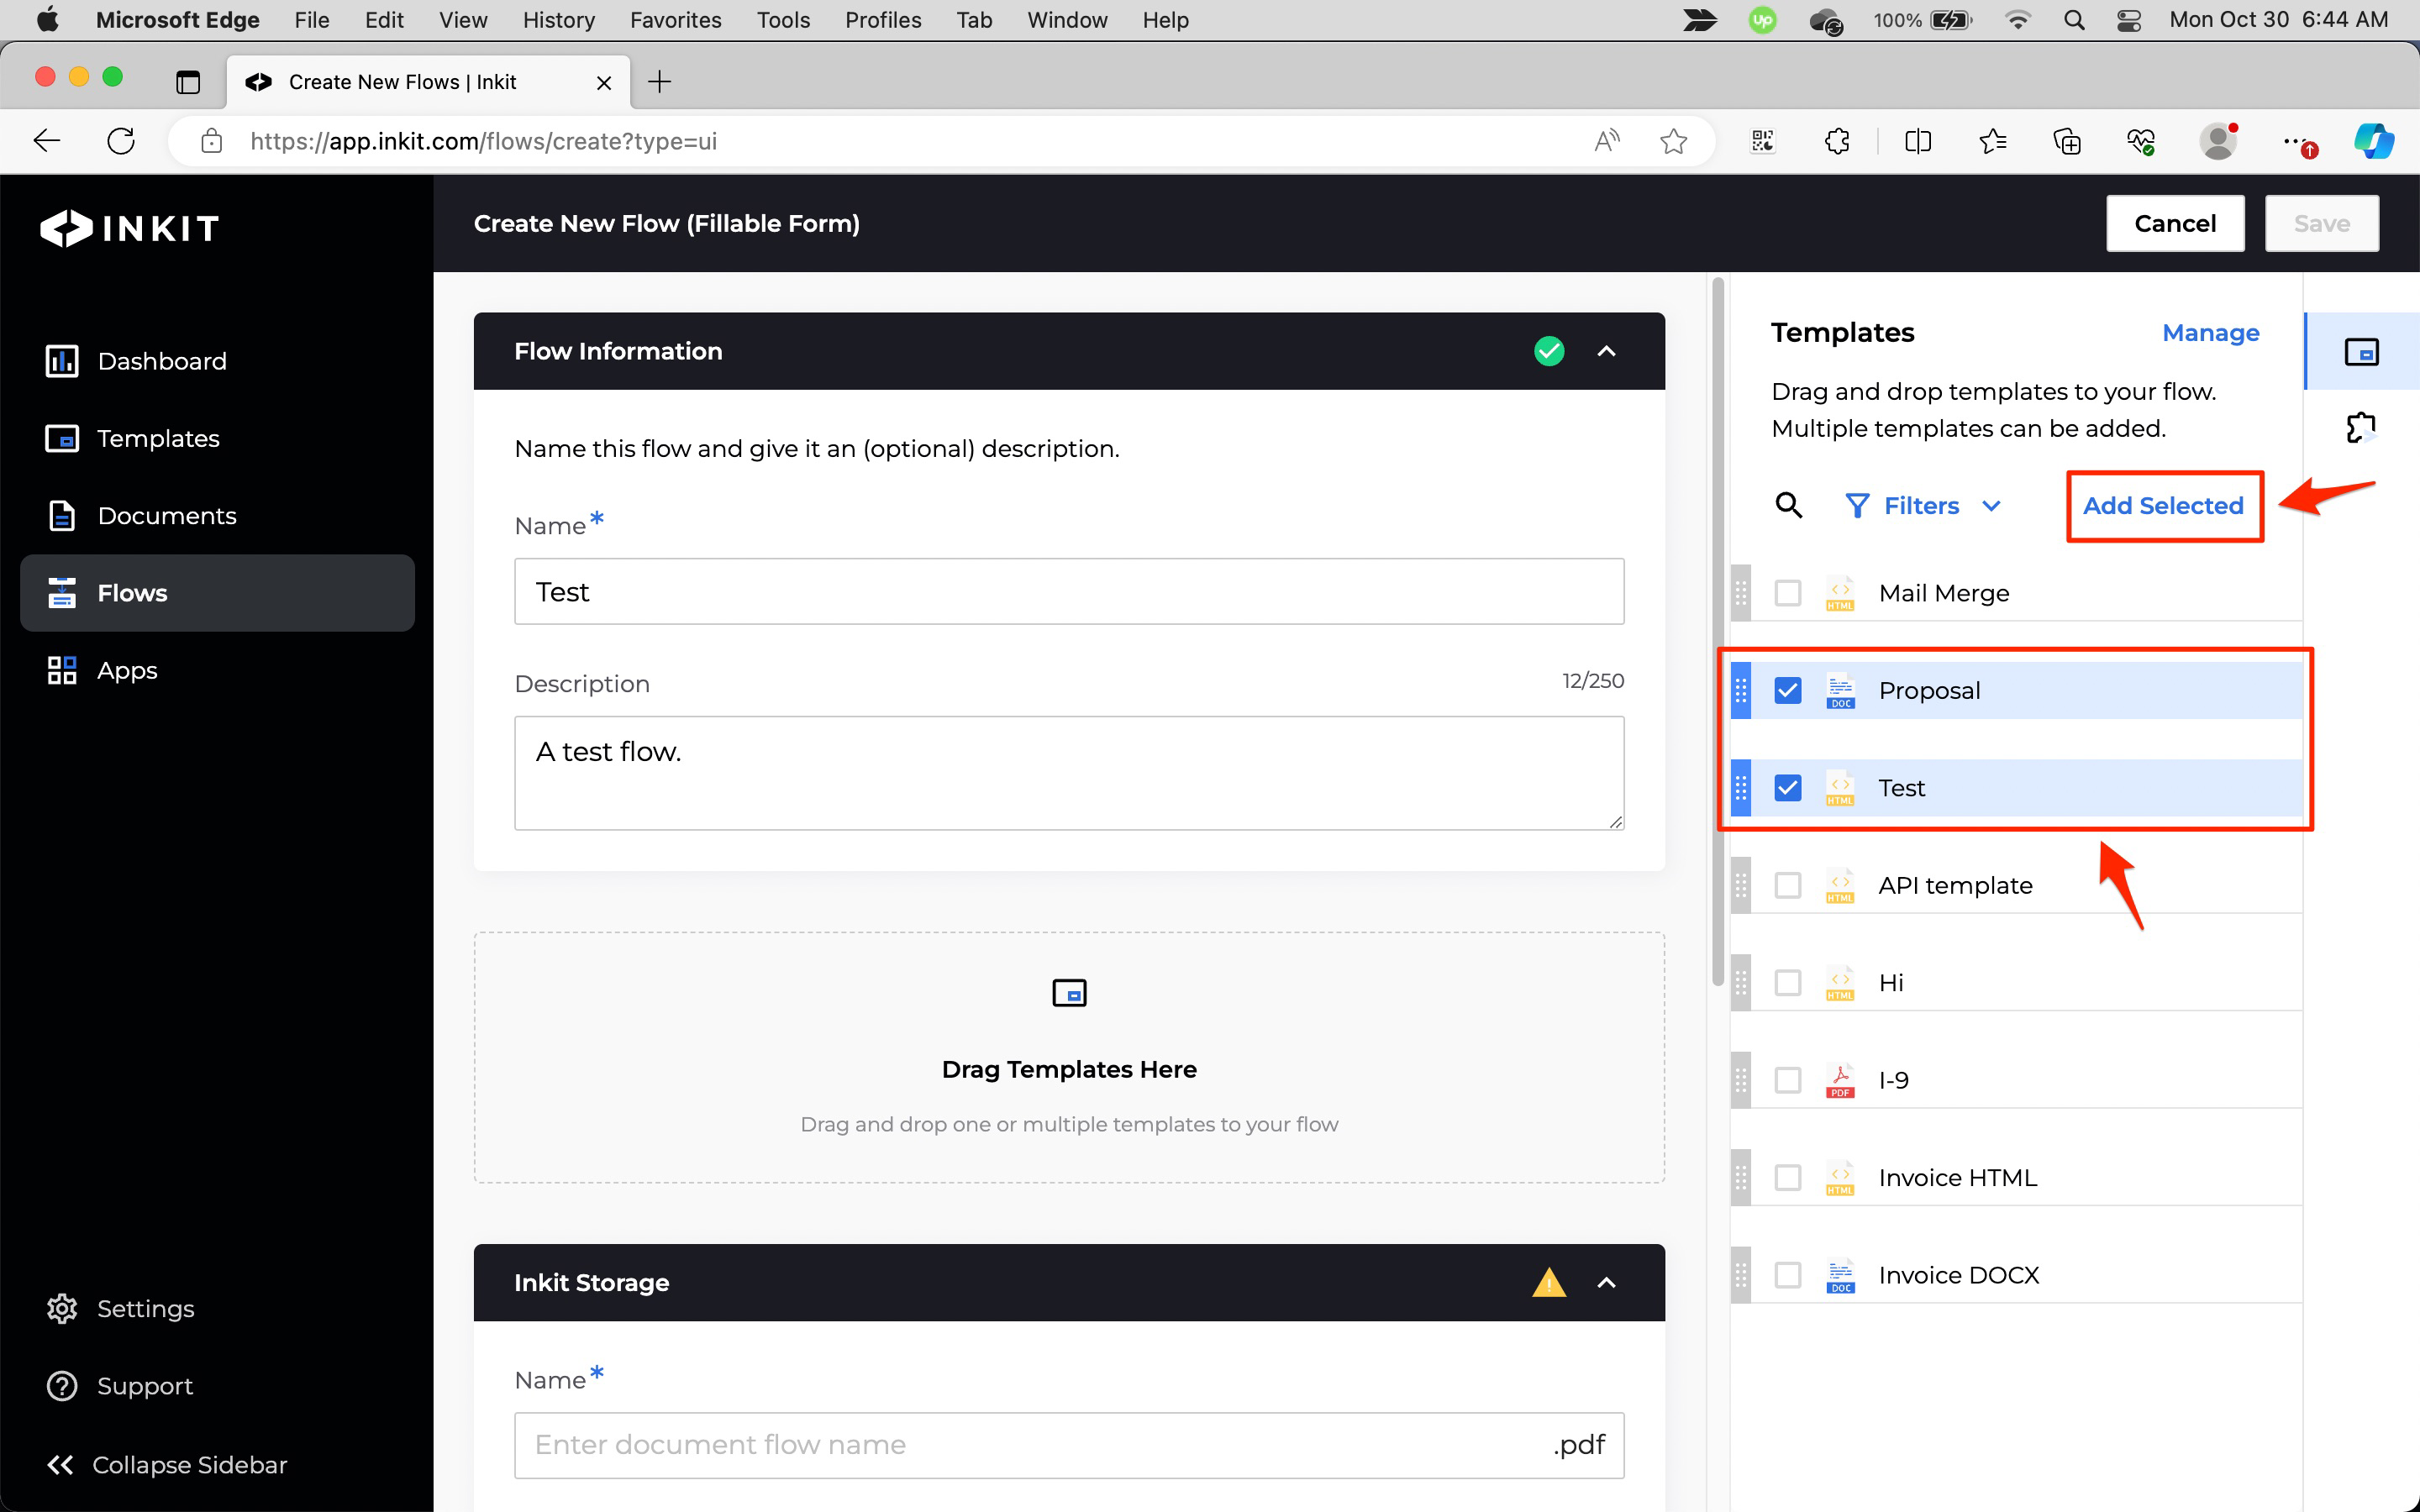
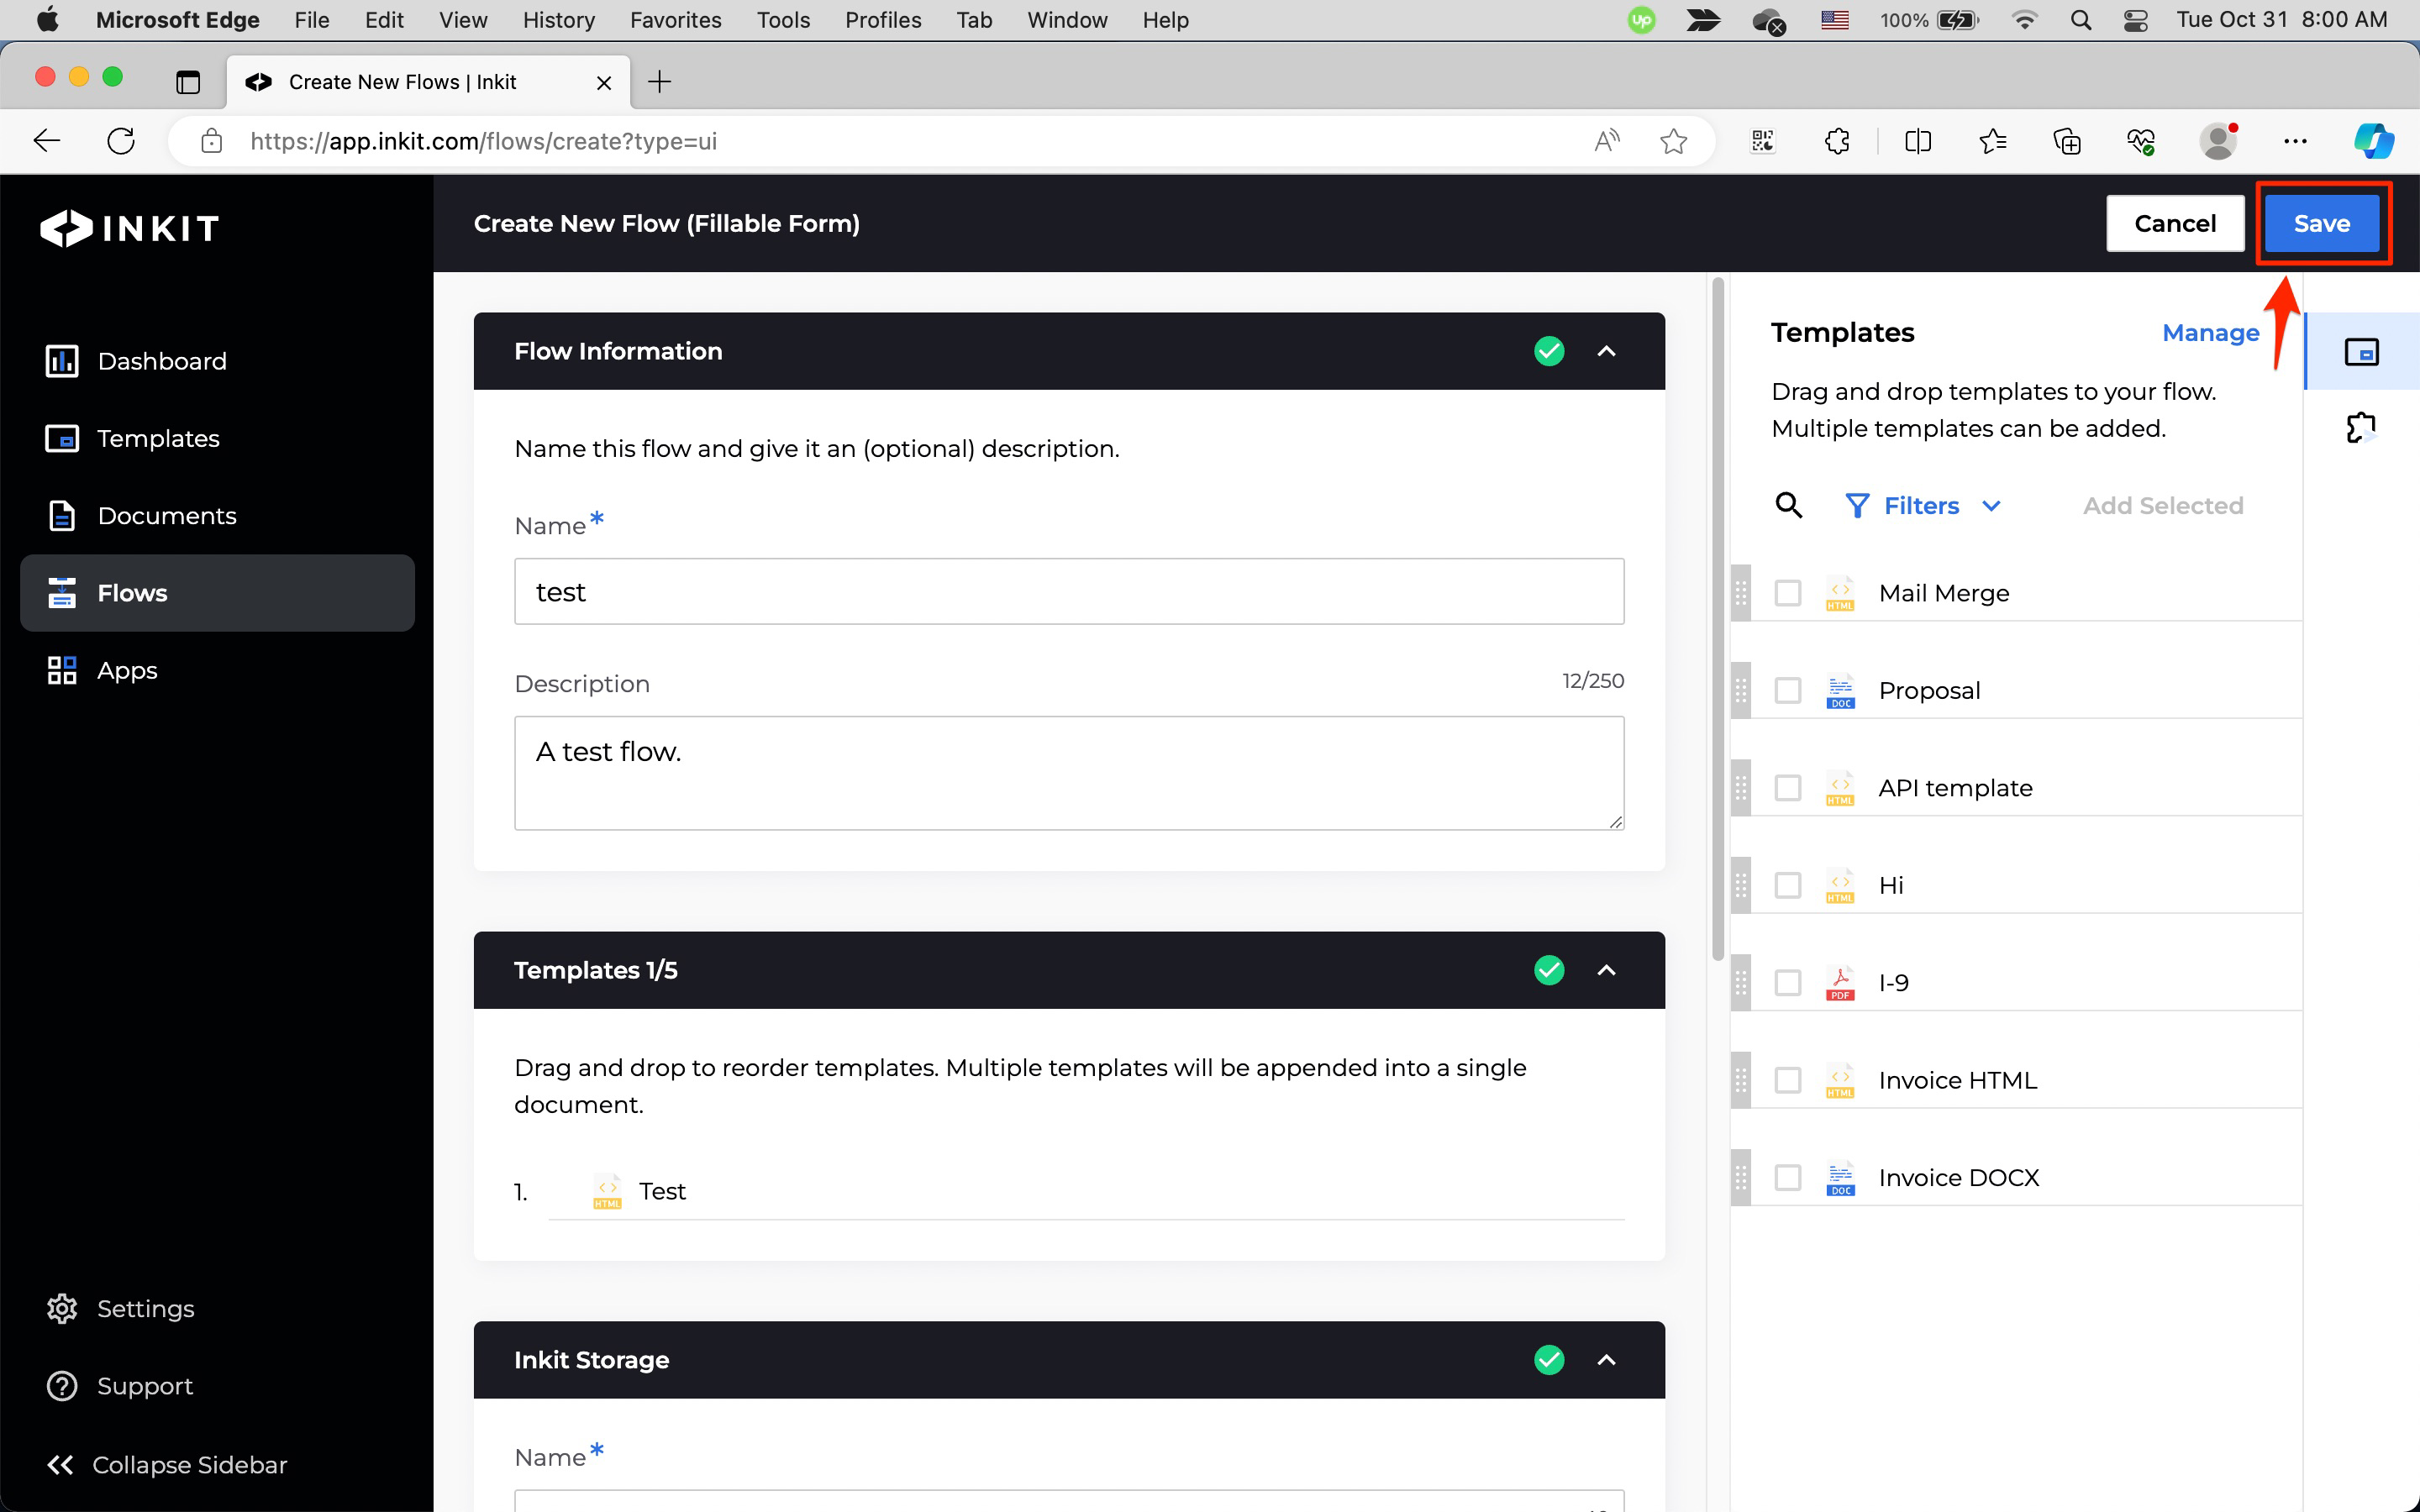
In the Create New Flow page, enter the Name of the workflow and optionally enter a Description of it in the Flow Information panel.
-
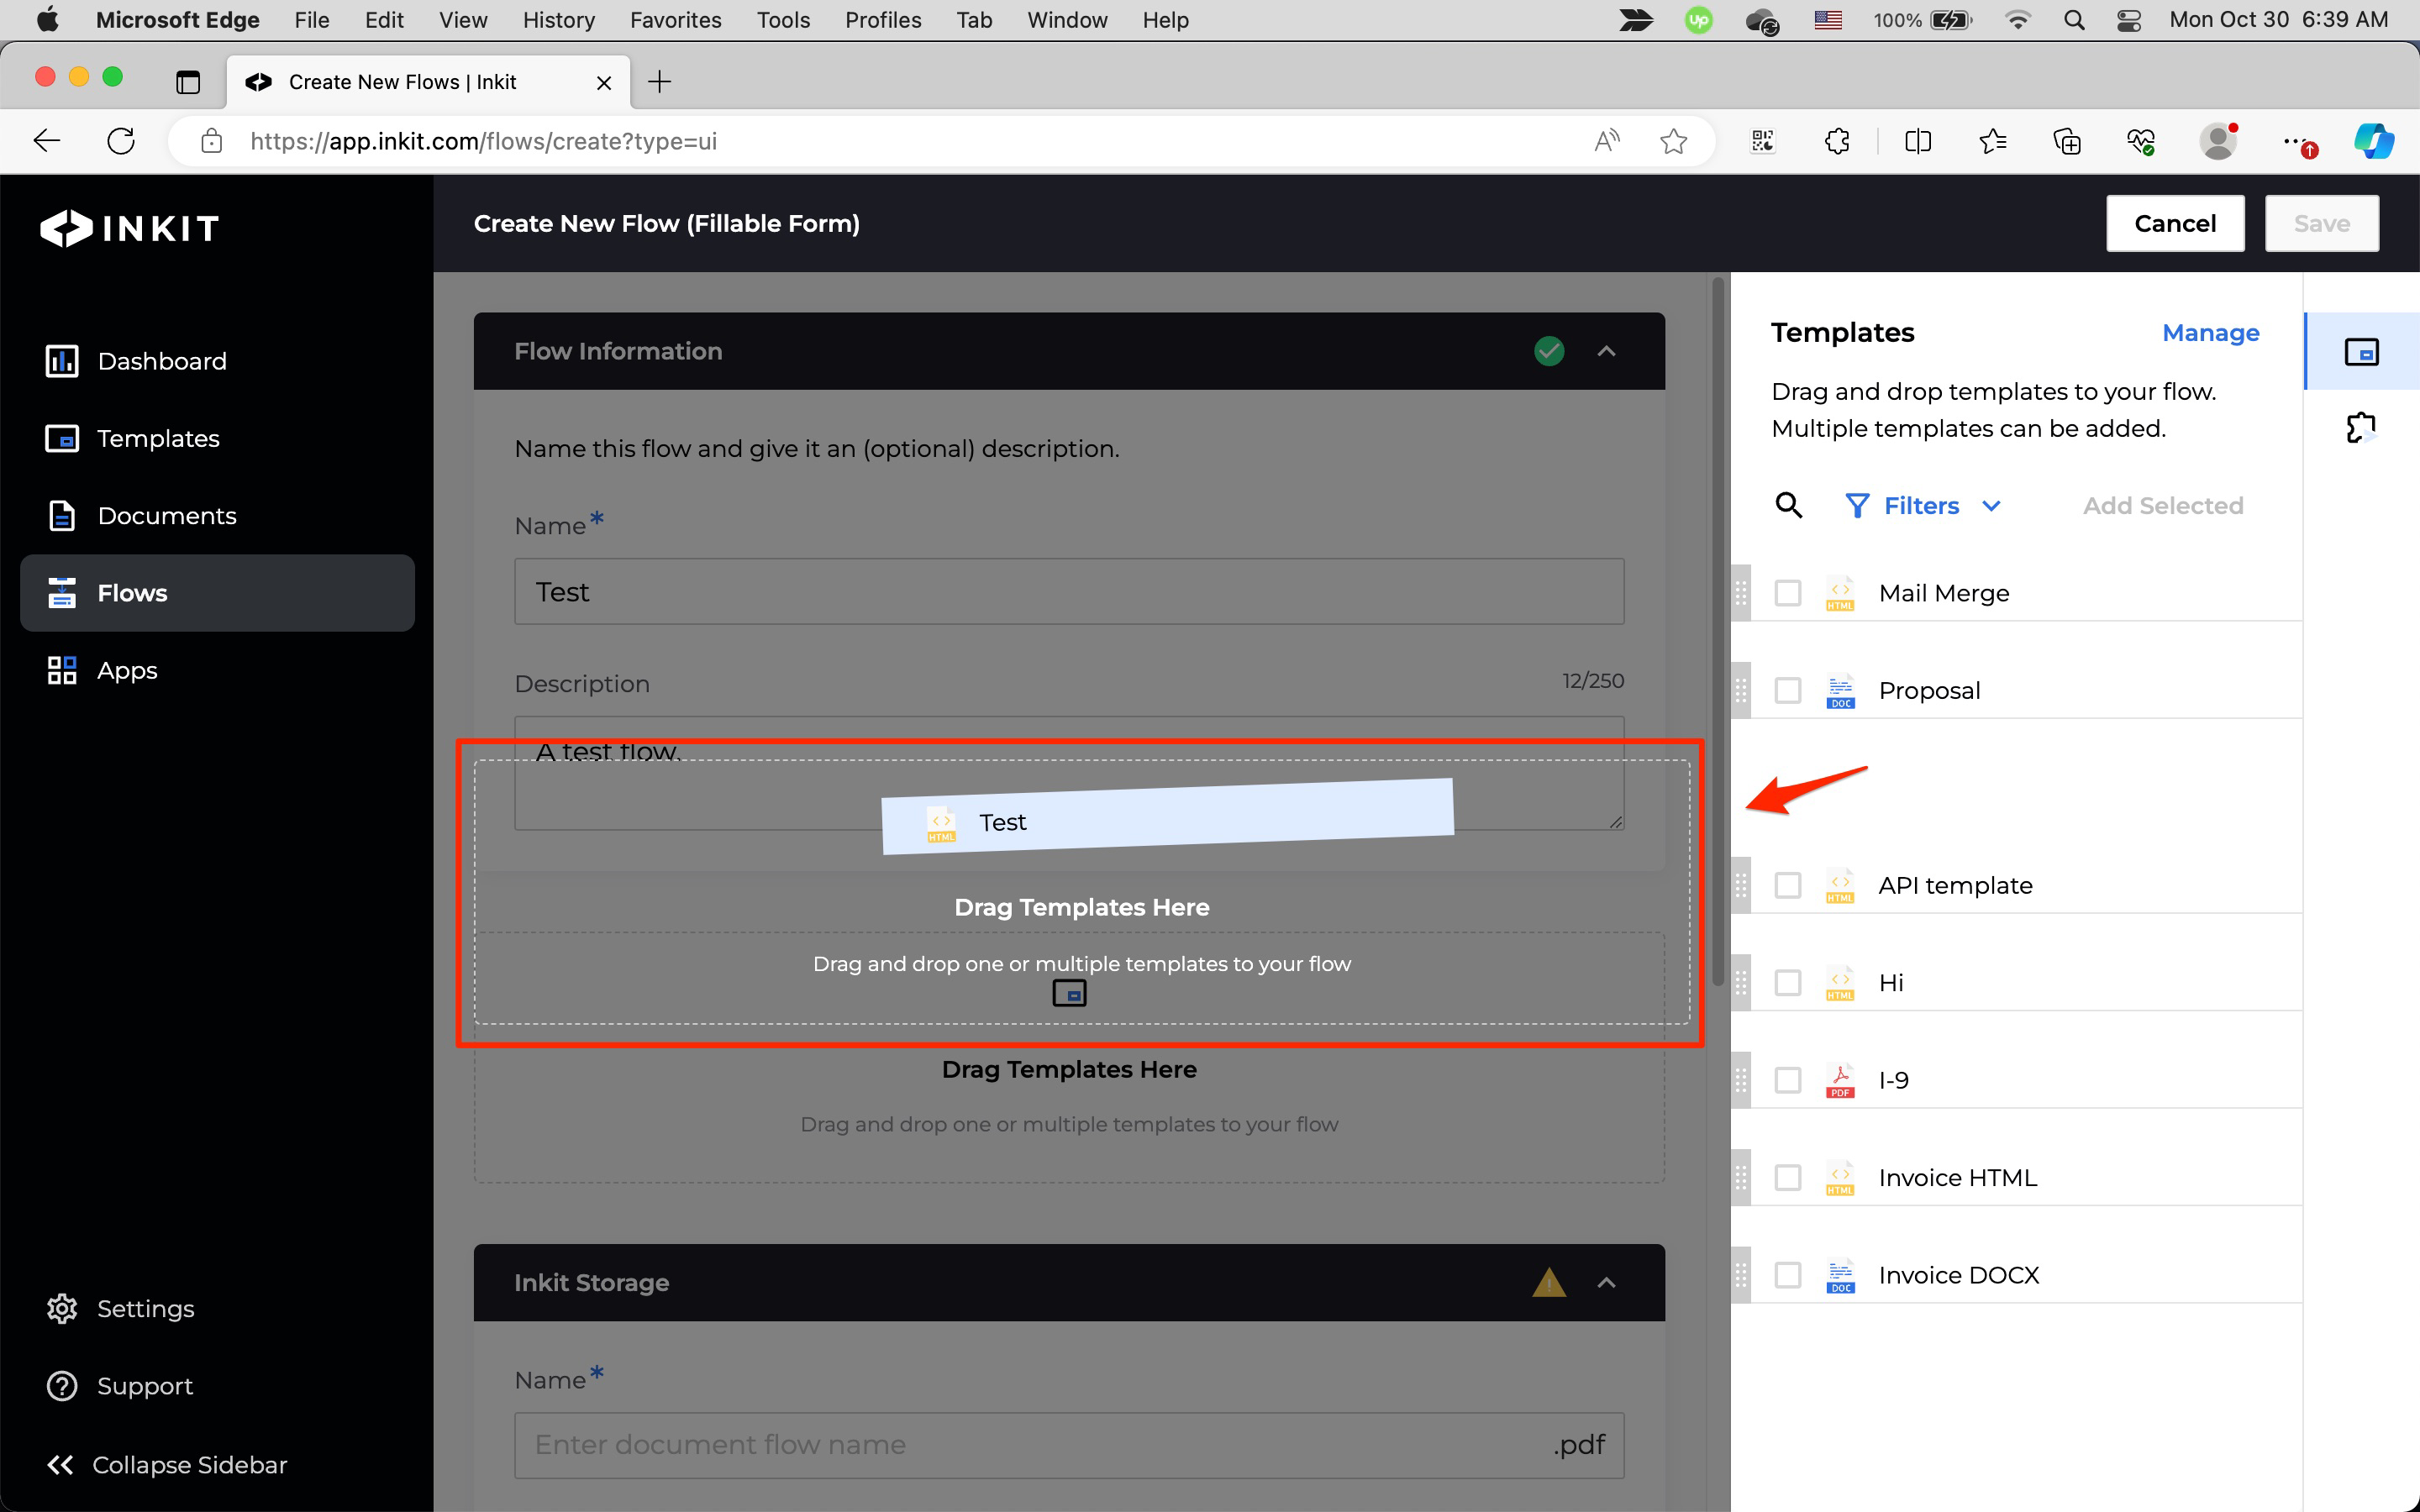
Drag up to five templates from the Templates right sidebar to the Drag Templates Here panel.
Note: All templates that you add to a workflow must be of the same source type. That is, all DOCX templates or all HTML templates or all PDF templates.
Note: If you are planning to add Sepire as a destination of the workflow, you cannot add more than one template to the workflow.
You can also select the templates you want to add to the workflow from the sidebar and click Add Selected.
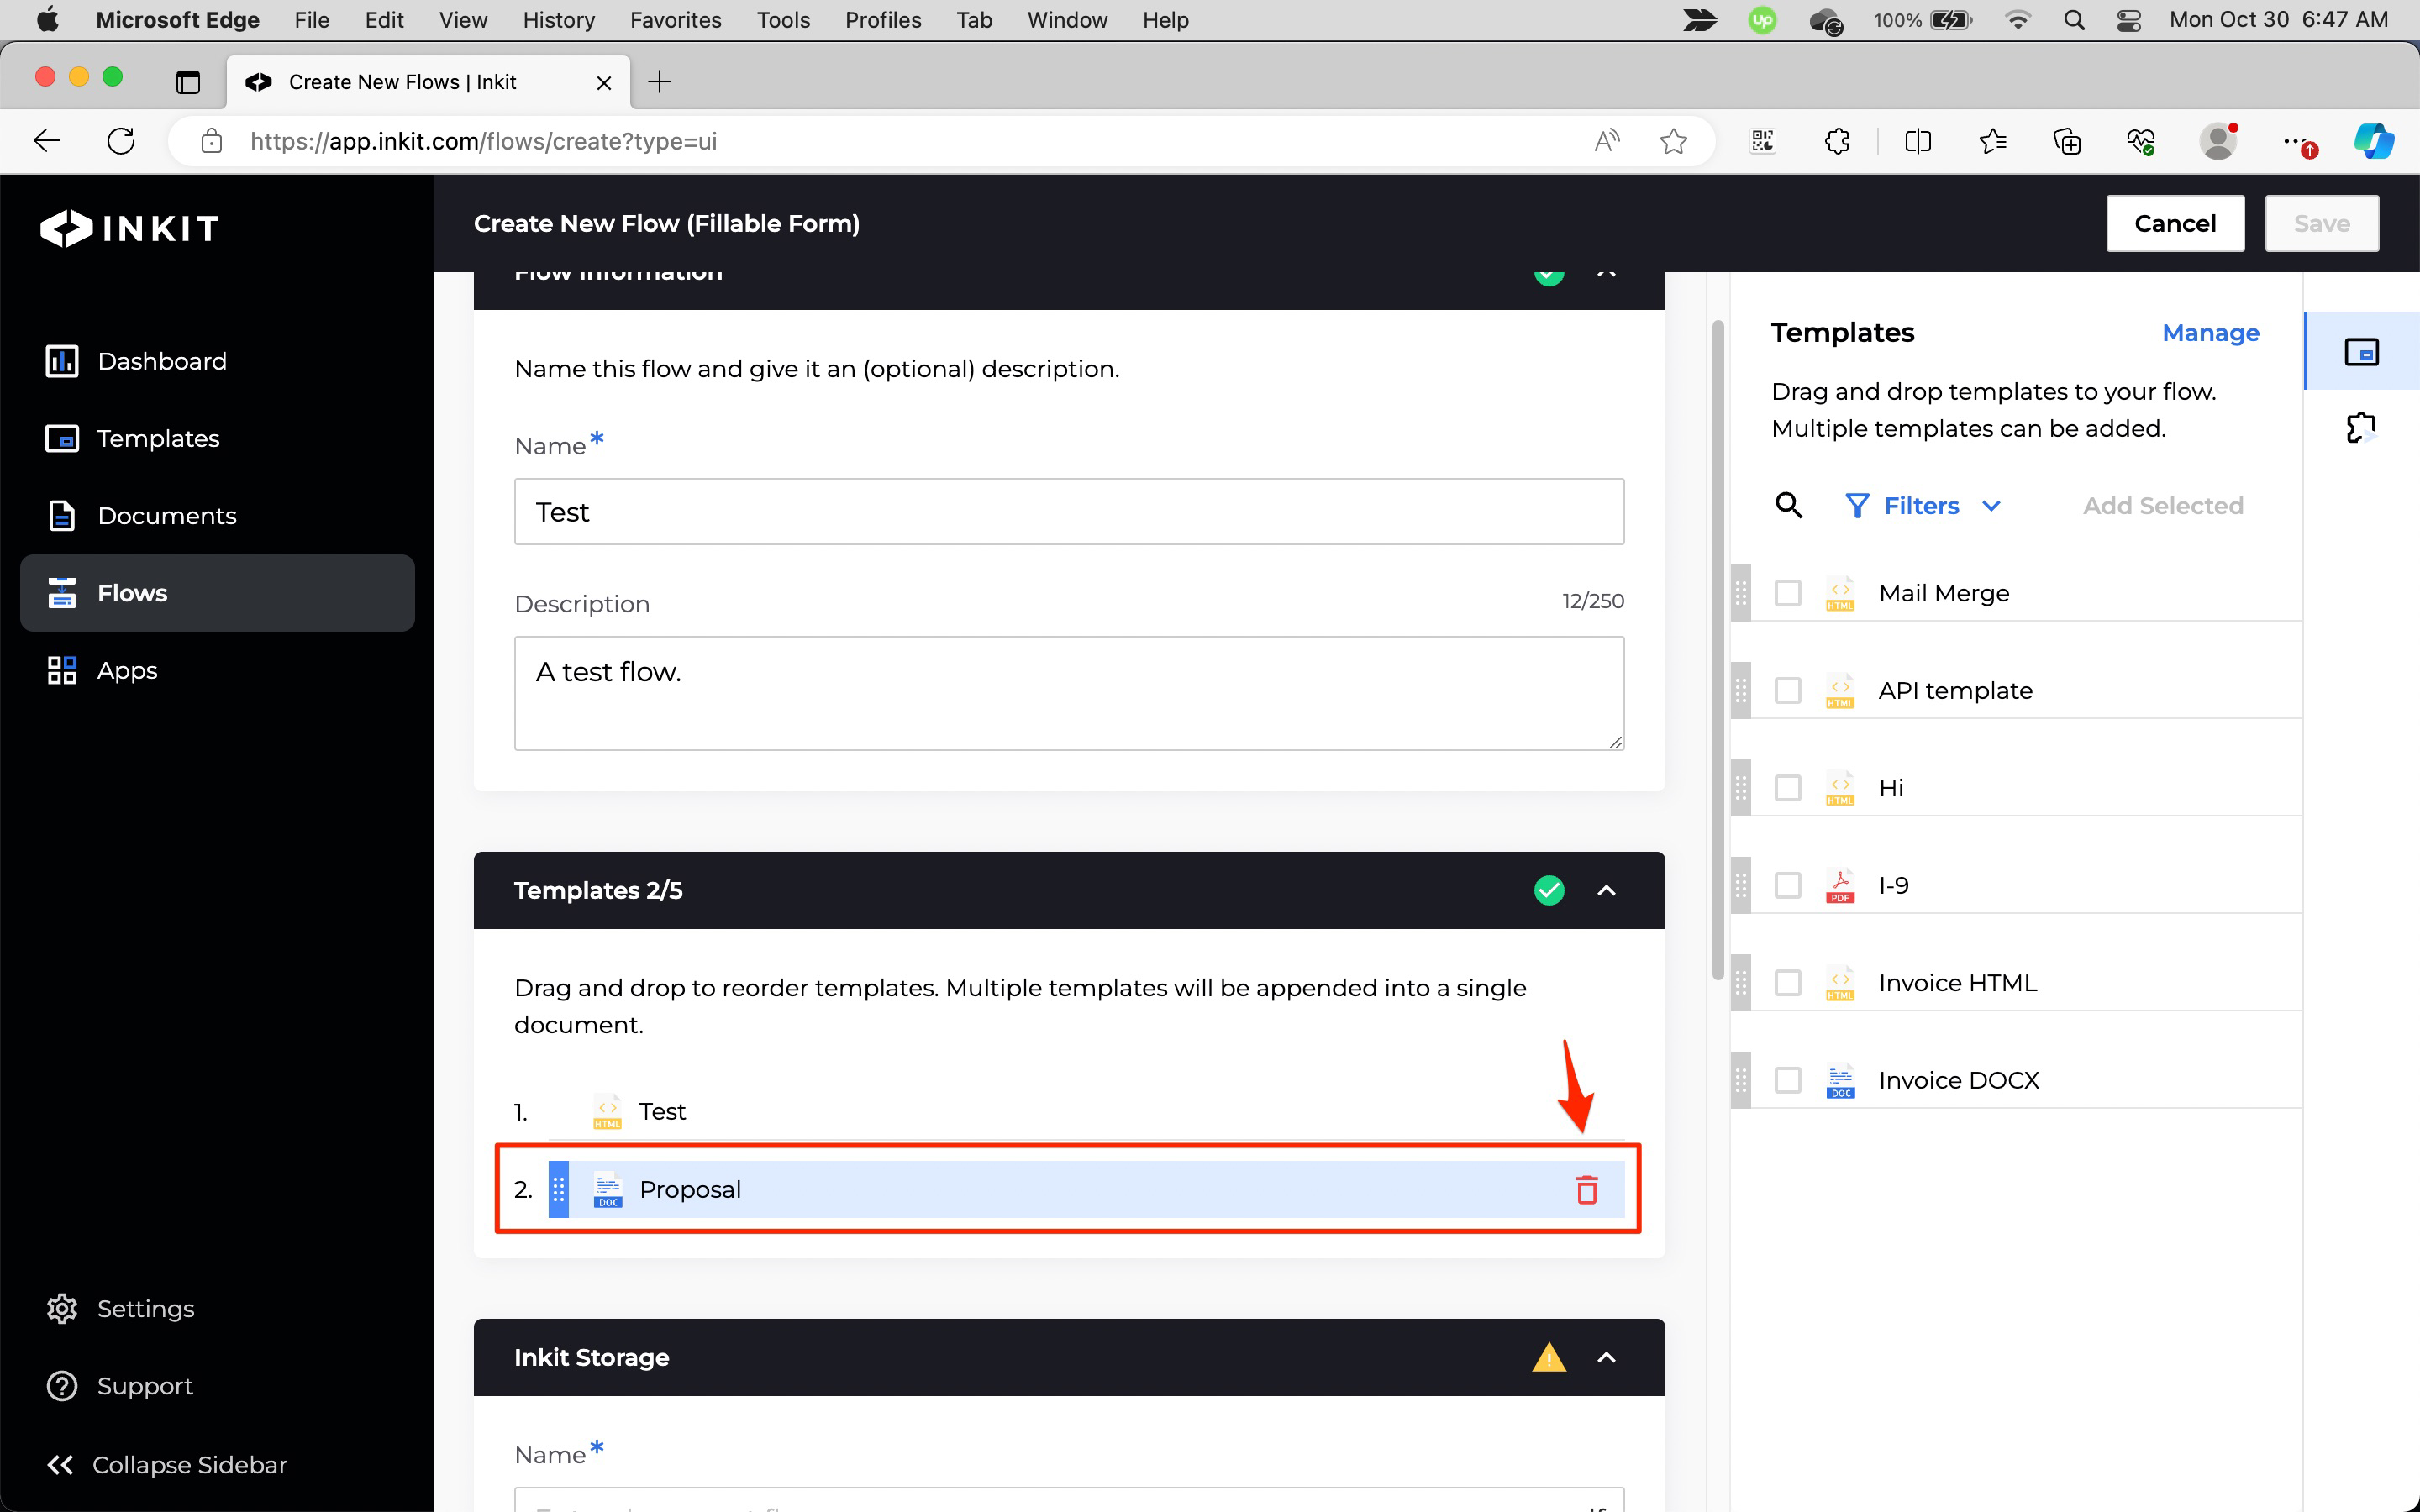
You can reorder the templates in the workflow by dragging them within the Templates panel.
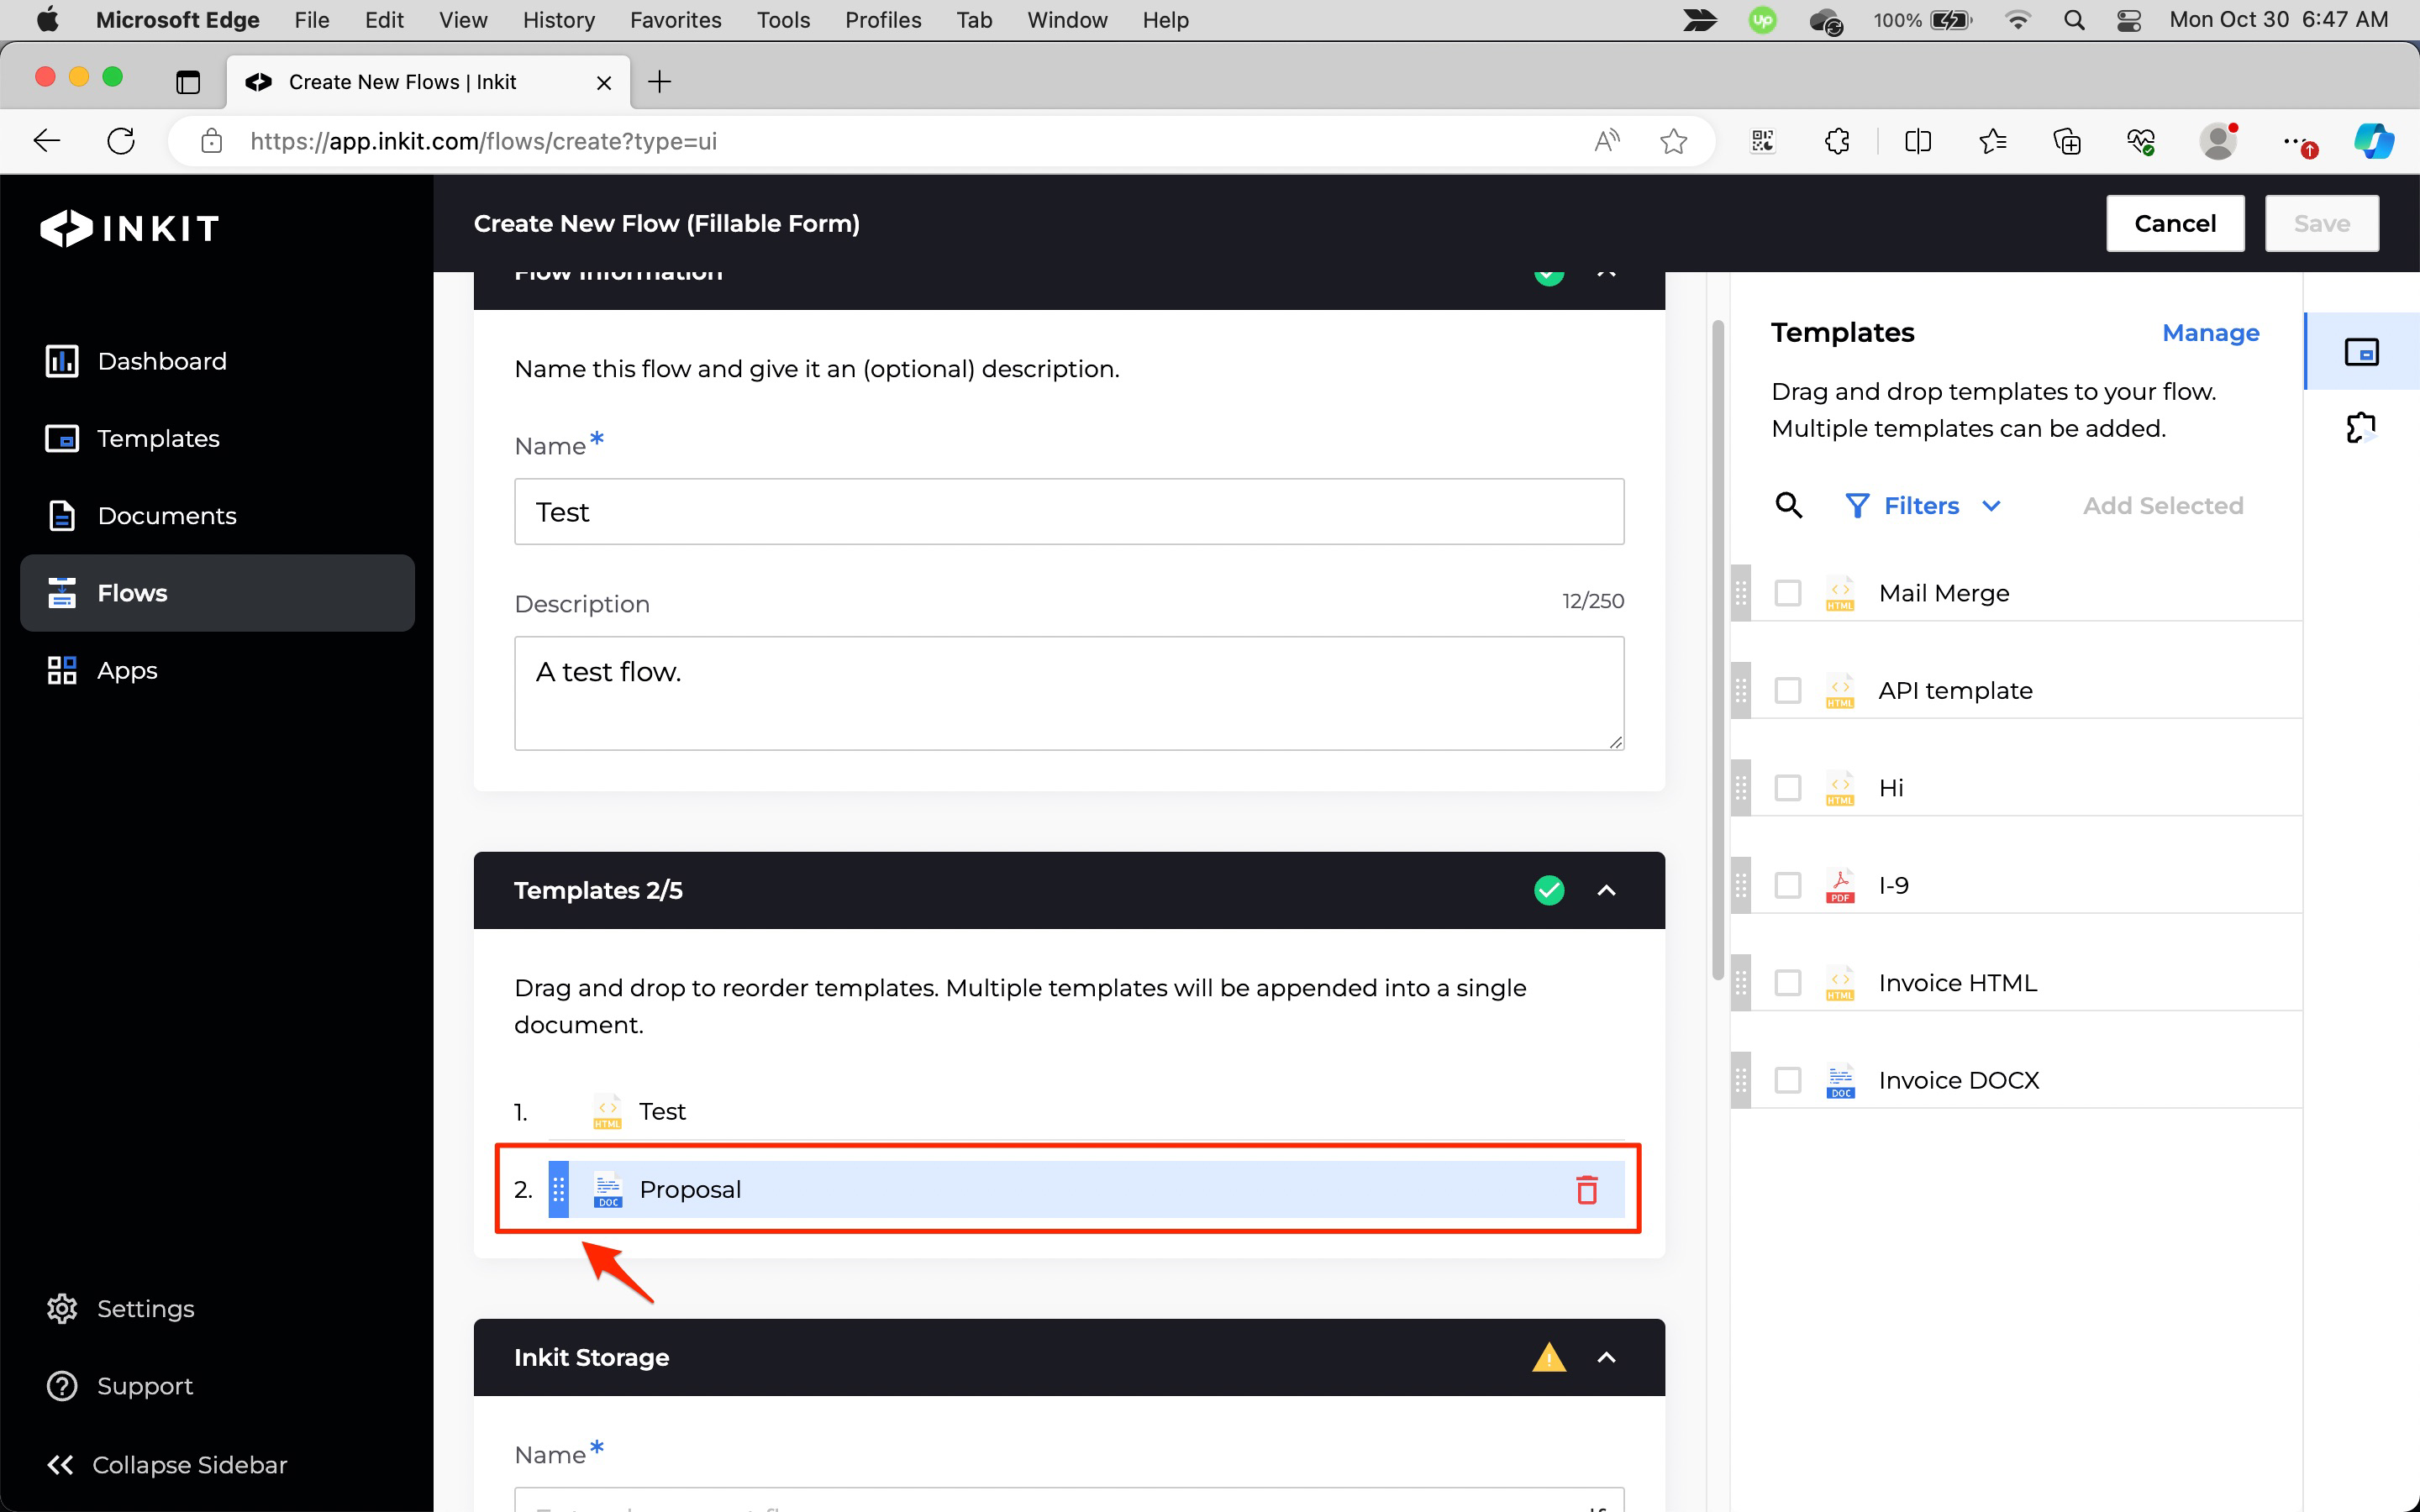
You can delete a template from the workflow by clicking the delete button next to the template you want to remove.
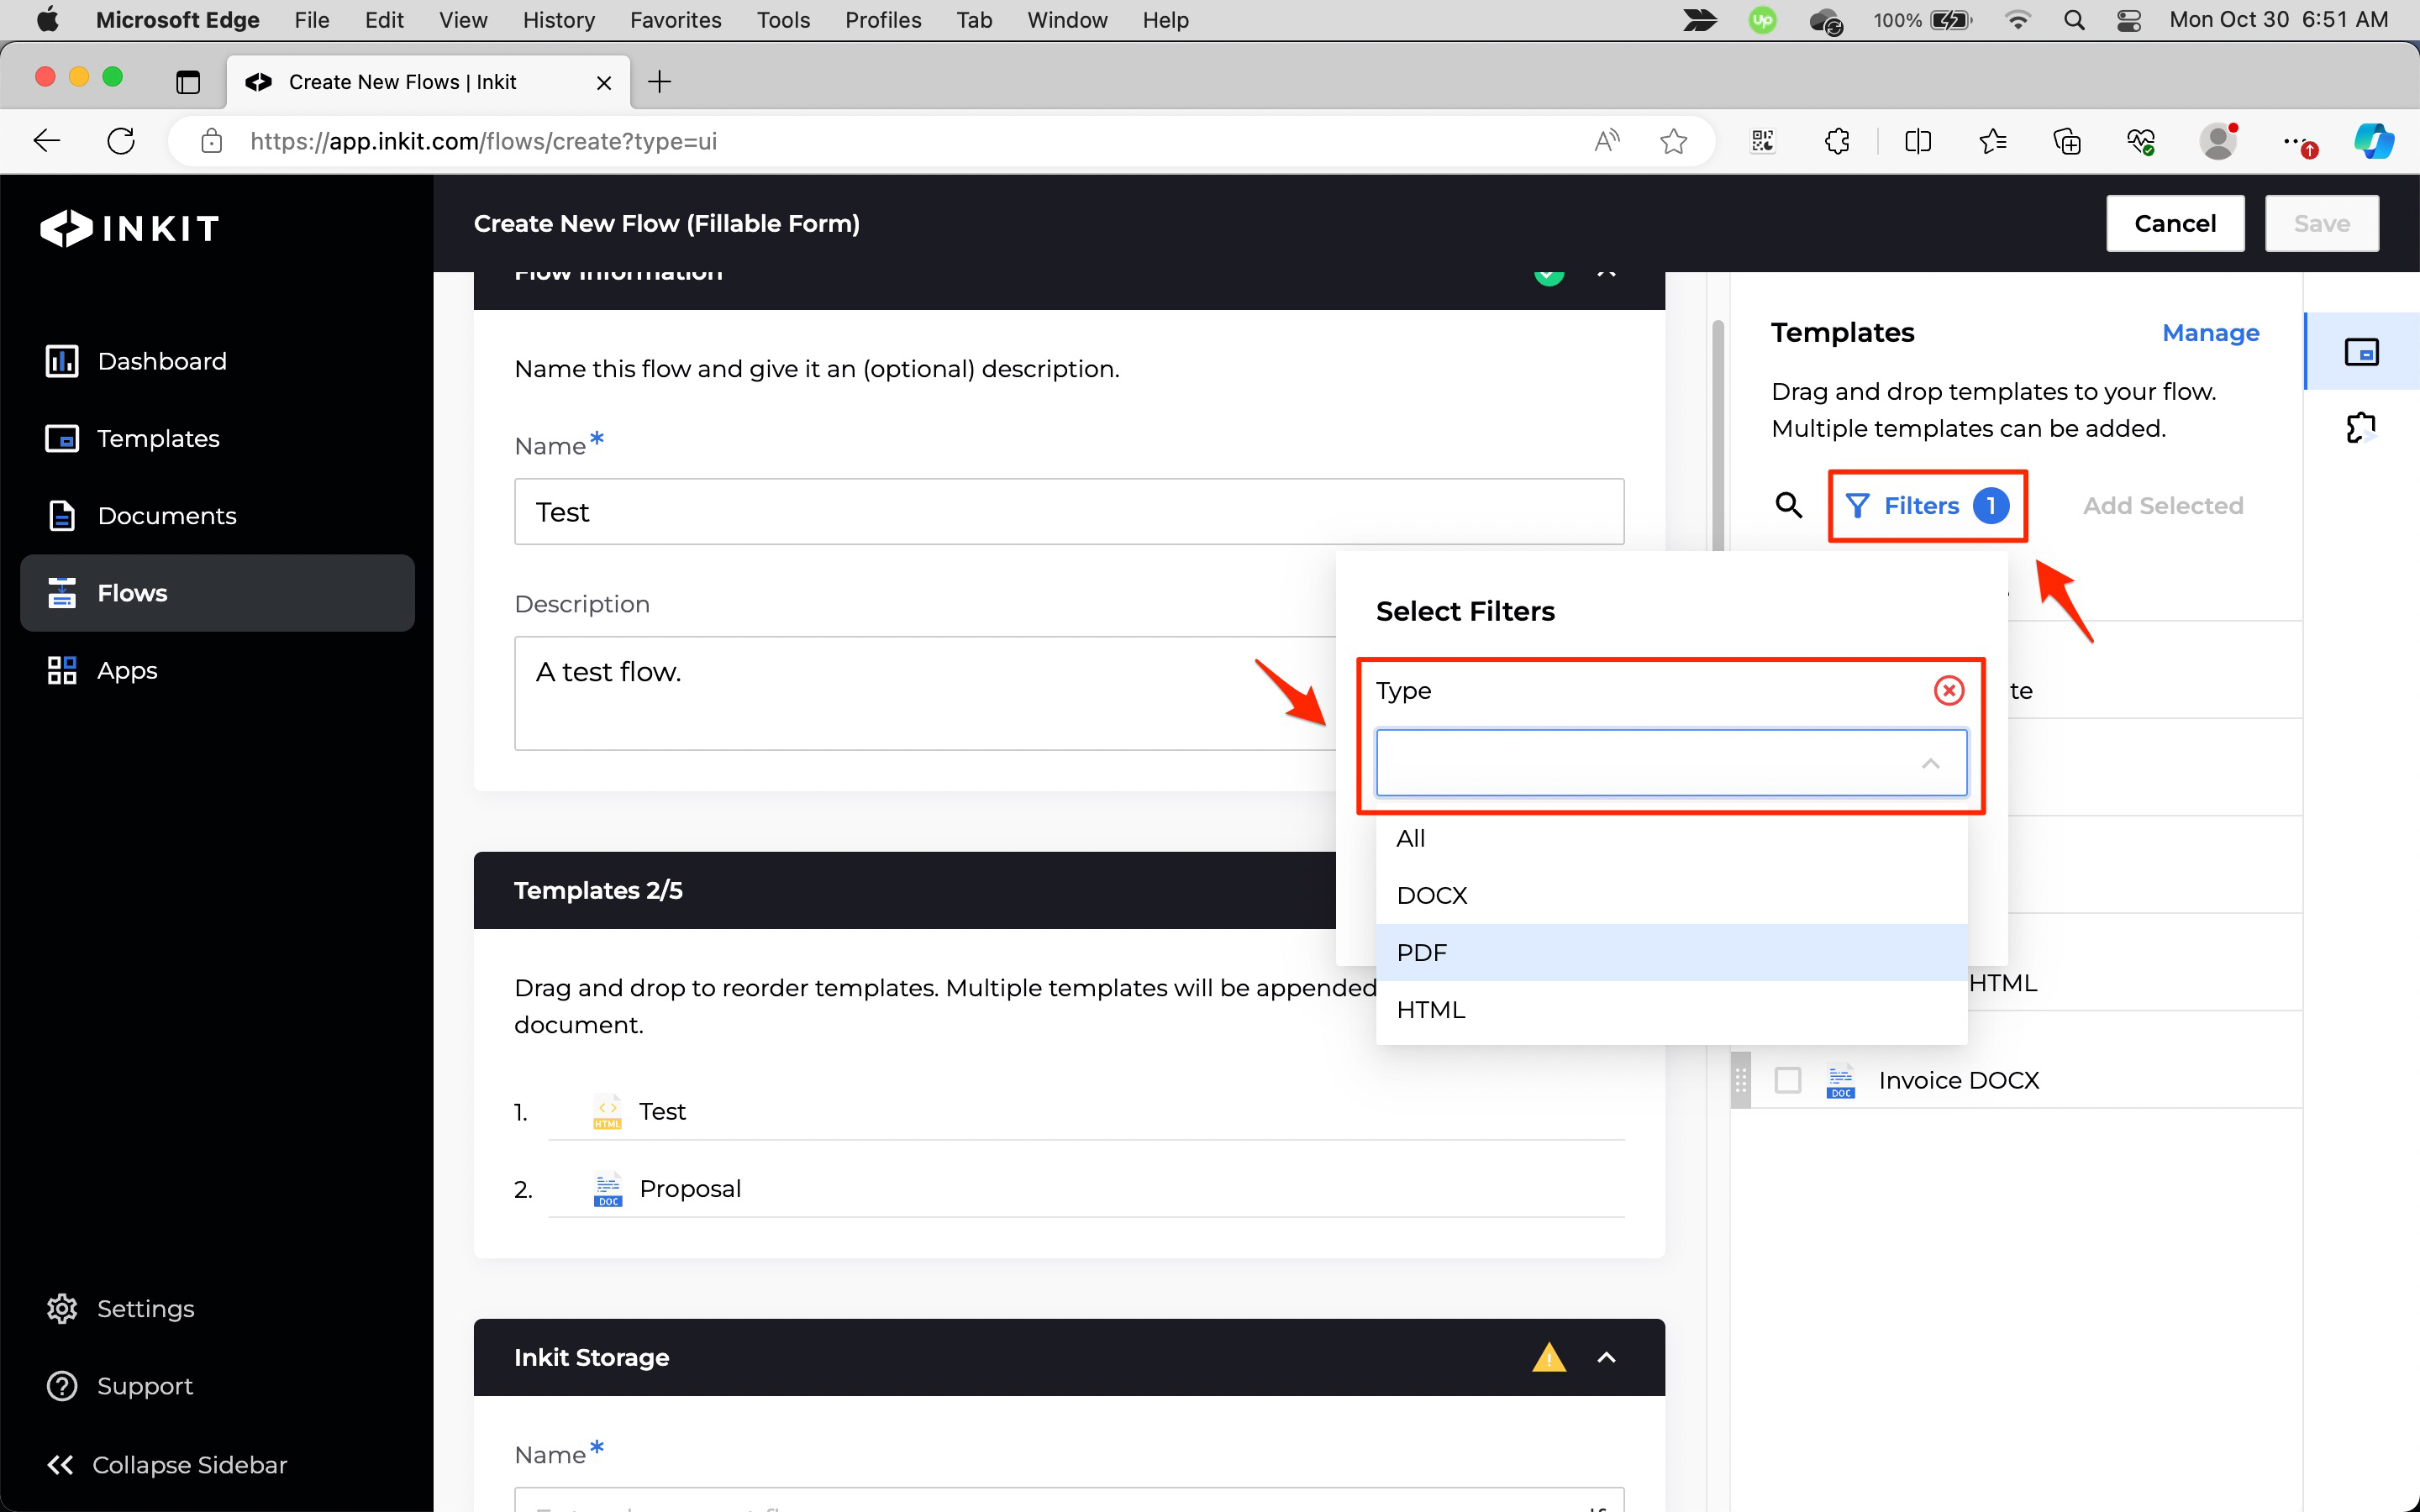
You can filter templates by clicking Filters in the Templates sidebar and then clicking the + button by Type and selecting one of the following template types from the dropdown box:
- All
- DOCX
- HTML
-
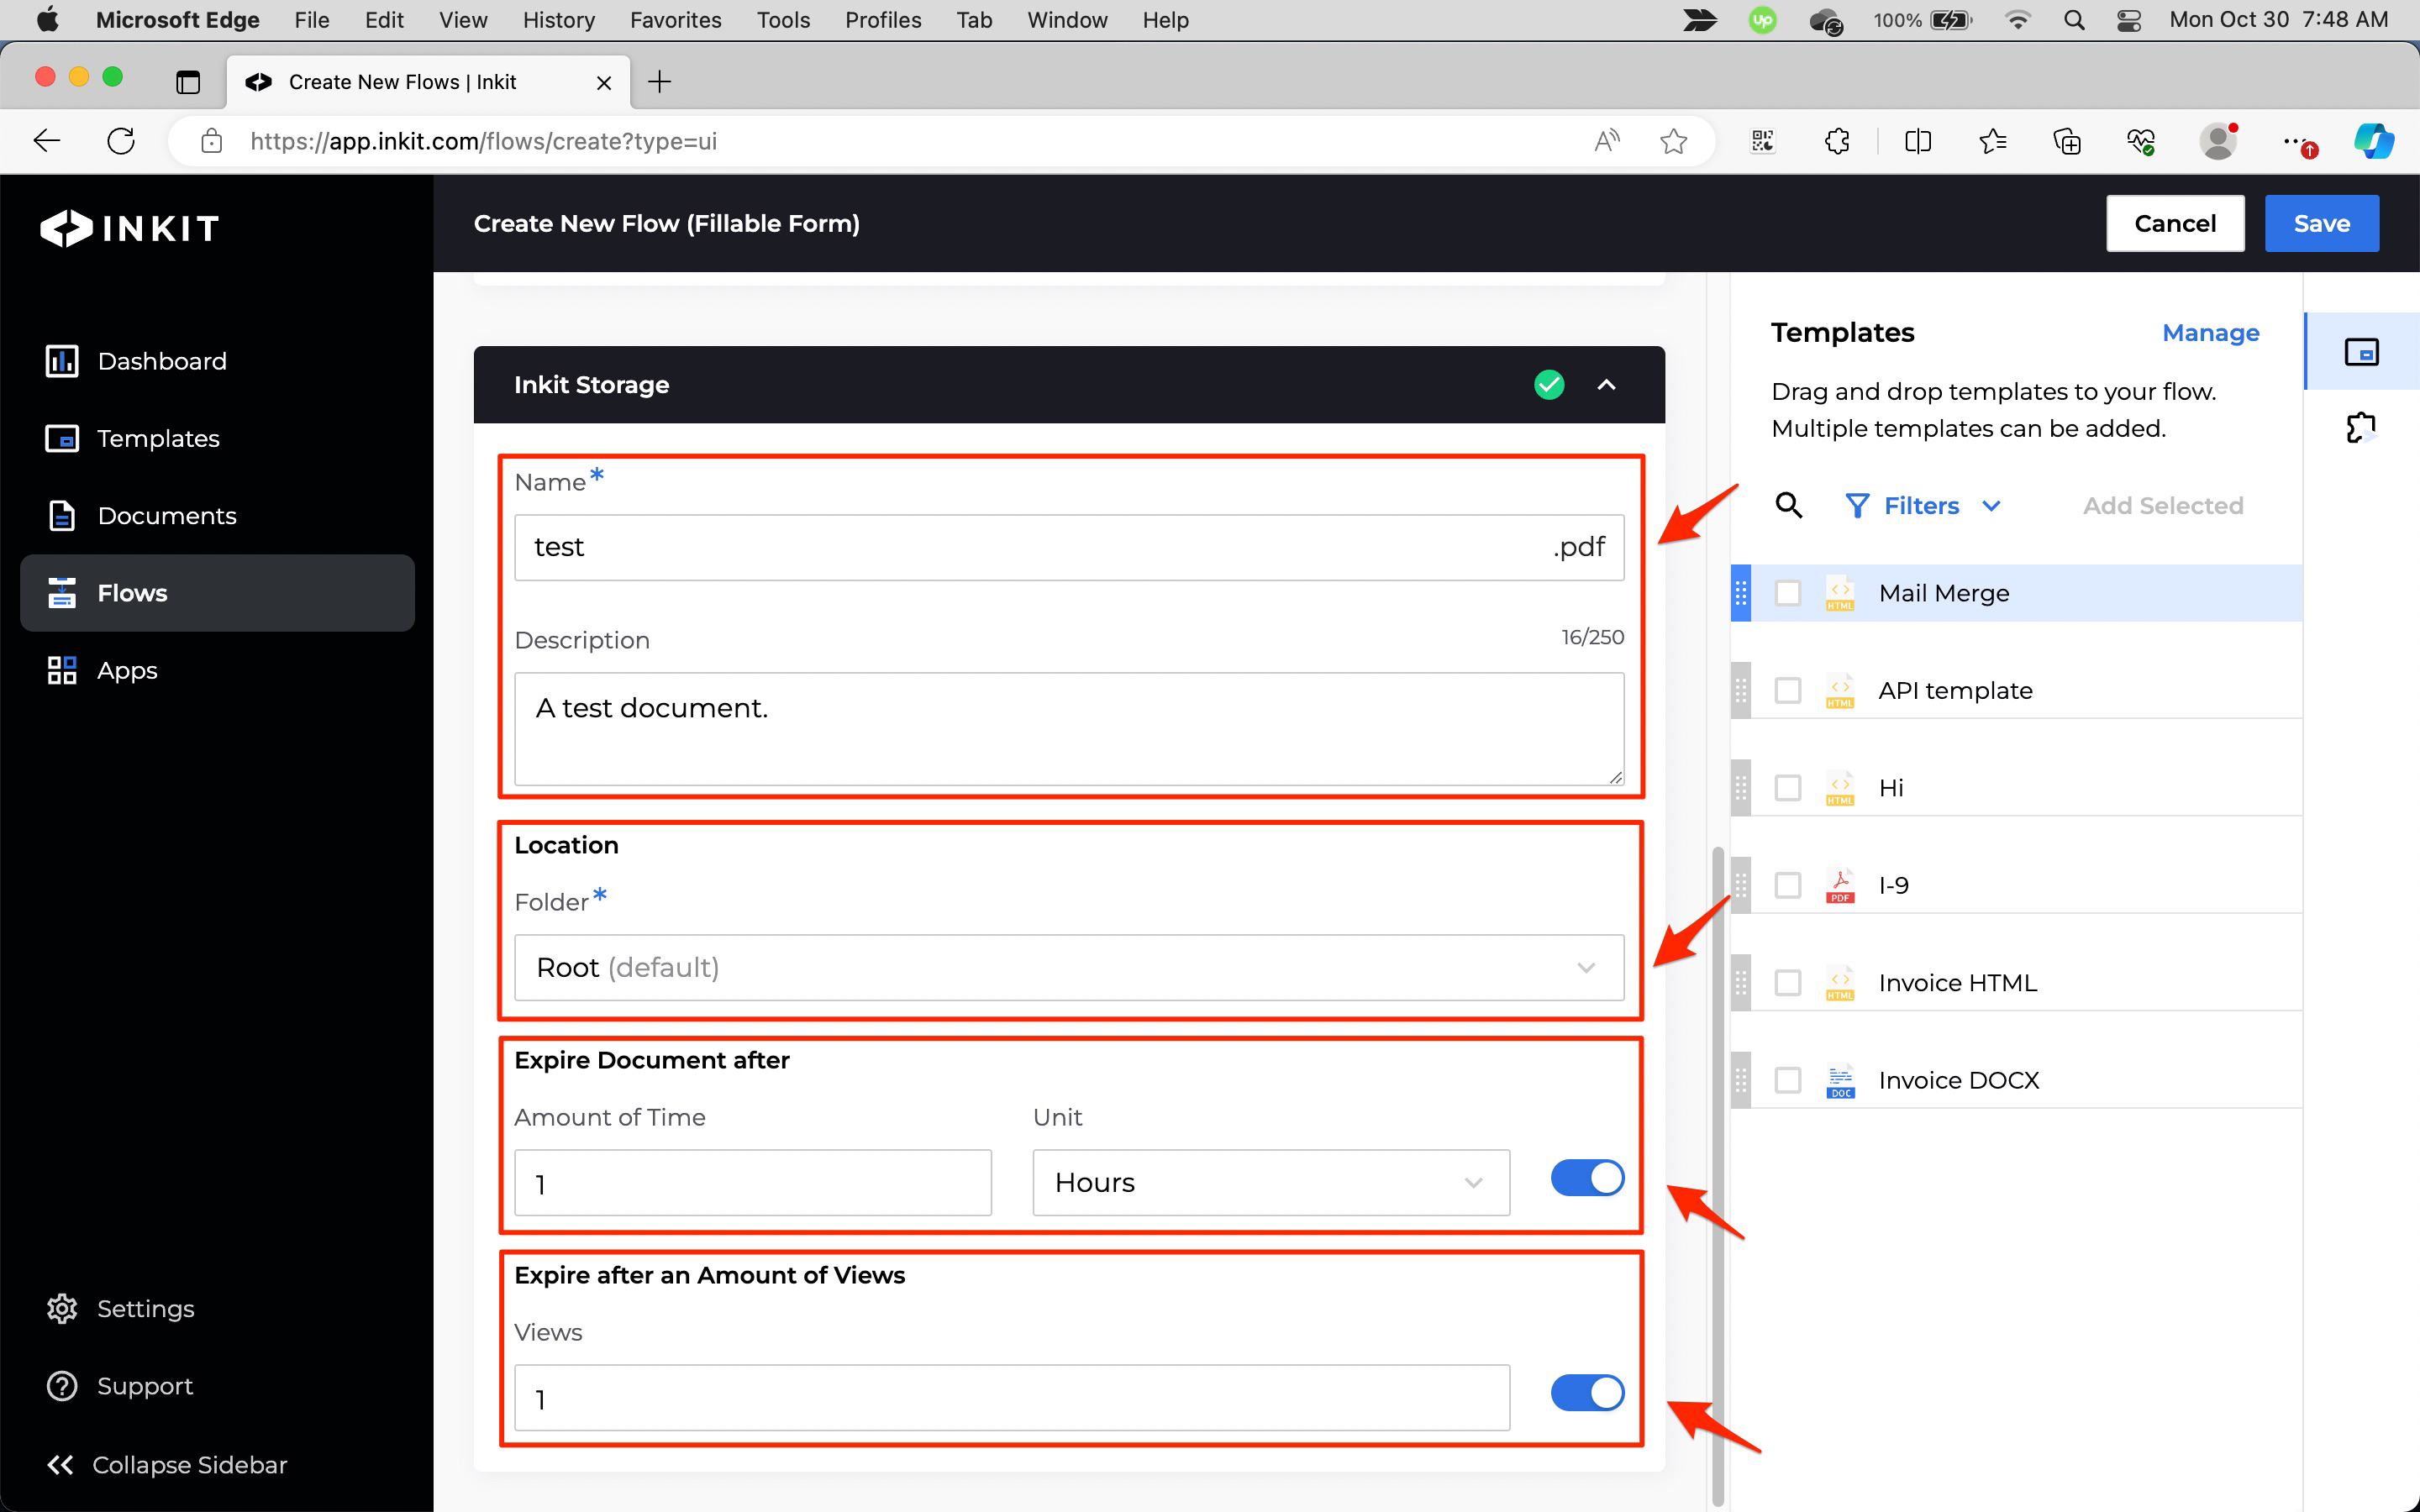
In the Inkit Storage panel, enter the Name of the generated document (without a file extenstion) and an optional Description of it.
Select the folder where you want to generate the documents from the Folder dropdown box. The default is the root folder.
To have documents expire after certain amount of time, turn the switch beside Expire Document after on and specify the Amount of Time and the Unit of time. You can choose from the following units:
- Minutes
- Hours
- Days
- Years
To have documents expire after specific number of views, turn the switch beside Expire after an Amount of Views on and enter the number of Views before the document expires.
Note: You can apply both expiration options at the same time. Whichever option that happens first will trigger the expiration.
-
Optionally add additional destinations to the workflow.
-
To save the workflow, click Save.
Adding additional destinations to a workflow
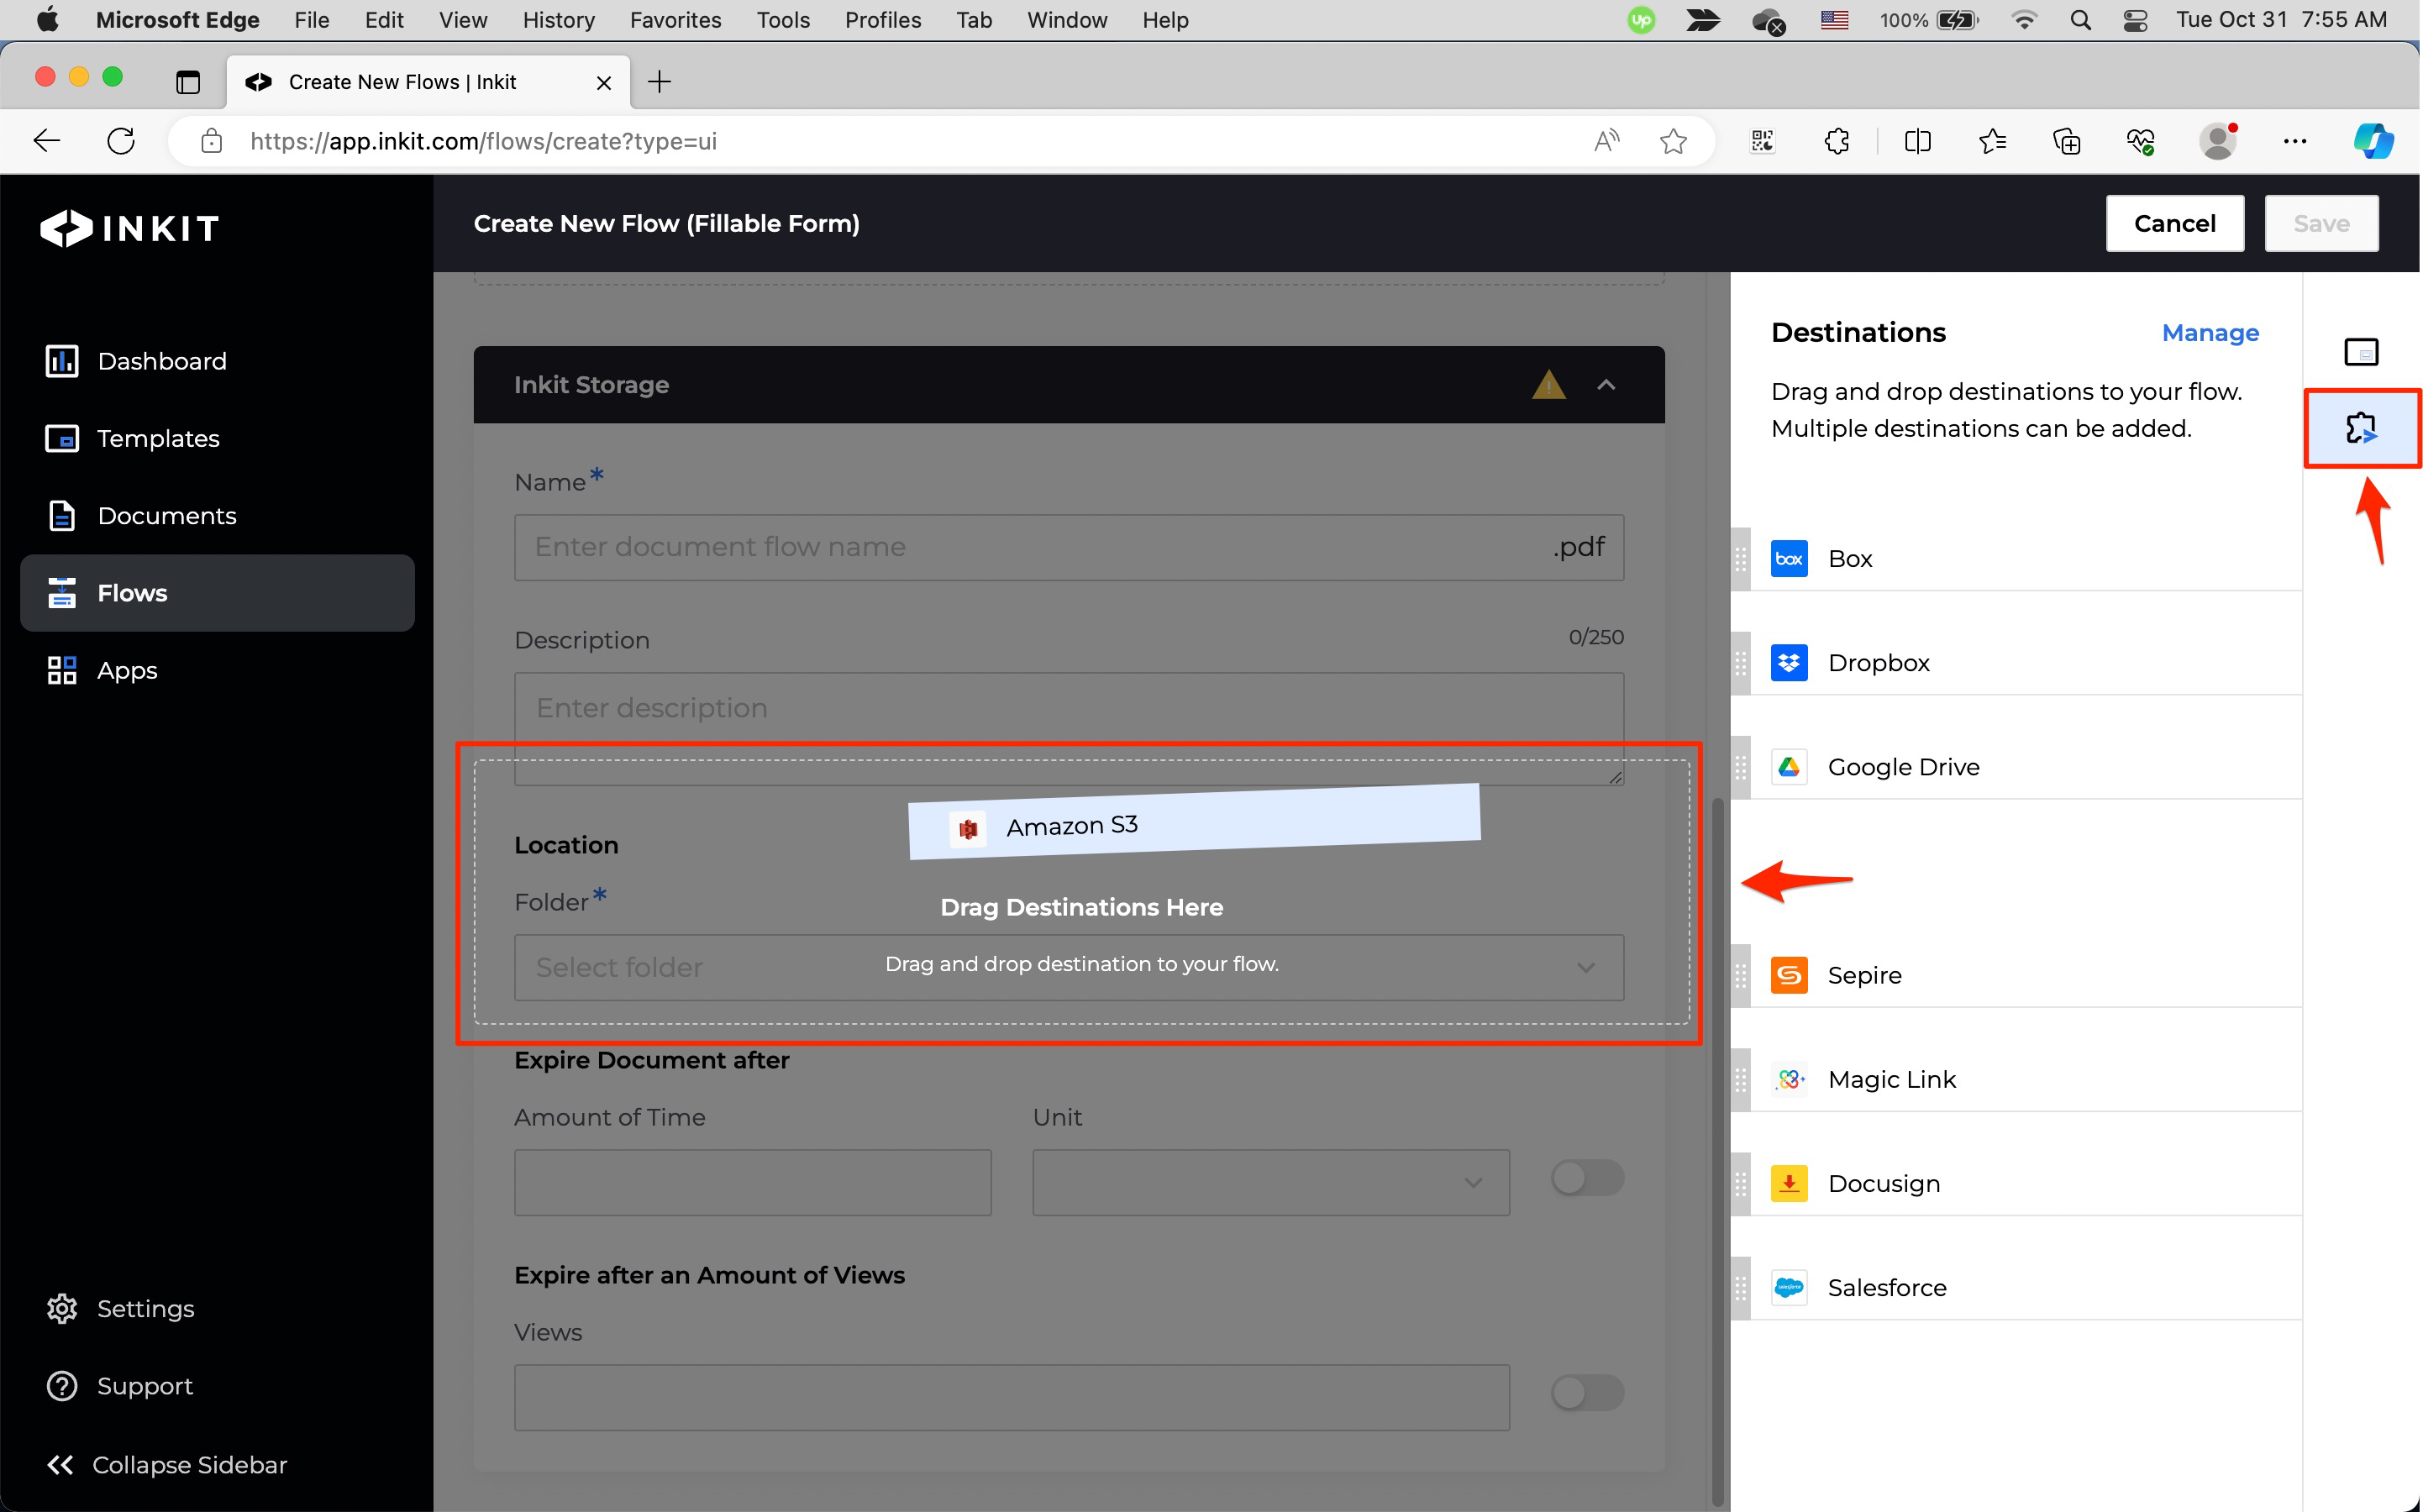
To add workflow destinations in addition to Inkit Storage, click the Destinations button in the right sidebar and drag any number of destinations to the Drag Destinations Here panel.
Note: Before you can add a destination to a workflow, you must first set up its app.
You can delete a destination from the workflow by clicking on its delete button.
Adding Salesforce as a document destination
To add Salesforce as a destination of the workflow, do the following:
-
Set up the Salesforce app if you have not done so.
-
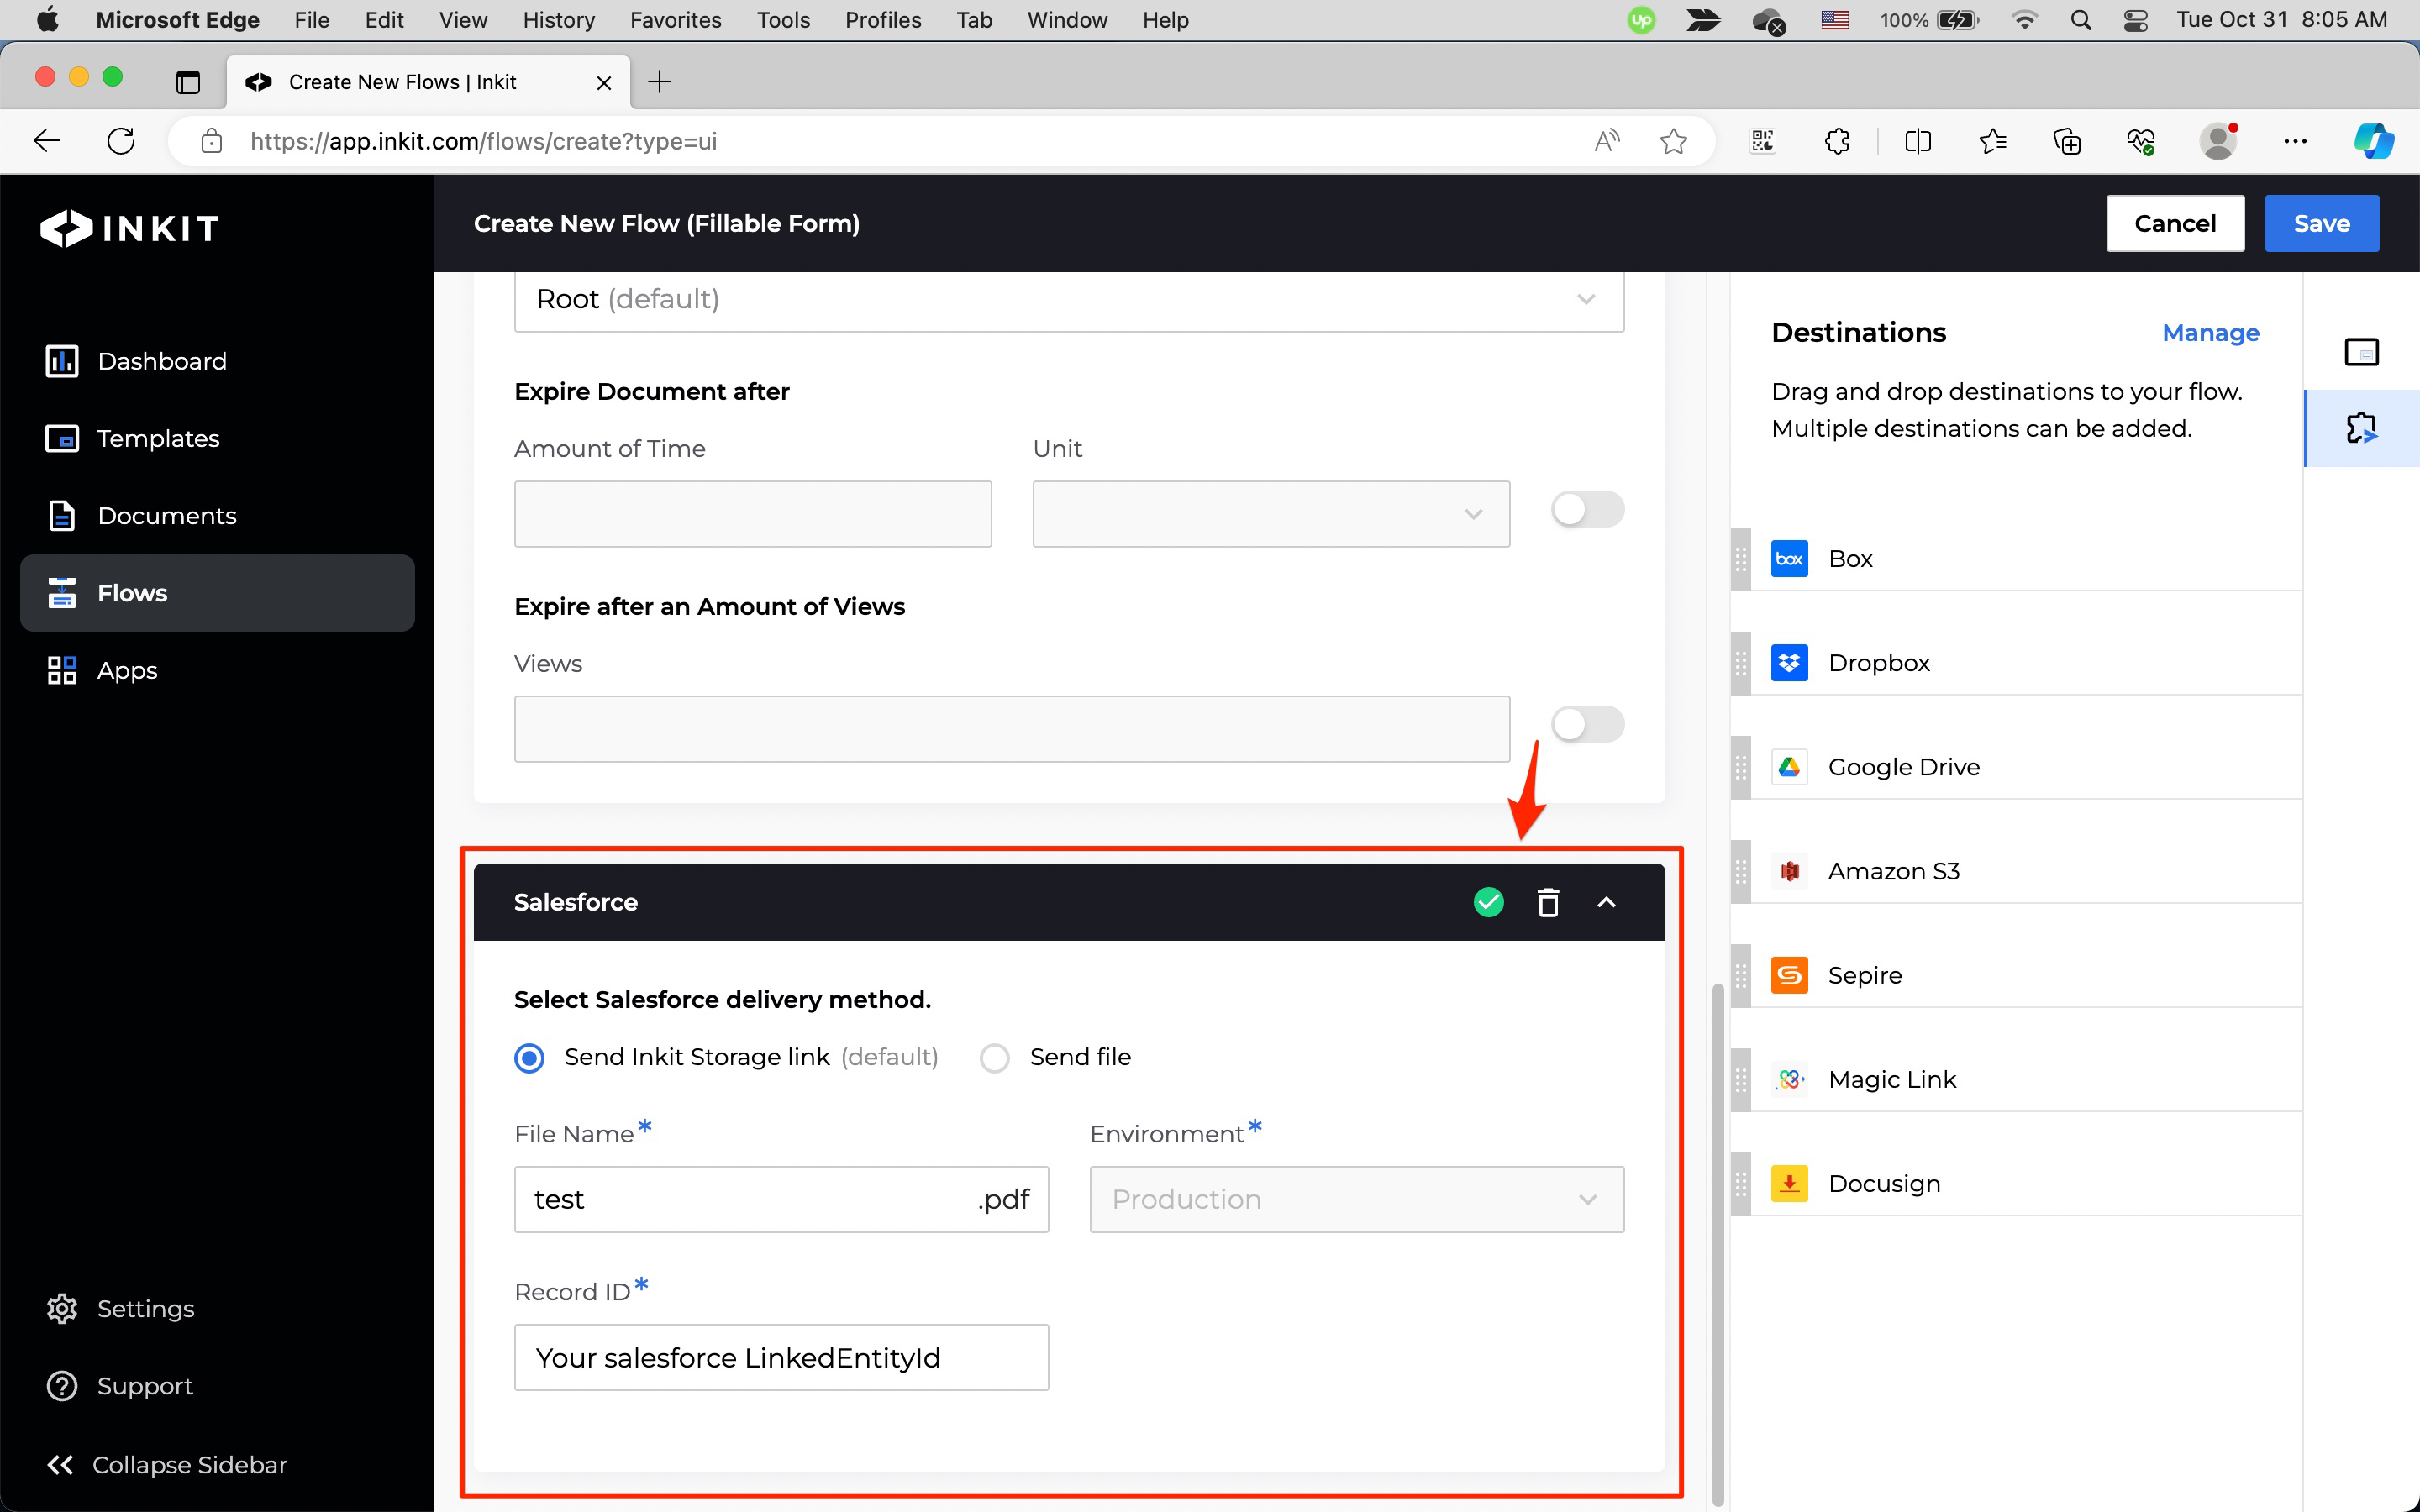
In the Salesforce panel, select the Salesforce delivery method from the following options:
- Send Inkit Storage link (sends only a link to the generated document back to Salesforce)
- Send file (sends the entire generated document back to Salesforce)
In the Salesforce Environment dropdown box, select from the following options:
- Production
- Sandbox
Note: You can only select the sandbox environment if you connected it when setting up the Salesforce app.
Enter the File Name of the generated document (without a file extenstion) and the Salesforce Record ID.
Adding Magic Link as a document destination
To add Magic Link as a destination of the workflow, do the following:
-
Set up the Magic Link app if you have not done so.
-
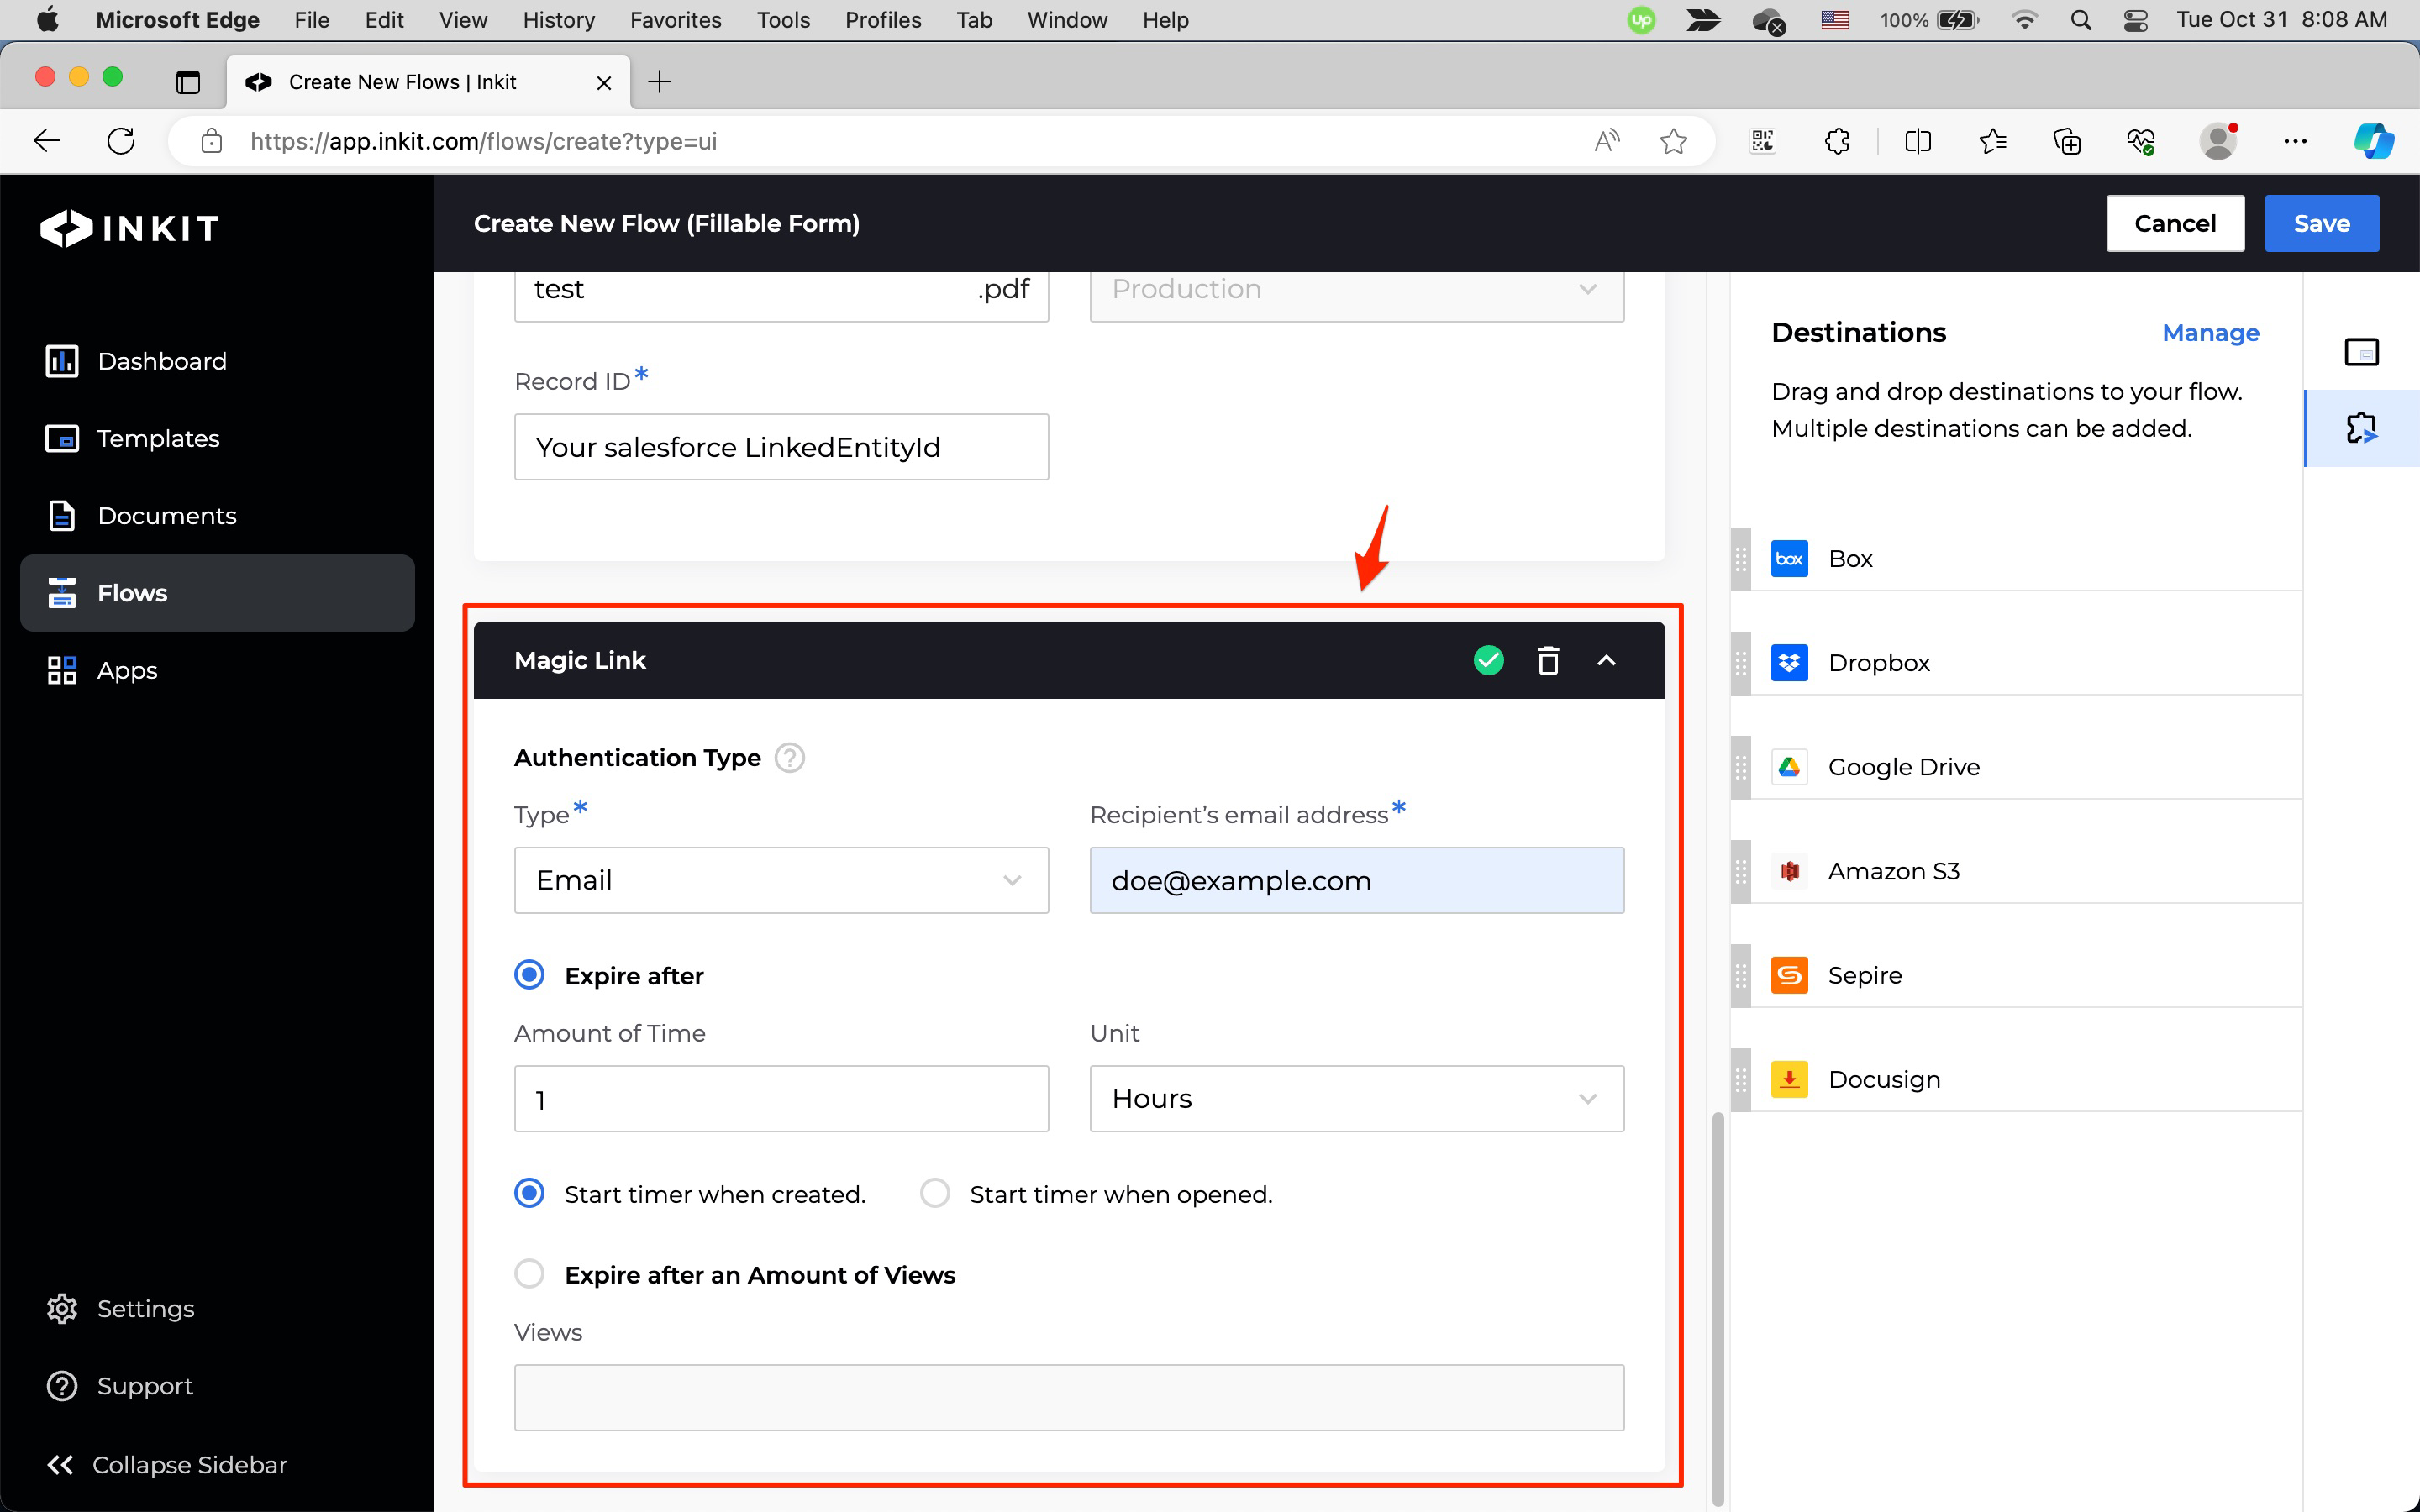
In the Magic Link panel, select the Authentication Type from the following options:
- Email (users complete authentication through an email address)
- Social (users complete authentication through a social login provider such as Google)
Enter the email address of the Magic Link's recepient in Recipient’s email address.
To have documents expire after certain amount of time, select Expire after and specify the Amount of Time and the Unit of time. You can choose from the following units:
- Minutes
- Hours
- Days
Then select when to start the expiration timer from the following options:
- Start expiration timer when link is sent
- Start expiration timer when link is opened
To have documents expire after specific number of views, select Expire after an Amount of Views and enter the maximum number of Views before the document expires.
Note: If you select Expire after an Amount of Views, the link will expire in 10 days even if there are views remaining.
Adding DocuSign as a document destination
To add DocuSign as a destination of the workflow, do the following:
-
Set up the DocuSign app if you have not done so.
-
Add at least one template to the workflow that has DocuSign fields embedded in it.
-
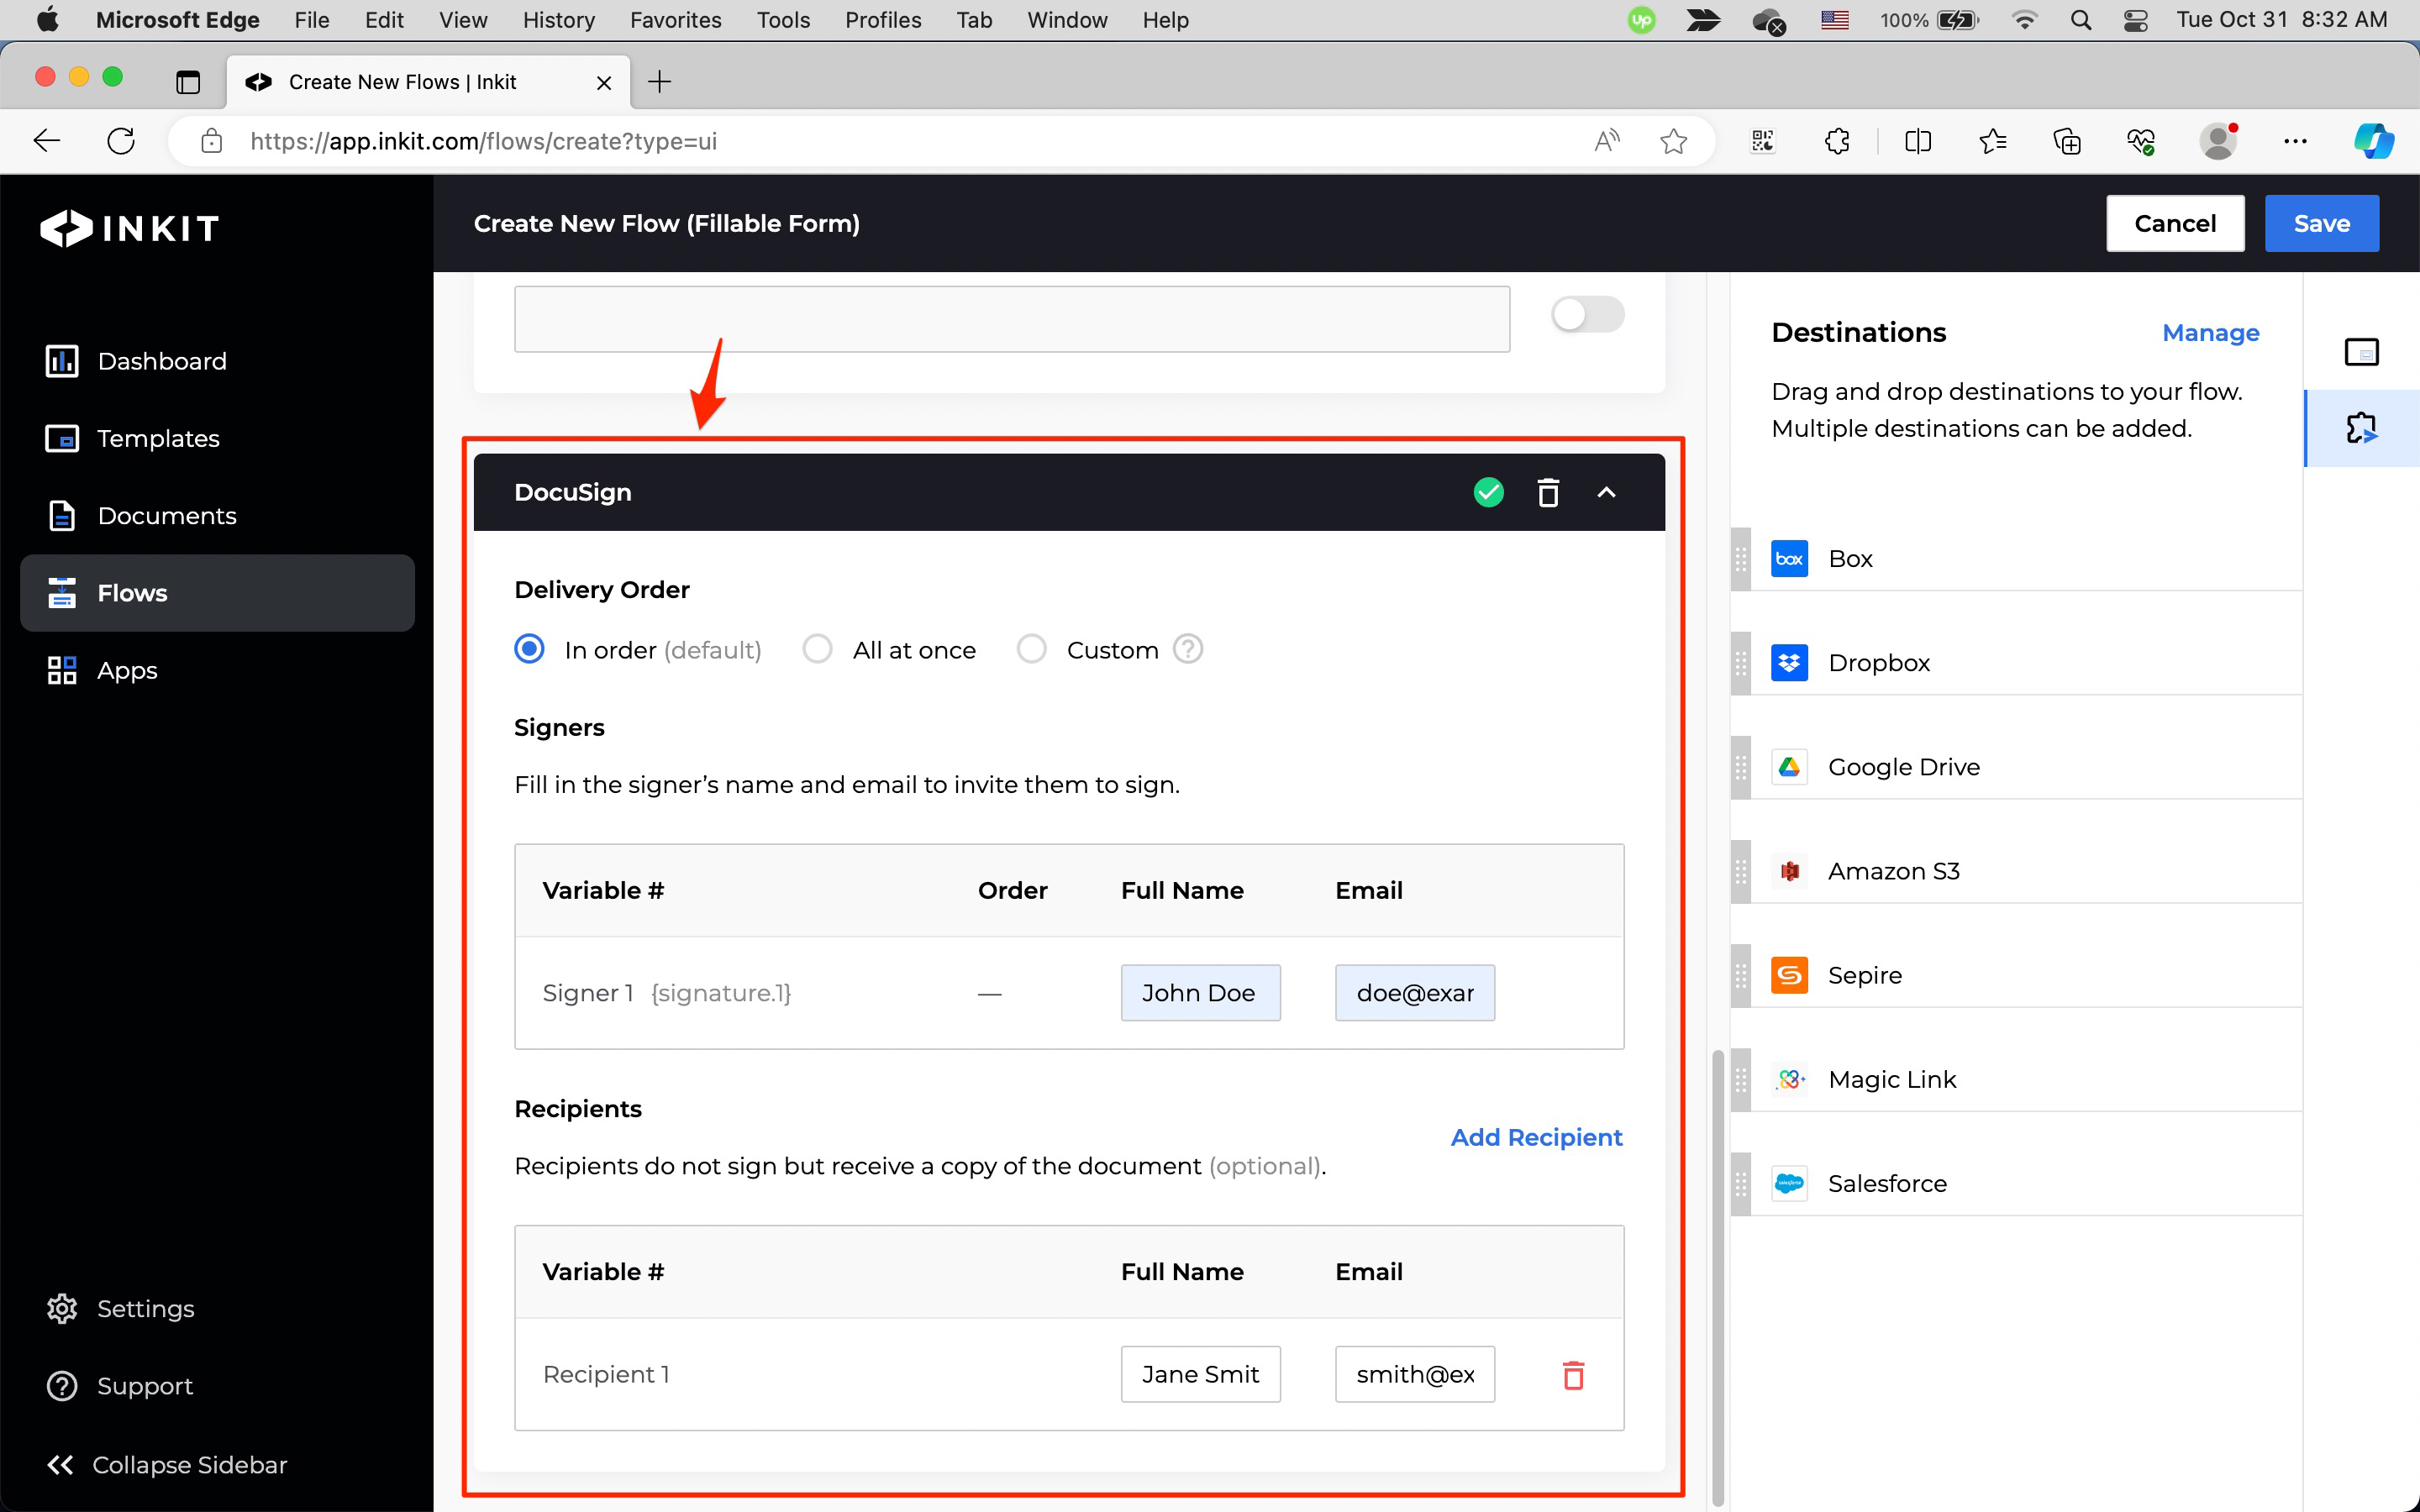
In the DocuSign panel, select signer delivery order from the following:
- In order (default)
- All at once
- Custom (set the order at the time of document generation)
Under Signers, enter a Full Name and Email for each DocuSign field embedded in the templates.
Optionally, under Recipients, enter a Full Name and Email for each recipient. You can add recipients by clicking Add Recipient.
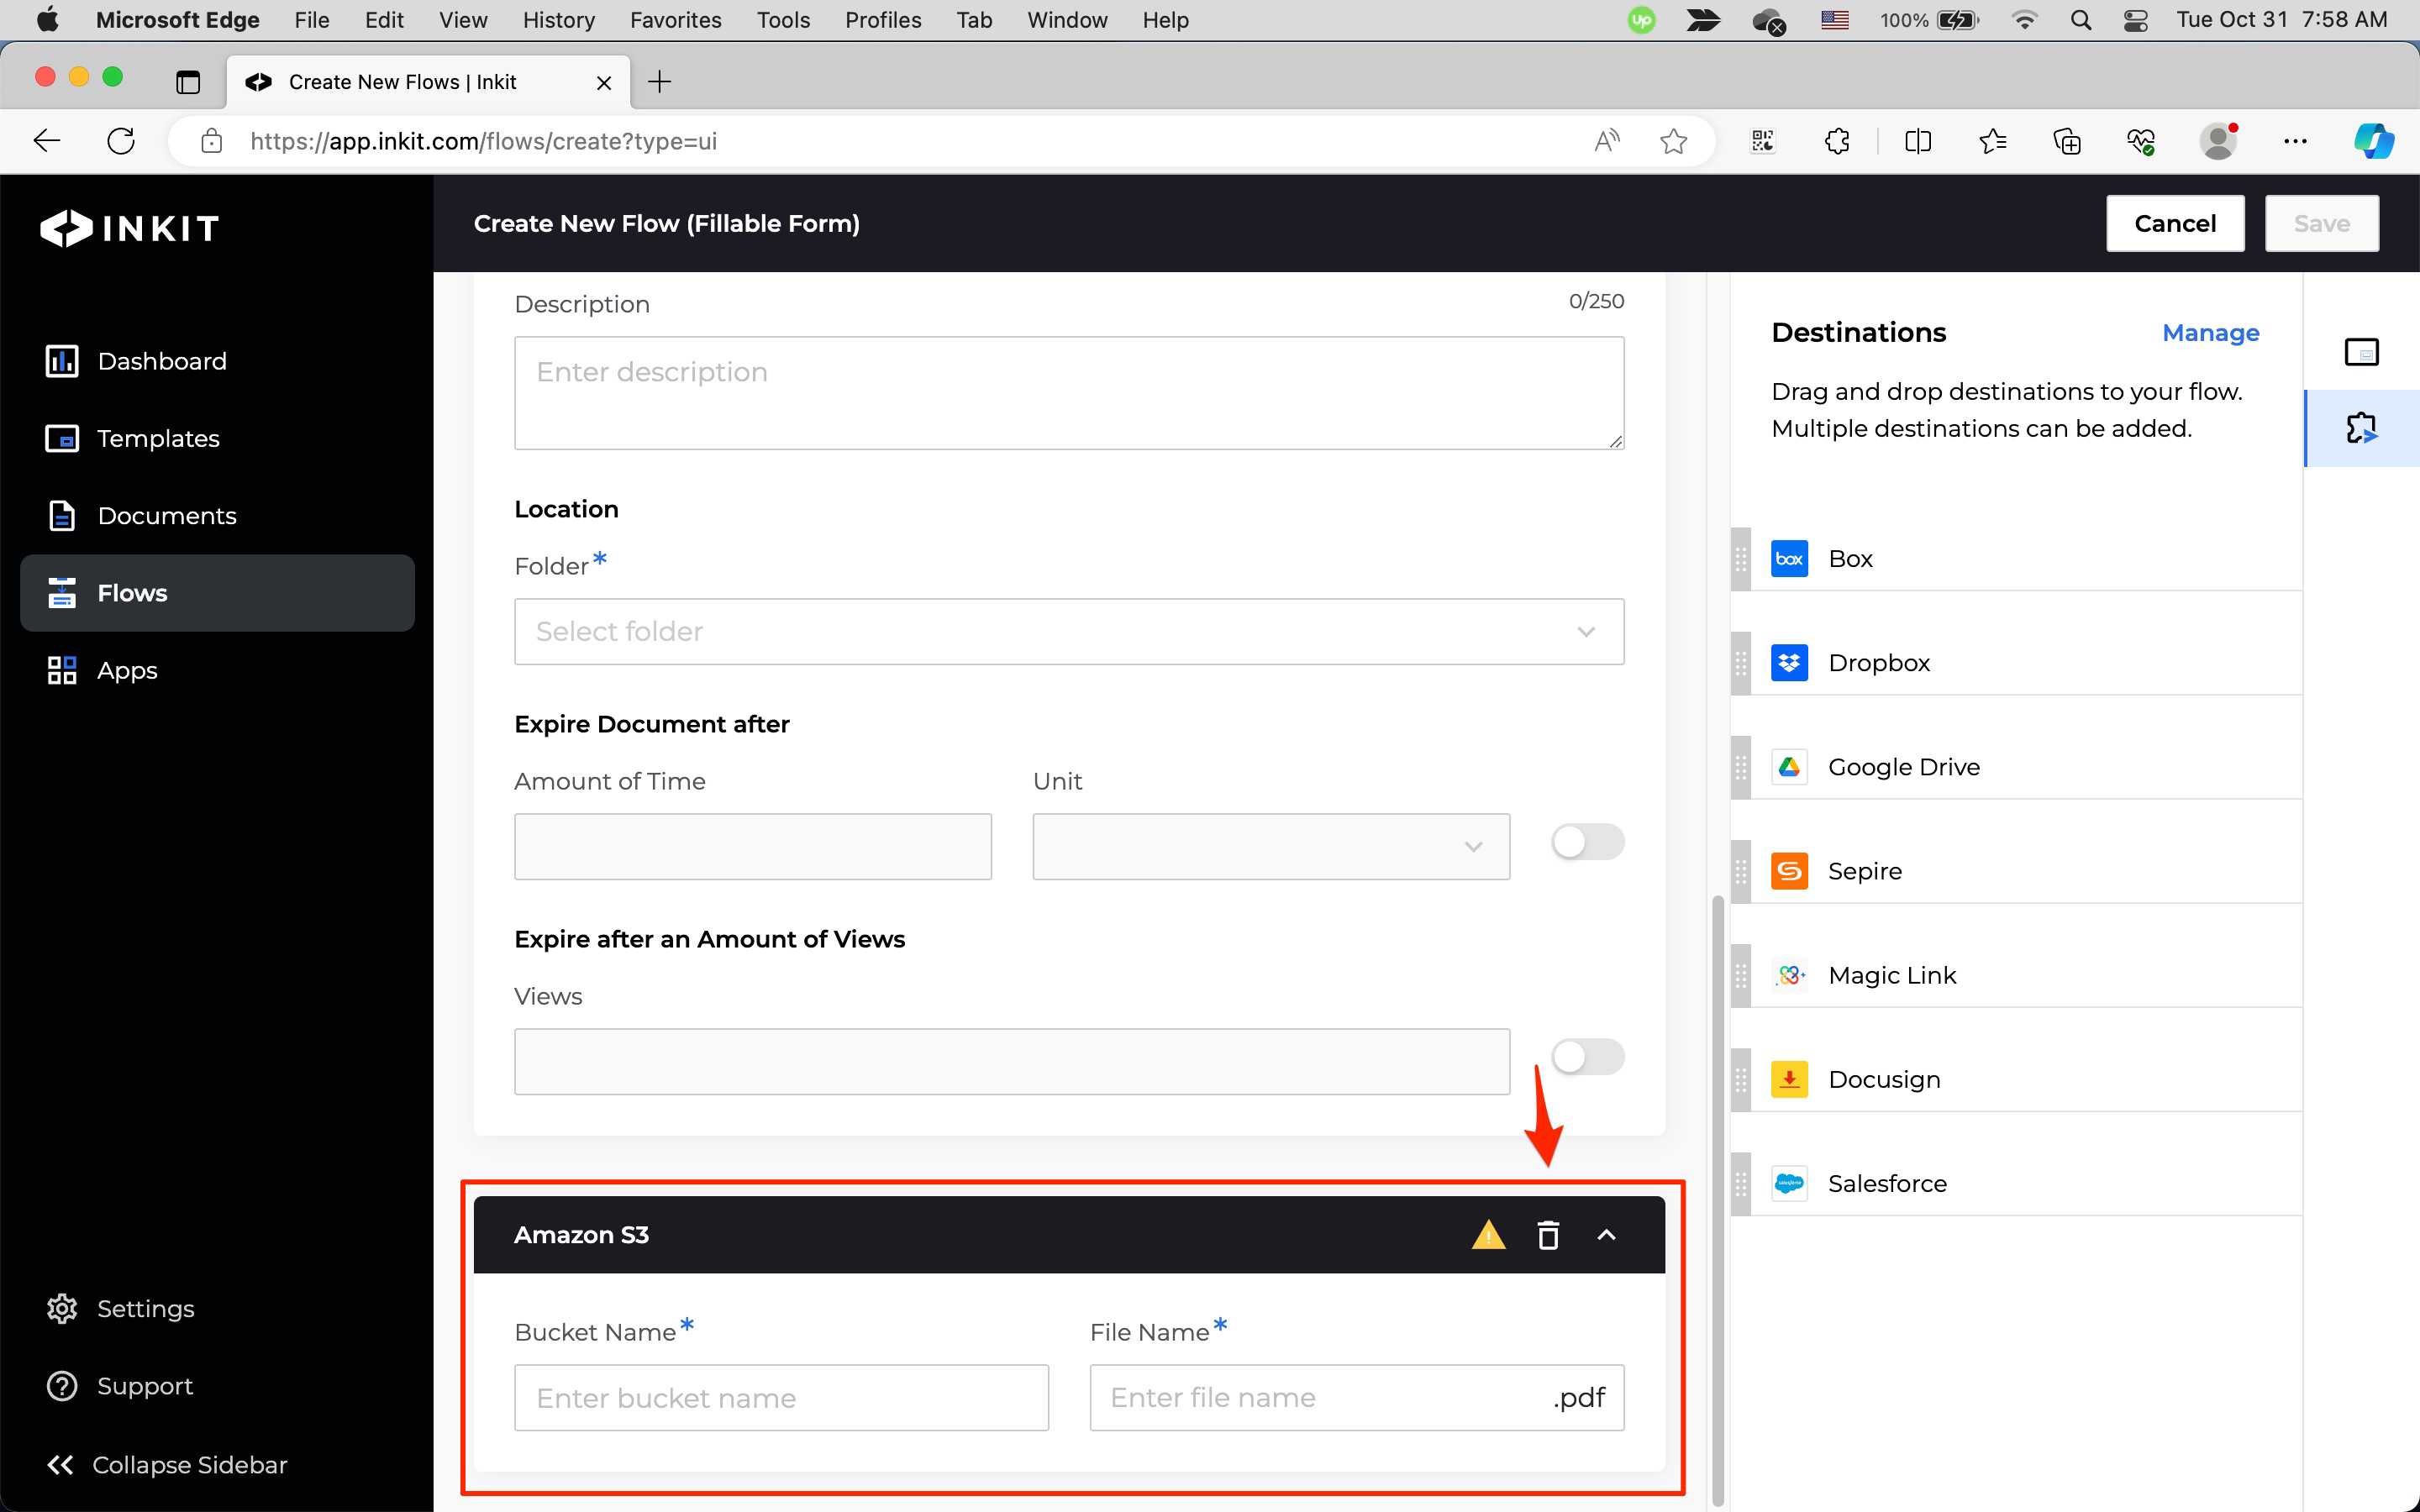
Adding Amazon S3 as a document destination
To add Amazon S3 as a destination of the workflow, do the following:
-
Set up the Amazon S3 app if you have not done so.
-
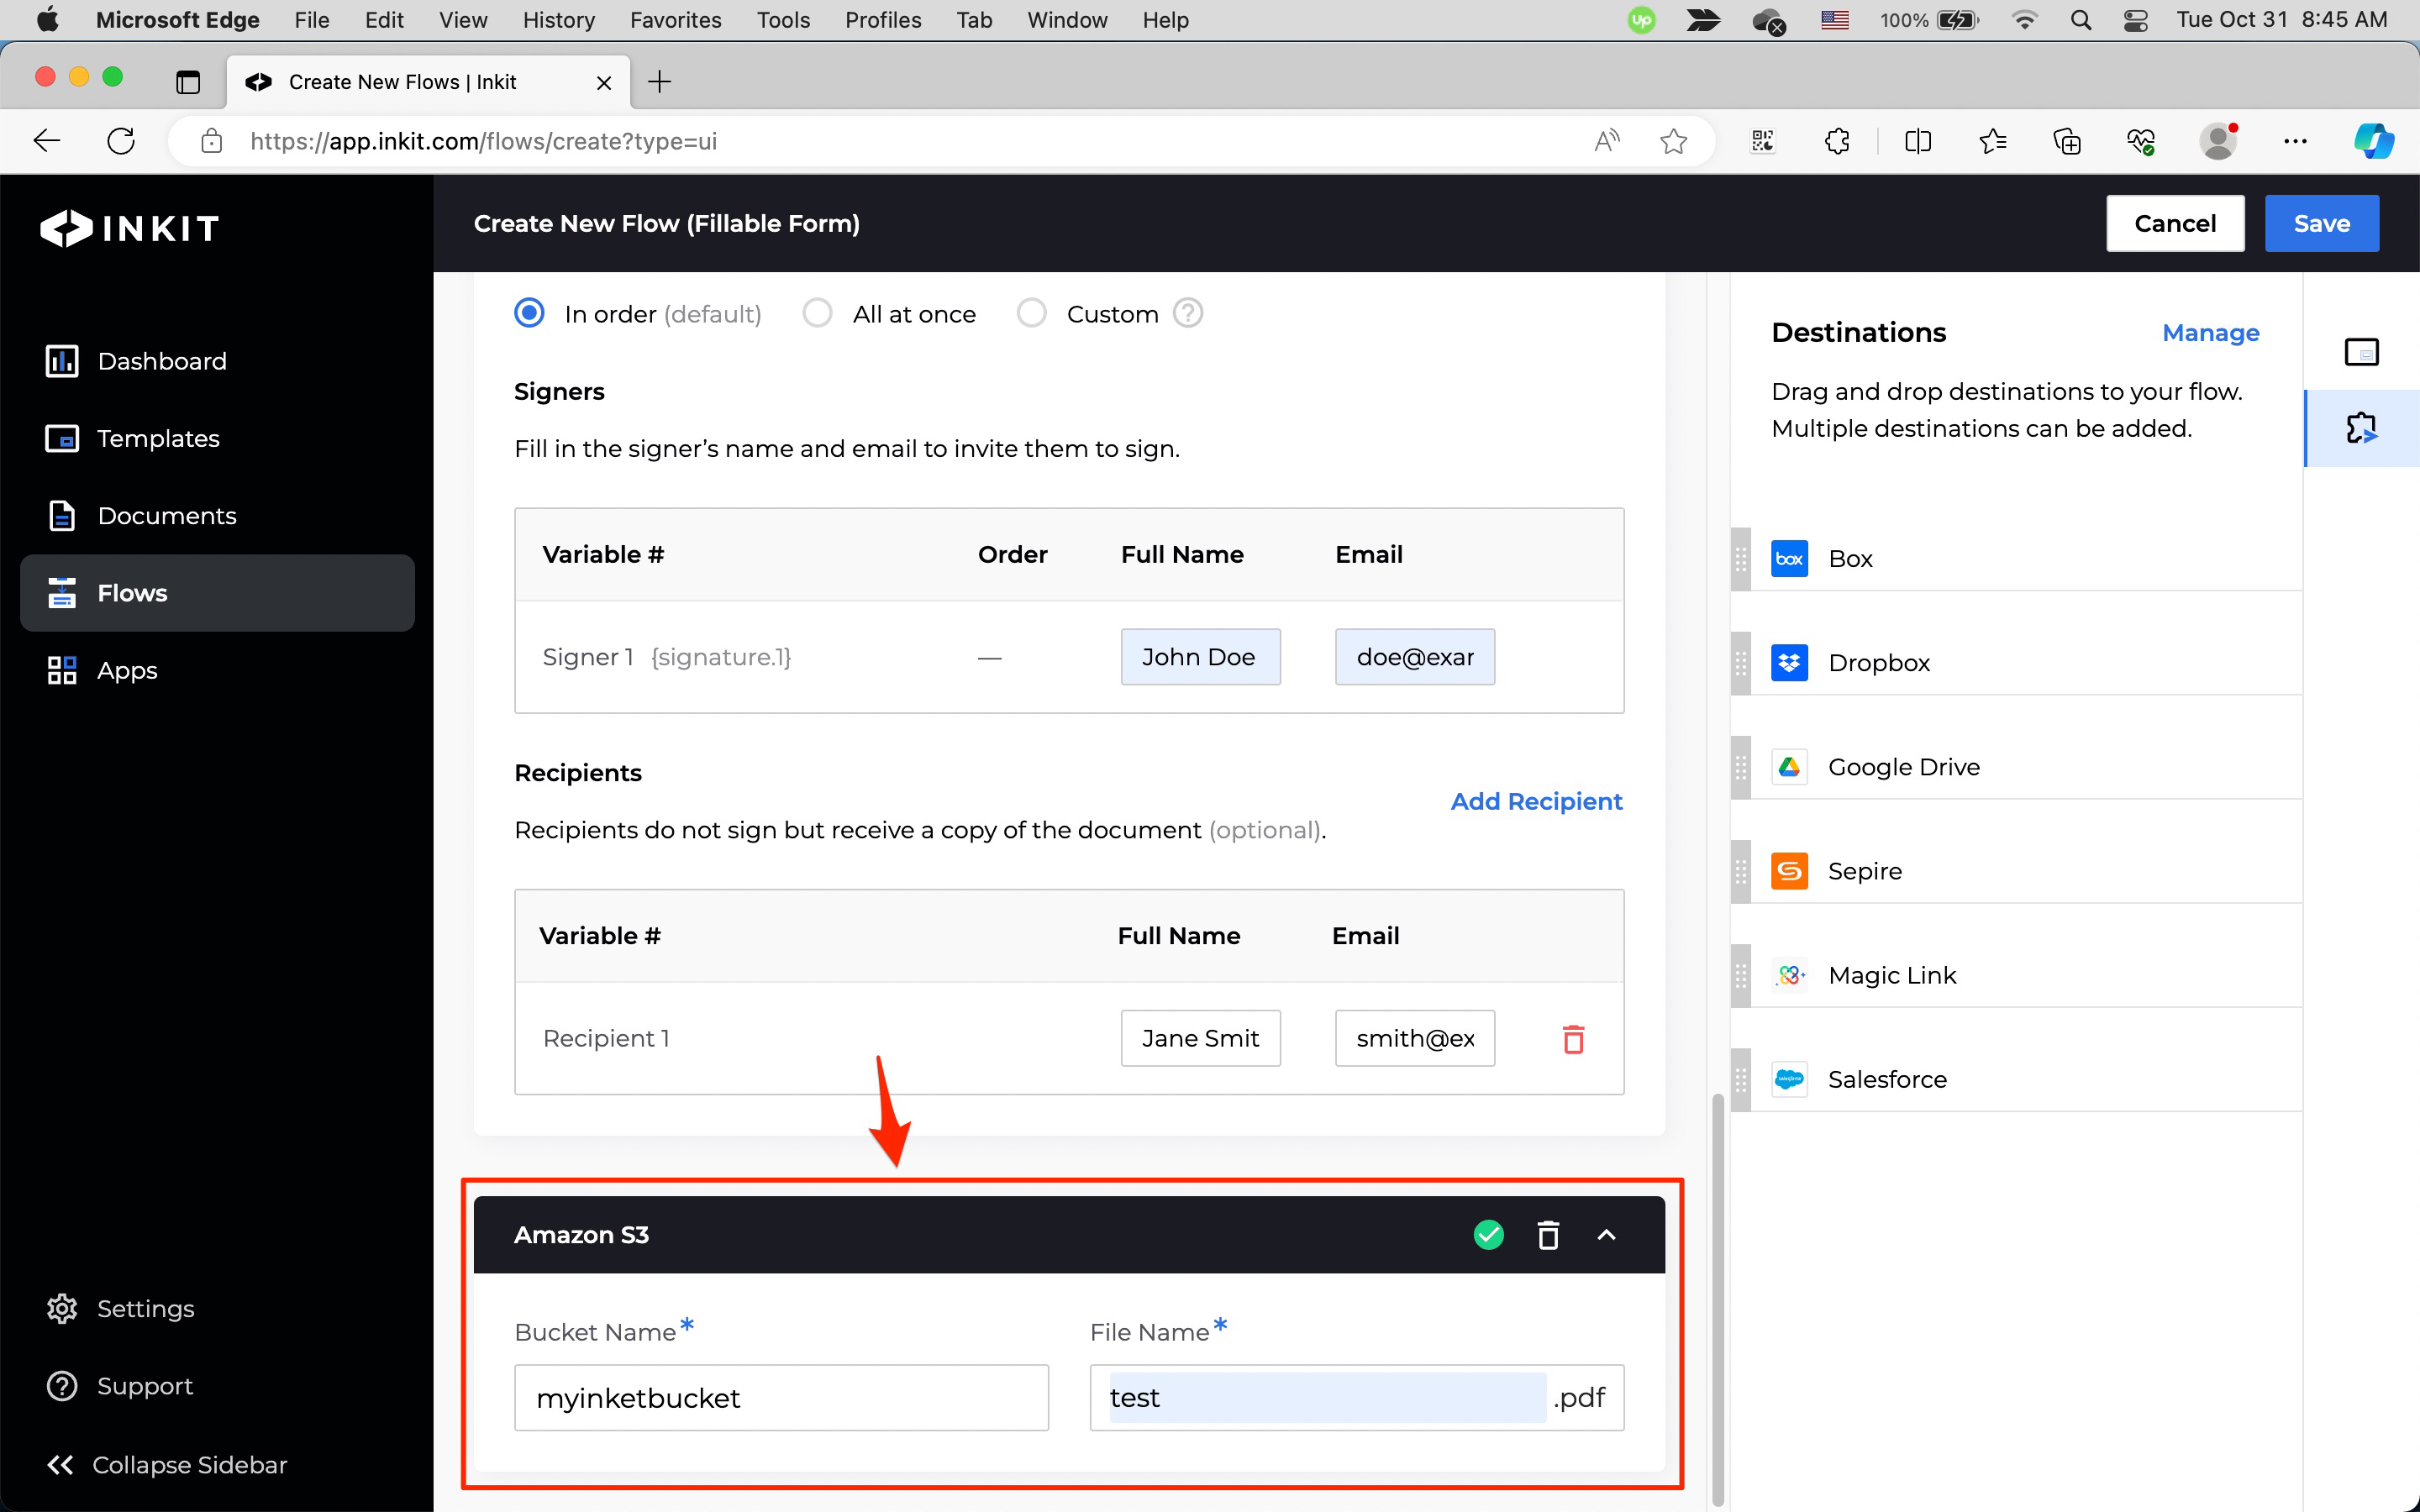
In the Amazon S3 panel, enter the Bucket Name of the generated document and the File Name of the document (without a file extenstion).
Adding Google Drive as a document destination
To add Google Drive as a destination of the workflow, do the following:
-
Set up the Google Drive app if you have not done so.
-
In the Google Drive panel, enter the Folder ID where the document will be generated and the File Name of the document (without a file extenstion).
Note: You cannot generate documents in the root folder of your Google Drive.
Note: You can find the ID of Google Drive folder by opening the folder and checking the URL. If, for example, the URL is
https://drive.google.com/drive/folders/12HCqdH7SEJT7USqIpmxqcyn0m3gDTu8b, the ID is12HCqdH7SEJT7USqIpmxqcyn0m3gDTu8b.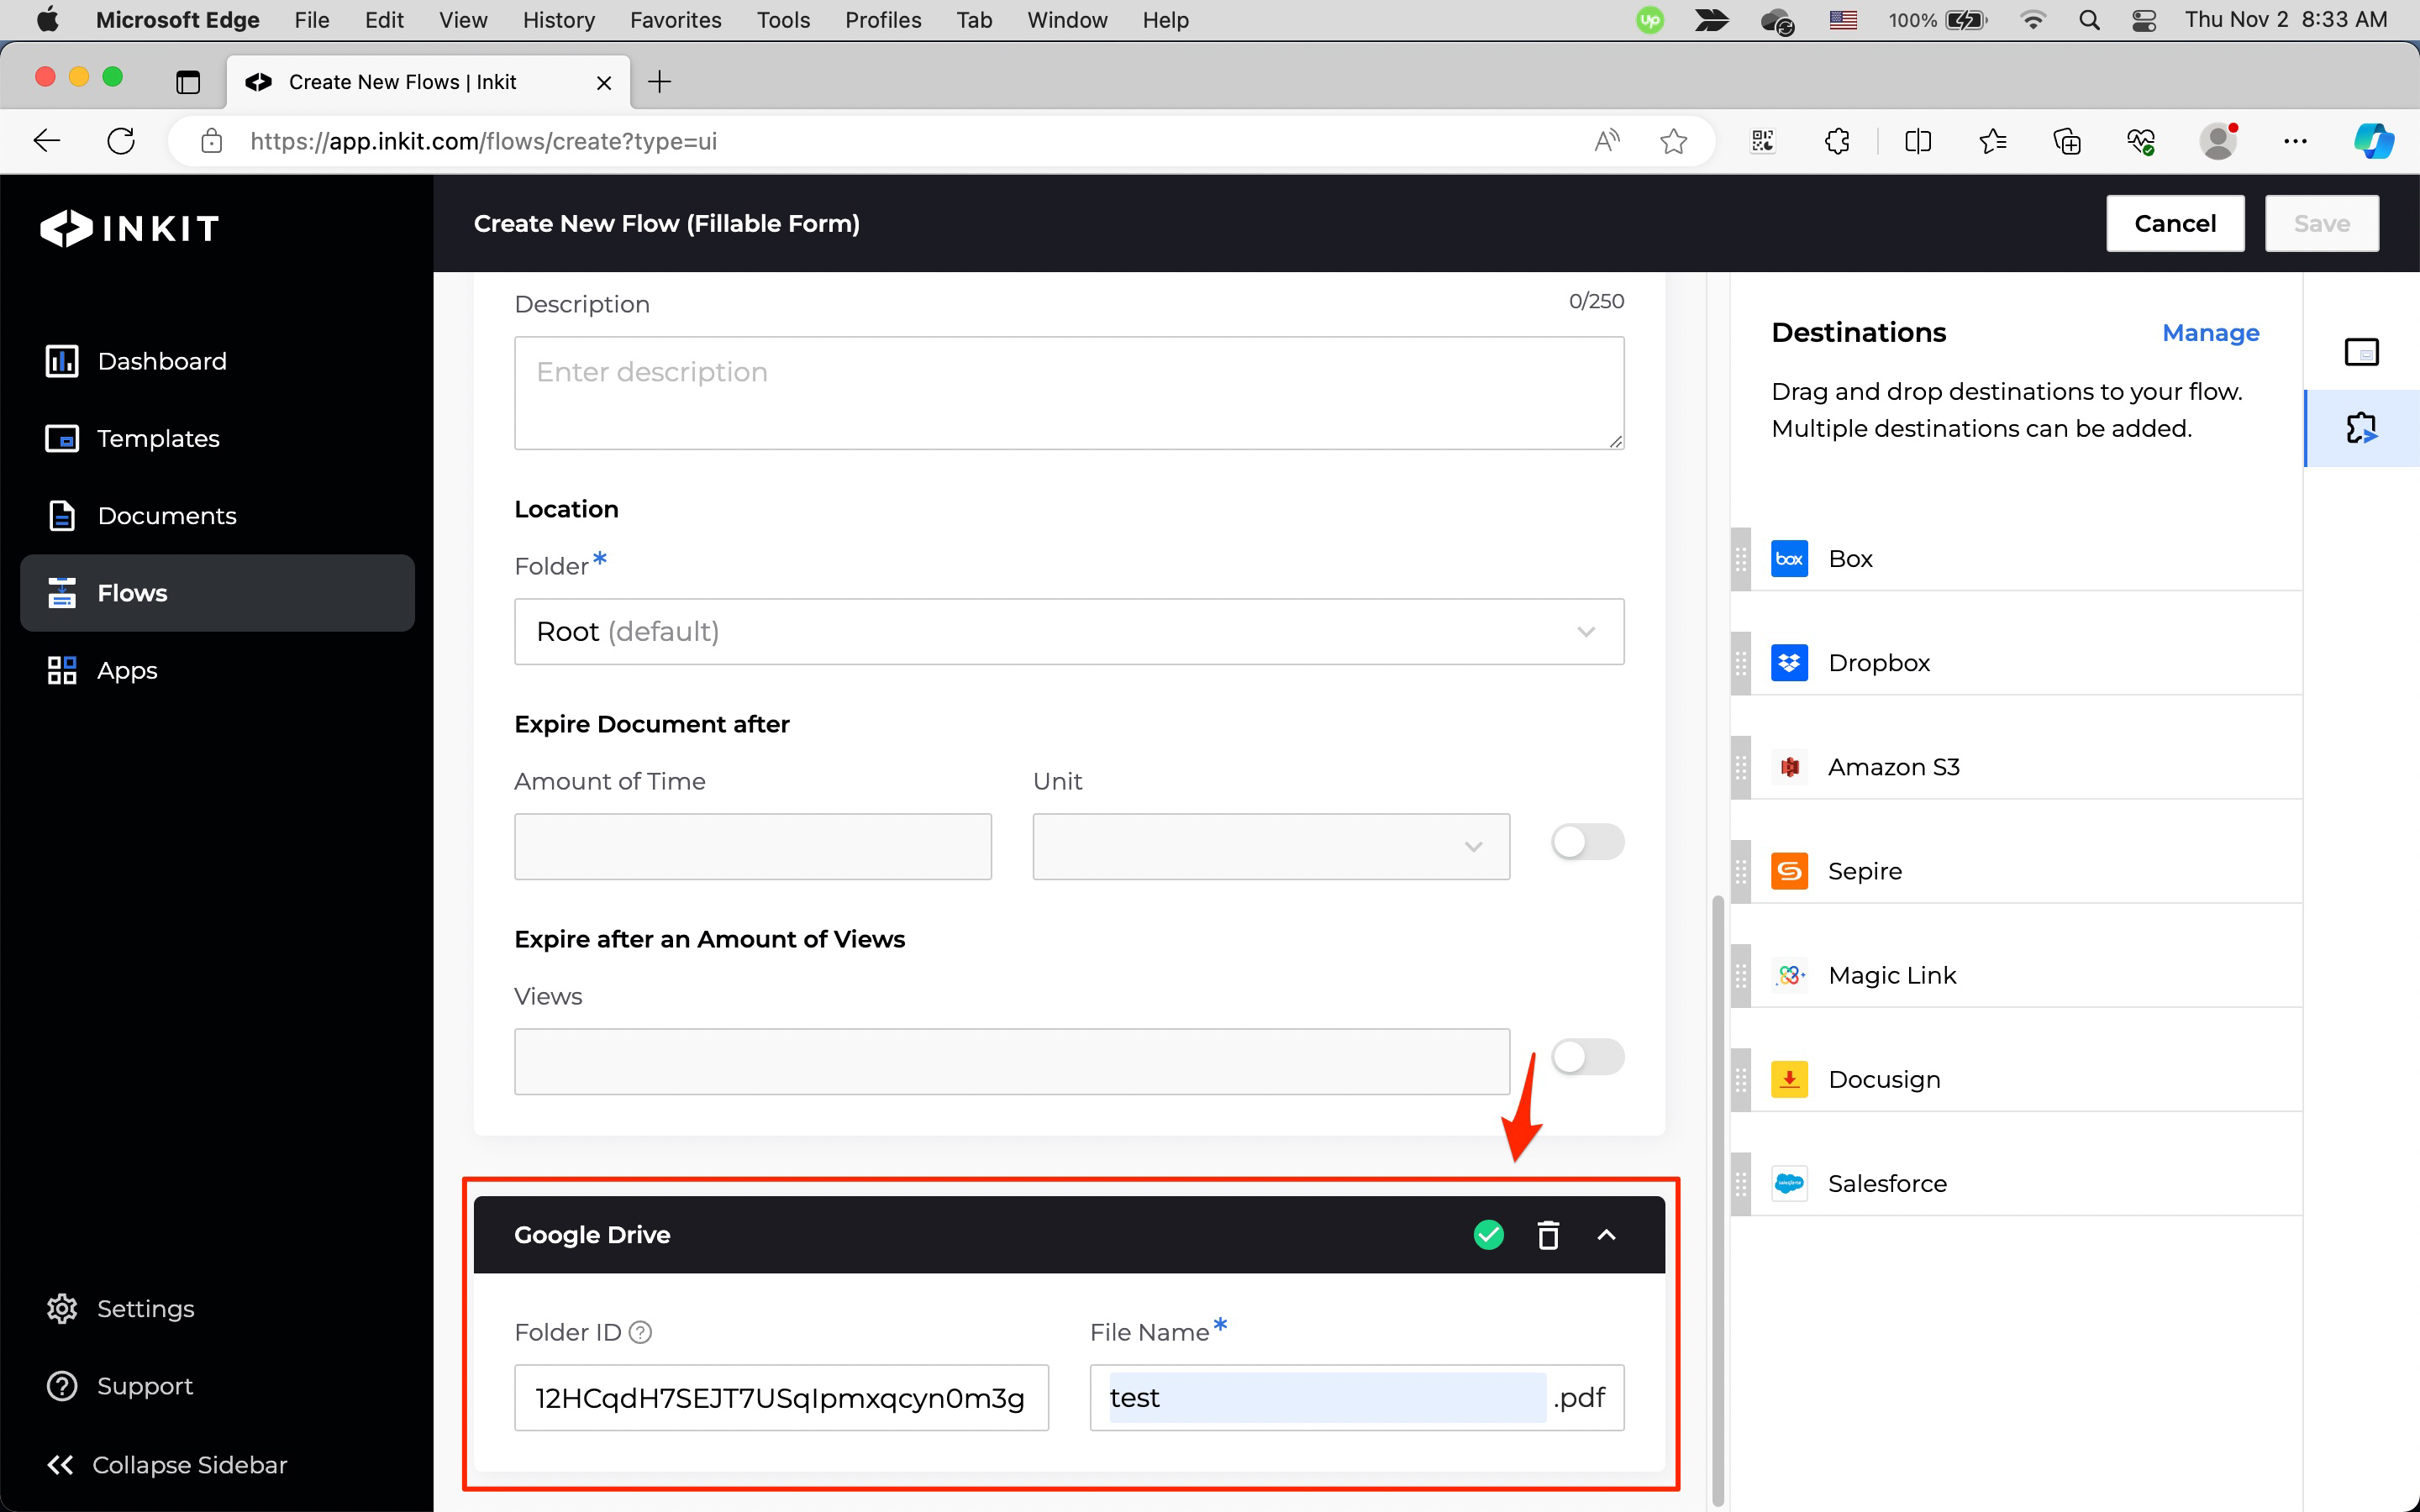
Adding Dropbox as a document destination
To add Dropbox as a destination of the workflow, do the following:
-
Set up the Dropbox app if you have not done so.
-
In the Dropbox panel, enter the Path and the File Name of the generated document (without a file extenstion).
Note: Enter a Path of
/if you want to place the generated document in the root folder.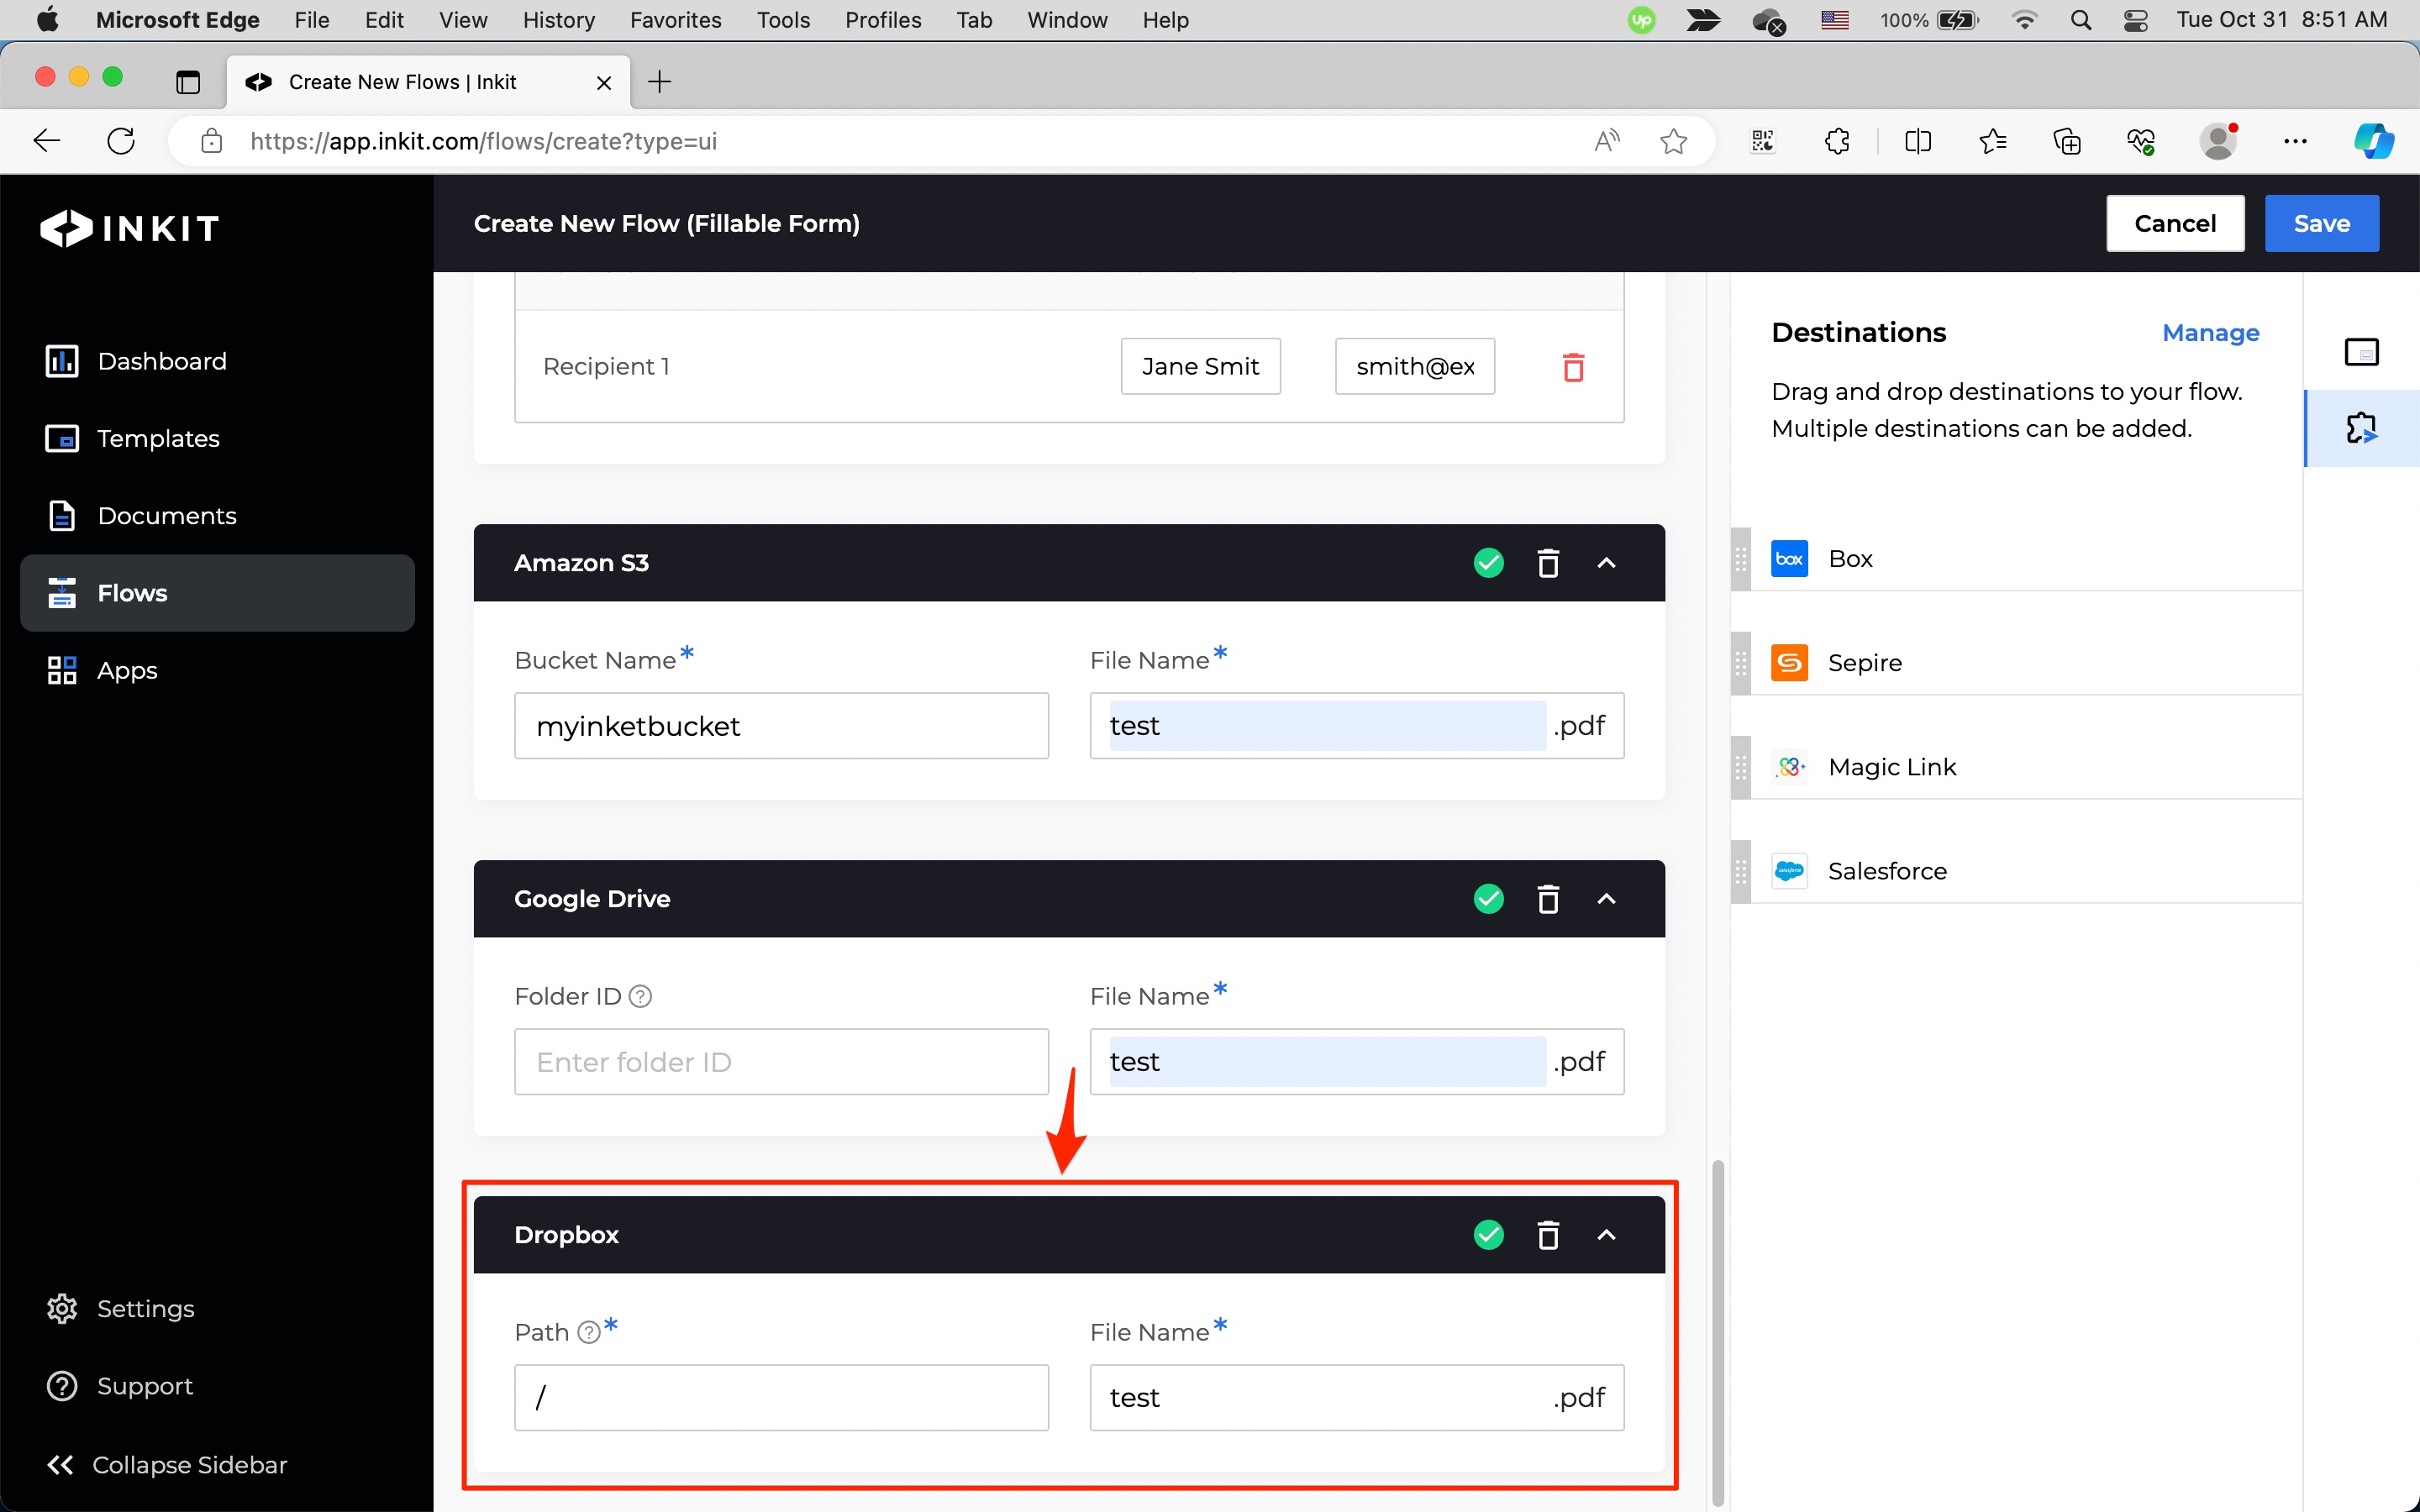
Adding Box as a document destination
To add Box as a destination of the workflow, do the following:
-
Set up the Box app if you have not done so.
-
In the Box panel, enter the Parent ID and the File Name of the generated document (without a file extenstion).
Note: Enter a Path of
0if you want to place the generated document in the root folder.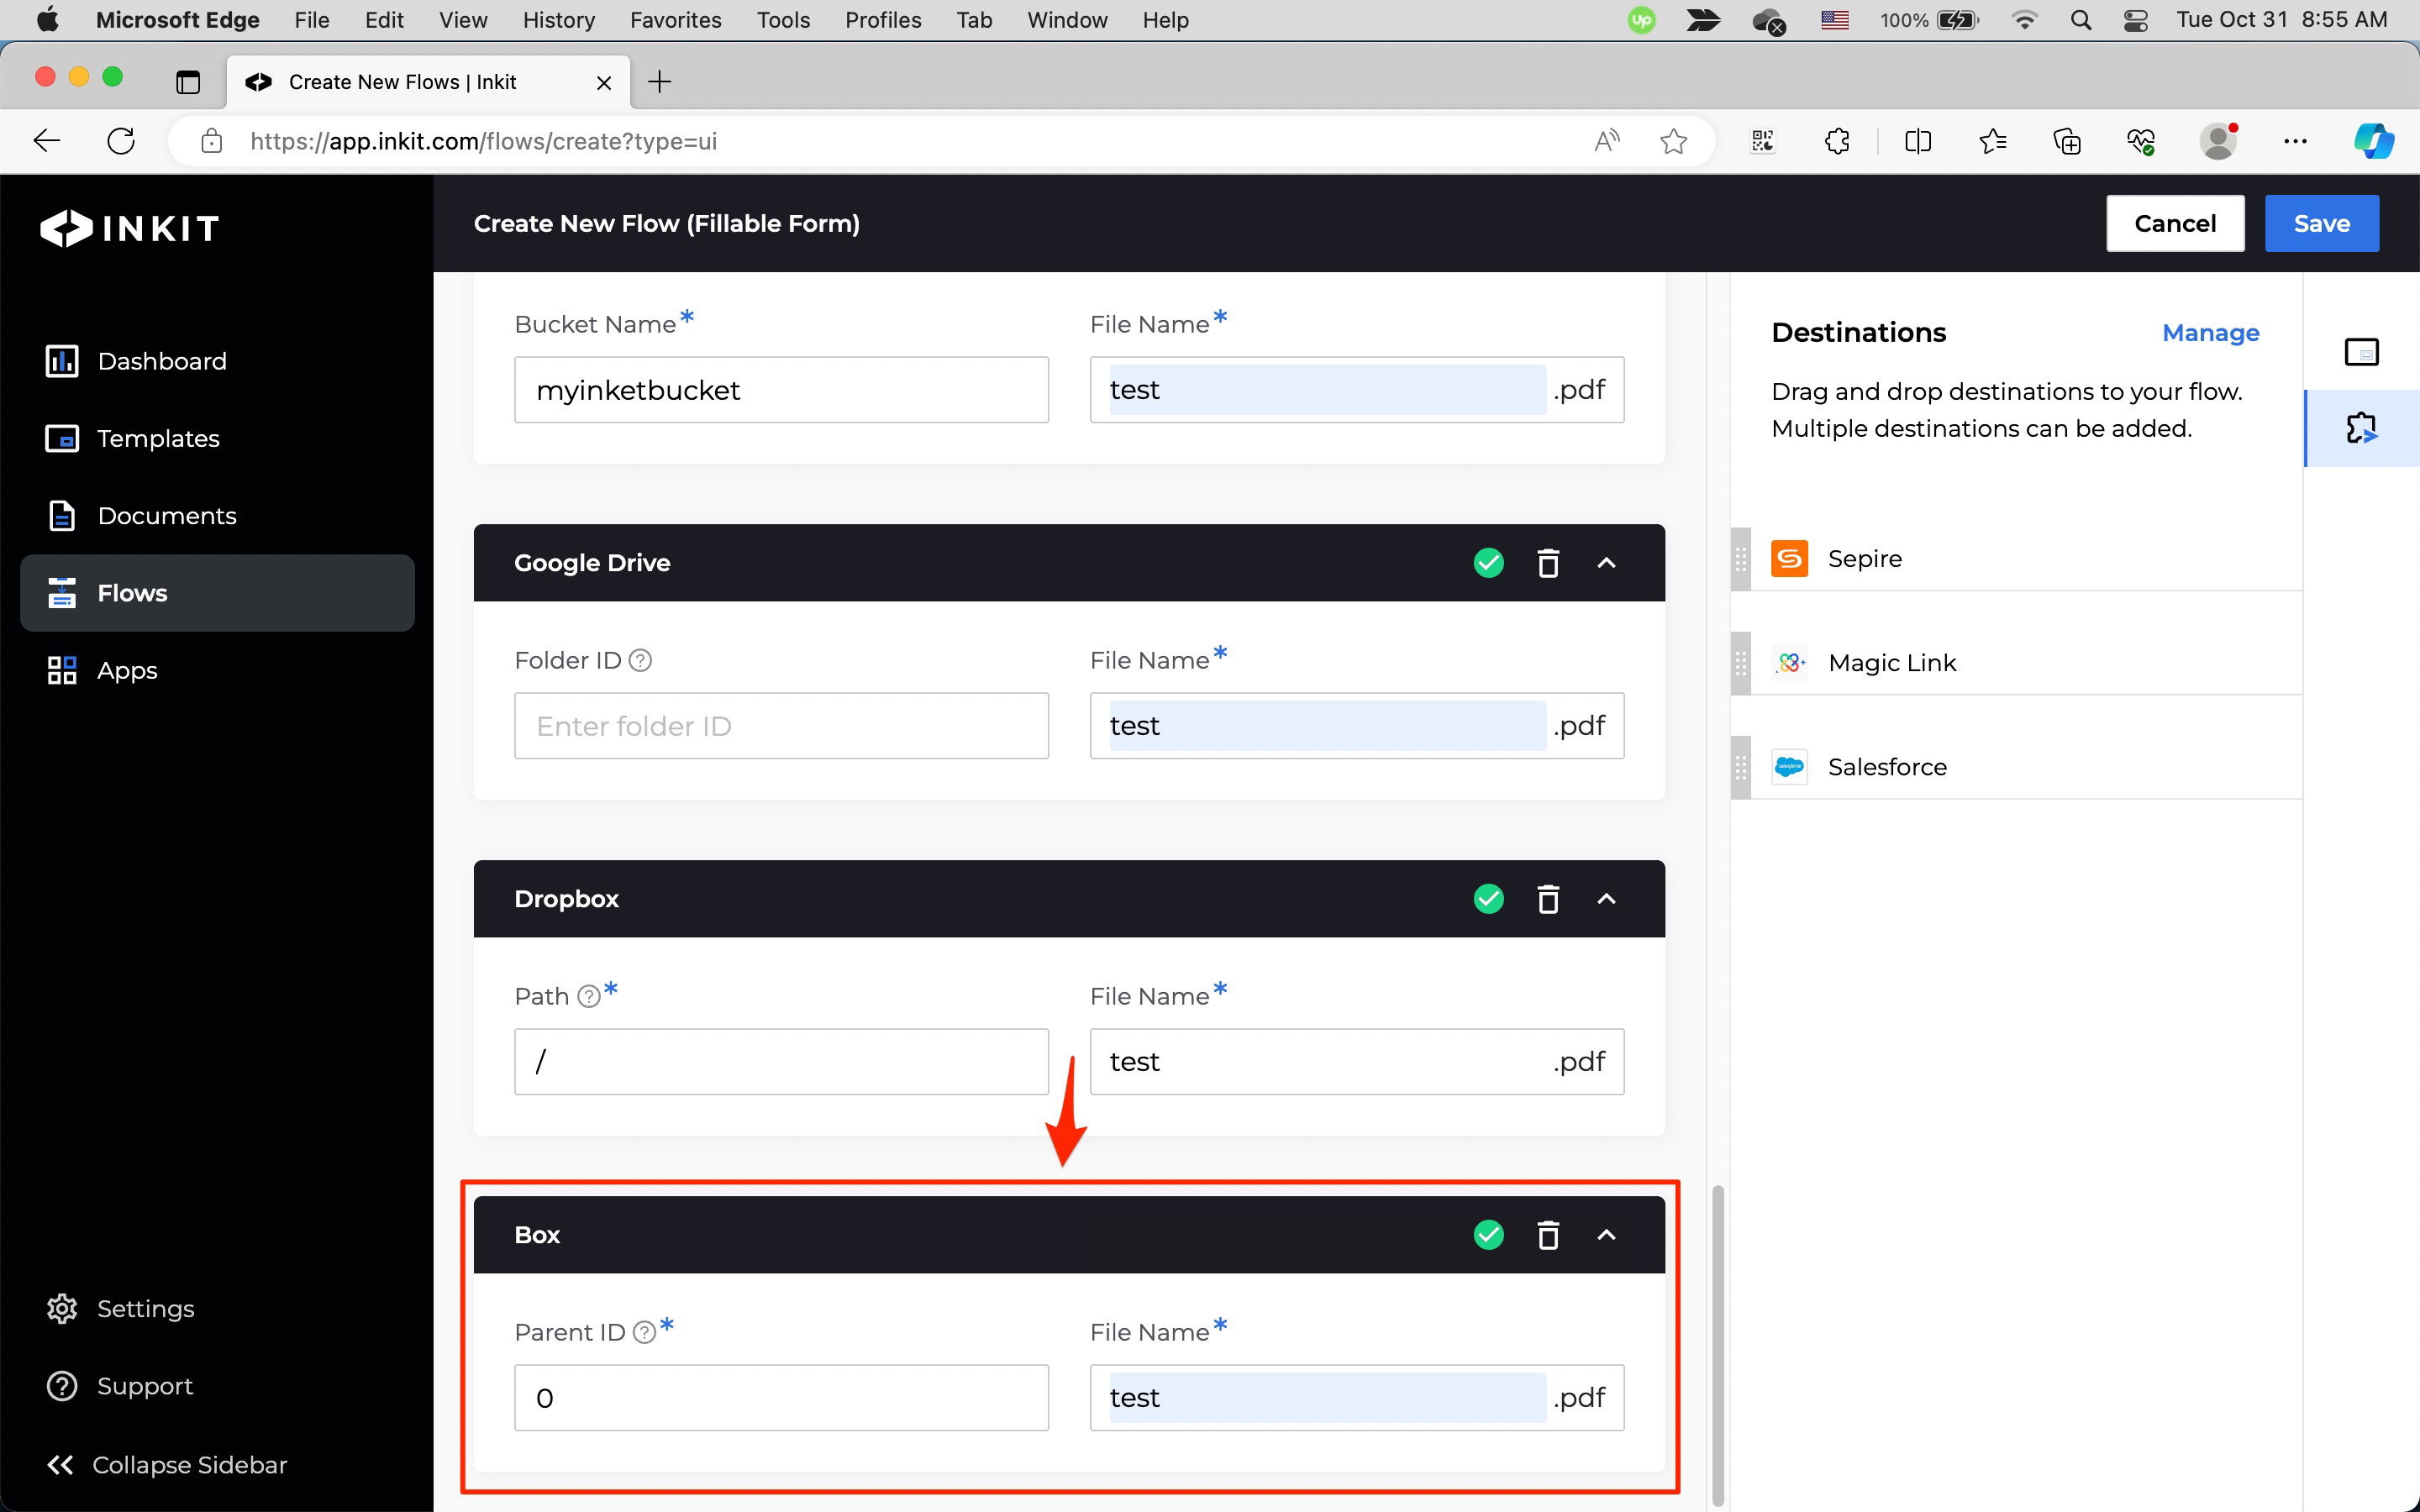
Adding Sepire as a document destination
To add Sepire as a destination of the workflow, do the following:
Note: When adding Sepire as a document destination of the workflow, you cannot have more than one template in the workflow.
-
Set up the Sepire app if you have not done so.
-
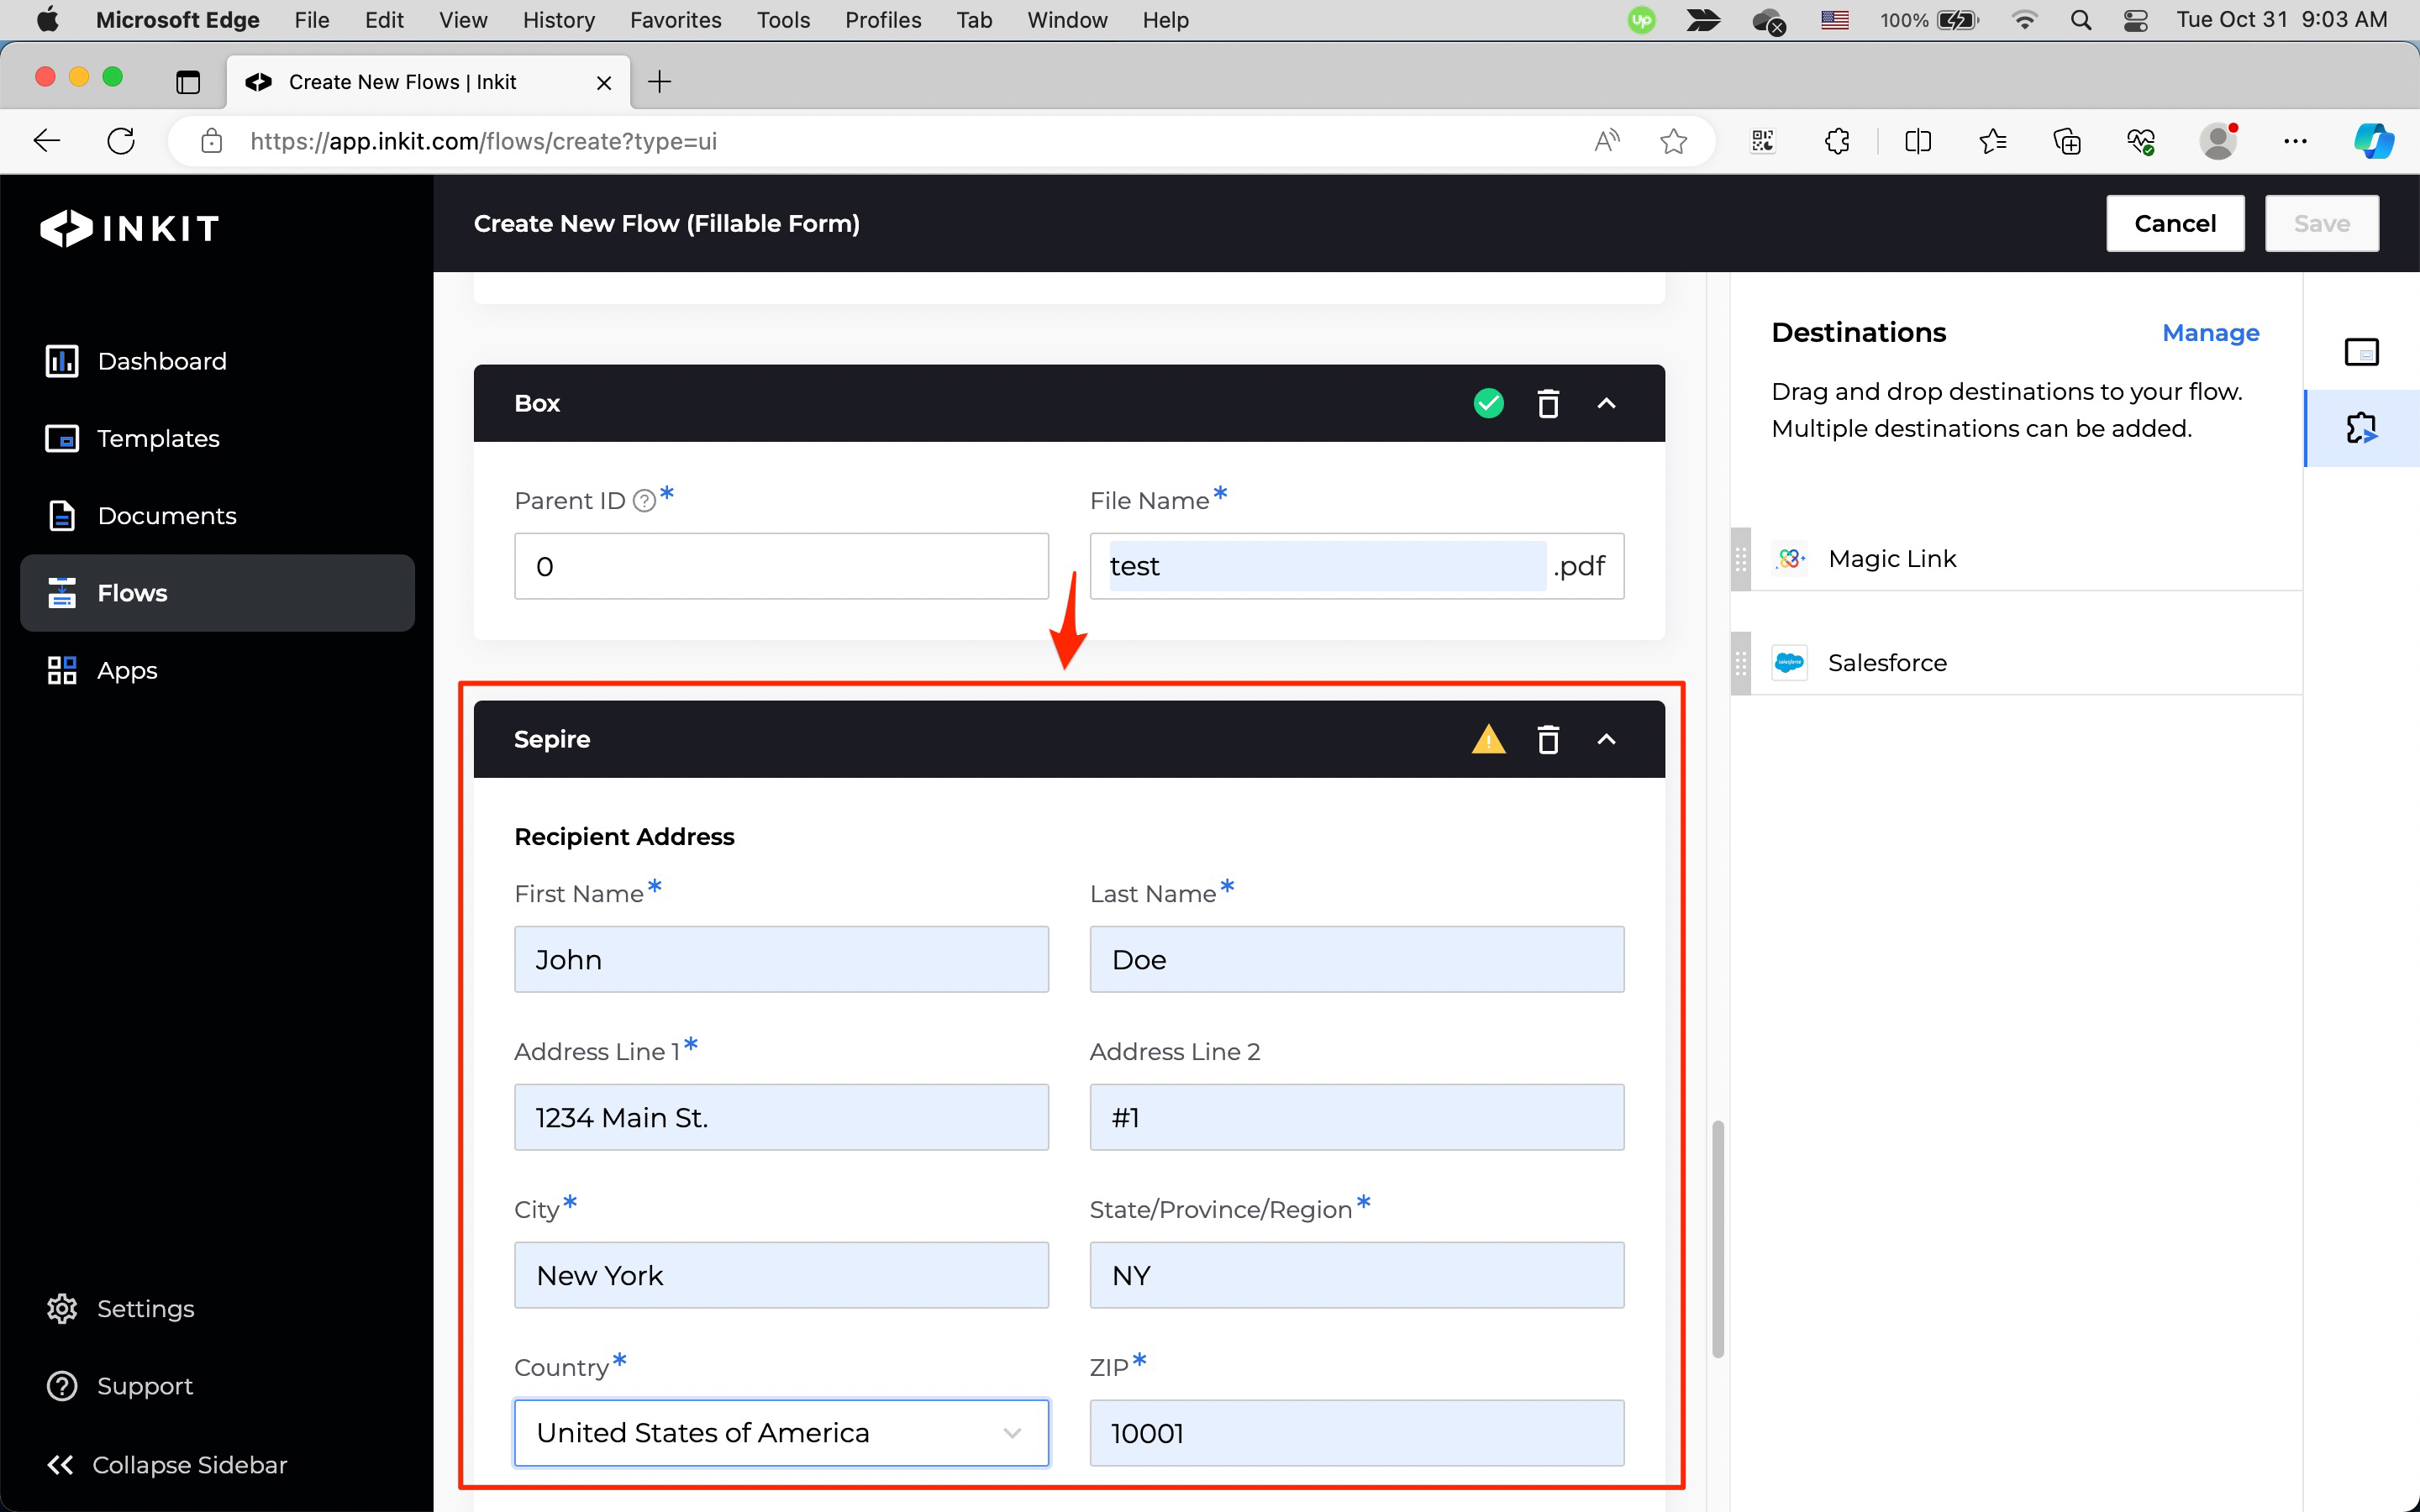
In the Sepire panel, under Recipient Address, enter the following fields:
- First Name
- Last Name
- Address Line 1
- Address Line 2
- City
- State/Province/Region
- Country
- ZIP
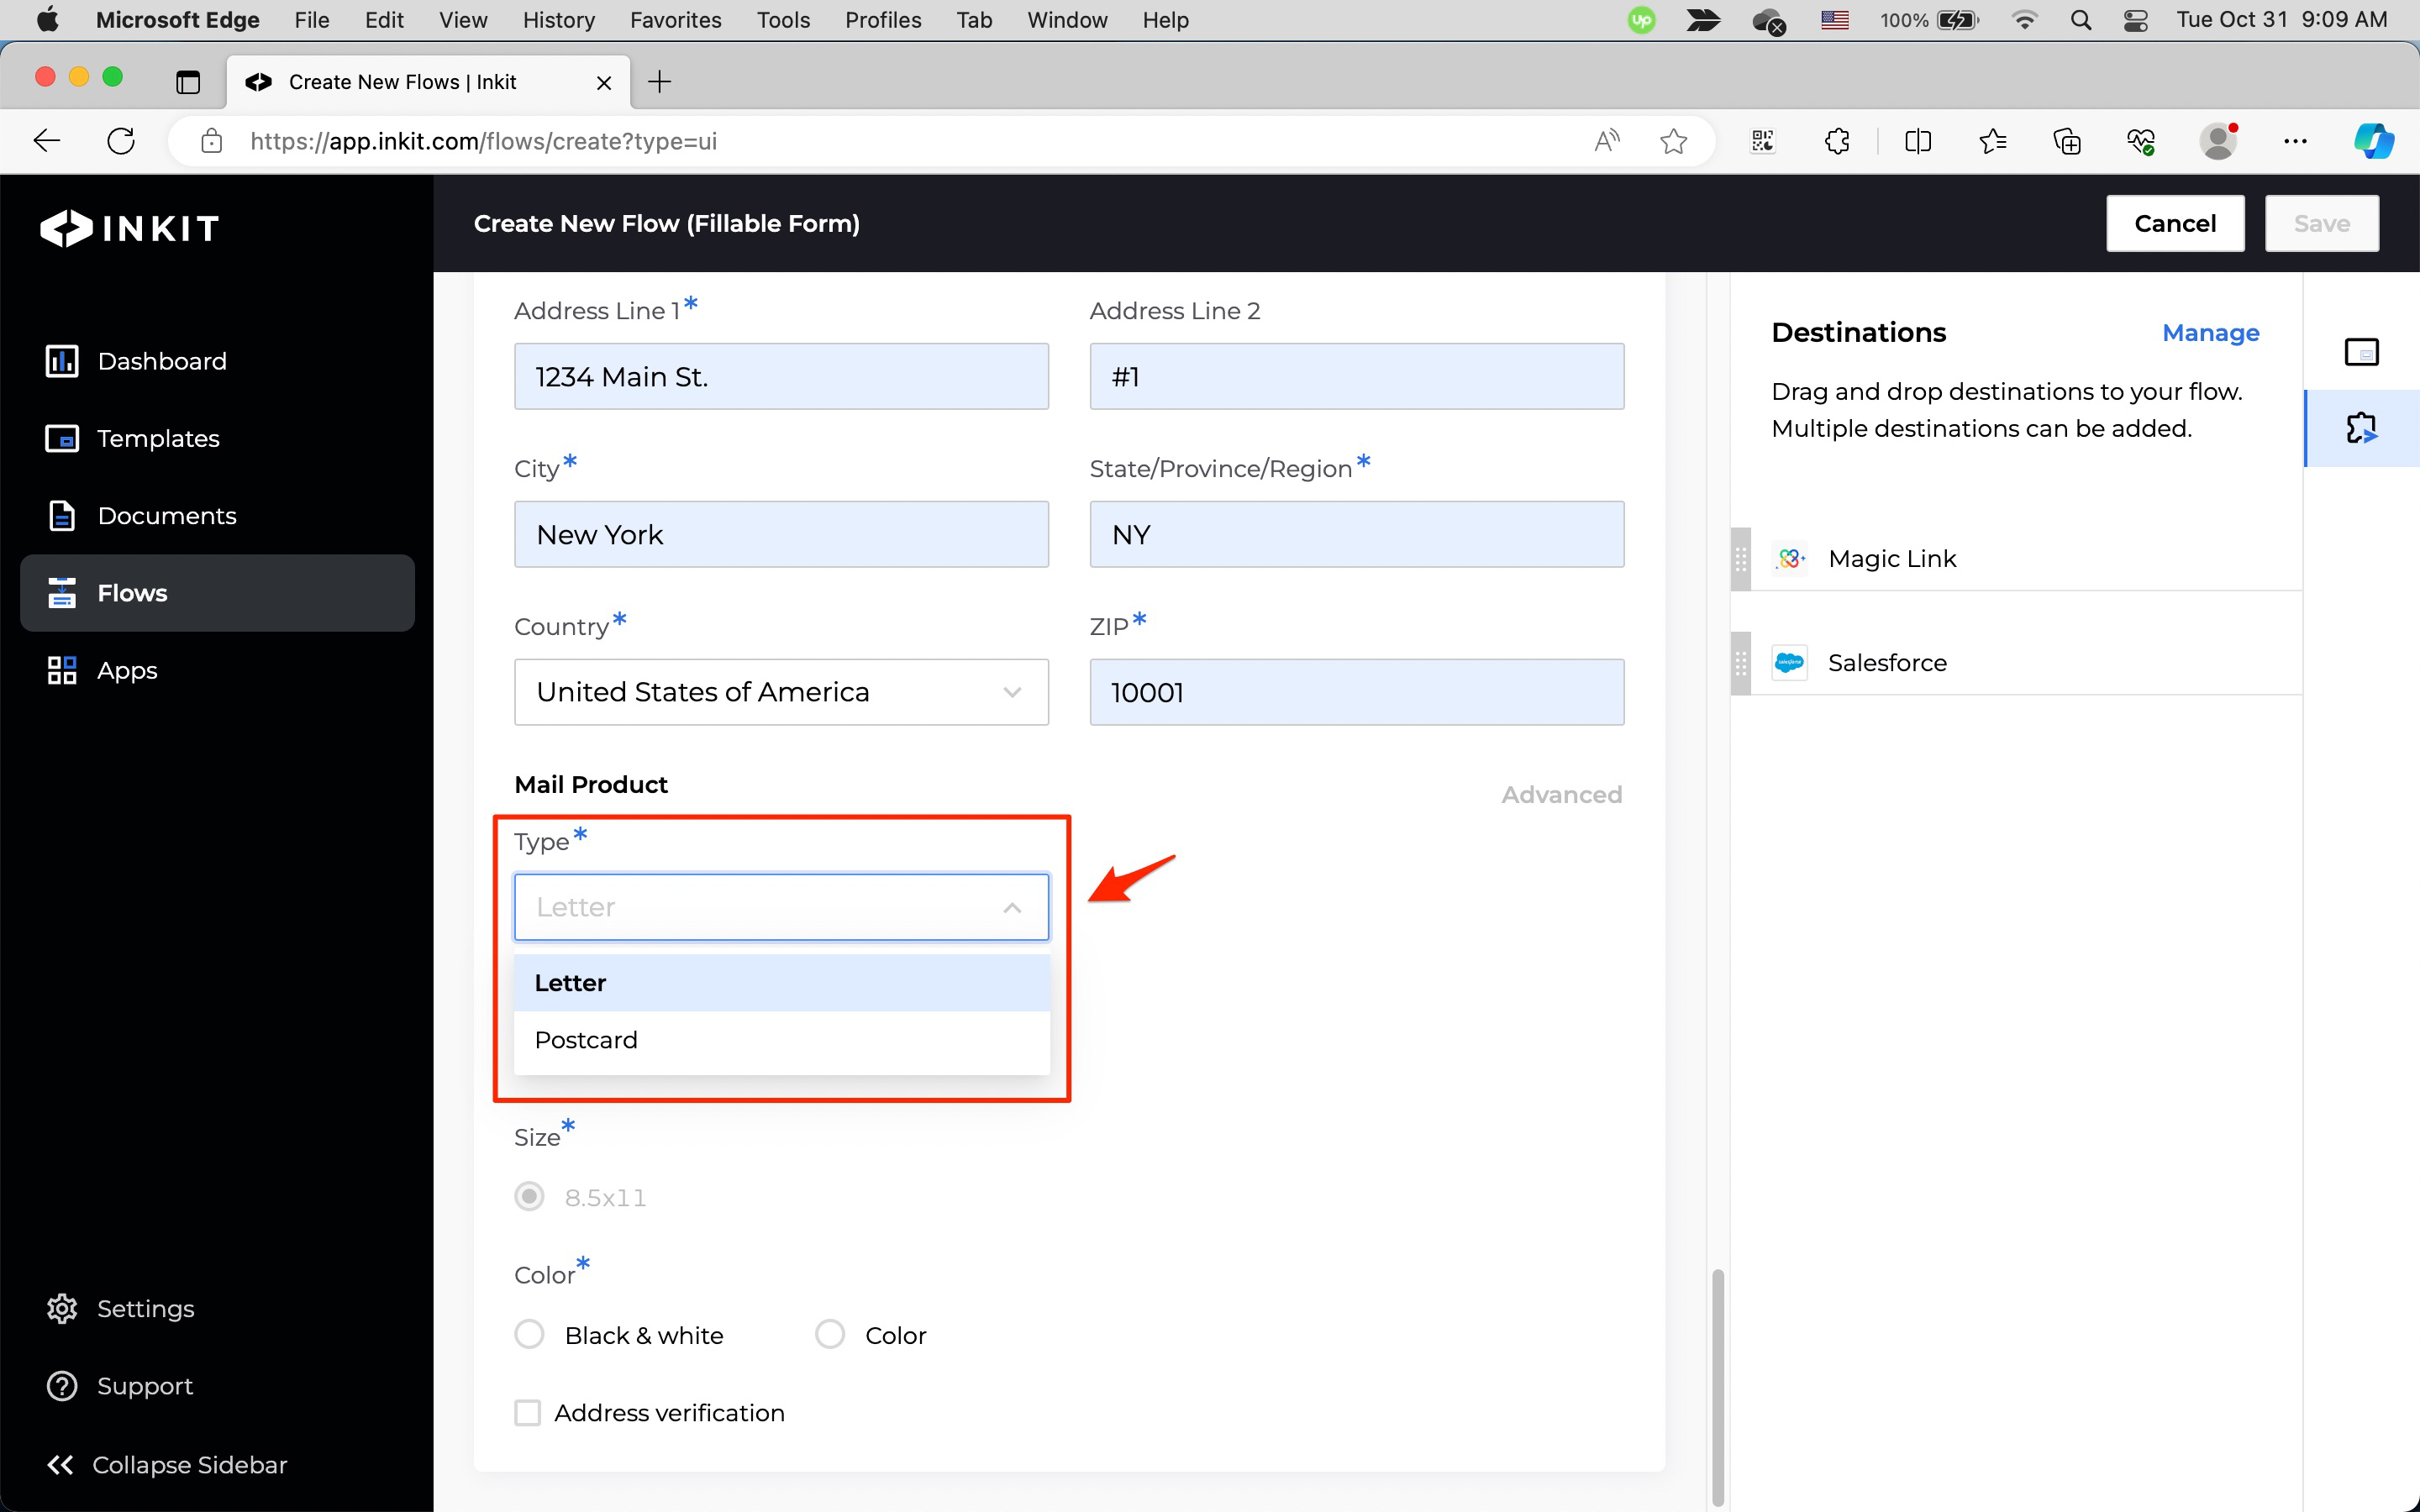
Under Mail Product, select the Type from the dropdown box. you can select one of the following options:
- Letter
- Postcard
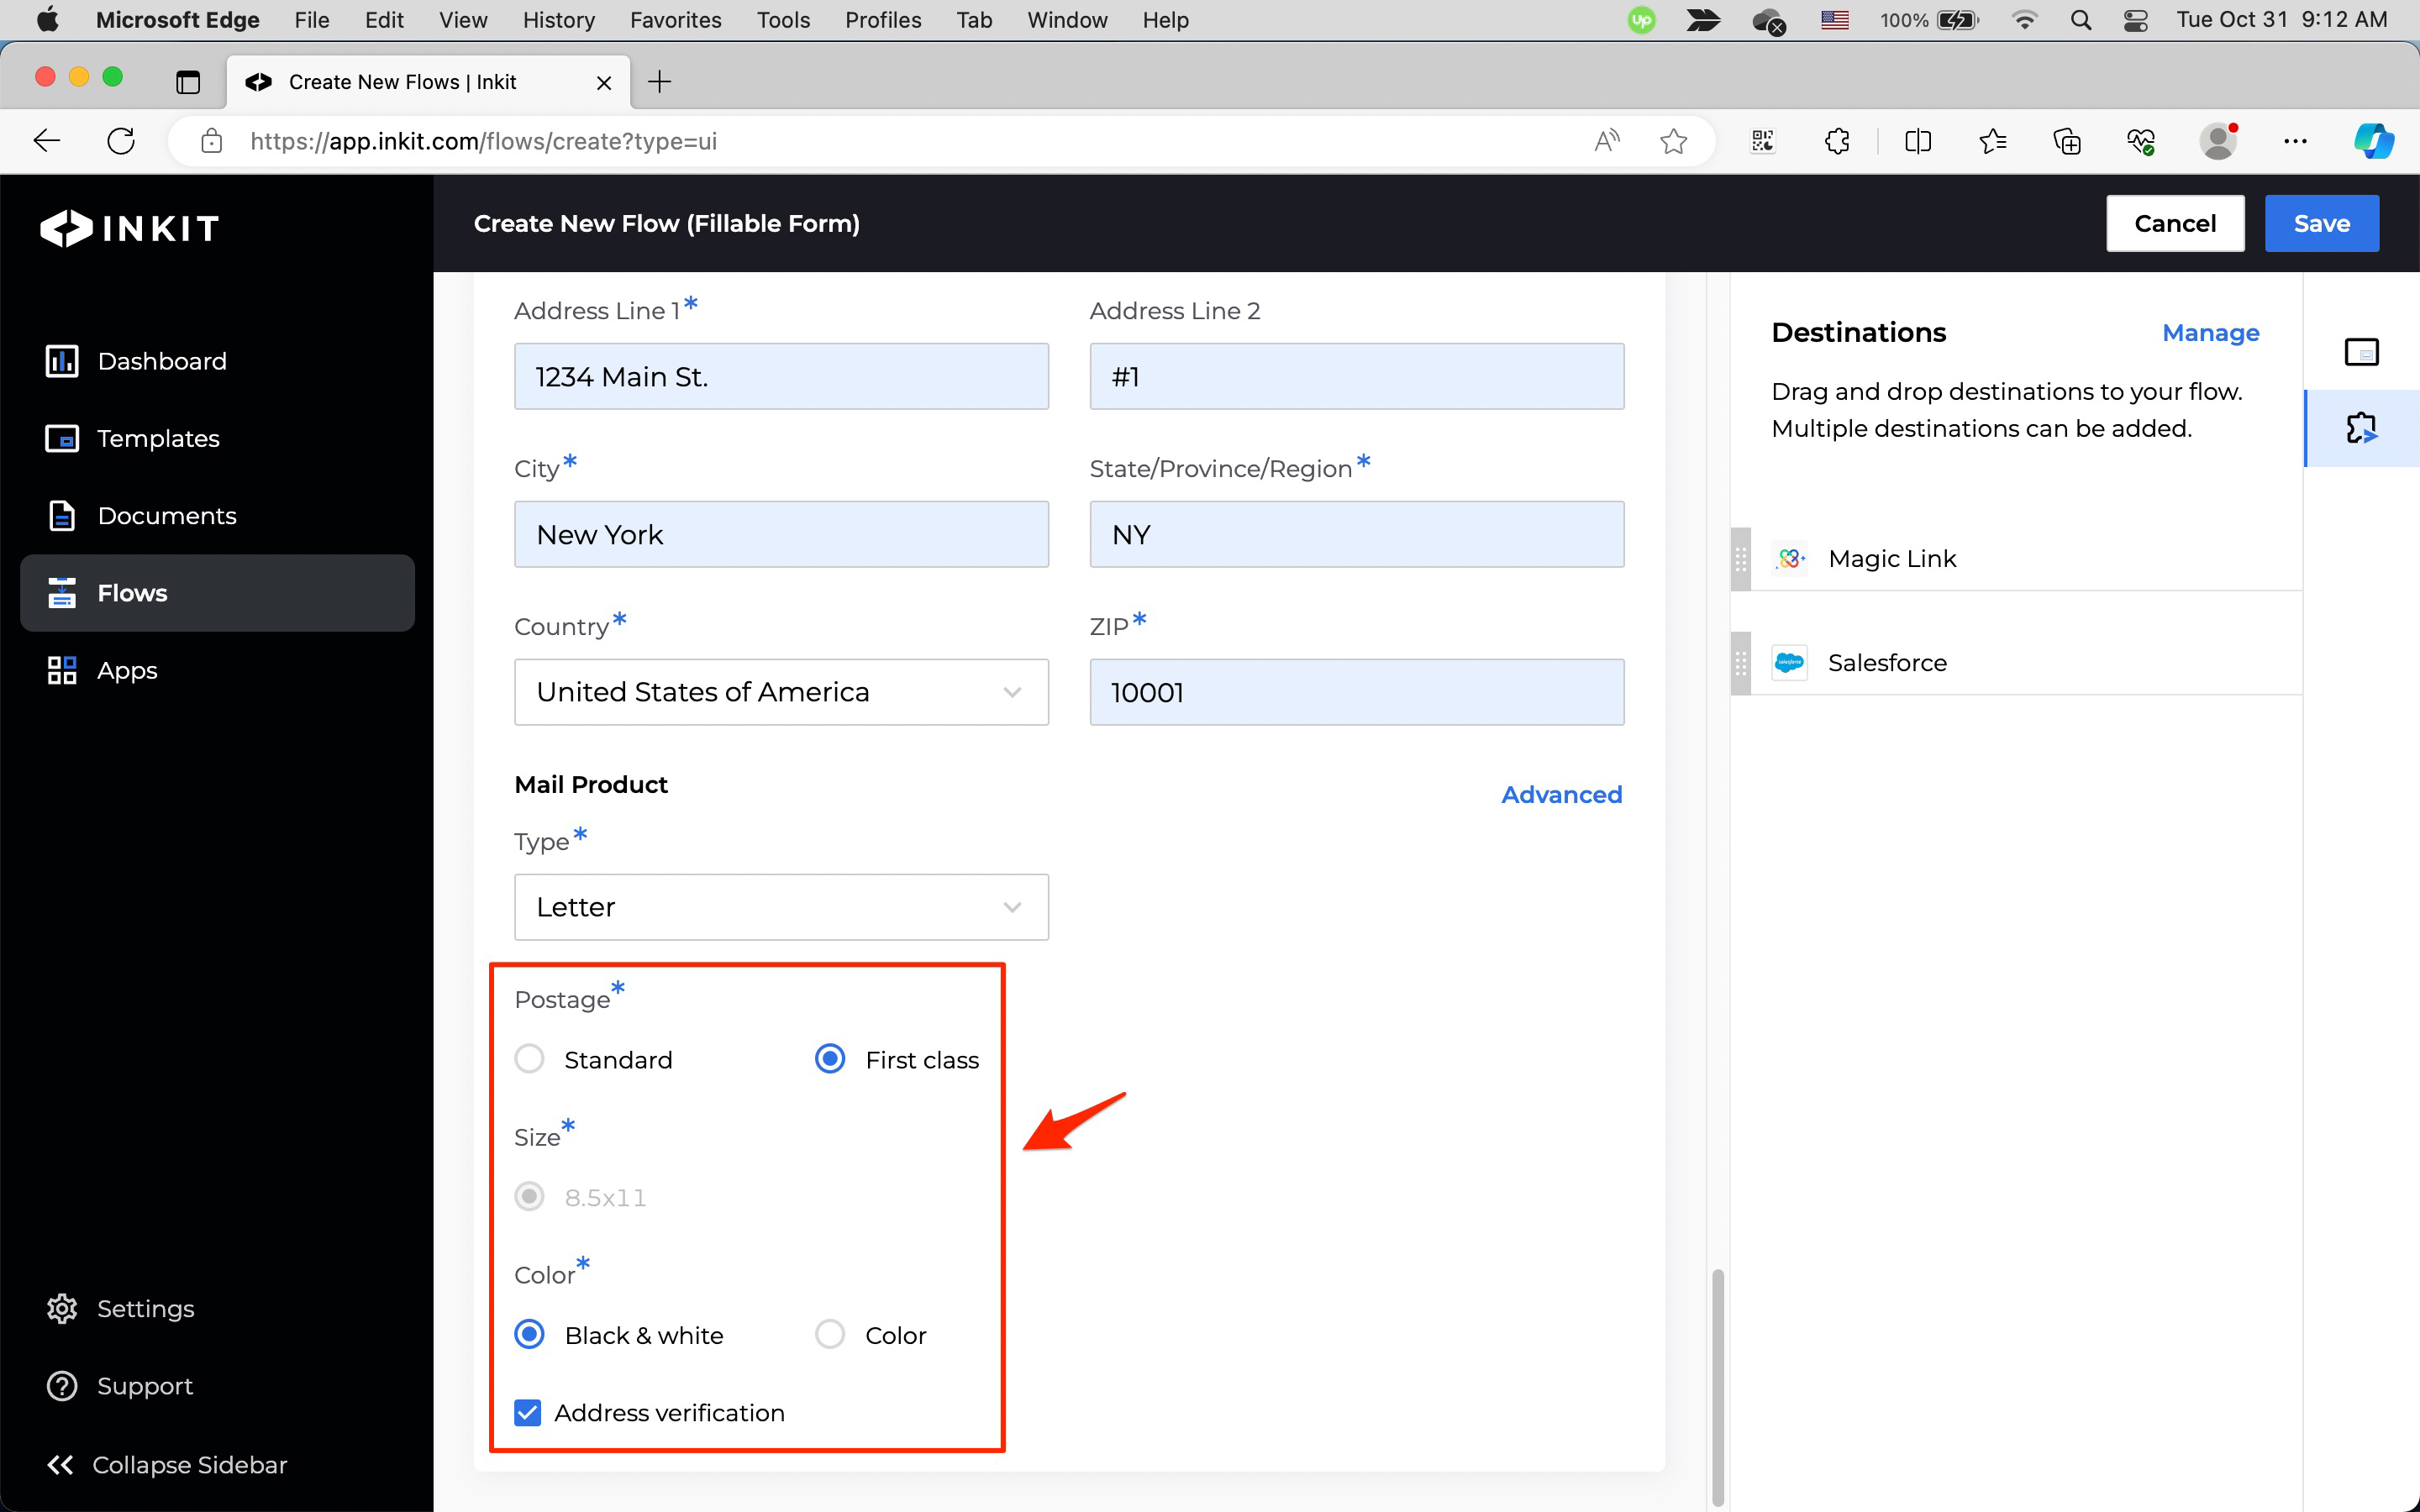
If you select a Type of Letter, do the following:
Select one of the following Postage options:
- Standard
- First class
Select one of the following Color options:
- Black & white
- Color
If you want to verify the address of the recipient, click on Address verification.
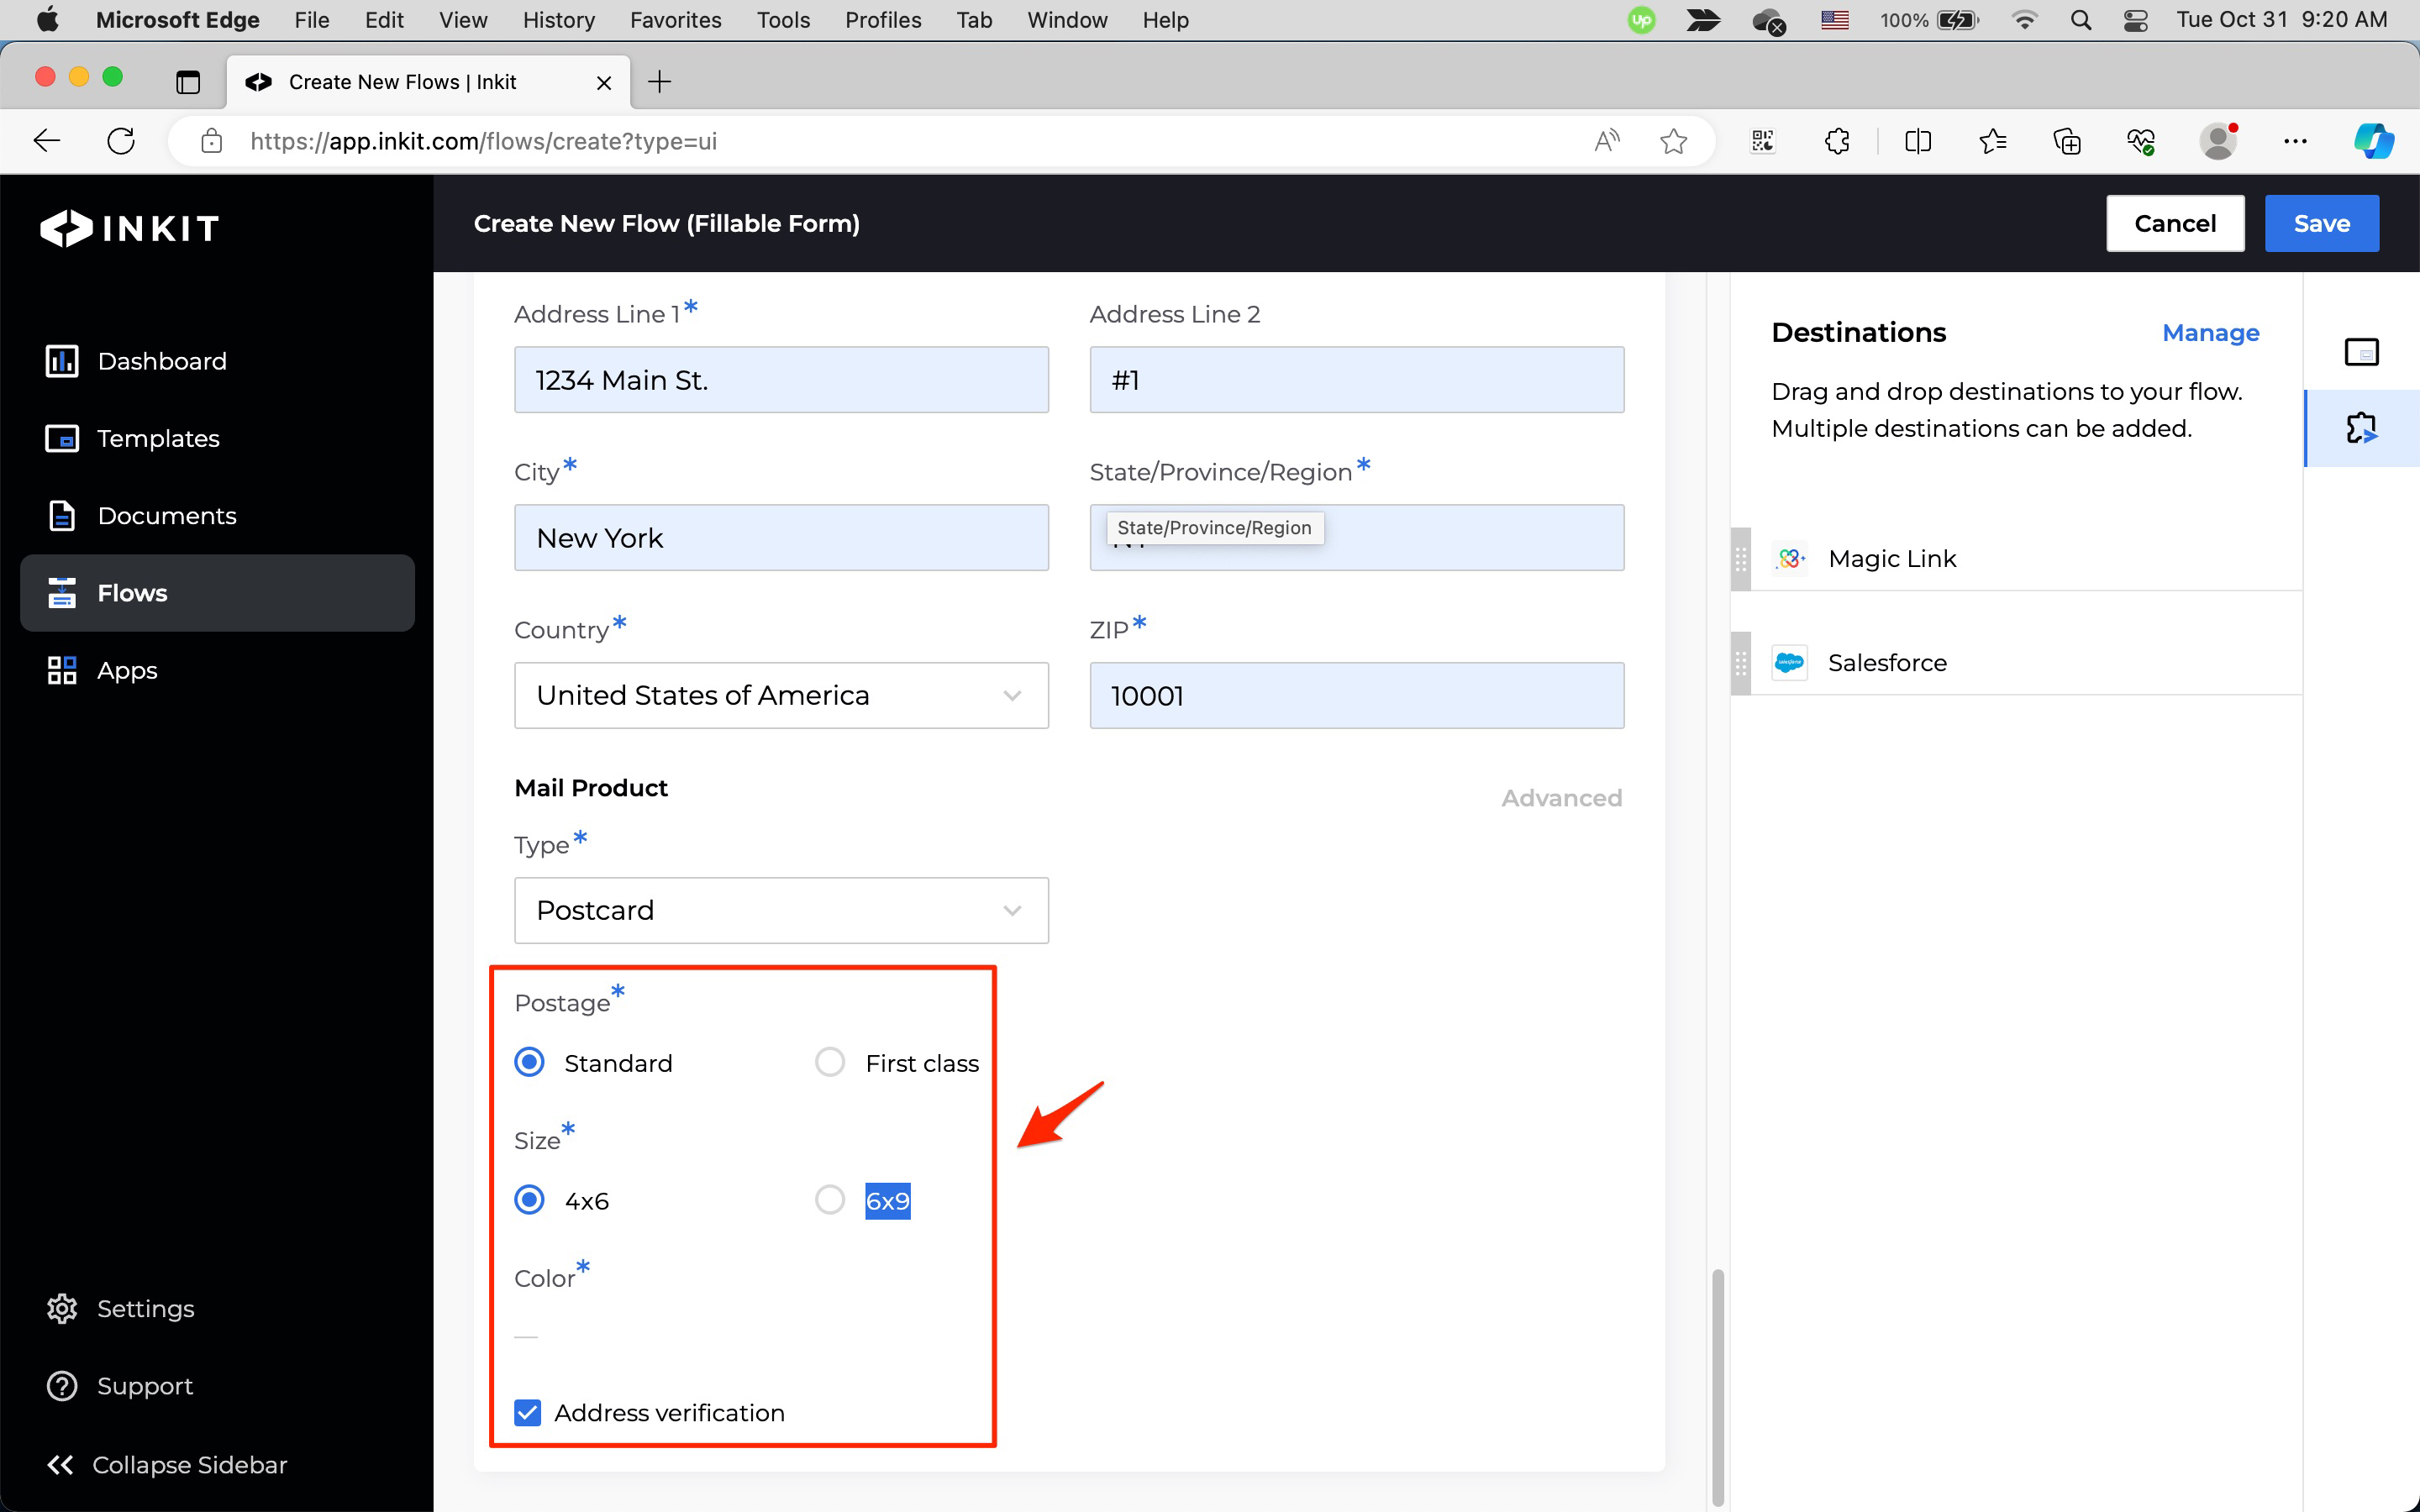
If you select a Type of Postcard, do the following:
Select one of the following Postage options:
- Standard
- First class
Select one of the following Size options:
- 4x6
- 6x9
If you want to verify the address of the recipient, click on Address verification.
Updated 10 months ago