

Using Signing Groups for flexible signing
Signing Groups allow you to request a signature from a predefined group of recipients. Any one member of the group can sign the document on behalf of the group.
A signing group lets an eligible member act for the group. Group membership and permission to manage groups are controlled by your organization.
Setting up a Signing Group
- Open the account menu and select Manage organization.
- Open Users → Signing Groups, then click Create Group.
- Enter the required Name and optional Description, then click Next.
- Search for users, select the members, and click Create.
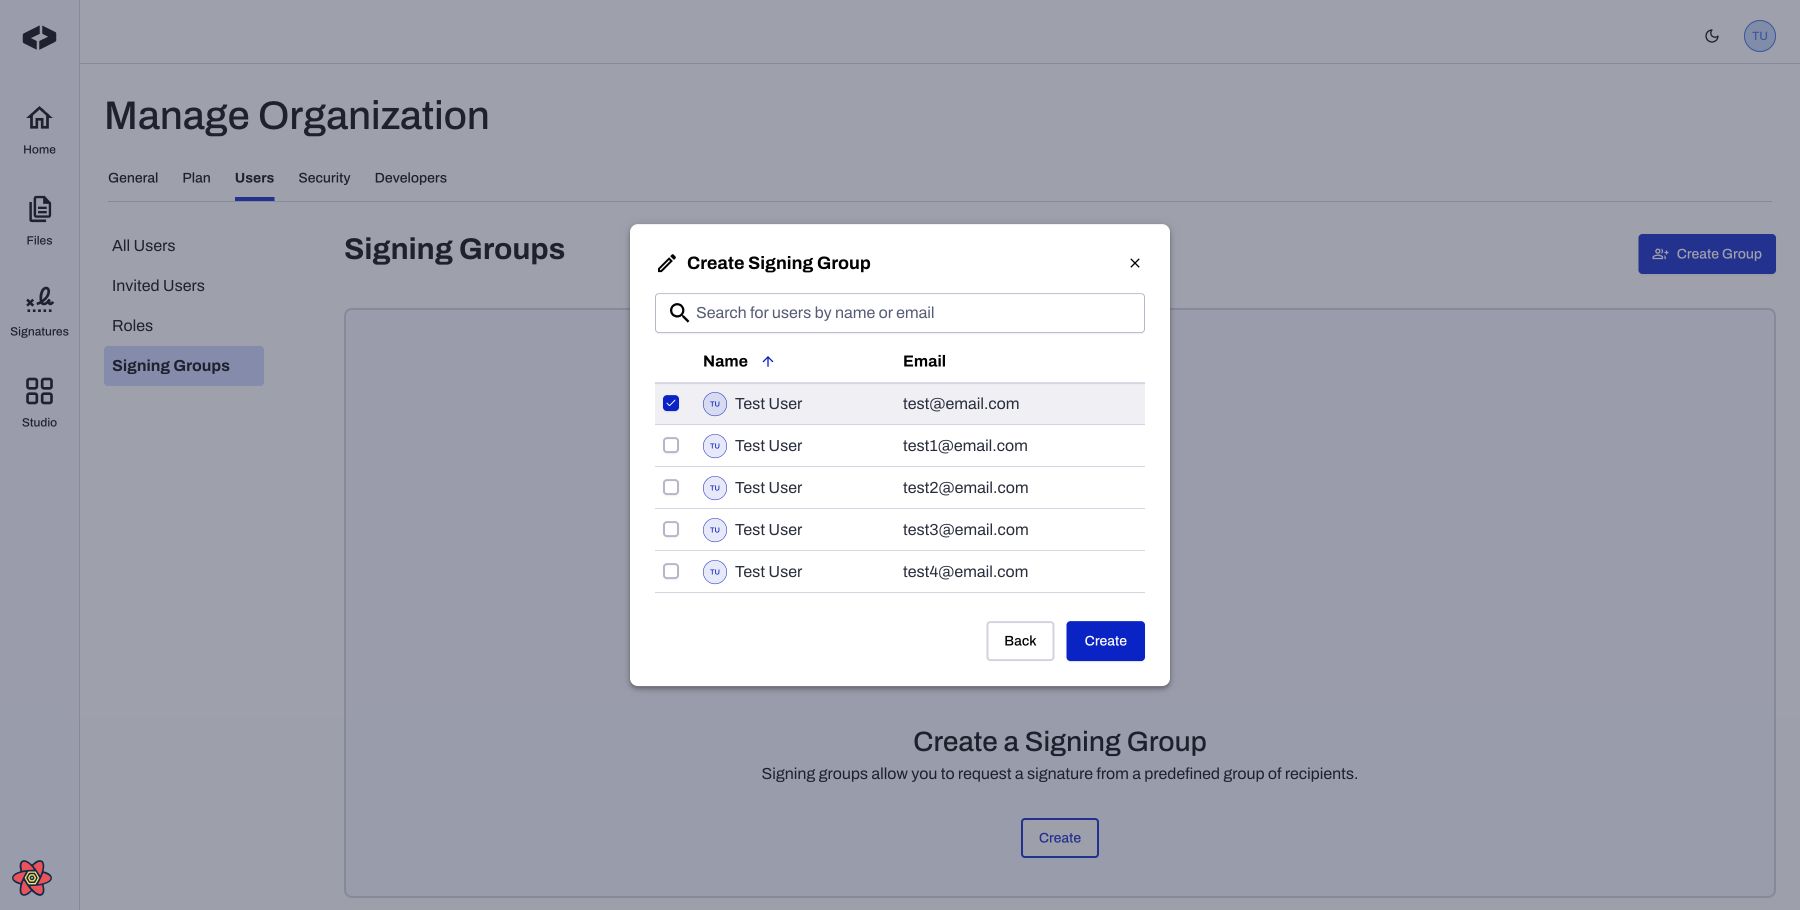
Second step of Create Signing Group; the example was not submitted. Local demonstration using production application code and test data.
Sending to a Signing Group
In Signatures → New Signature Request → Add Signers, select the group signer type and choose the intended signing group. Review the signer requirement and order, then continue through the request wizard.
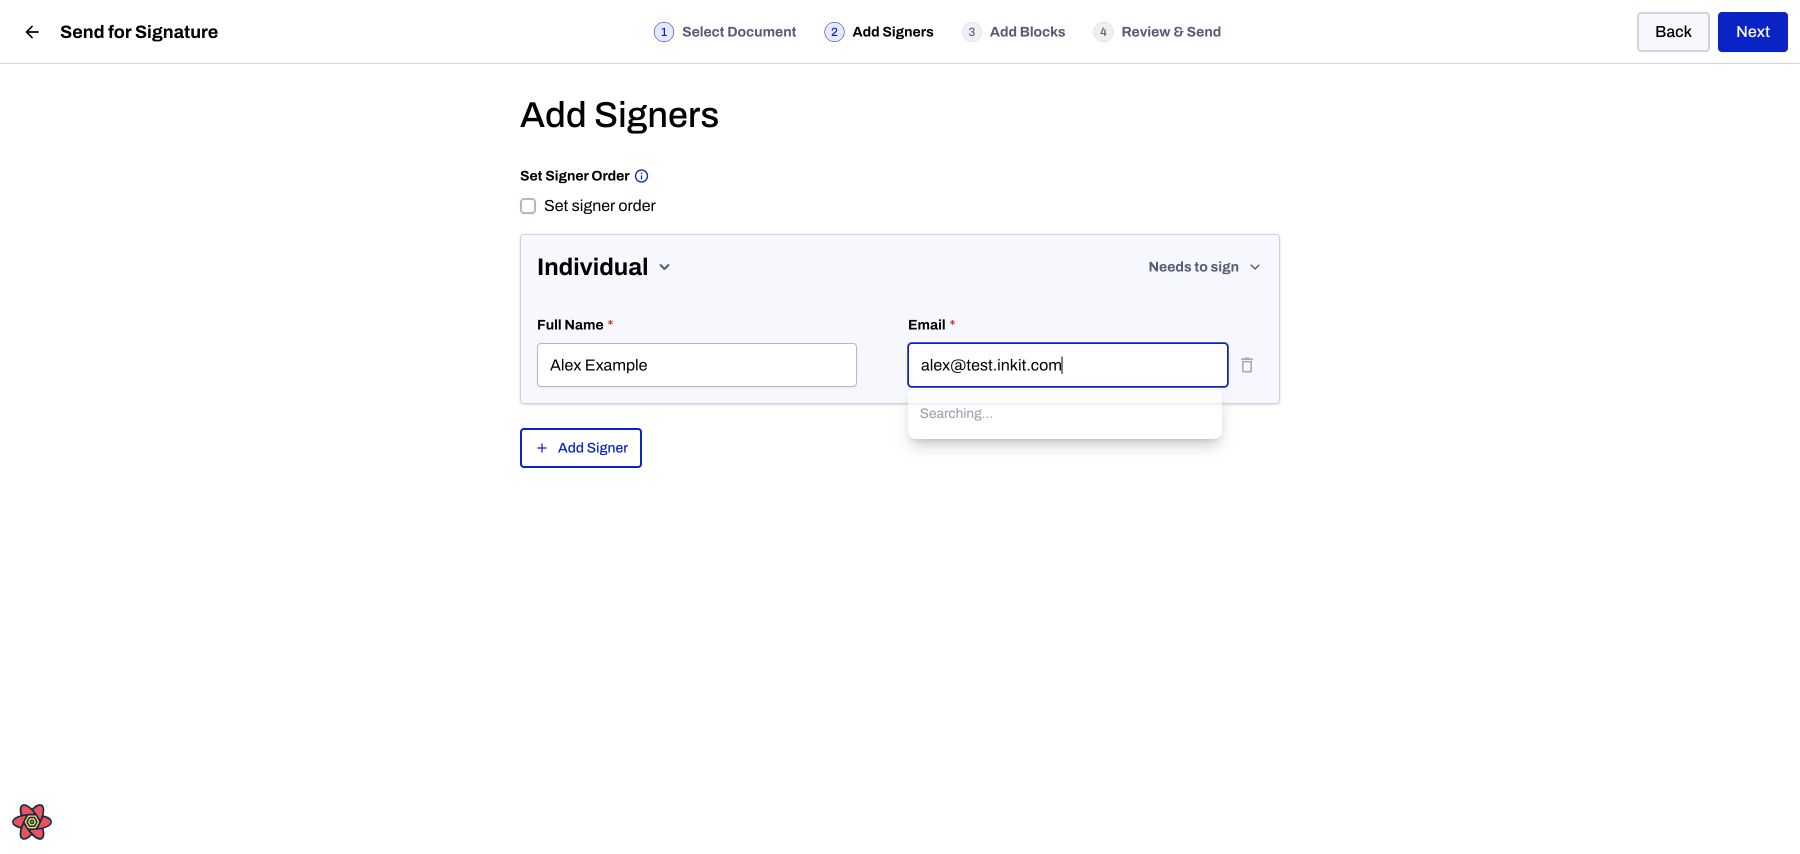
Current Add Signers layout; this illustration shows an individual recipient. Local demonstration using production application code and test data.
For a workflow, configure the group in the Digital Signature mapping for the corresponding signer. Do not look for the old global Signing Groups toggle. For programmatic requests, use the signature API guidance and its current signer schema.
Updated 11 days ago