Generating documents that expire
When you generate documents into Inkit's cloud storage, by default they exist forever. But you also can have documents expire after a specific number of views or a certain amount of time. We call these "disappearing documents," and they can enhance the security of your information by limiting access of sensitive data.
Setting document expiration through the web app
To set document expiration when you generate a document through the web app, do the following:
-
Follow the first four steps of generating a document.
-
In the Fill Out Destinations panel, click the Inkit Storage tab.
To have documents expire after certain amount of time, turn the switch beside Expire Document after on and specify the Amount of Time and the Unit of time. You can choose from the following units:
- Minutes
- Hours
- Days
- Years
To have documents expire after specific number of views, turn the switch beside Expire after an Amount of Views on and enter the number of Views before the document expires.
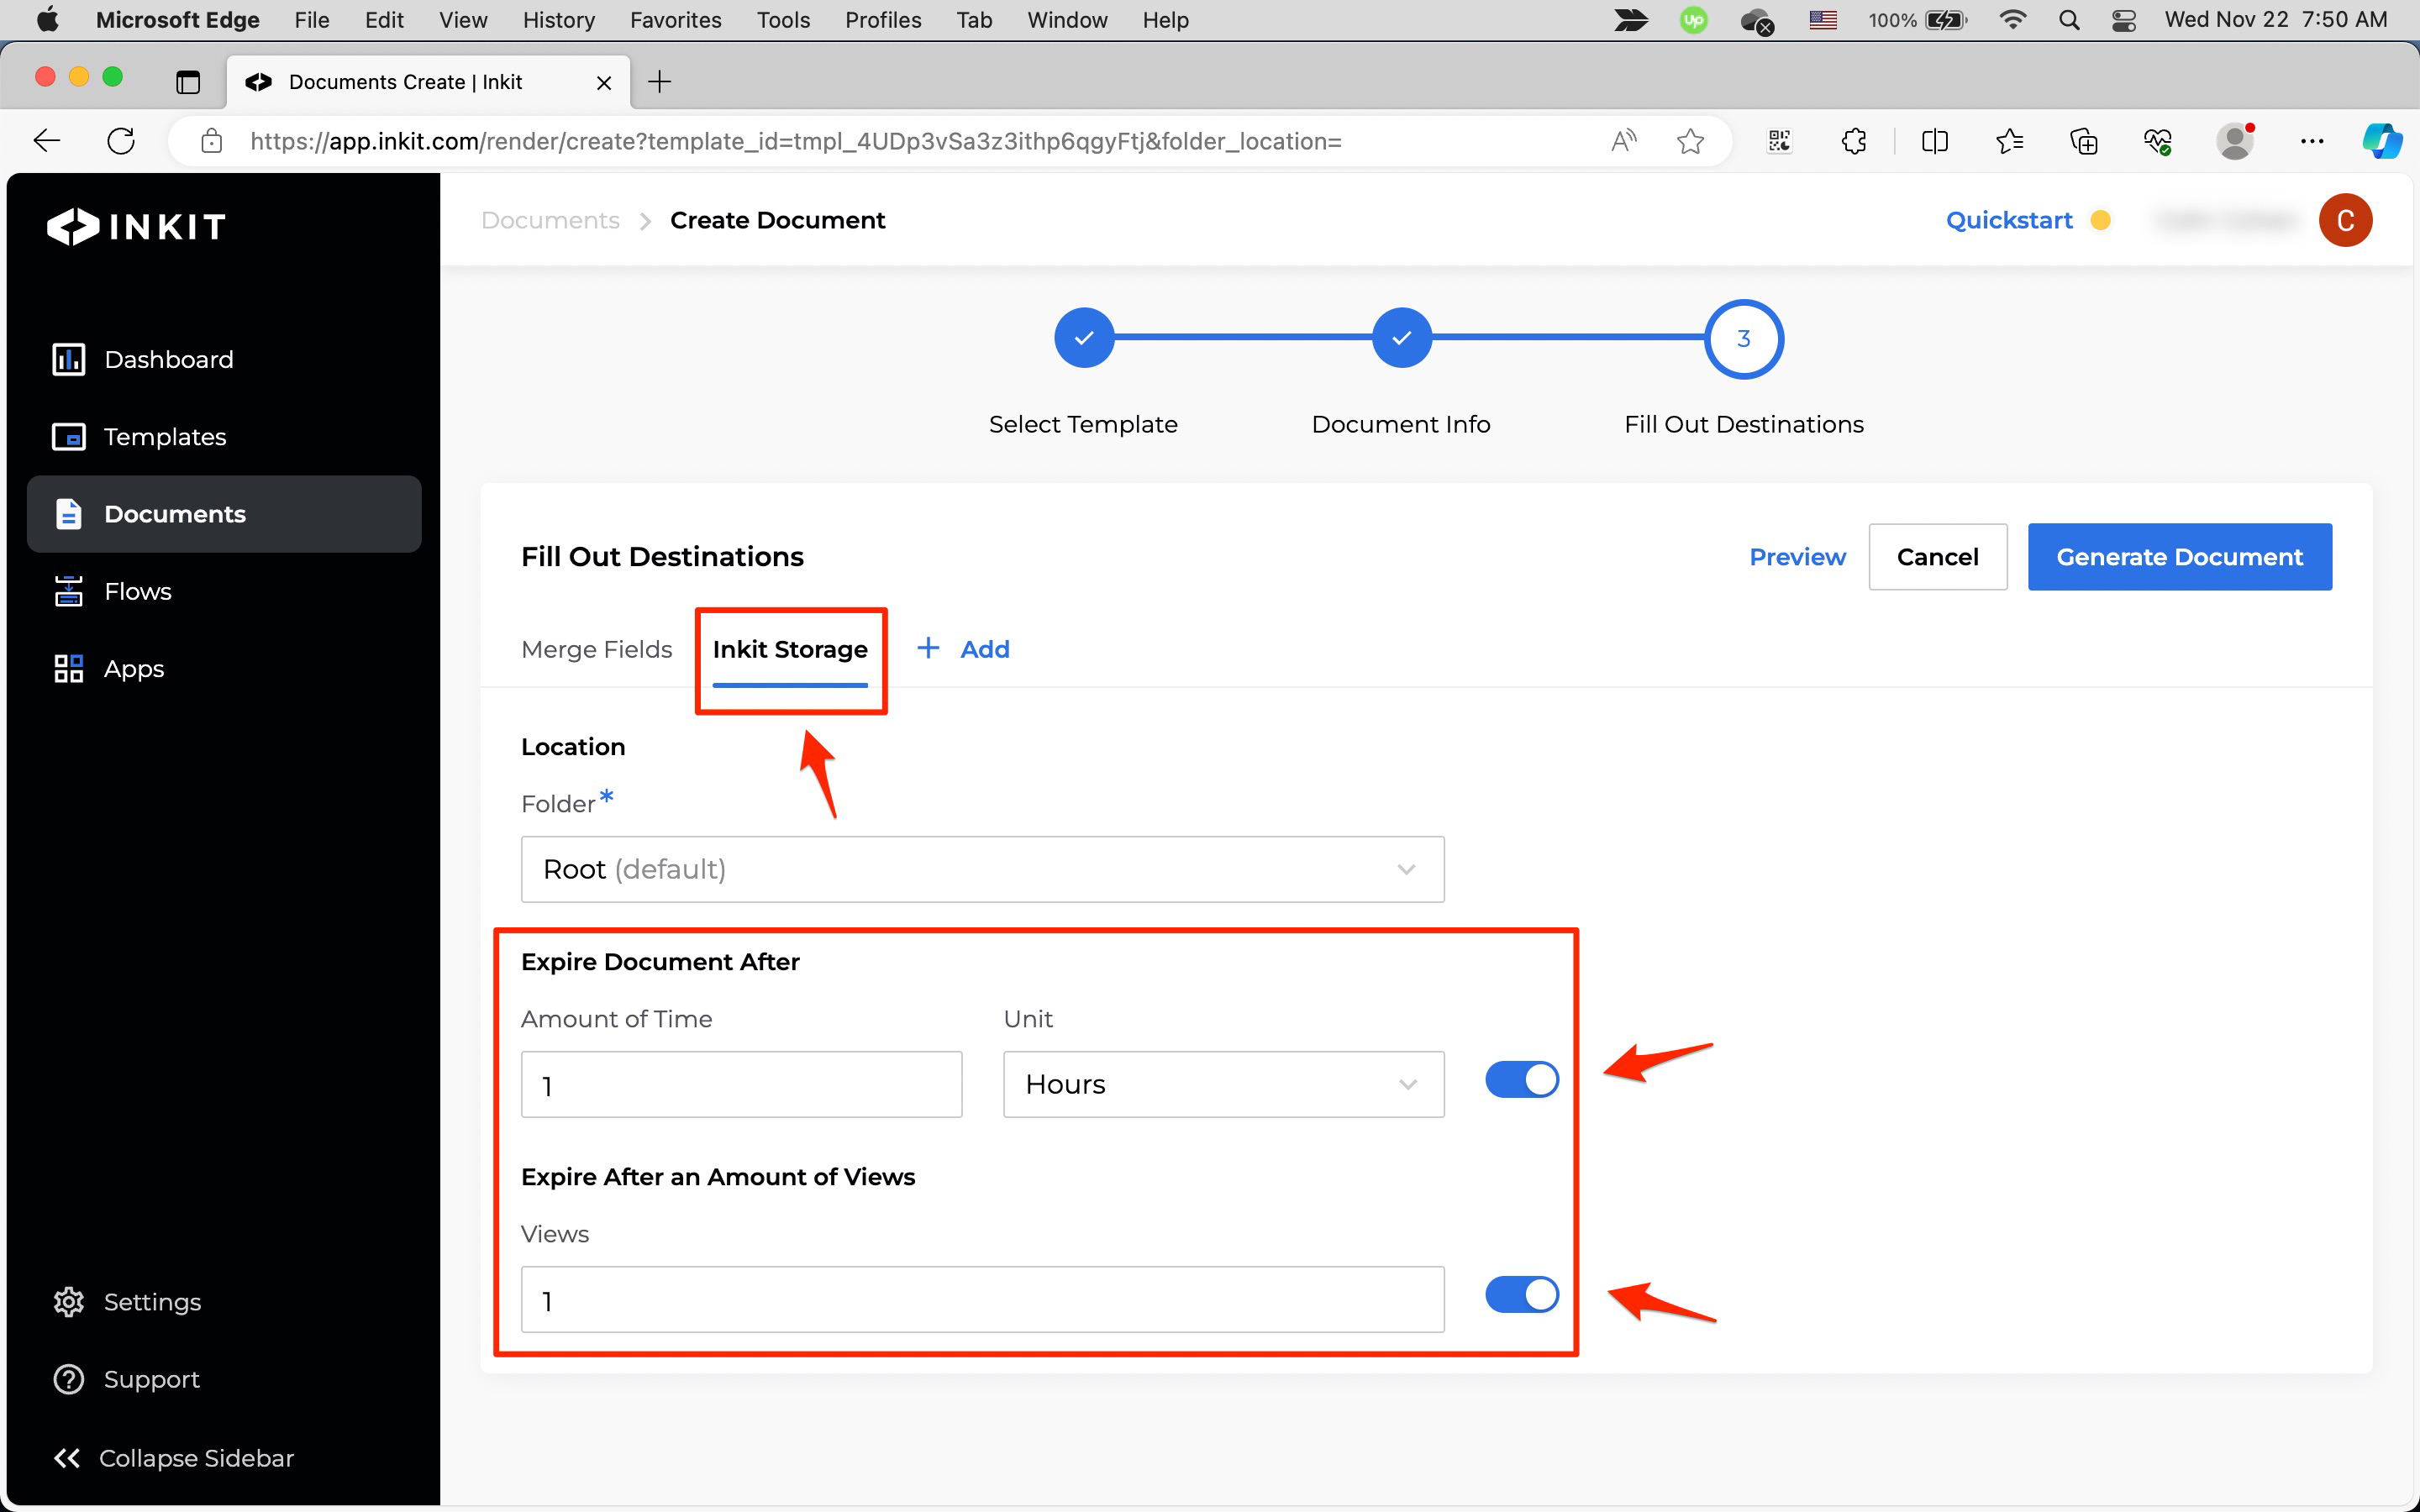
Note: You can apply both expiration options at the same time. Whichever option that happens first will trigger the expiration.
Setting document expiration through the API
To set the document expiration options when you generate the document in the API, place them in the inkit_storage suboject of your destinations object.
# Import the Inkit Python package
import inkit
from inkit.exceptions import InkitResponseException

# Replace the string below with your API key
inkit.api_token = "ENTER YOUR API KEY"

try:
  # Create a PDF document from a template
  resp = inkit.Render.create(
      # Specify the ID of the template
      template_id = "ENTER YOUR TEMPLATE ID",
      # Specify the data for the Name field
      merge_parameters = {"Name": "John"},
      # Specify the name and the expirations options of the PDF file
      destinations = {"inkit_storage": {"name": "Mail Merge Python SDK",
                                        "expire_after_n_views": 1,
                                        "retain_for": {"hours": 1}}
   )
   # Print the JSON repsonse of the API call
   print(json.dumps(dict(resp.data), indent = 3))
except InkitResponseException as err:
   # Print any error
   print(err.response.data)
// Import the Inkit Node.js package
const Inkit = require("inkit");
// Replace the string below with your API key
Inkit.apiToken = "ENTER YOUR API KEY";
// Call the PDF renderer
createRender();
// Create a PDF document from a template
async function createRender() {
try {
const result = await Inkit.Render.create({
// Specify the ID of the template
templateId: 'ENTER YOUR TEMPLATE ID',
// Specify the data for the Name field
mergeParameters: {"Name": "John"},
// Specify the name and the expirations options of the PDF file
destinations: {"inkit_storage": {"name": "Mail Merge Node.js SDK",
"expire_after_n_views": 1,
"retain_for": {"hours": 1}}}
});
// Print the JSON response of the API call
console.log(JSON.stringify(result.data, null, 3));
} catch (error) {
// Print any error
console.error(error.response.status, error.response.statusText);
}
}curl --request POST \
--url https://api.inkit.com/v1/generate \
--header 'Content-Type: application/json' \
--header 'X-Inkit-API-Token: ENTER YOUR API KEY' \
--header 'accept: application/json' \
--data '
{
"destinations": {
"inkit_storage": {
"retain_for": {
"hours": 1
},
"expire_after_n_views": 1,
"name": "Mail Merge cURL"
}
},
"template_id": "ENTER YOUR TEMPLATE ID"
}
'Setting document expiration in a workflow
To set document expiration in a workflow, do the following:
-
Follow the first four steps of creating a workflow.
-
In the Inkit Storage panel, to have documents expire after certain amount of time, turn the switch beside Expire Document after on and specify the Amount of Time and the Unit of time. You can choose from the following units:
- Minutes
- Hours
- Days
- Years
To have documents expire after specific number of views, turn the switch beside Expire after an Amount of Views on and enter the number of Views before the document expires.
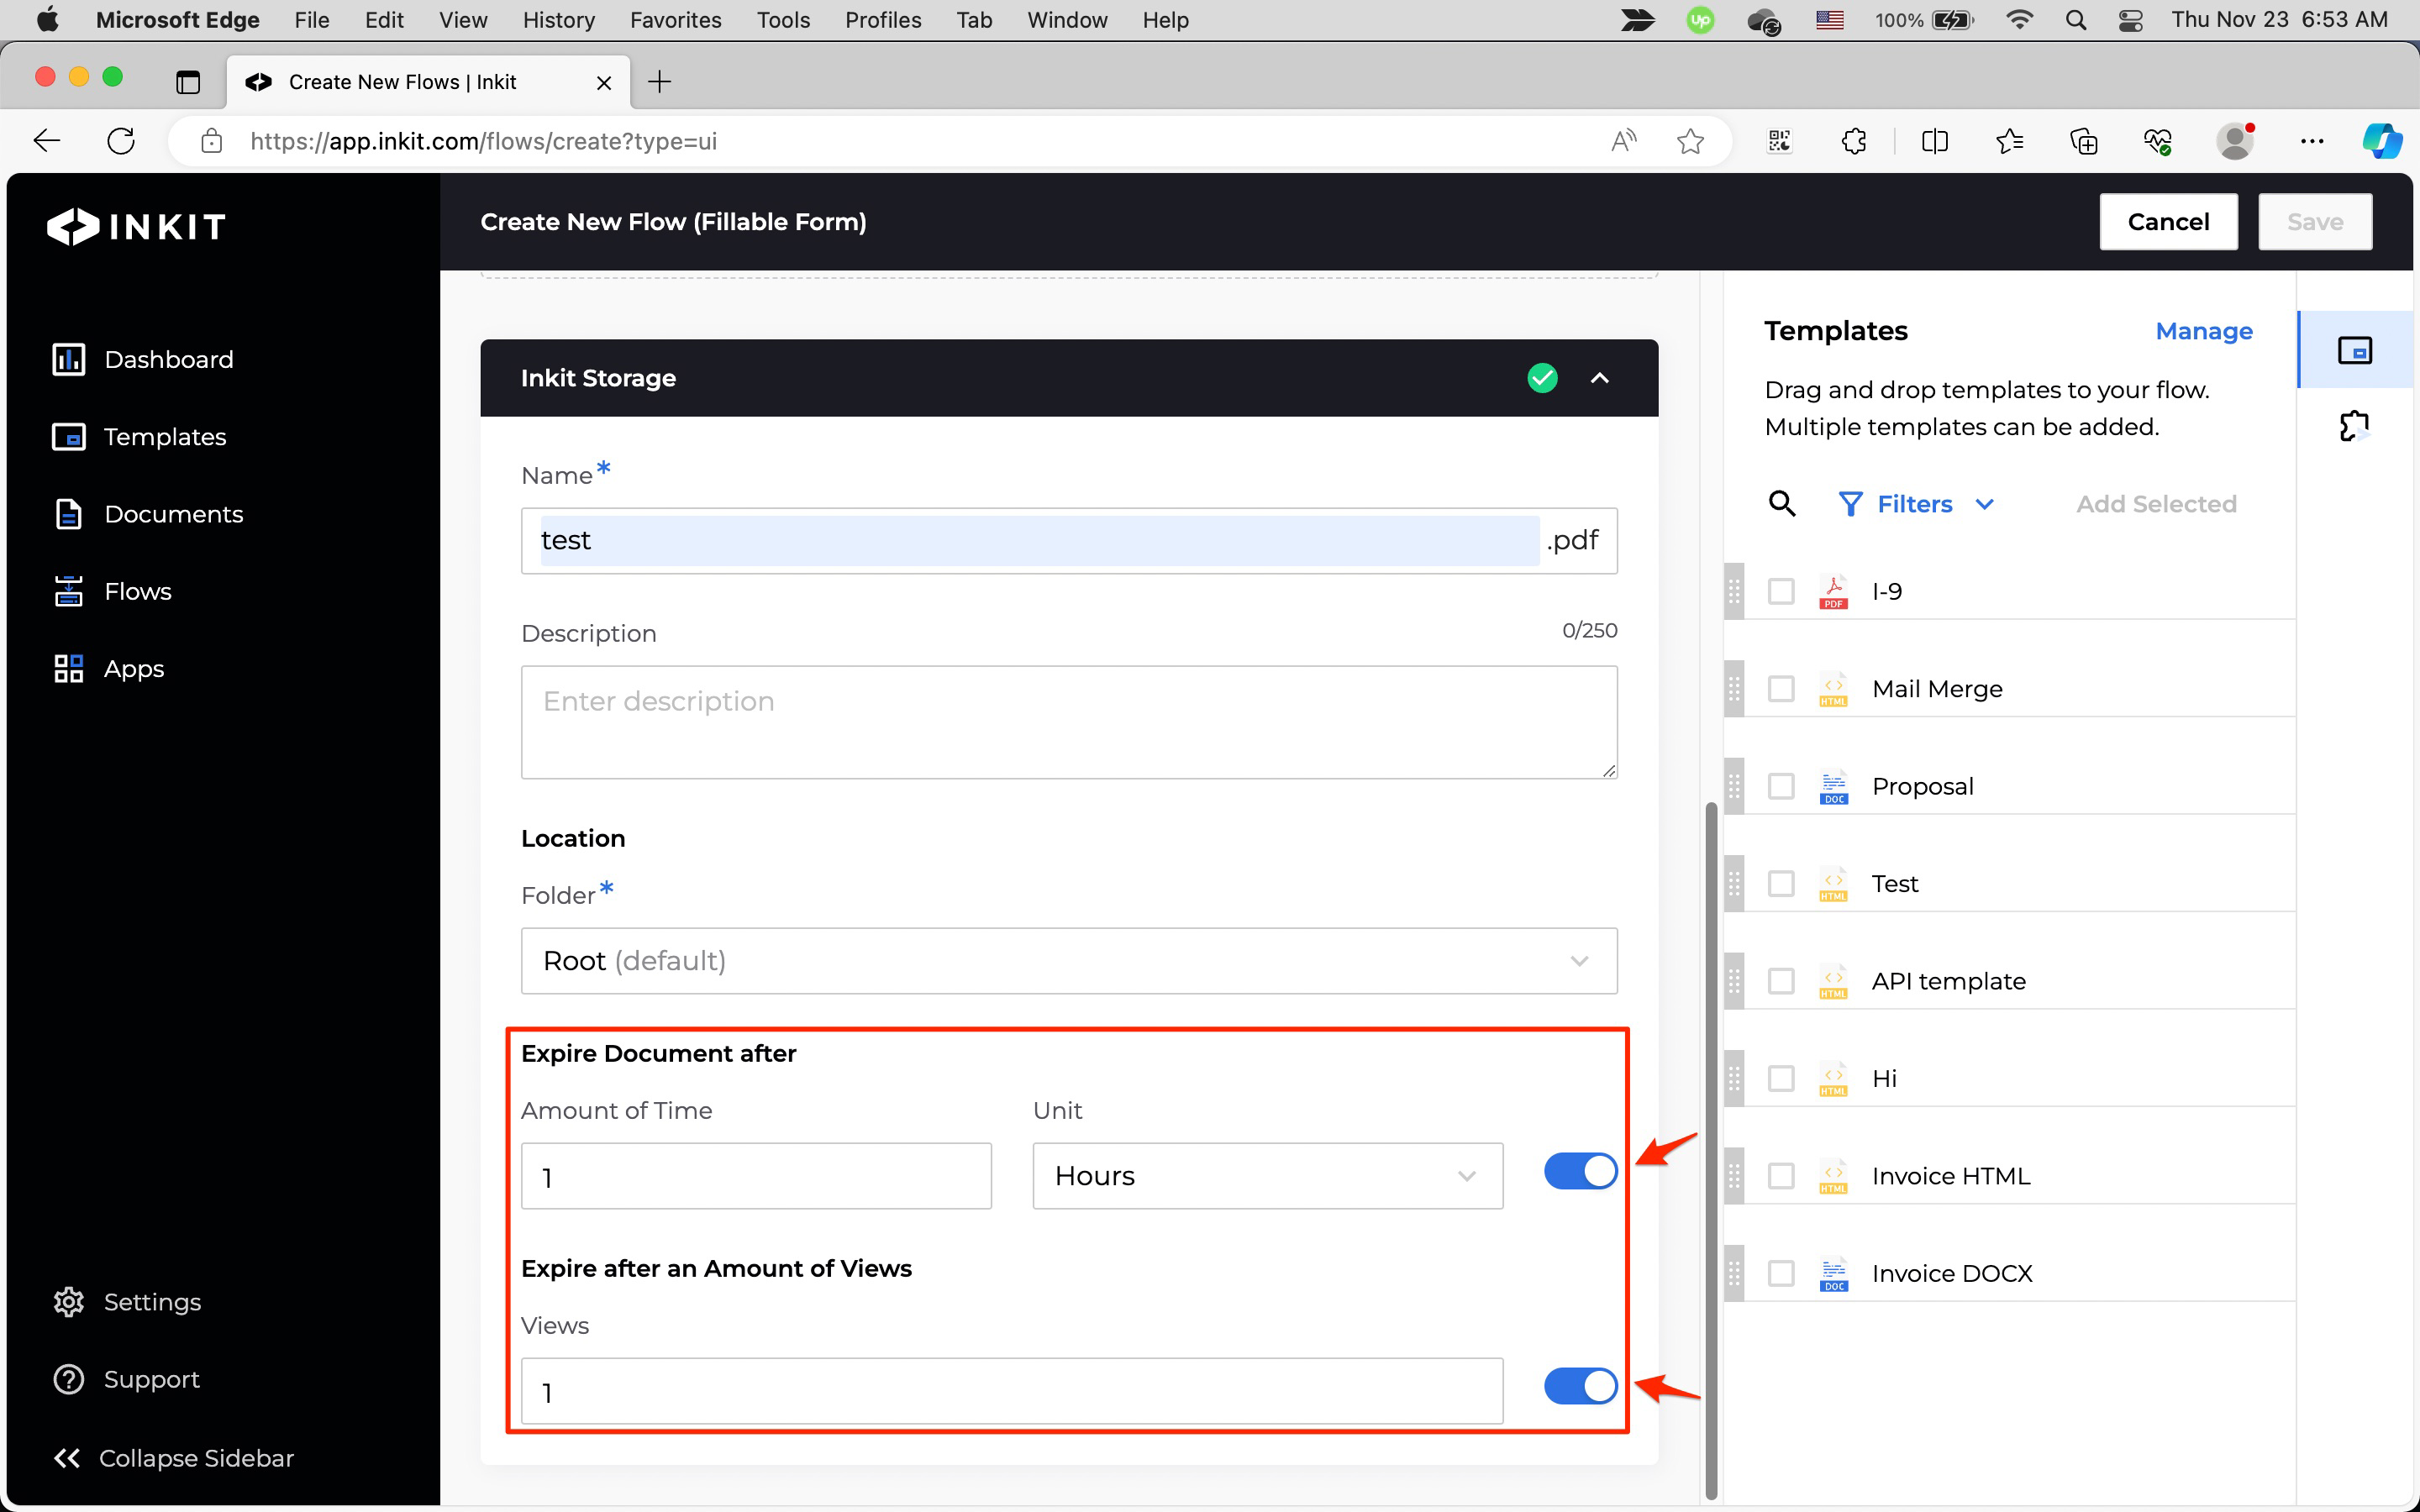
Note: You can apply both expiration options at the same time. Whichever option that happens first will trigger the expiration.