

Building a full-featured PDF template
Create a reusable PDF template
Start with a PDF you are authorized to use and fictional test values. In Studio, open the menu beside New, select Template, upload the PDF, enter its Title, and click Continue.
Add merge fields
- Create a PDF template, or open an existing PDF template in the editor.
- Select the page you want to edit, then open Merge Fields in the toolbar.
- Drag Textbox or Checkbox onto the PDF.
- Select the placed field and choose Edit to open its properties.
- Enter a Field Name, such as
effective_date. Use this same name when providing merge data. - For a textbox, configure the font, size, alignment, and color. Move and resize the field on the PDF so its value fits the intended space.
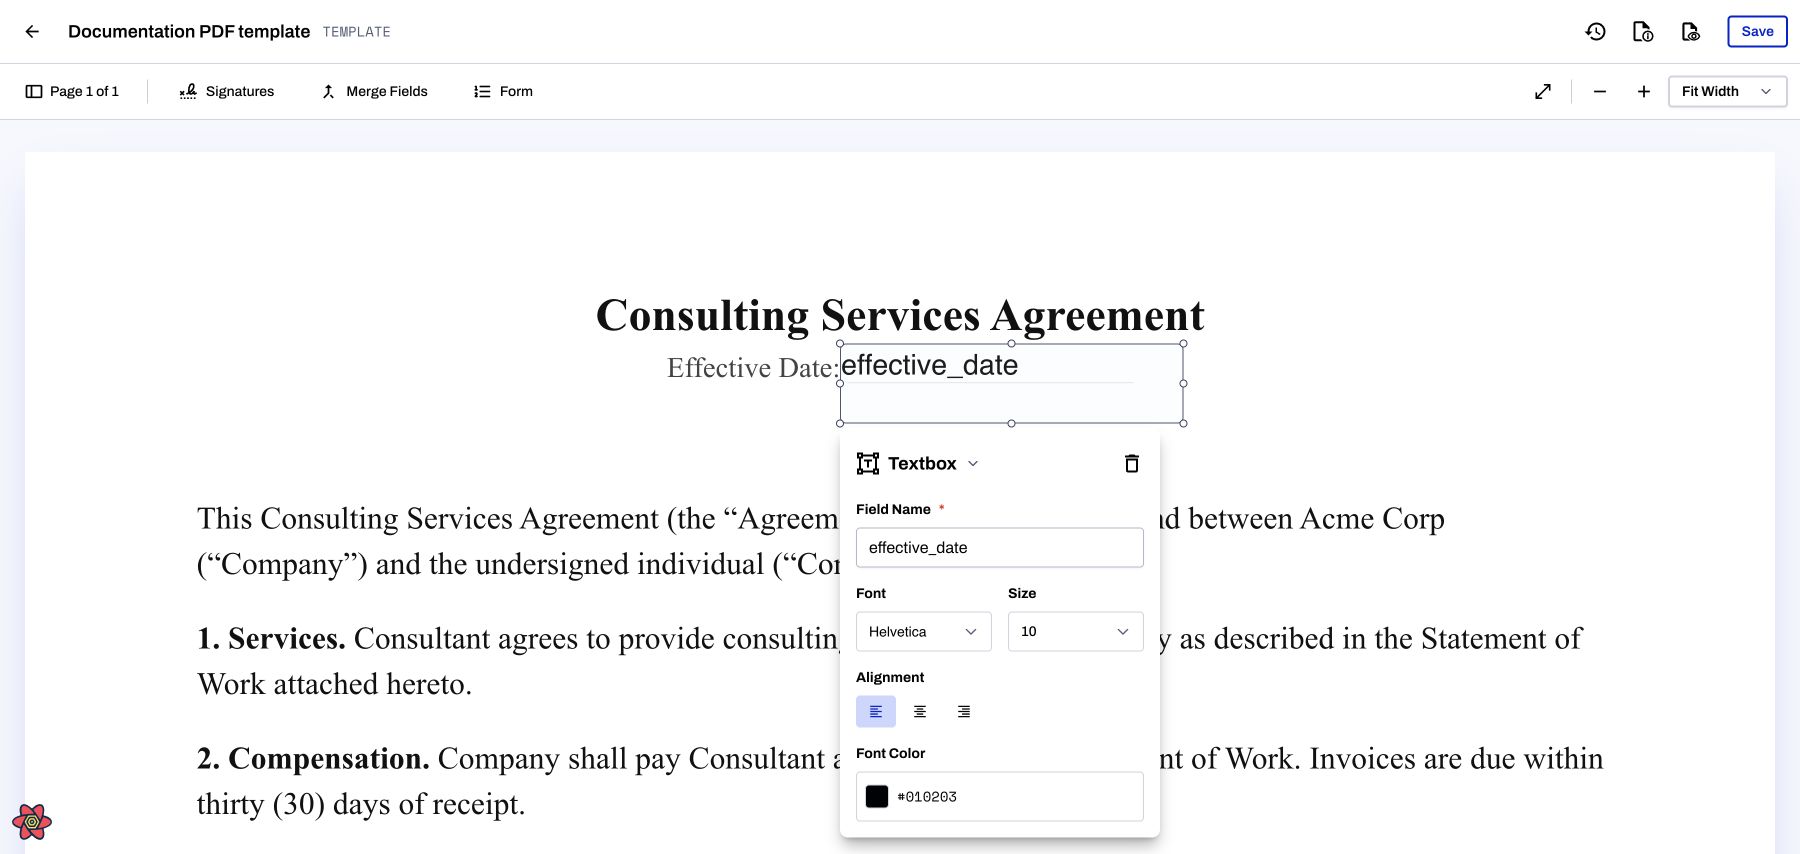
Textbox merge-field properties in the PDF editor — local demonstration using production code and fictional example data.
Save and preview
- Click Save in the editor.
- Click Preview to open Fill Out Merge Fields.
- Enter a sample value for each field, then click Preview in the panel.
- Check the rendered text for position, size, and clipping. Return to editing if you need to adjust the field, then save again.
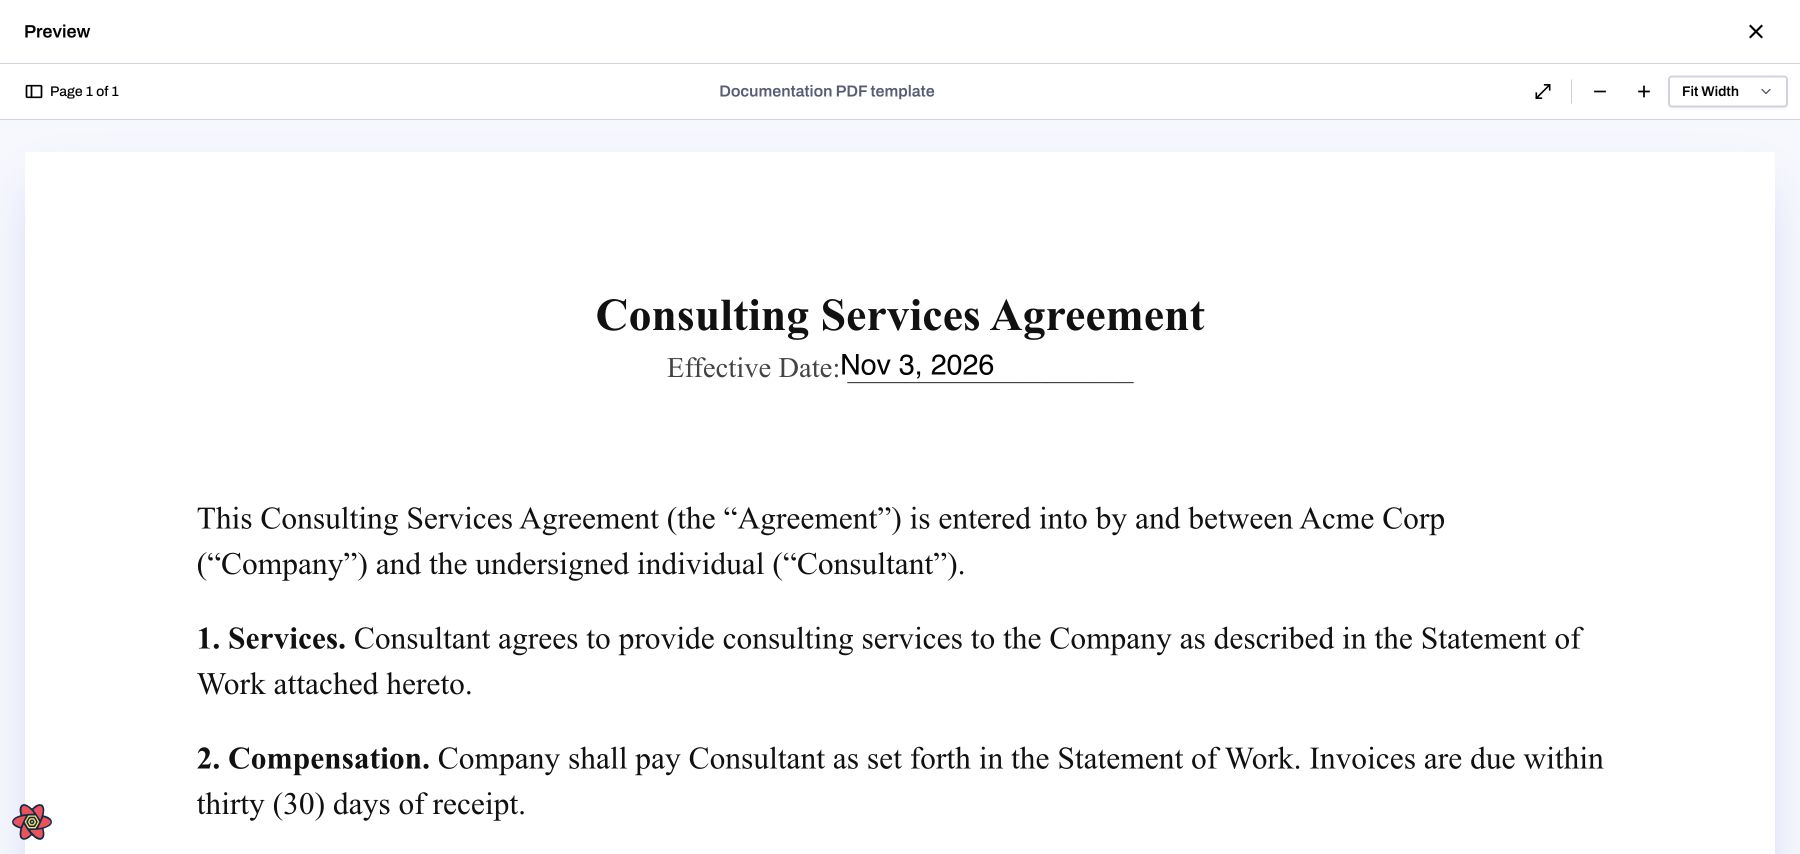
Rendered preview with an effective_date value — local demonstration using production code and fictional example data.
Preview values let you check the output; the template retains its named merge fields for later document generation.
Add signing fields when needed
Open Signatures → Add Signers, define a signer role, and place the required signature fields. These are native Inkit signing controls. Follow PDF signature fields for the full procedure.
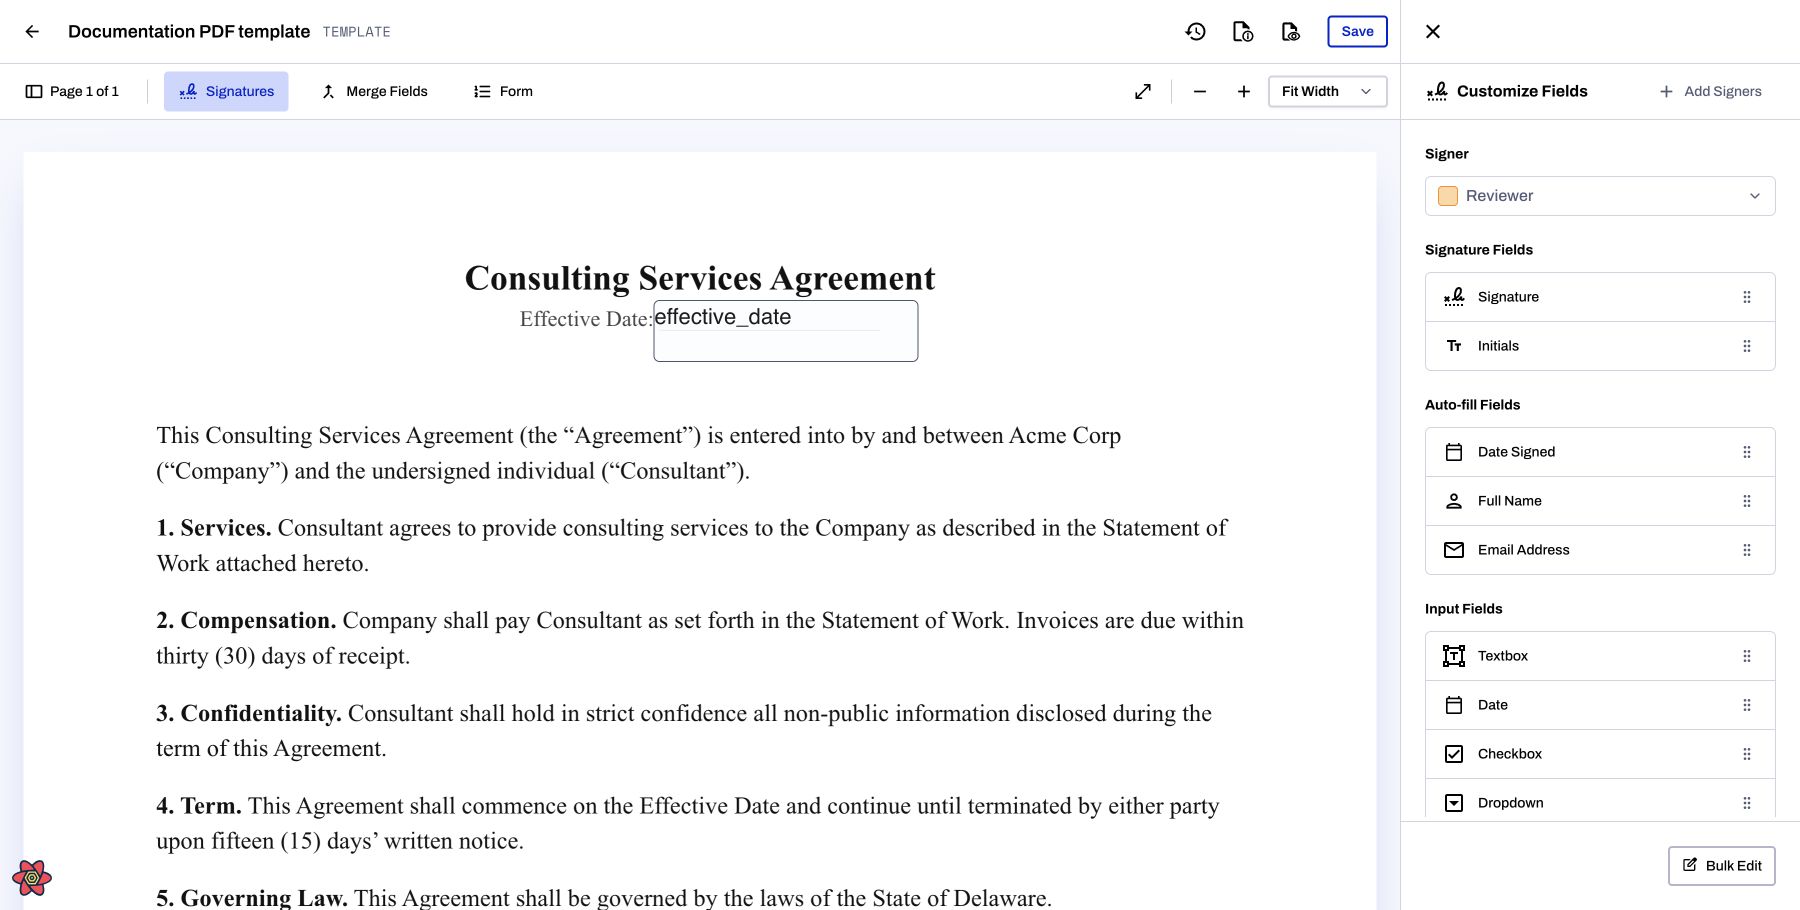
Current signer-role and signature-field controls. Local demonstration using production application code and test data.
Generate saved output
Save the template, then add it to a workflow. Configure destinations and their mappings before invoking it. For a signing workflow, provide the recipient details required by Digital Signature. For API generation, follow the current generation contract.
Updated 11 days ago