Adding a Generate Document button in Salesforce
Once you've installed our Salesforce package and set up the Inkit app, you can add a Generate Document button on any Salesforce page layout and use it.
Keep in mind that, by default, Generate Document buttons are only included in Account, Contact, Lead and Opportunity objects. But you can optionally include it in any standard or custom object.
Adding a Generate Document button to a page layout and using it
In this tutorial, we will show you how to add a Generate Document button to a Salesforce page layout and then how to use it.
Note: Here we will add the Generate Document to an Opportunity page layout, but you can do the same to any Salesforce page layout.
-
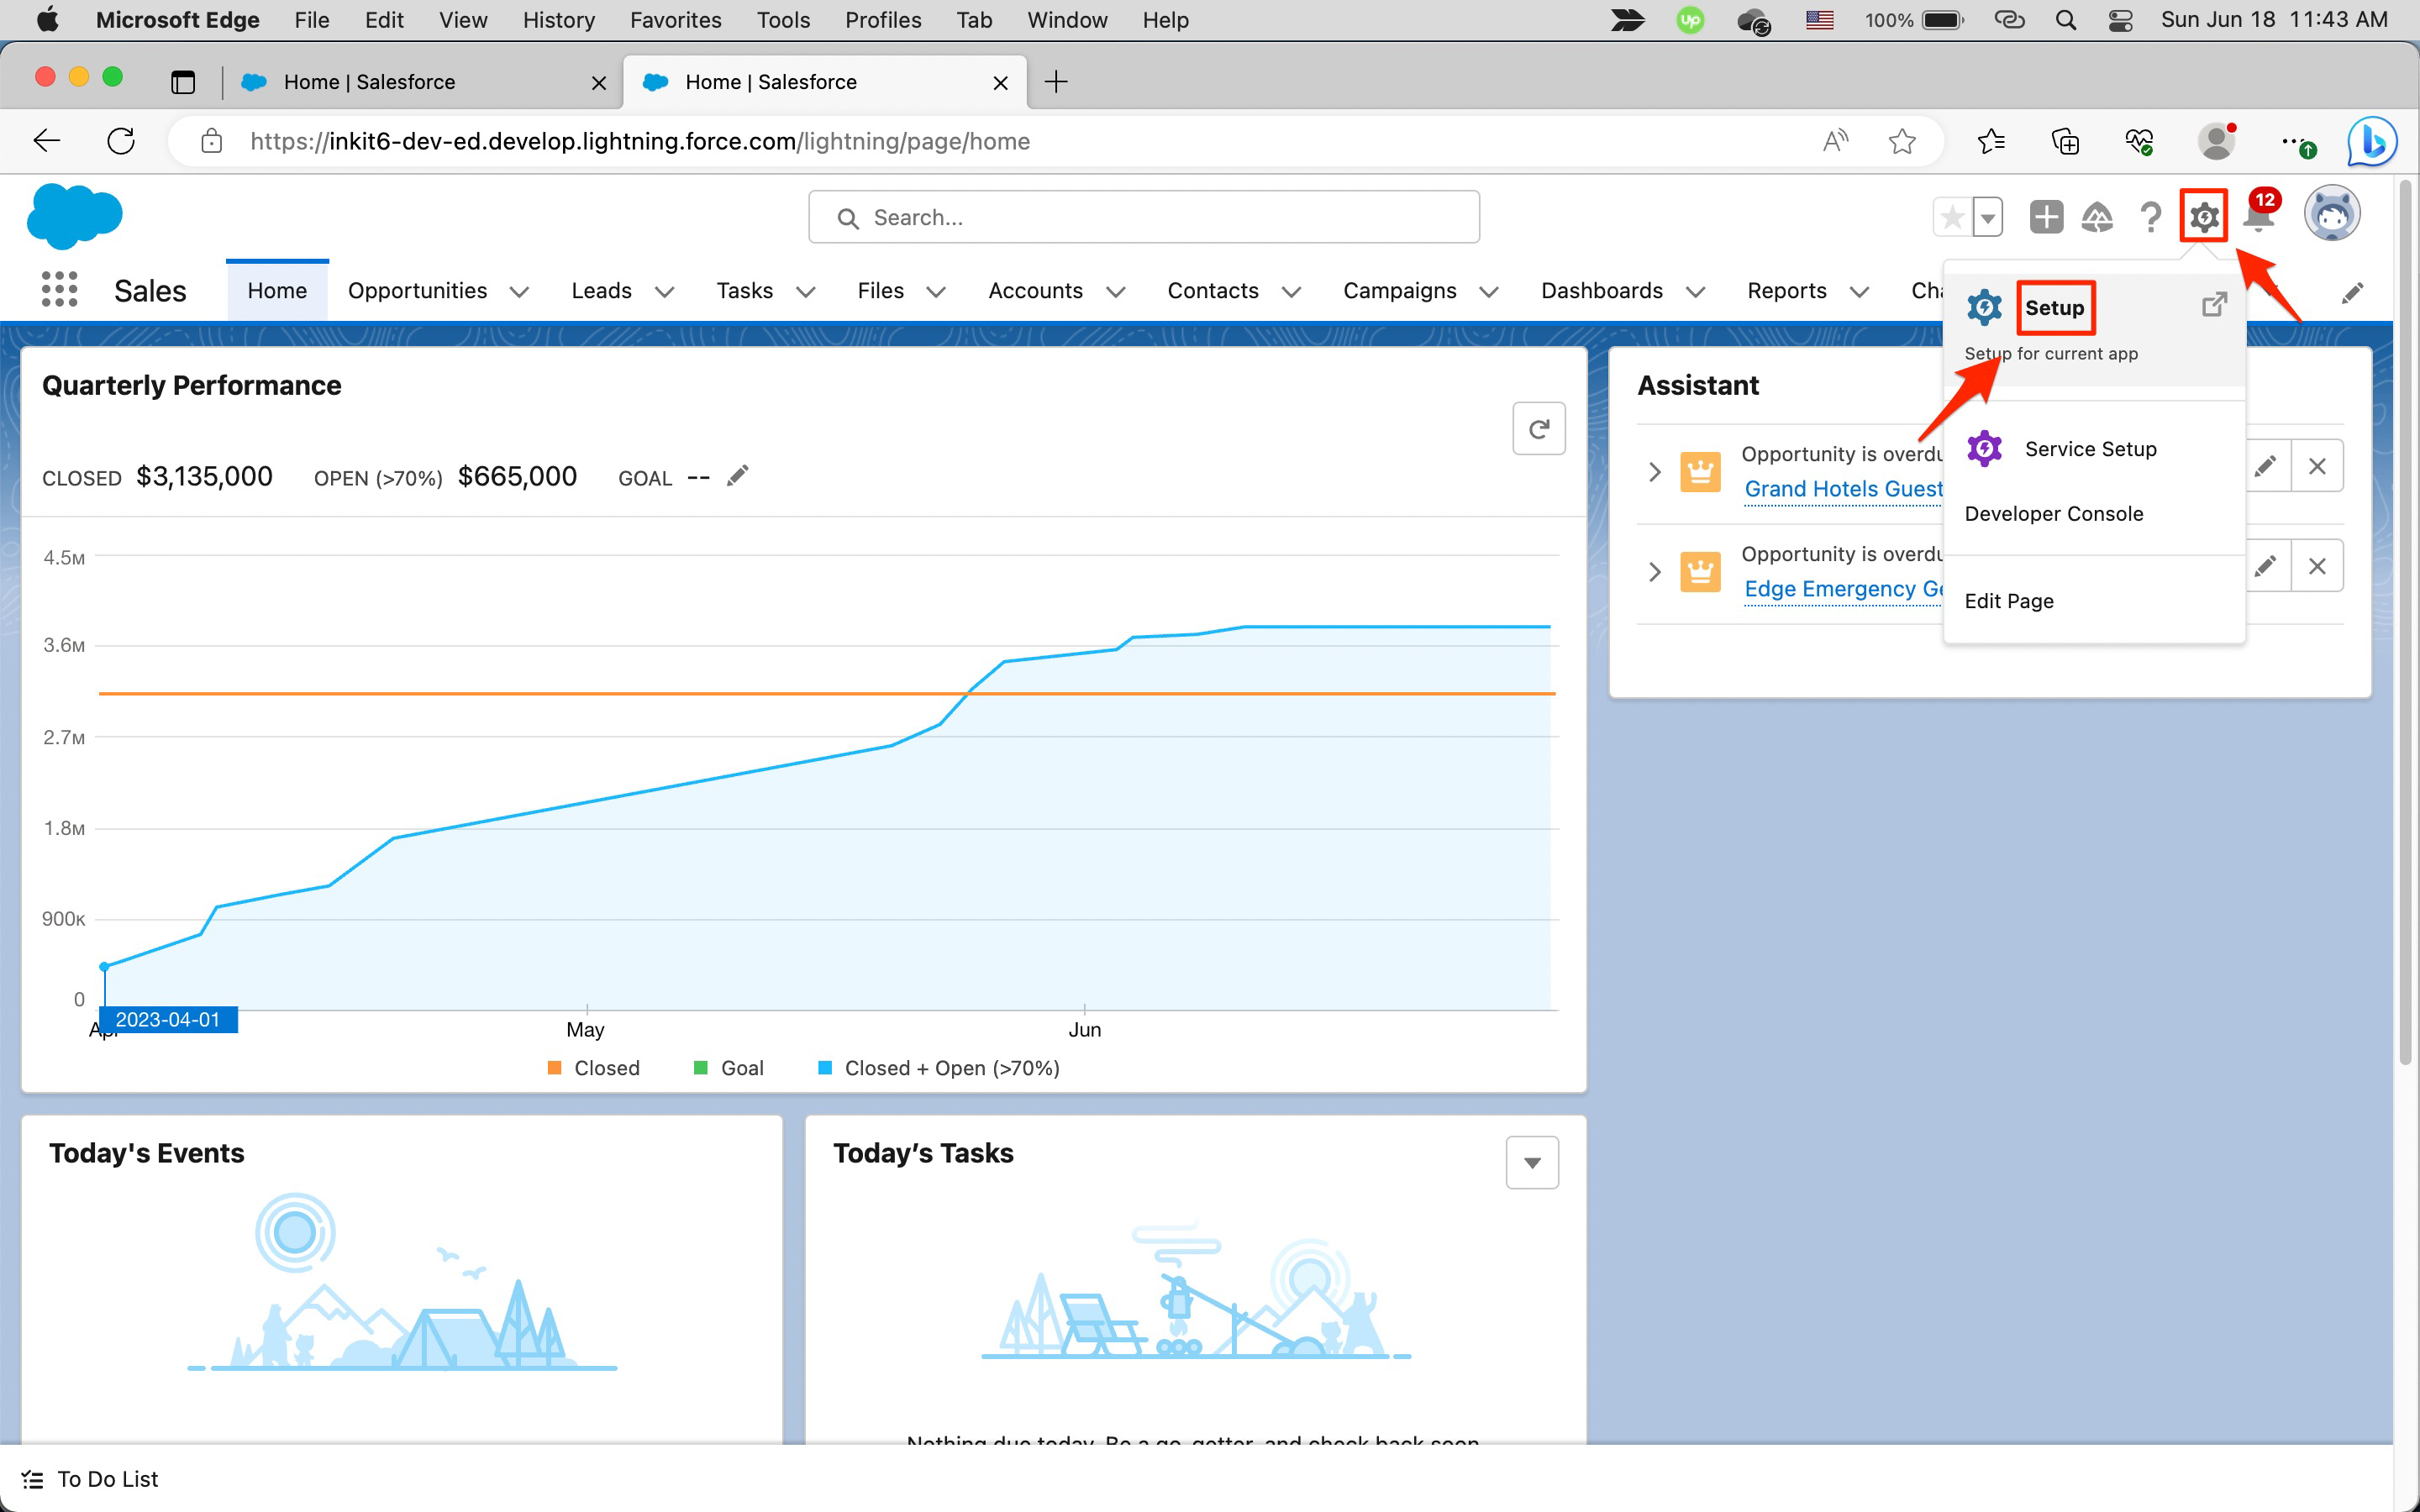
In Salesforce, click the settings gear and then click Setup.
-
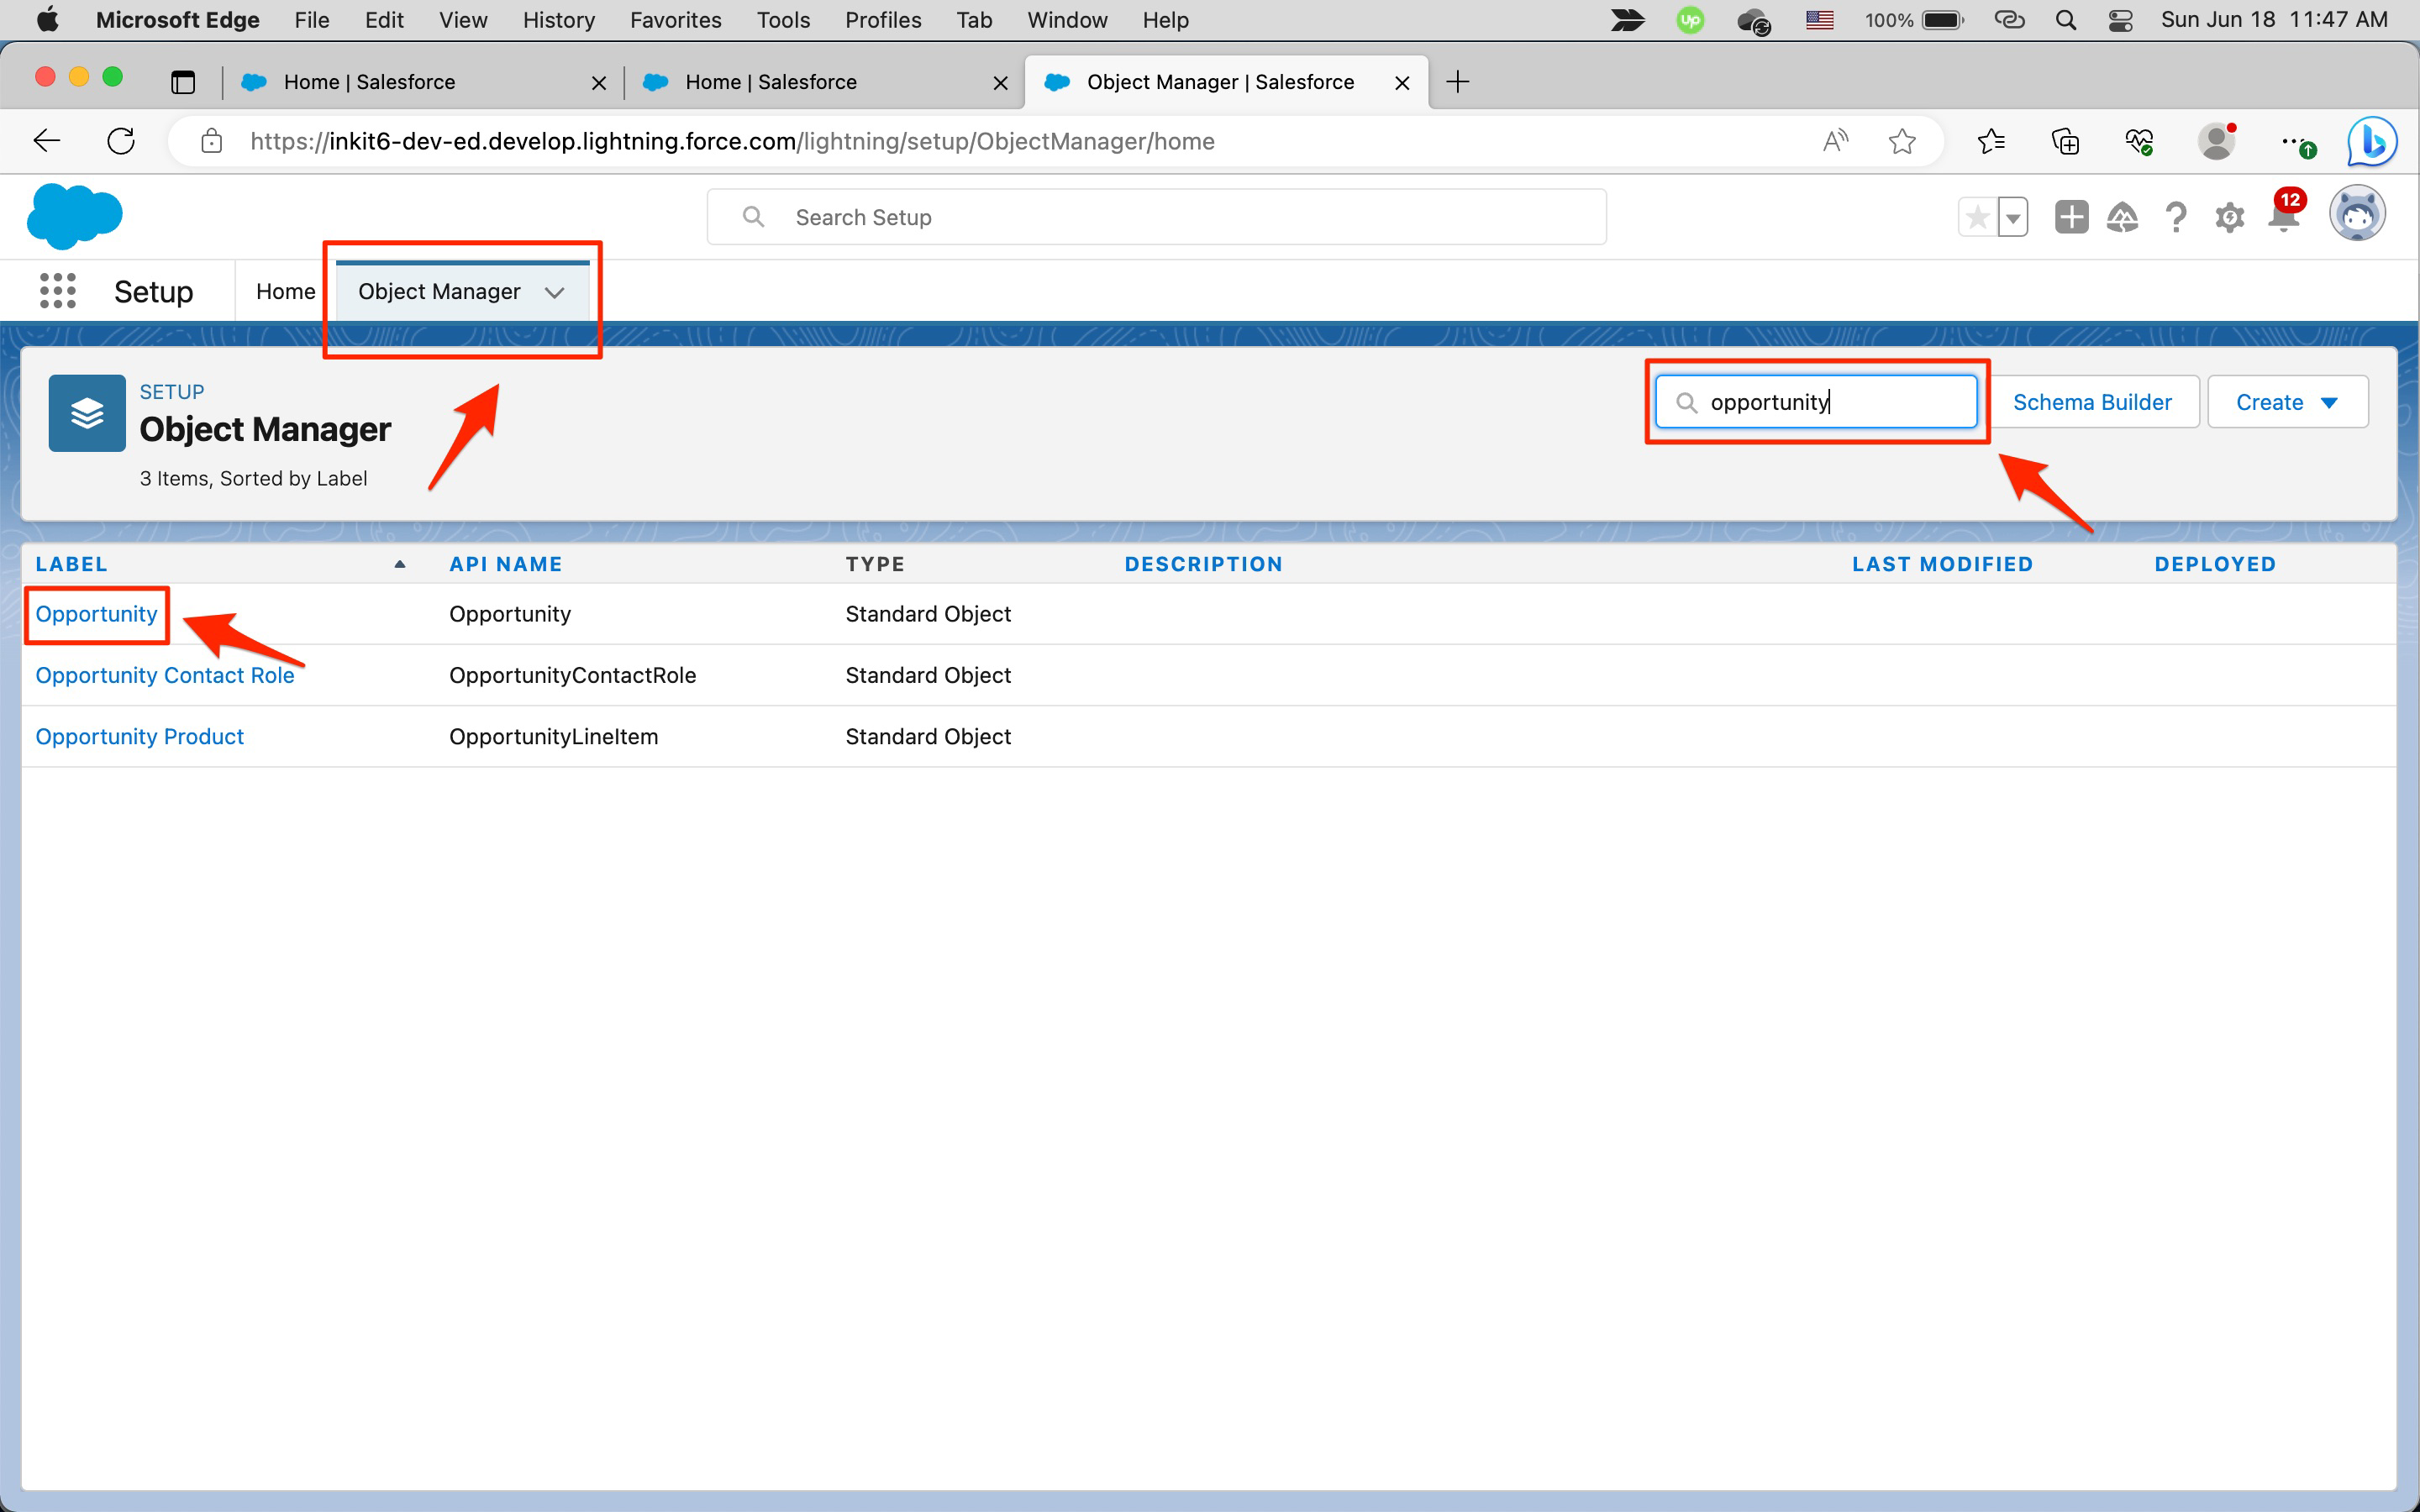
Click the Object Manager tab, enter opportunity in the Quick Find field and click Opportunity.
-
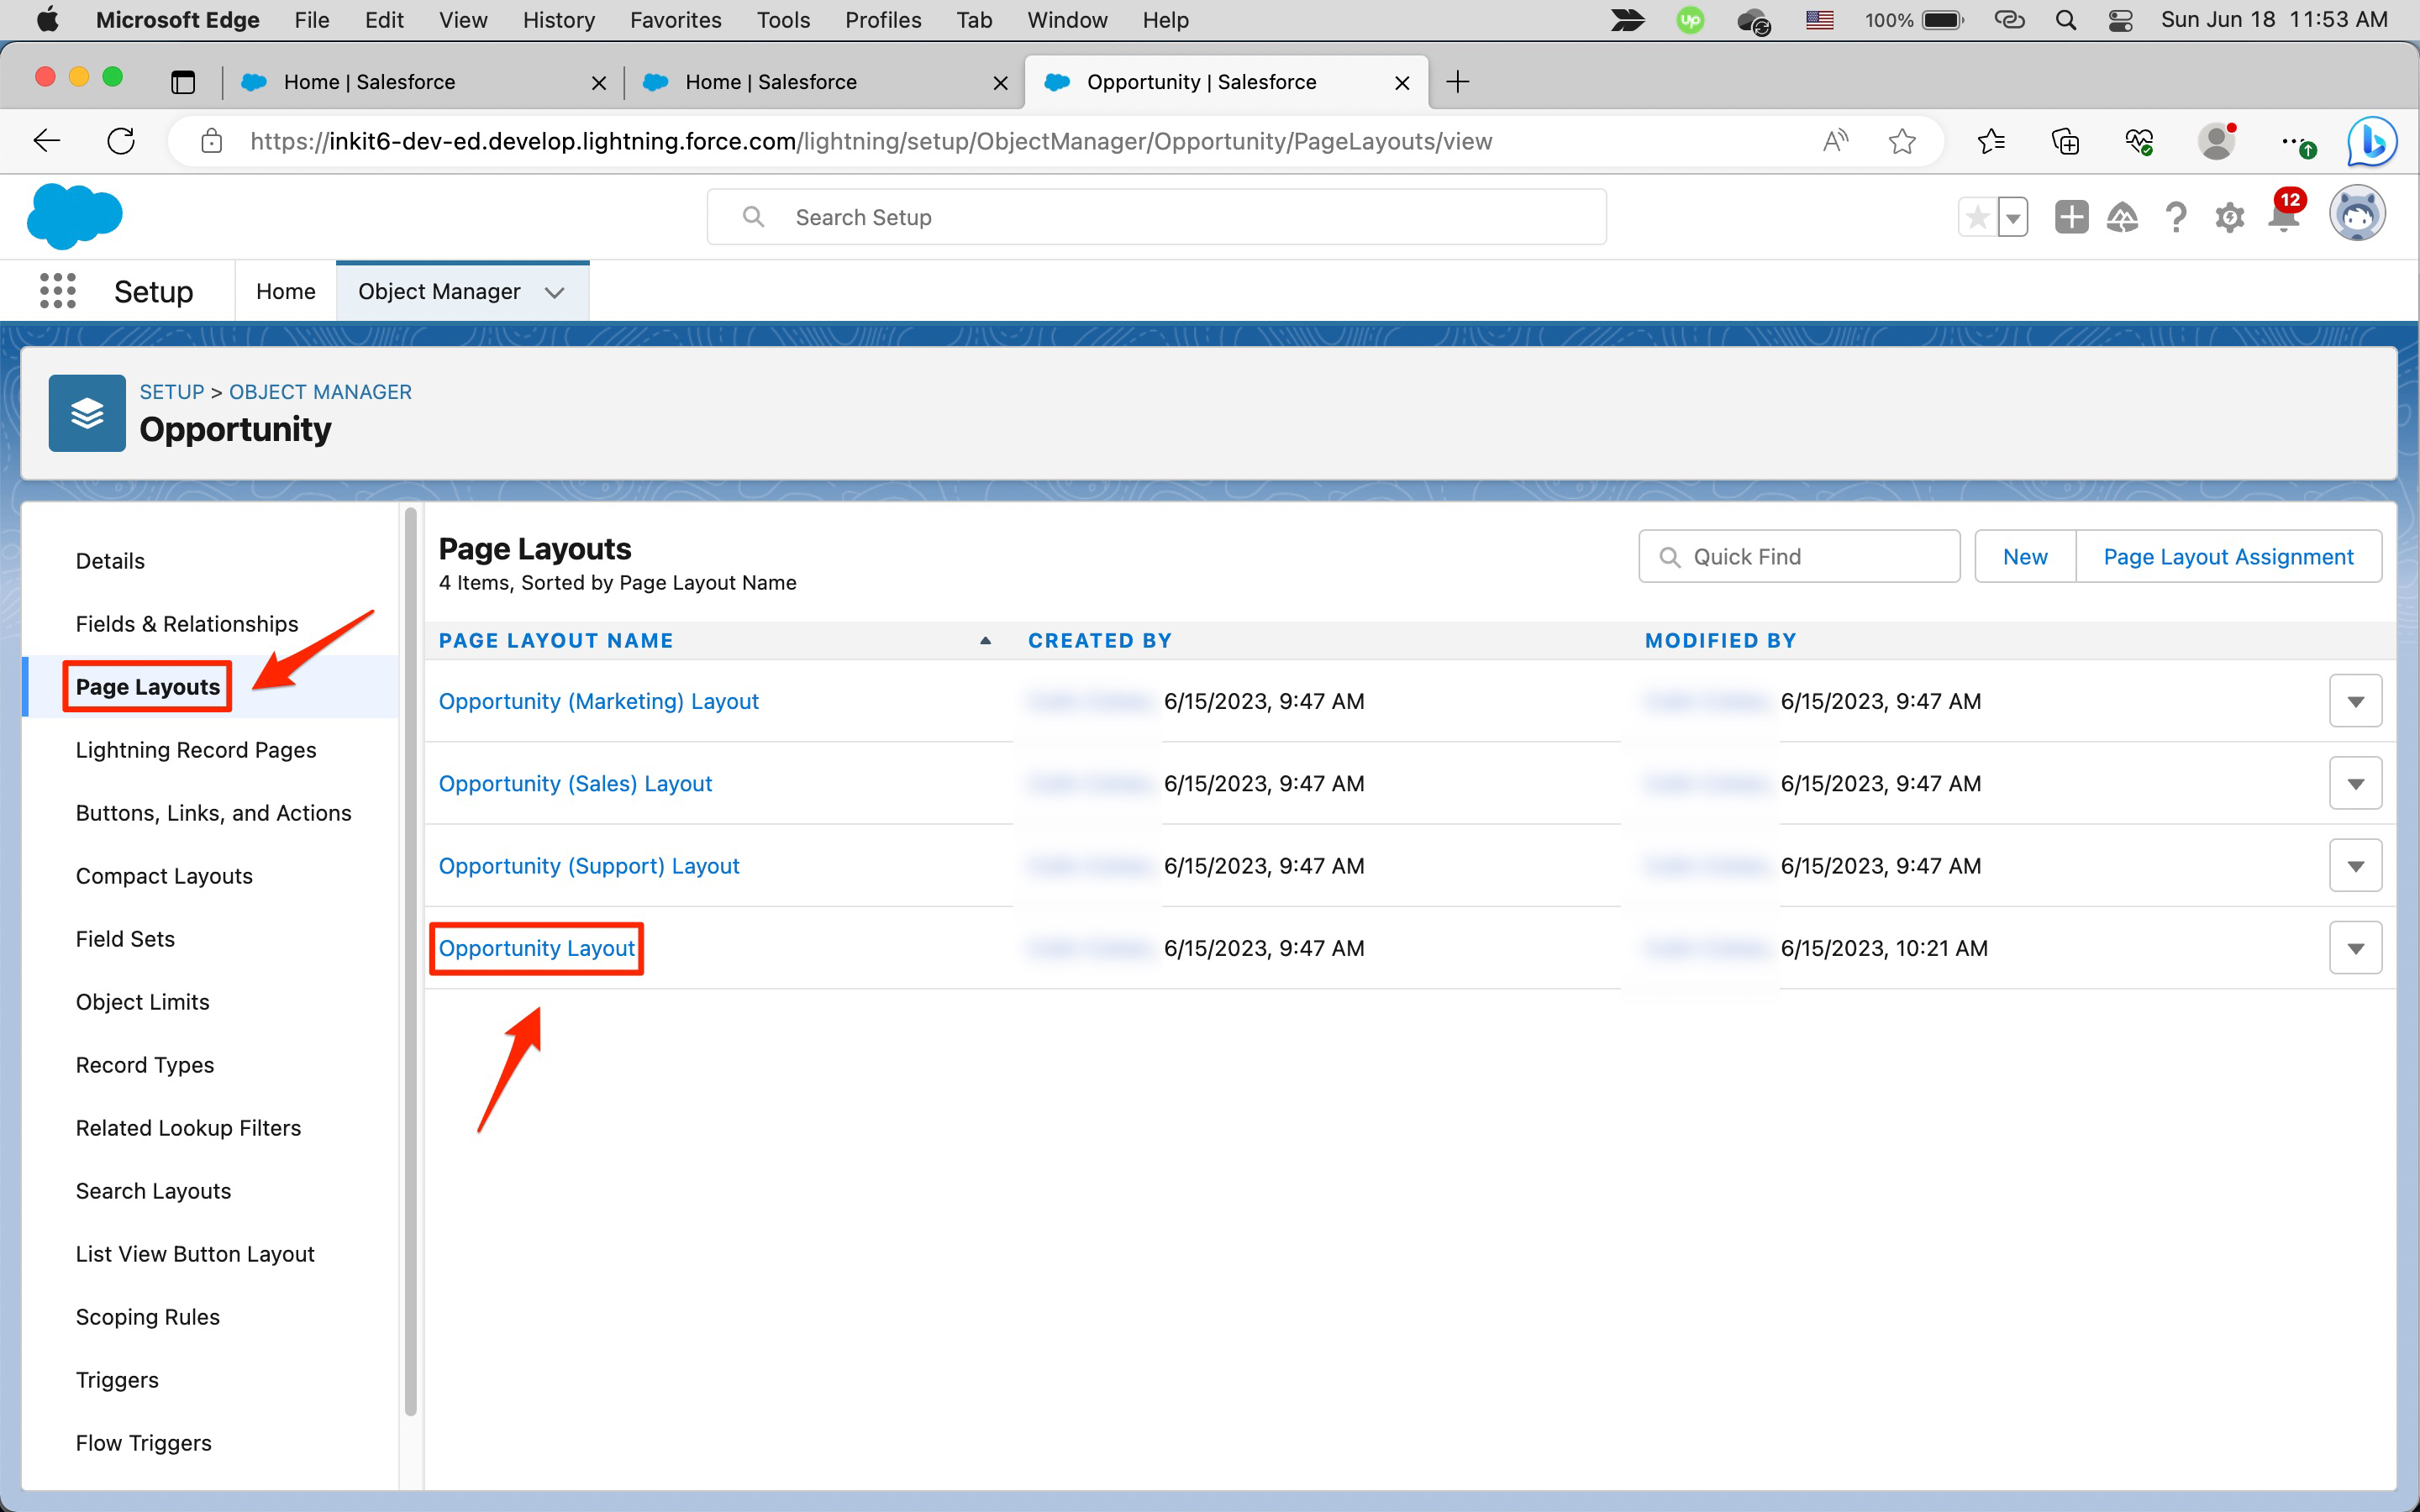
Select Page Layouts in the left sidebar and click Opportunity Layout.
-
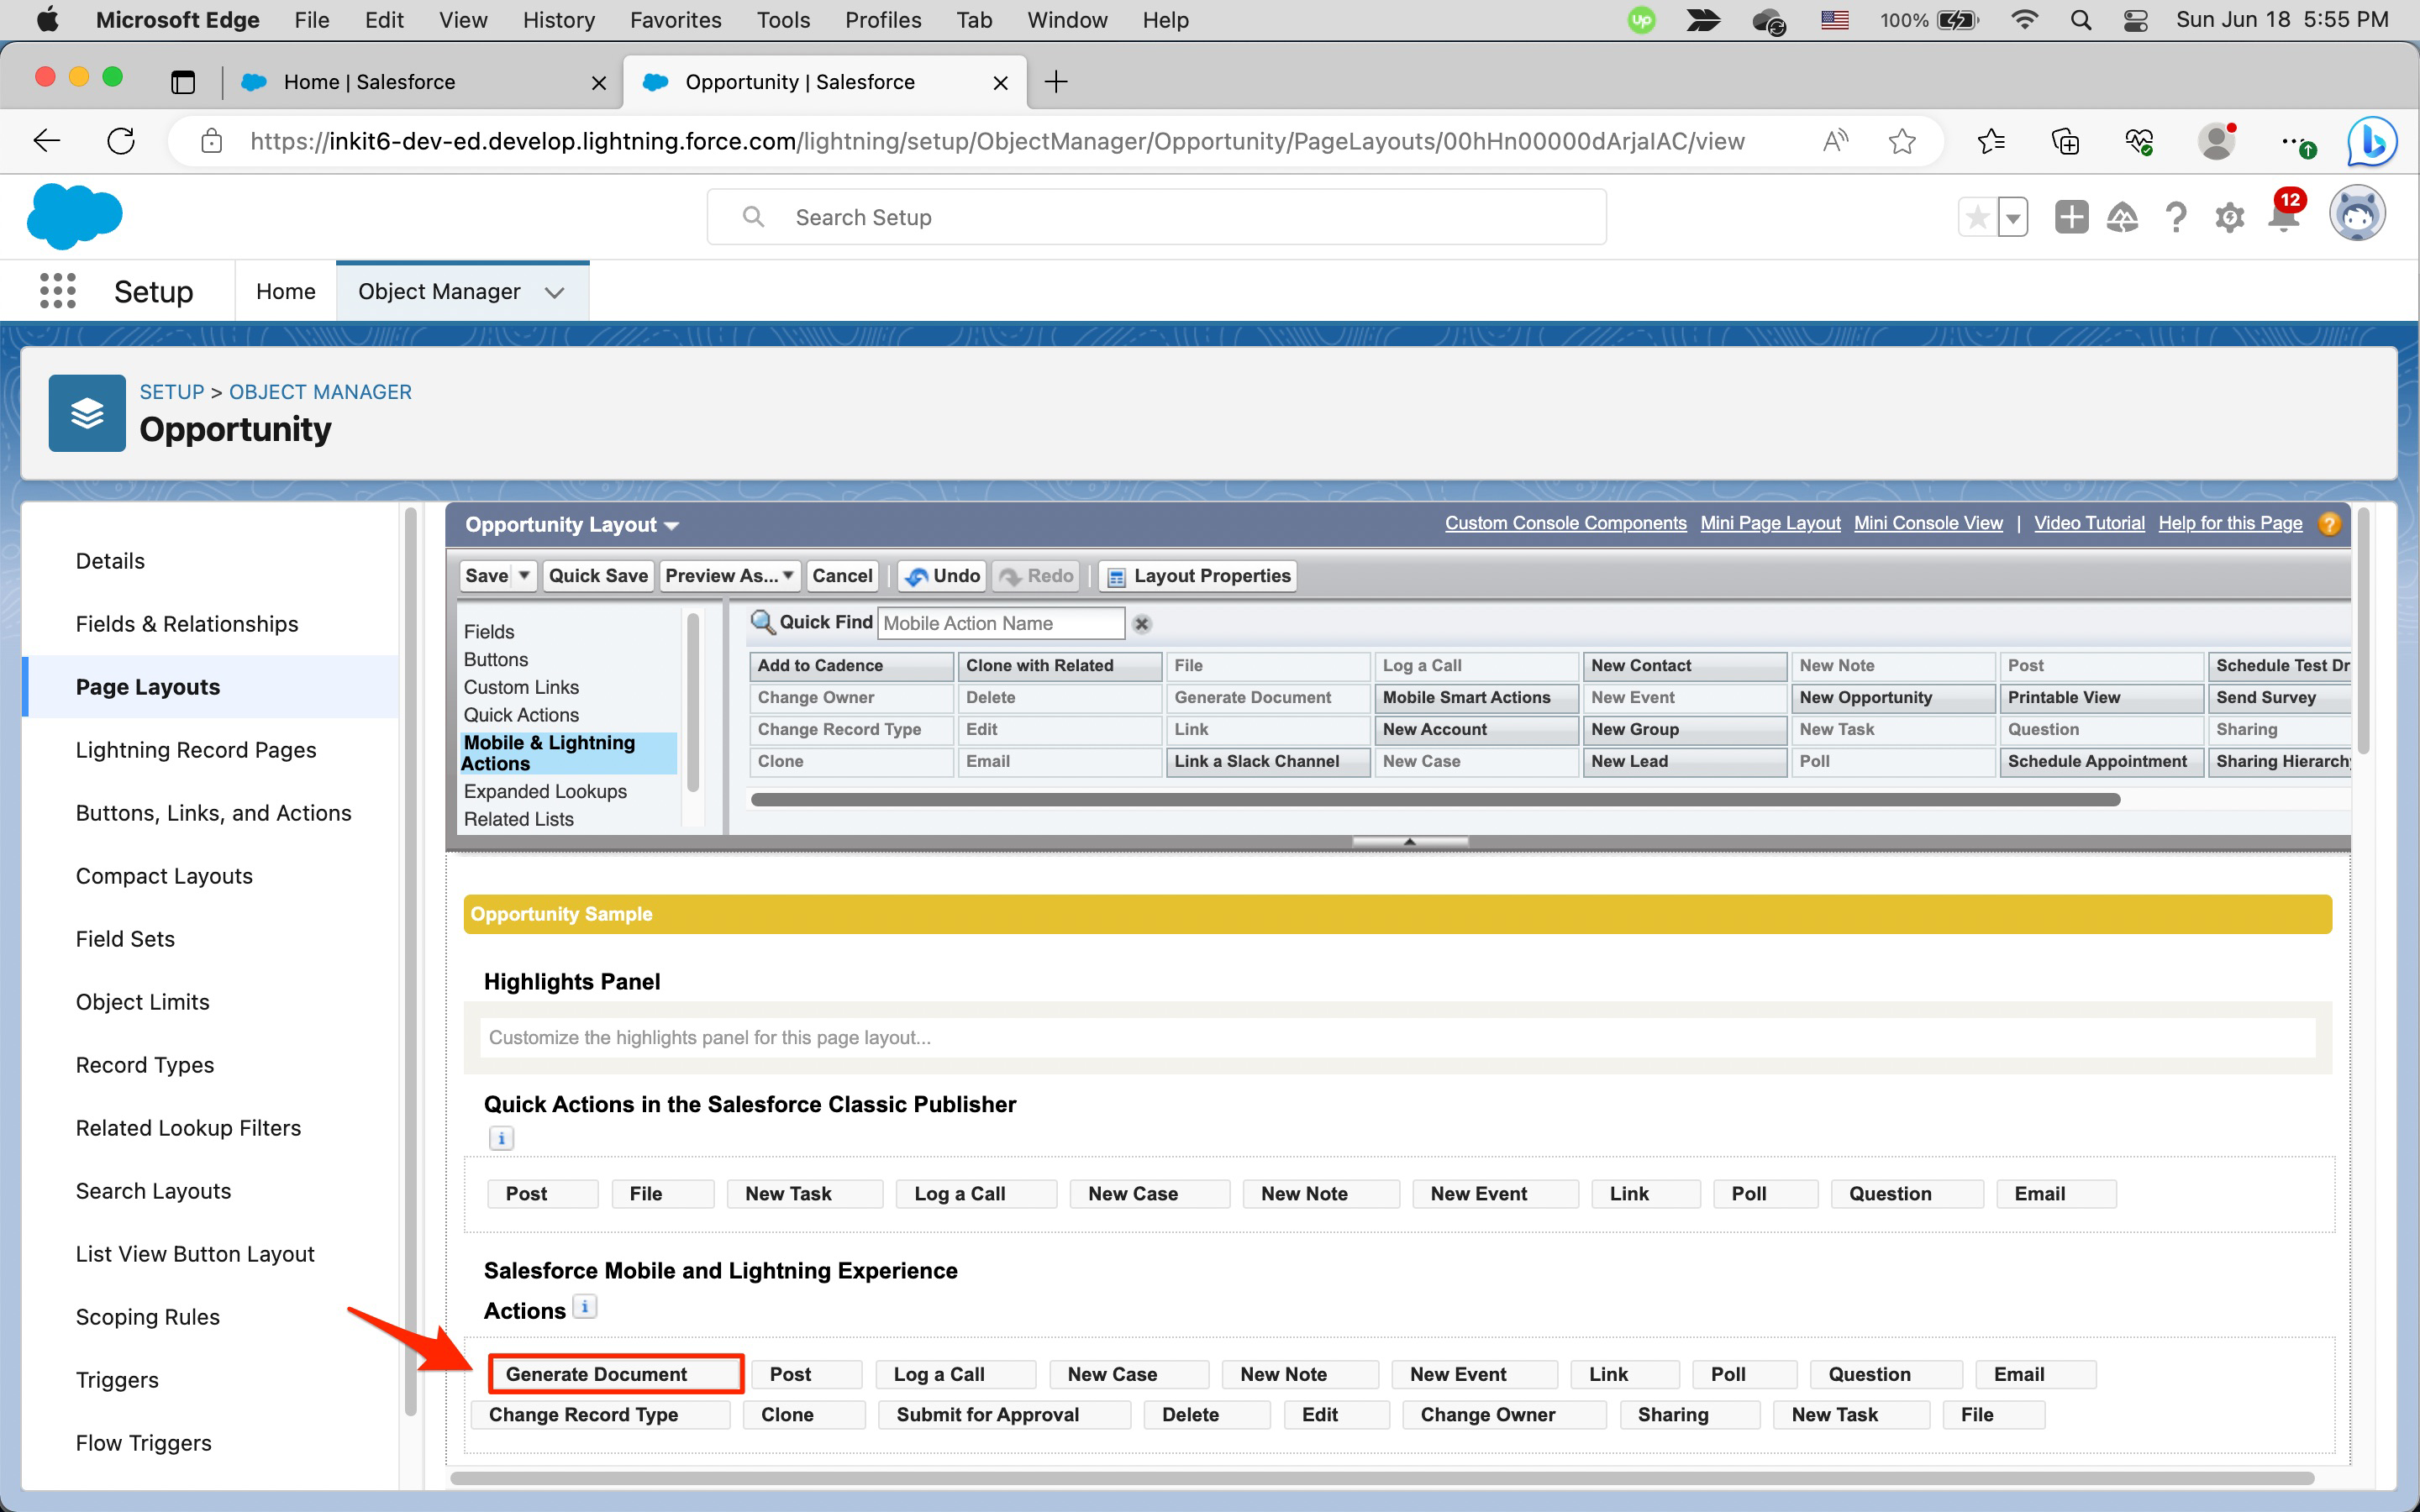
In the Opportunity Layout panel, select Mobile & Lighting Actions in the left sidebar and drag the Generate Document button in the front of the Salesforce Mobile and Lighting Experience Actions field.
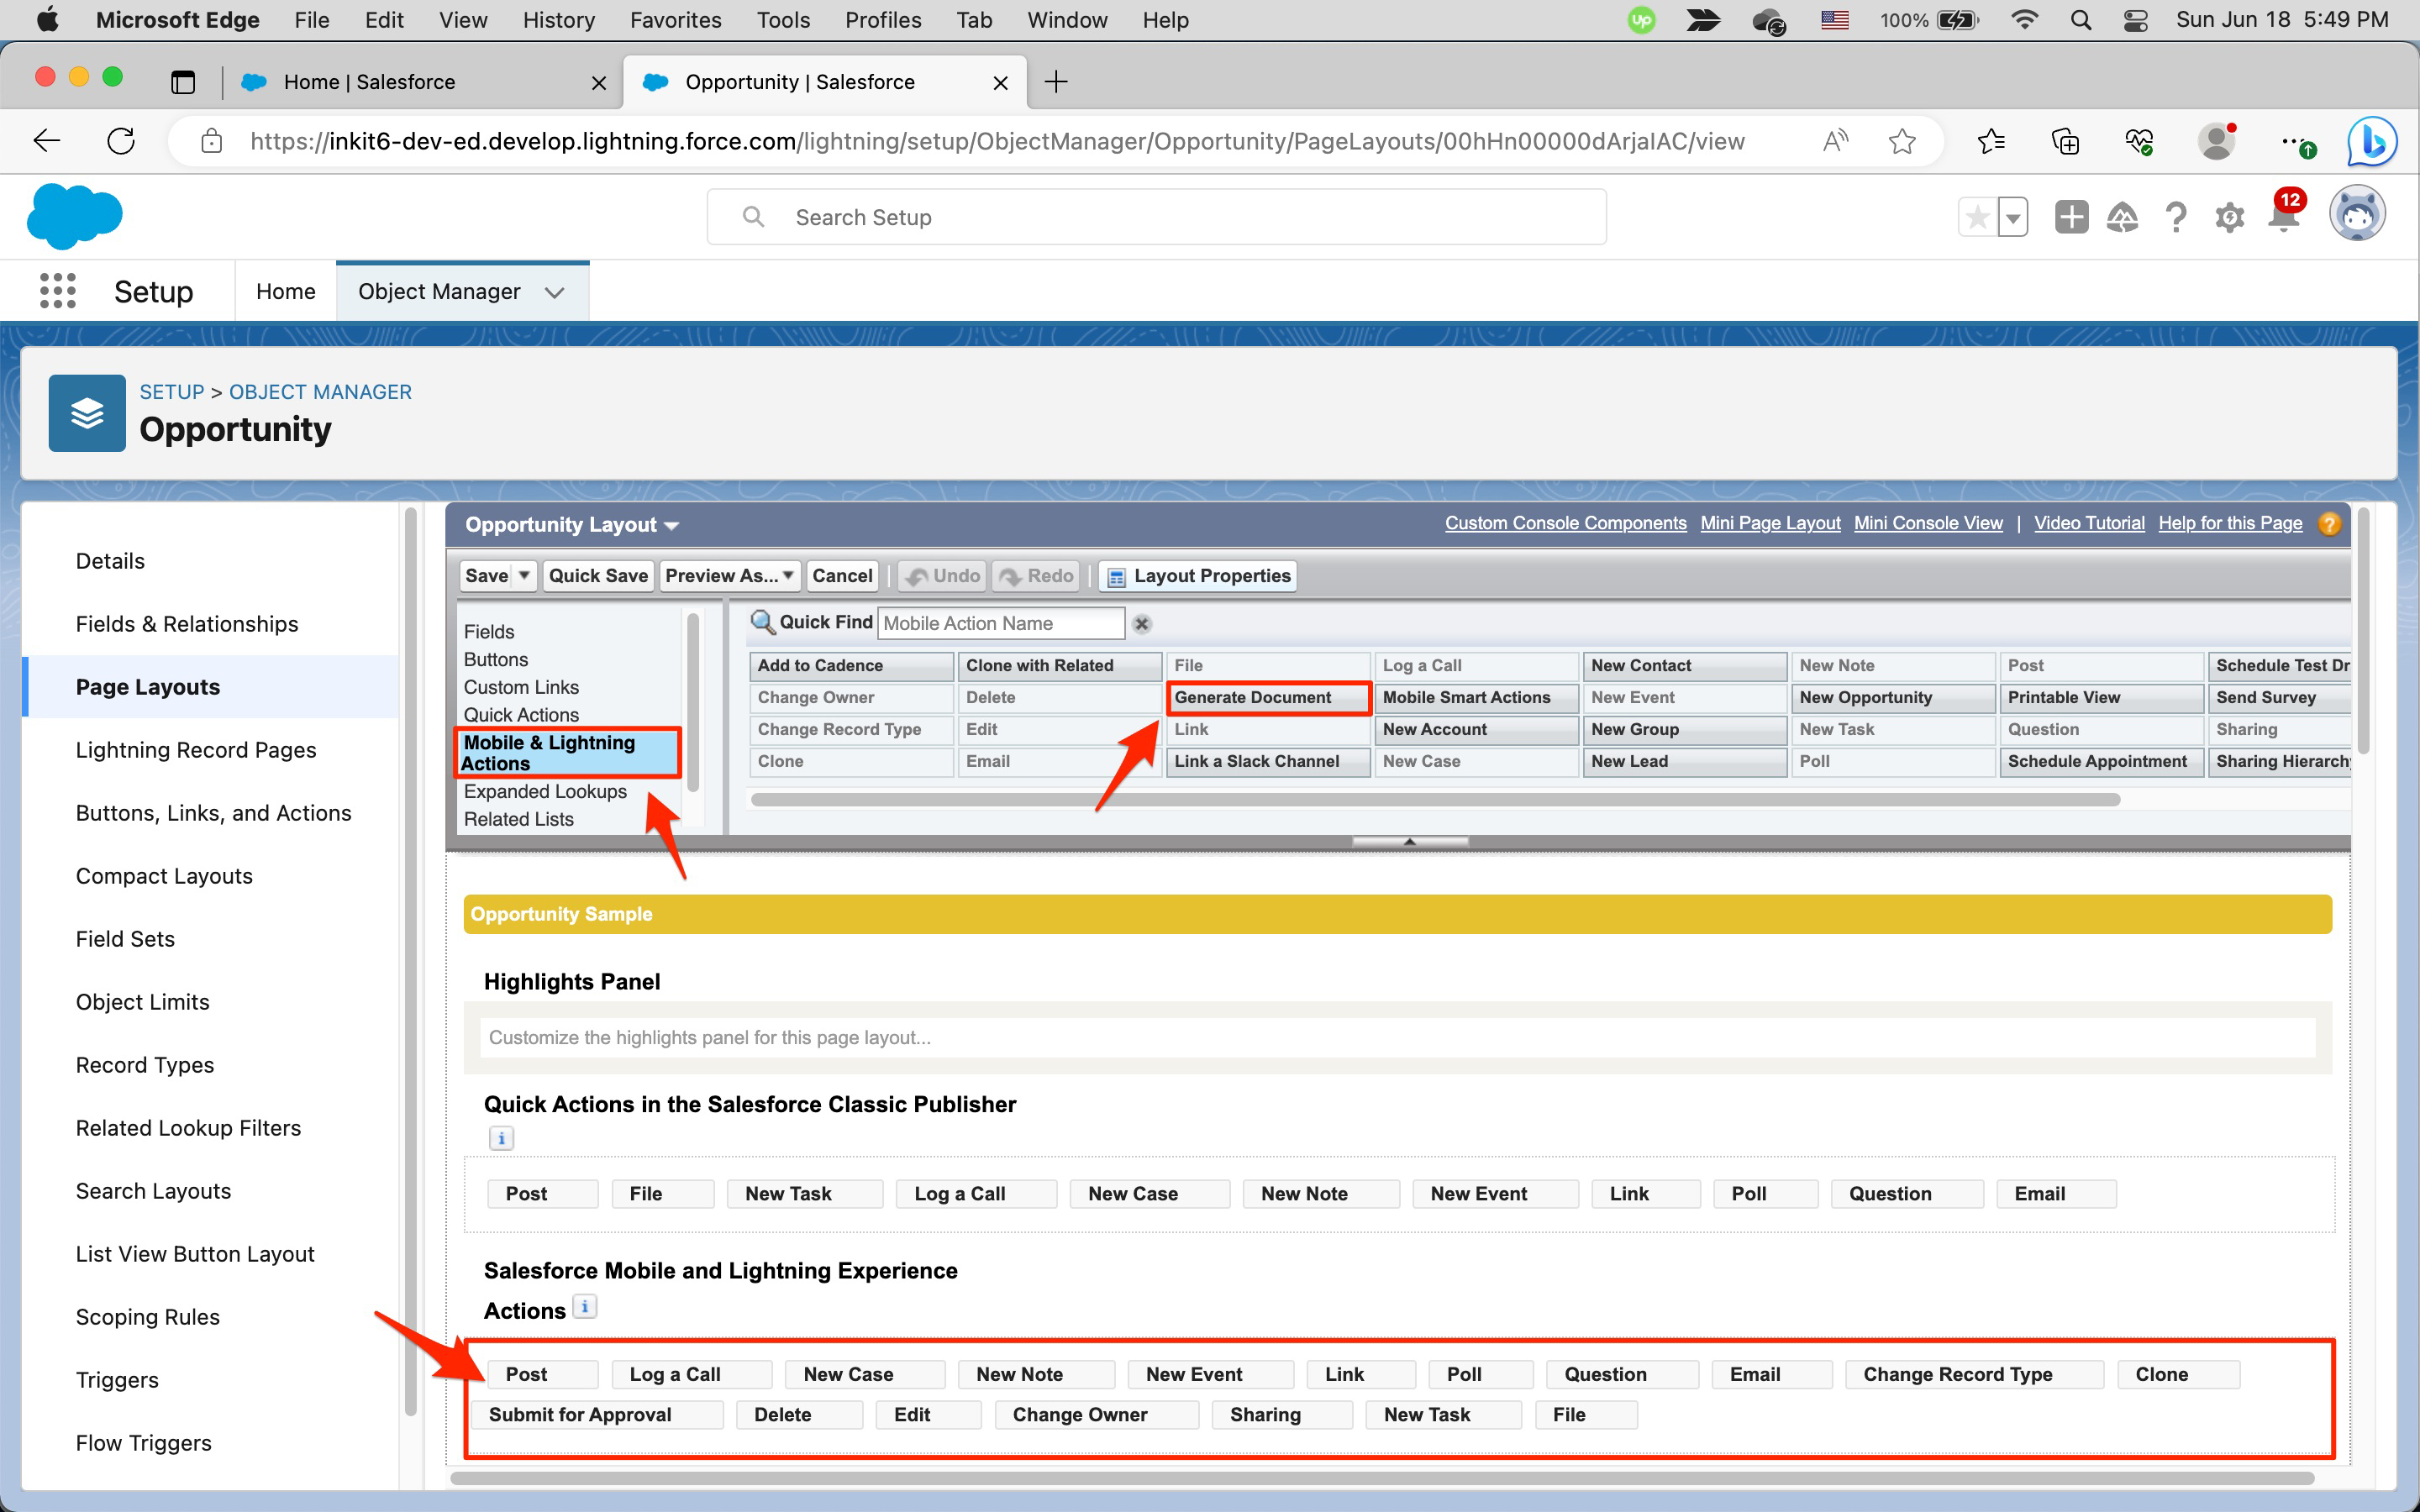
The Generate Document button will now display in the beginning of the Salesforce Mobile and Lighting Experience Actions field.
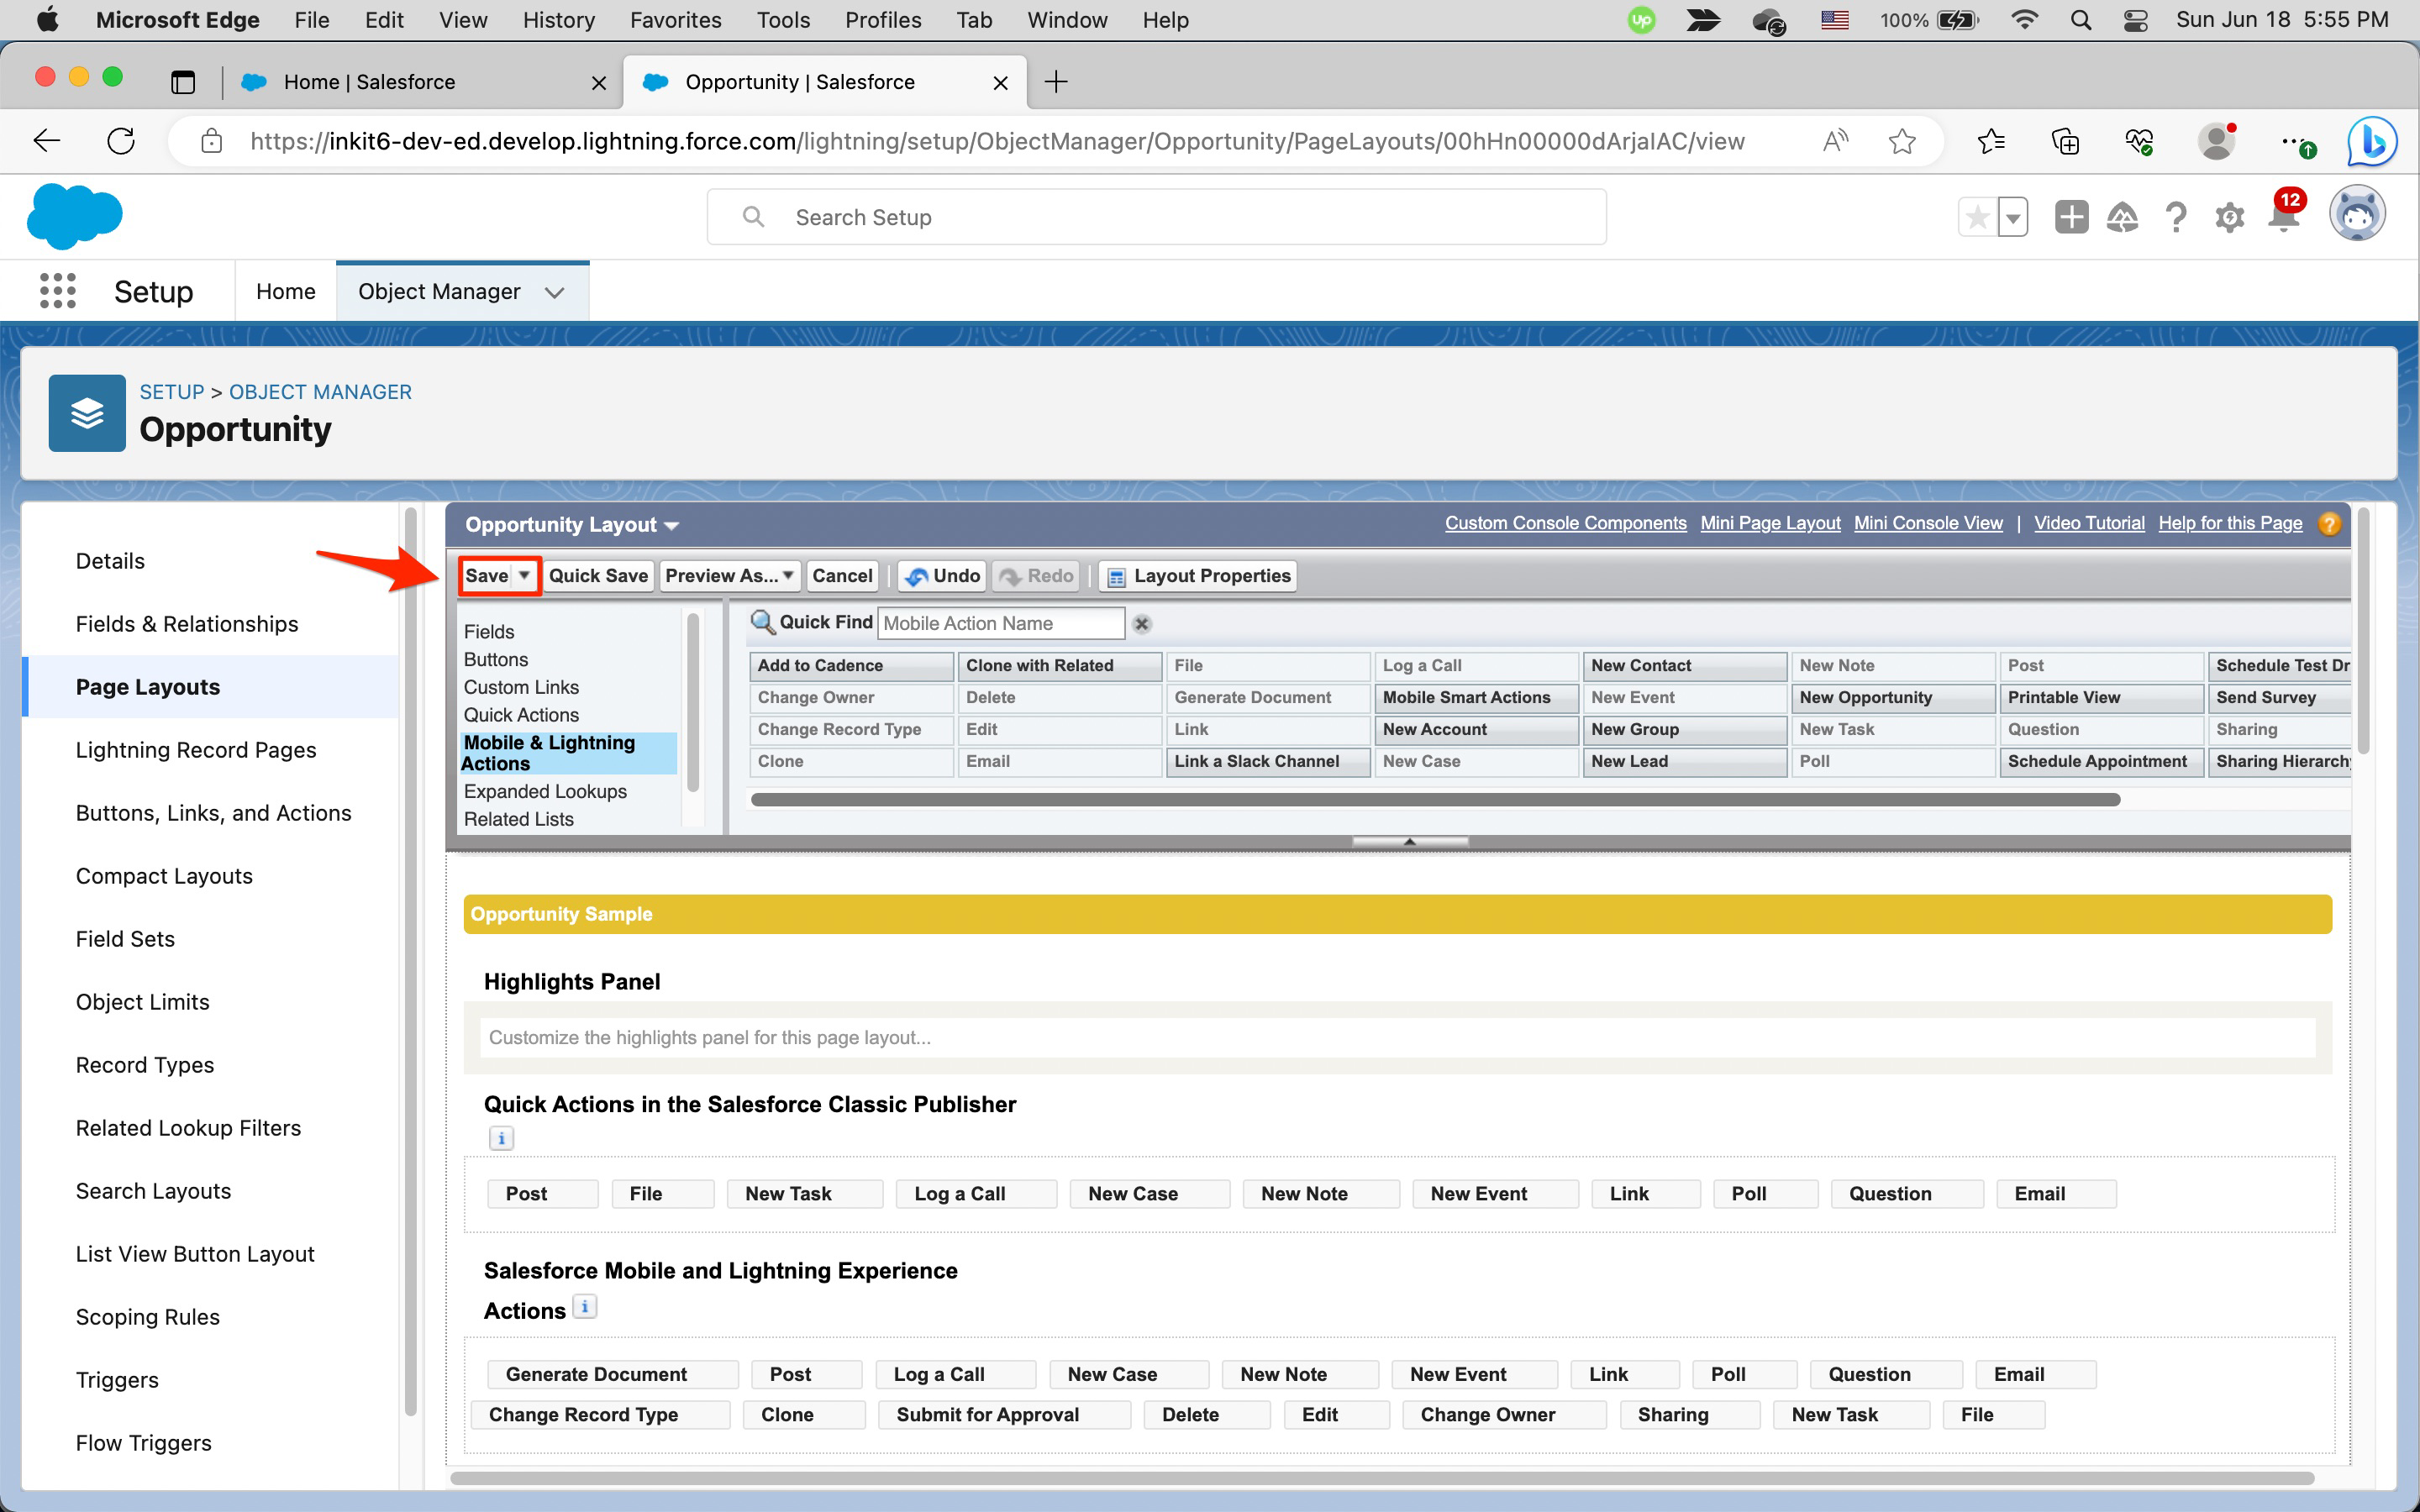
Finally, click Save.
-
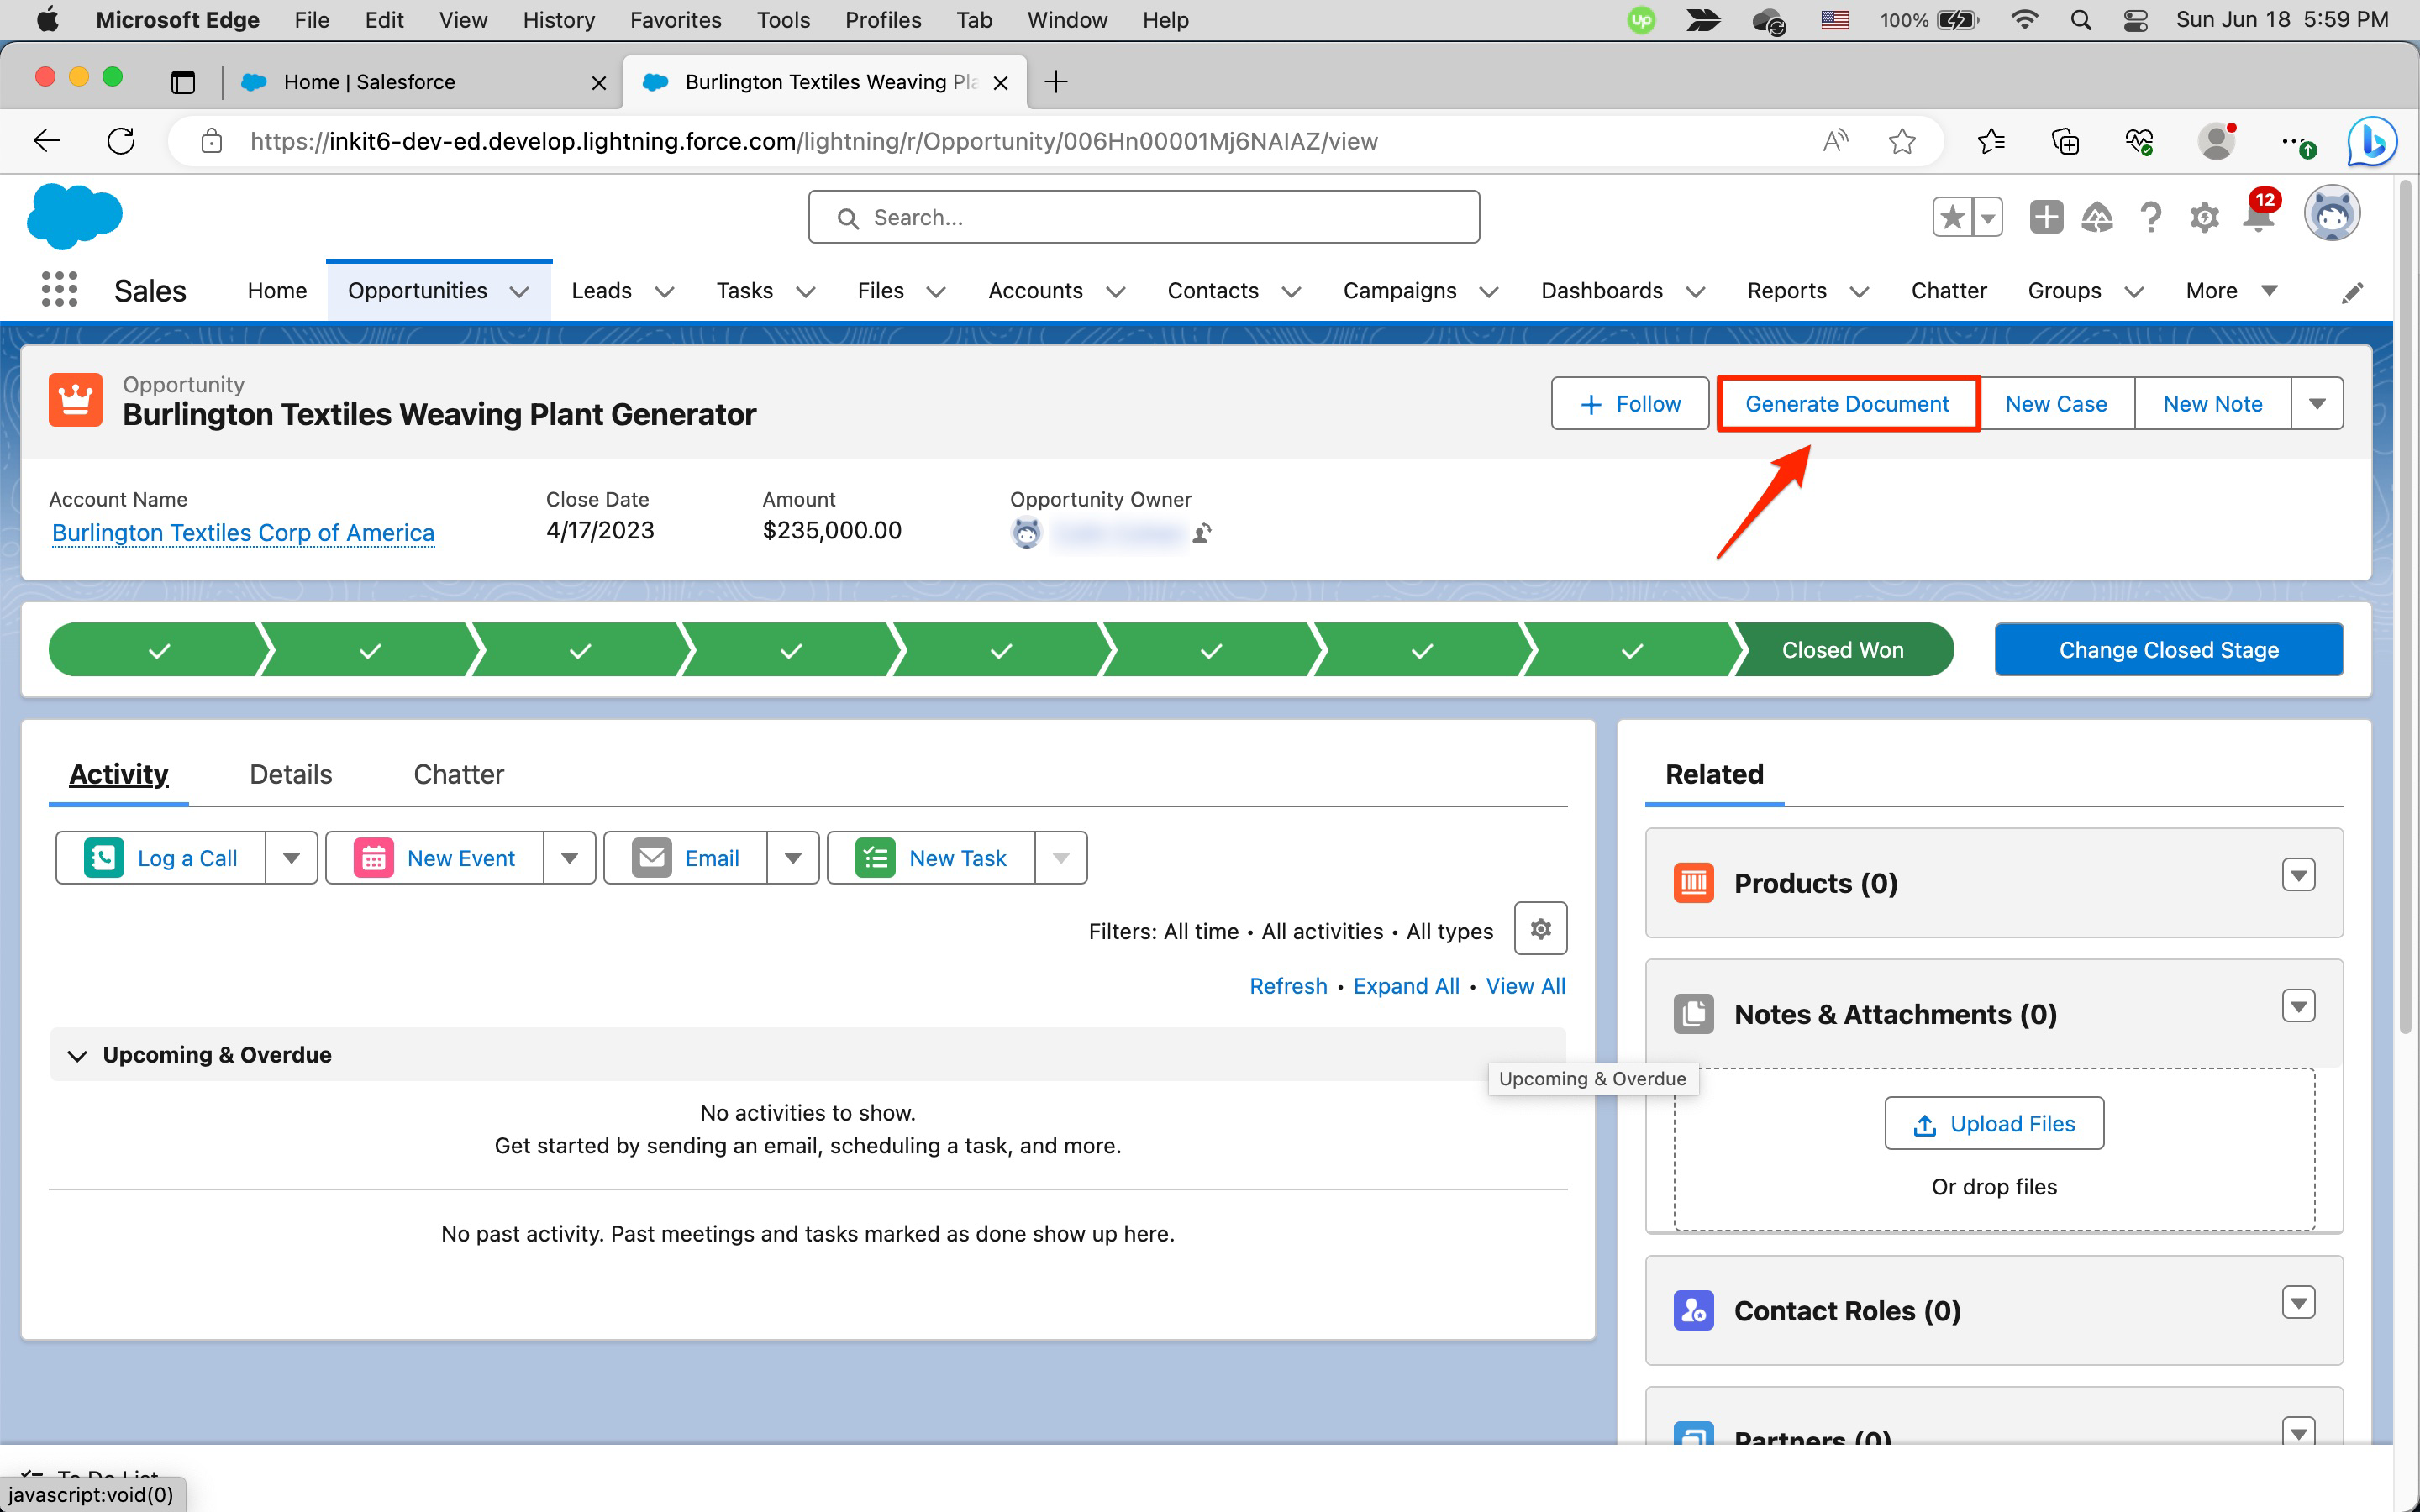
In an Opportunity page, you will now see the Generate Document button. Click it to generate a document.
-
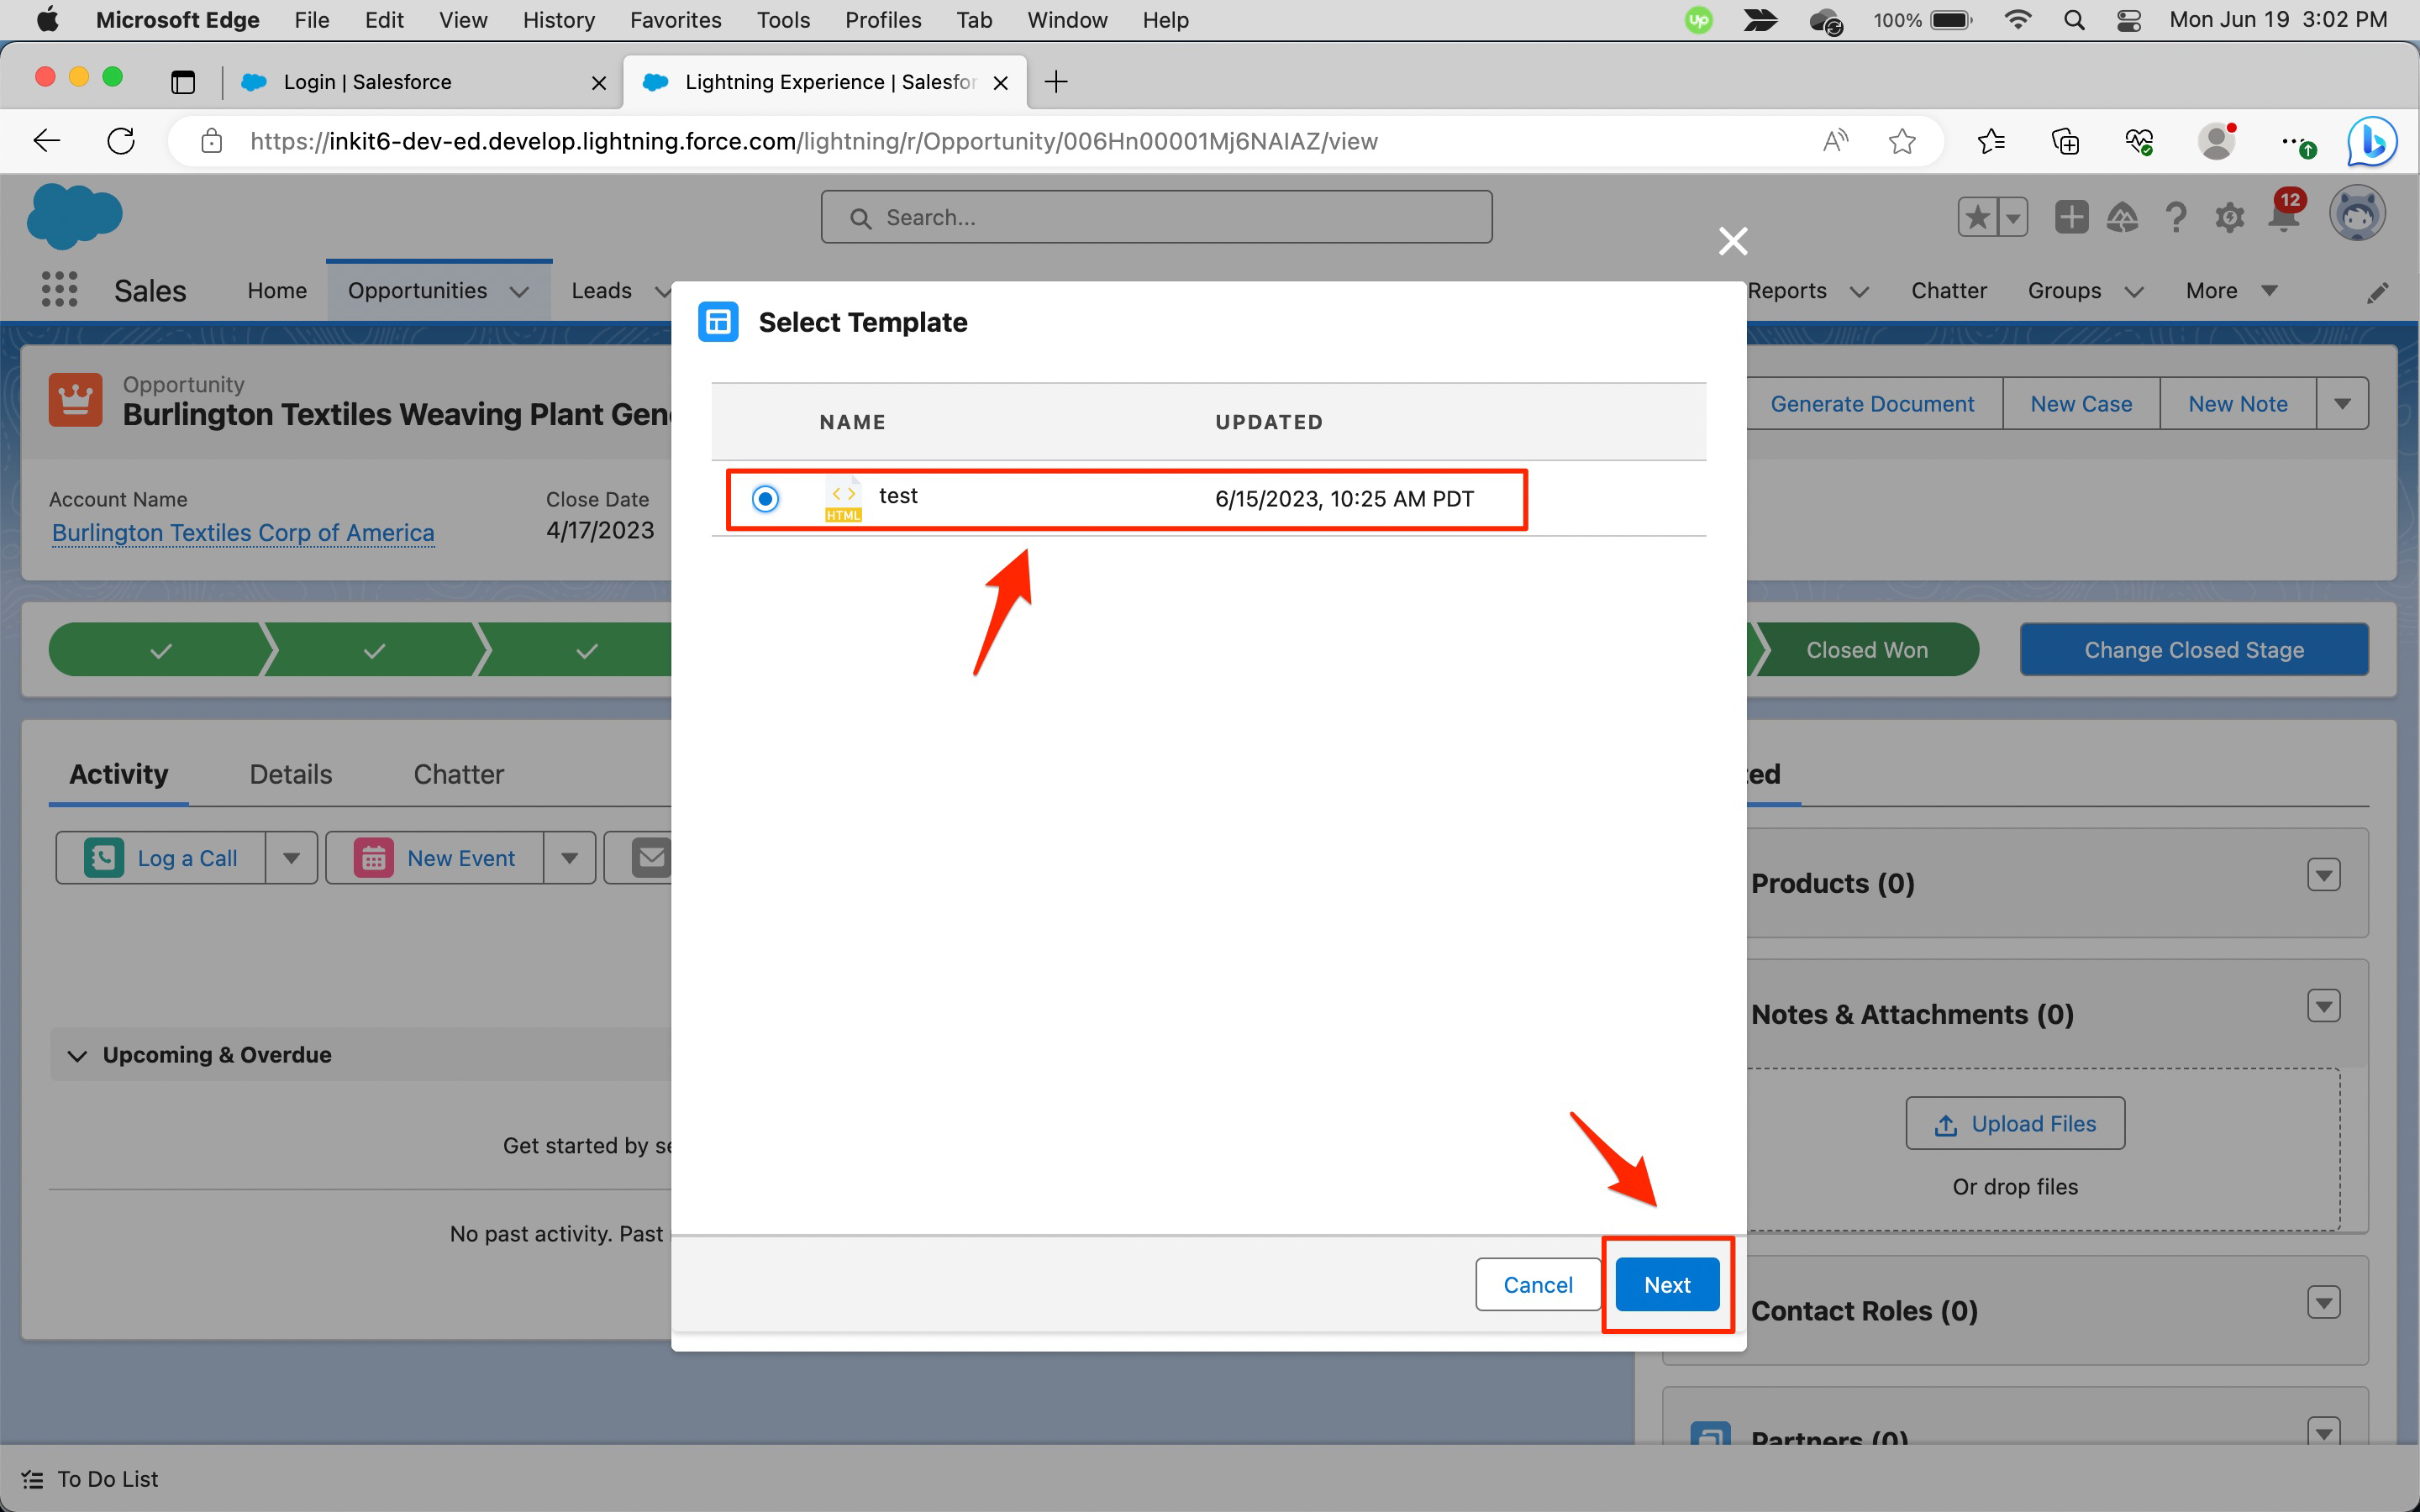
In the Select Template dialog box, select the Inkit template that you want to use to generate your document and click Next.
-
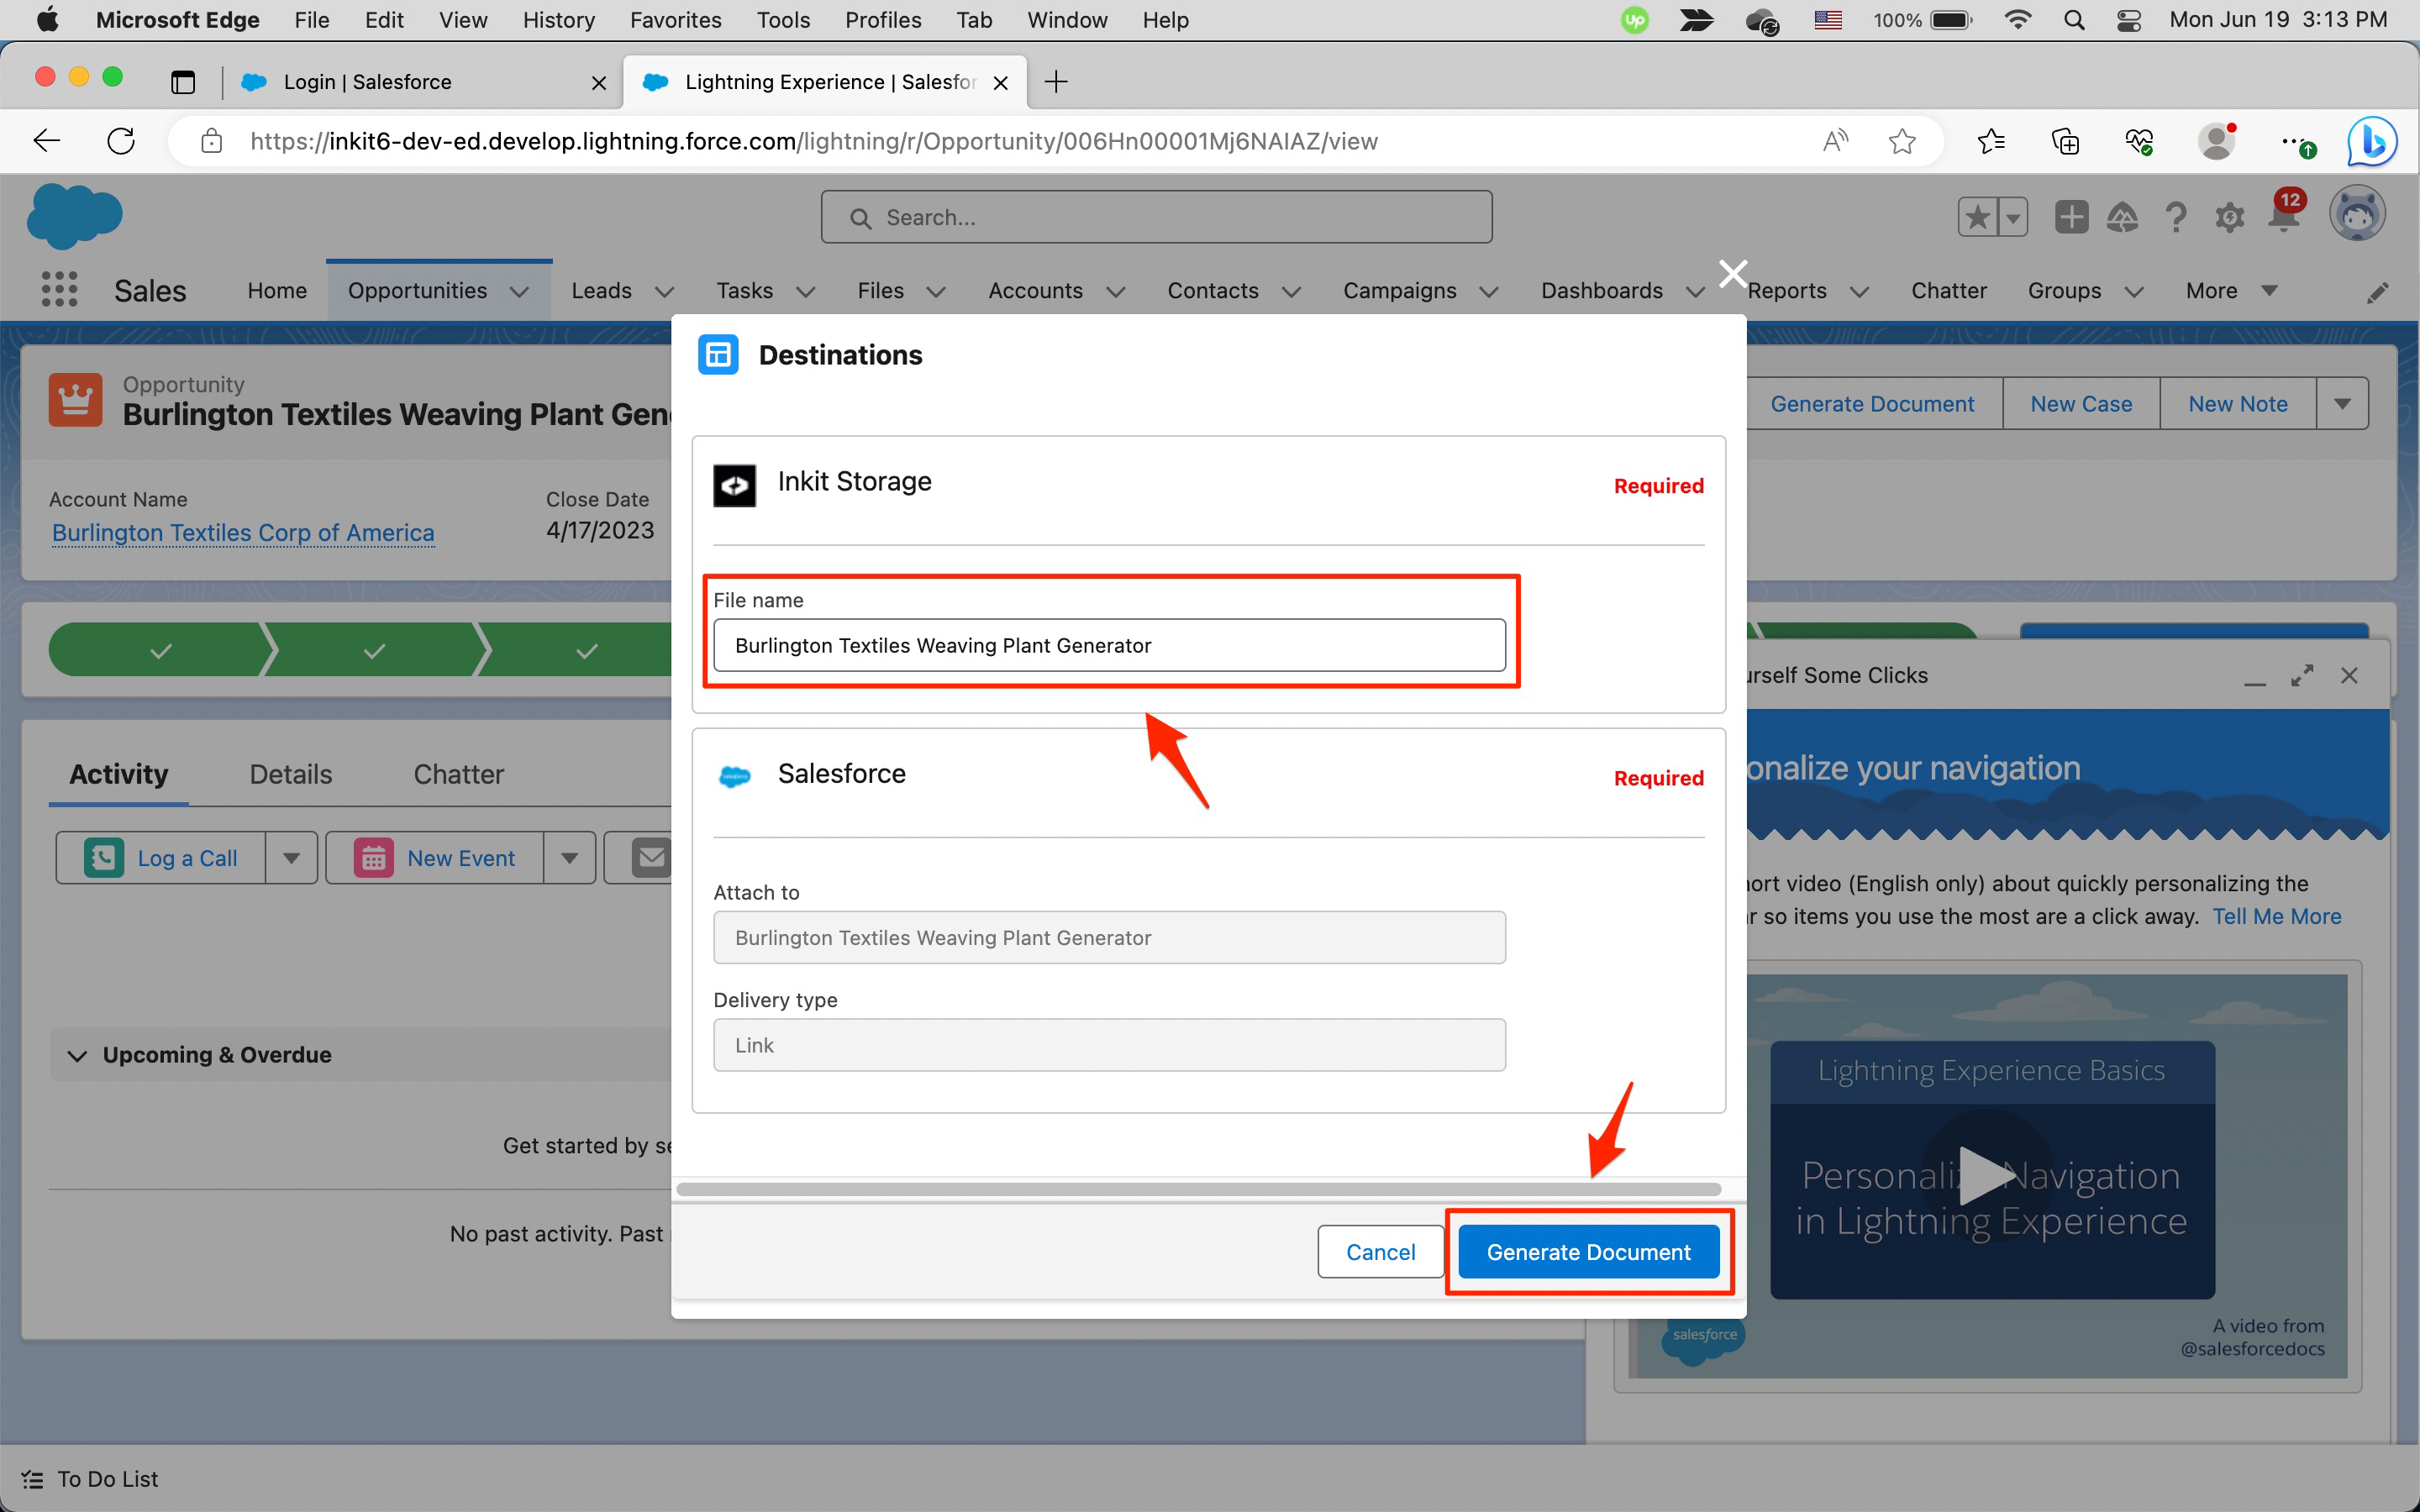
In the Destinations dialog box, enter the document file name in the File name field and click Generate Document.
Including a Generate Document button in non-default objects
Note: You only need to include a Generate Document button in Salesforce objects other than Account, Contact, Lead or Opportunity.
To include a Generate Document button in a Salesforce standard or custom object in addition to the default ones (Account, Contact, Lead and Opportunity), do the following:
-
In Salesforce, click the settings gear and then click Setup.
-
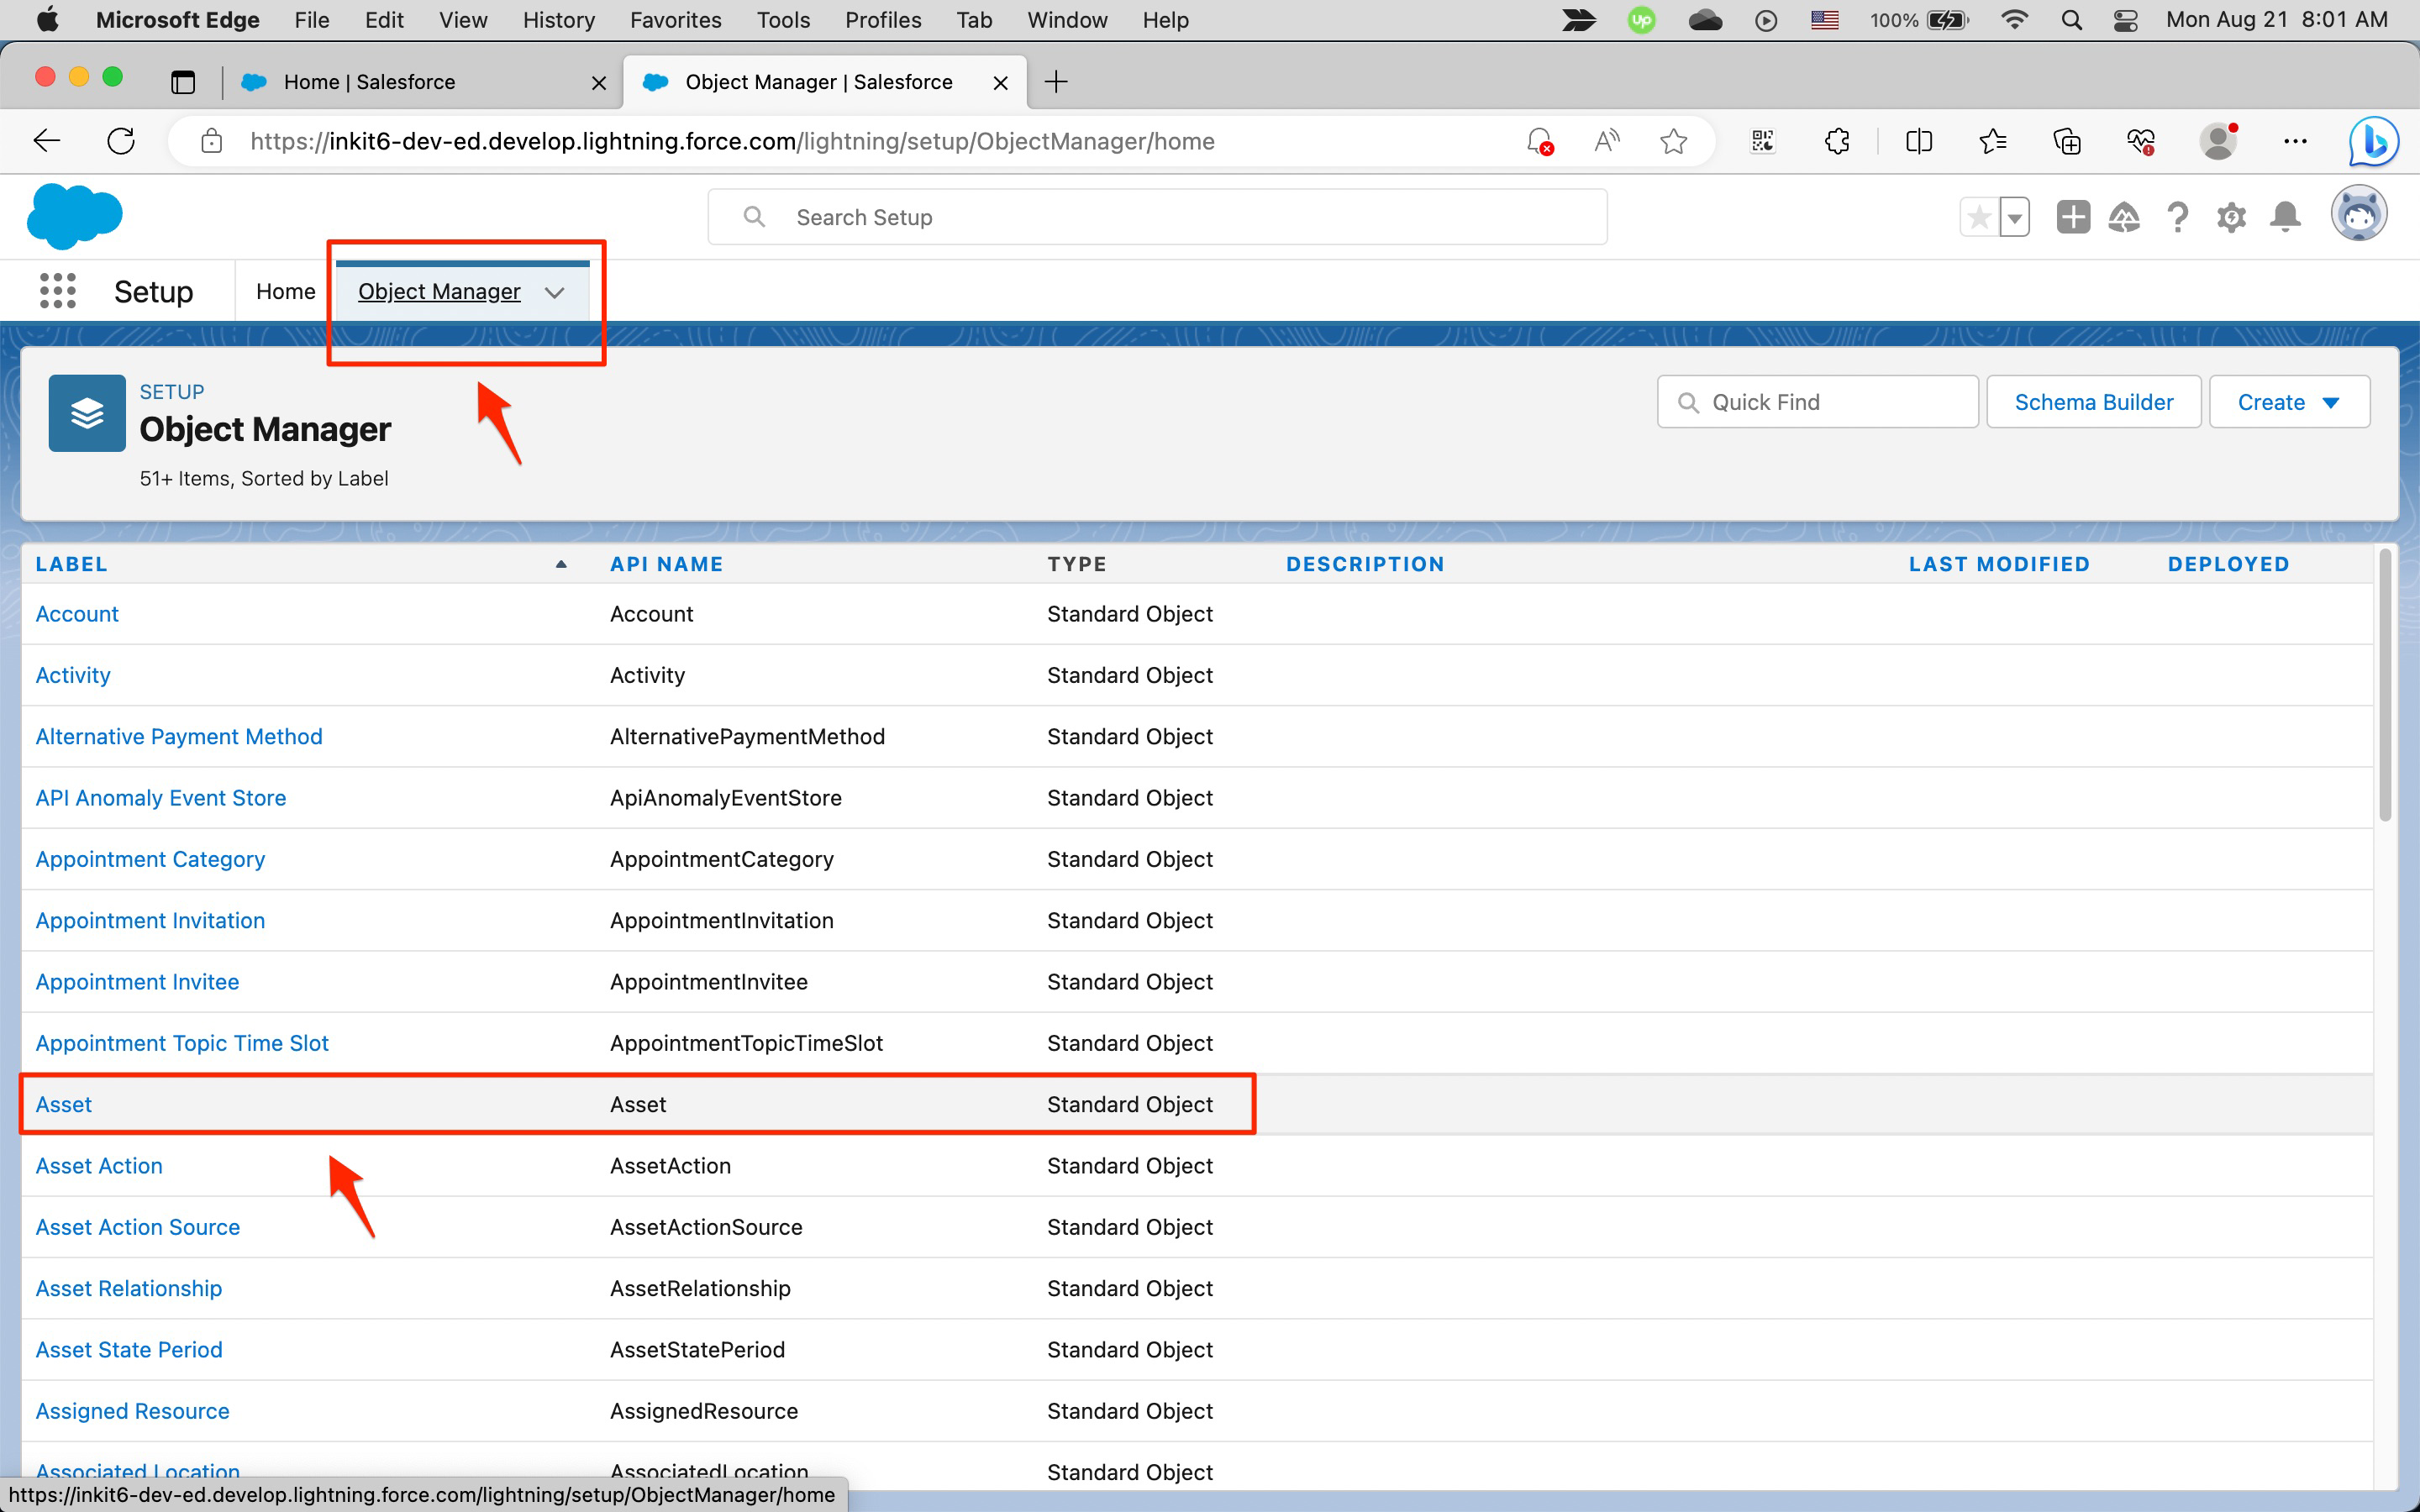
Click the Object Manager tab, and select the object that you want to add the Generate Document button to. Here we'll choose Asset.
-
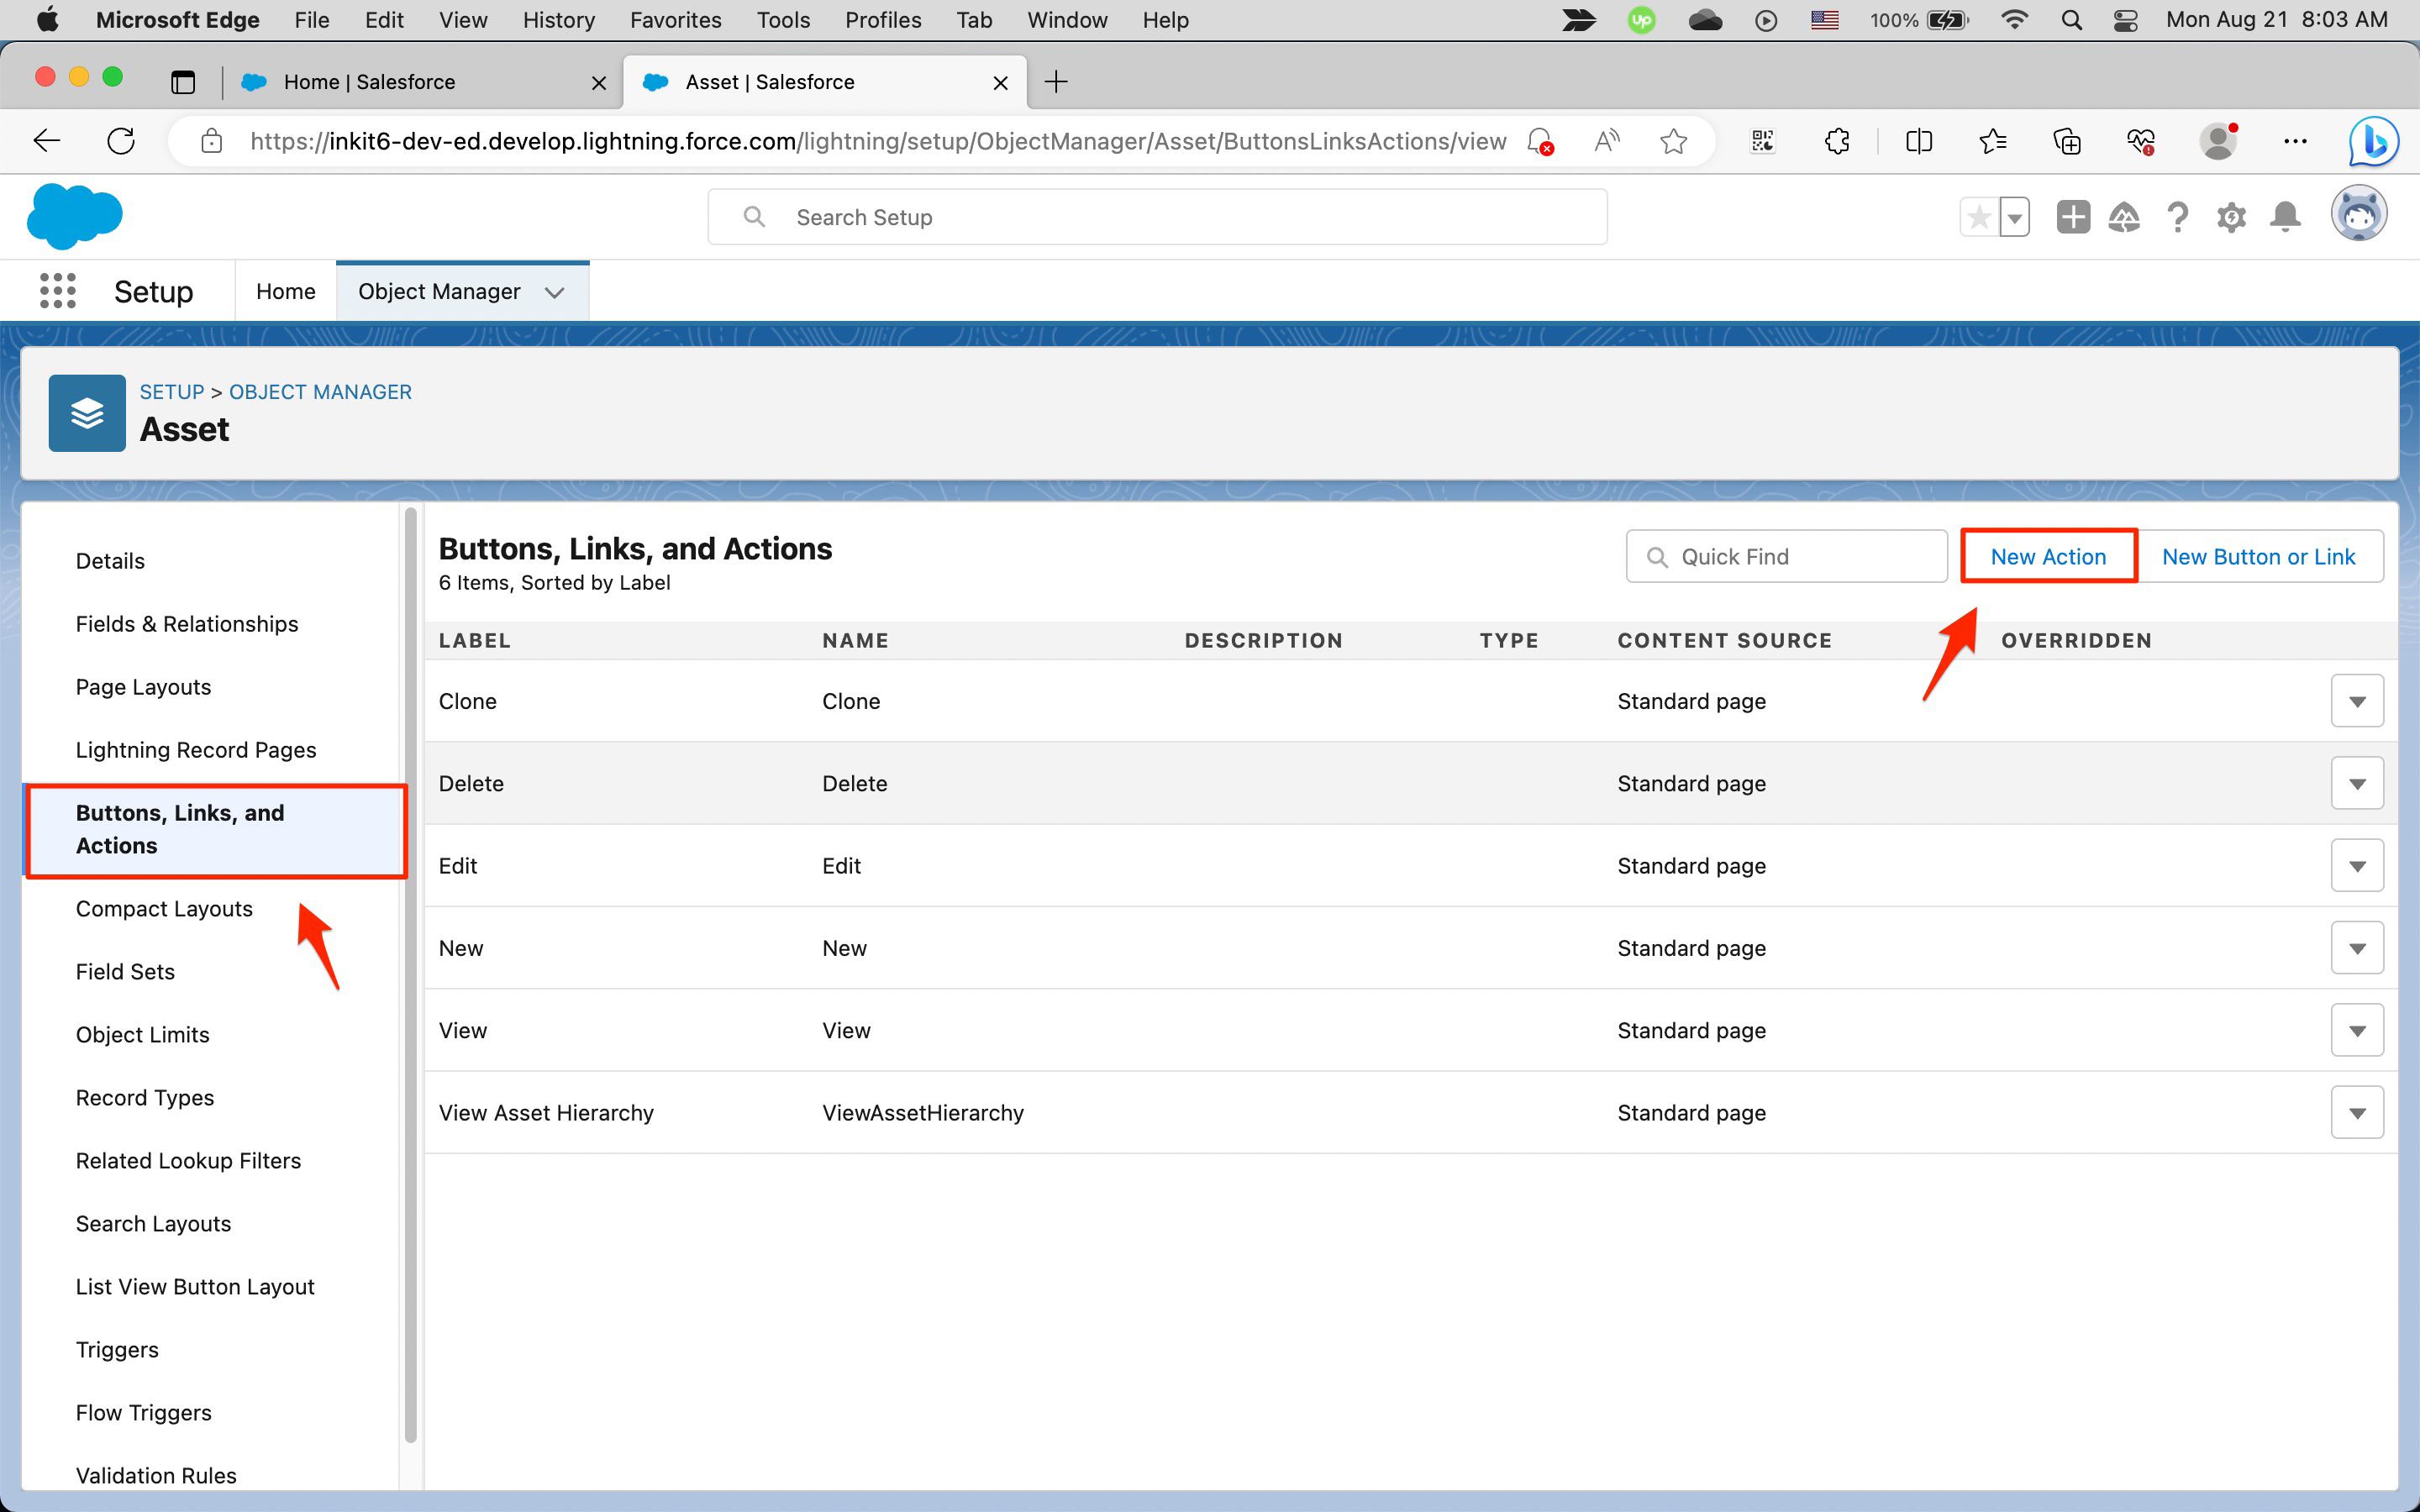
In the left sidebar, select Buttons, Links, and Actions and click New Action.
-
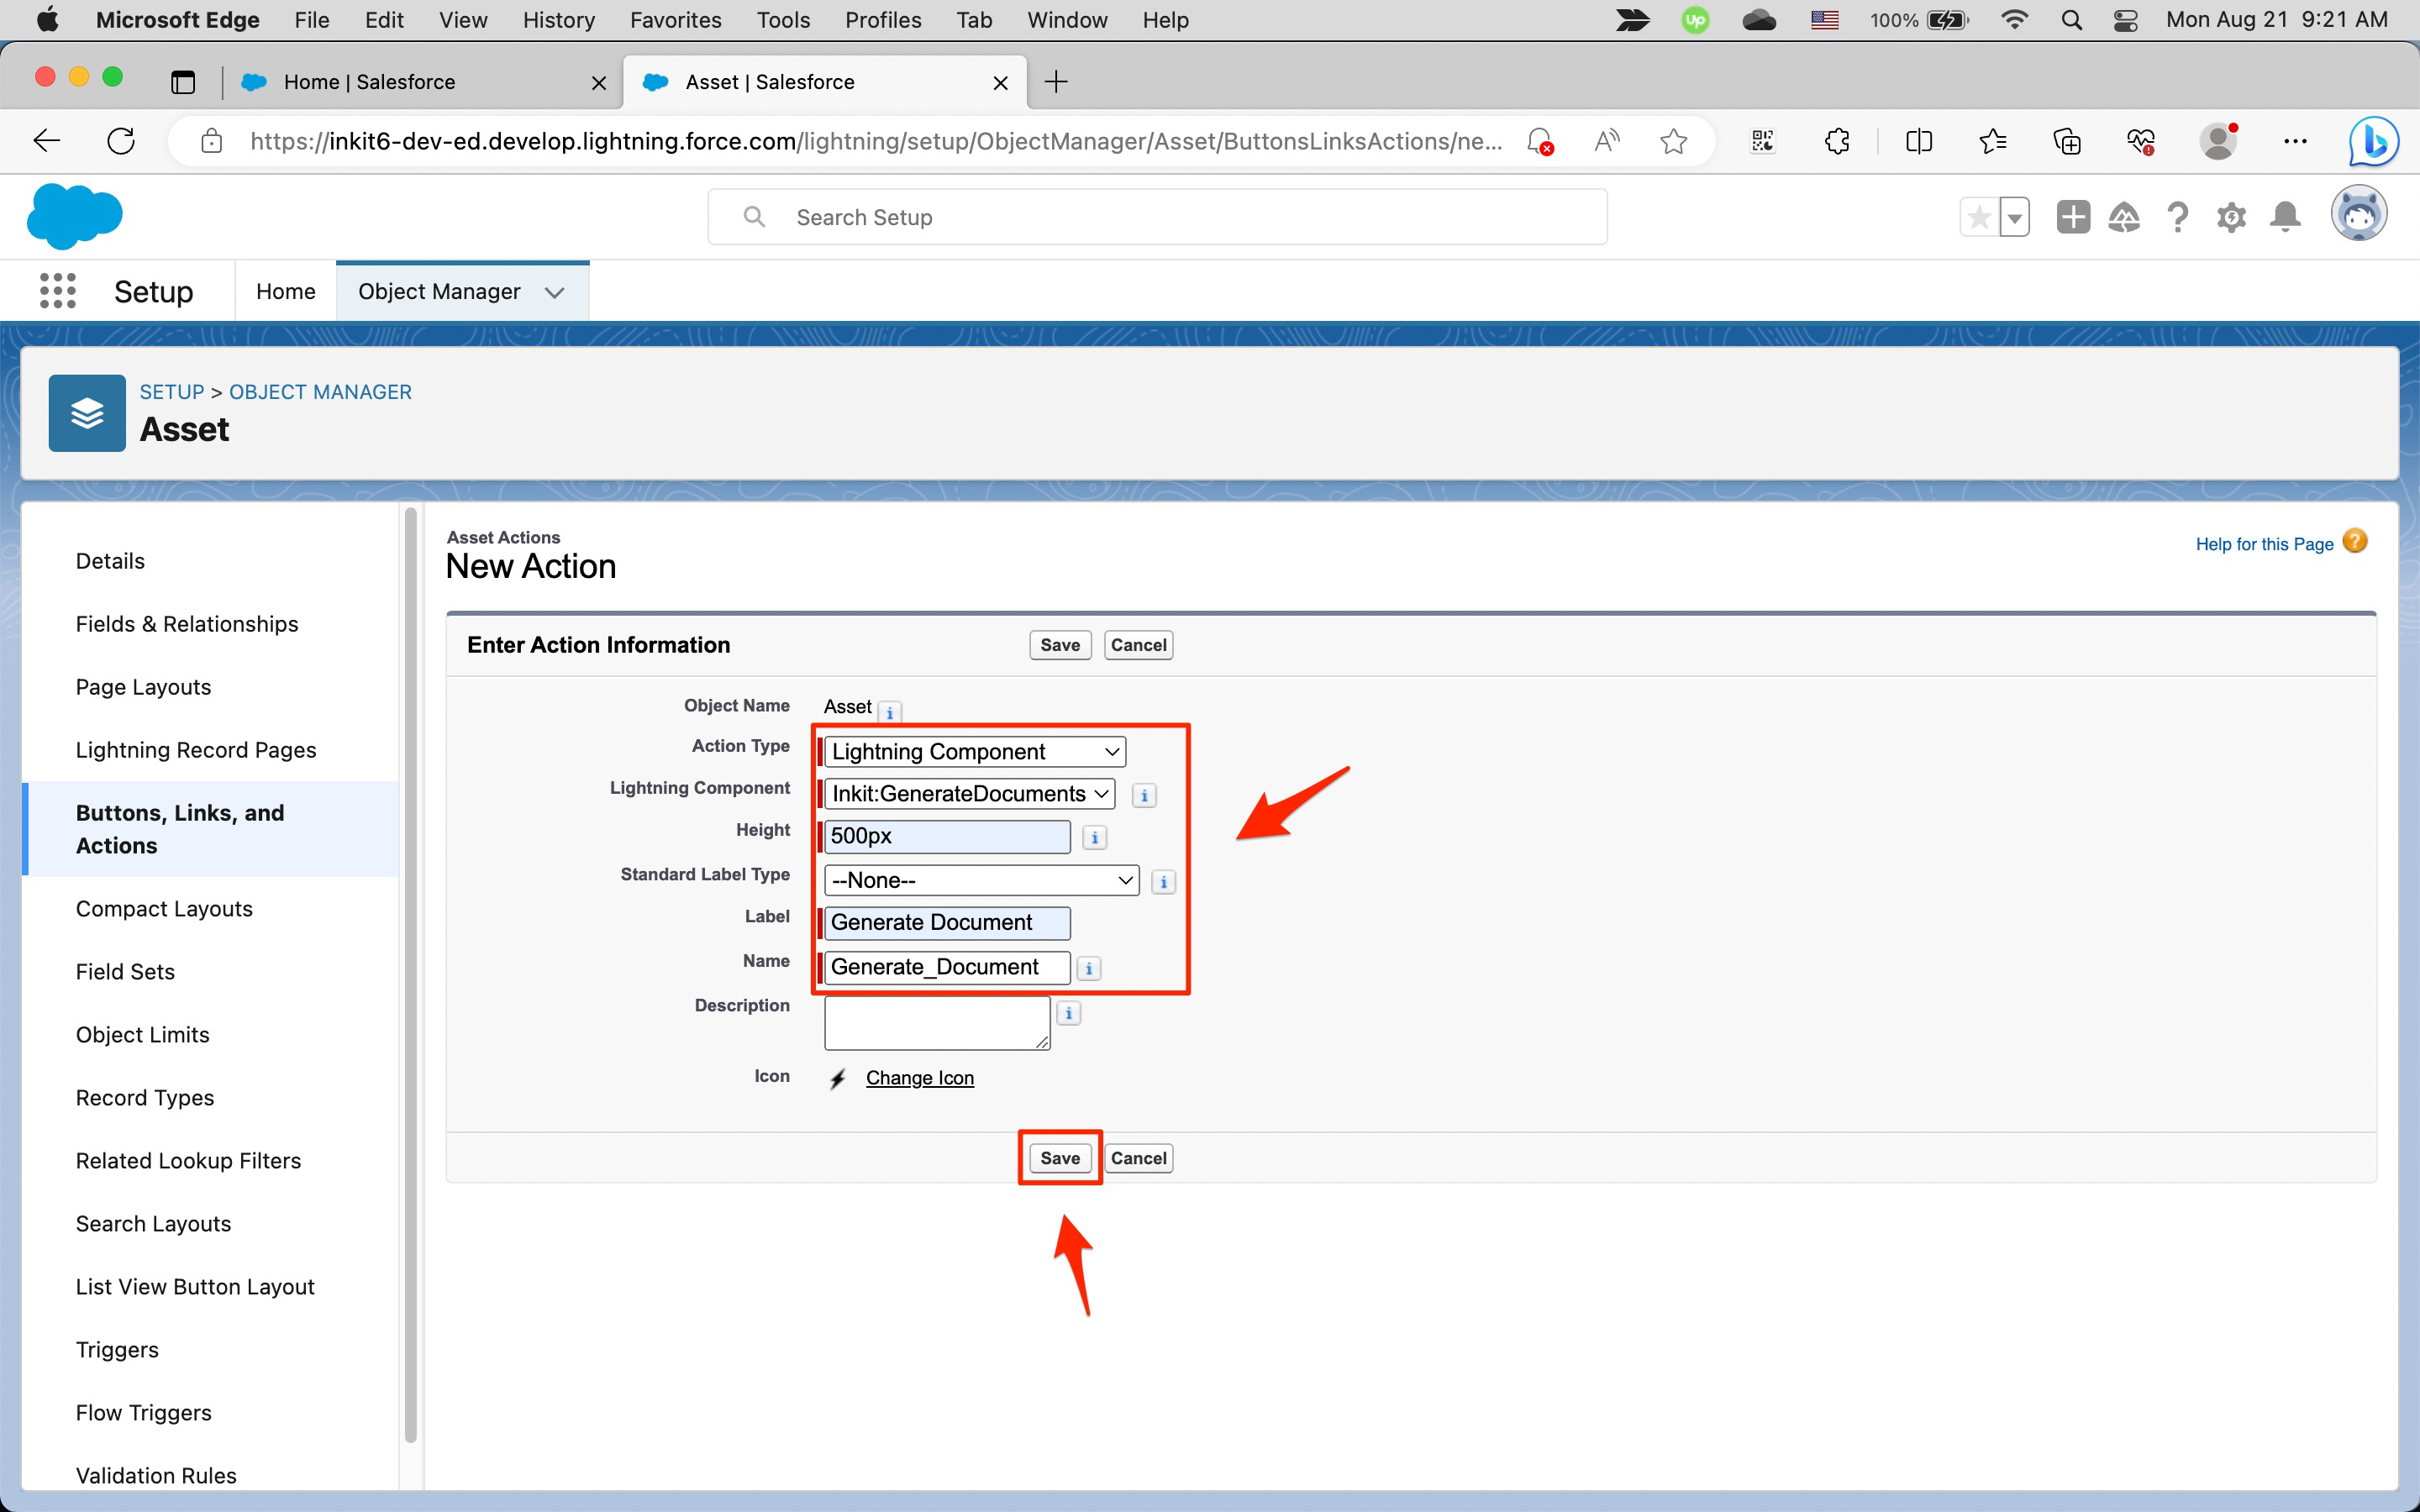
In the New Action page, select Lightning Component from the Action Type dropdown box and select Inkit: GenerateDocuments from the Lightning Component dropdown box. We also strongly recommend that you enter 500px as the Height of the button and enter Generate Document as the Label.
Then click Save.
Updated 10 months ago