Generating documents using the web app (Government)
Generating documents using the Inkit web app is a good way of generating a single document or testing a template that you created.
Generating a document from a template
To generate a document from a template using the Government version of the Inkit web app, do the following:
-
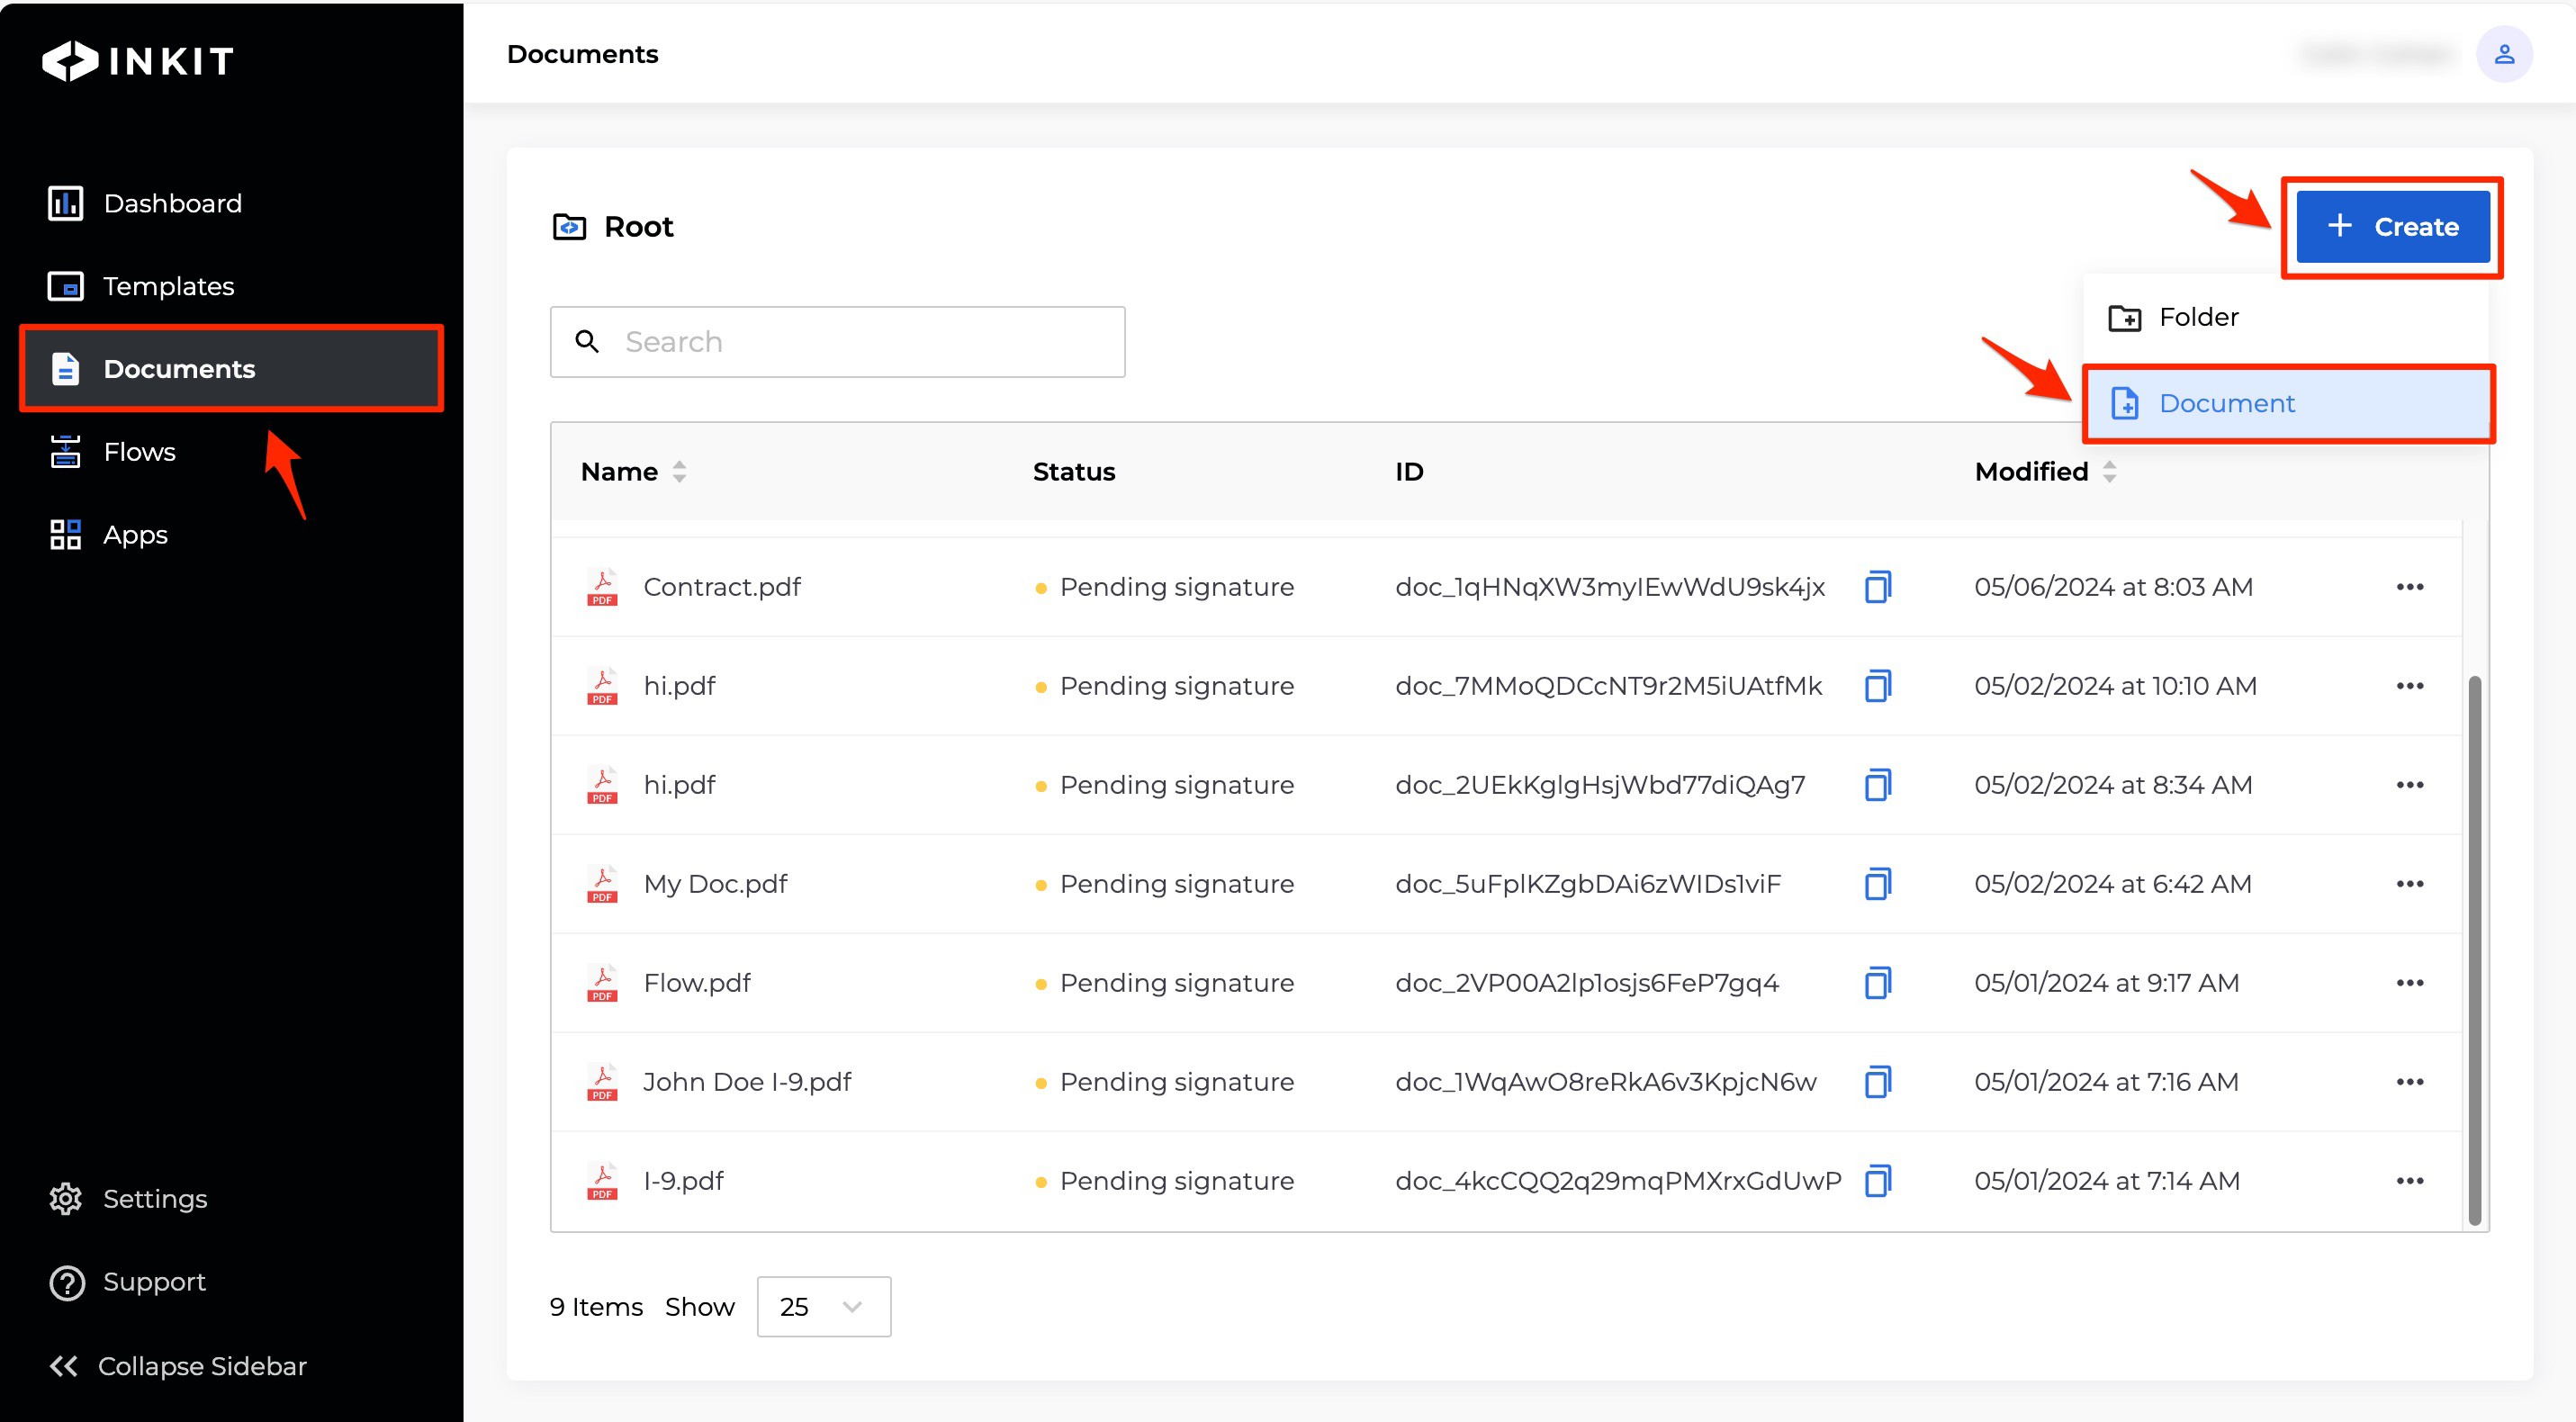
In the Inkit web app, select Documents in the left sidebar. Then click + Create and select Document from the dropdown list.
-
In the Select Template tab, select a template that you want to use to generate the document and click Continue.

-
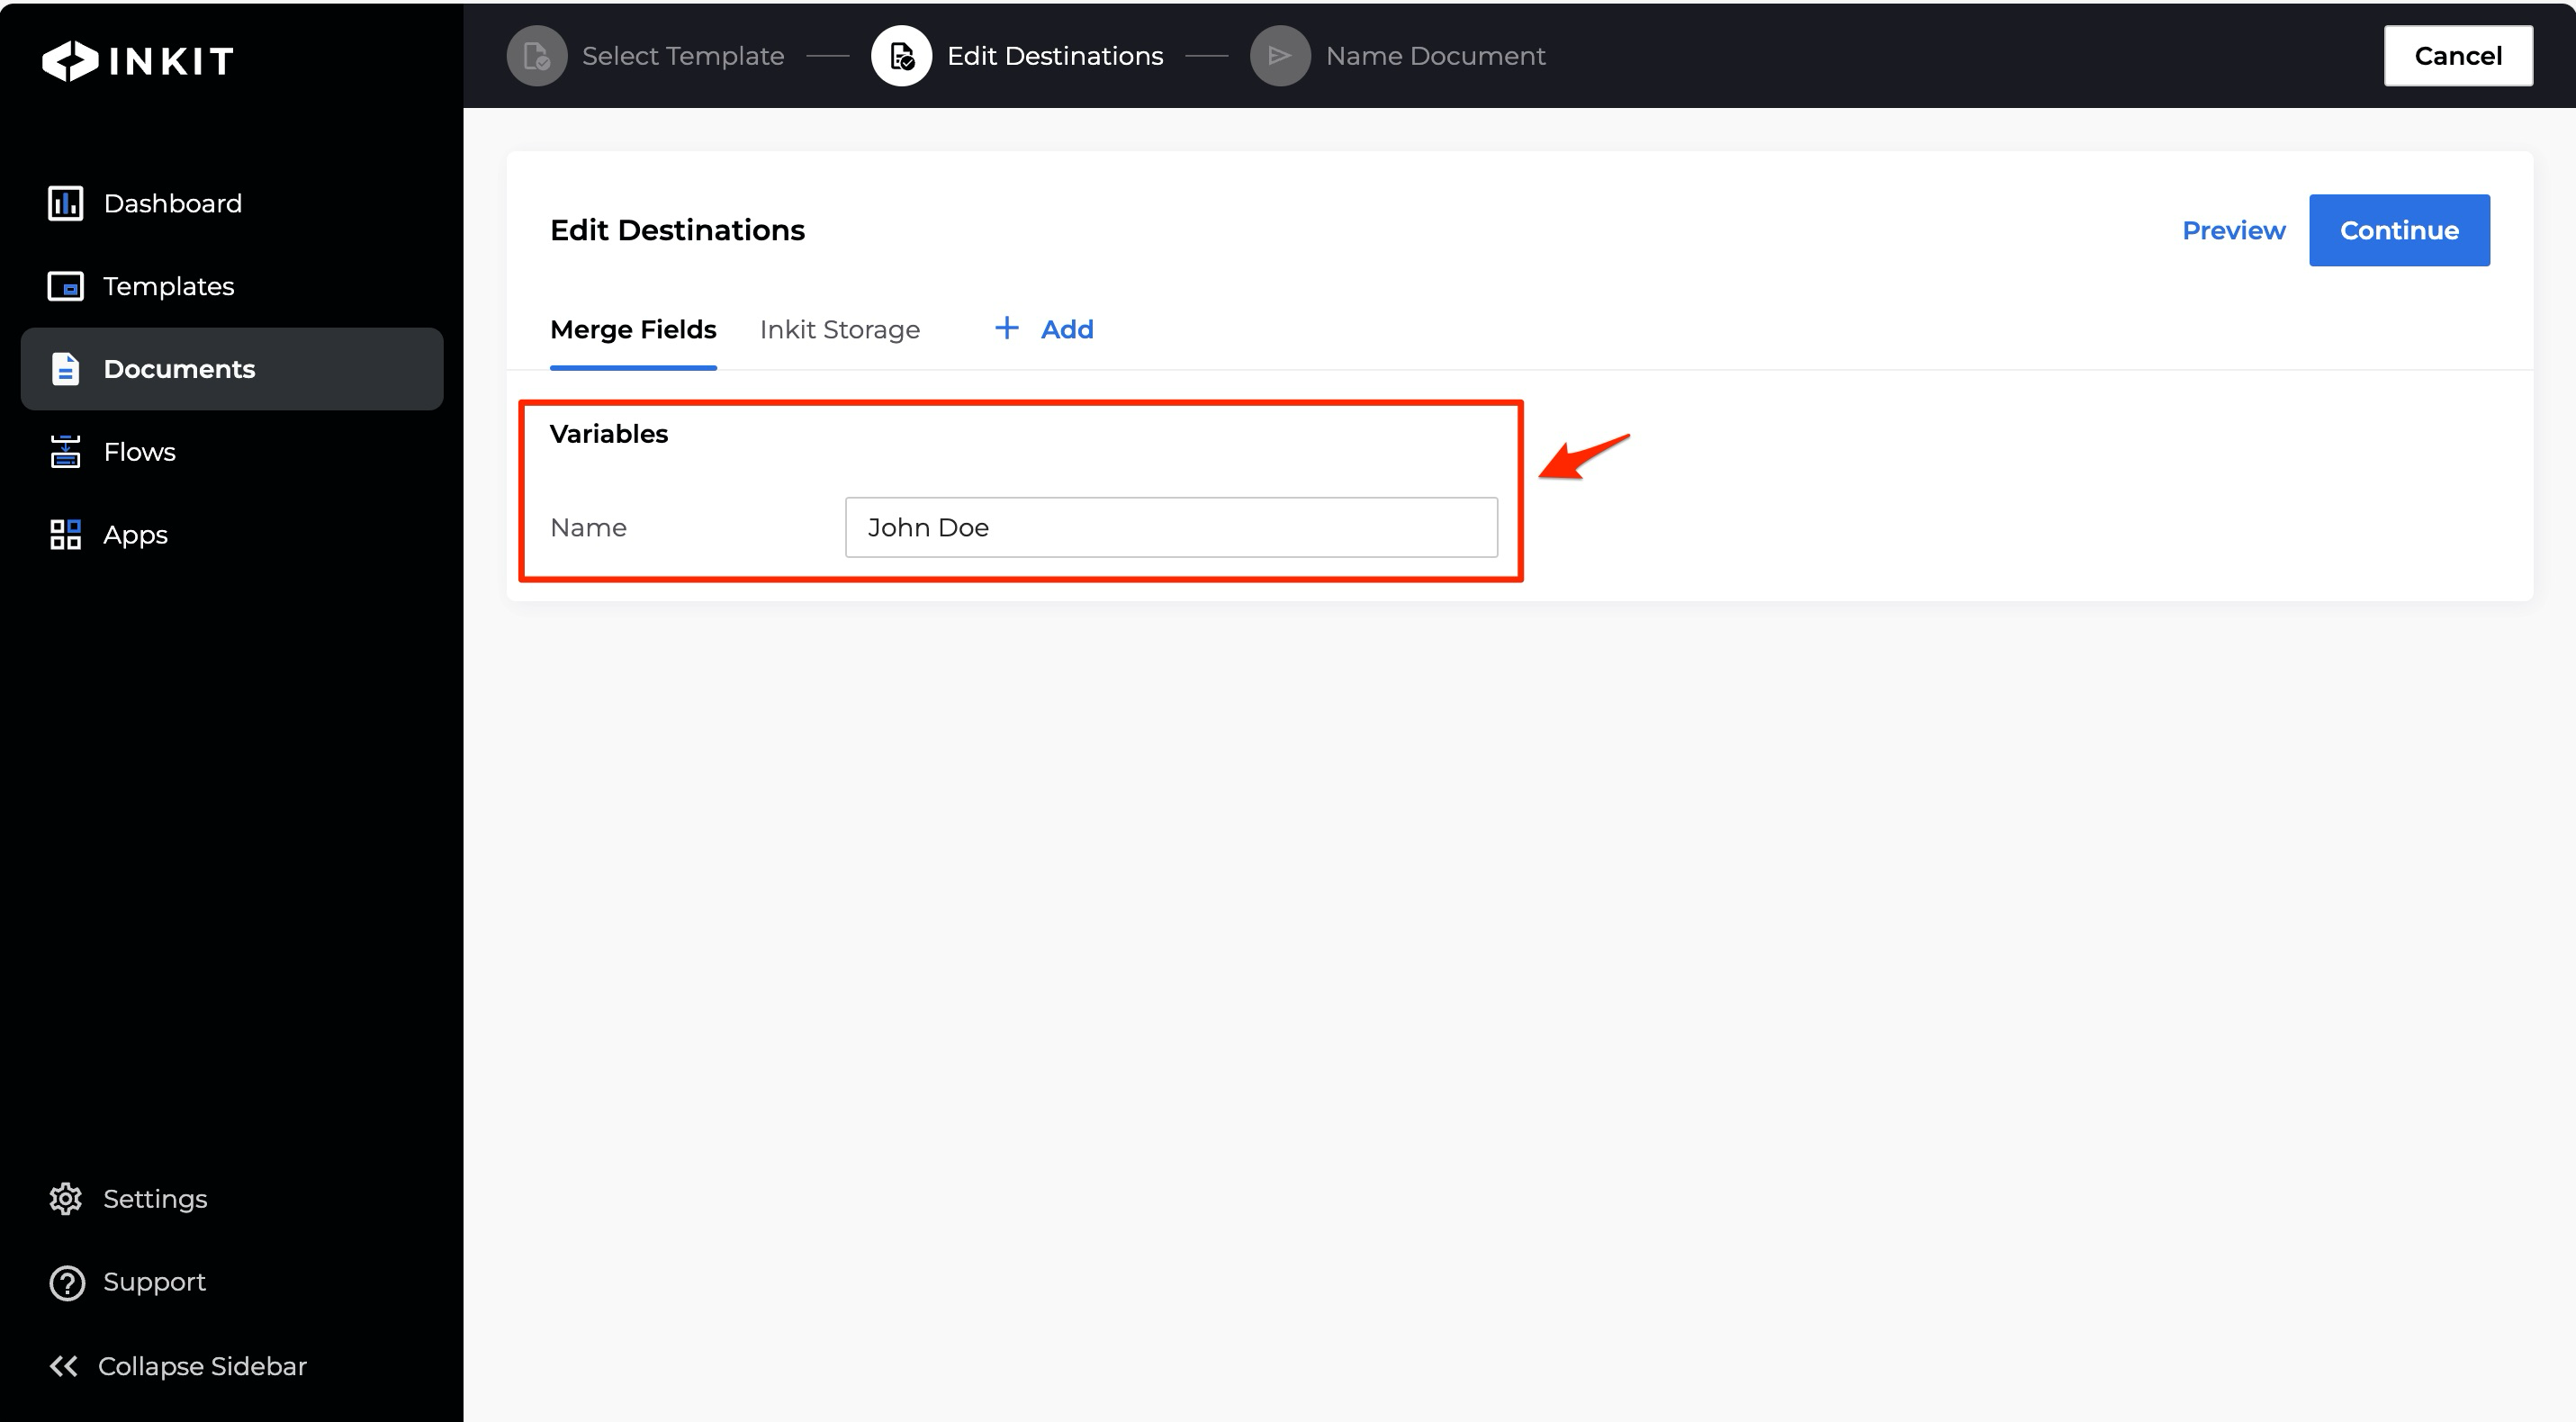
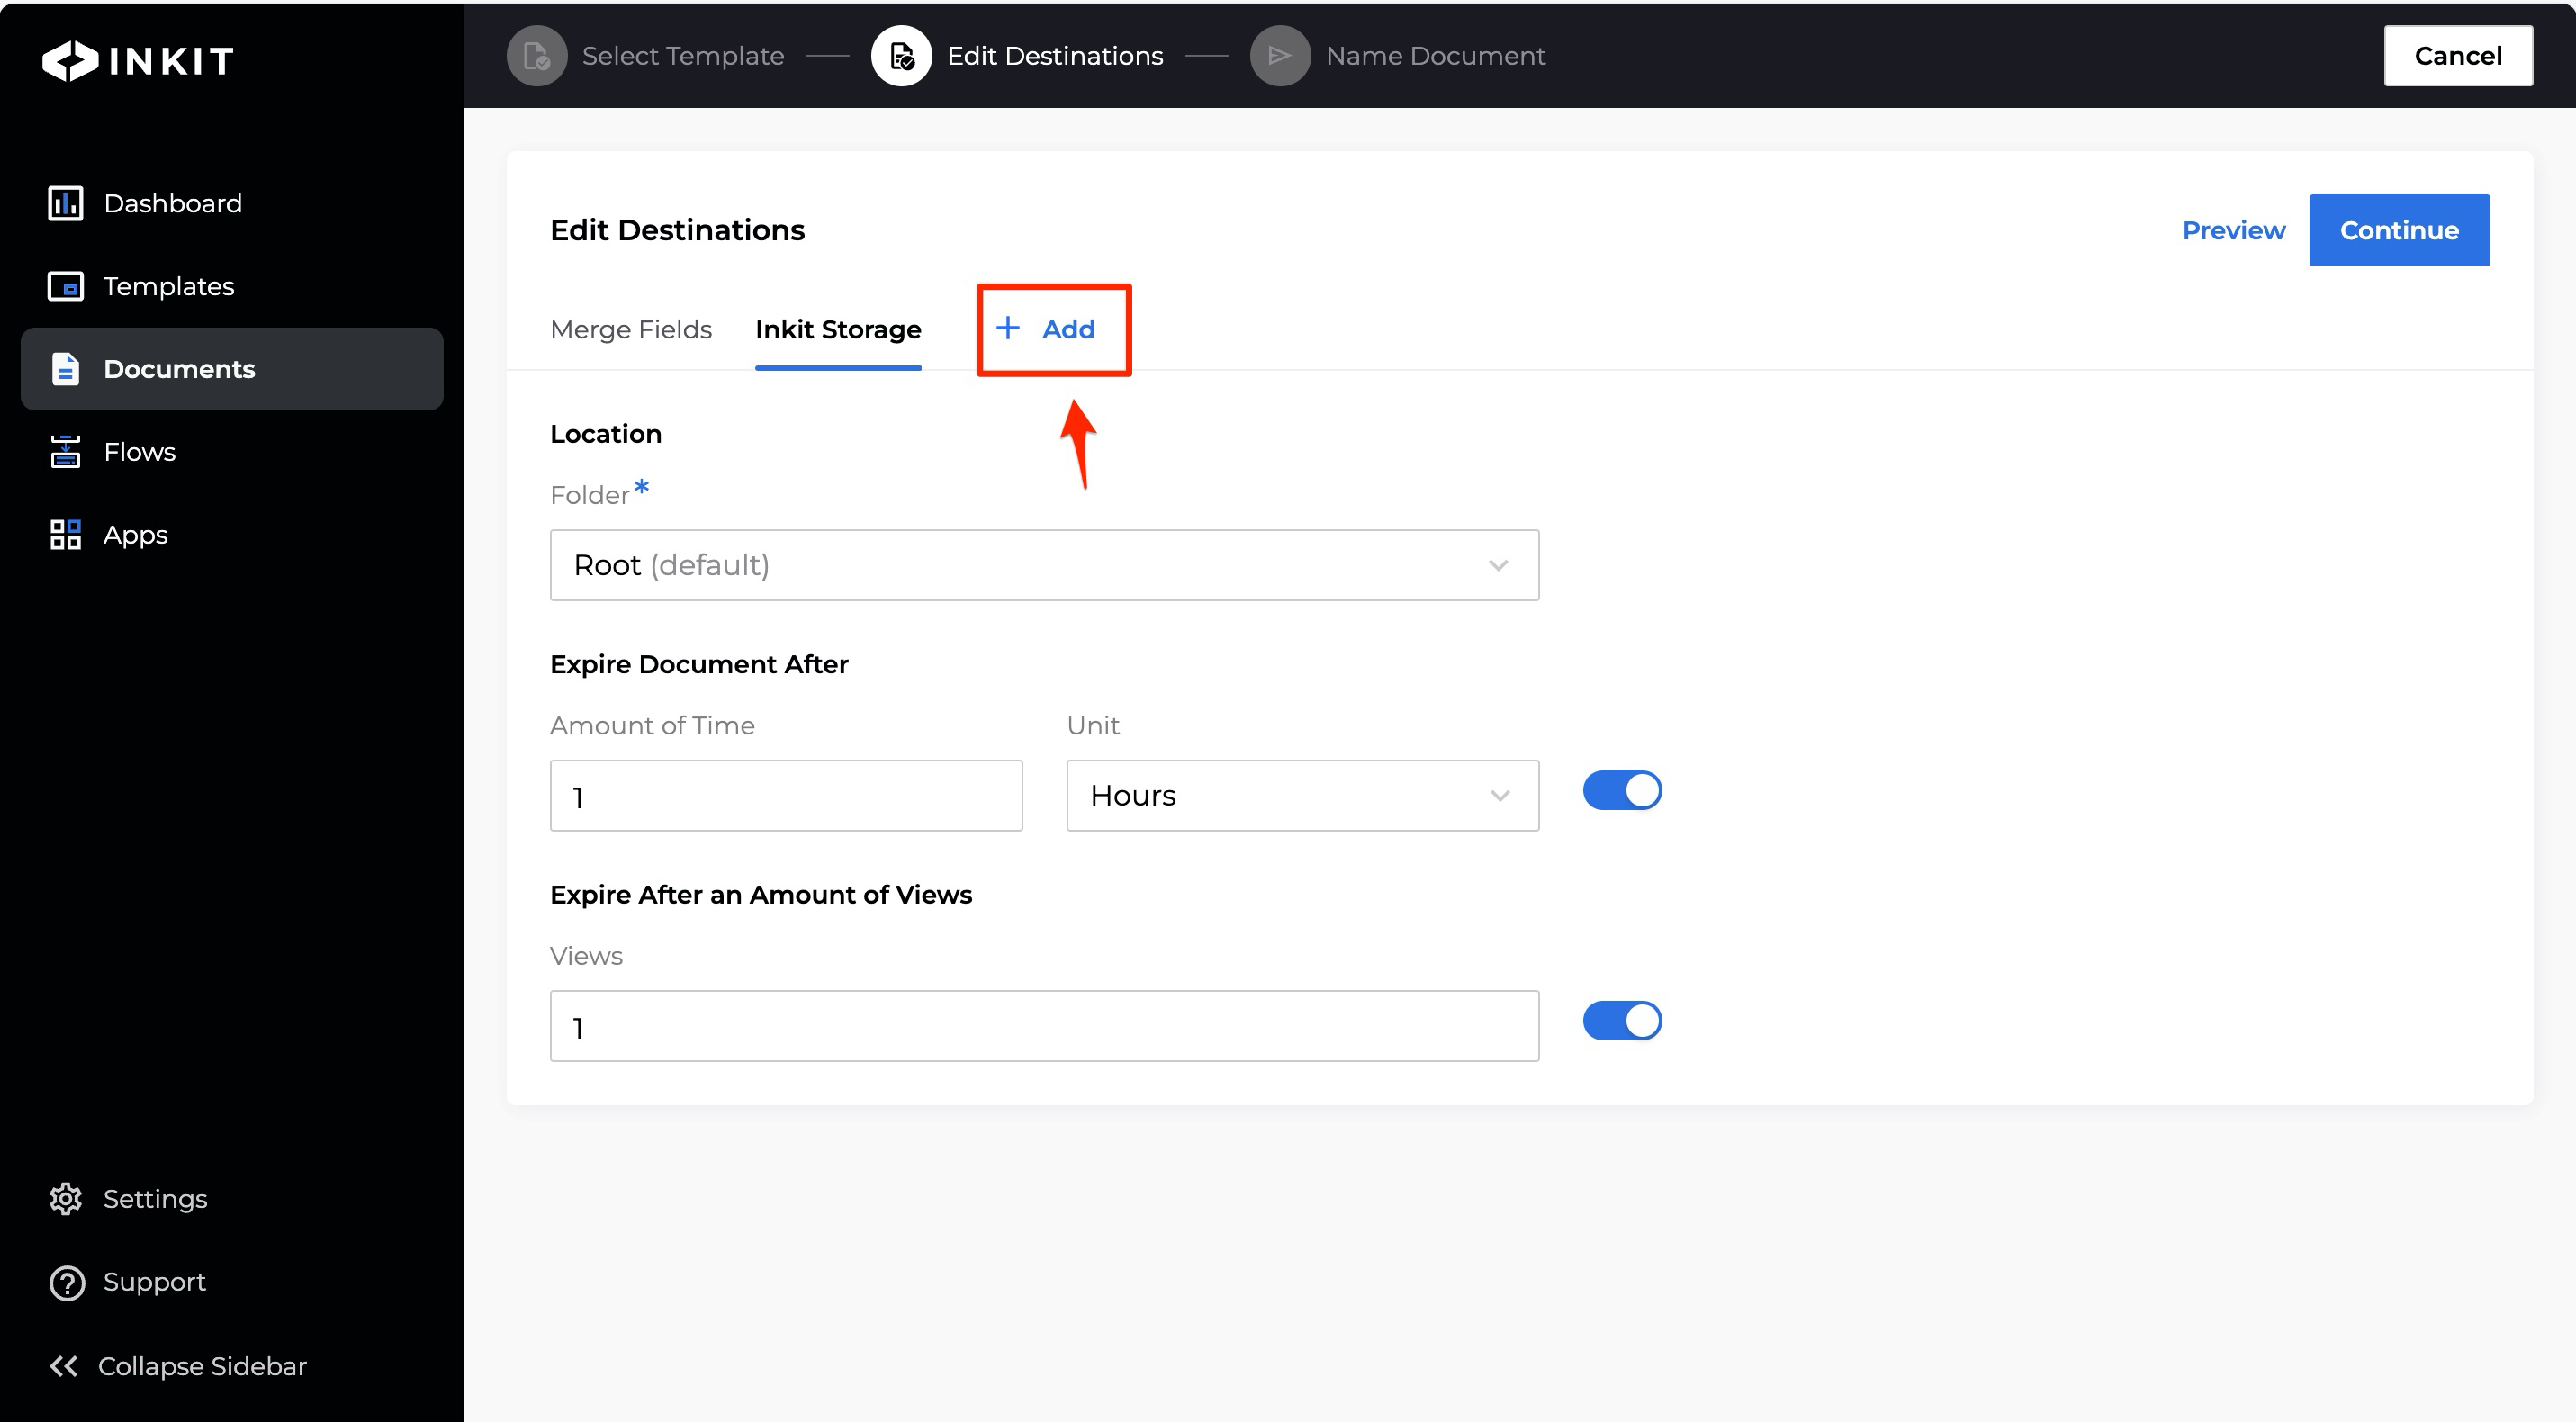
In the Edit Destinations tab, enter the data that you will inject into your document under Merge Fields.
-
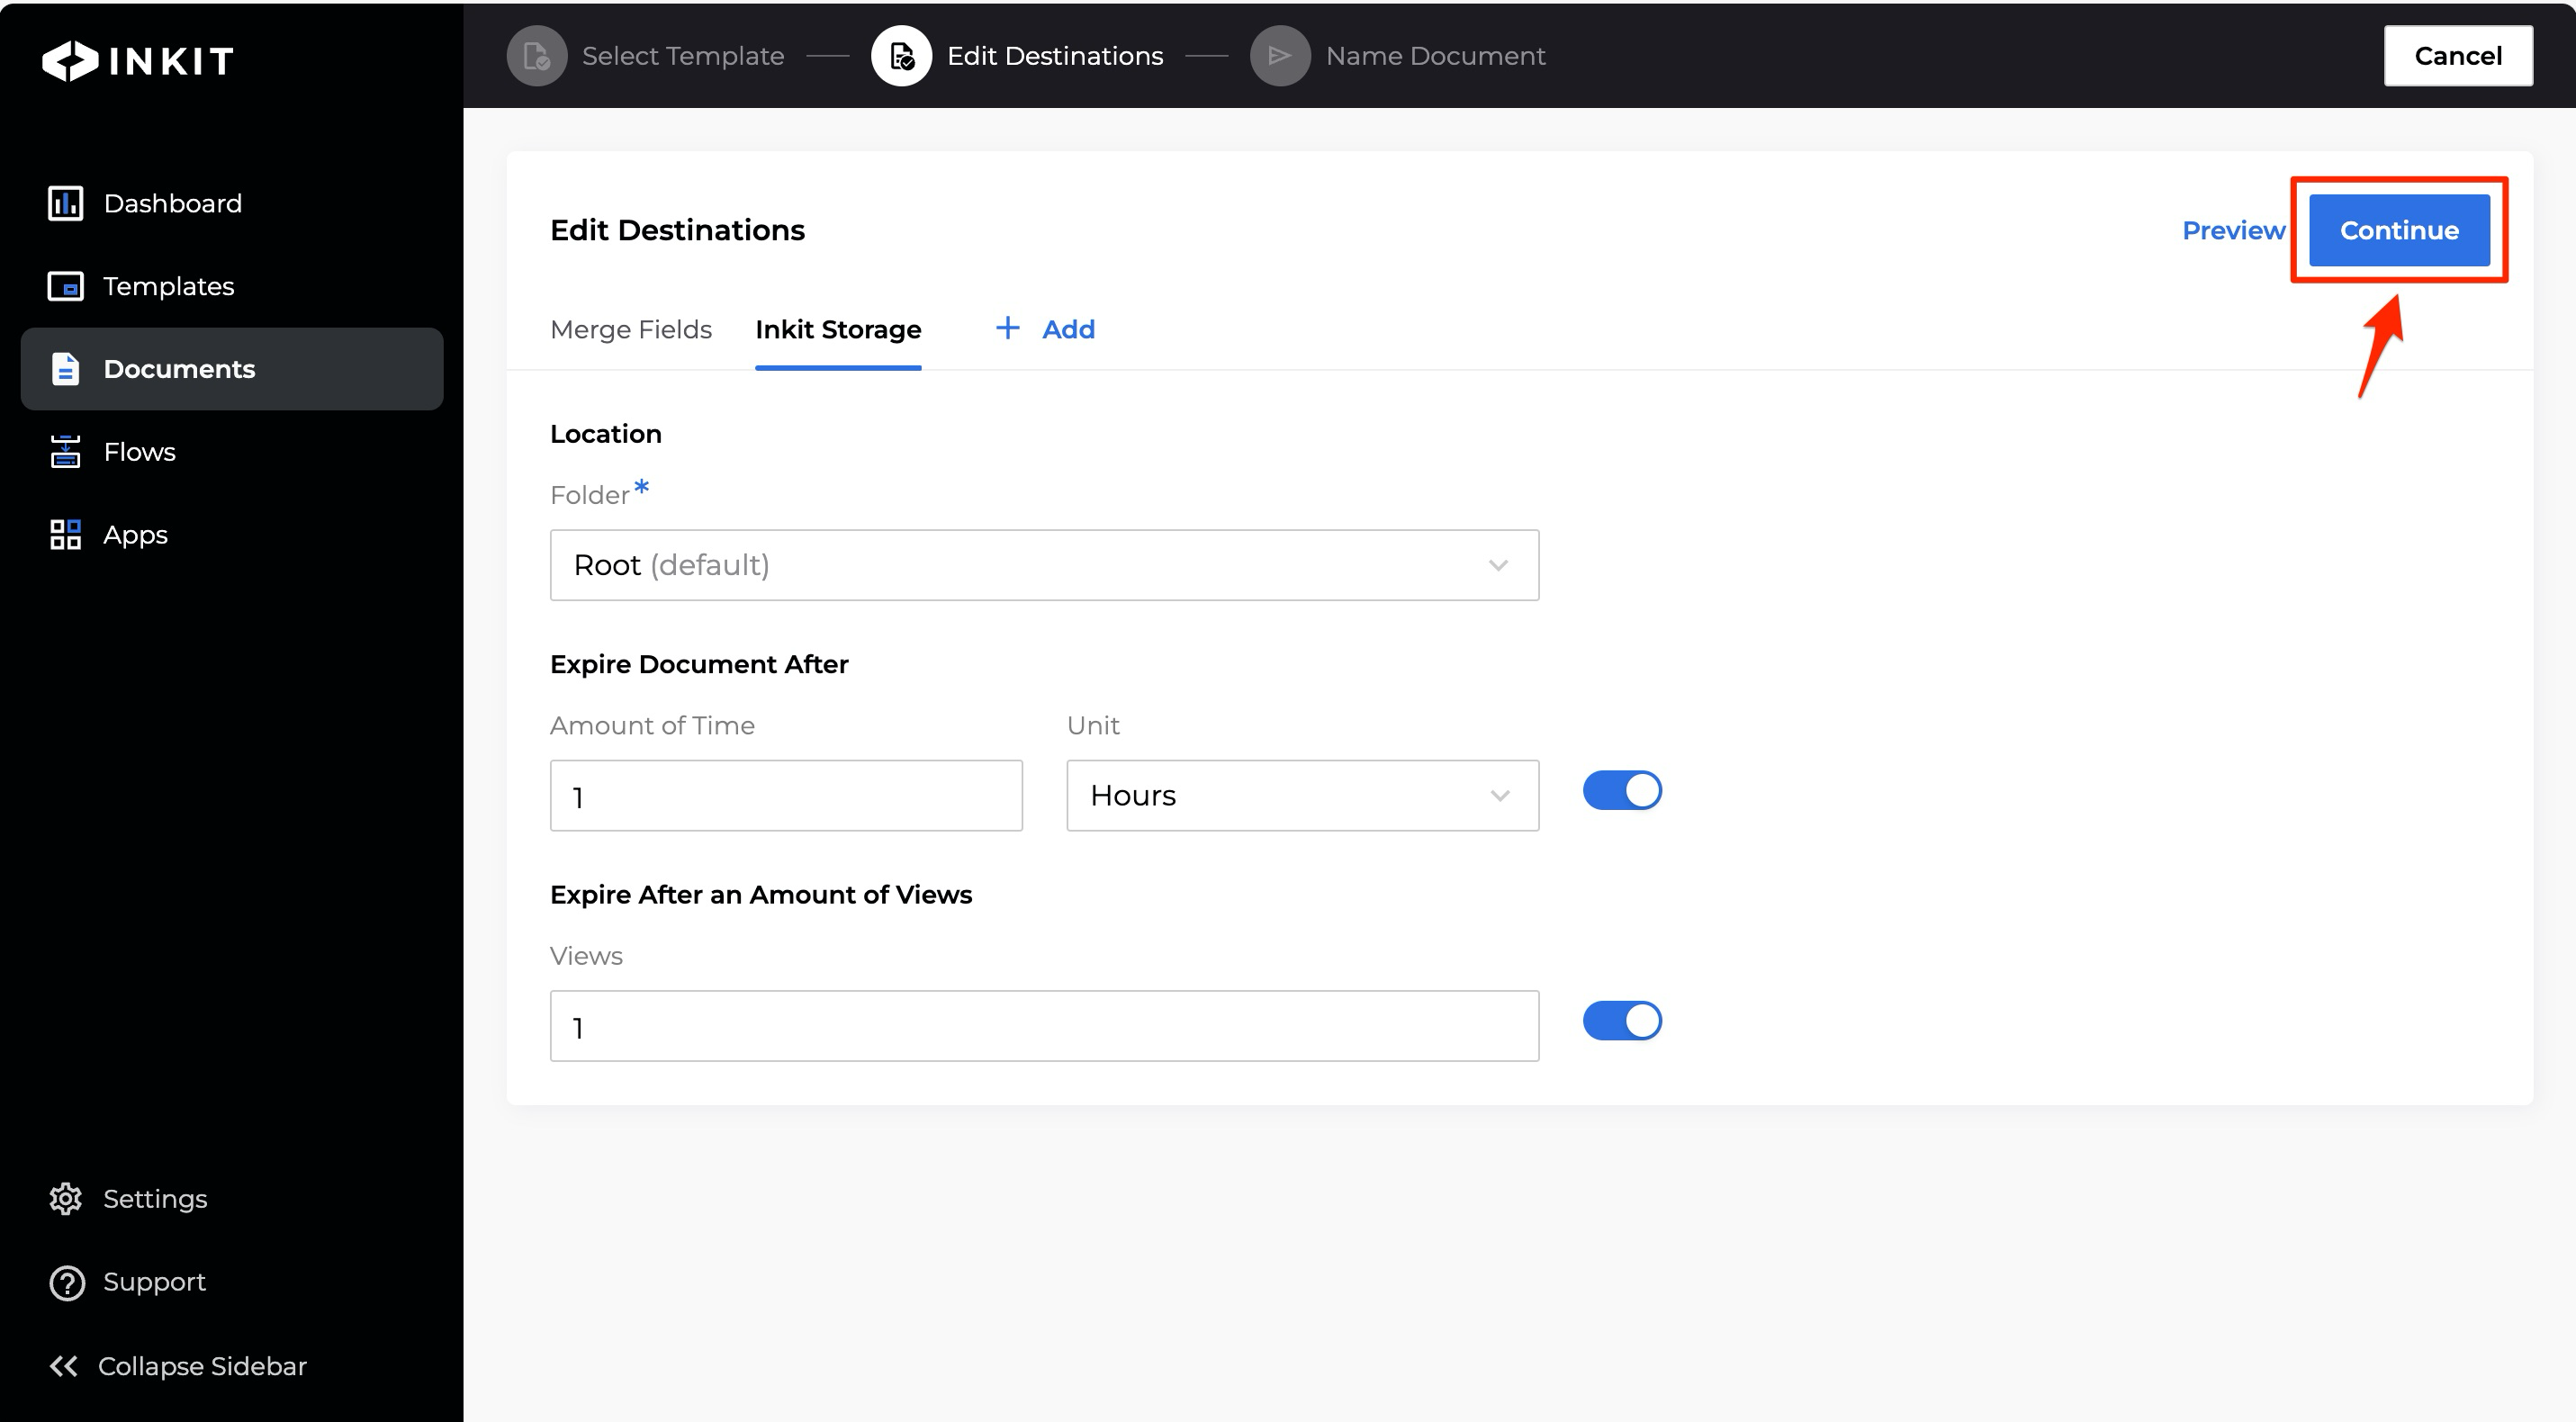
Click the Inkit Storage tab.
Select the folder where you want to generate the documents from the Folder dropdown box. The default is the root folder.
To have documents expire after certain amount of time, turn the switch beside Expire Document after on and specify the Amount of Time and the Unit of time. You can choose from the following units:
- Minutes
- Hours
- Days
- Years
To have documents expire after specific number of views, turn the switch beside Expire after an Amount of Views on and enter the number of Views before the document expires.
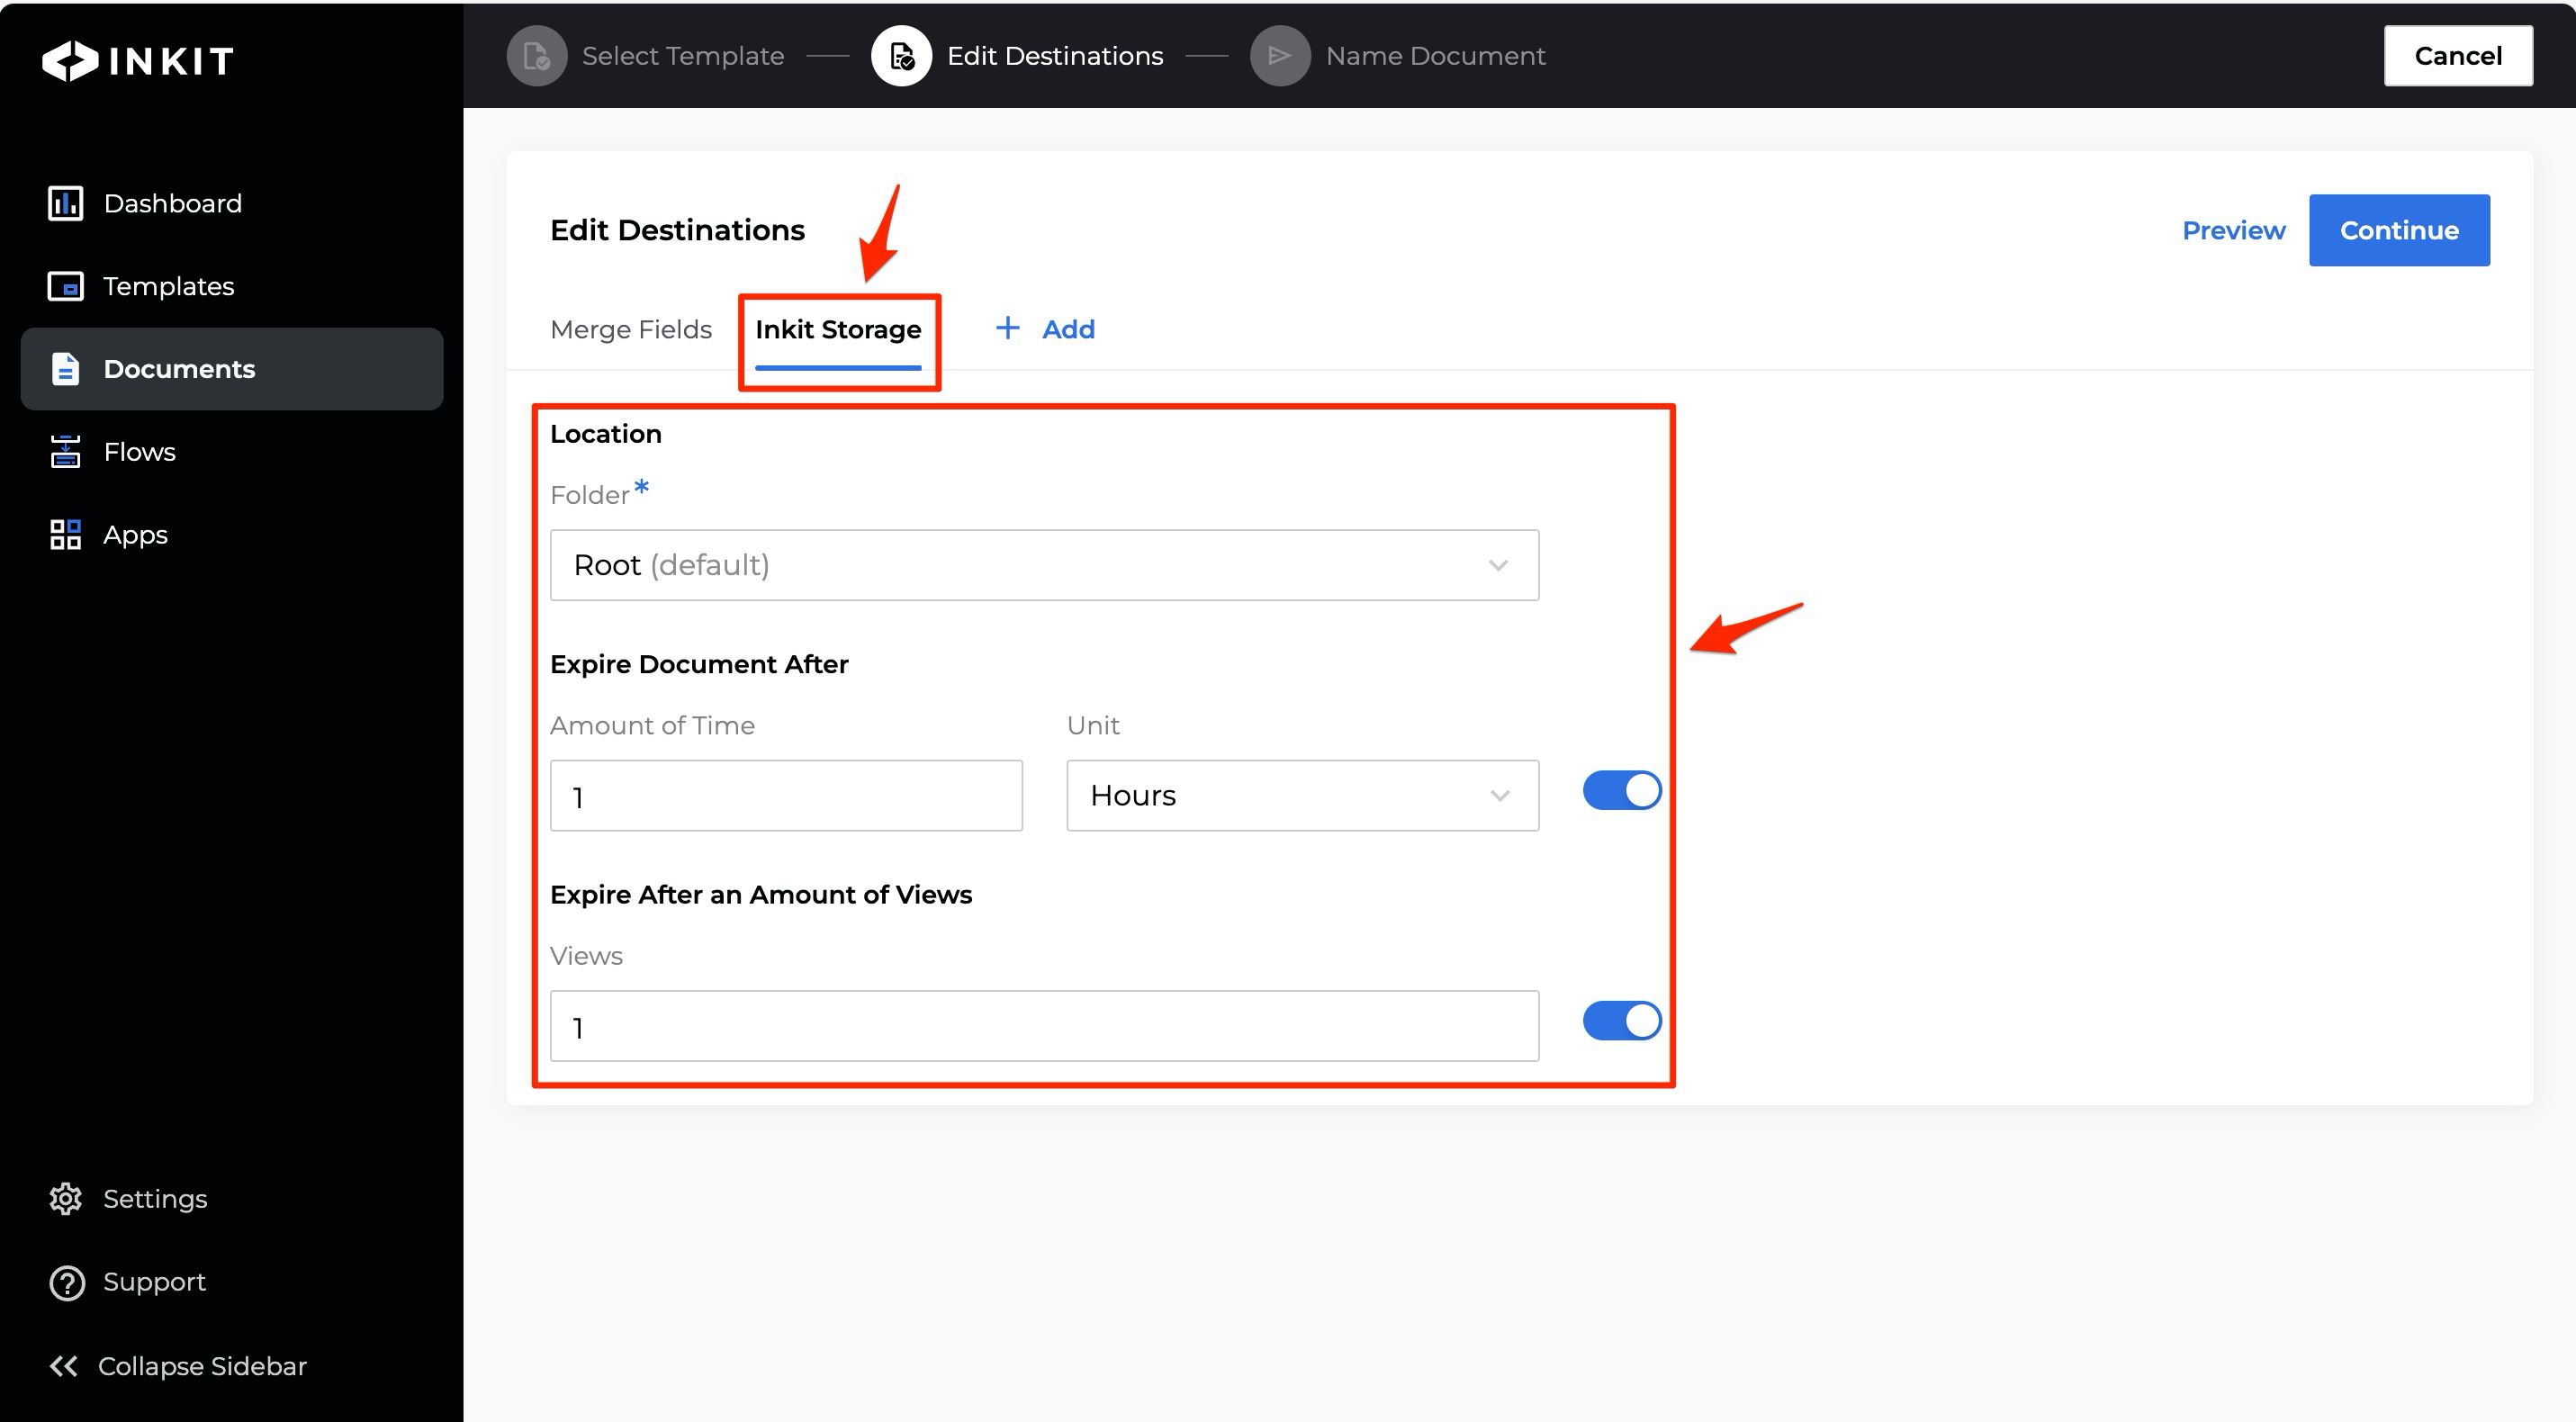
Note: You can apply both expiration options at the same time. Whichever option that happens first will trigger the expiration.
-
Optionally add additional destinations to the document.
-
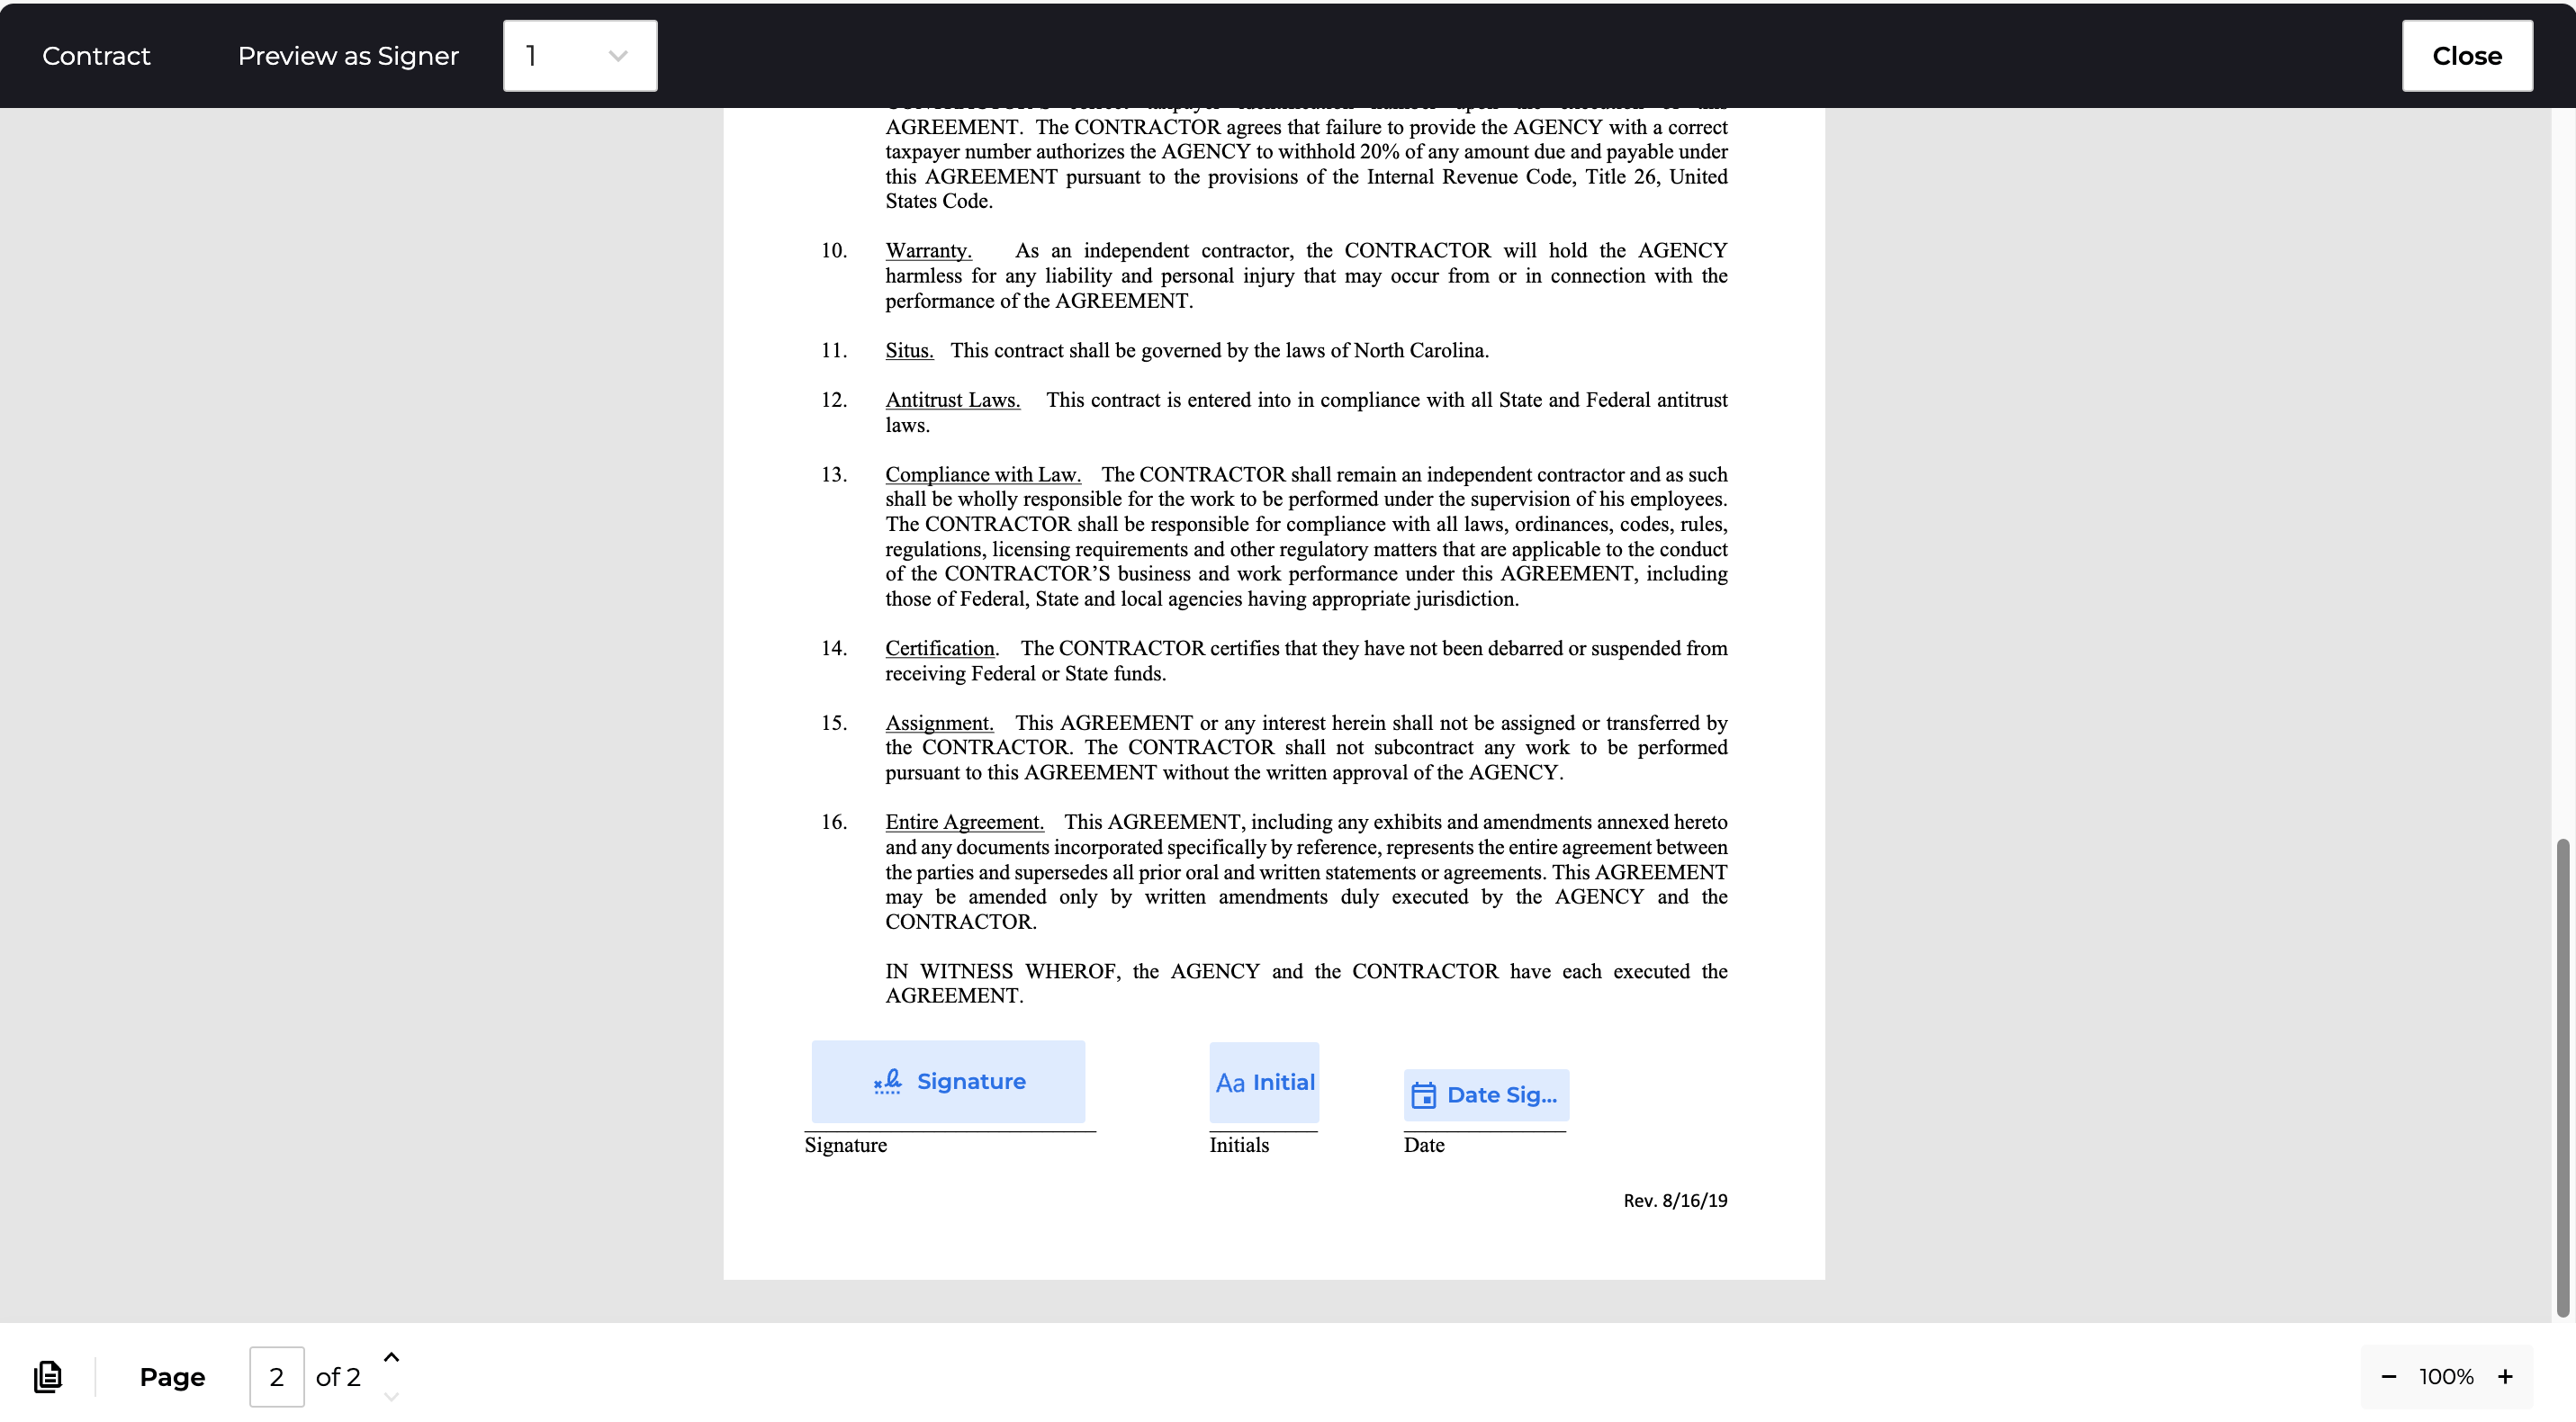
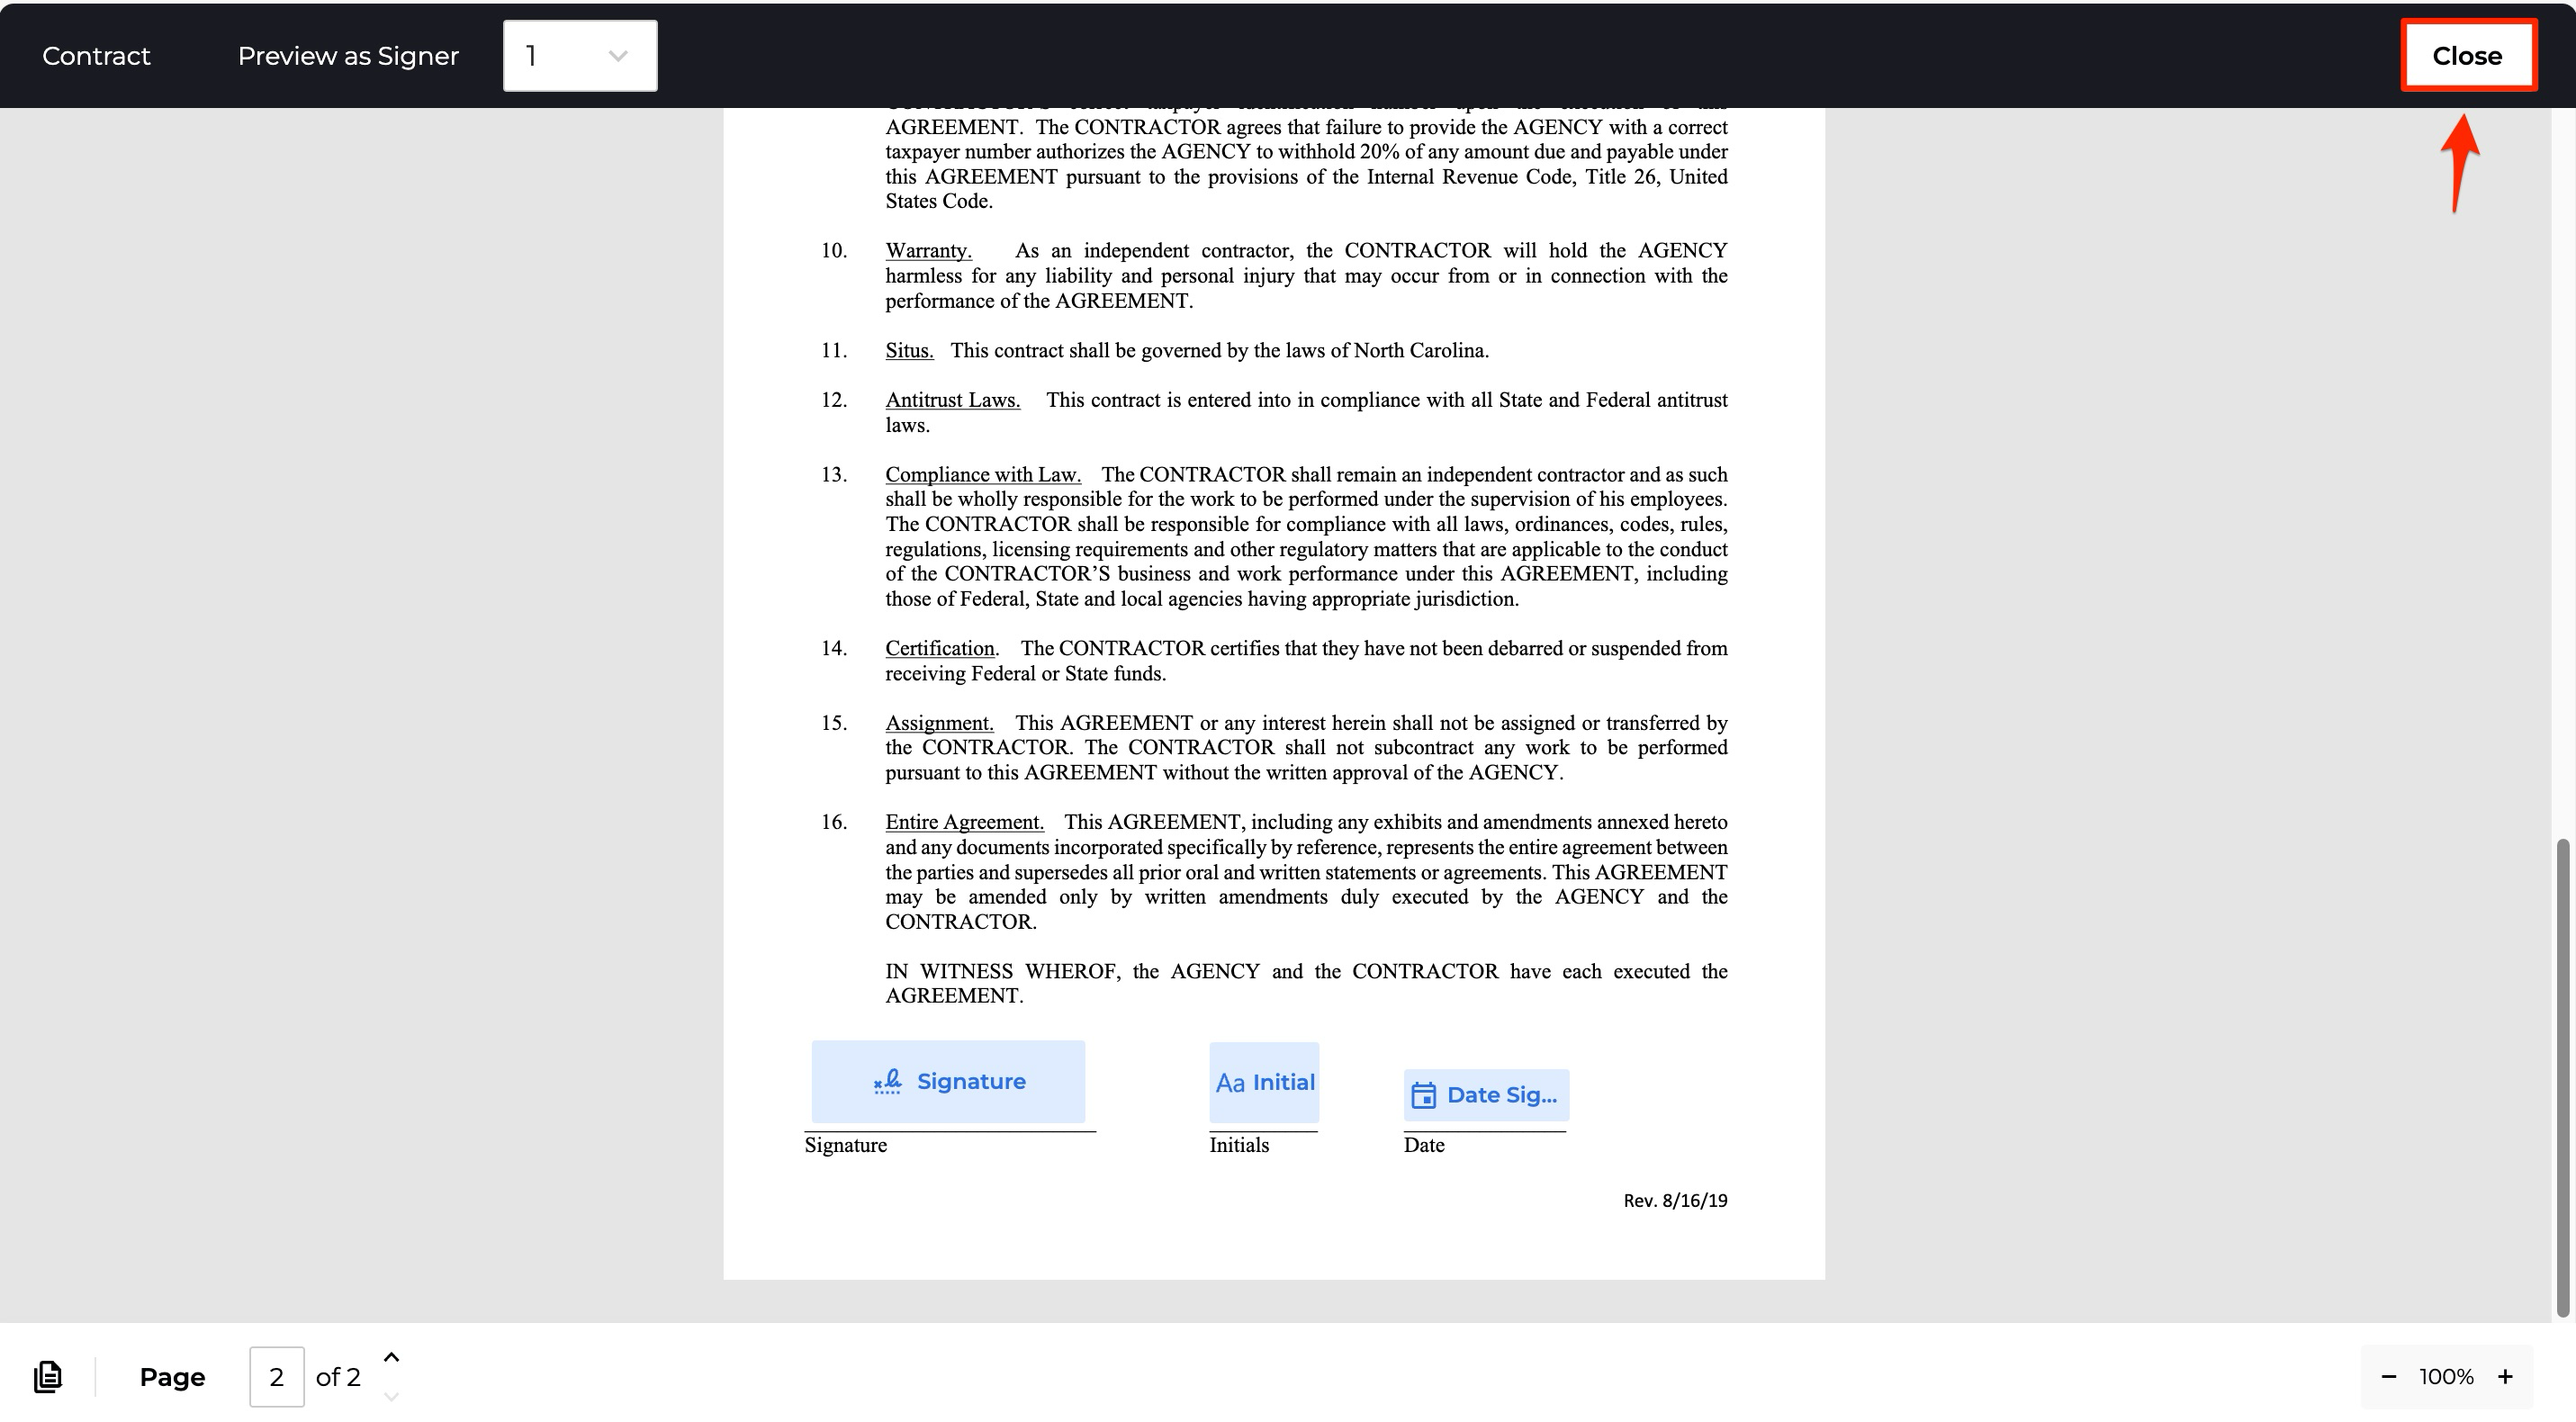
Optionally preview the document by clicking Preview.
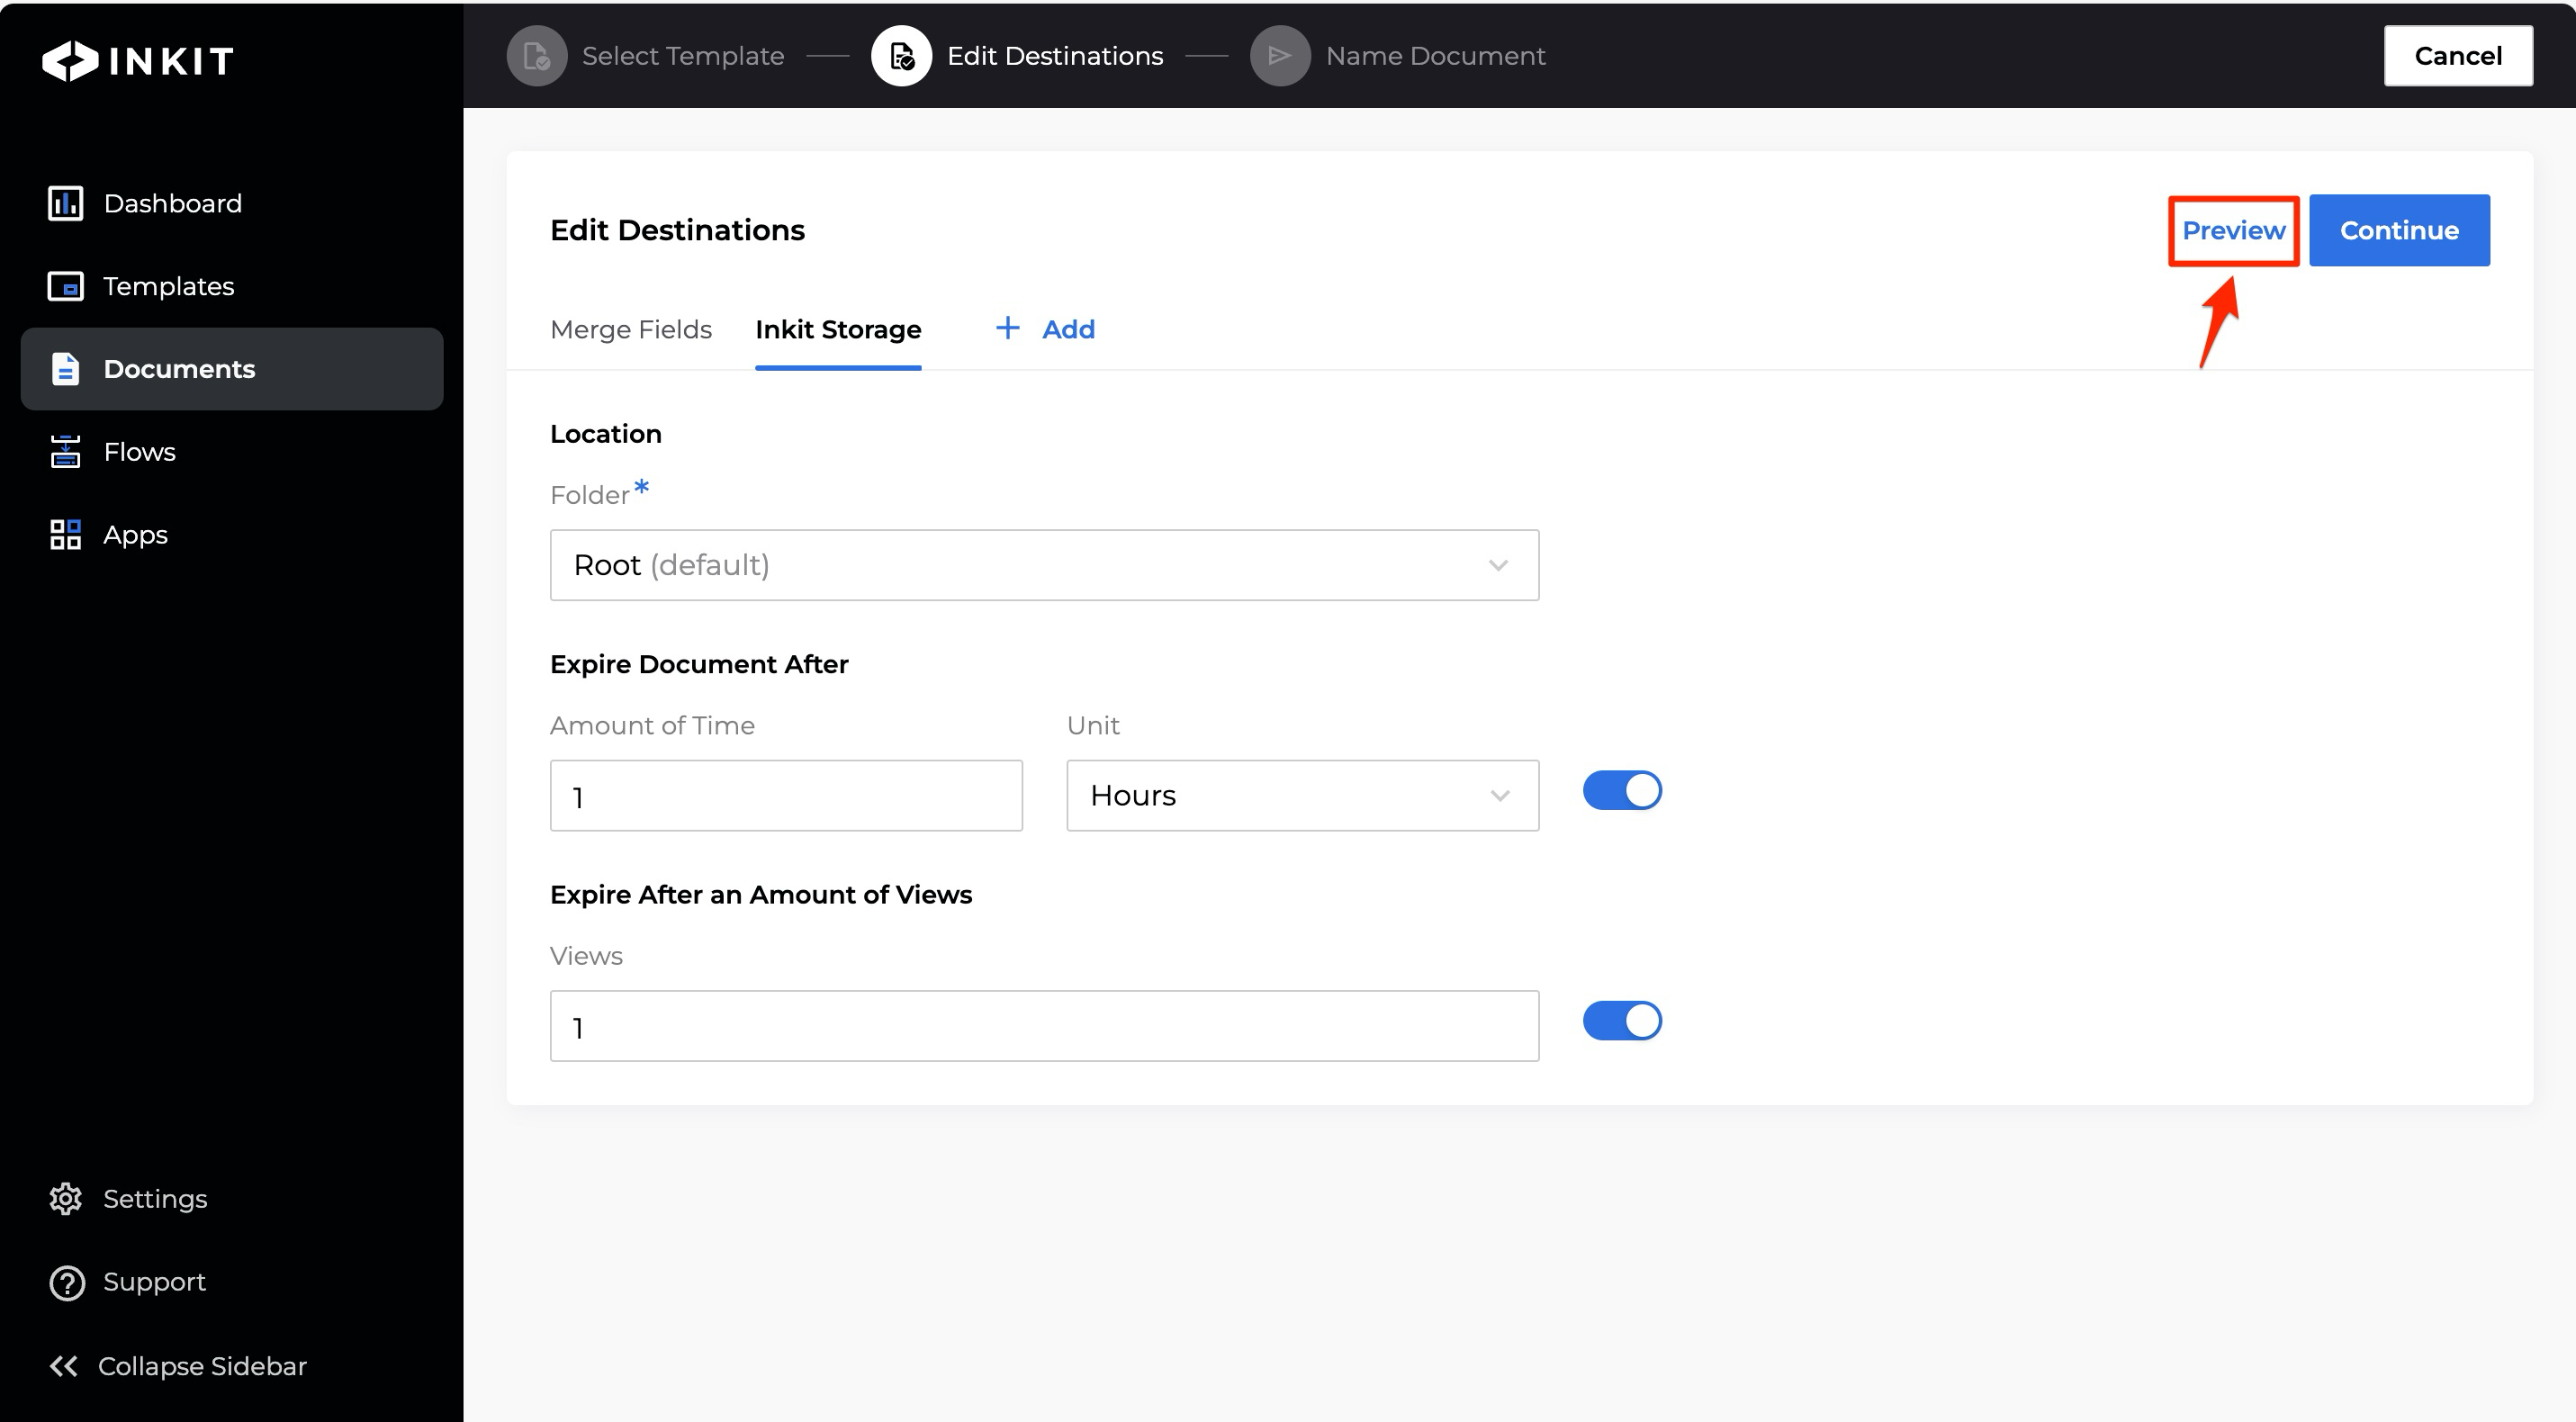
The Preview window will display.
To close the Preview window, click Close.
-
Click Continue.
-
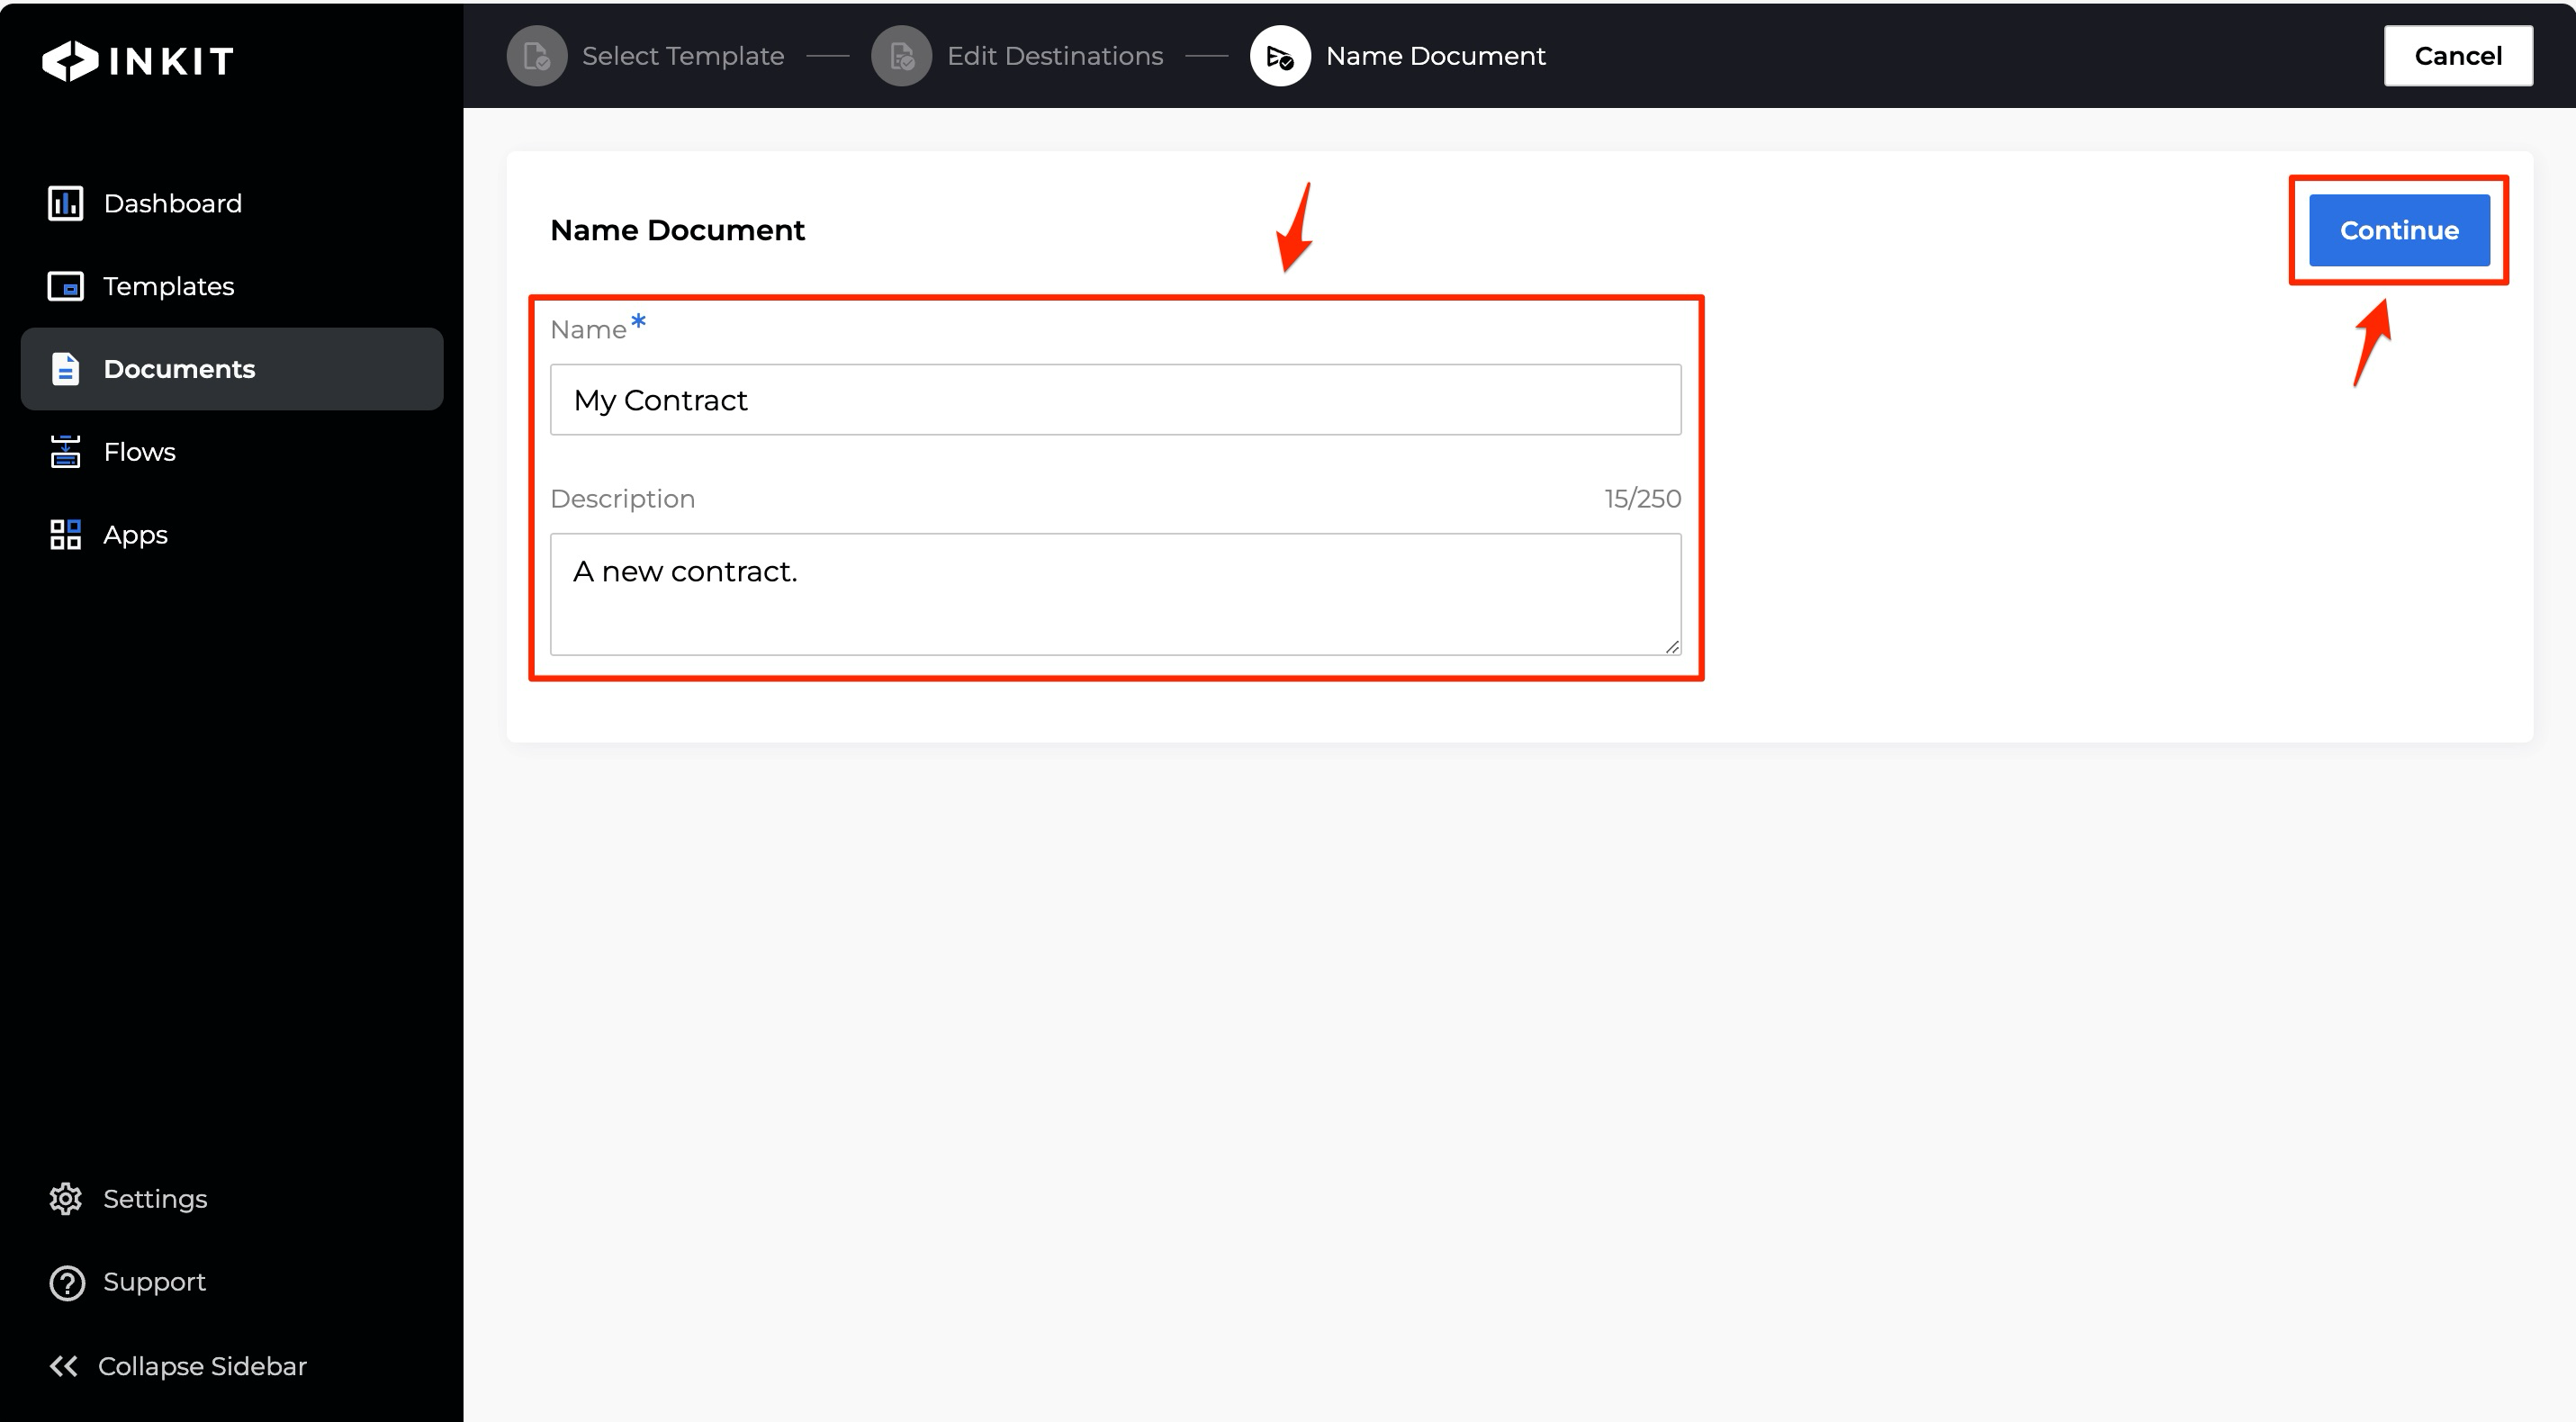
In the Name Document tab, enter a Name of the document and an optional Description and click Continue.
The document job will then enter the Inkit queue. Wait a few seconds for it to complete and refresh the page.
-
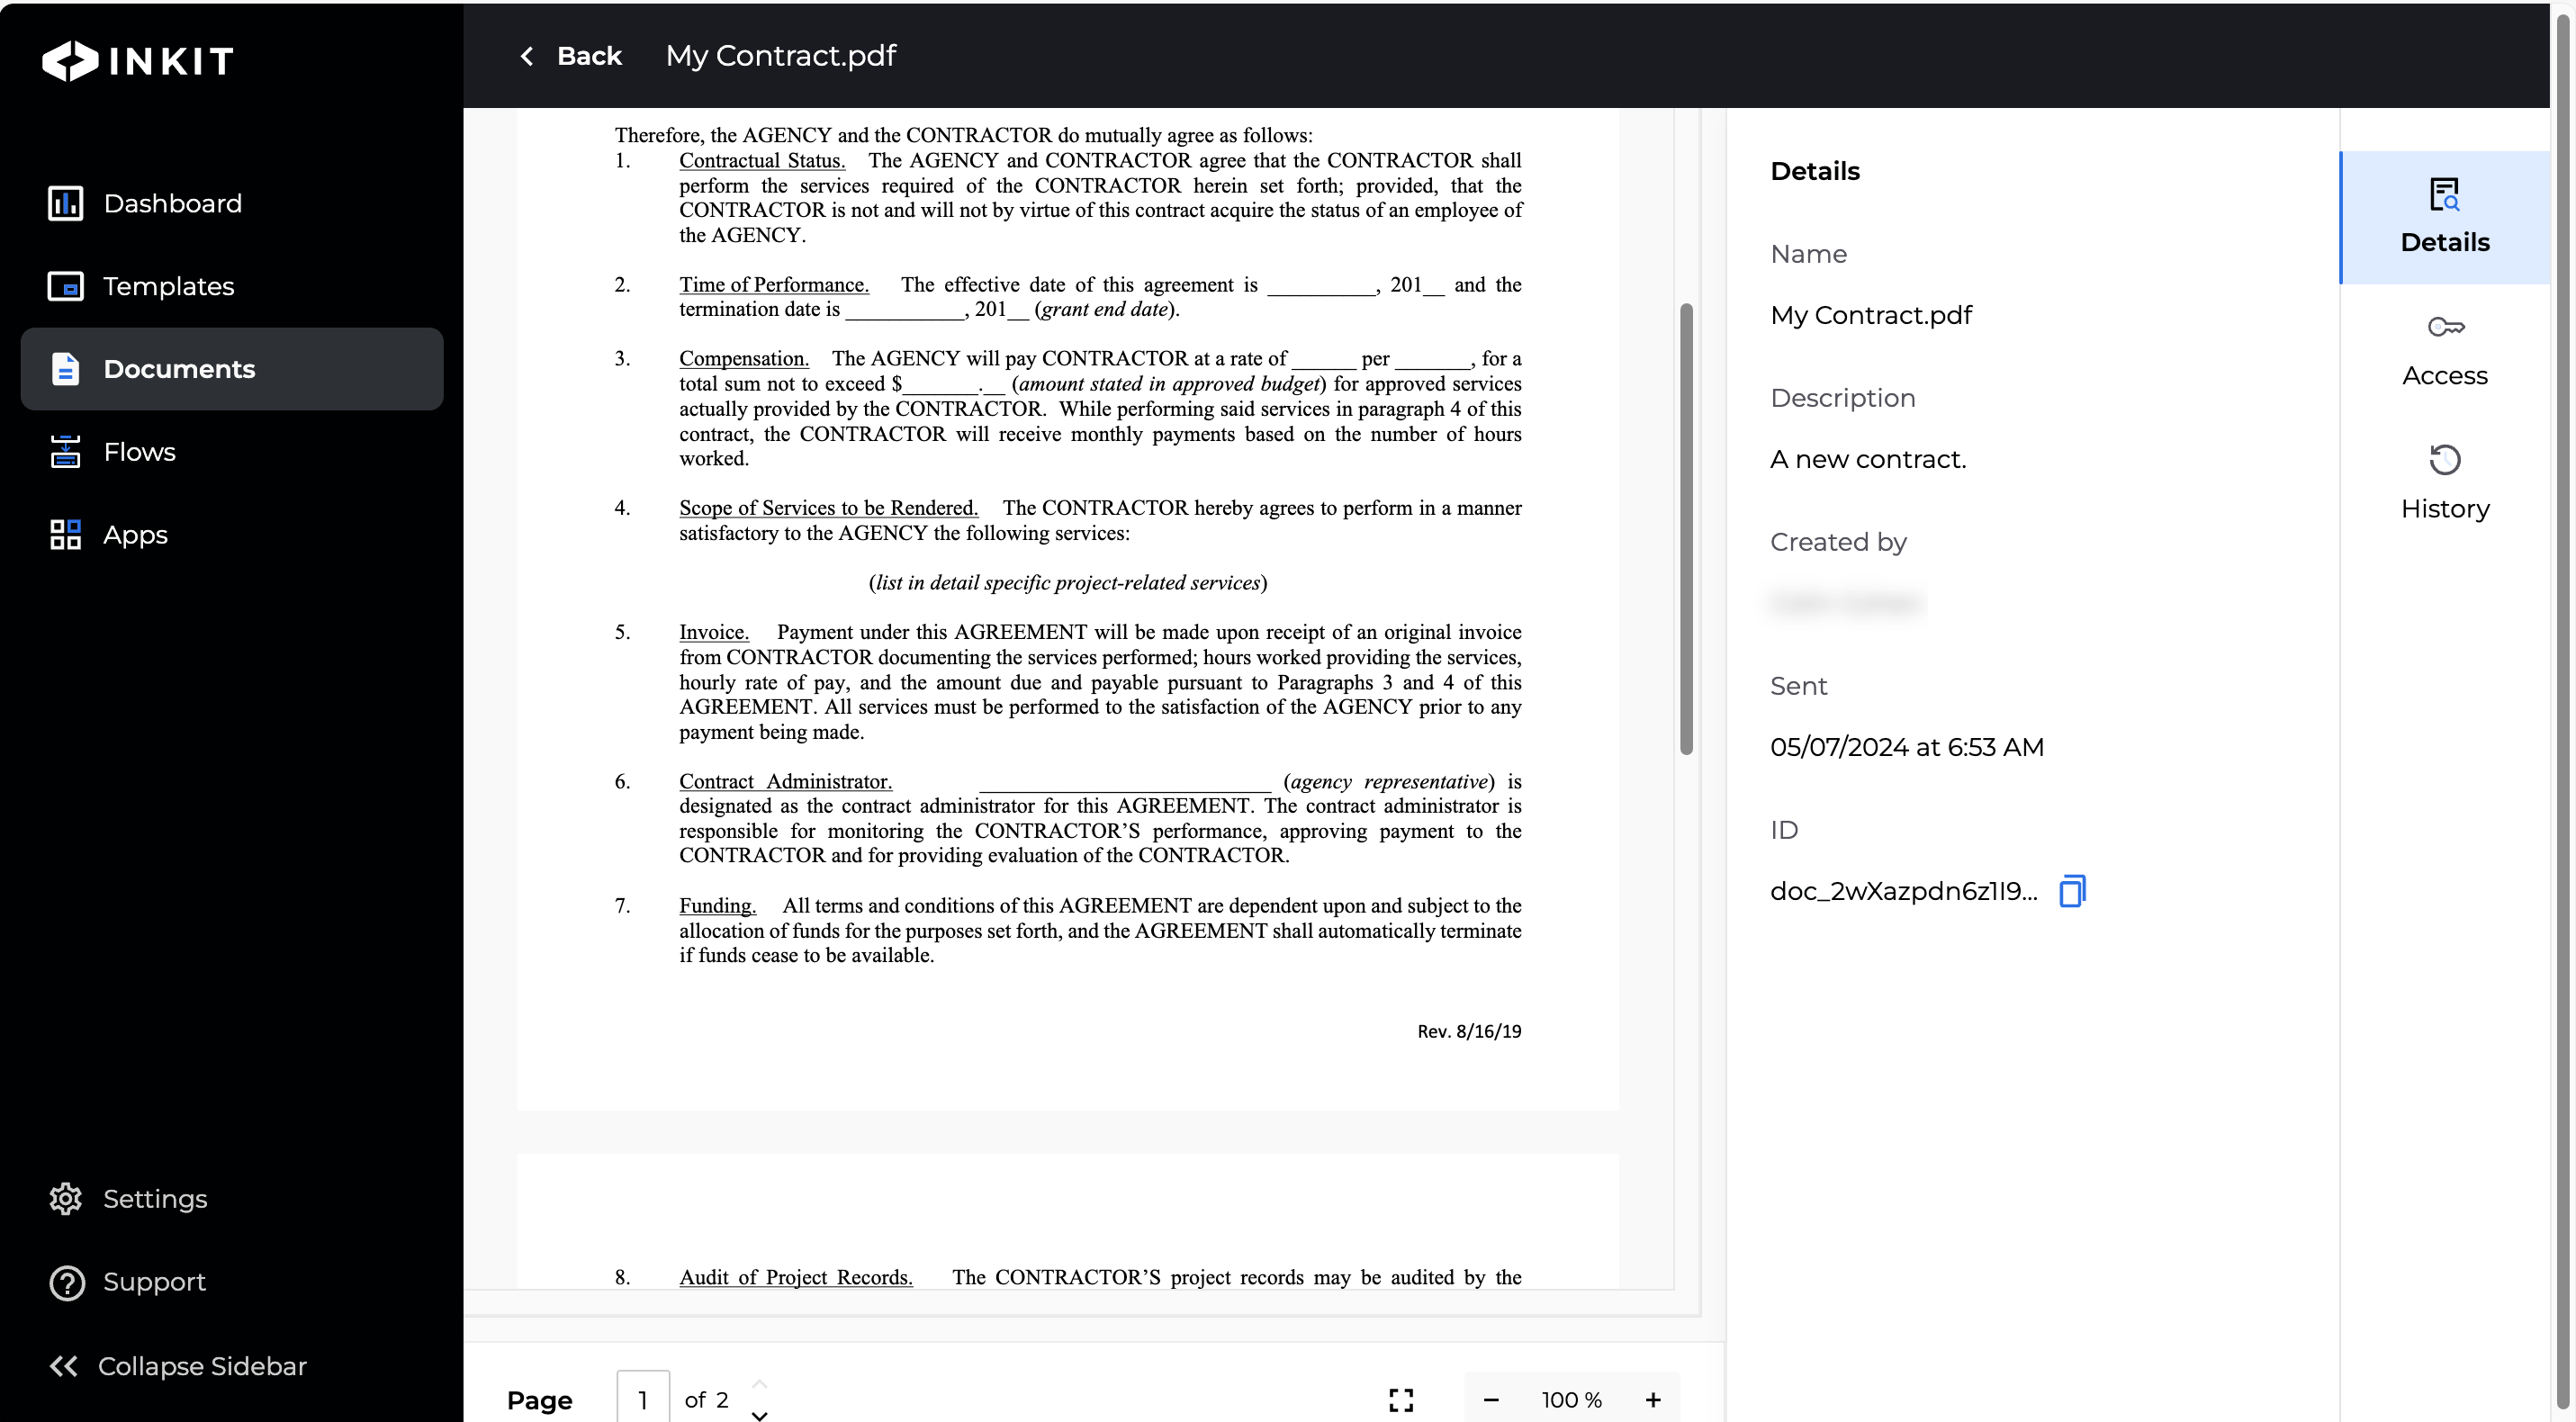
To view your generated document, double-click on it.
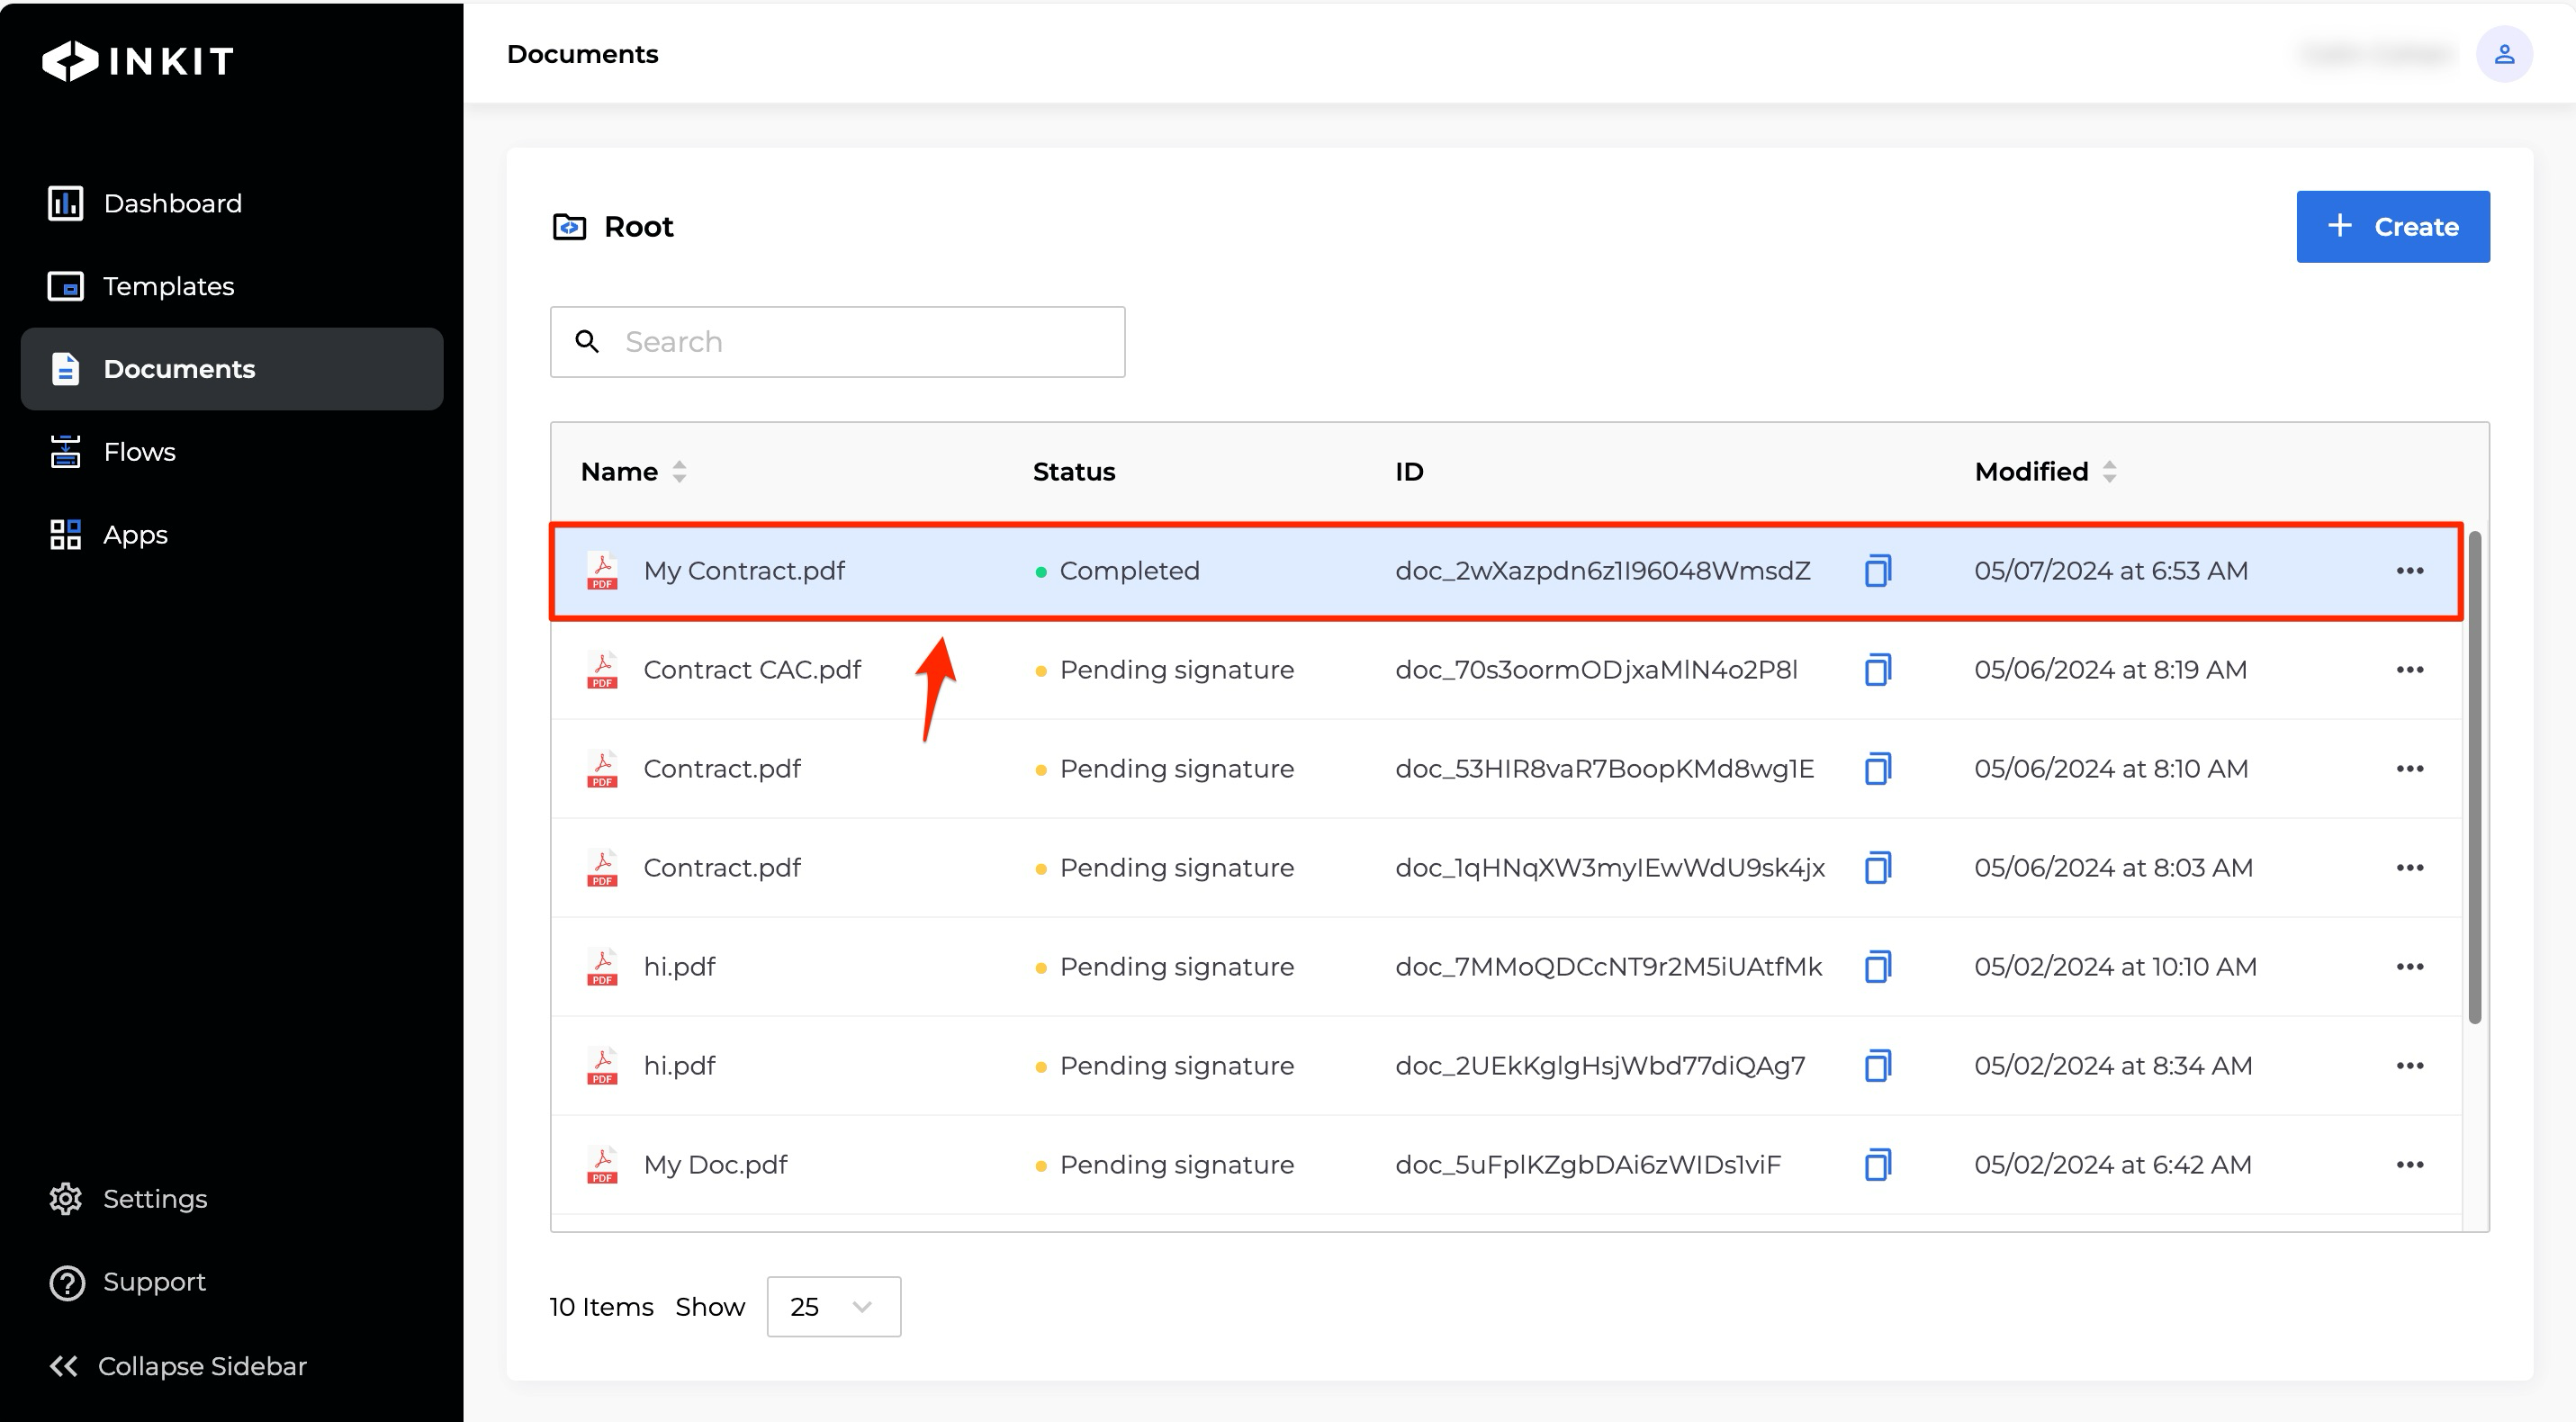
-
Your generated document will display in the document viewer.
Adding additional destinations to a document
To add document destinations in addition to Inkit Storage, click + Add under Fill Out Destinations in the Edit Destinations tab.
In the Add Destination dialog box, select a destination and click Continue.
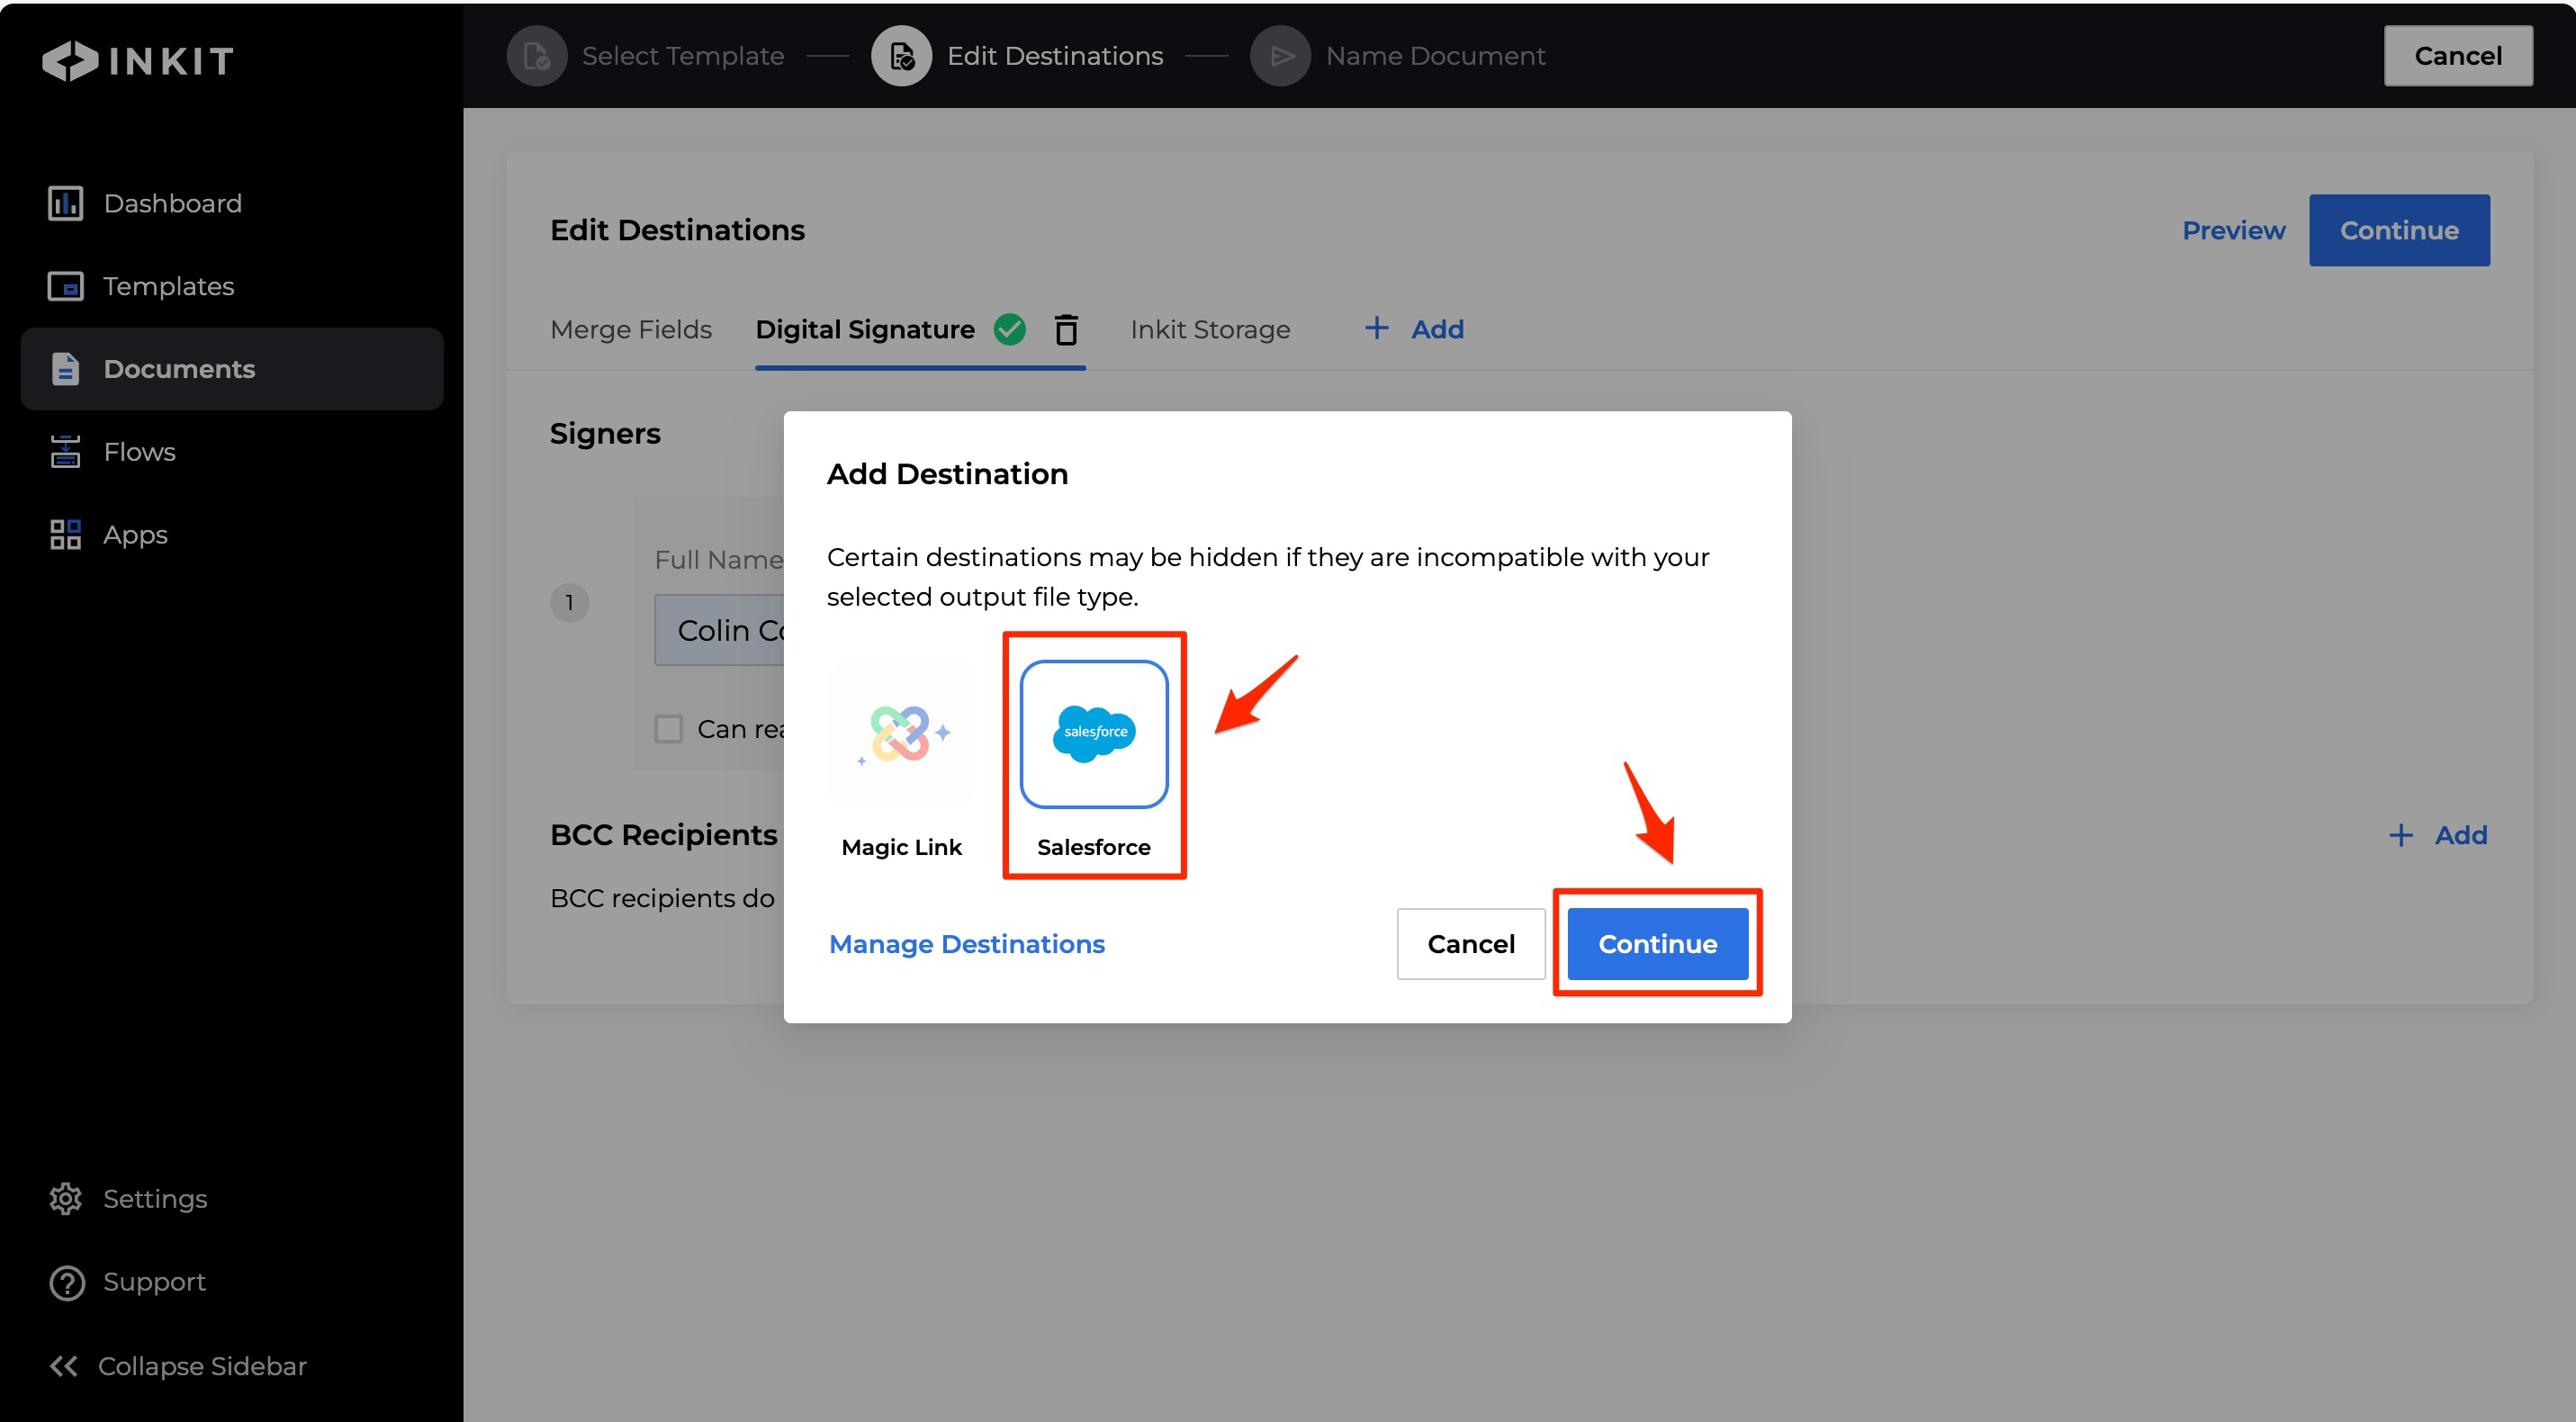
This will create a tab for the destination that you added. You will then need to fill out settings for the destination.
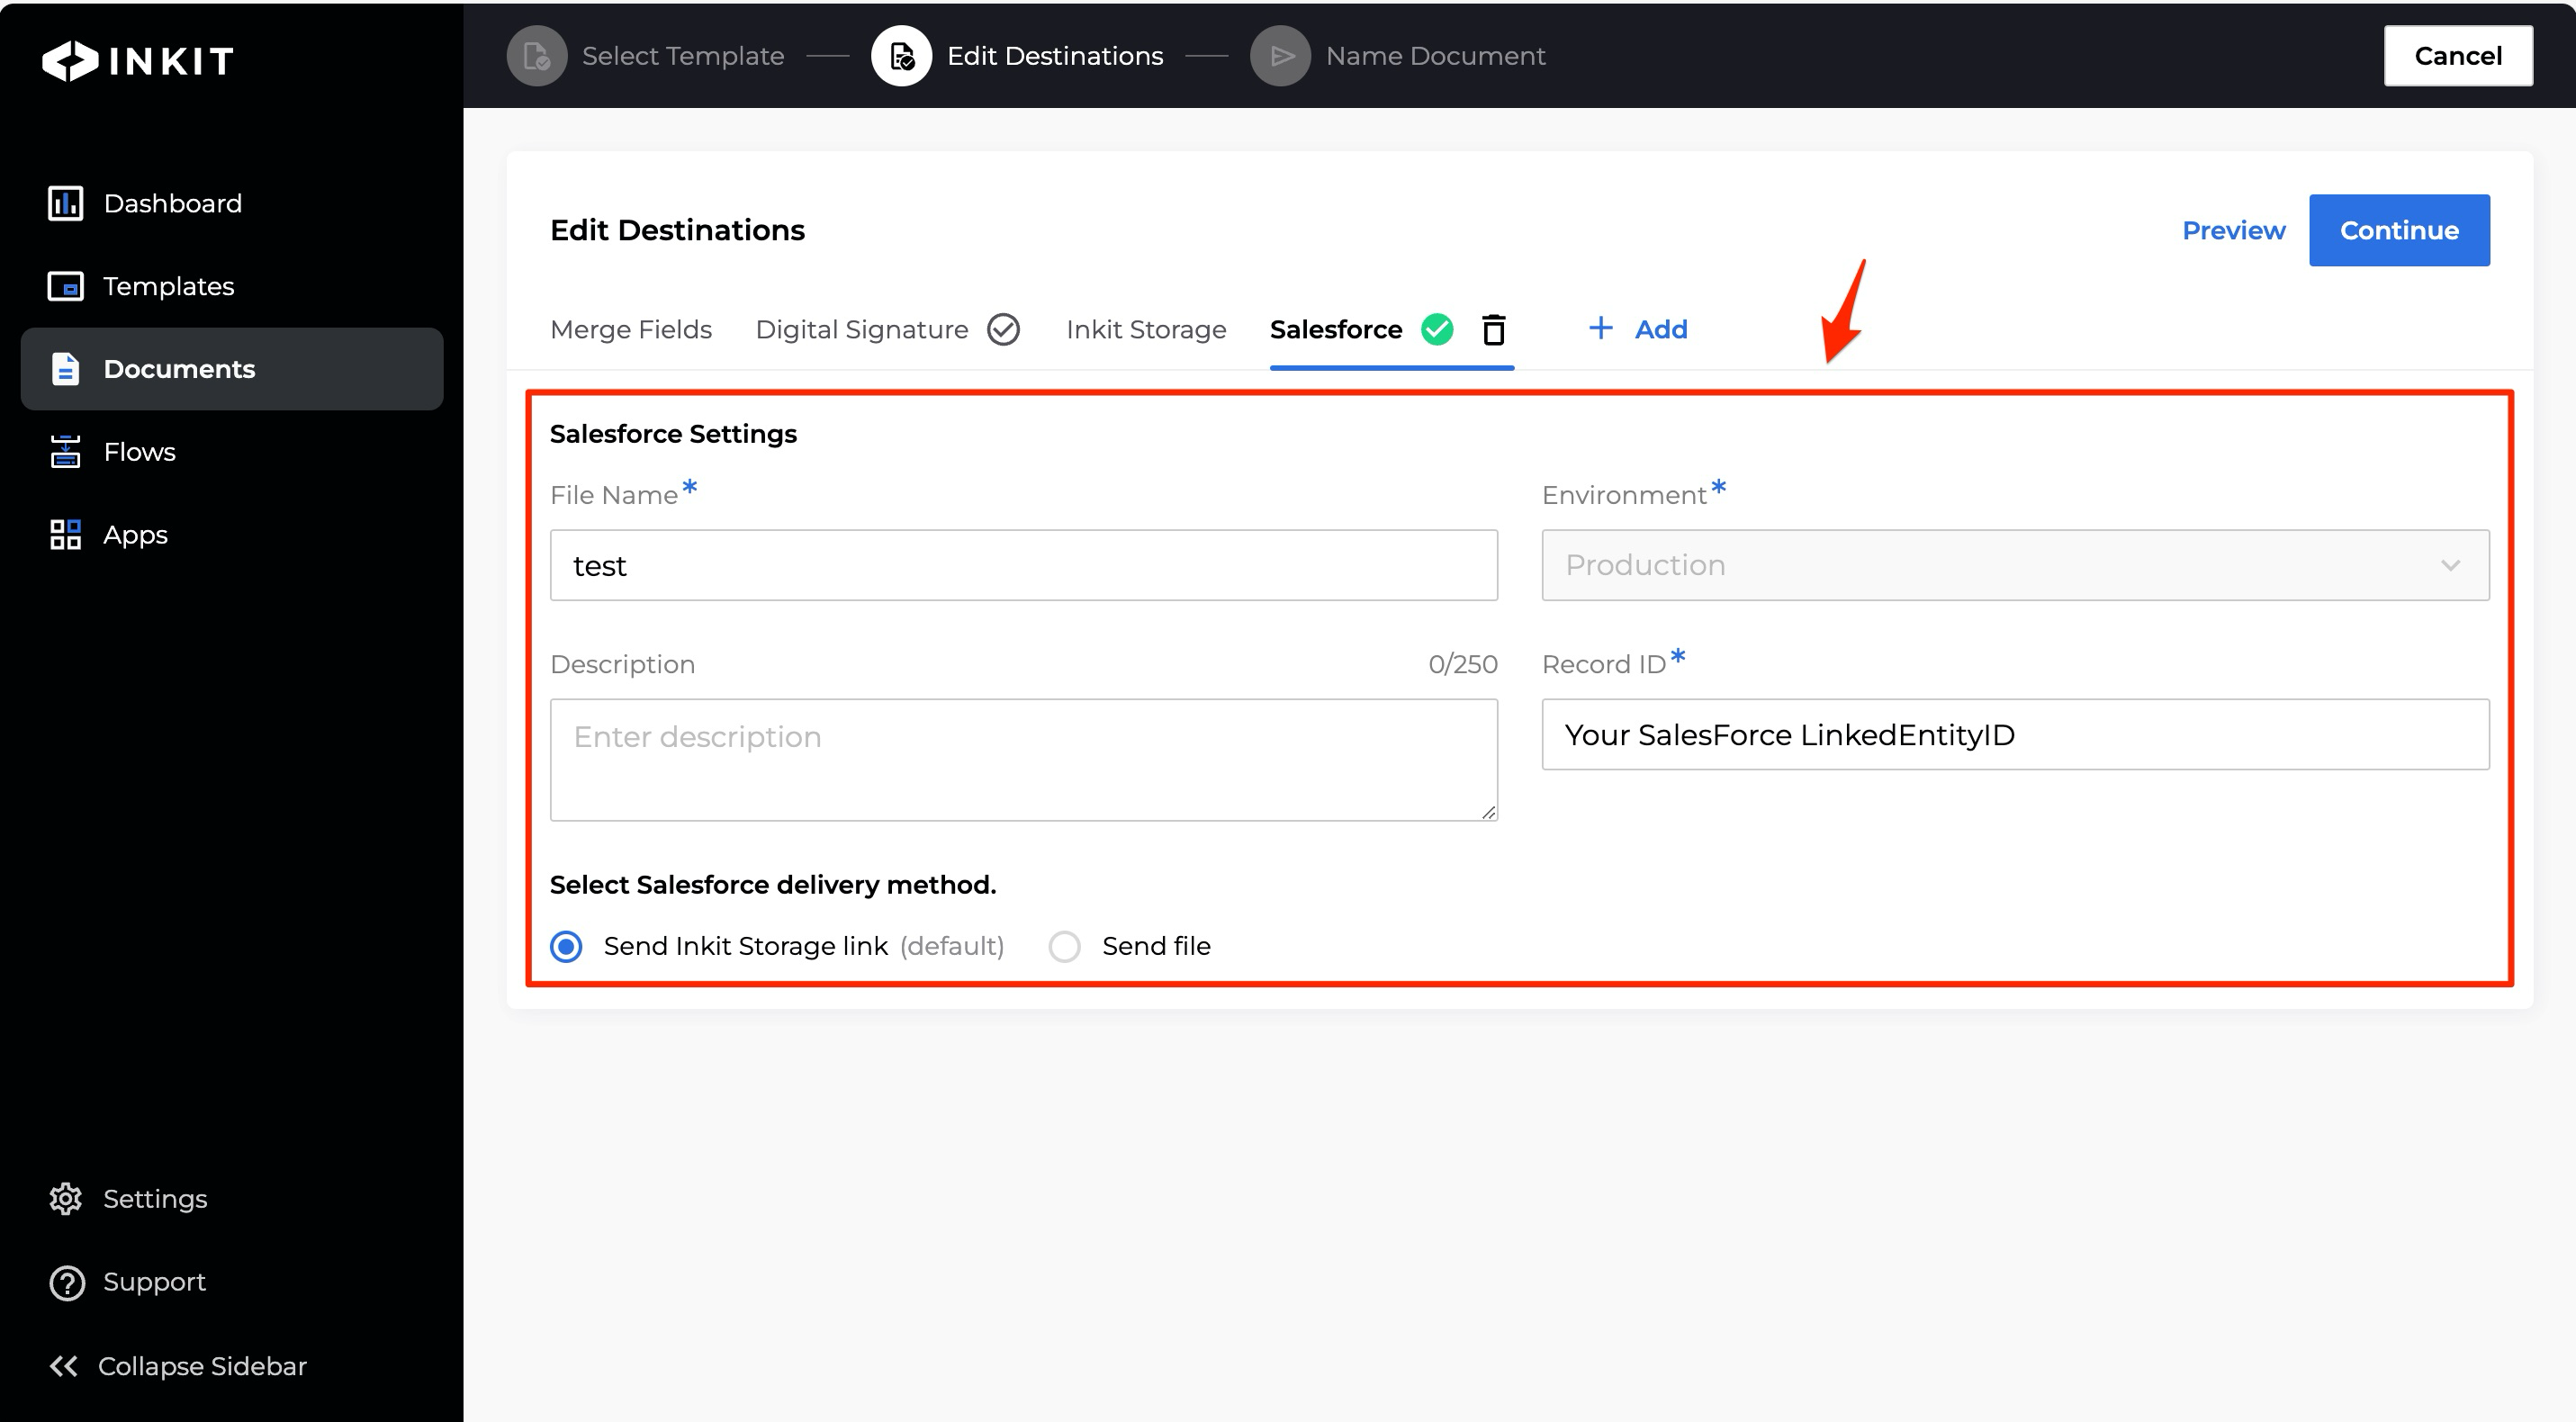
Setting Salesforce as a document destination
To set Salesforce as a destination of the document, do the following:
In the Salesforce tab, select the Salesforce delivery method from the following options:
- Send Inkit Storage link (sends only a link to the generated document back to Salesforce)
- Send file (sends the entire generated document back to Salesforce)
In the Salesforce Environment dropdown box, select from the following options:
- Production
- Sandbox
Note: You can only select the sandbox environment if you connected it when setting up the Salesforce app.
Enter the File Name of the generated document (without a file extenstion), an optional Description and the Salesforce Record ID.
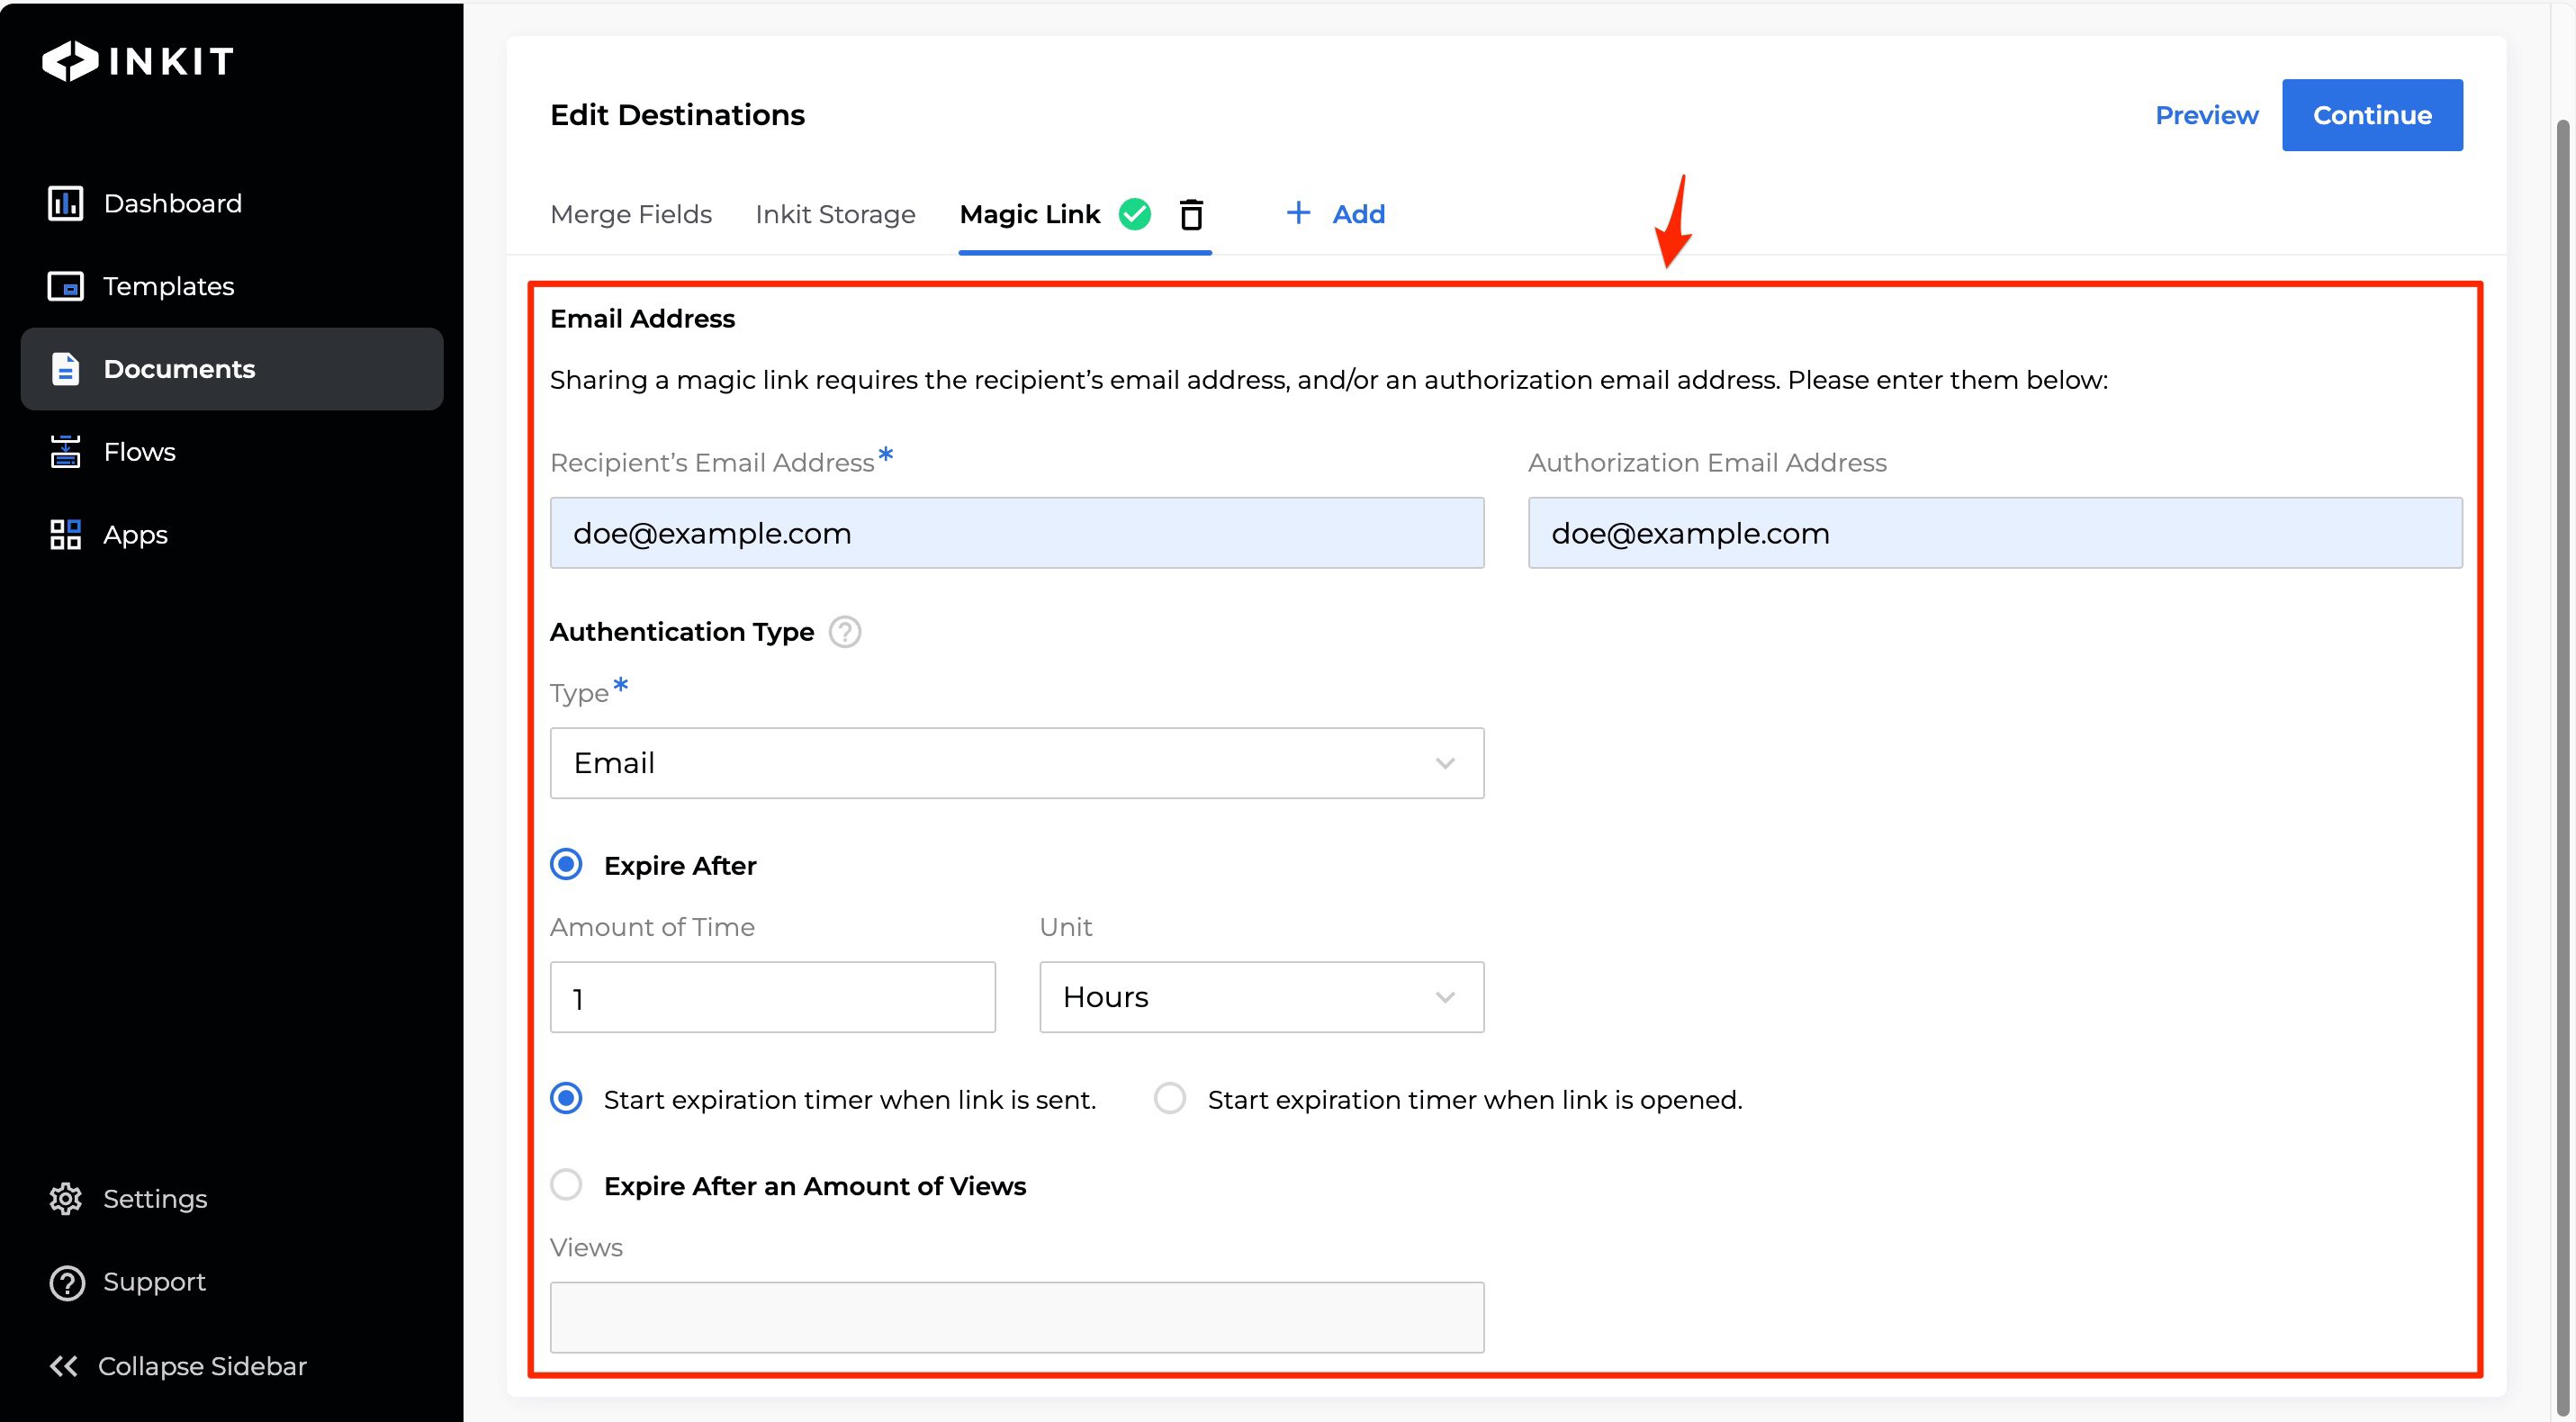
Setting Magic Link as a document destination
To set Magic Link as a destination of the document, do the following:
In the Magic Link tab, select the Authentication Type from the following options:
- Email (users complete authentication through an email address)
- Social (users complete authentication through a social login provider such as Google)
Enter the email address of the Magic Link's recepient in Recipient’s Email Address and Authorization Email Address.
To have documents expire after certain amount of time, select Expire after and specify the Amount of Time and the Unit of time. You can choose from the following units:
- Minutes
- Hours
- Days
Then select when to start the expiration timer from the following options:
- Start expiration timer when link is sent
- Start expiration timer when link is opened
To have documents expire after specific number of views, select Expire after an Amount of Views and enter the maximum number of Views before the document expires.
Note: If you select Expire after an Amount of Views, the link will expire in 10 days even if there are views remaining.
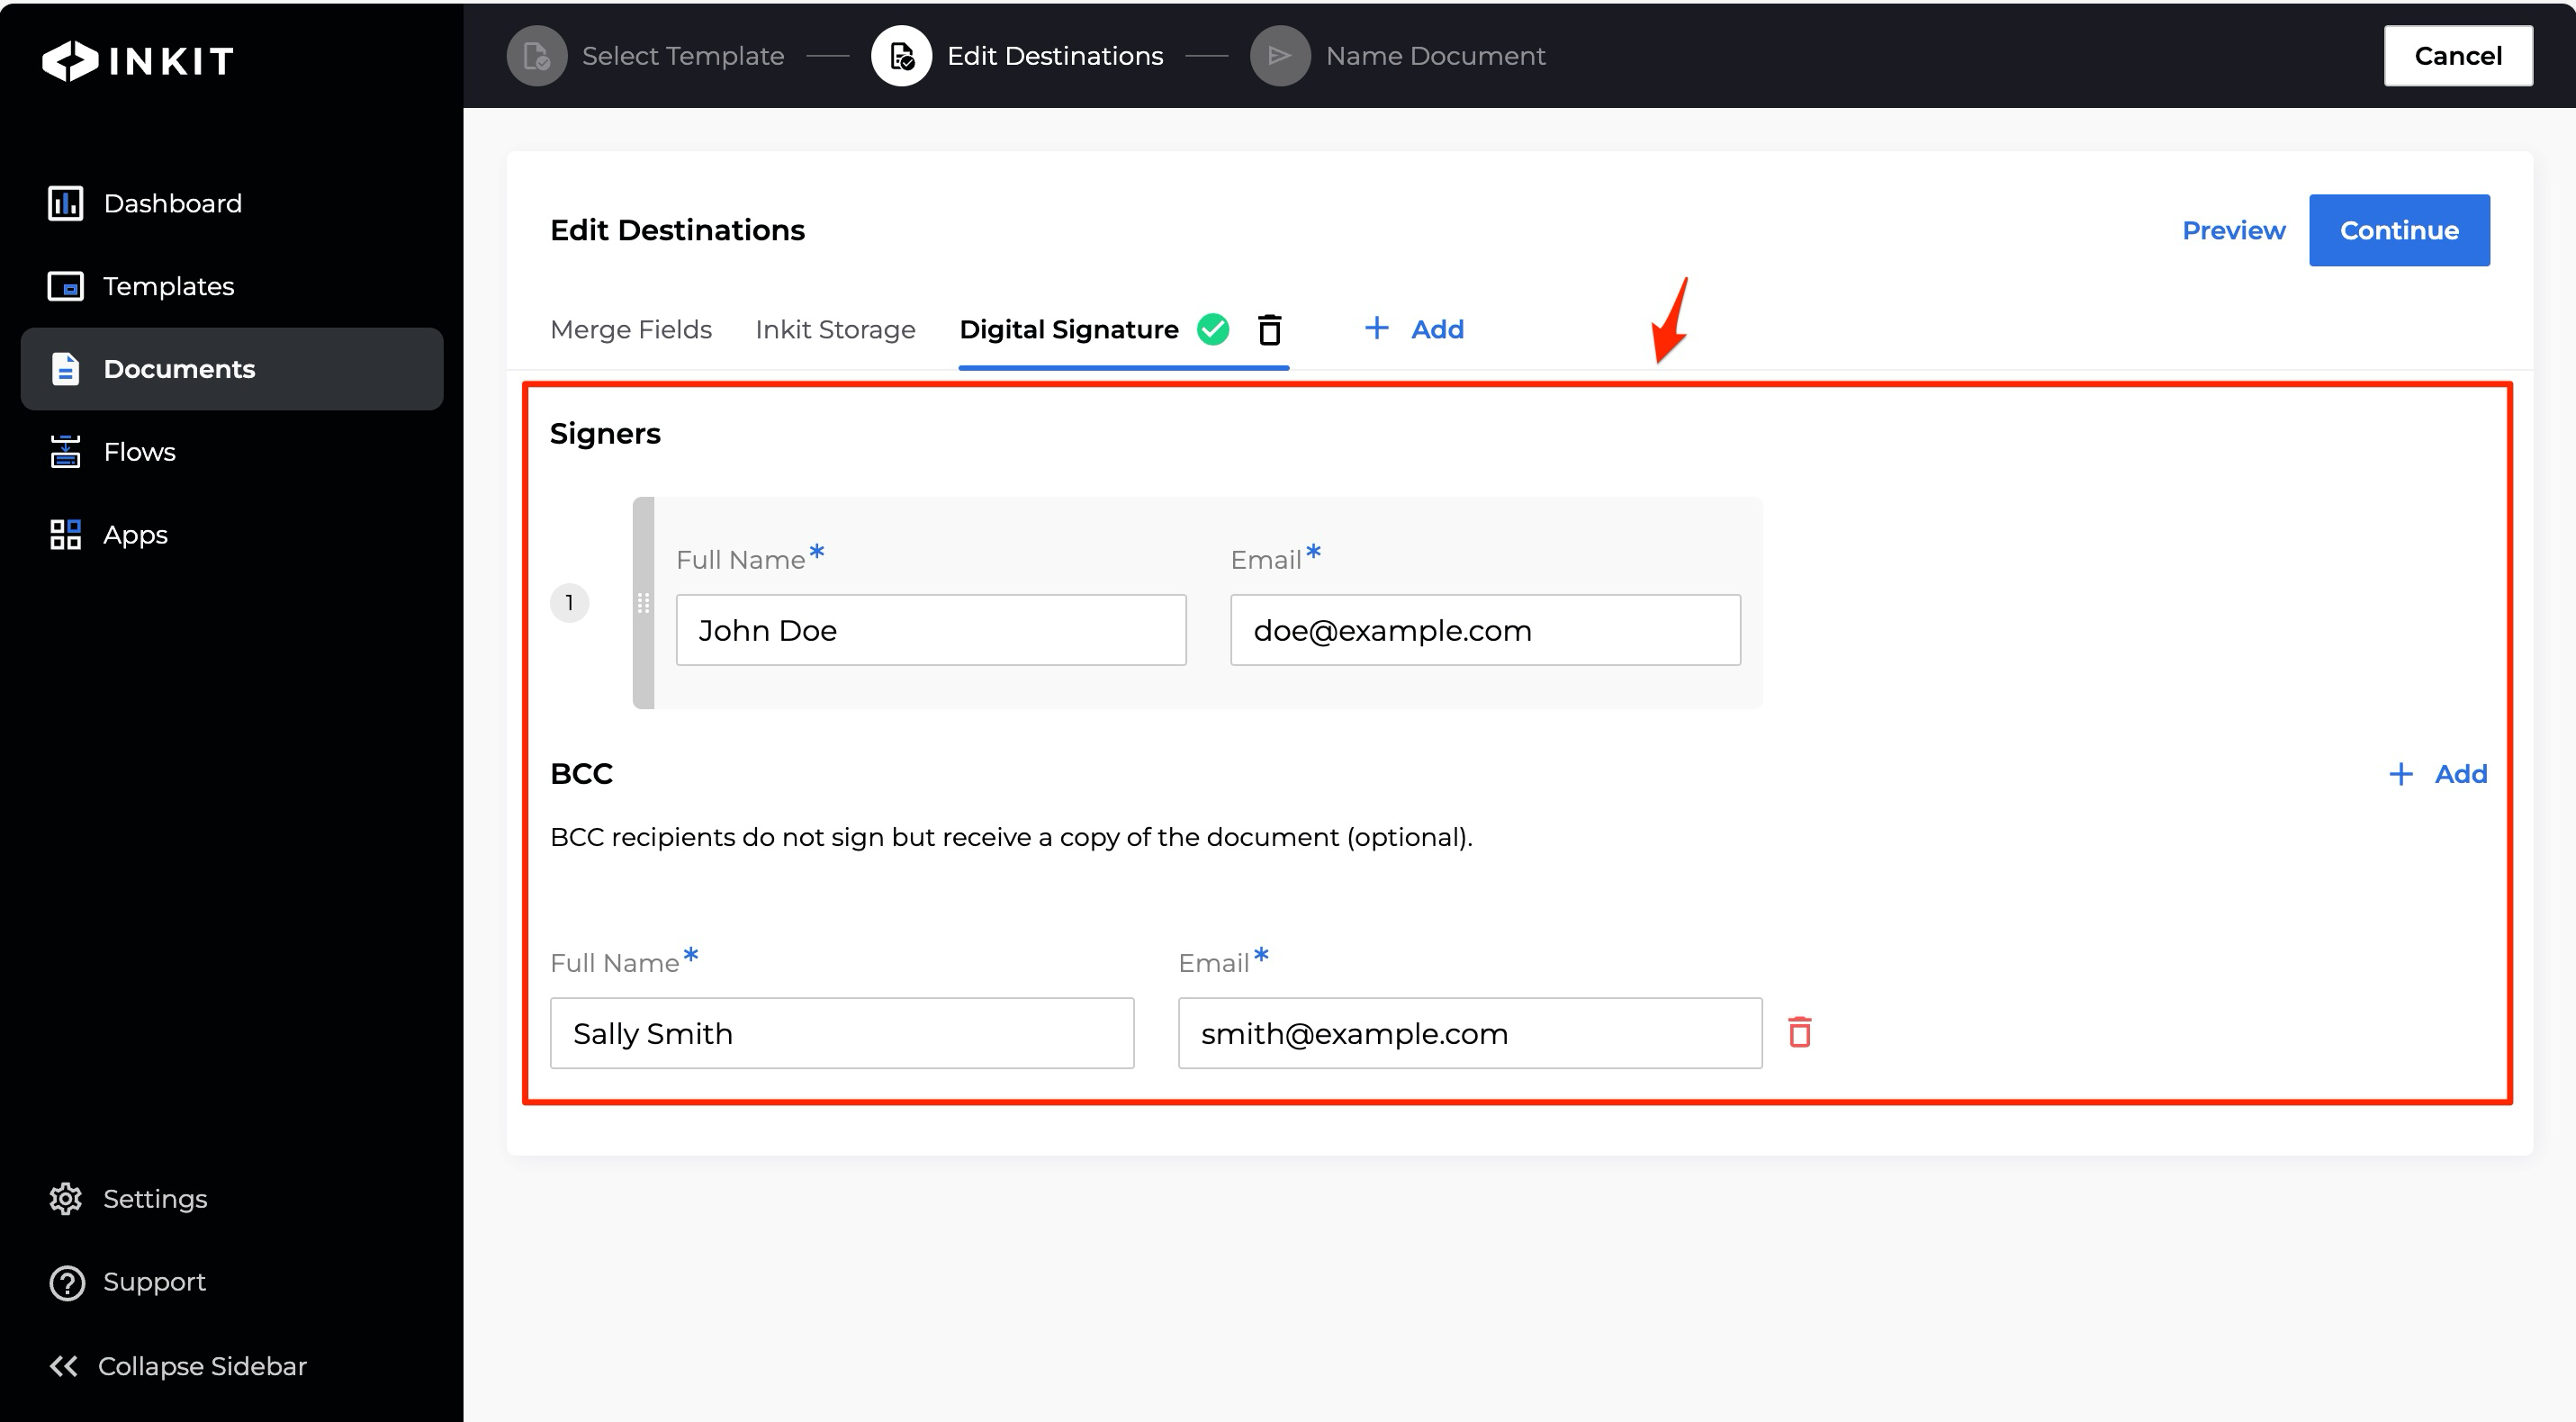
Setting Digital Signature as a document destination
Note: You can only add Digital Signature as a document destination if there are Digital Signature fields in the template.
To set Digital Signature as a destination of the document, do the following:
In the Digital Signature tab, under Signers enter a Full Name and Email for each Digital Signature field embedded in the template.
Optionally, under BCC add additional recipients of the document by clicking + Add and entering a Full Name and Email for each.
Updated 10 months ago