Adding an Inkit Document Viewer in Salesforce
Once you've installed our Salesforce package and set up the Inkit app, you can add a an Inkit Document Viewer to any Salesforce lightning record page. With the viewer, you can view the documents you've generated through Inkit that relate to a record page.
Note: The Document Viewer only contains the documents you've generated and sent back to Salesforce with a link. If you send generated documents back to Salesforce as a file, they appear in the Notes & Attachments section in the Related panel.
In the following example, we will add the viewer to an Opportunity page, but you can add it to any record page you'd like.
-
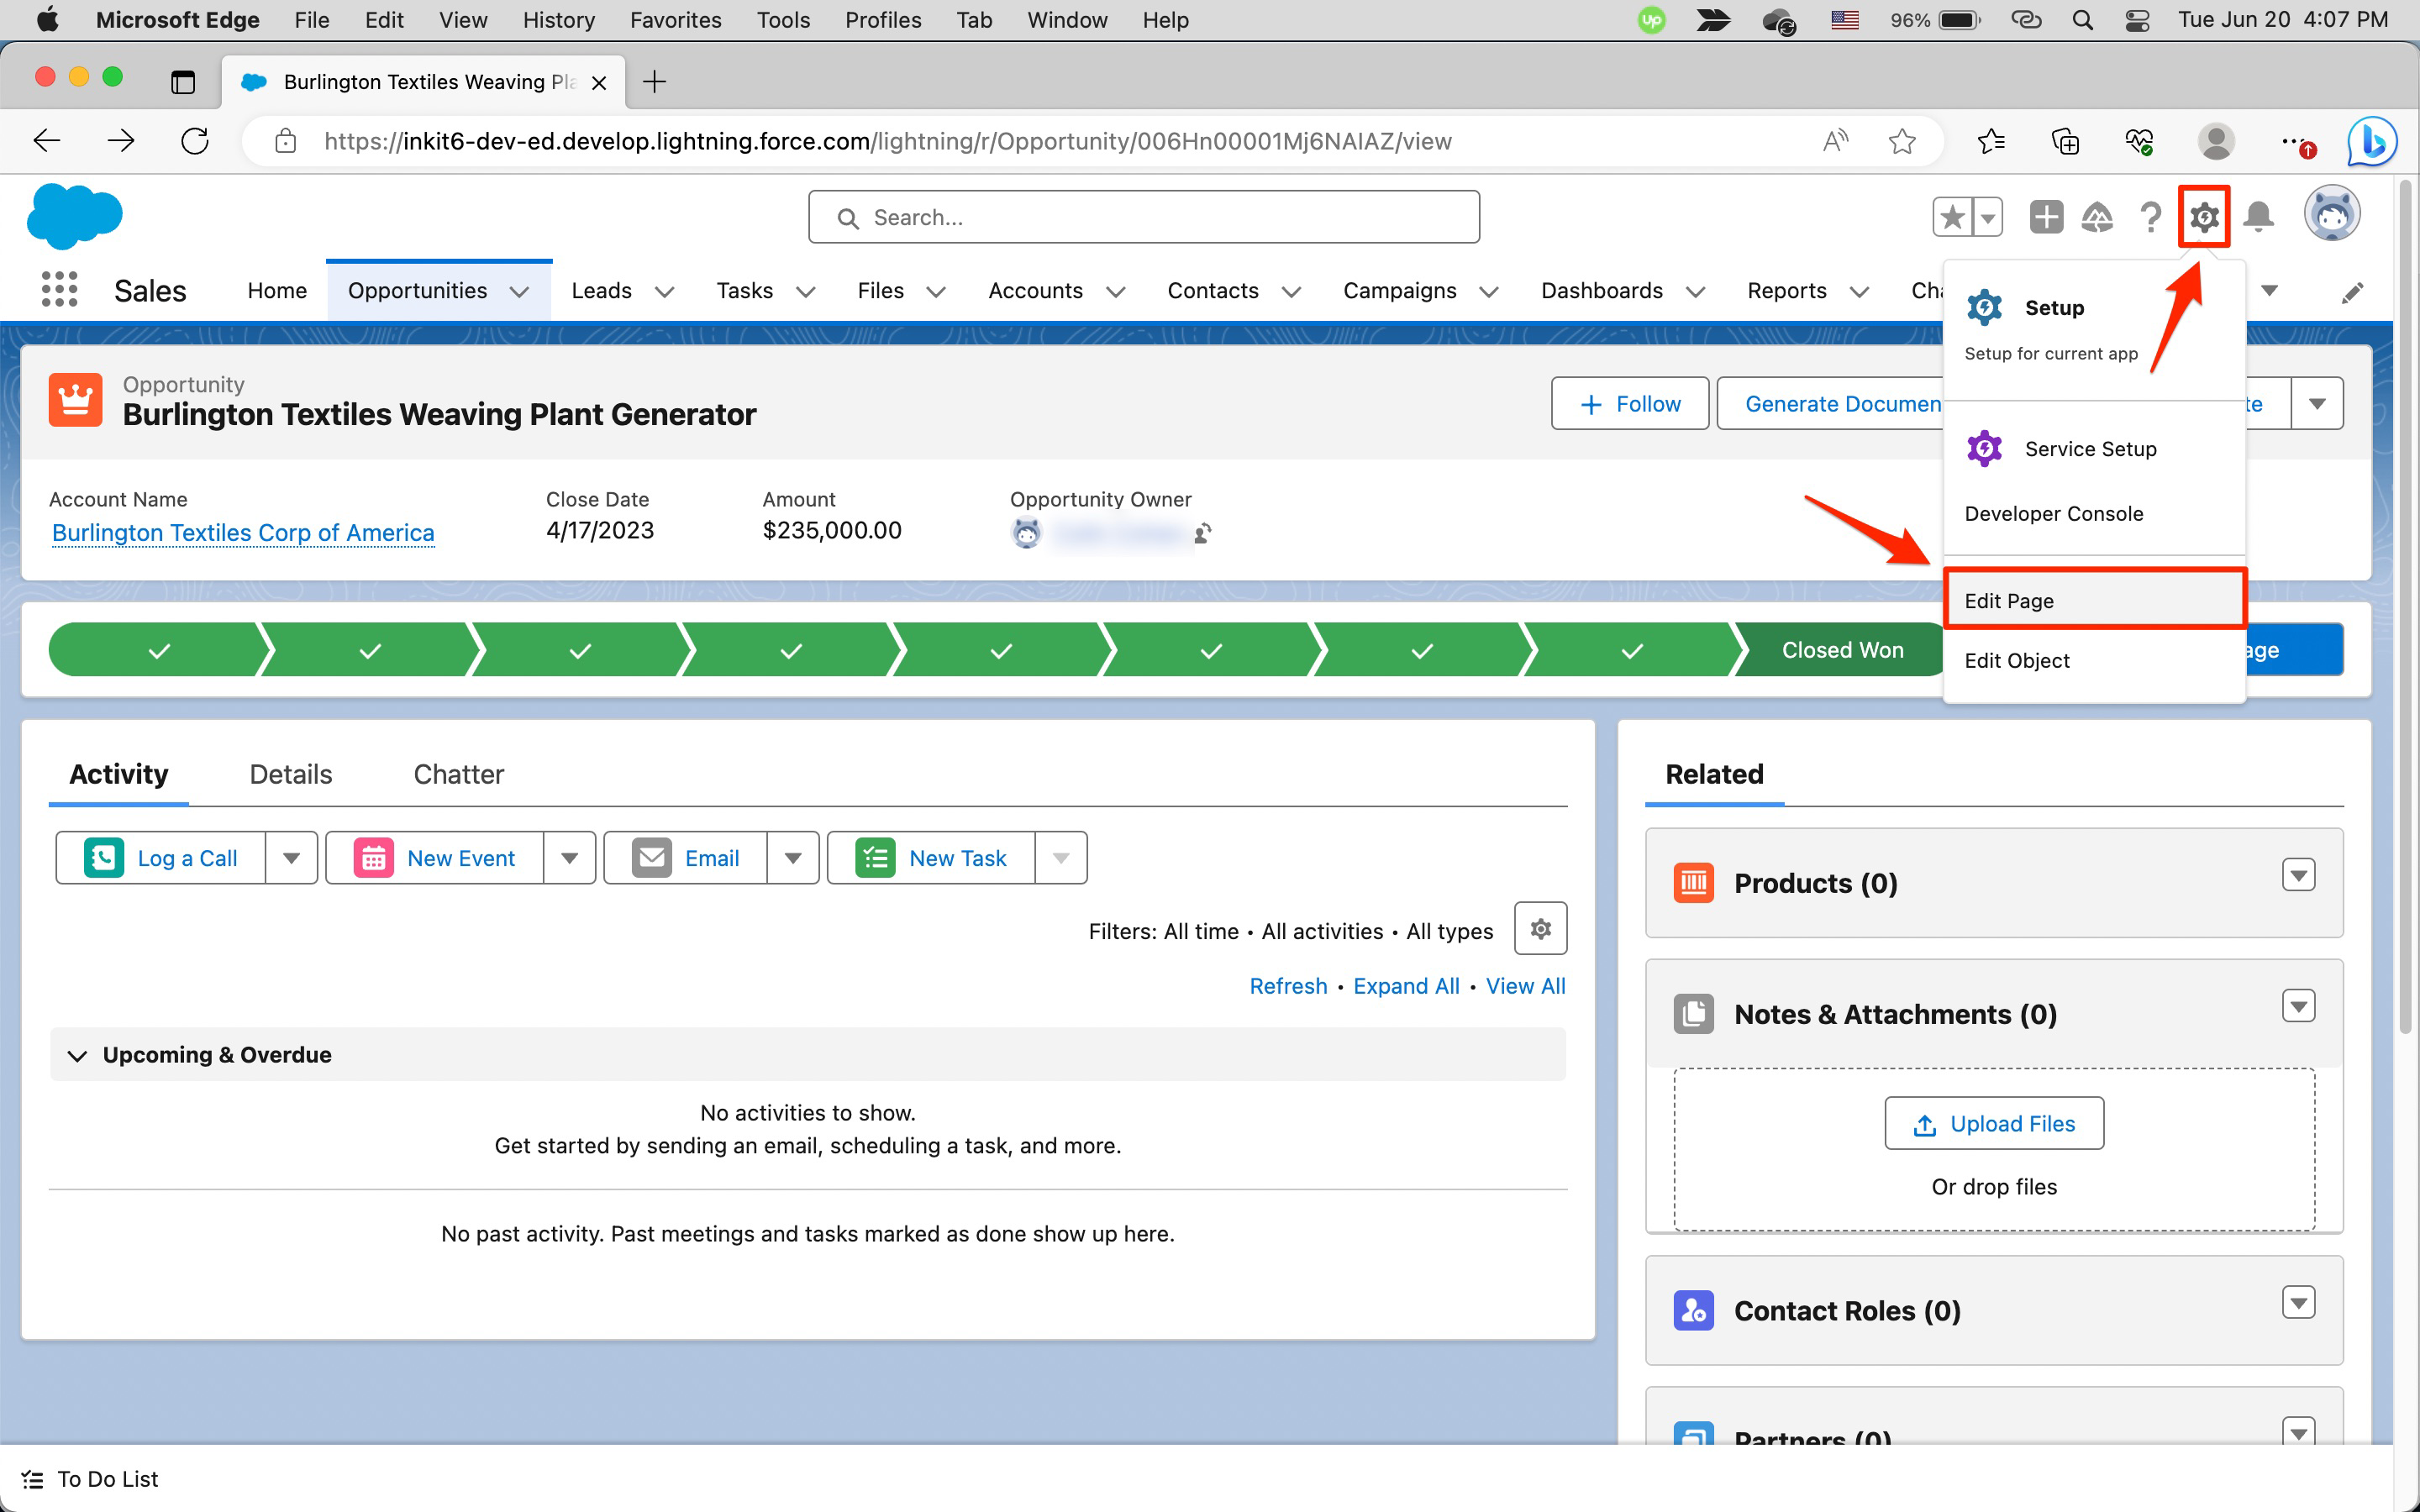
In an Opportunity page, click the settings gear and then click Edit Page.
-
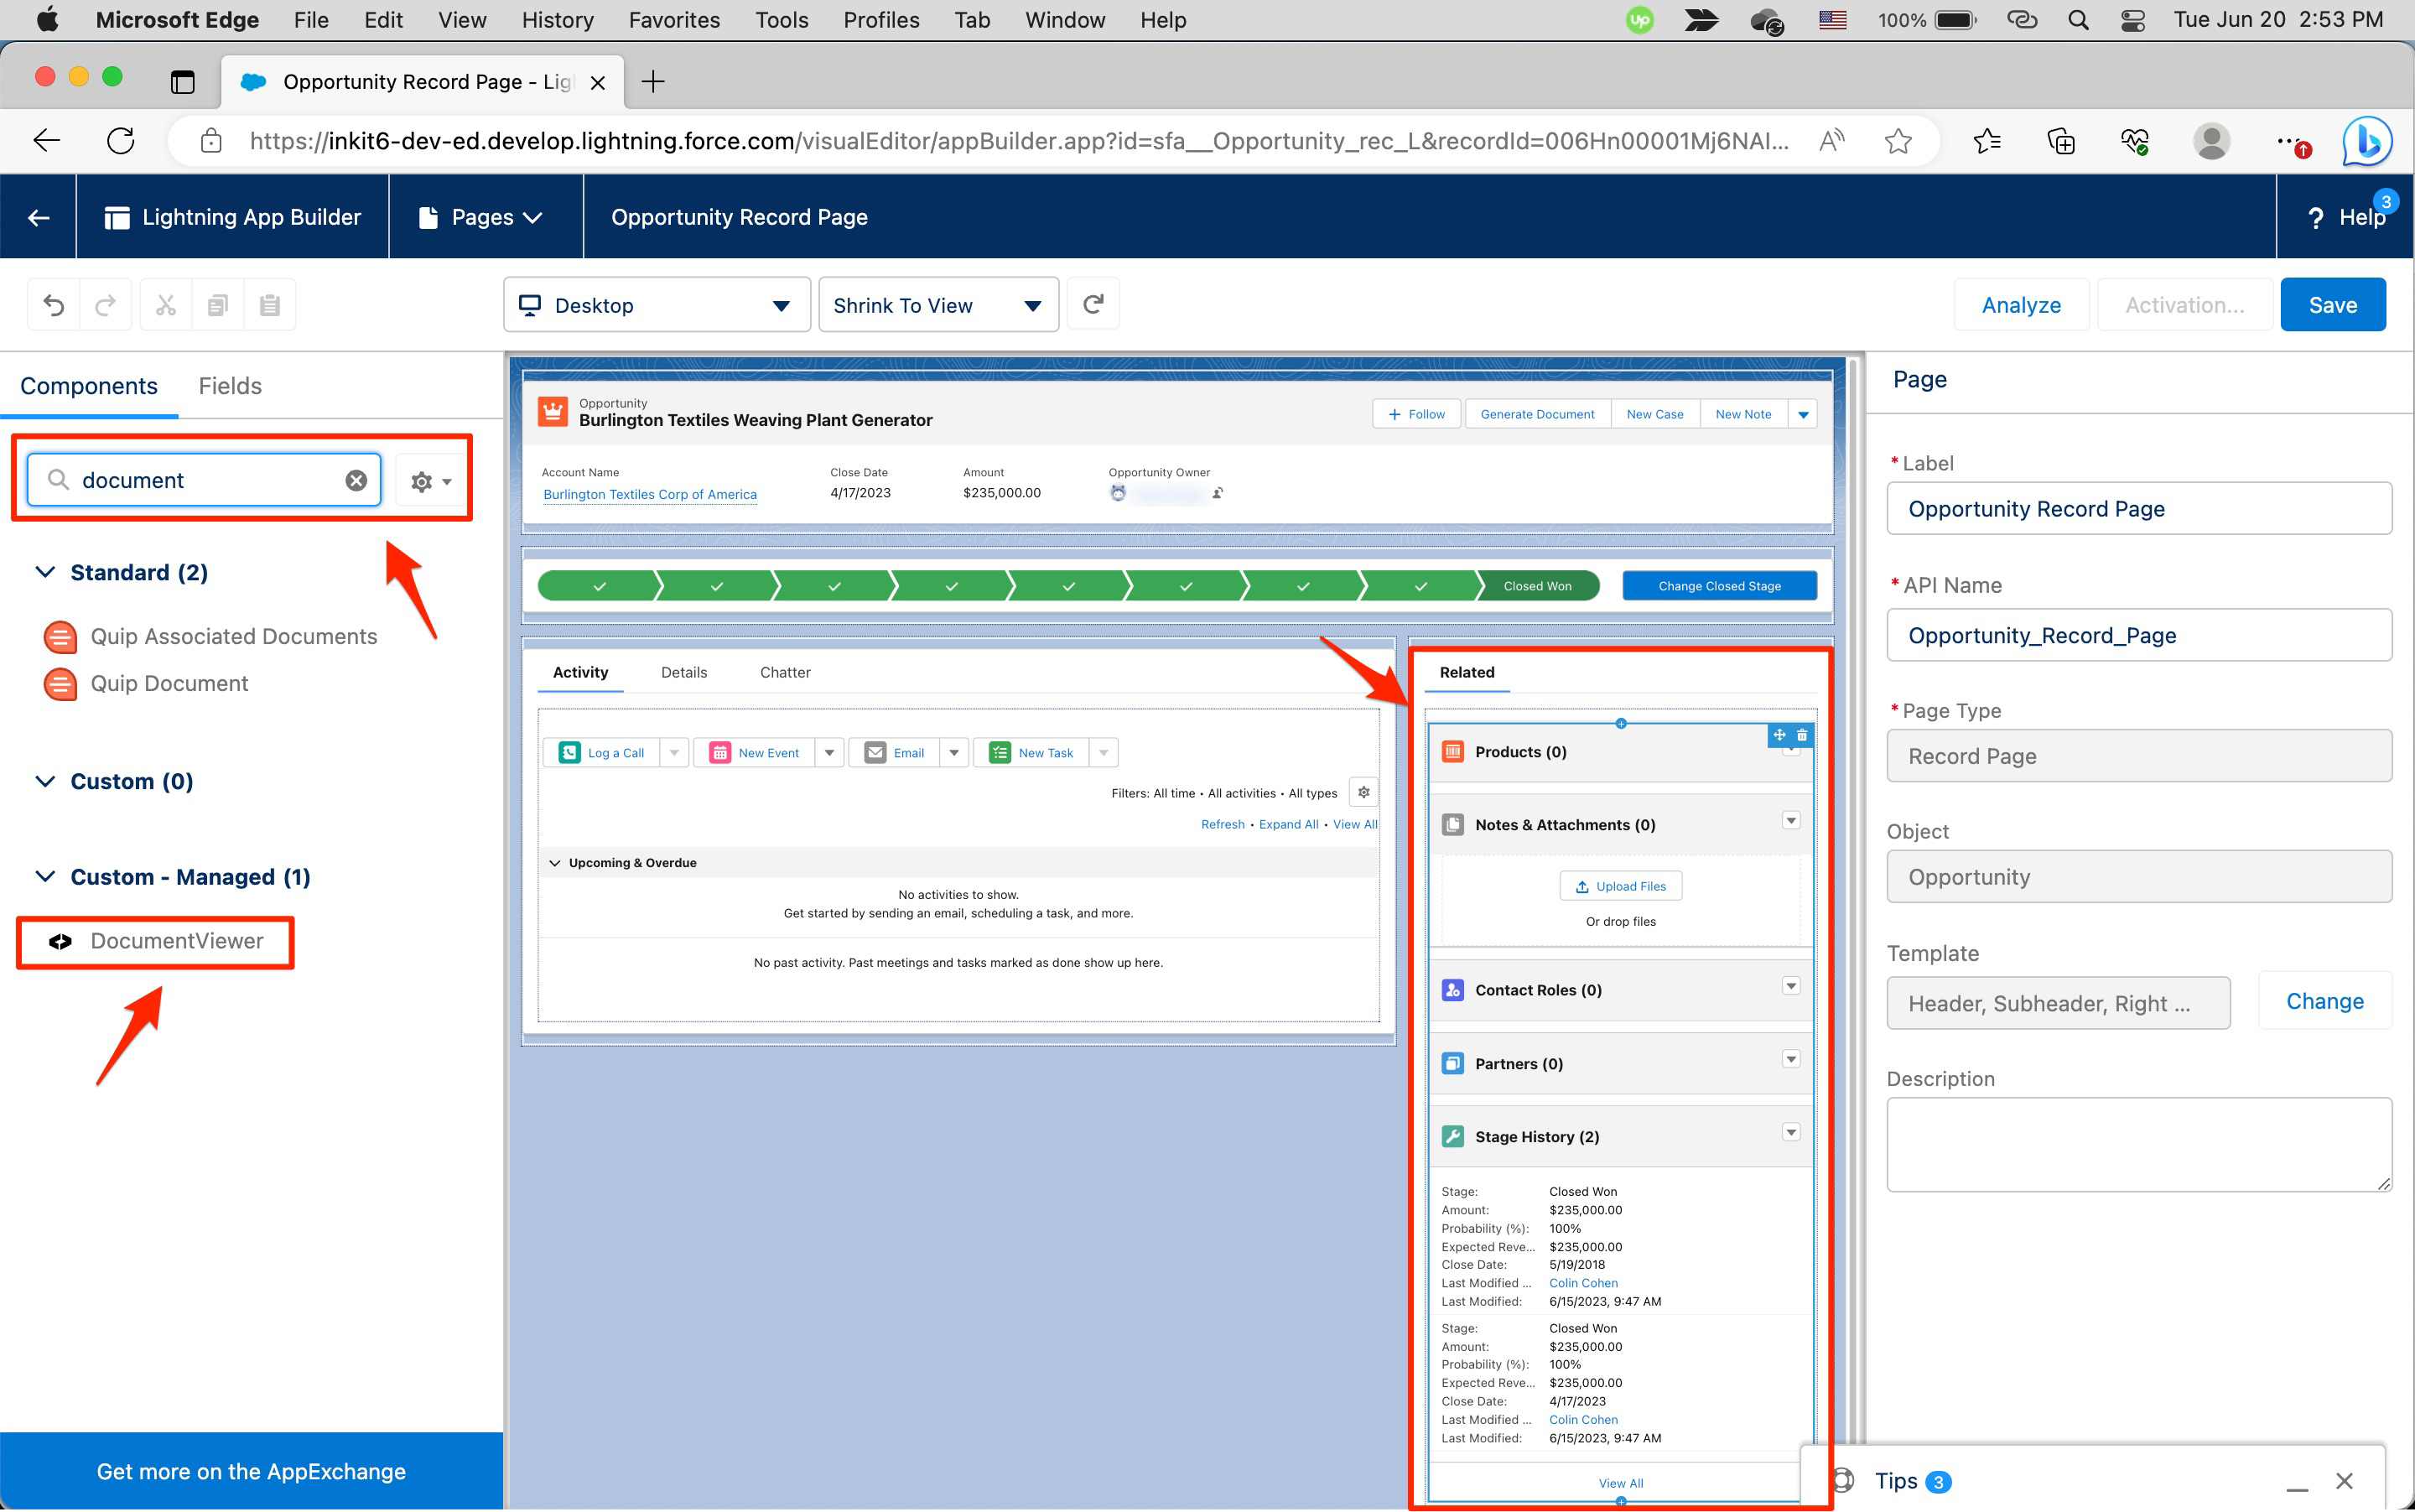
In the Opportunity Record Page, enter document in the Search... field and then drag the DocumentViewer component to the location in the Related panel where you'd like to see the viewer.
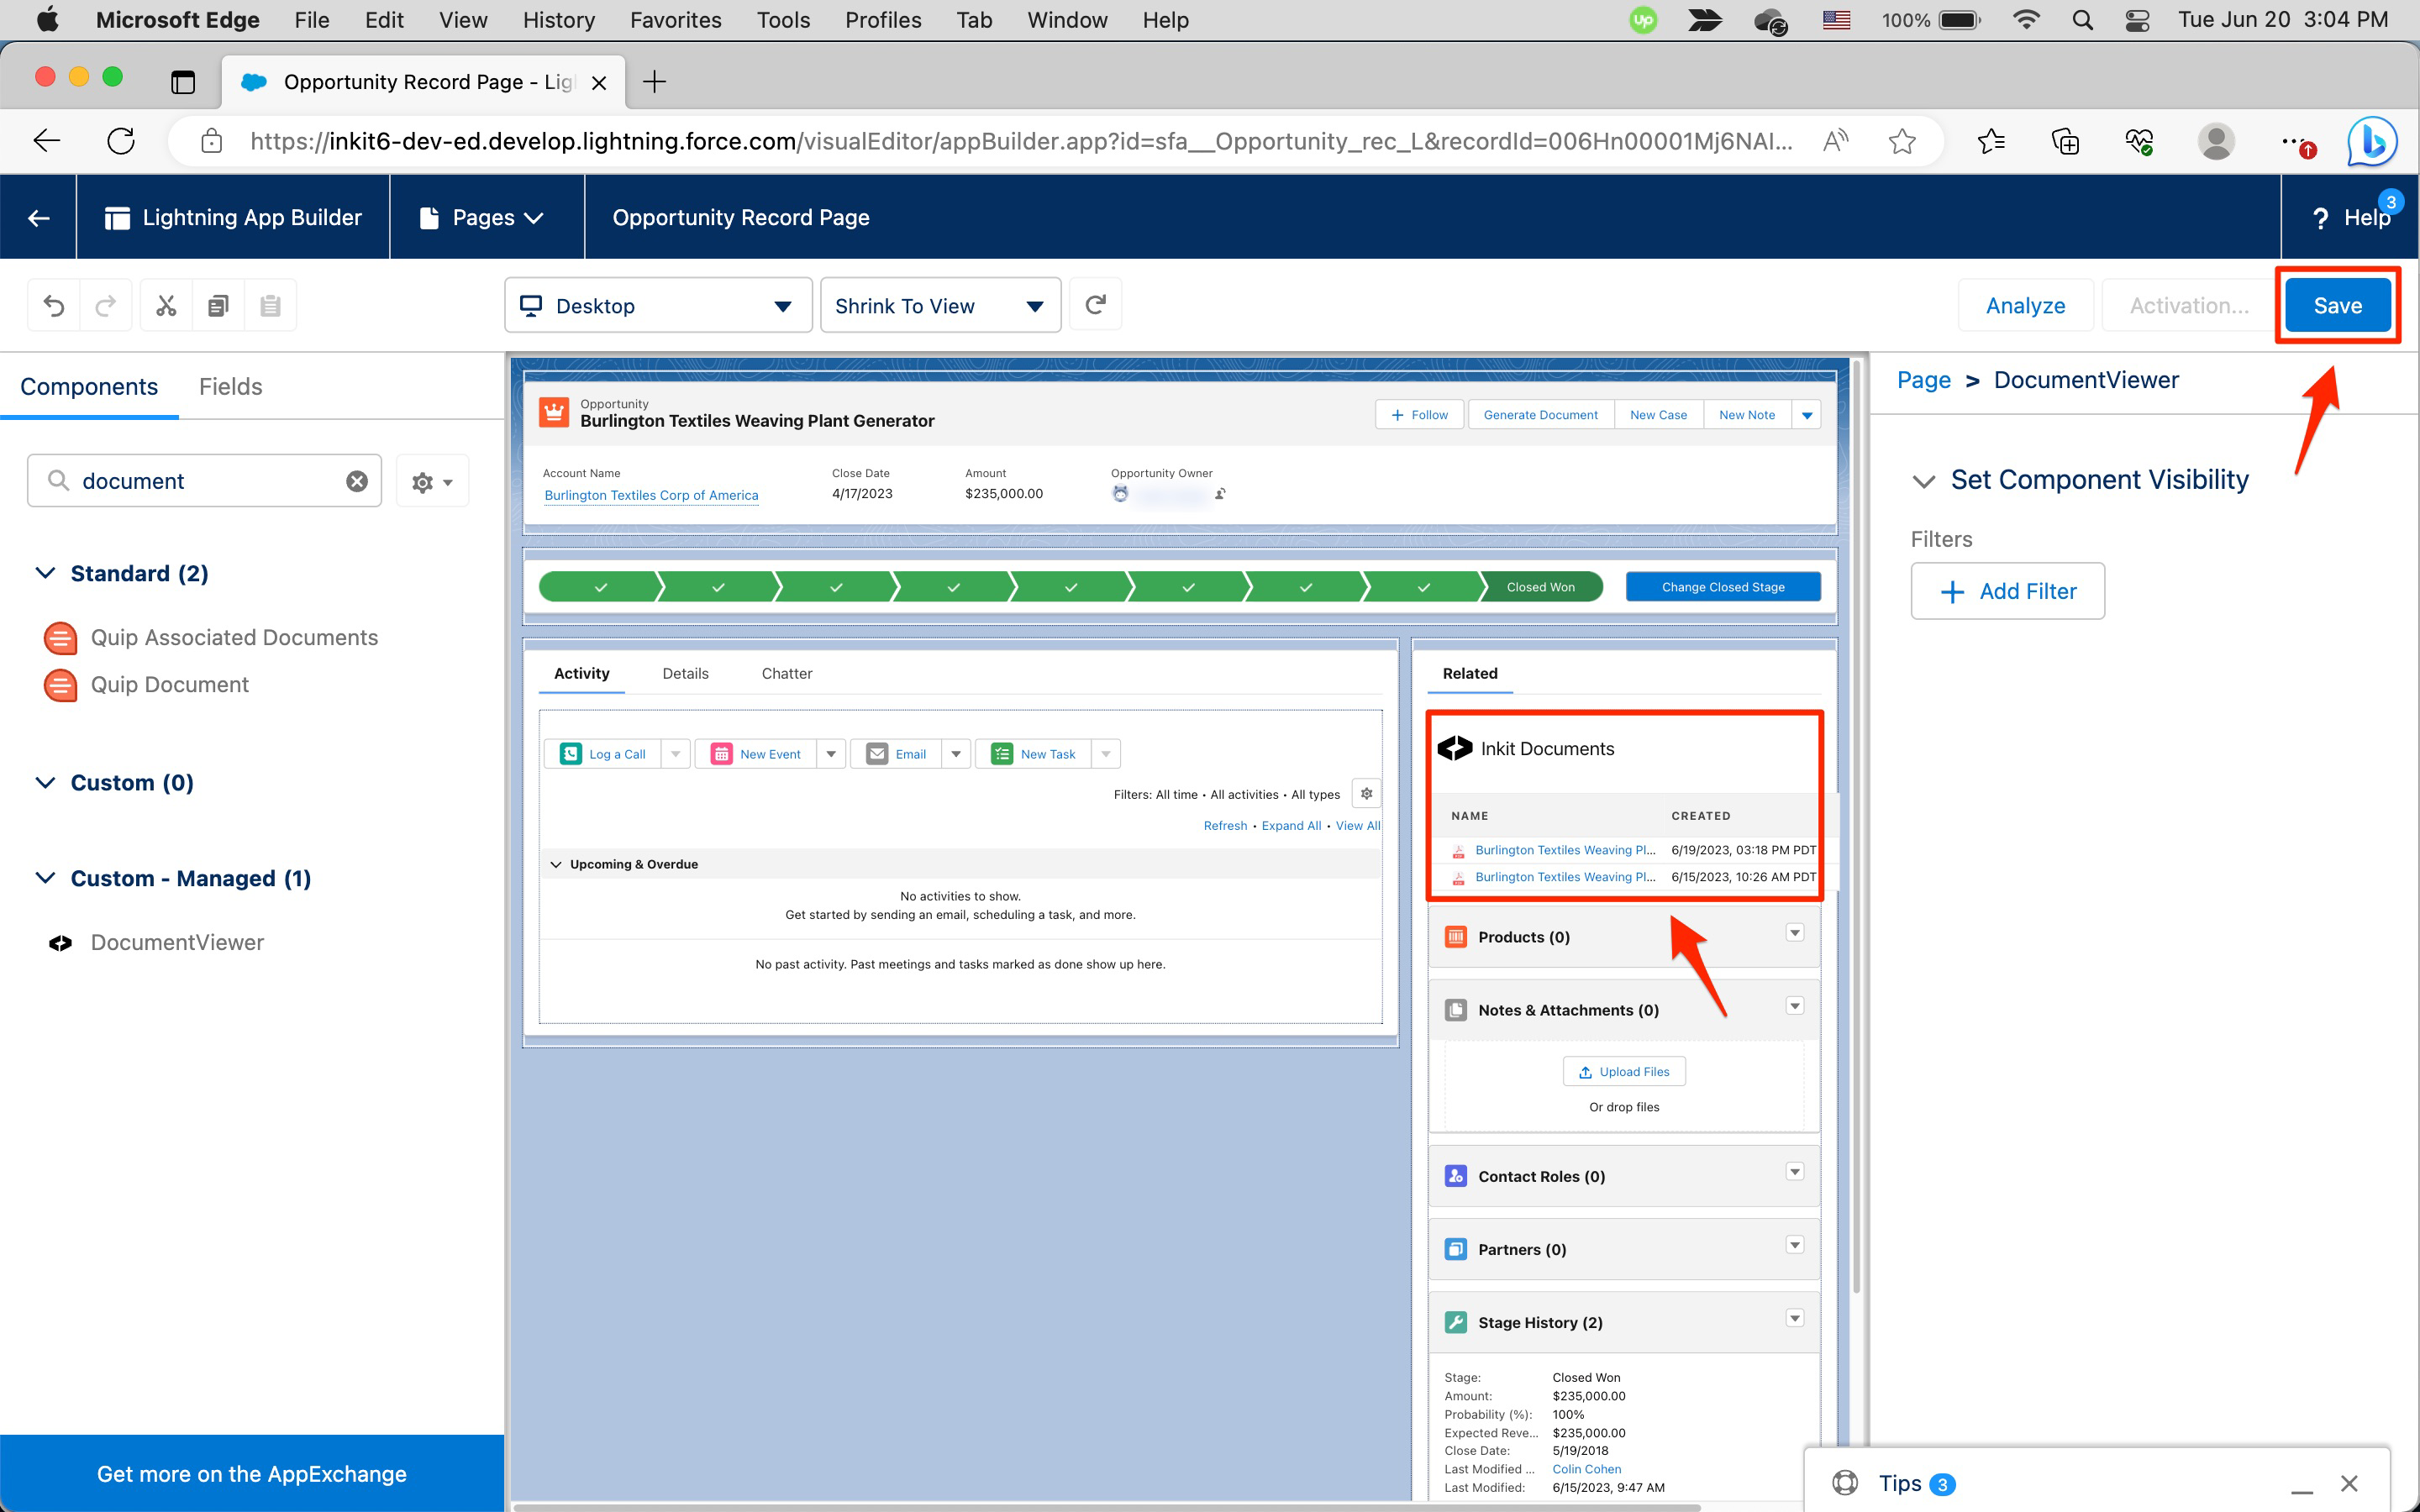
The DocumentViewer will now display in the Related panel. To save the page, click Save.
-
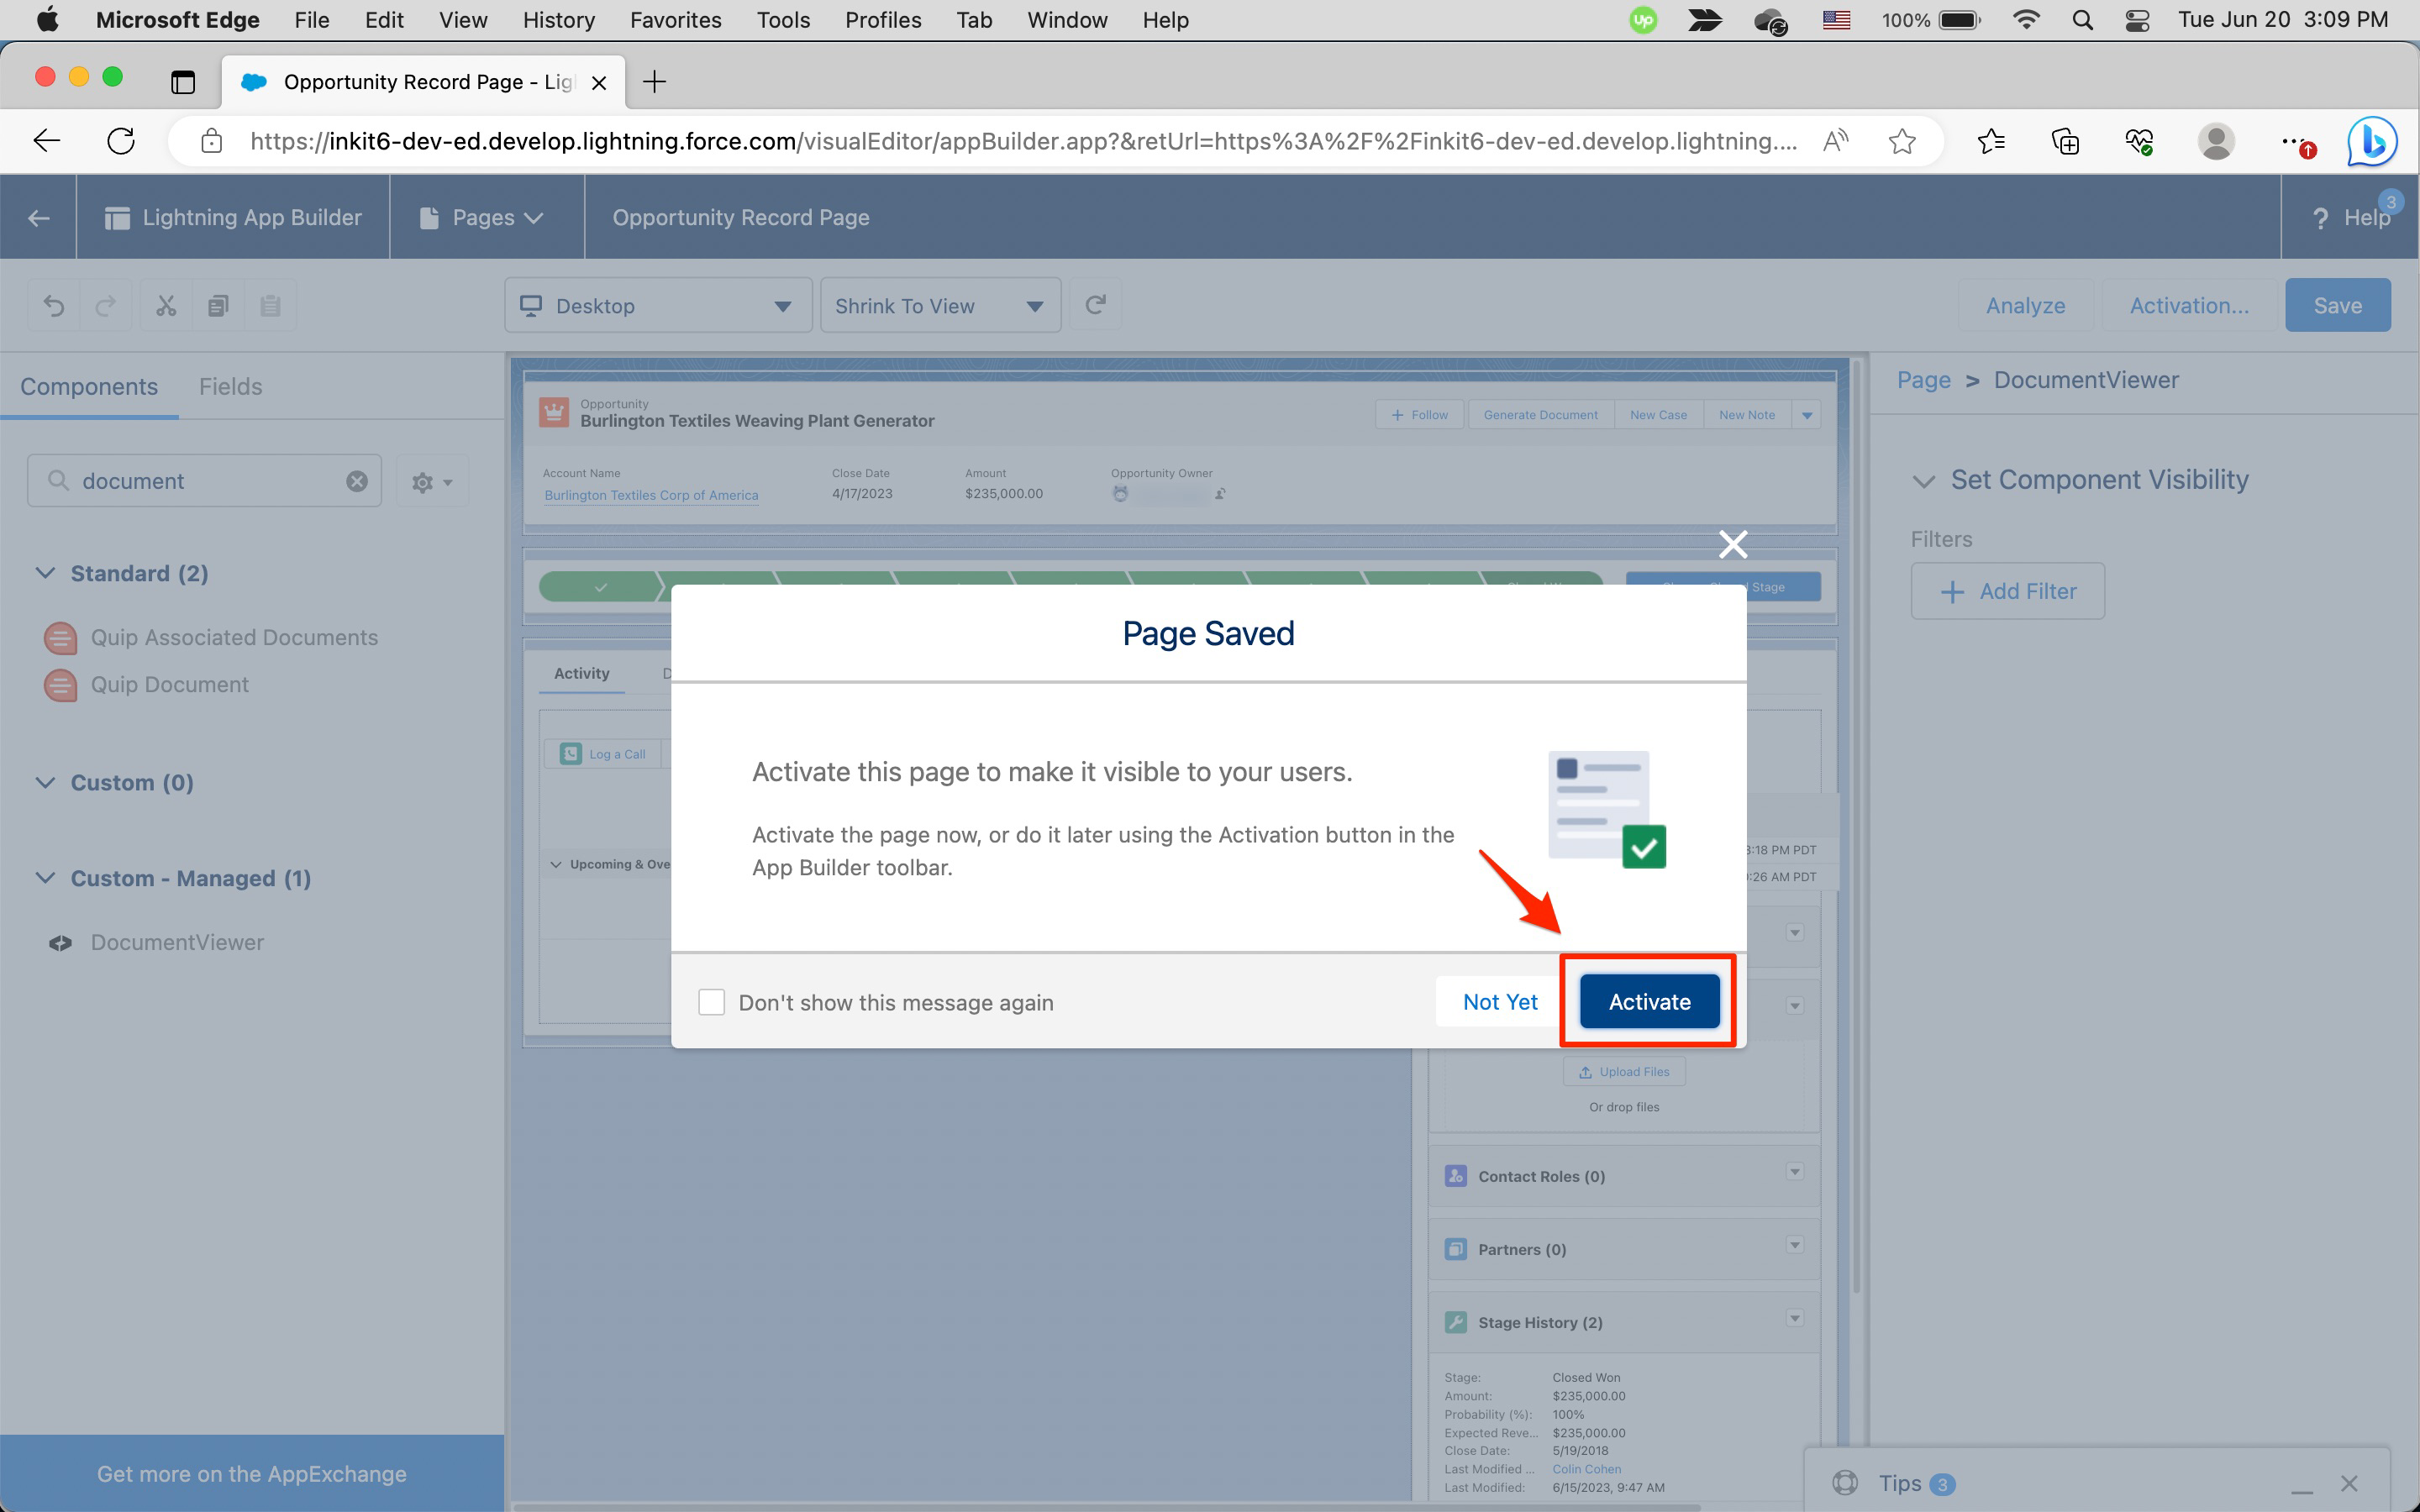
If you have not already activated the page, in the Page Saved dialog box, click Activate.
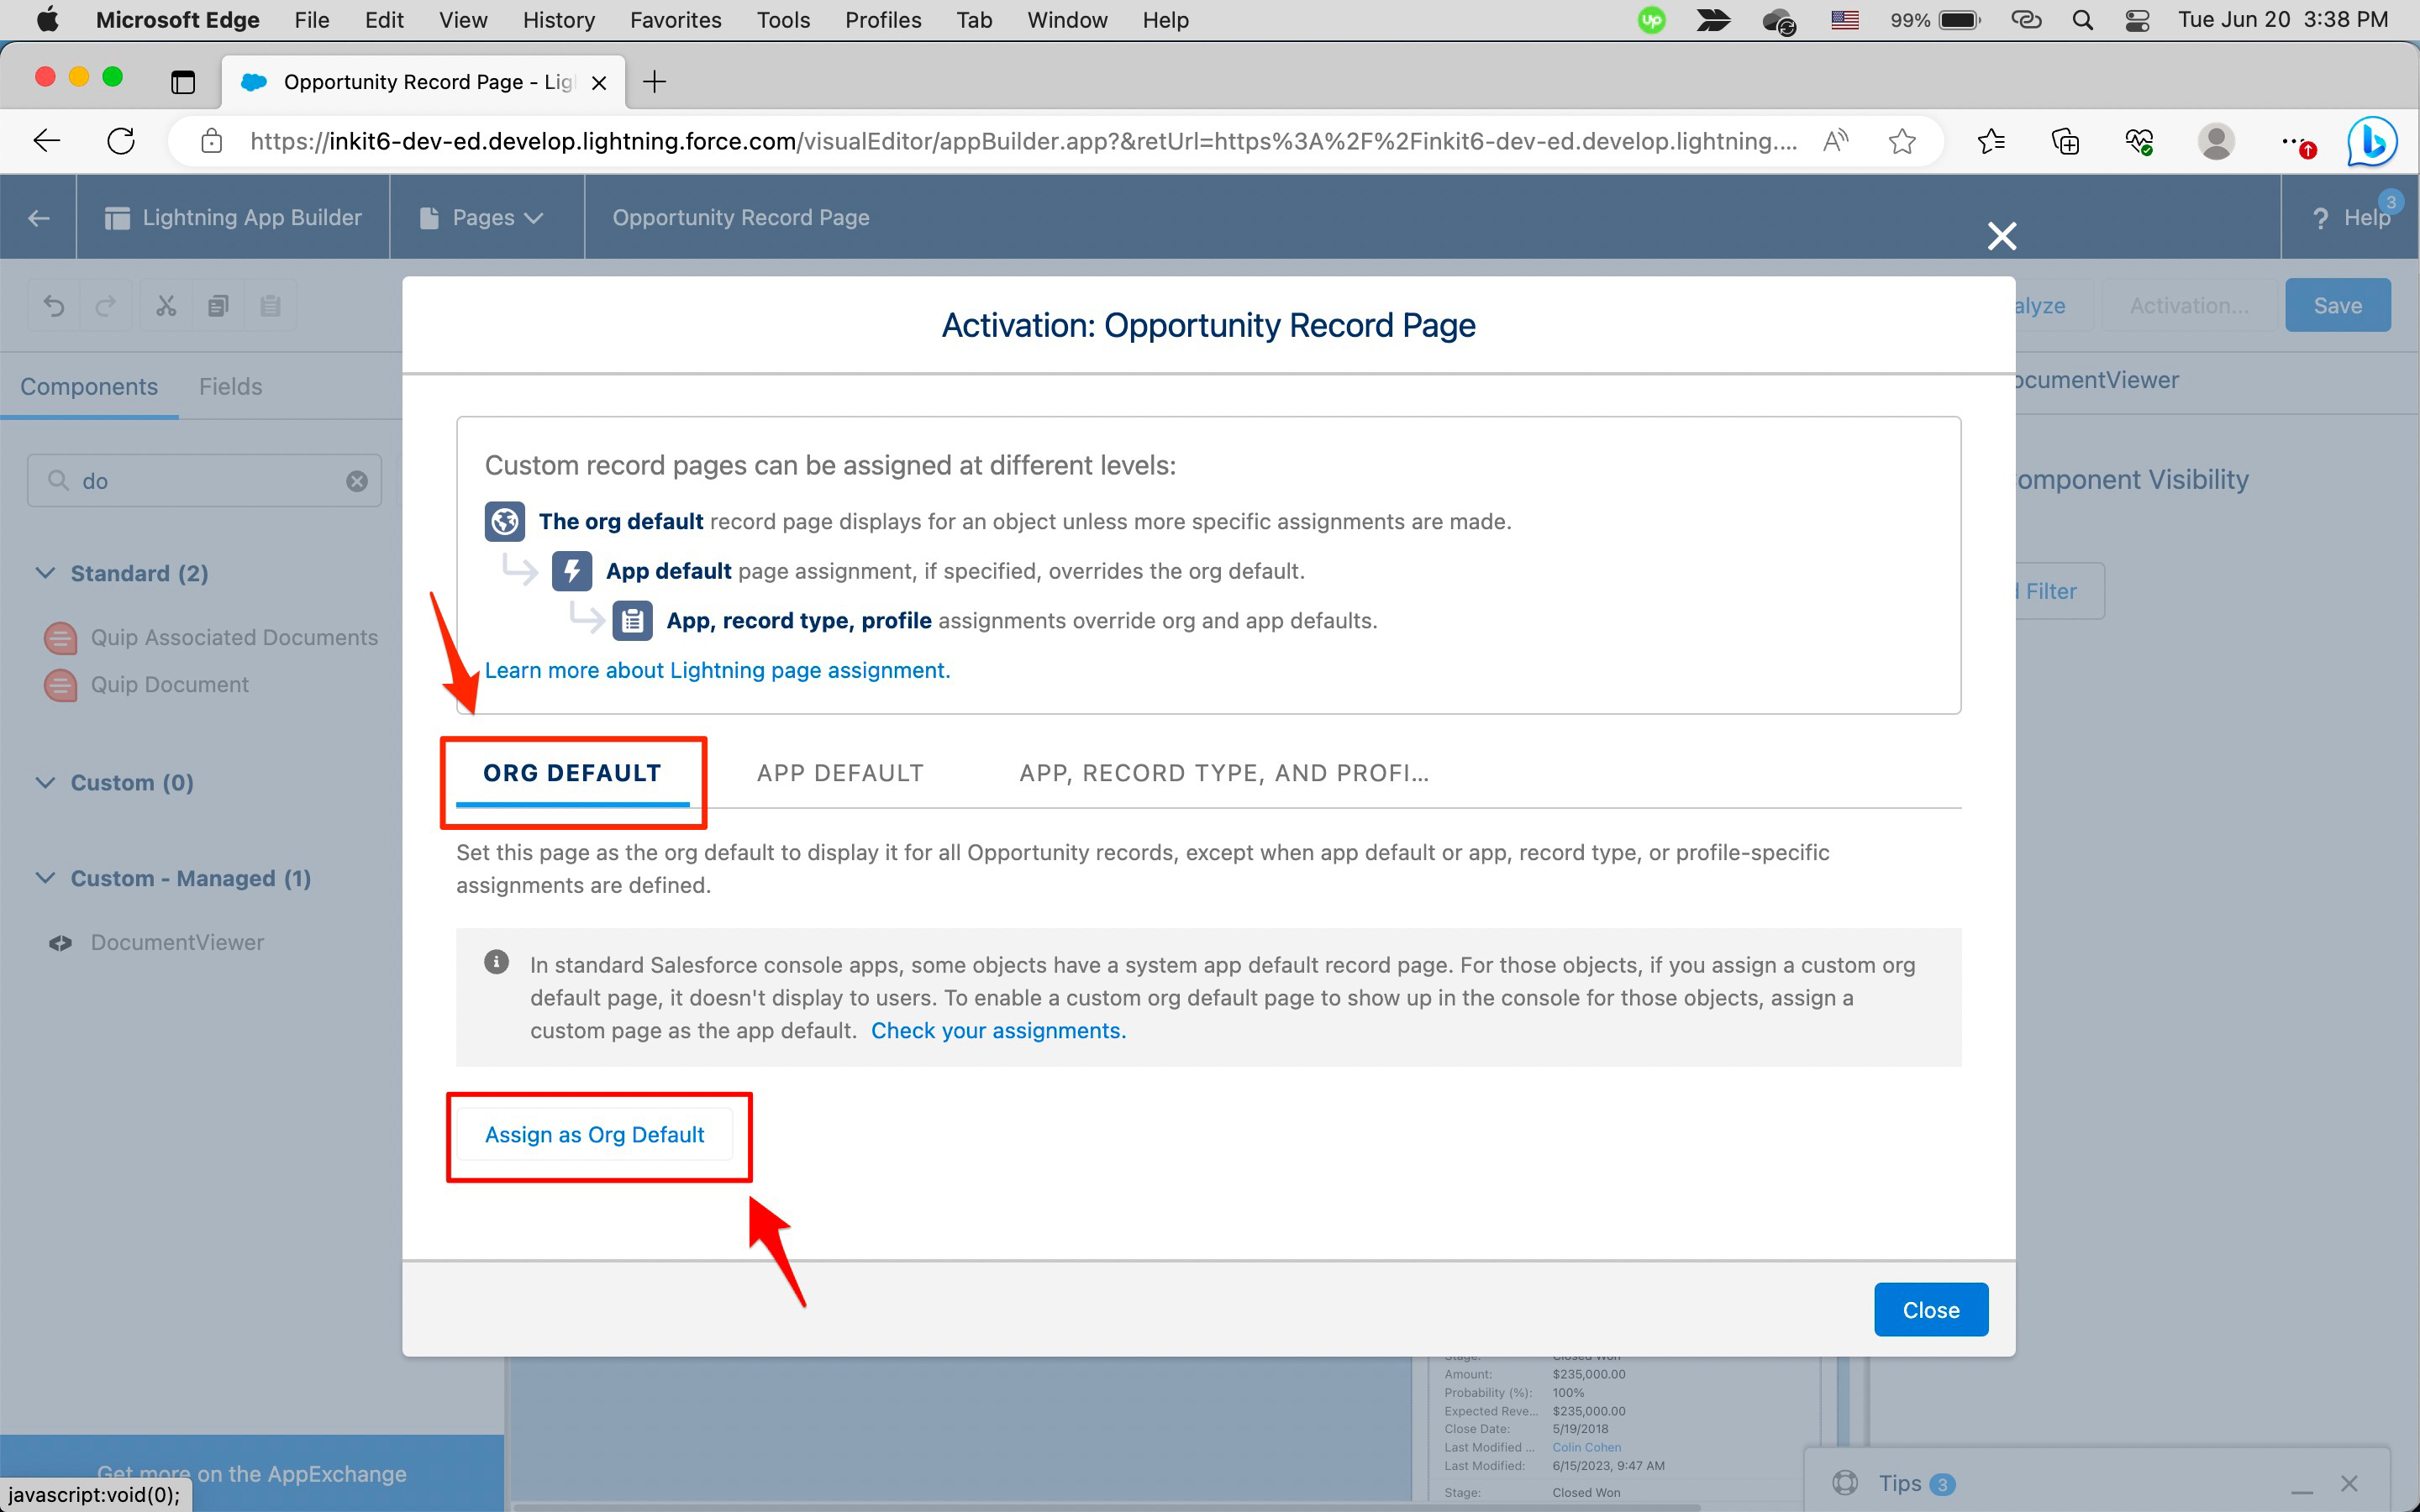
In the Activation: Opportunity Record Page dialog box, select how to assign the record page from the following tabs:
- ORG DEFAULT
- APP DEFAULT
- APP, RECORD TYPE, AND PROFILE
We recommend that you choose ORG DEFAULT.
Then click Assign as Org Default.
In the Assign form factor dialog box, select the form factor of the page. You can choose from the following:
- Desktop
- Phone
- Desktop and phone
Then click Next.

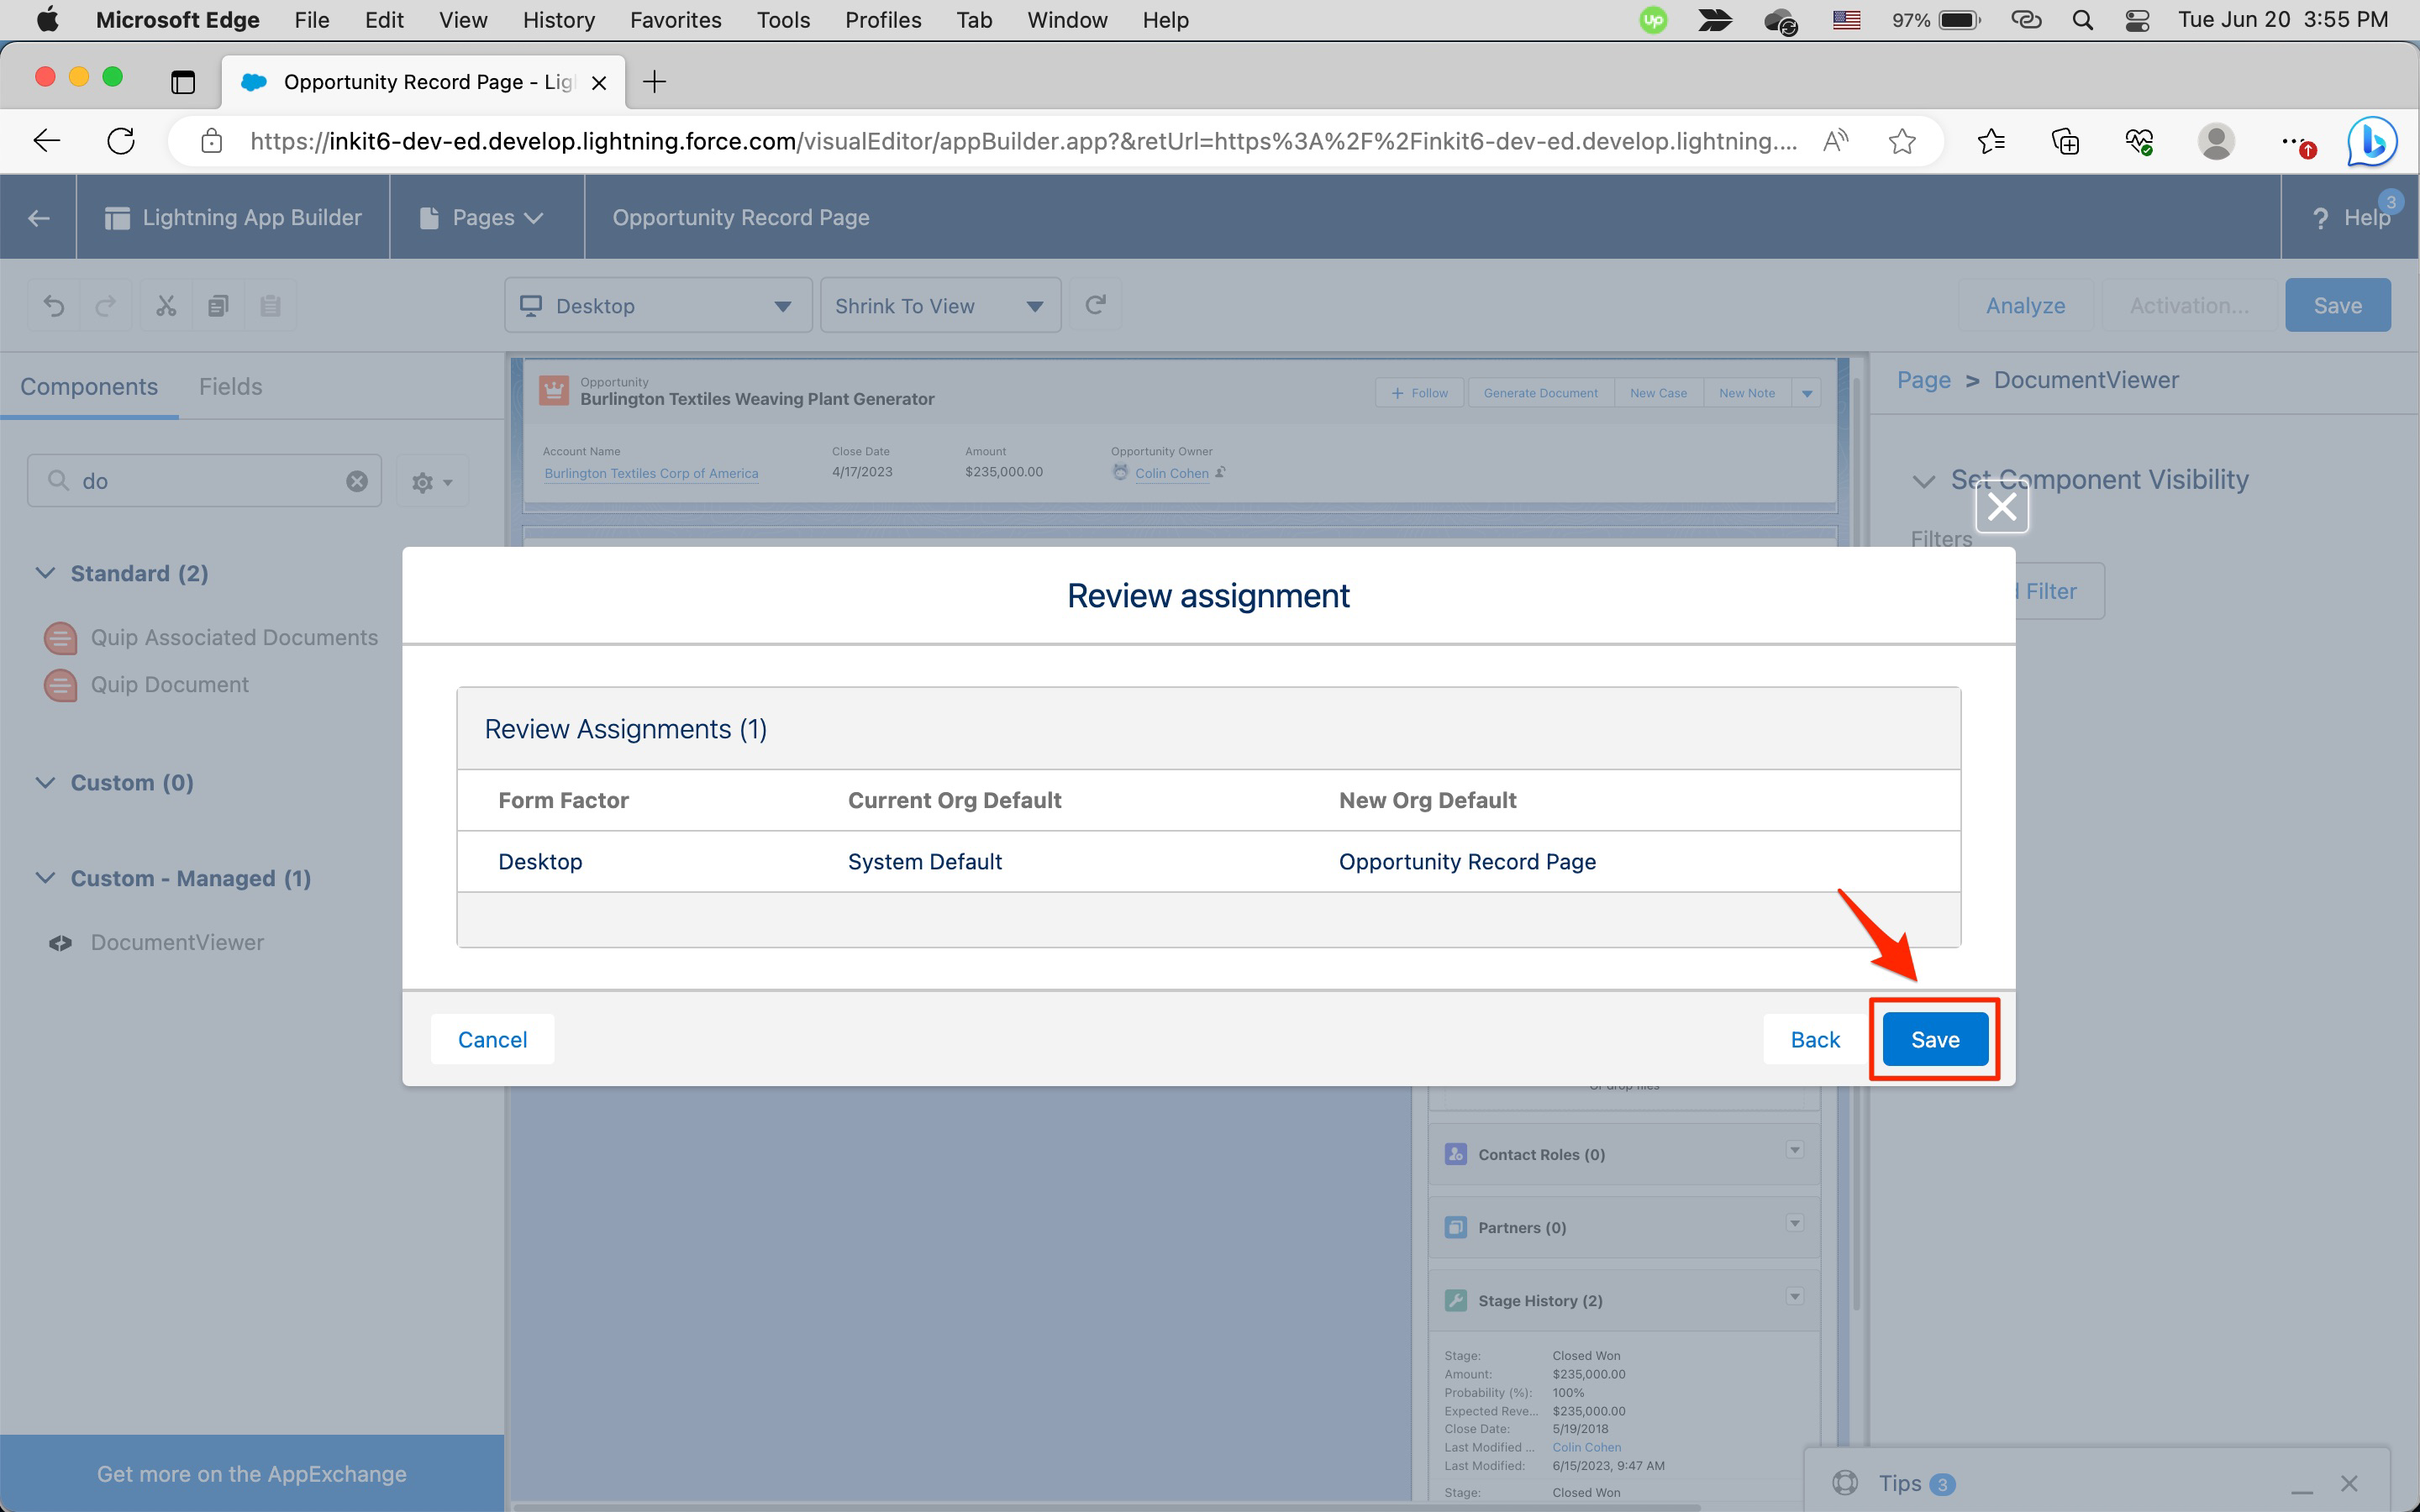
In the Review assignment dialog box, confirm the record page assignment and click Save.
-
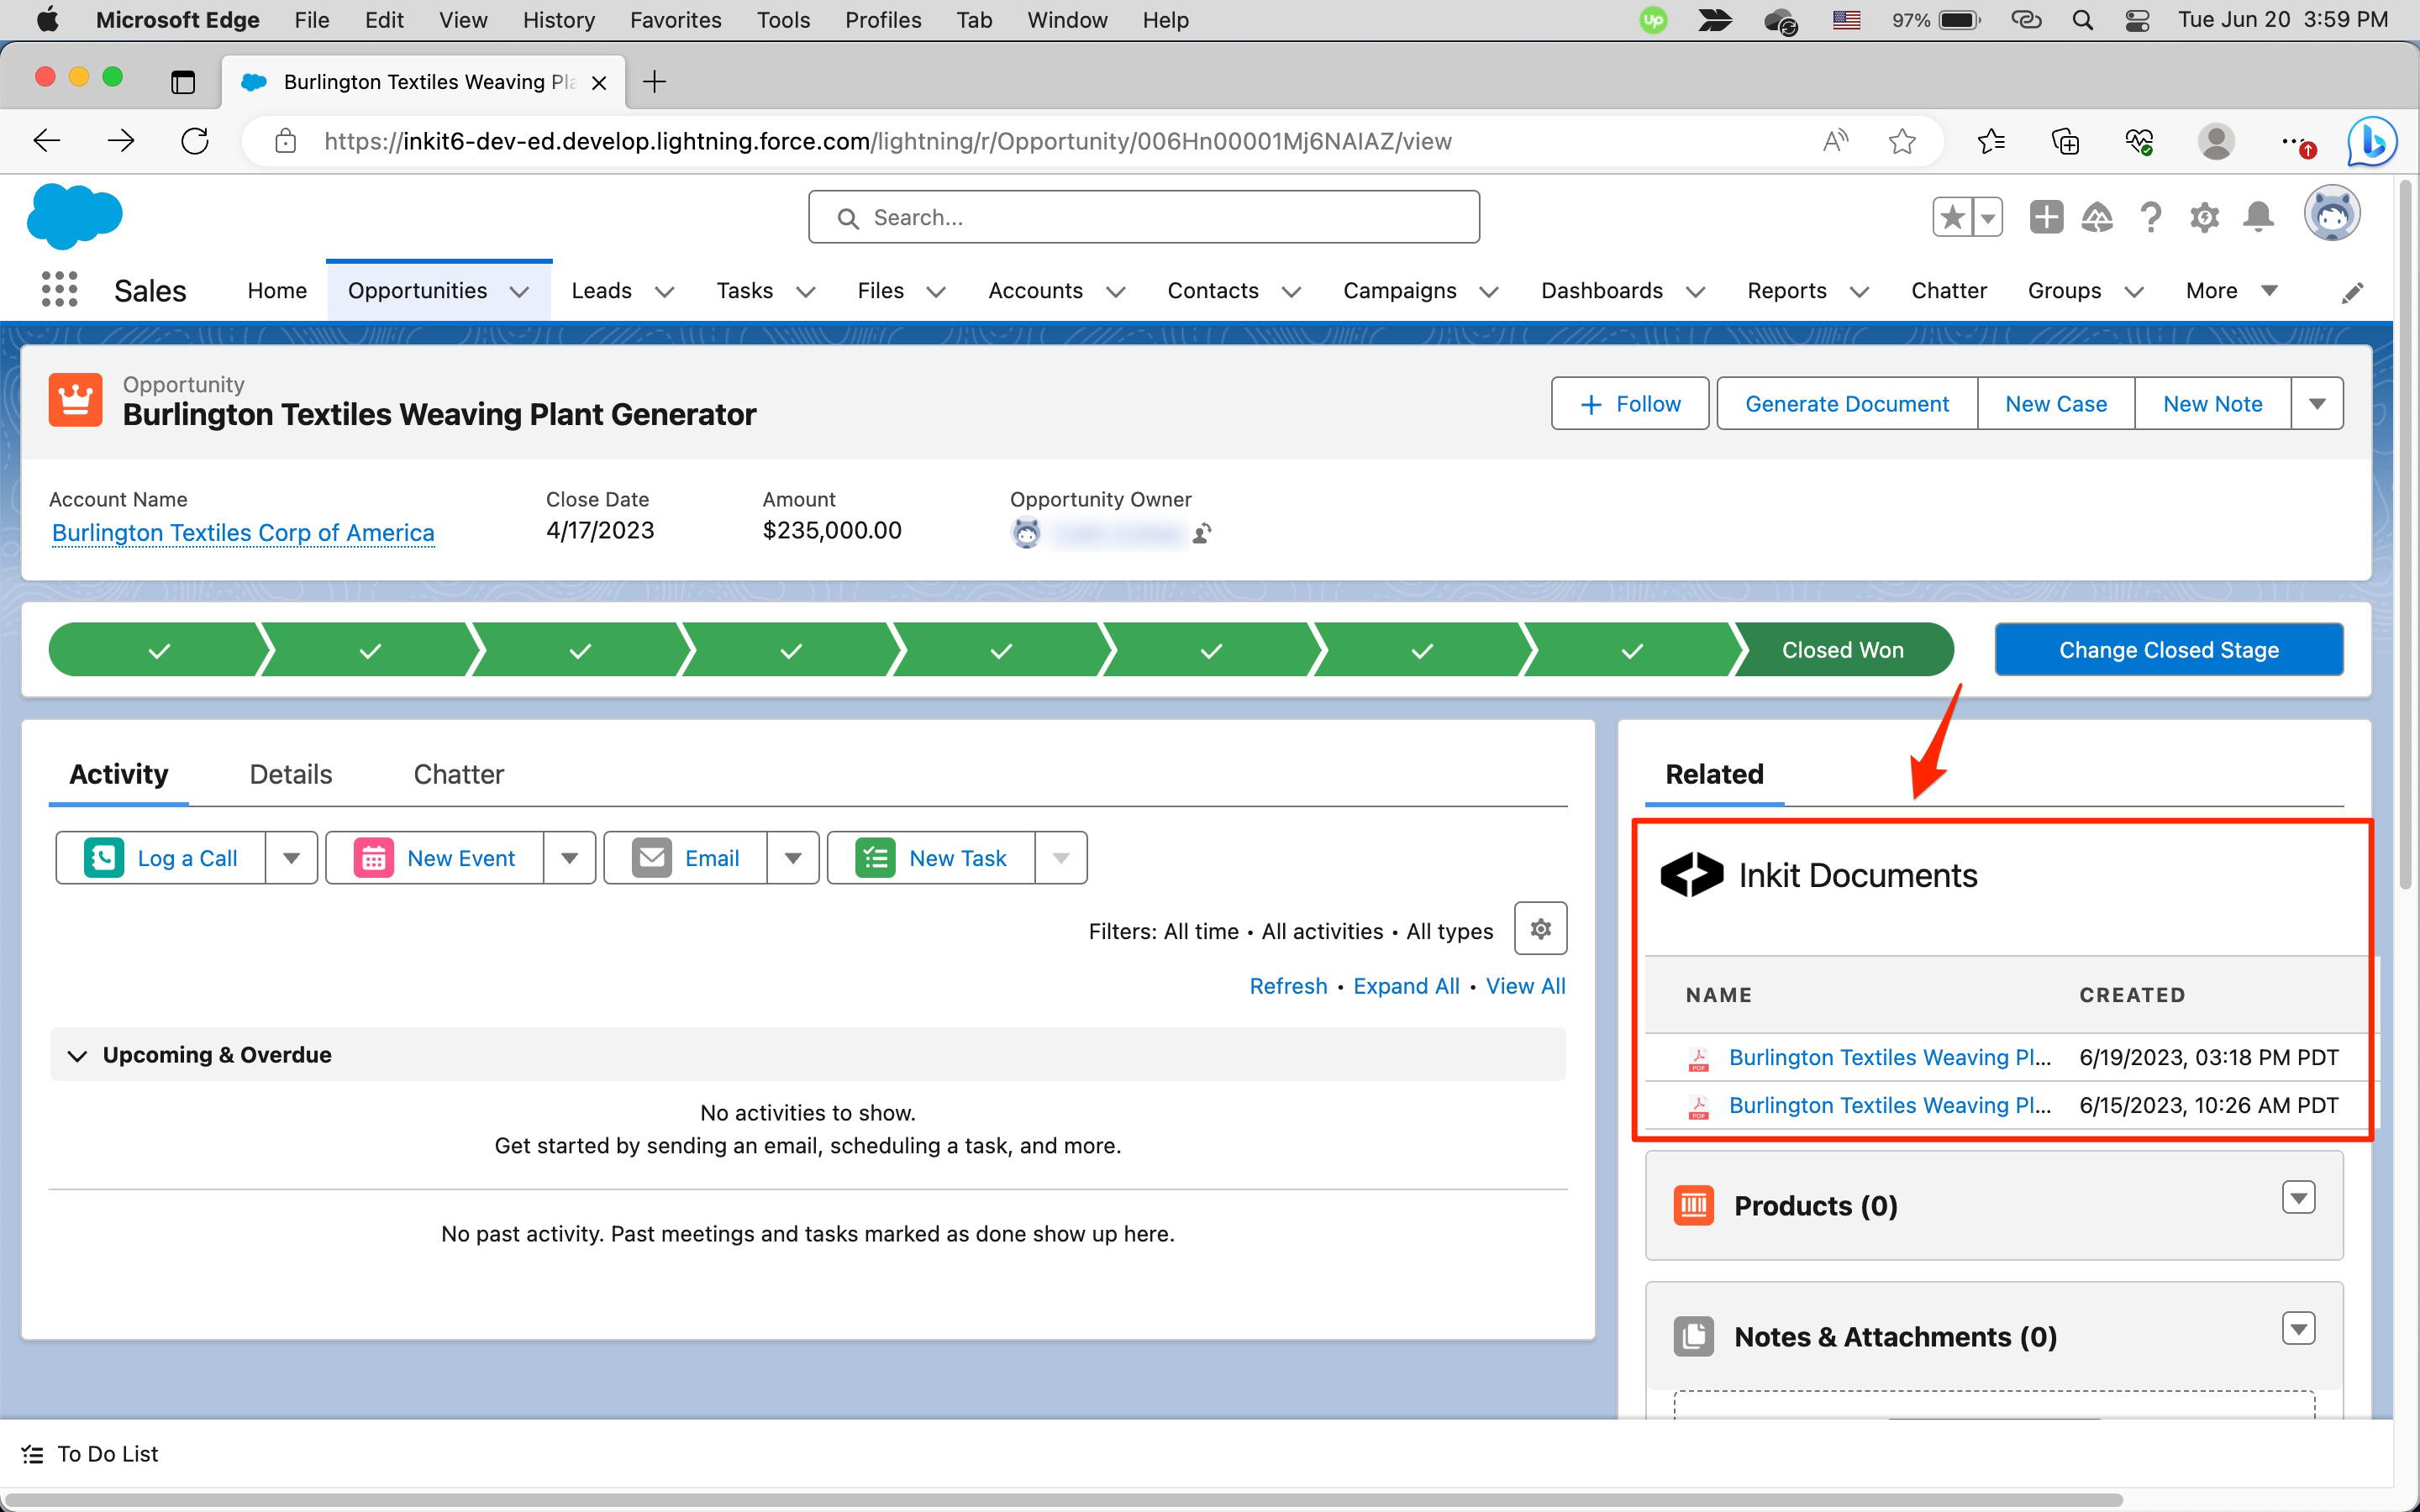
In the Opportunity page, you will now have an Inkit Document Viewer in the Related panel. Within this, you will see links to your Inkit documents, which you can click on to view.
Updated 10 months ago