Embedding Salesforce fields into your Inkit template
You inject Salesforce data into the documents you generate through Inkit by embedding Salesforce fields into the template you will use to generate your documents.
To embed Salesforce data into your Inkit template, do the following:
- Identify the names of the Salesforce fields that you want to embed.
- Embed the Salesforce fields into your document template.
Identifying the names of the Salesforce fields that you want to embed
Before you can embed Salesforce data into your Inkit template, you need to identify the names of the Salesforce fields that you want to embed. You do this by editing a Salesforce object. In the following example, we will discover the fields available within a Sales Opportunity object:
-
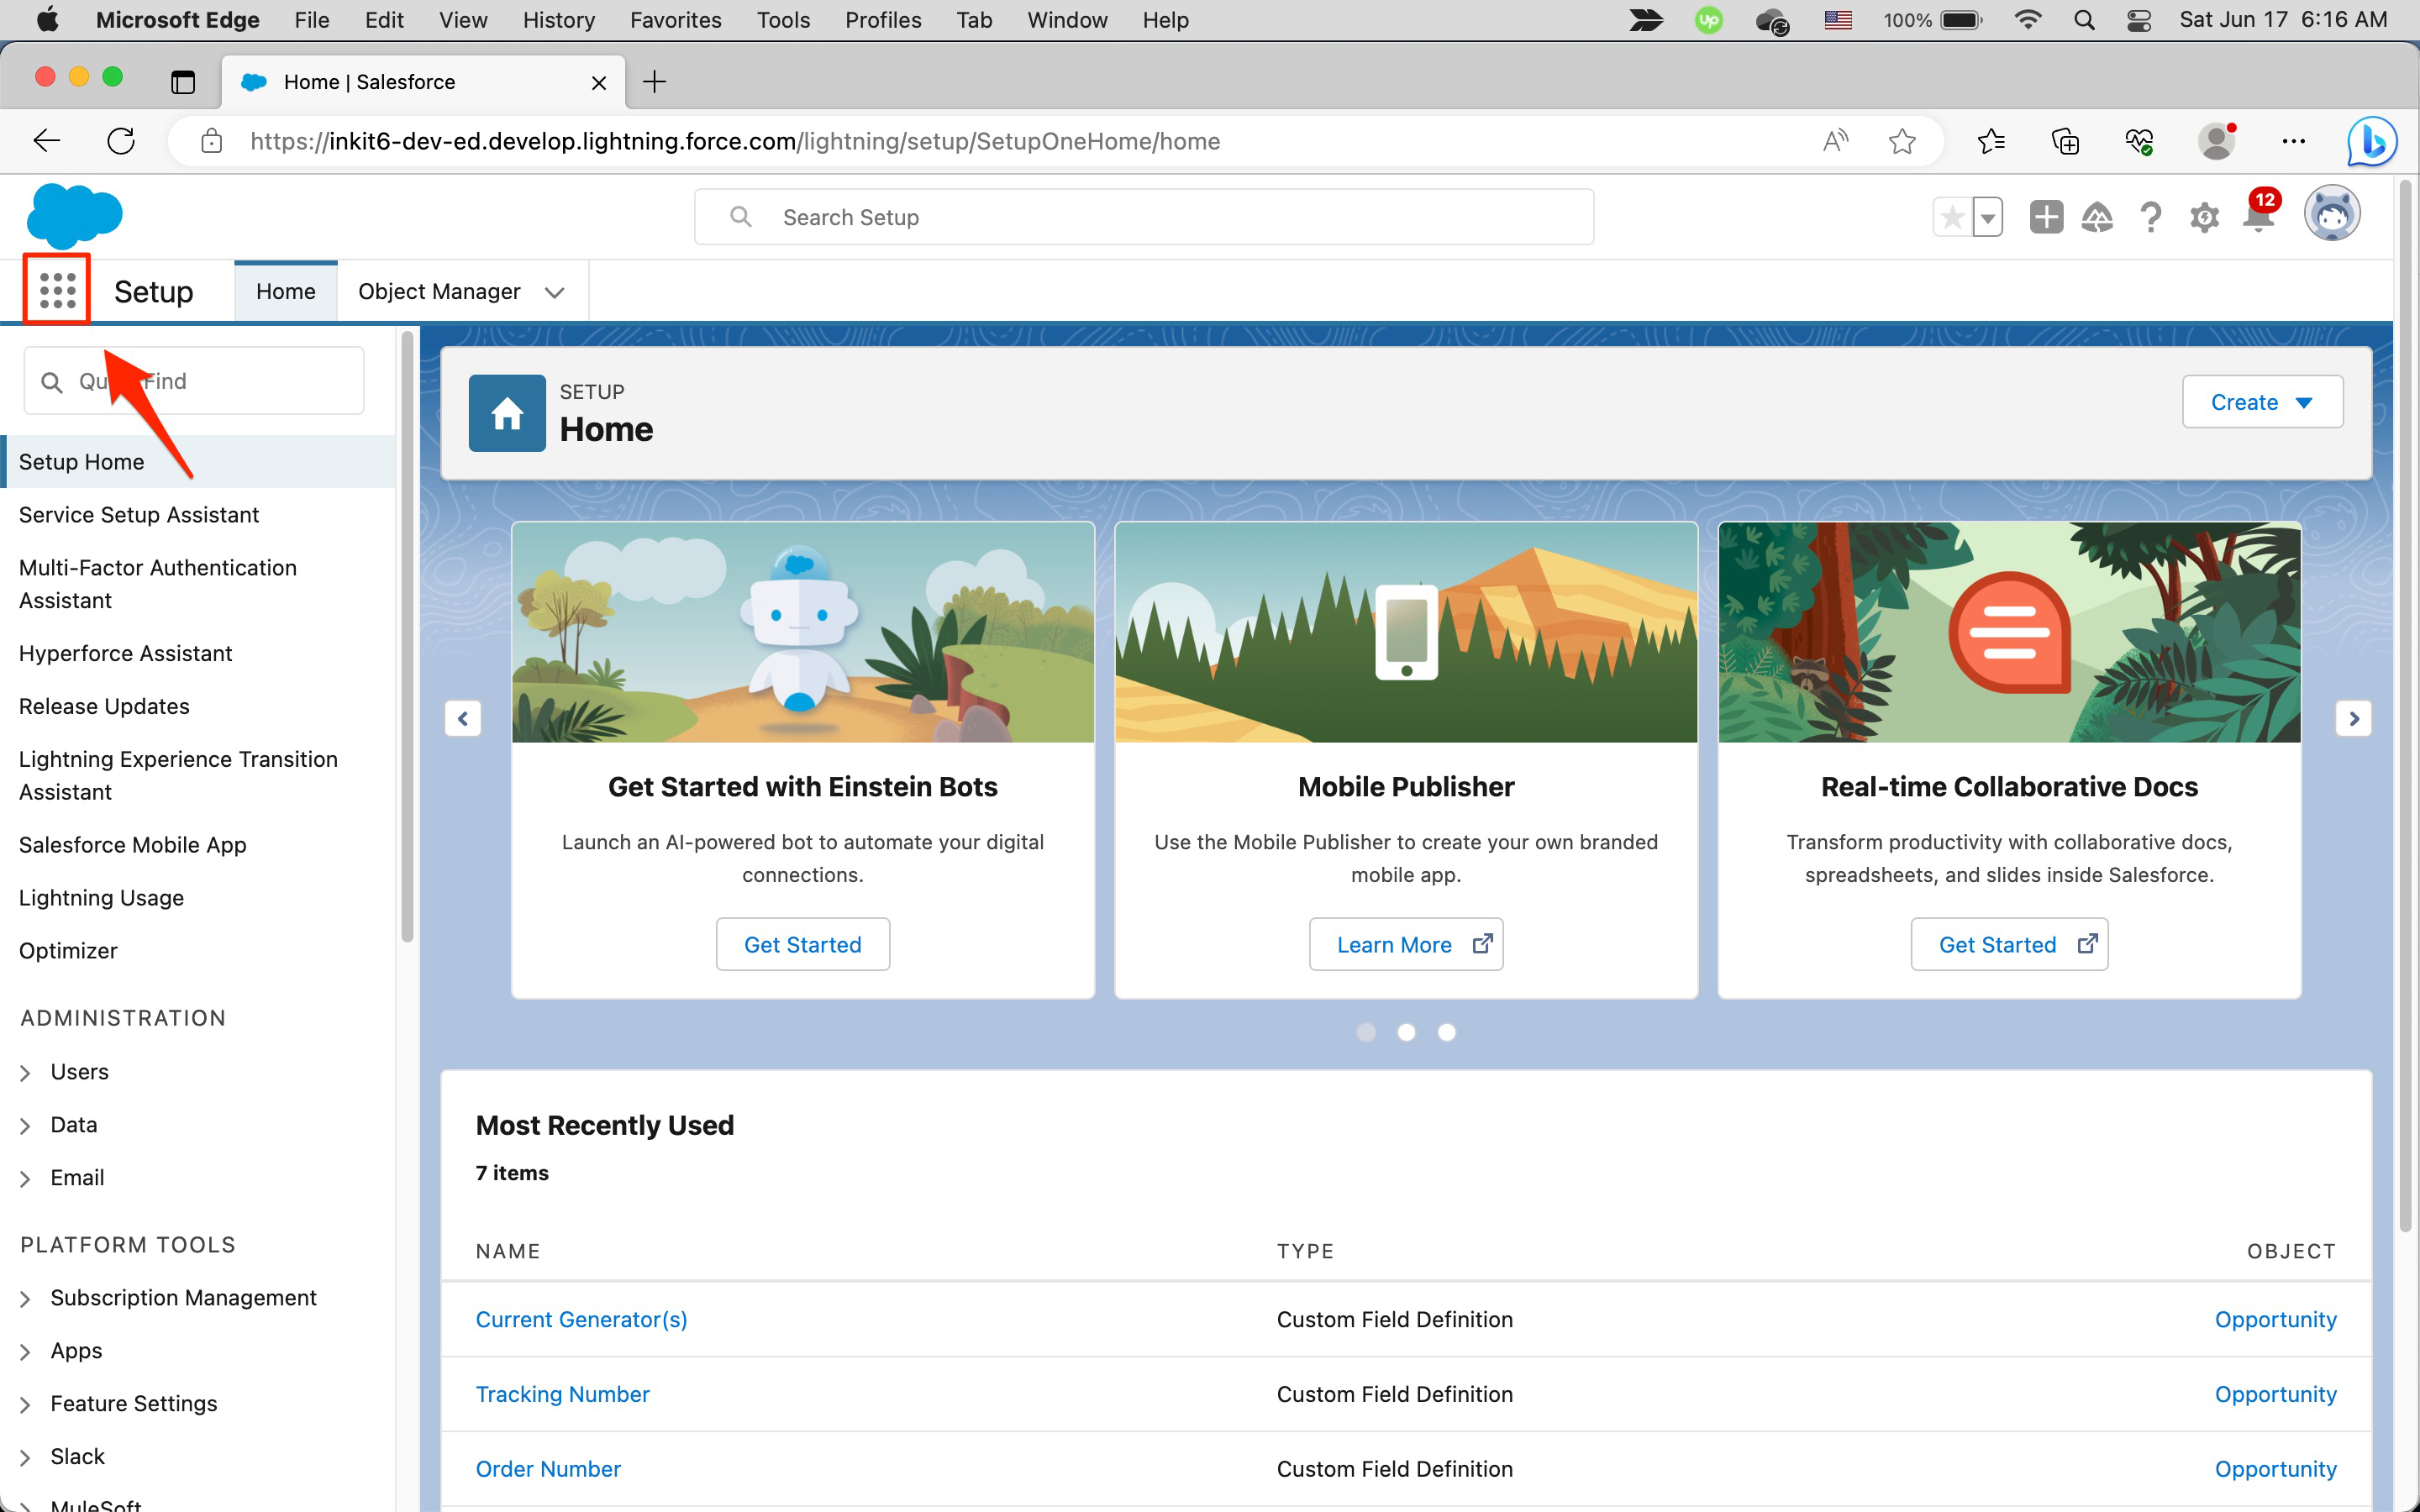
In Salesforce, click the App Launcher.
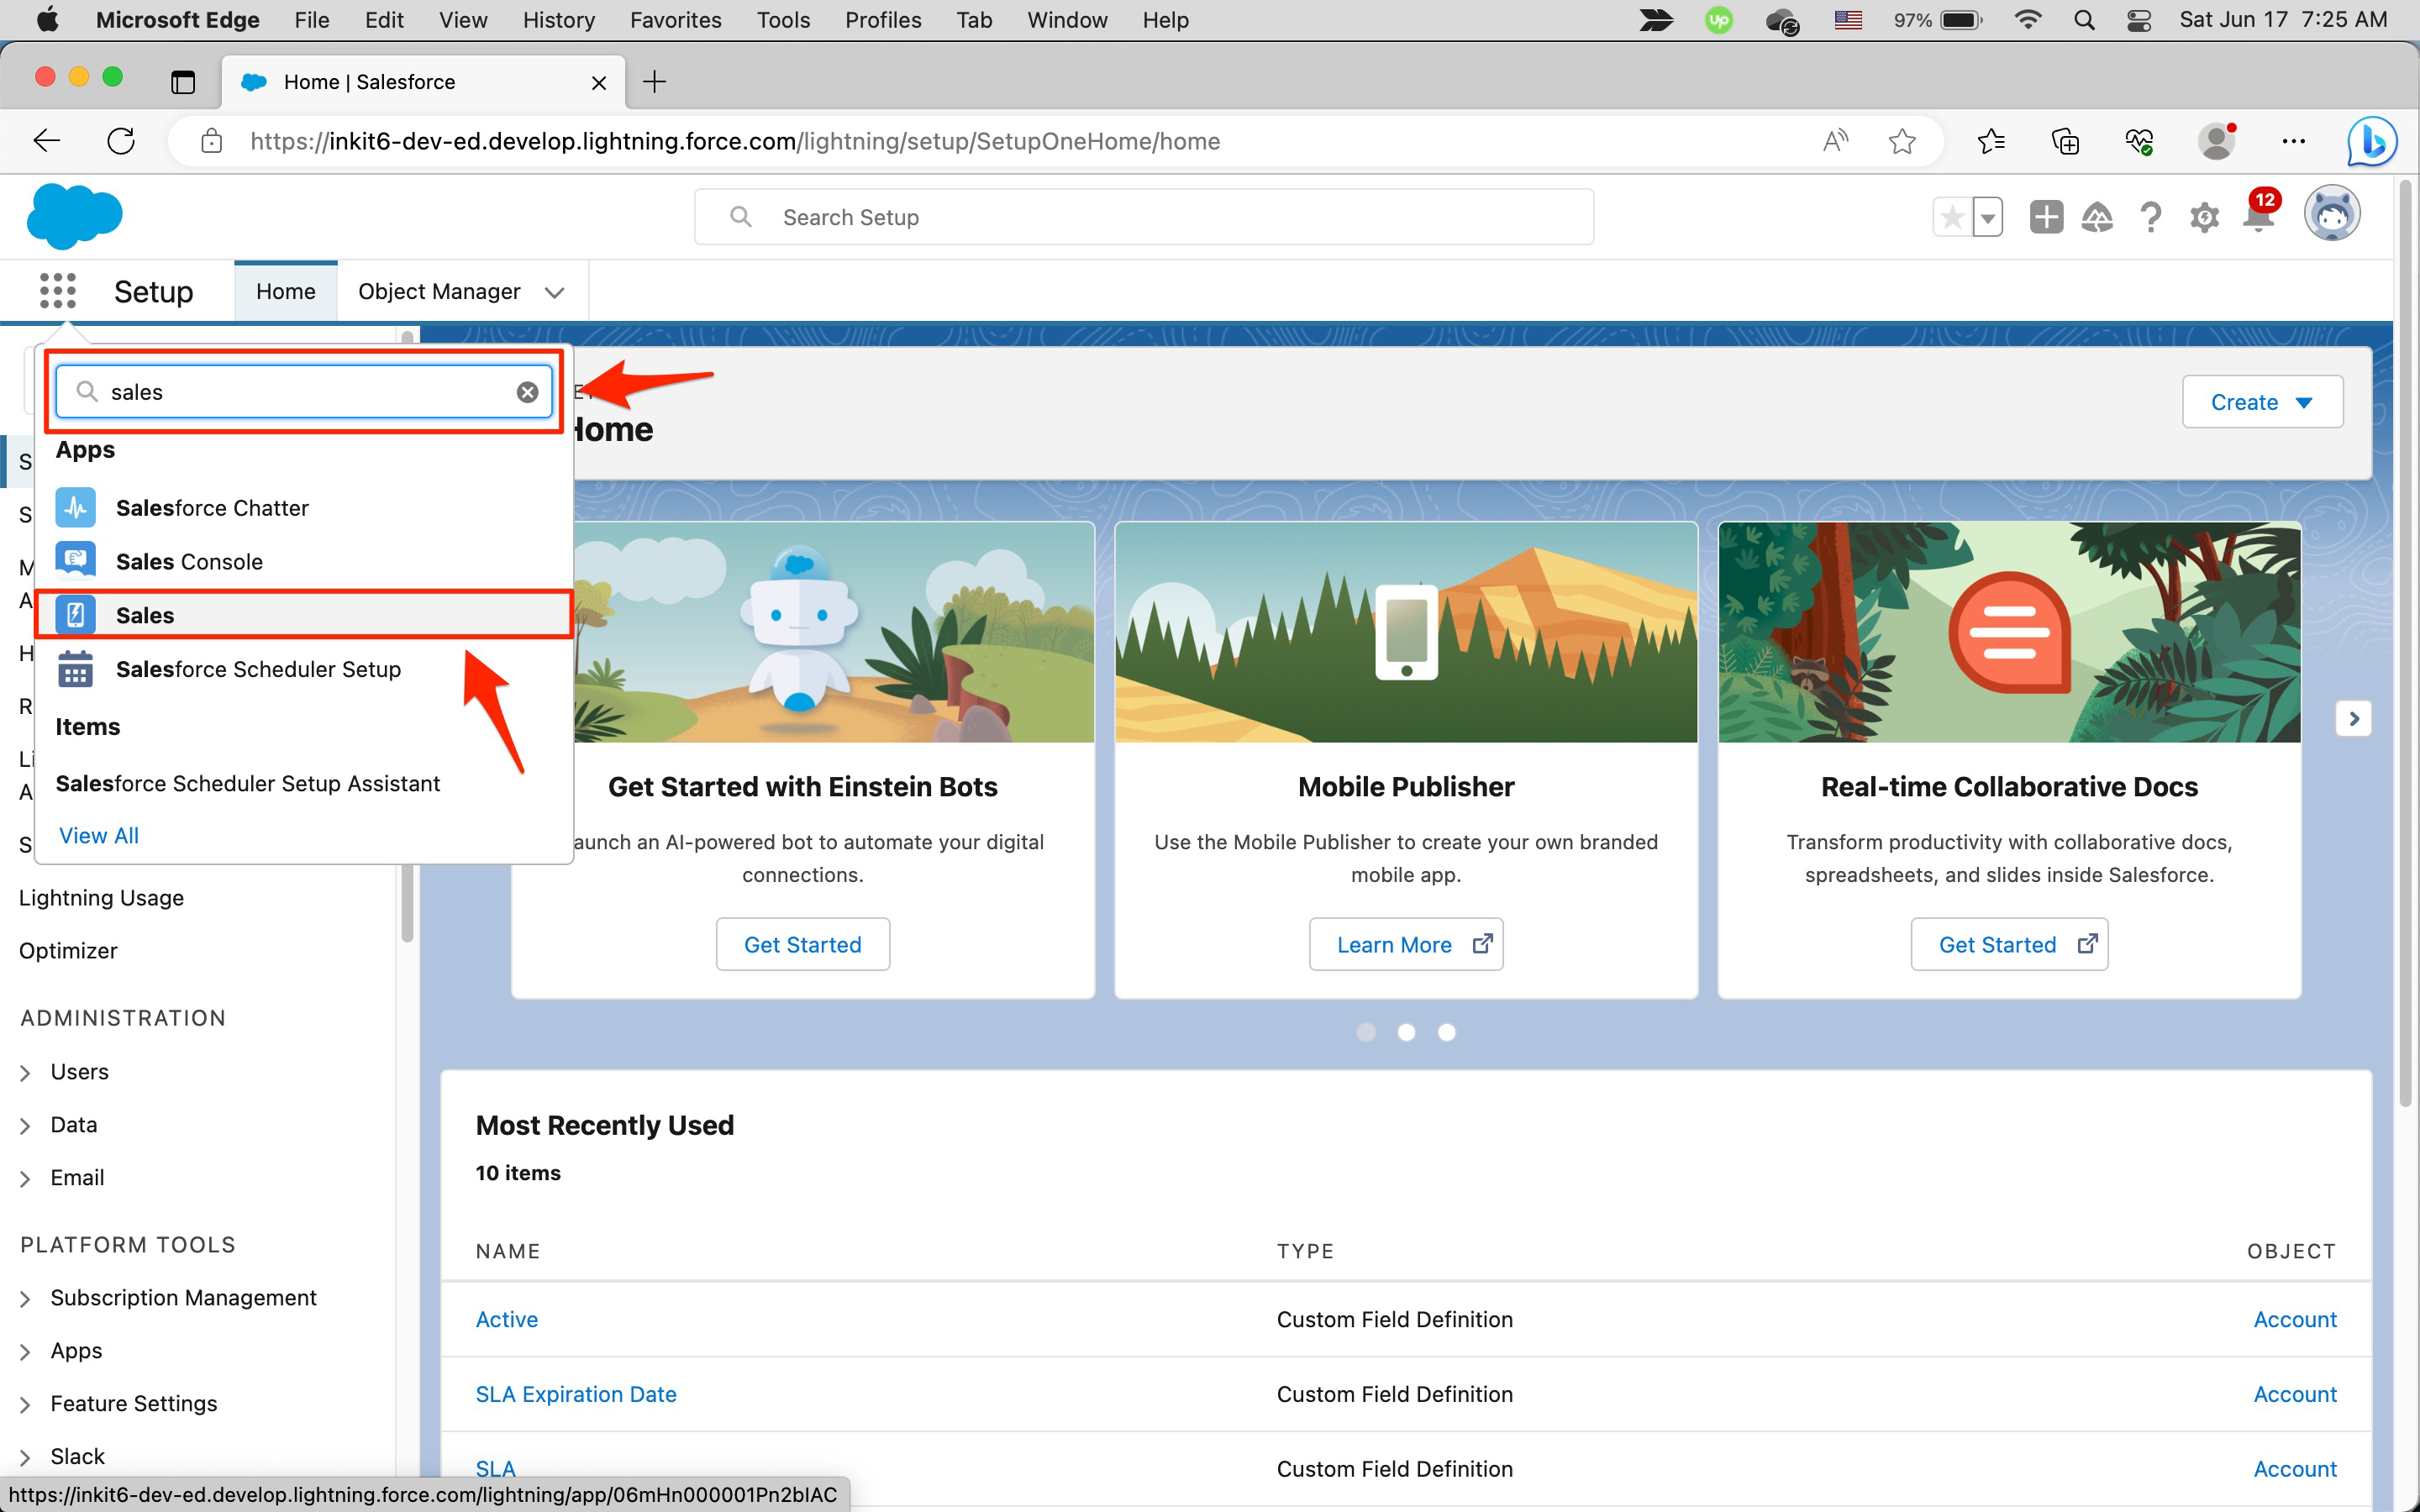
In the Search apps and items... field, enter sales and click the Sales app.
-
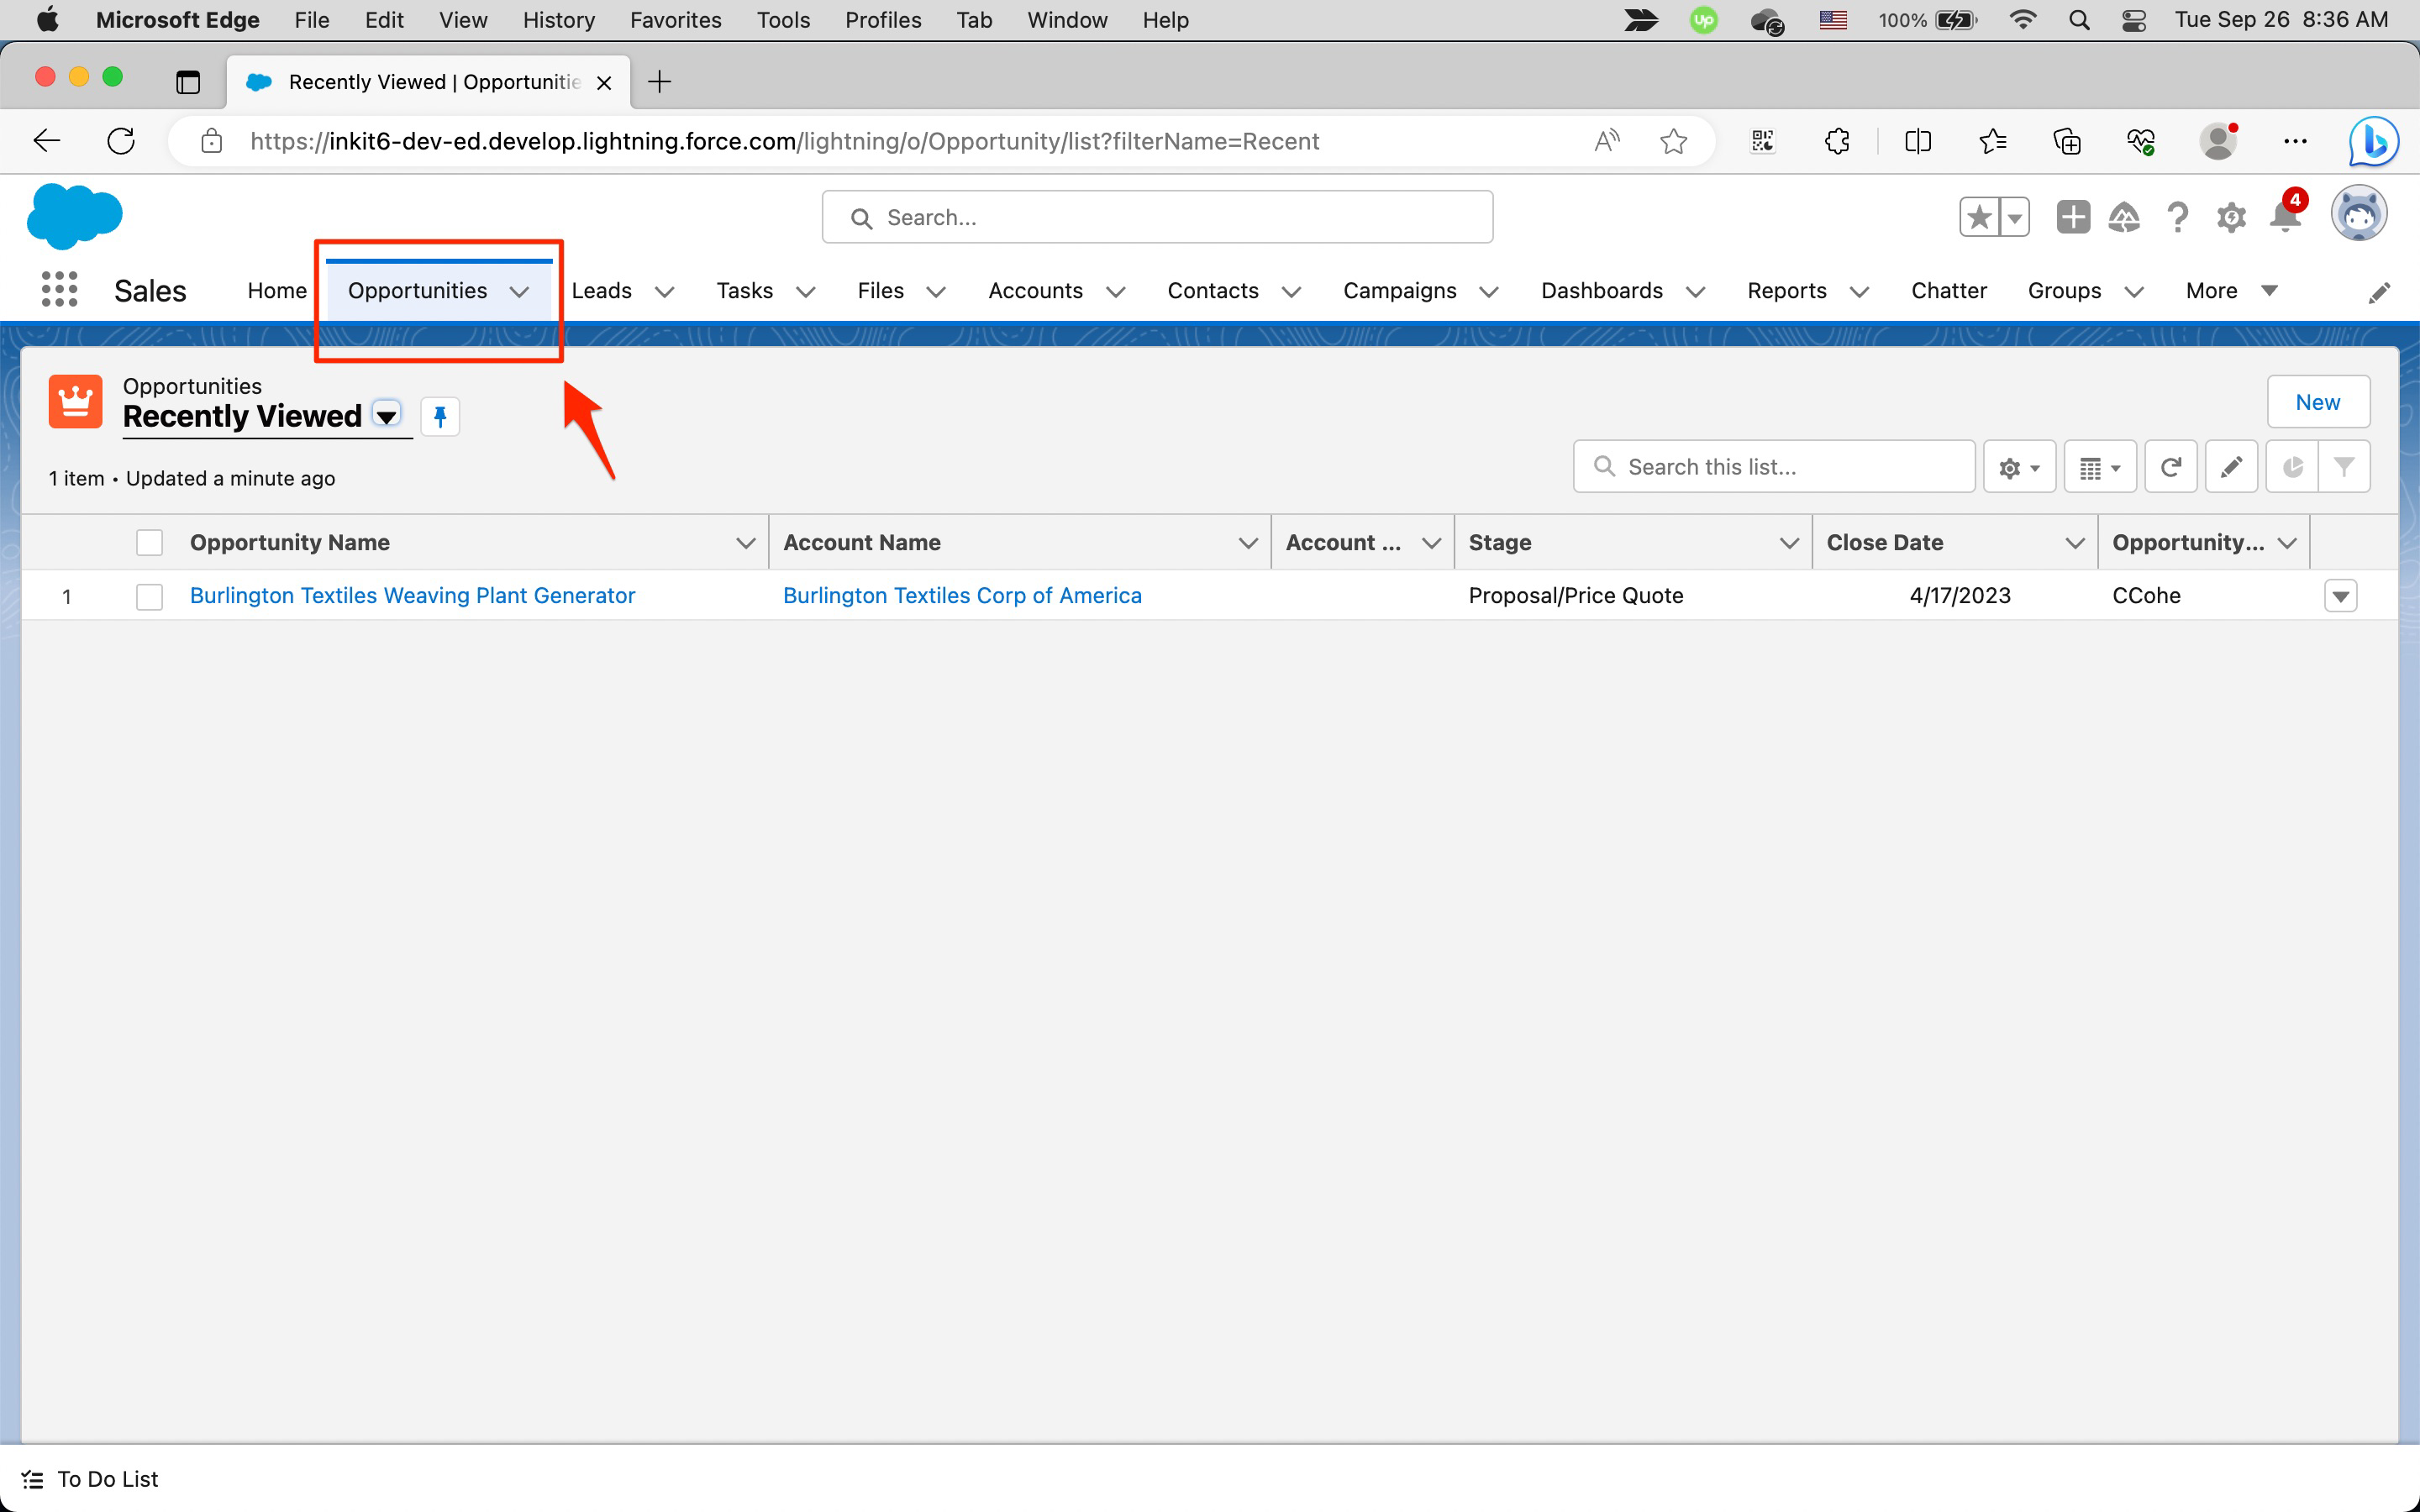
In the Sales page, click the Opportunities tab.
-
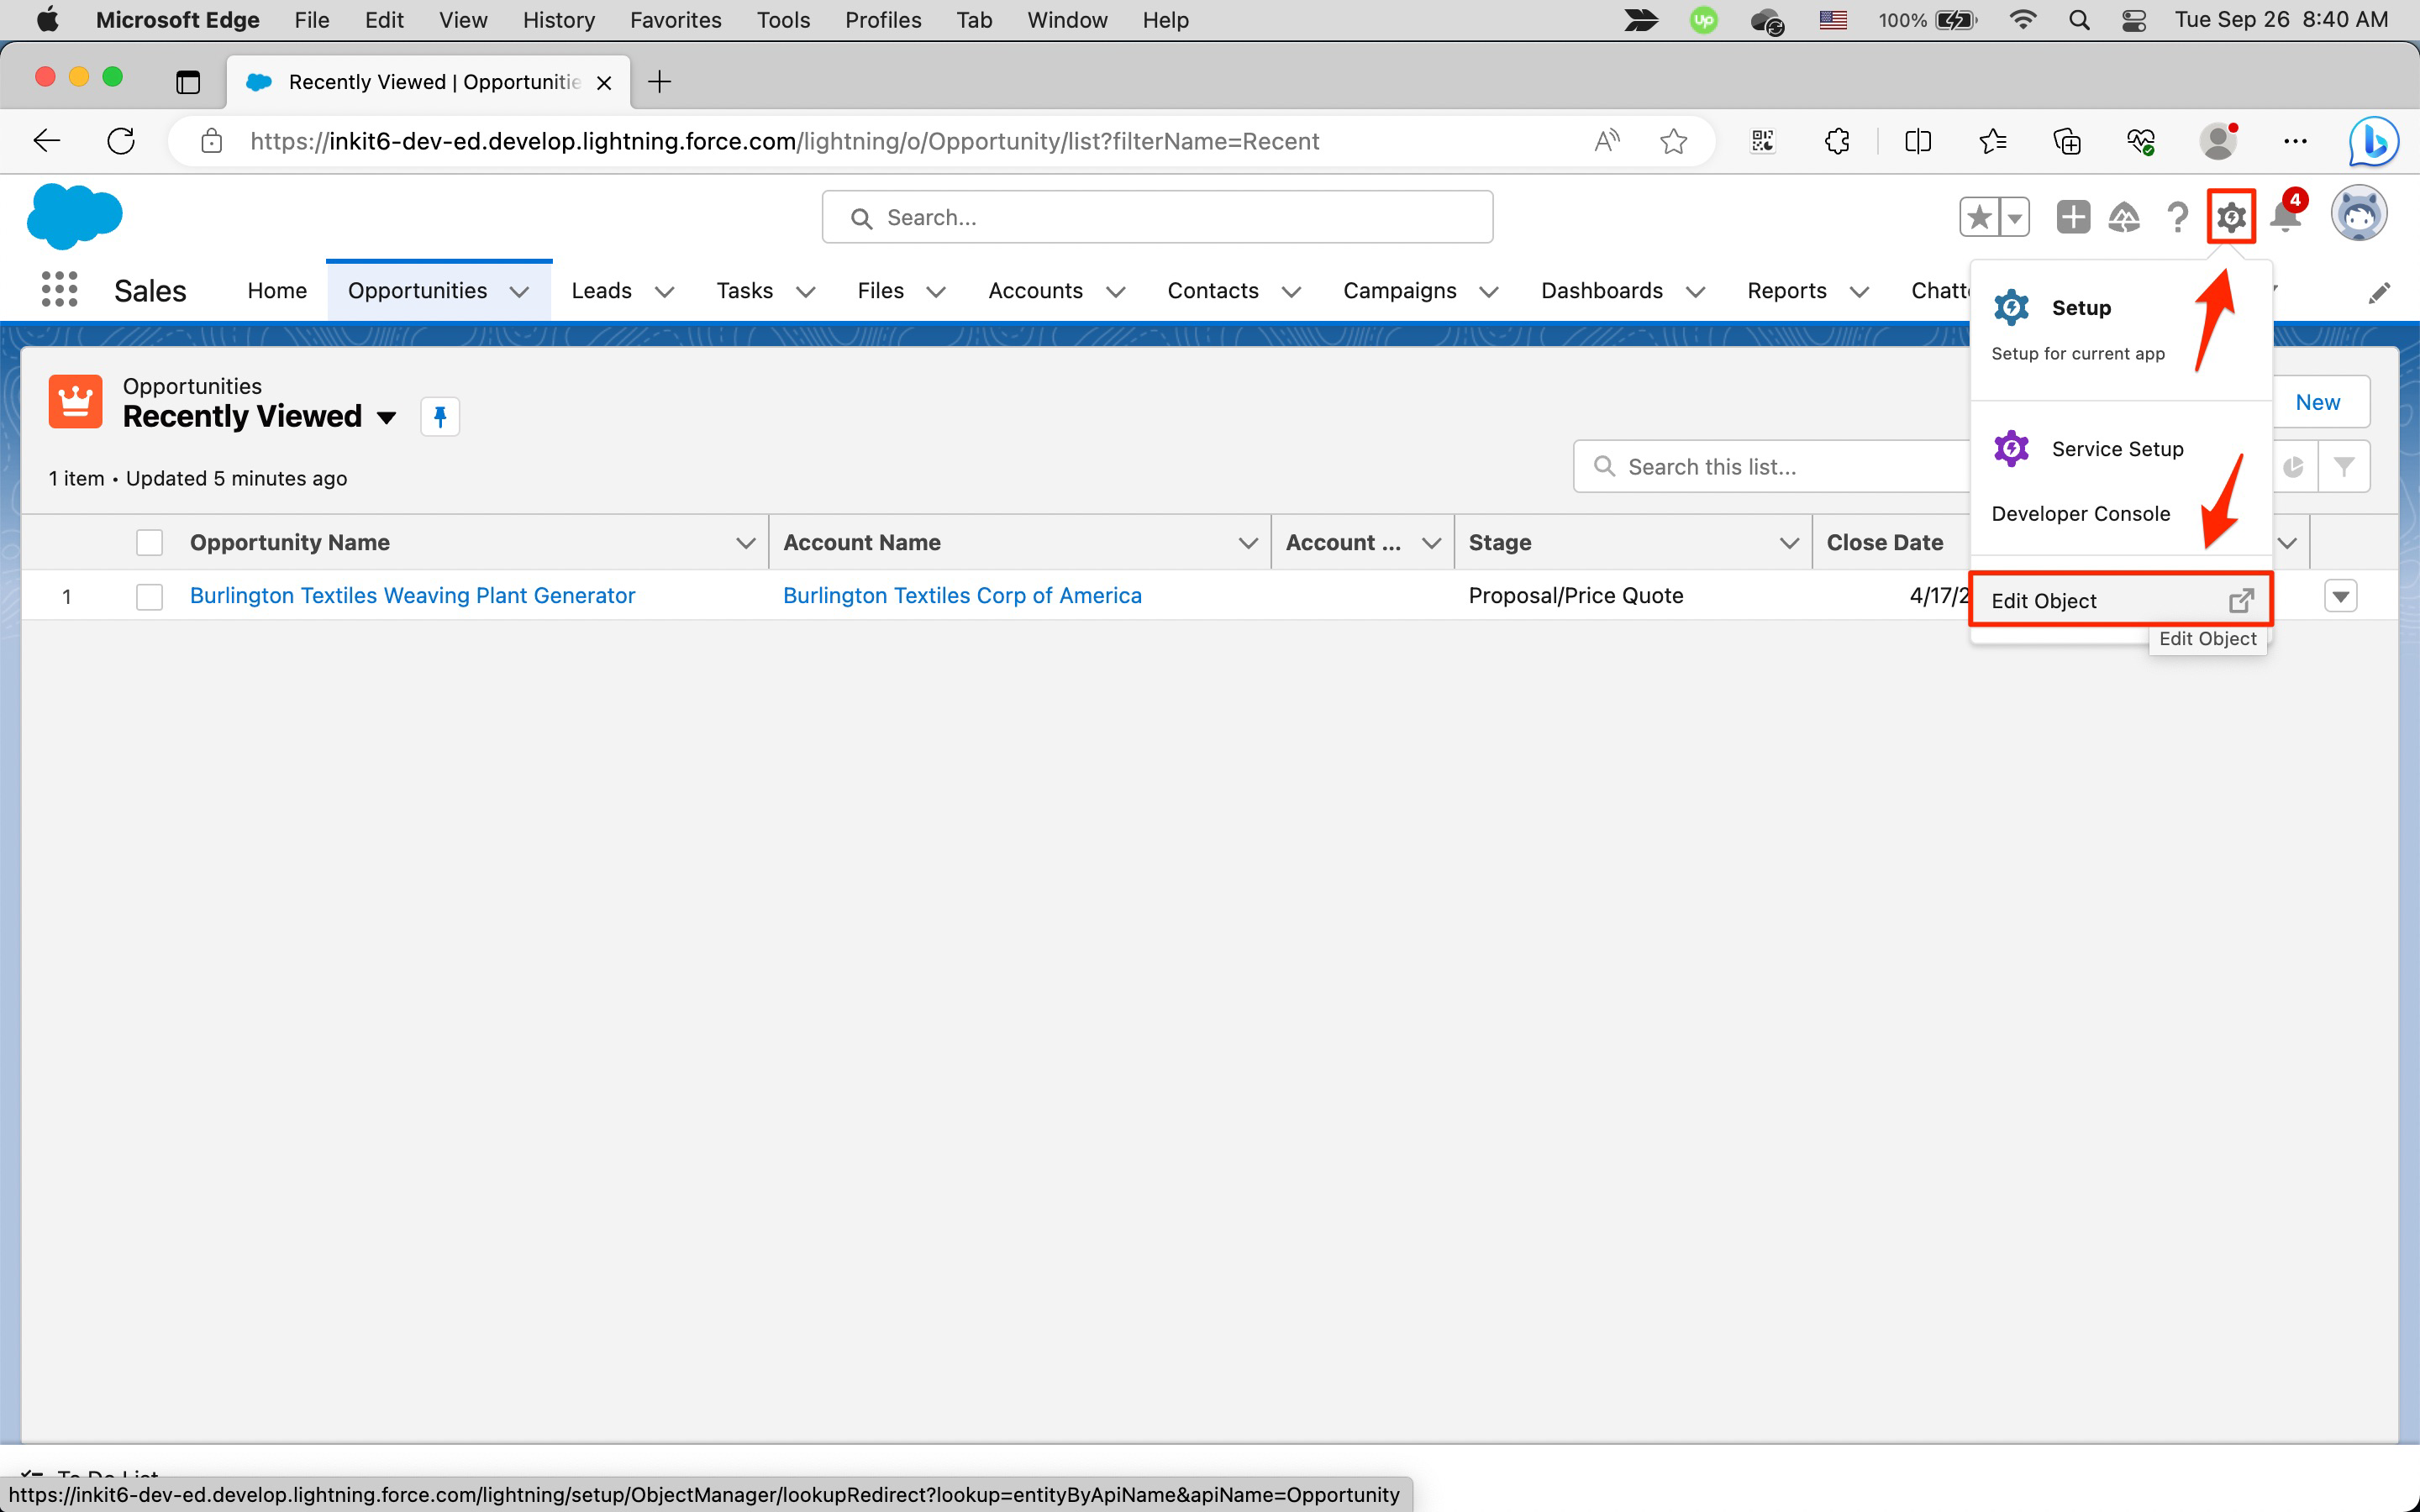
In the Opportunity page, click the settings gear and then click Edit Object.
-
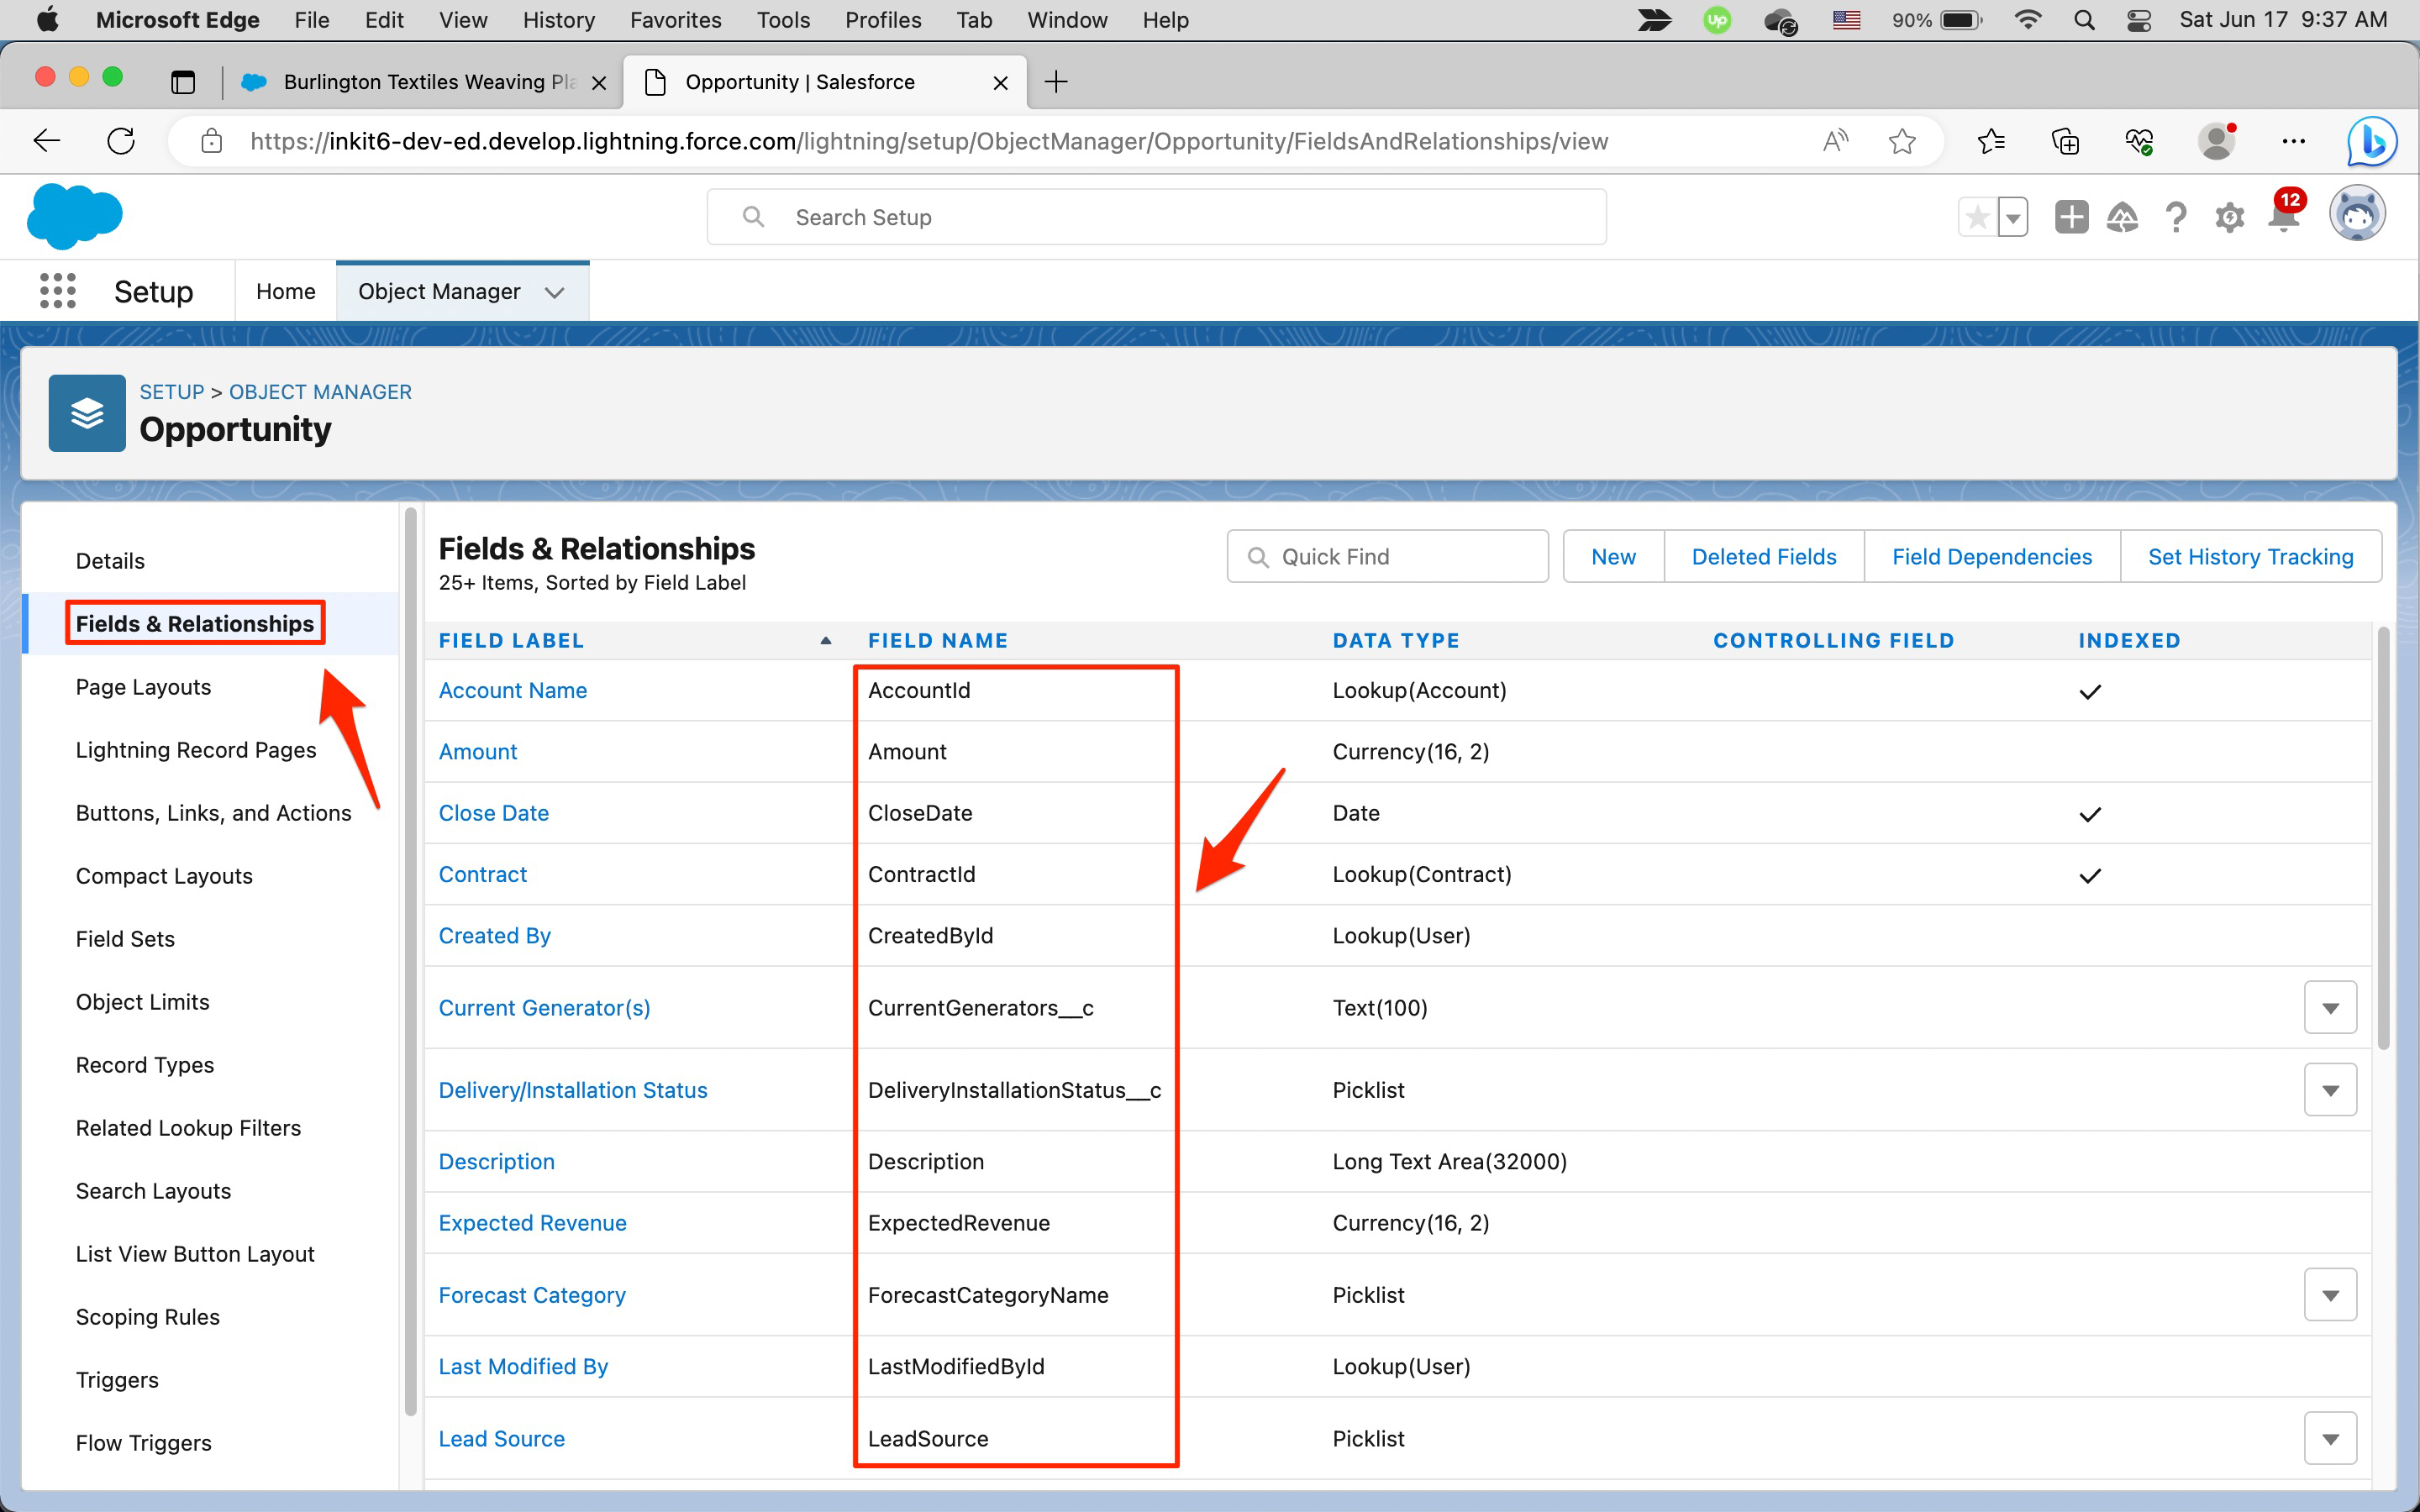
In the Object Manager page, select Fields & Relationships in the left sidebar. The field names will display under FIELD NAME.
Once you have found the Salesforce fields you want to embed into your document template, you next need to identify their Inkit naming convention. You determine this based on whether it's a simple field, a parent field or a child field.
Identifying a simple Salesforce field
A simple Salesforce field is one that doesn't refer to a parent object. In the following example, the field Close Date in an Opportunity object is a simple Salesforce field, as its DATA TYPE is neither Lookup([object]) or Master-Detail([object]).
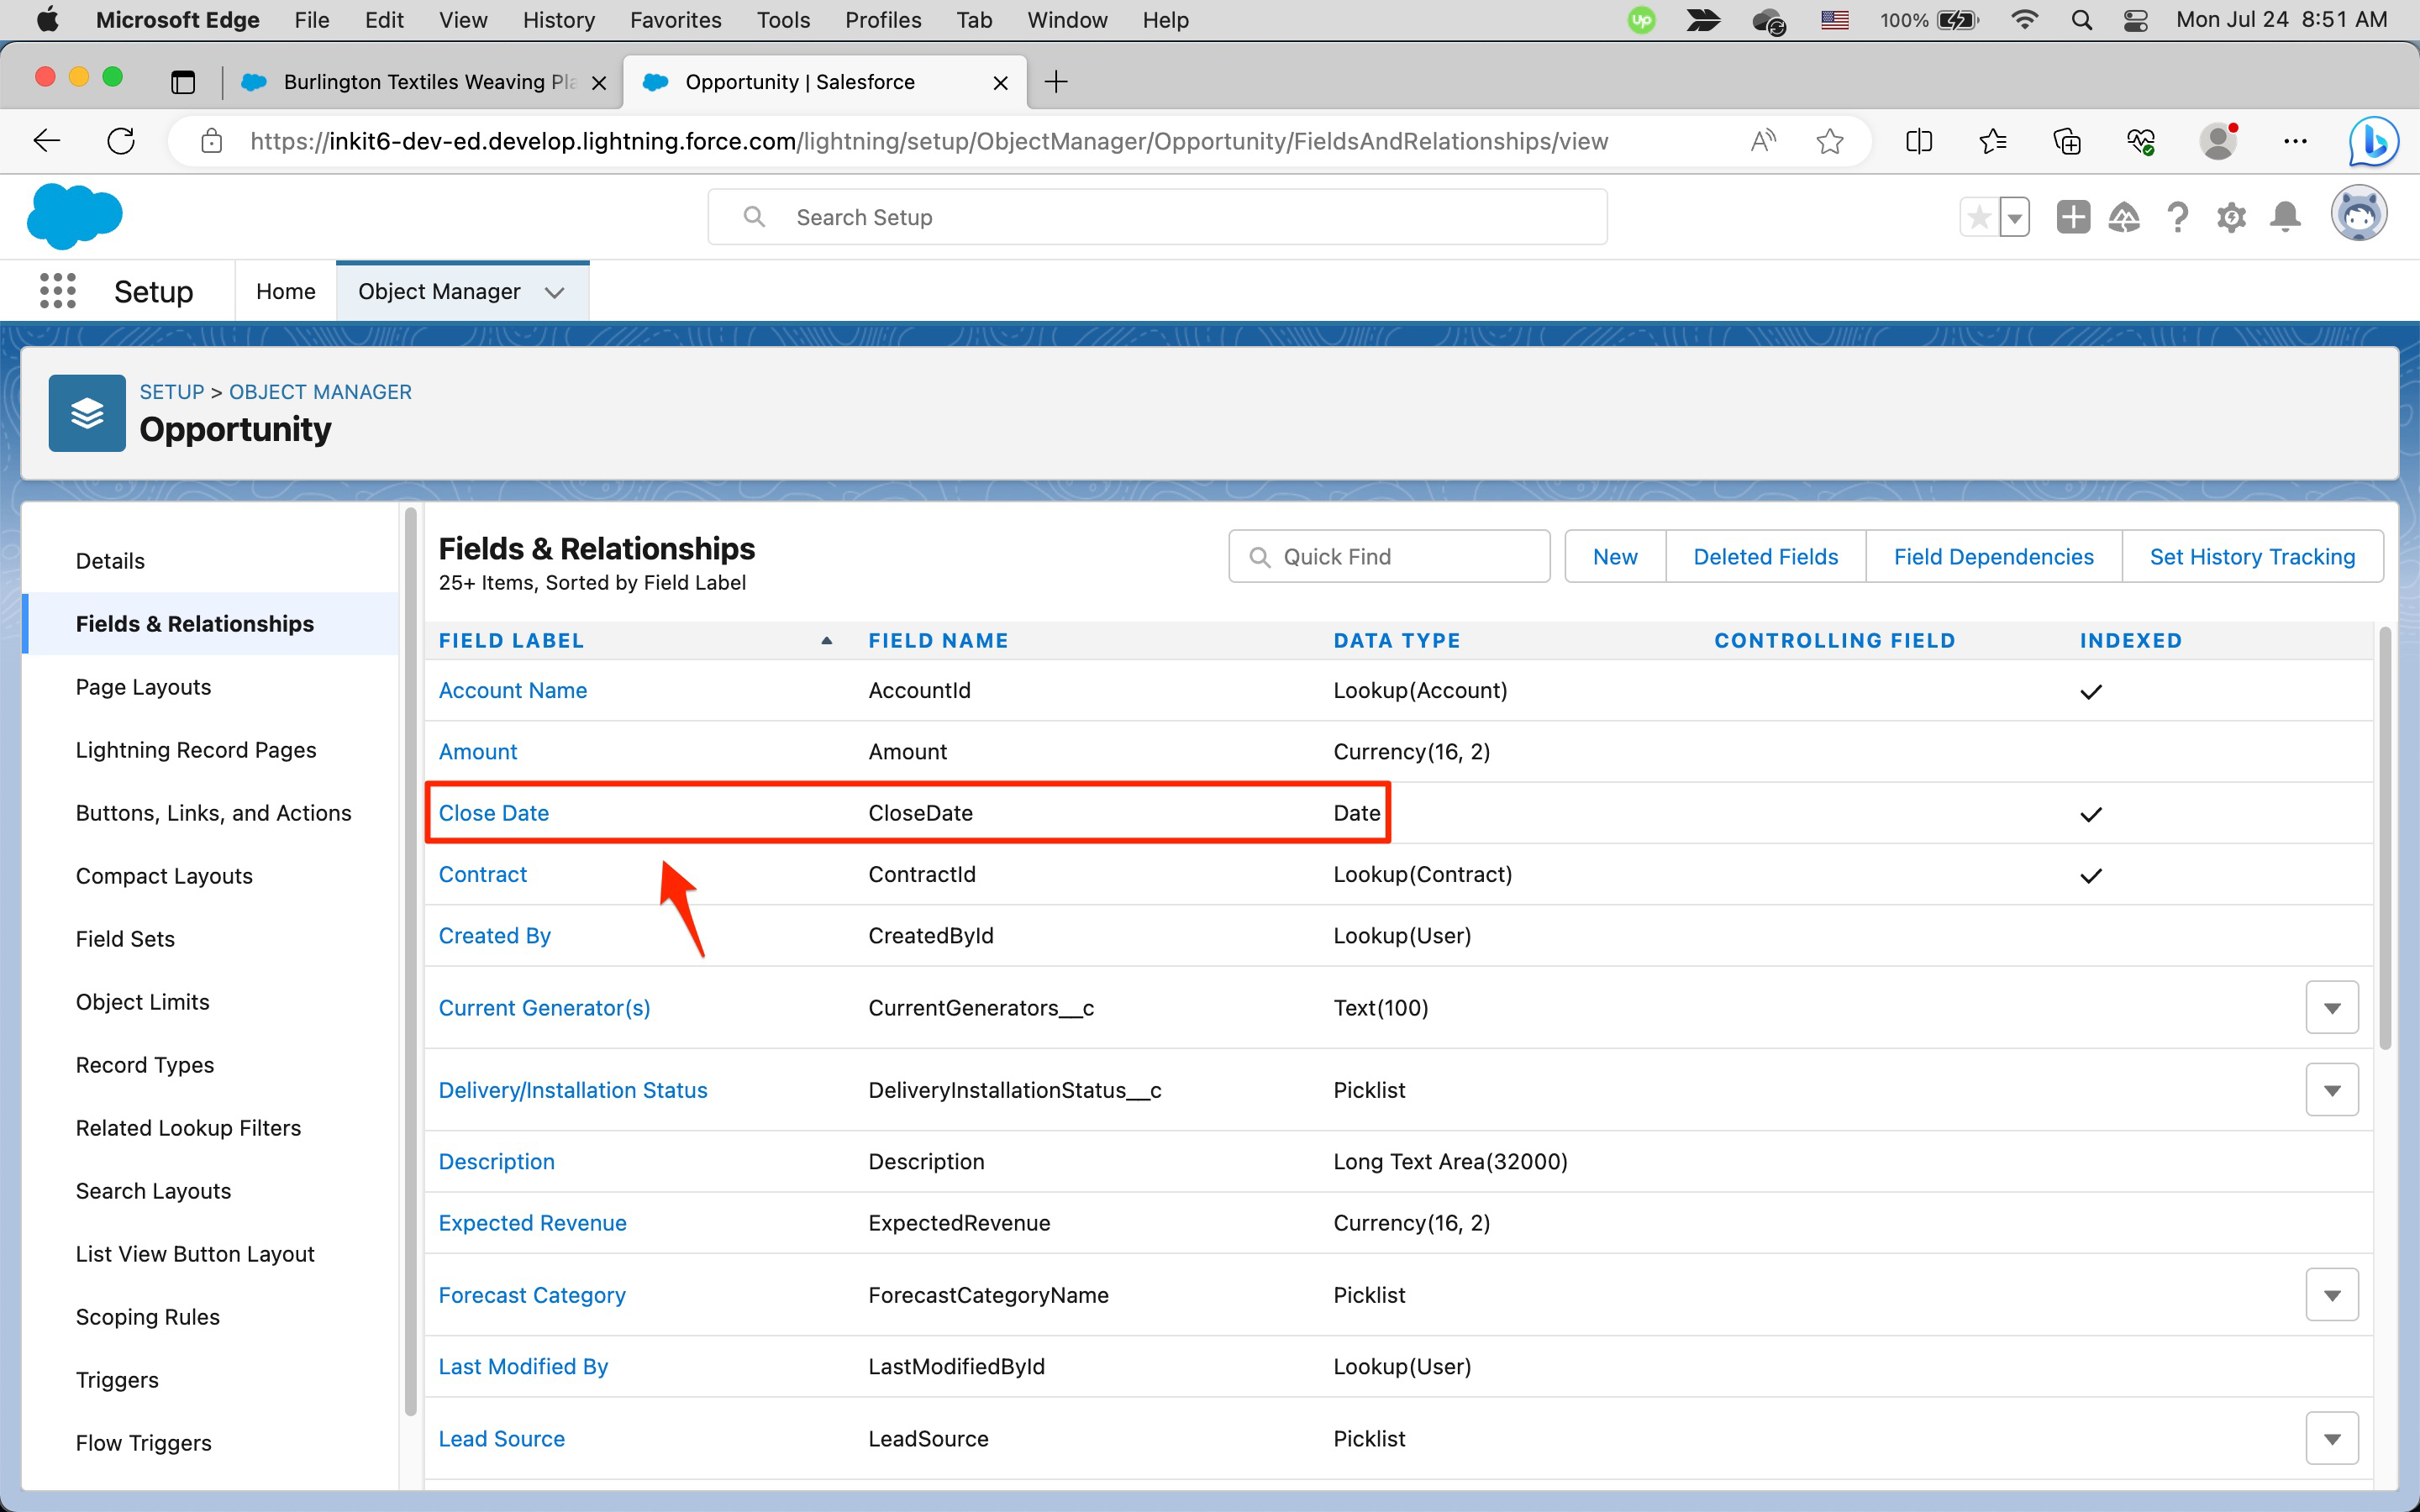
You can identify the field by the FIELD NAME CloseDate in your template.
Identifying a parent Salesforce field
A parent Salesforce field refers to one that has a parent object, so it must be referenced to by this object. Parent Salesforce fields have a DATA TYPE of either Lookup([object]) or Master-Detail([object]) and are identified using the notation: Parent.Child. There are two types of parent Salesforce fields: standard and custom.
Standard parent Salesforce fields
Standard parent Salesforce fields refer to the fields that come standard in Salesforce. In the following example, the field Account Name in an Opportunity object refers to a DATA TYPE of Lookup(Account).
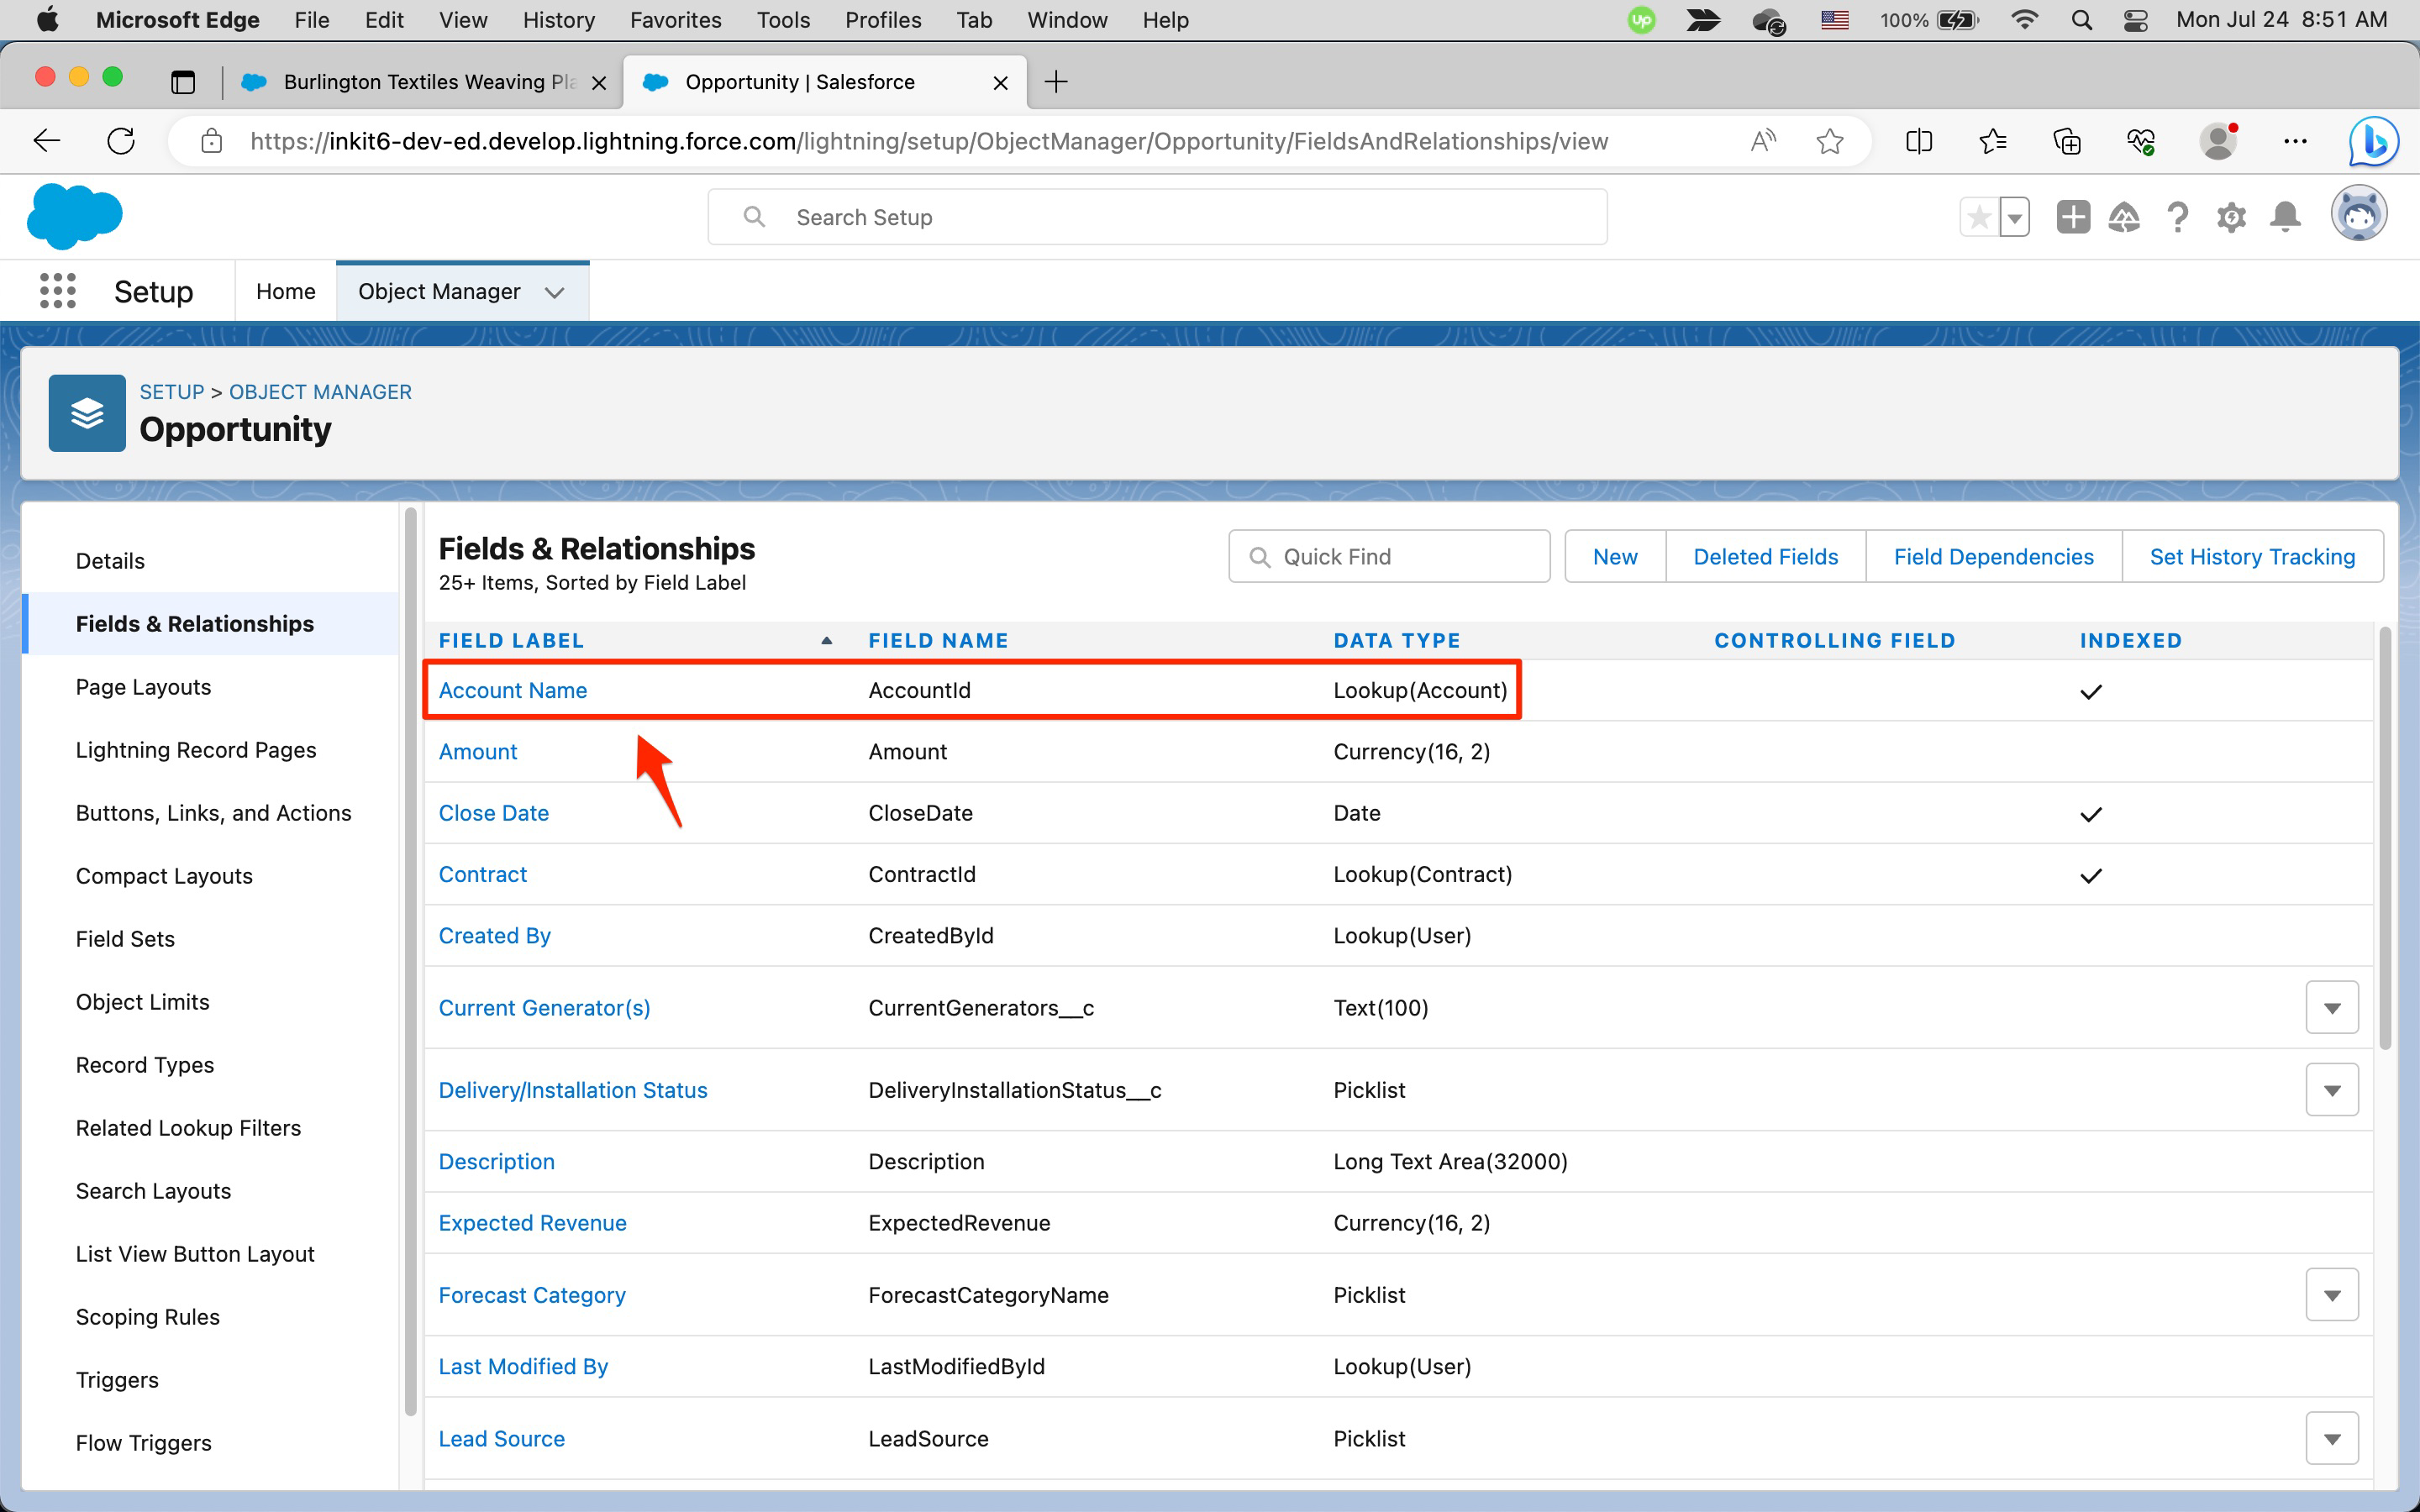
To find the FIELD NAME for Account Name, you must first view the Fields & Relationships page of the parent Account object. You do this by clicking on the Object Manager tab and selecting Account.
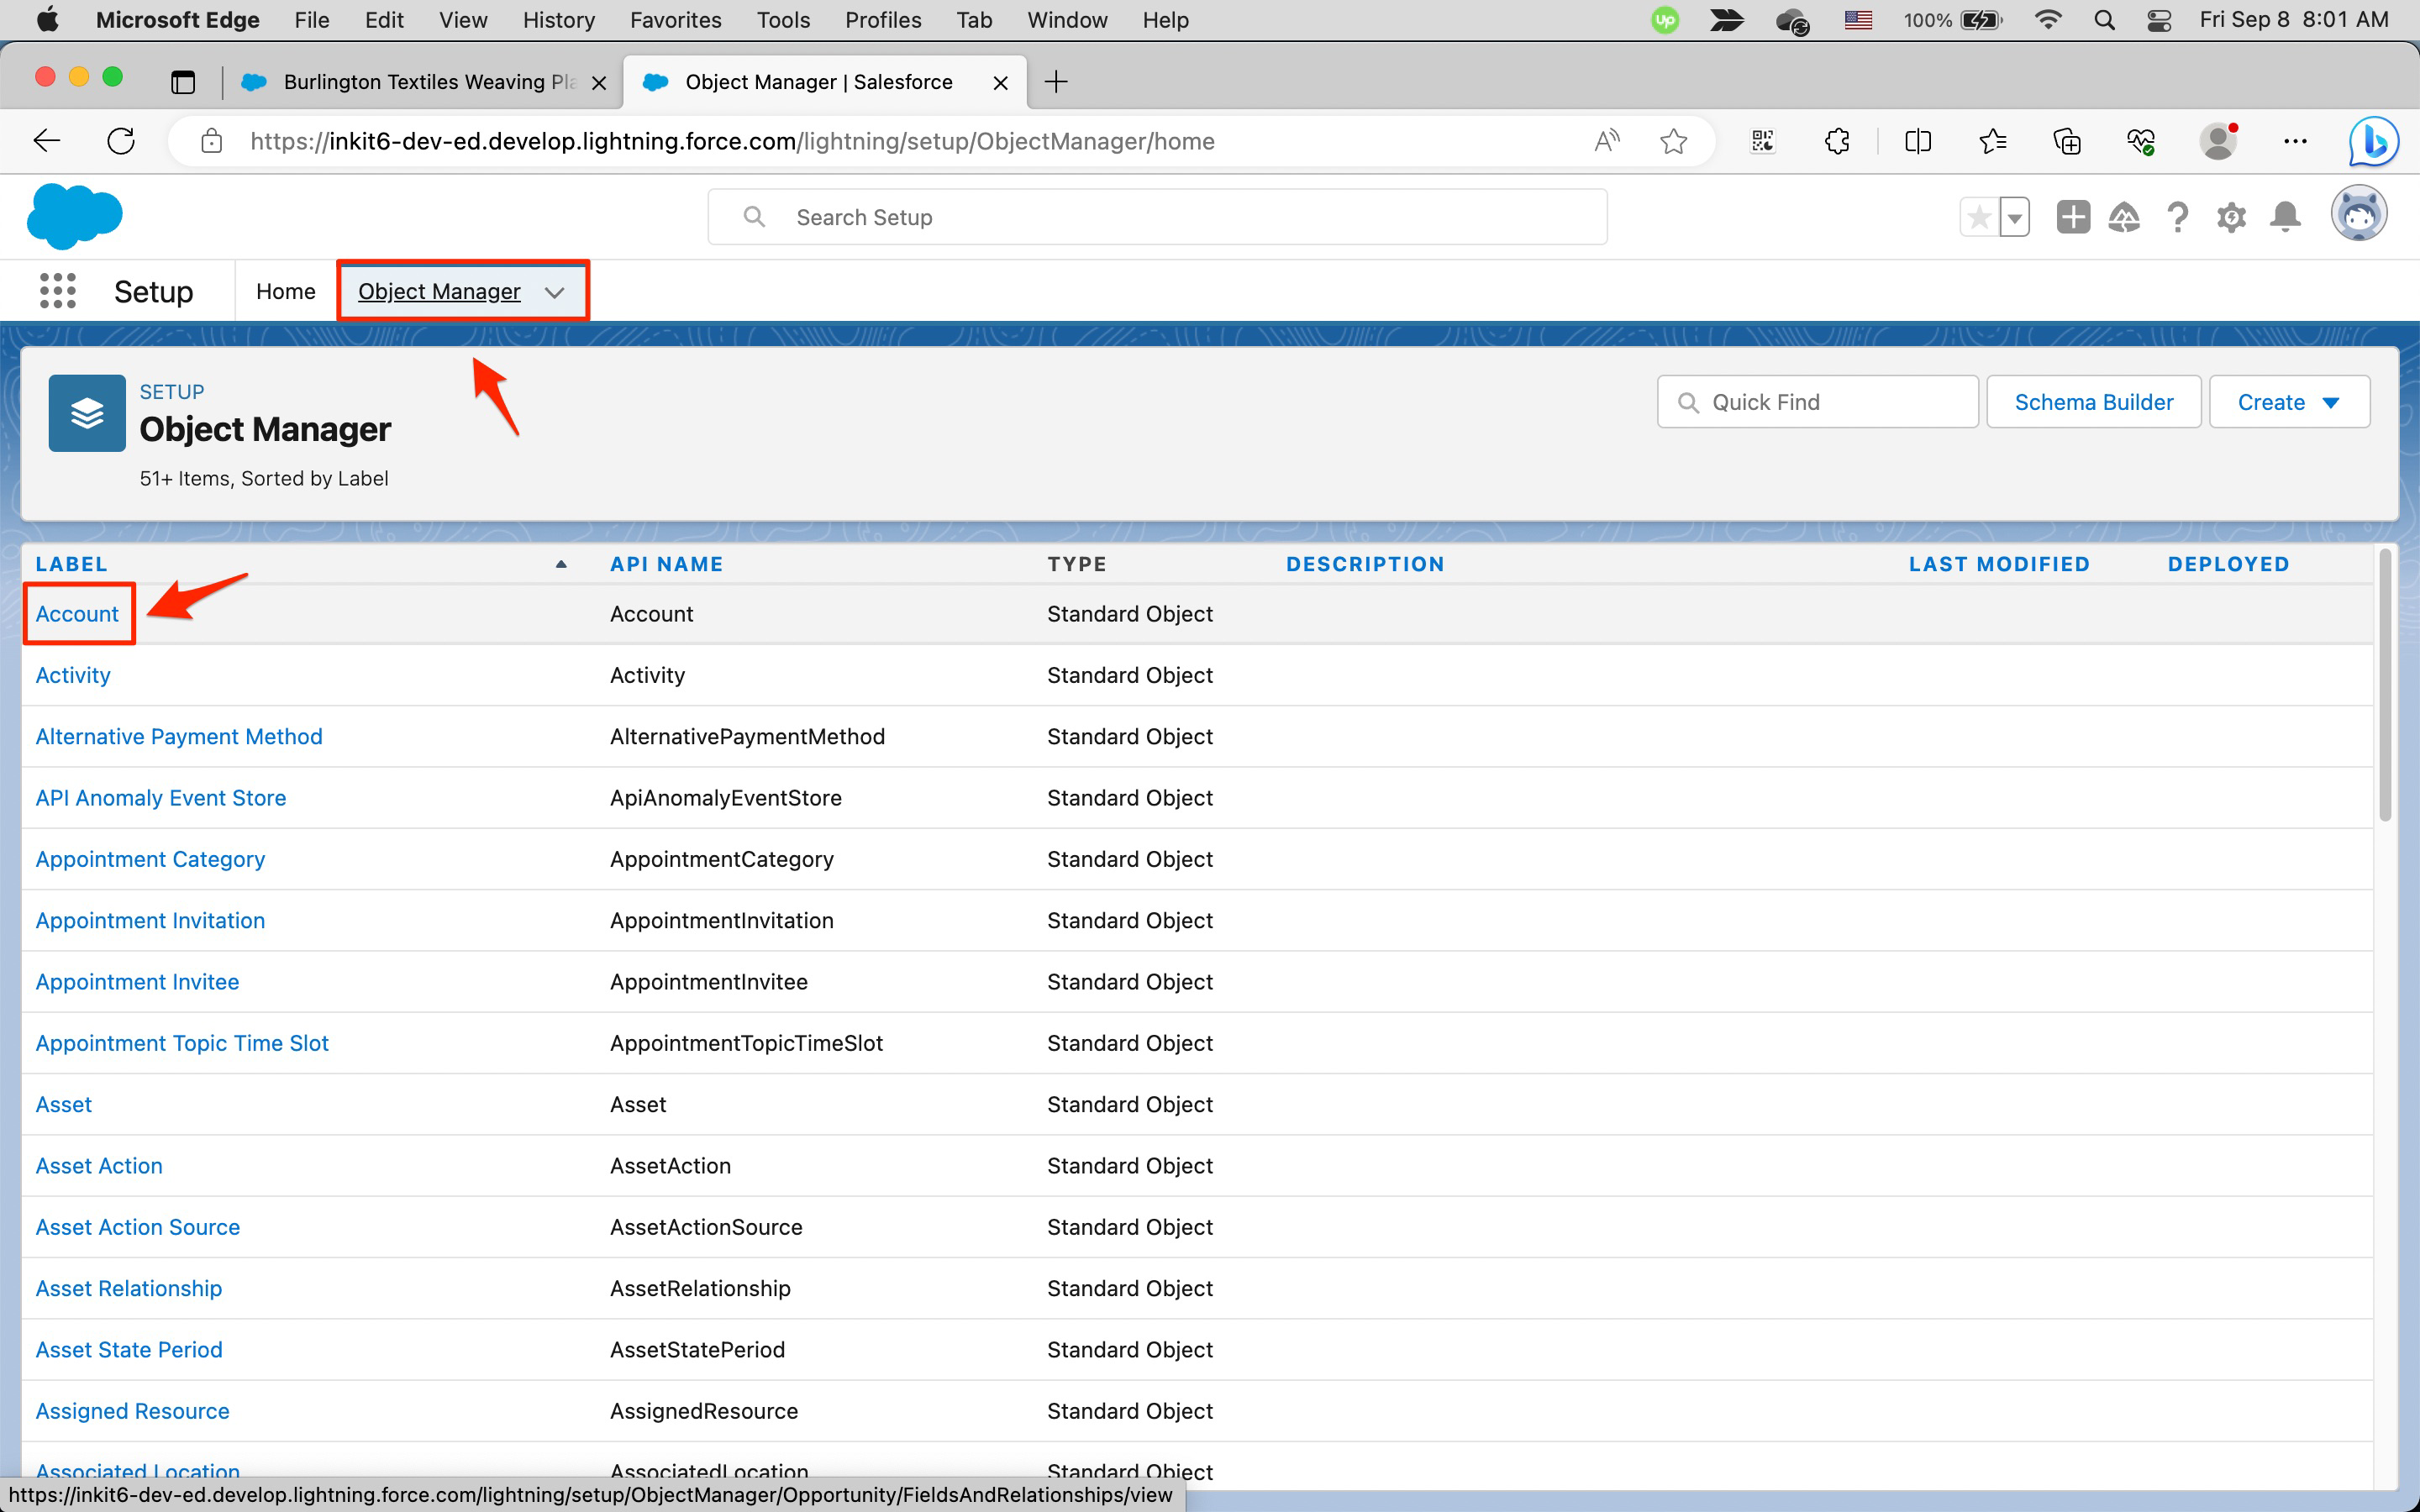
Then look for the field you want to embed.
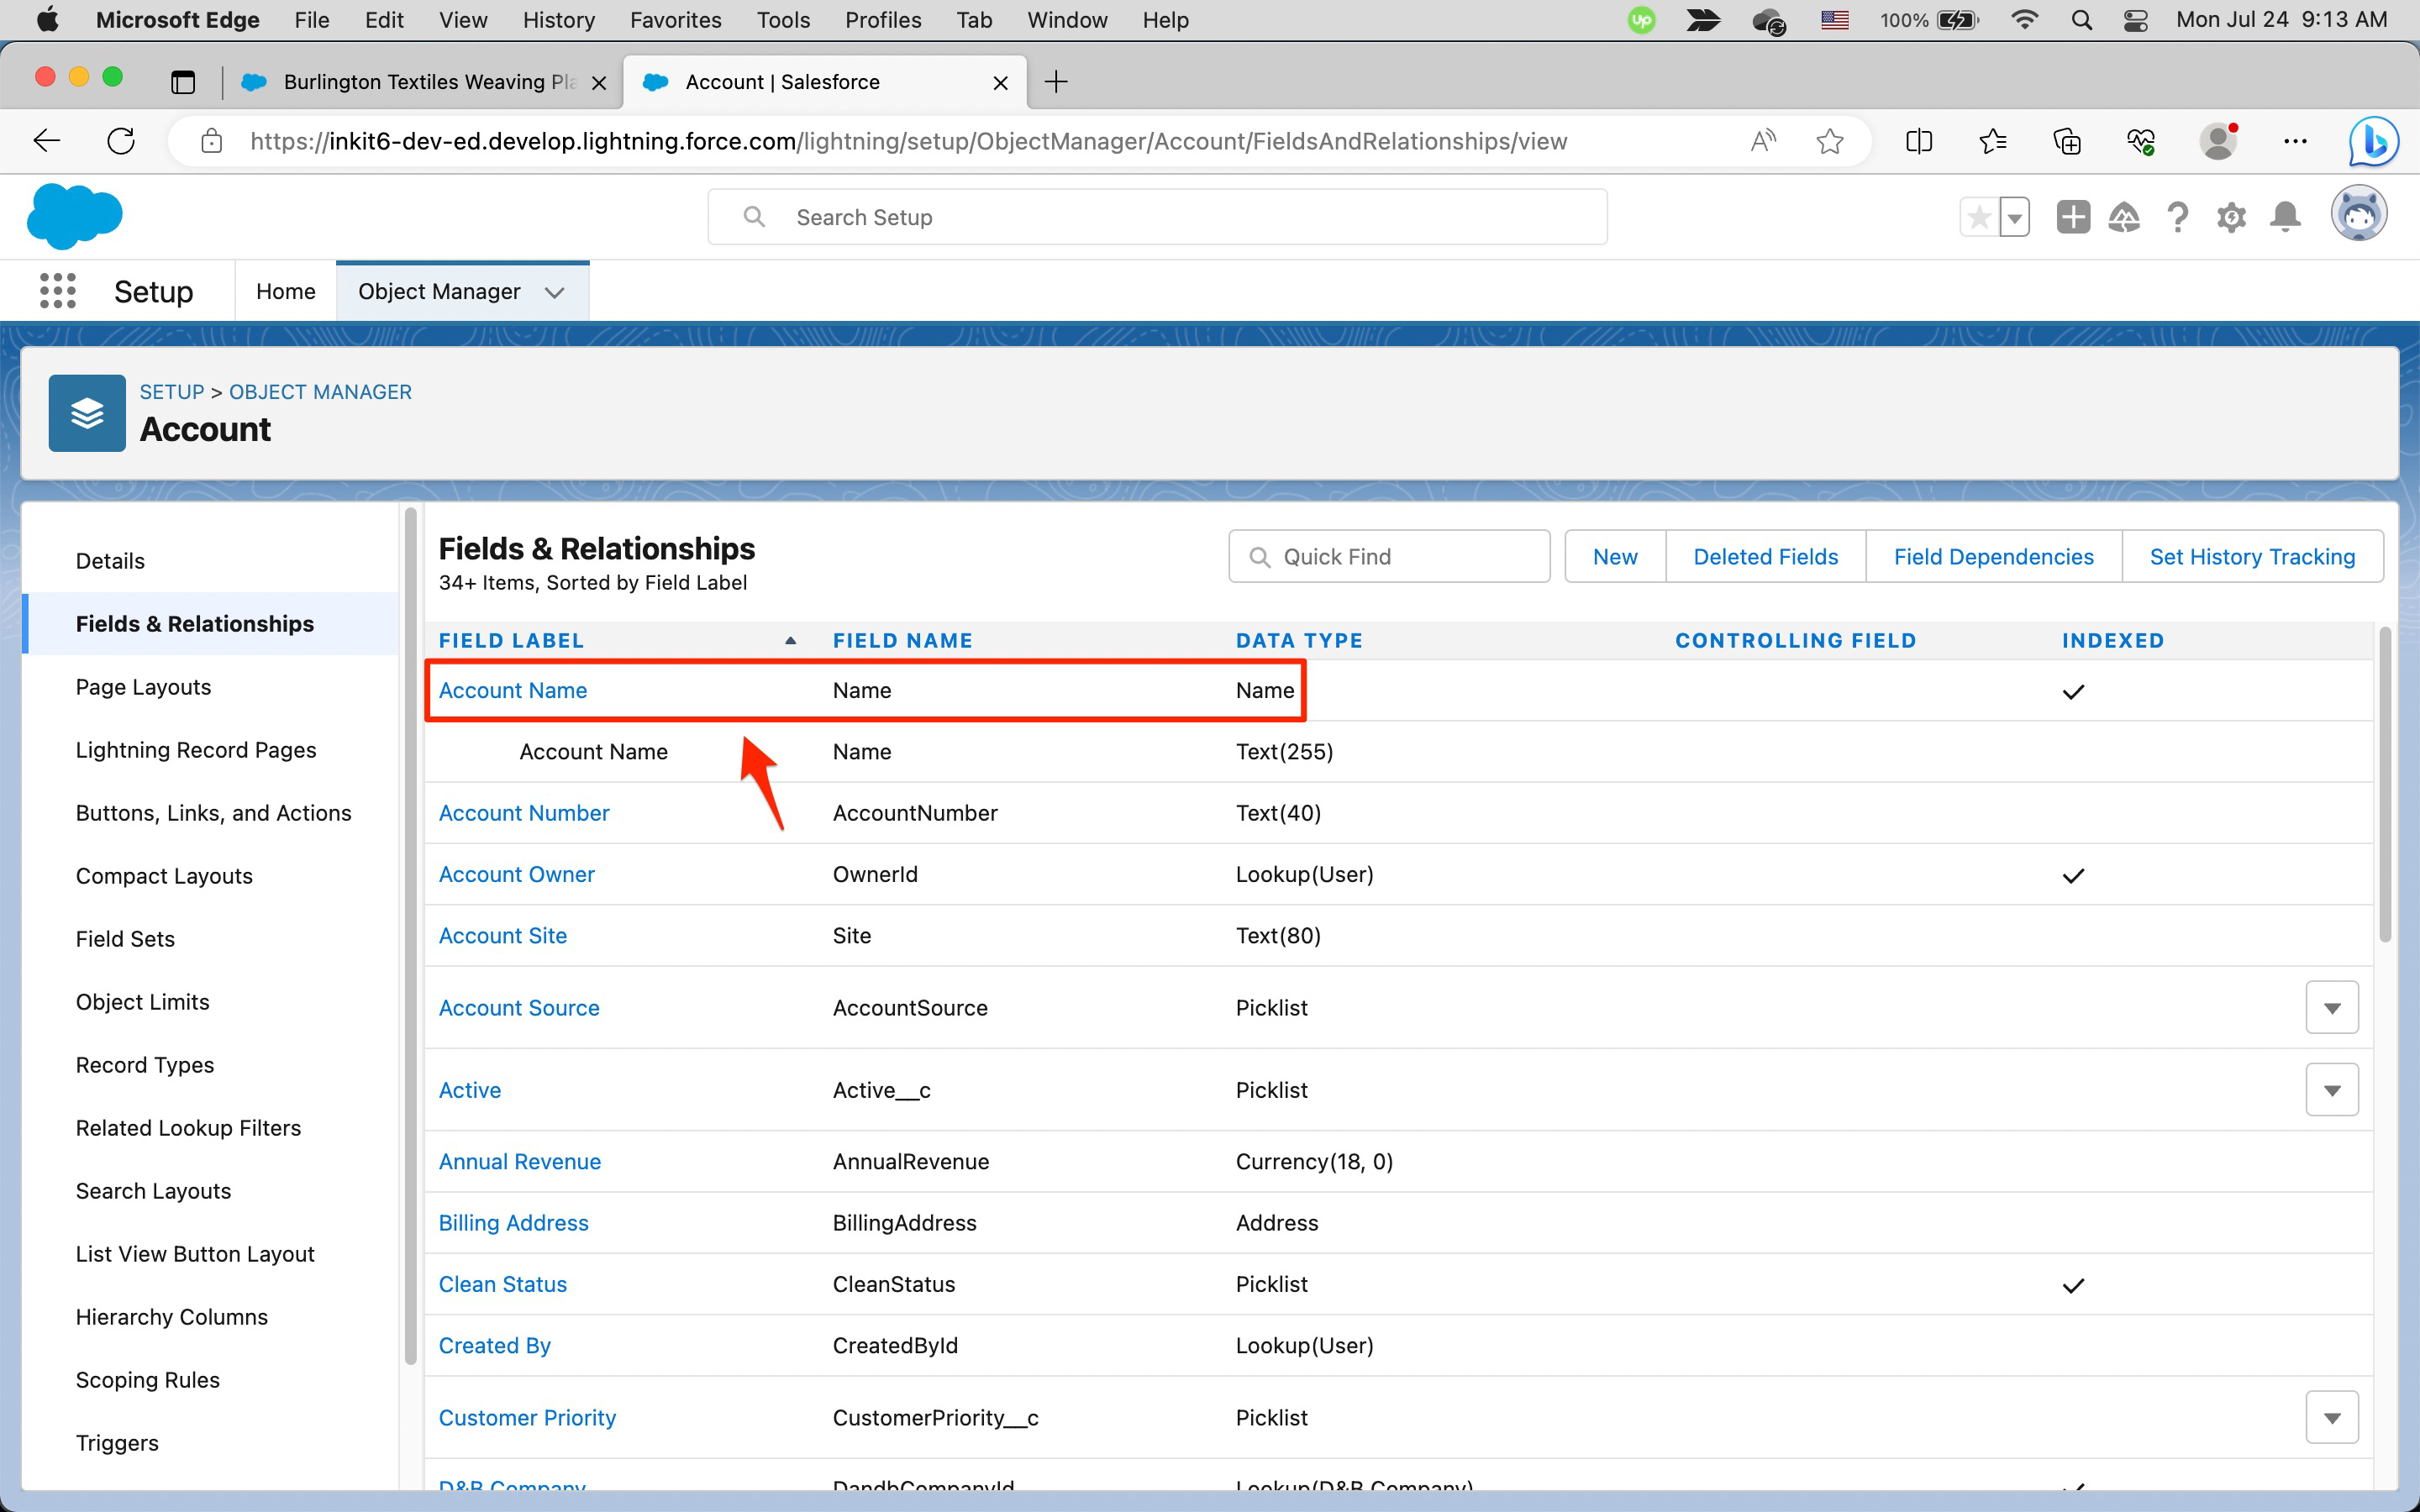
To identify this field, you append the FIELD NAME to its object, so the field you use is Account.Name.
Custom parent Salesforce fields
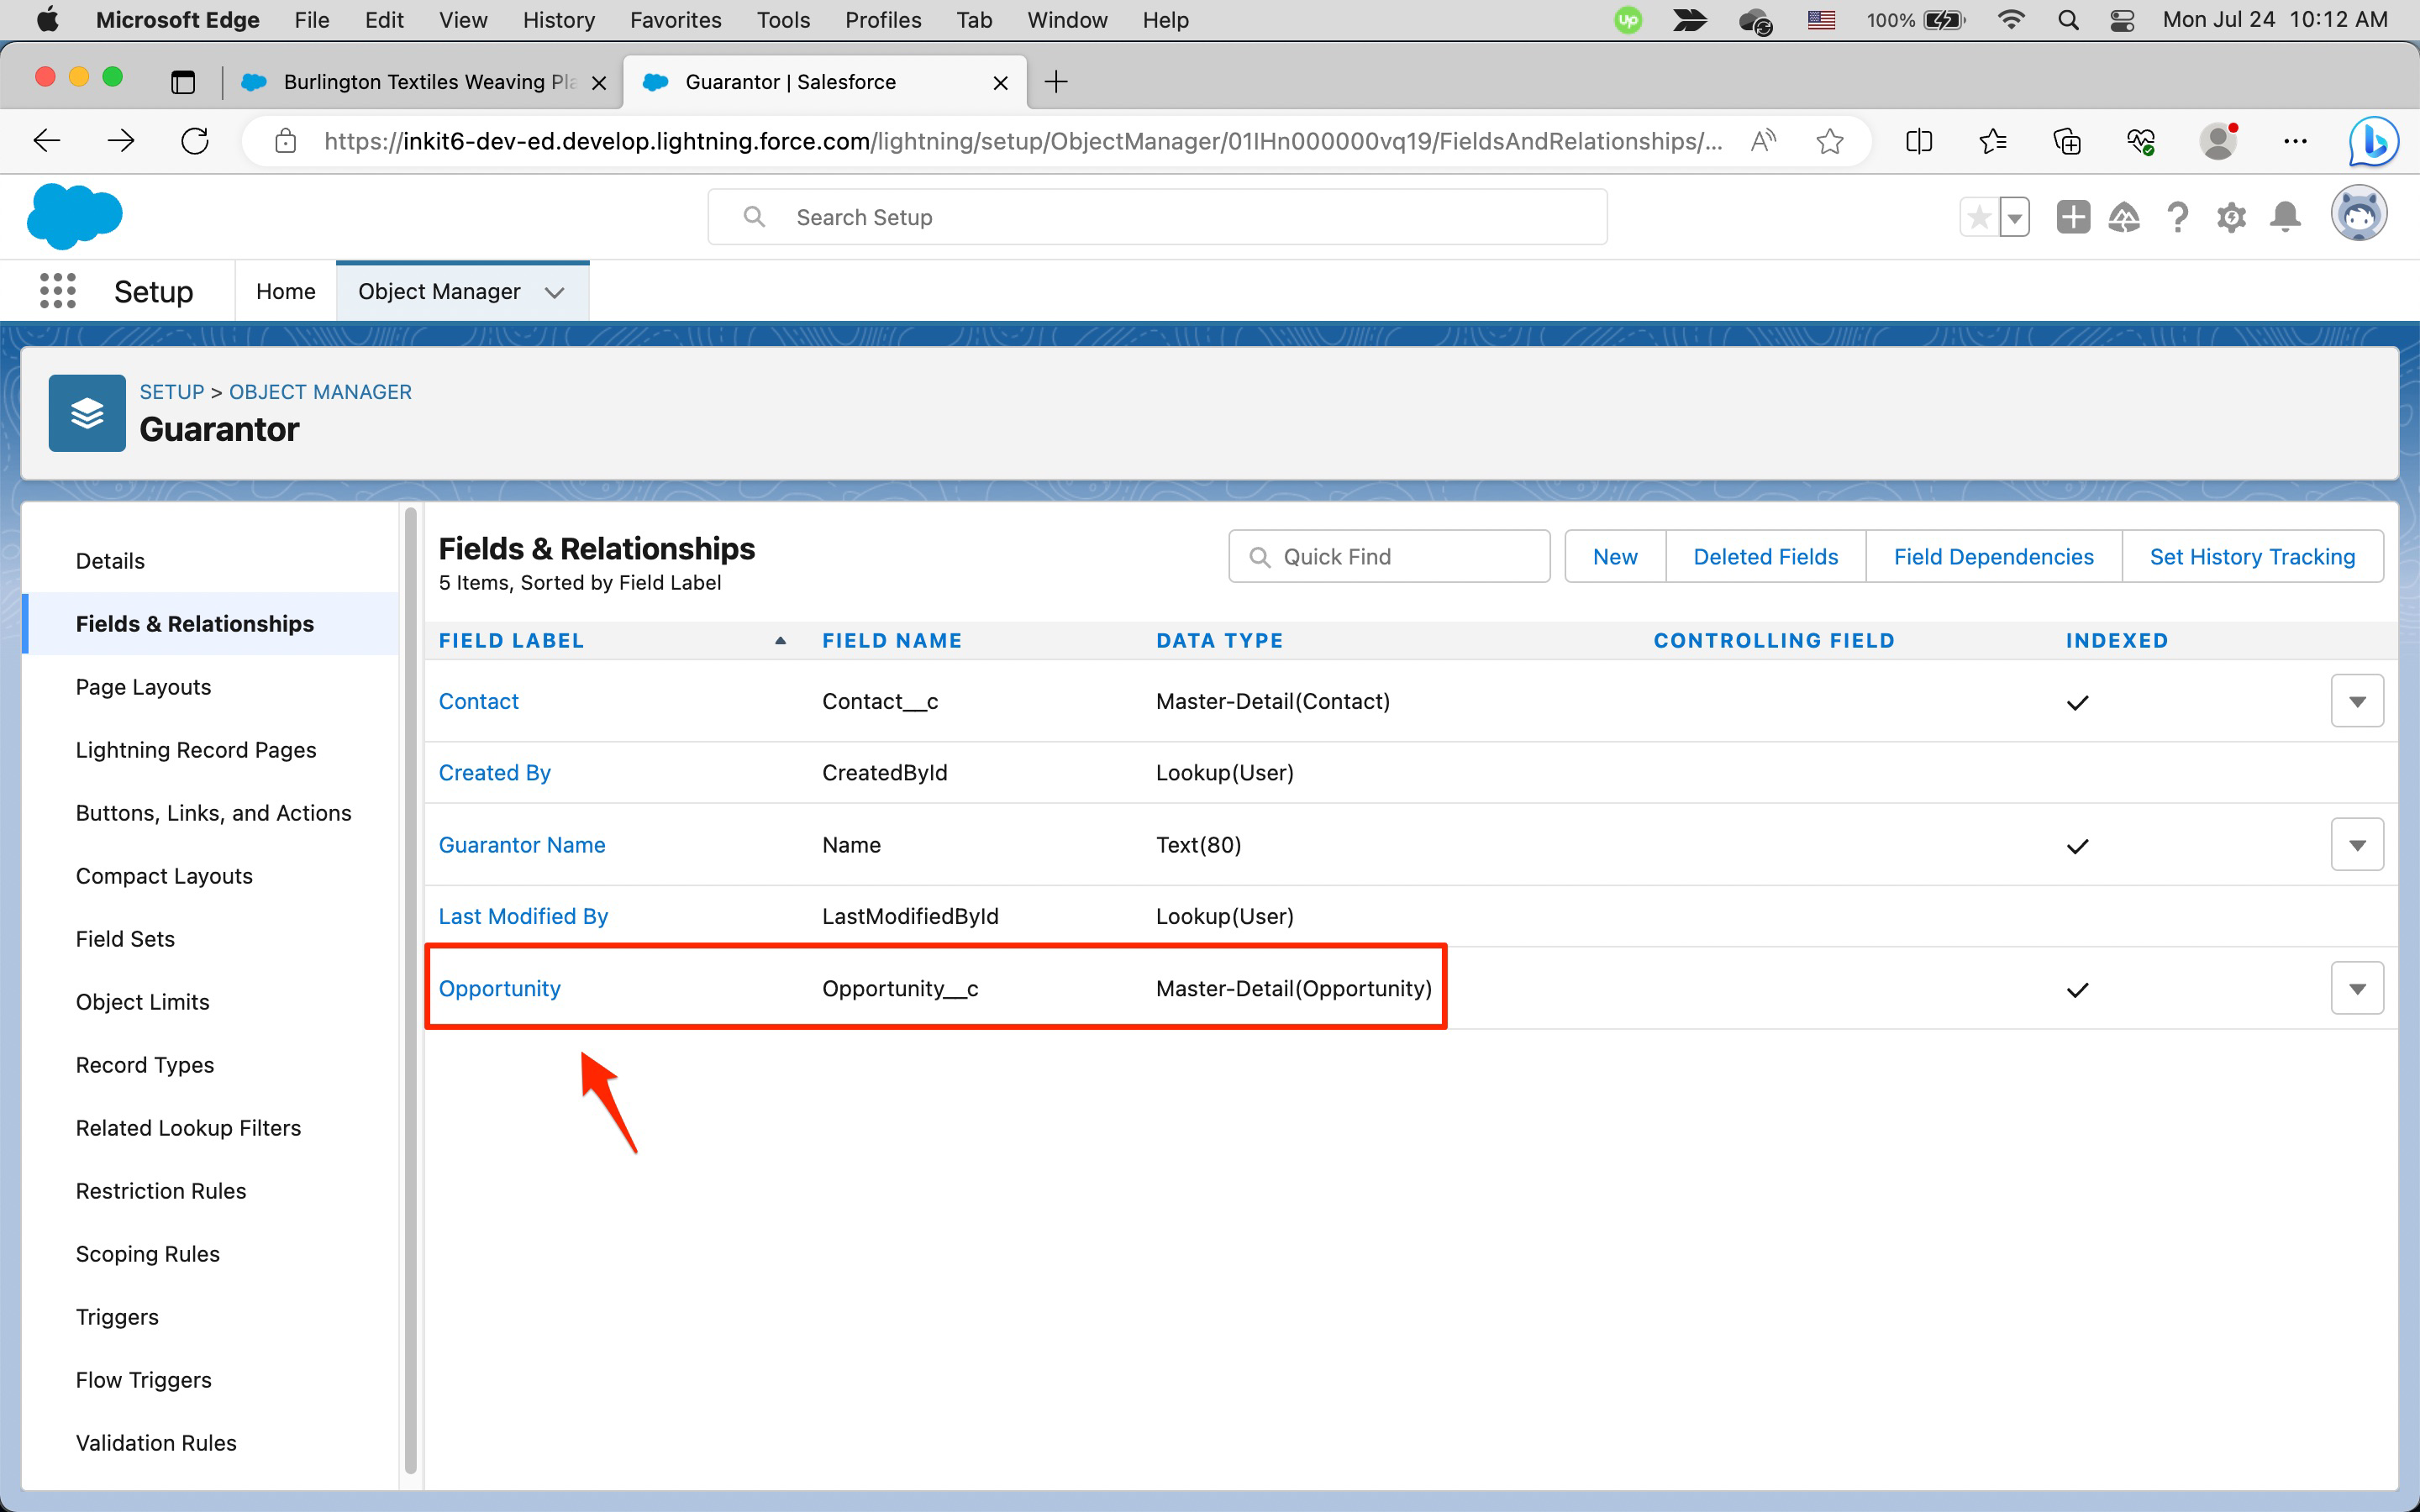
Custom parent Salesforce fields refer to fields that have been added to Salesforce (fields appended with __c in the Salesforce interface.) In the following example, we have added a Guarantor object to an Opportunity object. In the Guarantor object, the field Opportunity refers to a DATA TYPE of Master-Detail(Opportunity).
To find the FIELD NAME for Opportunity Name, you must first view the Fields & Relationships page of the parent Opportunity object. You do this by clicking on the Object Manager tab and selecting Opportunity.
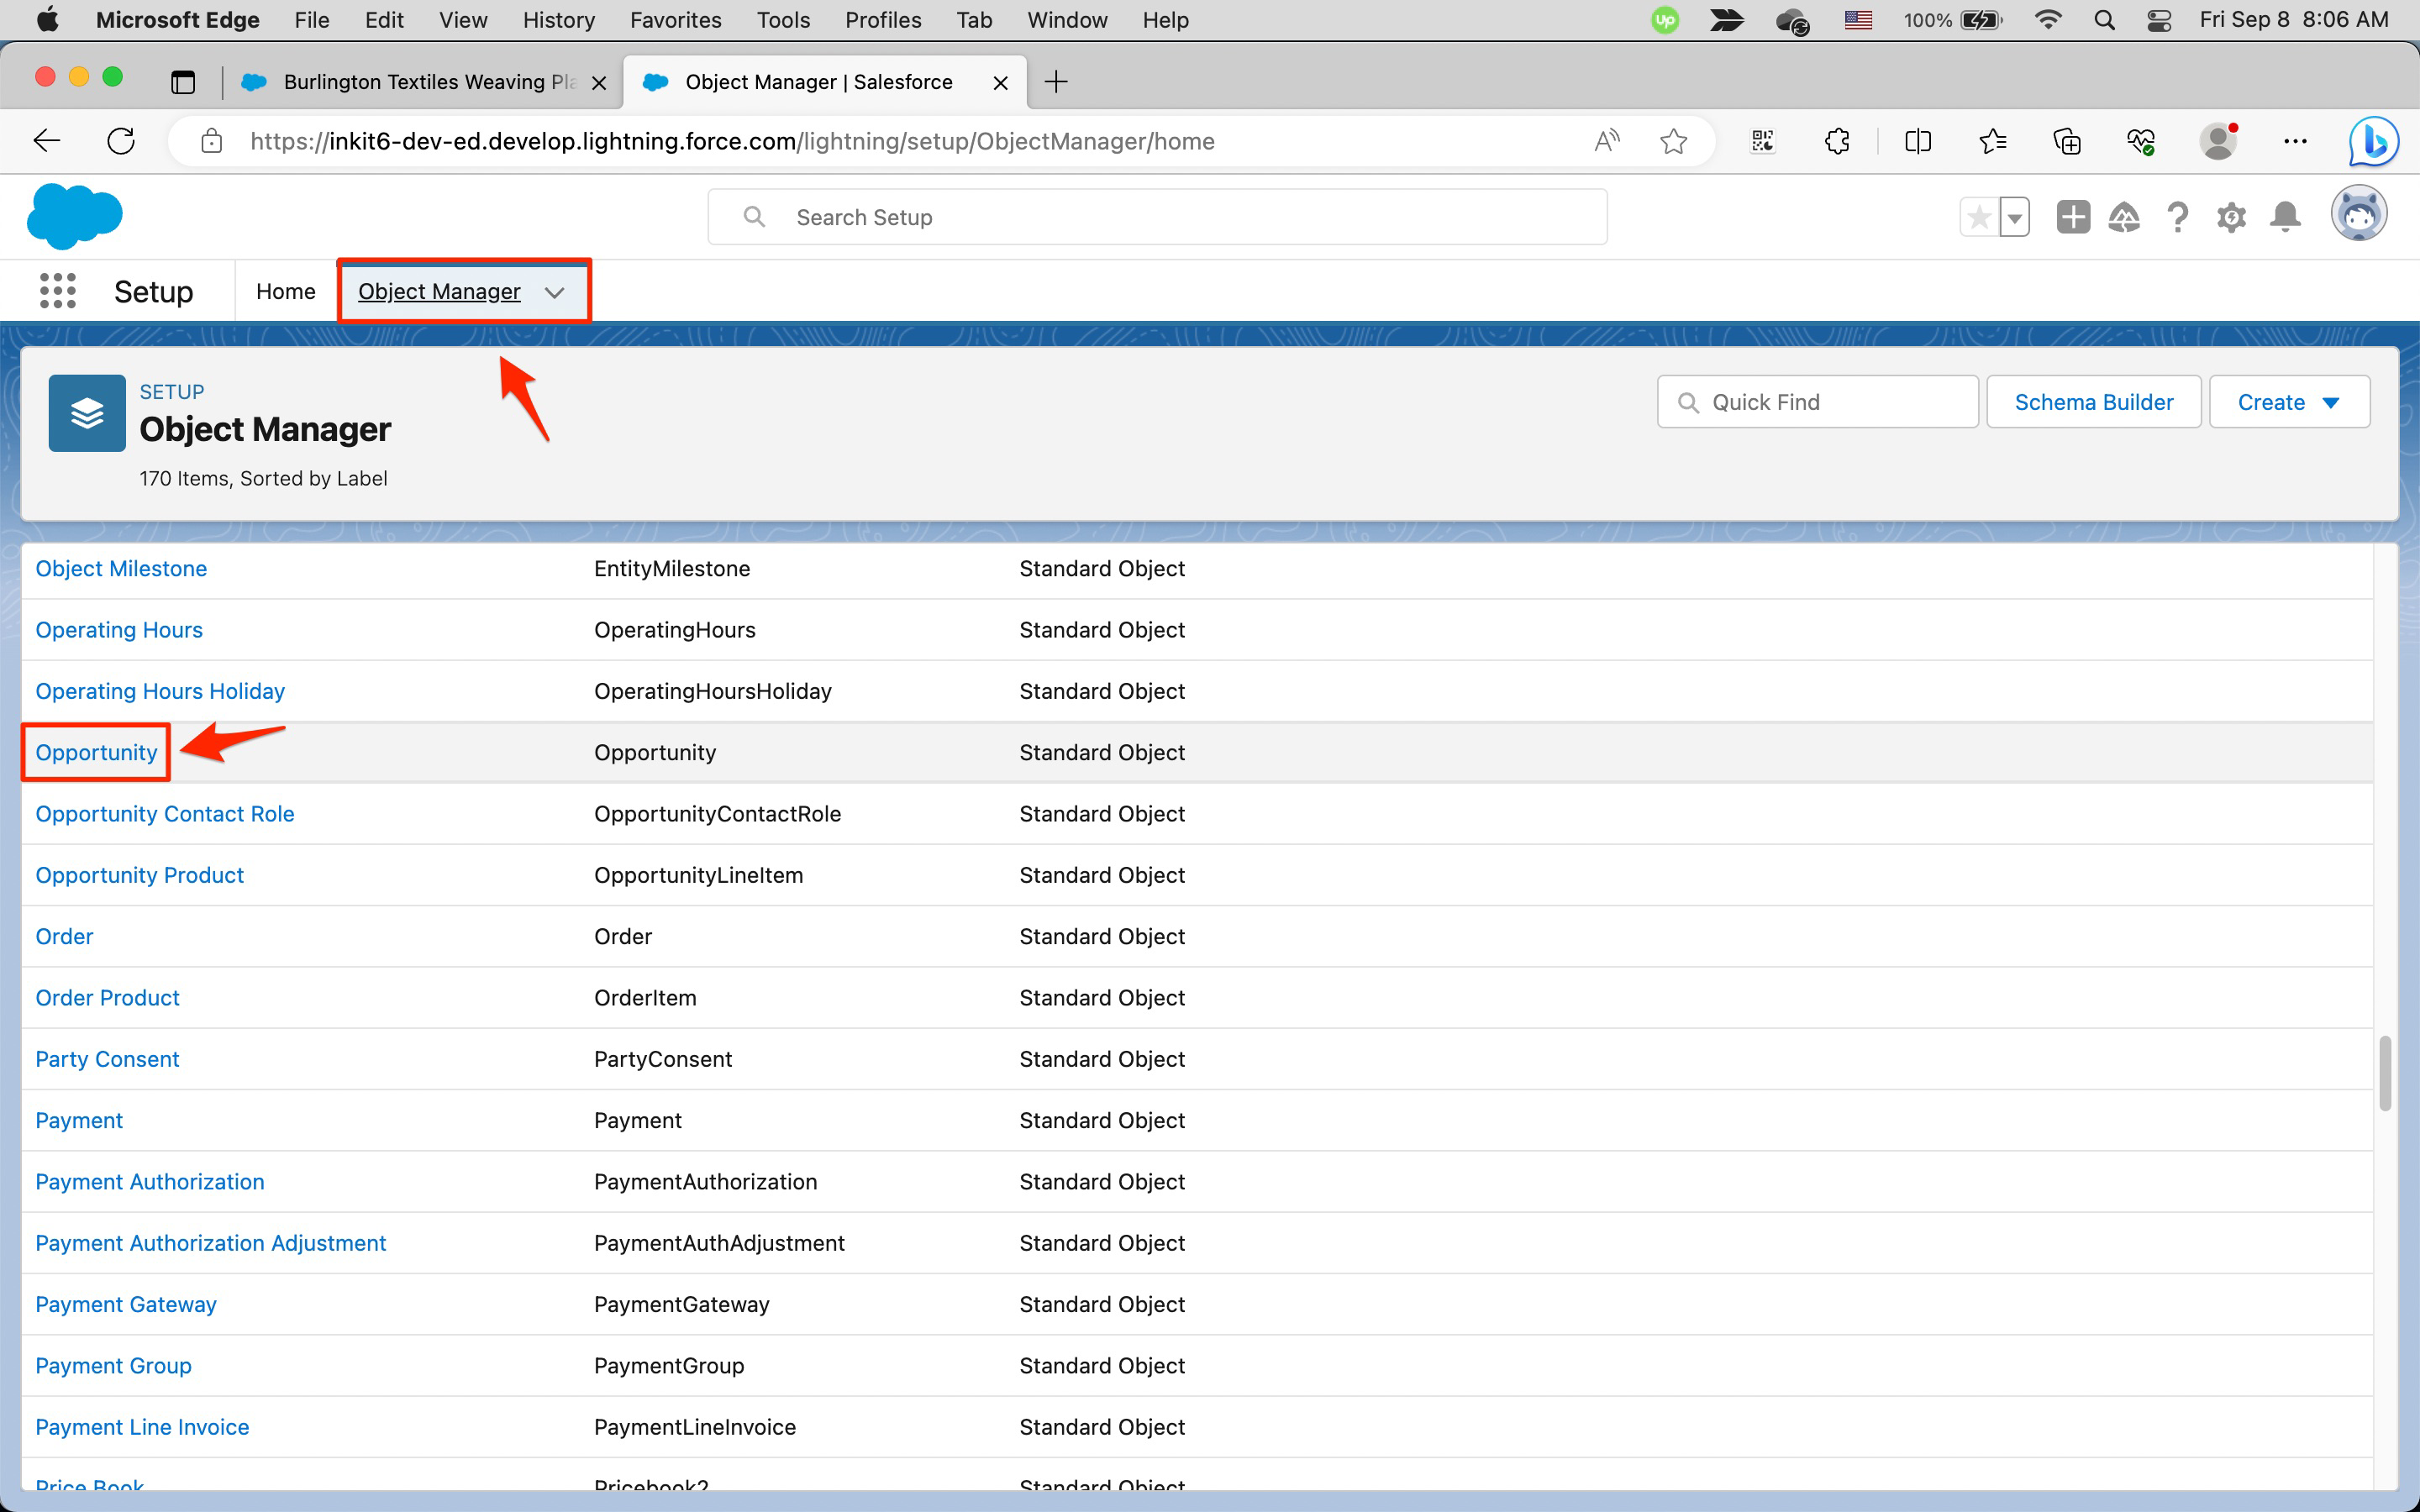
Then look for the field you want to embed.
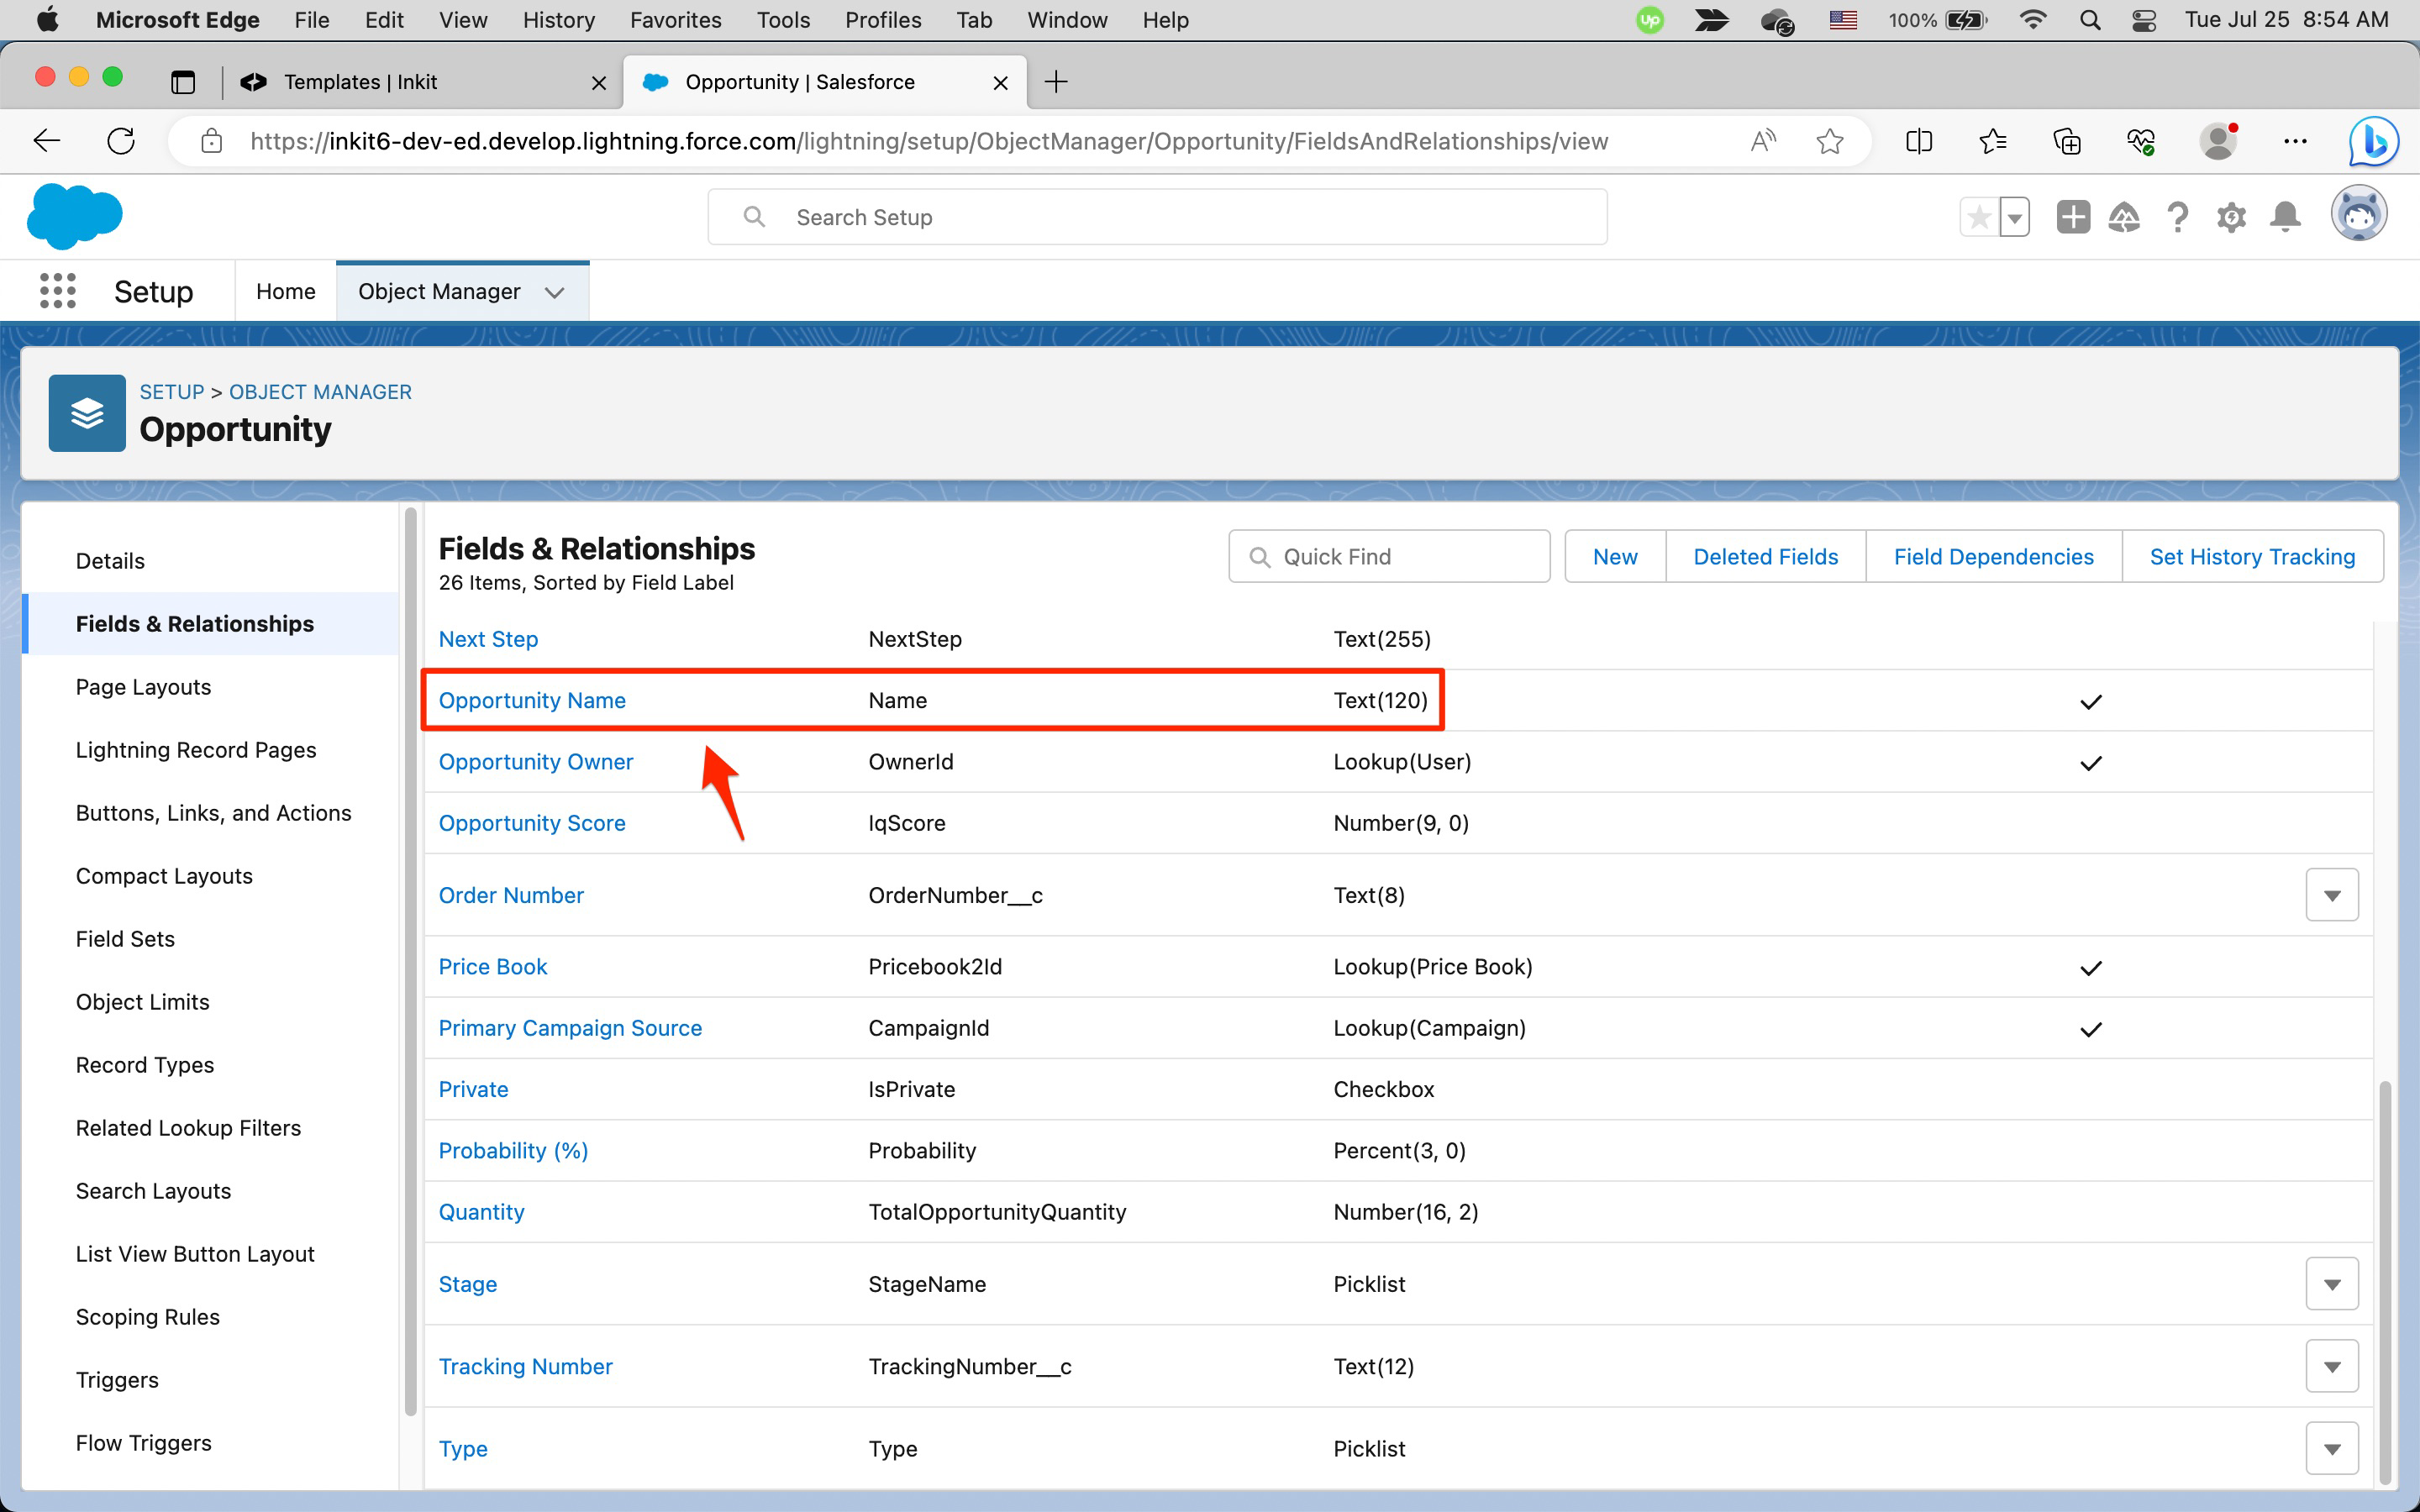
To identify this field, you append the FIELD NAME to its object, replacing the __c part of the object with __r, so the field you use is Opportunity__r.Name.
Identifying a child Salesforce field
A child Salesforce field refers to a field that represents a collection of children of an object. There are two types of child Salesforce fields: standard and custom.
Standard child Salesforce fields
Standard child Salesforce fields refer to the fields that come standard in Salesforce. For example, the Opportunity object is a child of the Account object. To identify all Opportunities within an Account, the field you use is Opportunity.
Custom child Salesforce fields
Custom child Salesforce fields refer to fields that have been added to Salesforce (fields appended with __c in the Salesforce interface.) For example, we have added the Guarantor object as a child of the Opportunity object. To identify all Guarantors within an Opportunity, the field you use is Guarantor__r, replacing the __c part of the field with an __r.
Embedding the Salesforce fields into your document template
Once you've collected the set of Salesforce fields that you want to include in your Inkit template, the next step is to embed these into the template. To do this, either create or edit a template and add Salesforce fields to it.
For individual Salesforce fields, you embed them in your document between double curly brackets ({{}}). Using the examples from the previous section, if from an Opportunity object you want to include the Close Date, you would embed the following into your template:
{{CloseDate}}
If from an Opportunity object you want to include the Account Name, you would embed the following:
{{Account.Name}}
If from a Guarantor object you want to include the Opportunity Name, you would embed the following:
{{Opportunity__r.Name}}
For embedding a list of child Salesforce fields, you need to iterate through the child field. Using the examples from the previous section, if from an Account object you want include all the Opportunity names associated with it, you would embed the following into your template:
{% for opportunity in Opportunity %}
   1. {{opportunity.Name}}
{% endfor %}
If from an Opportunity object you want to include all the Guarantor names associated with it, you would embed the following list:
{% for guarantor in Guarantor__r %}
   1. {{guarantor.Name}}
{% endfor %}
Note: You cannot embed lists in PDF templates.
Updated 10 months ago