Generate a document from a template
Optimize your document generation workflows by using templates and dynamic content merging
In this topic, you will discover how to generate a document from a predefined template. Thus, this grants you the ability to utilize document templates to streamline and optimize your document generation workflows.
At the end of this guide, you will have generated a sample document from a template. But more importantly, you will feel ready to implement templates for standardized documents in your organization.
Prerequisites:
- You know how to send a render create request
- You have a mock request tool like Postman or Insomnia at hand
- You know about templates and how they work
Read more about:
- Creating a PDF from an HTML file
- Data requirements
- Templates and how they work
- How to create a template
- Managing API keys
Getting ready
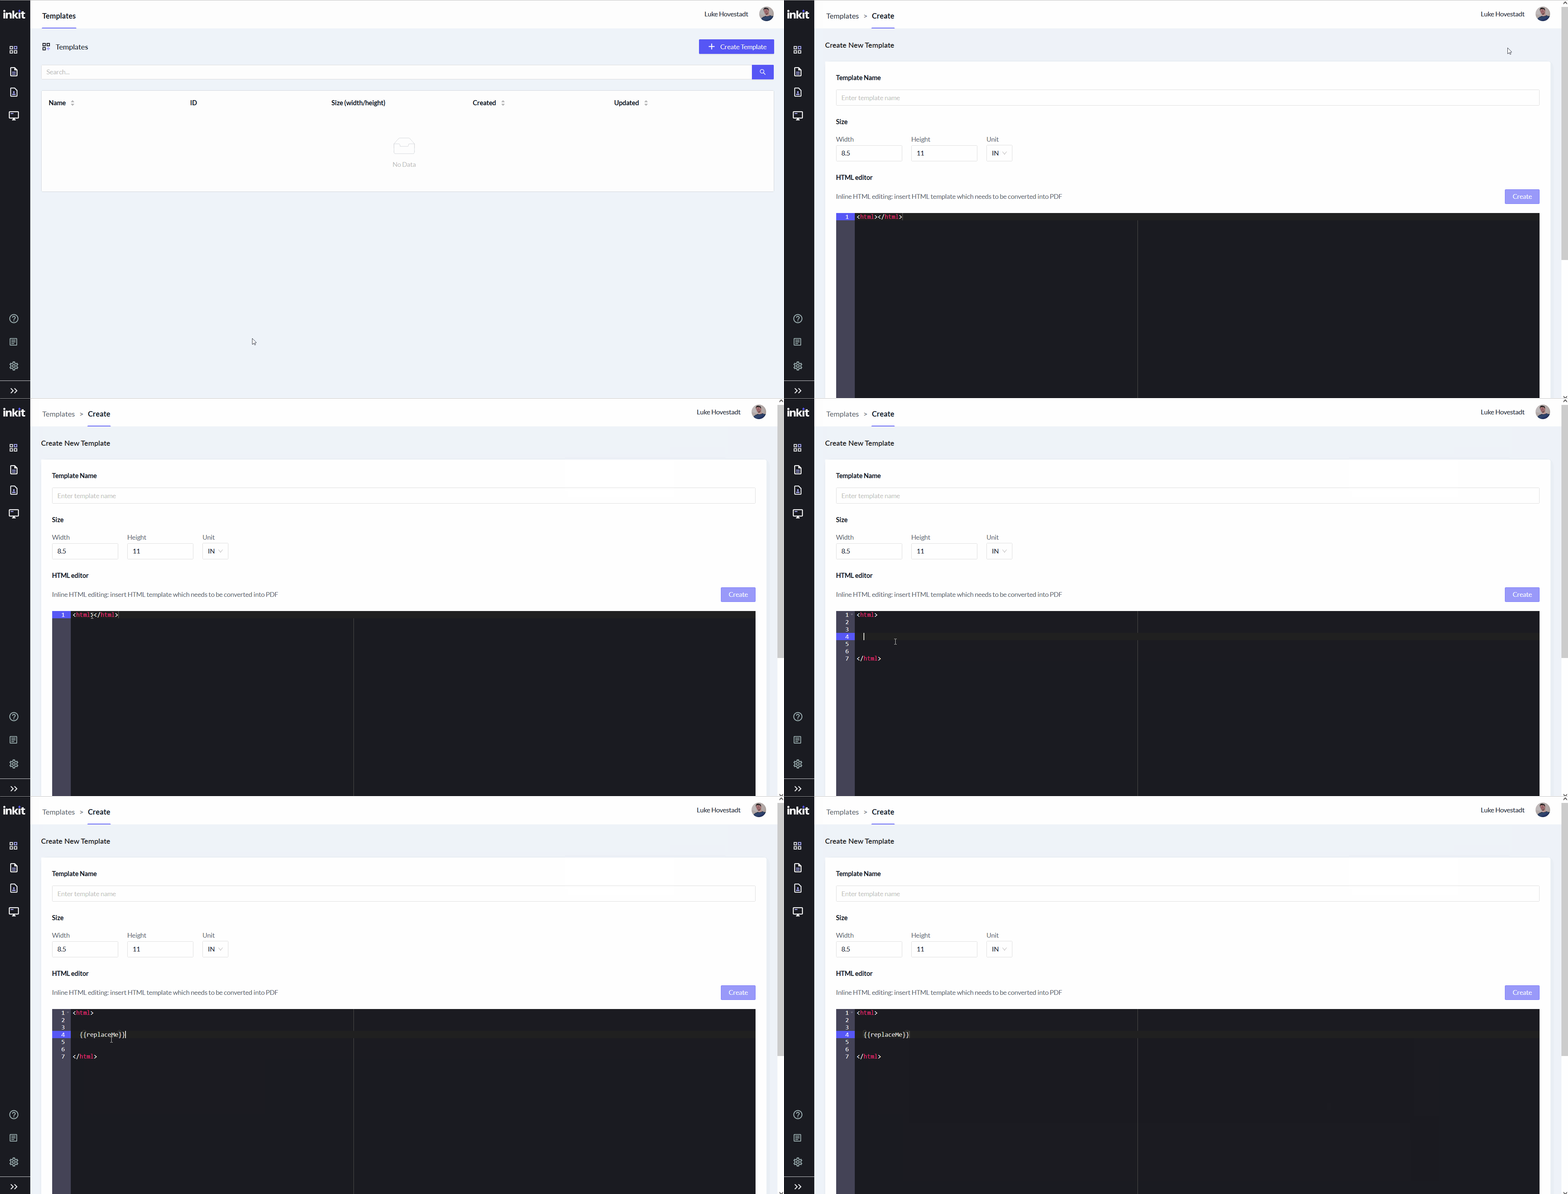
Before you can generate a document with a template, you must first complete a few preliminary steps. First, you will want to create a template in the Inkit web environment. Second, you will need to save its ID and have it ready for later in this guide.
While this is not an in-depth guide about creating templates, you may use the visual demonstration here for assistance. We have created a template with the key "replaceMe" inside the document.
Be sure to surround any key with the characters {{yourKey}} on its sides.
In this case we've called our key "{{replaceMe}}"

Next, you’ll want to have an API key with the Renders.create permission. Without it, you won’t be able to generate your document.
Make sure you have your to be merged content organized into a list of key : value pairs. You will need them in your create request.
As a quick reminder, the keys are the markers you include in your template. The Inkit Render API will replace them with the correct corresponding value.
Creating a document from a template
If you have your template ID at hand and your API key ready, then you can continue by following these next steps. Now then, it is time to generate a document from a template.
-
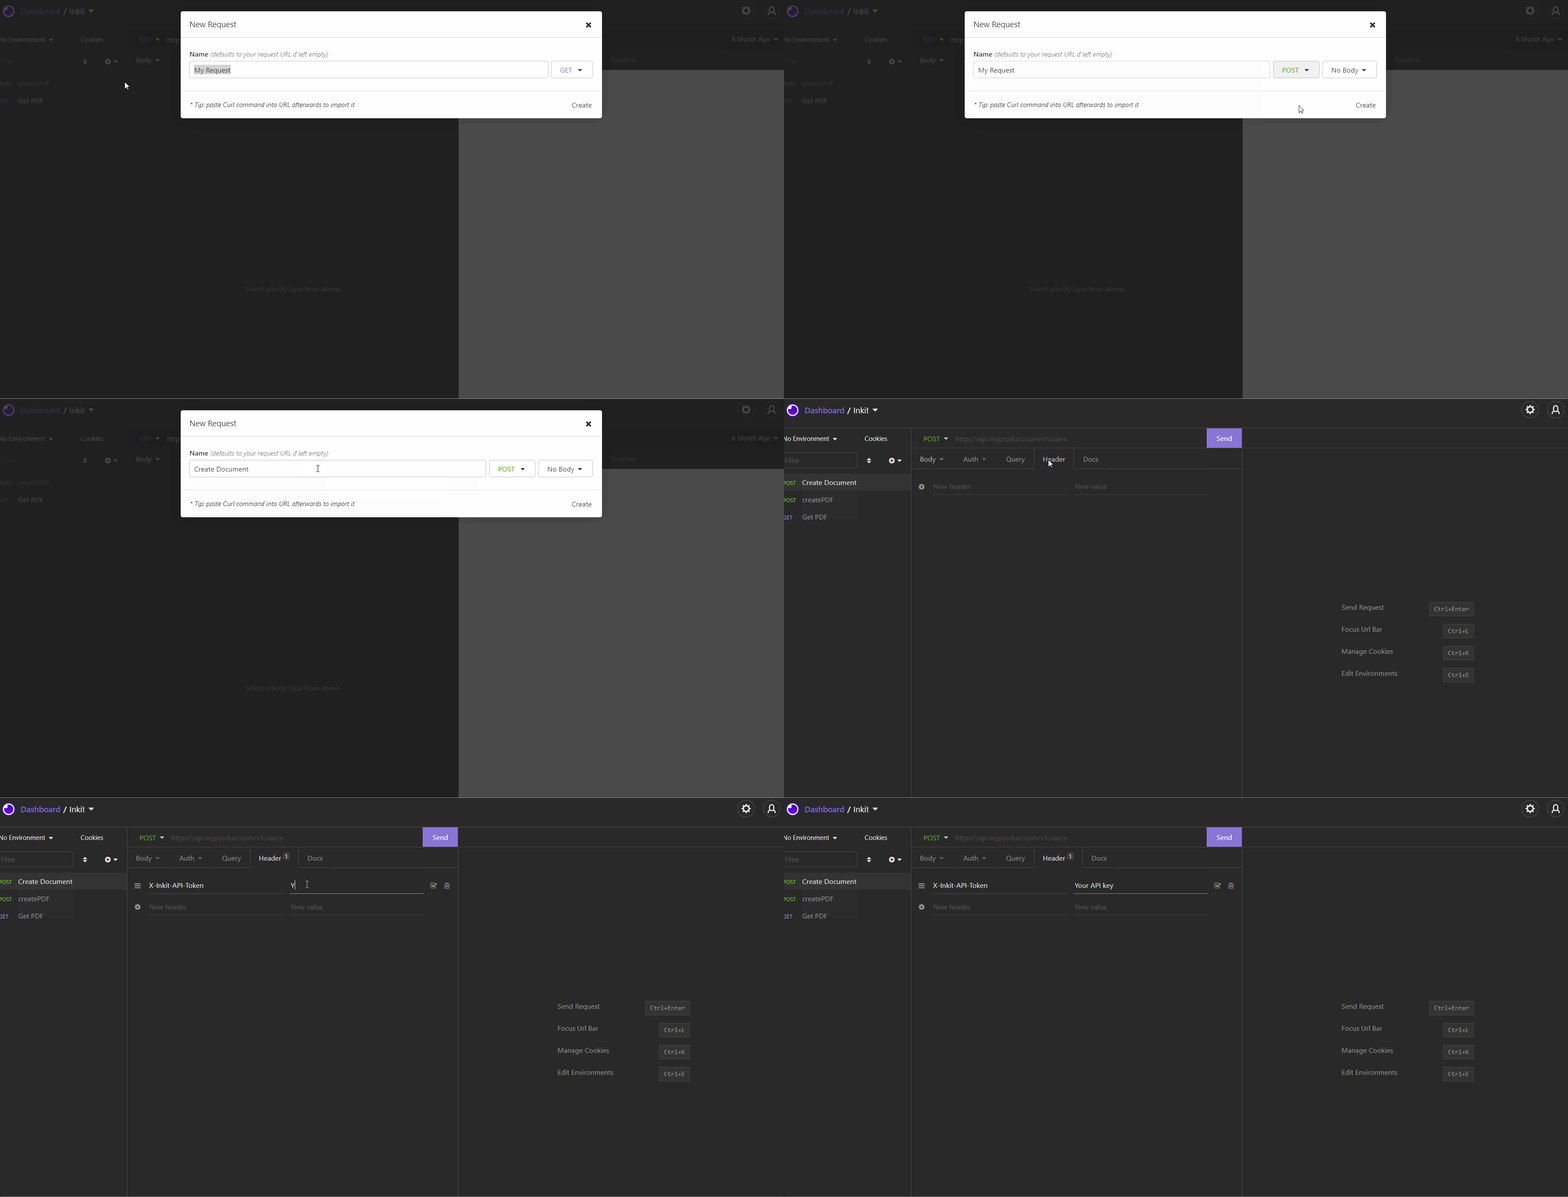
Open your API request testing tool and create a new post request. We are using Insomnia.
-
Include your API key in the request headers under the variable name X-Inkit-Token

-
However, unlike standard create requests, you do now not have to include the HTML source, unit, width, and height parameters.
-
In your JSON body, include the template ID you would like to use under the body parameter “templateid”. Template IDs are formatted as "tmpl" + a string of characters.
{
		 "template_id": "your template ID"
}- Now also add the key-value pairs you created earlier in this guide. Add them to your request under boy parameter “merge_parameters”
{
		 "template_id": "your template ID",
		 "merge_parameters": {
          "replaceMe": "Hello World"
     }
}
Note: You can add as many merge_parameters as you like. Just make sure that the keys can be found in your template.
If you wish to add more key-value pairs to your merge_parameters JSON object, you would do so this way:
"merge_parameters": {

          "replaceMe": "Hello World",

          "newKey": "New Value",

          "newKey-1": "New Value",

          "newKey-2": "New Value",

          "newKey-3": "New Value"

}- Send your request to the endpoint: https://api.inkit.com/v1/render
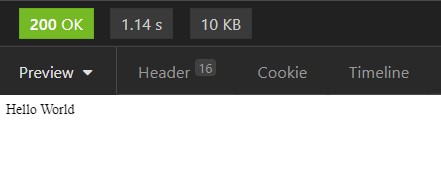
You should now see a 201 successful response code. If so, then you have created a document through a template. You should now be able to implement templates into your technical workflows and processes.
Optional: Pull your document, you should see the key replaced with the value you designated

Advanced Example: Generate documents from templates with dynamic lists
Wondering if you can generate dynamic documents? You can!
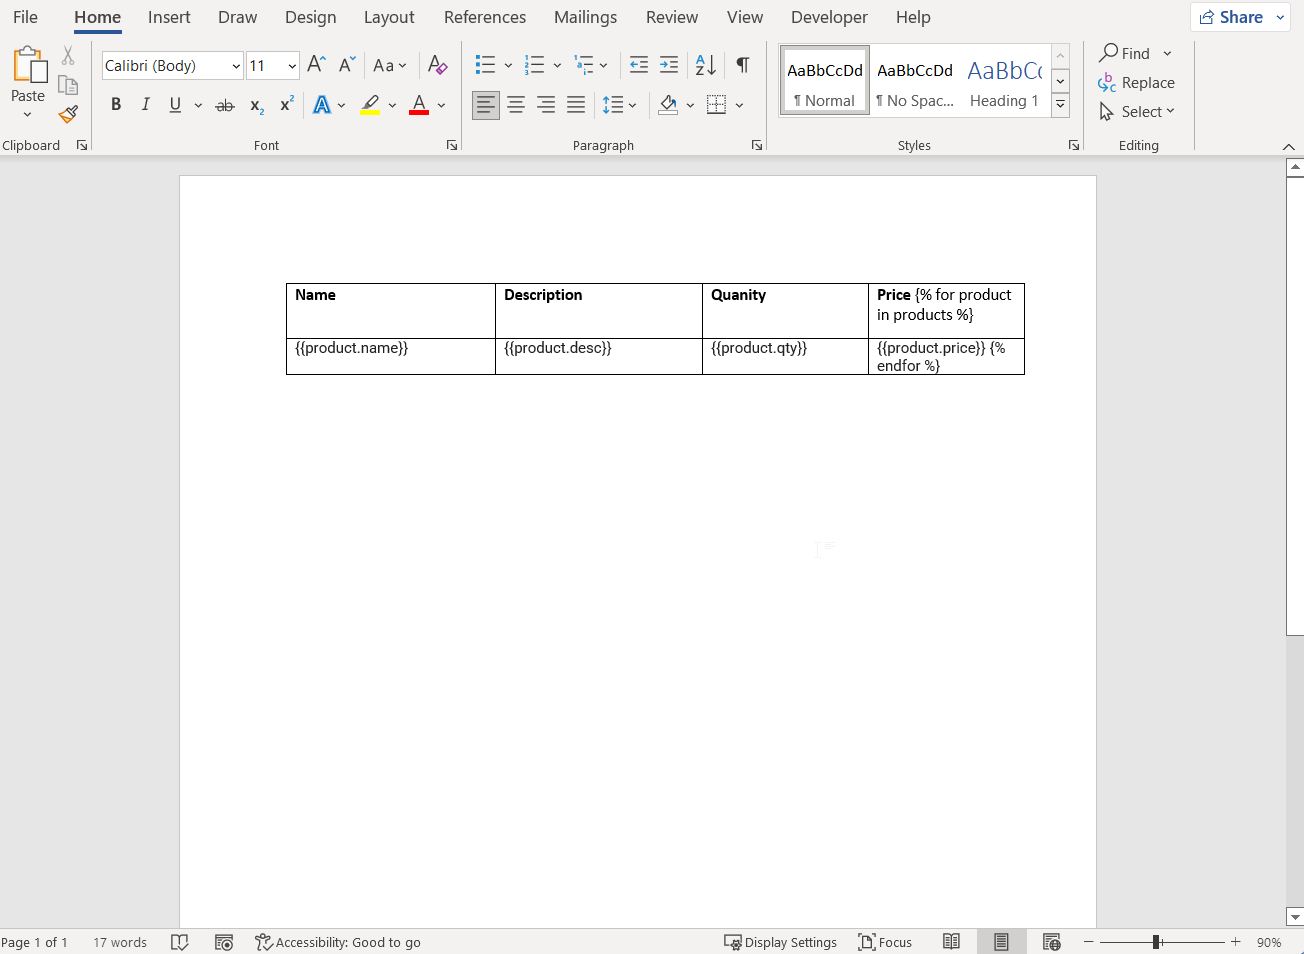
Take a look at this .docx template.

It contains an iterable element that you can fill by sending a request like the following:
{
	"template_id" : "tmpl_1juzBPJofjbwrLOaZZRA7R"
	,"merge_parameters": {
					"products": [
						{
							"name": "Item One",
							"desc": "Lorem Ipsum",
							"qty": "3",
							"price": "100"
						},
						{
							"name": "Item Two",
							"desc": "Lorem Ipsum",
							"qty": "2",
							"price": "12"
						},
						{
							"name": "Item Three",
							"desc": "Lorem Ipsum",
							"qty": "5",
							"price": "99"
						}
					]

     }
}
Updated 4 months ago