Make versions of templates for multi-purpose use
In some scenarios, you might want to have a specific version of a document, for example a policy version that has to be generated according to year 2022 standards, as opposed to year 2023 standards. You can use Inkit’s template versioning feature to help you with this.
With that, in this documentation guide, you will learn how to update templates and save previous versions for continued use.
After reading this guide, you will feel comfortable using template versioning. And you will know how to keep old versions at hand for legacy use.
Prerequisites:
- You are familiar with .pdf or .docx templates
- You have a template that you want to create a new version of
Read more about:
- Create a template from an existing .pdf form
- Creating Inkit-ready templates in Microsoft Word (.docx) - coming soon
What is template versioning?
With template versioning you can make multiple iterations of a document.
Here is an example. Say you are an insurer, and you generate insurance policies. You might change a policy as you go into the new fiscal year. However, clients who signed up before the start of the new year, will have to still generate the “old version” of the policy. You can use template versioning to make this transition go smoothly.
How to create a new version of a template
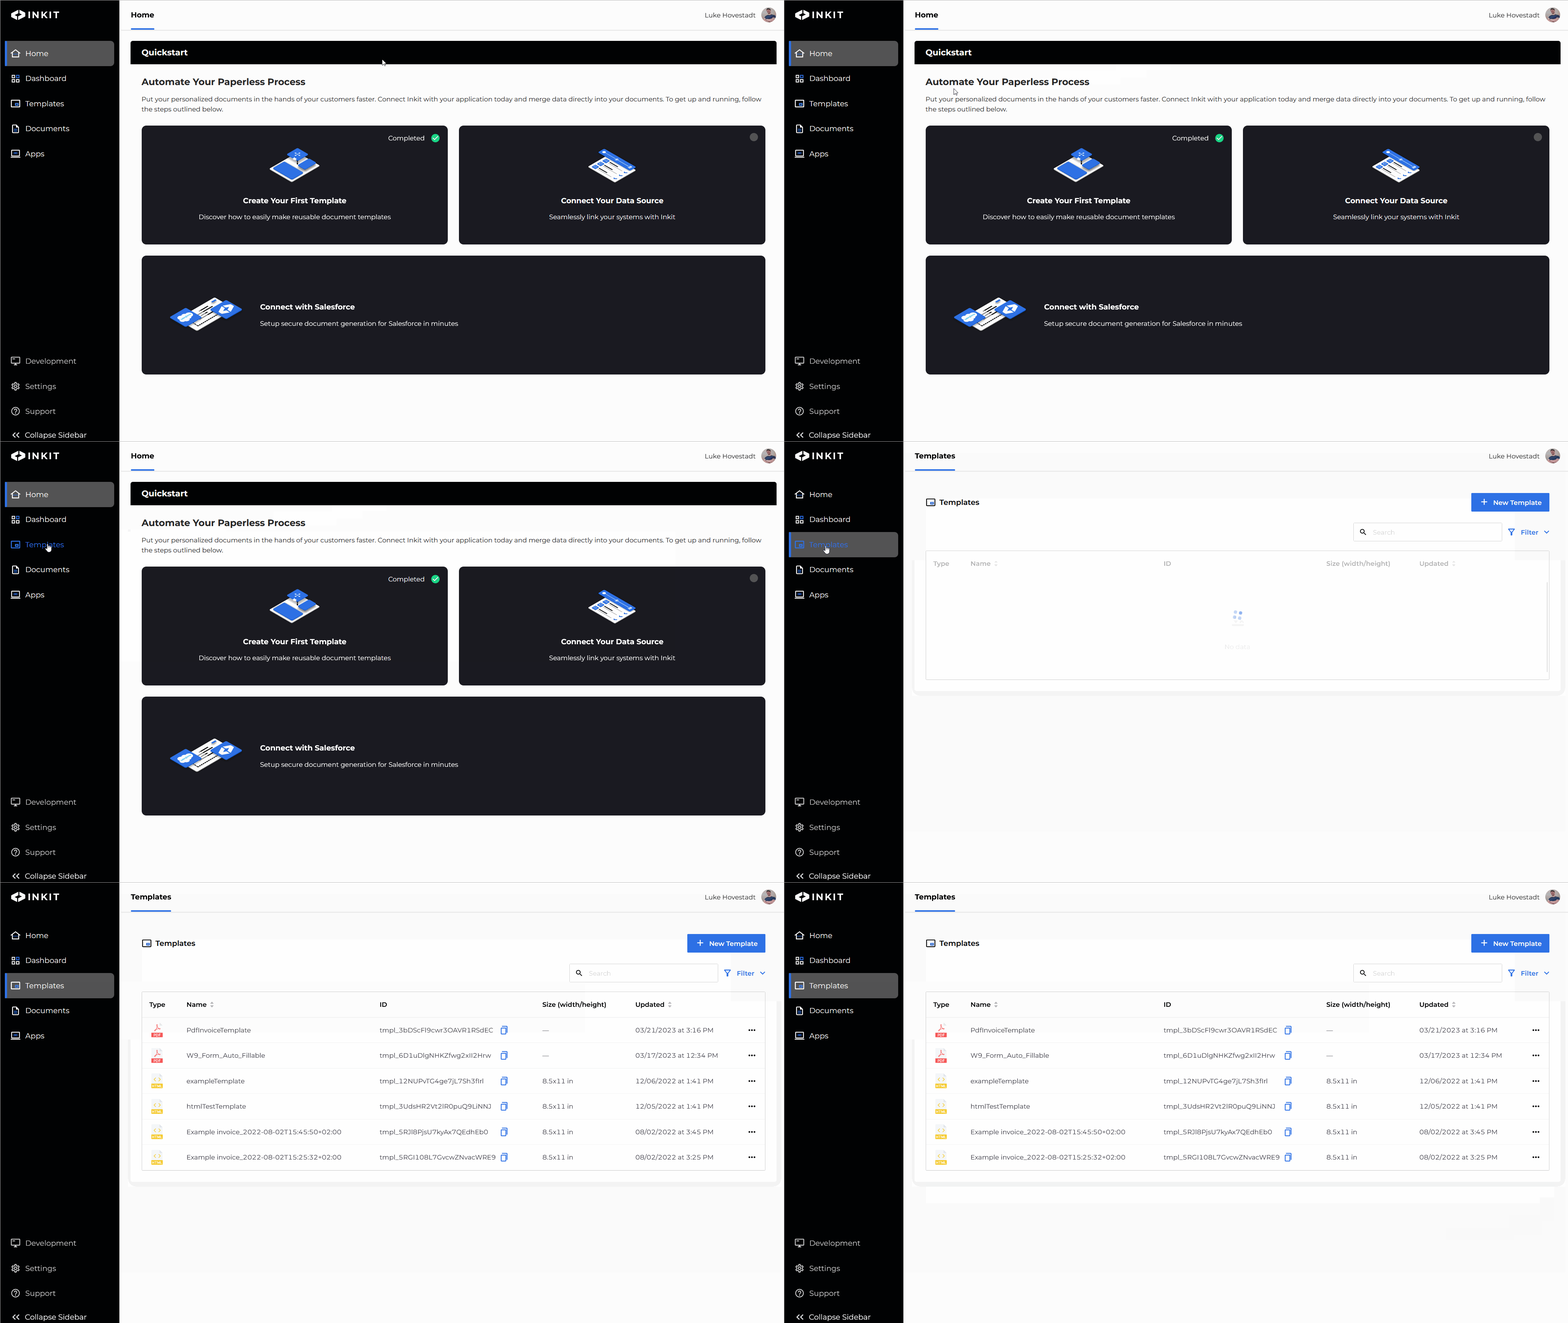
Make sure you have an existing template in your Inkit environment at (https://www.app.inkit.com).
If you do not know how to make templates, please refer to one of either topics in the read more about section in the introduction of this article or click one of the links below.
- Create a template from an existing .pdf form
- Creating Inkit-ready templates in Microsoft Word (.docx) - coming soon
If you have a template already, navigate to the “Templates” tab in your Inkit environment.

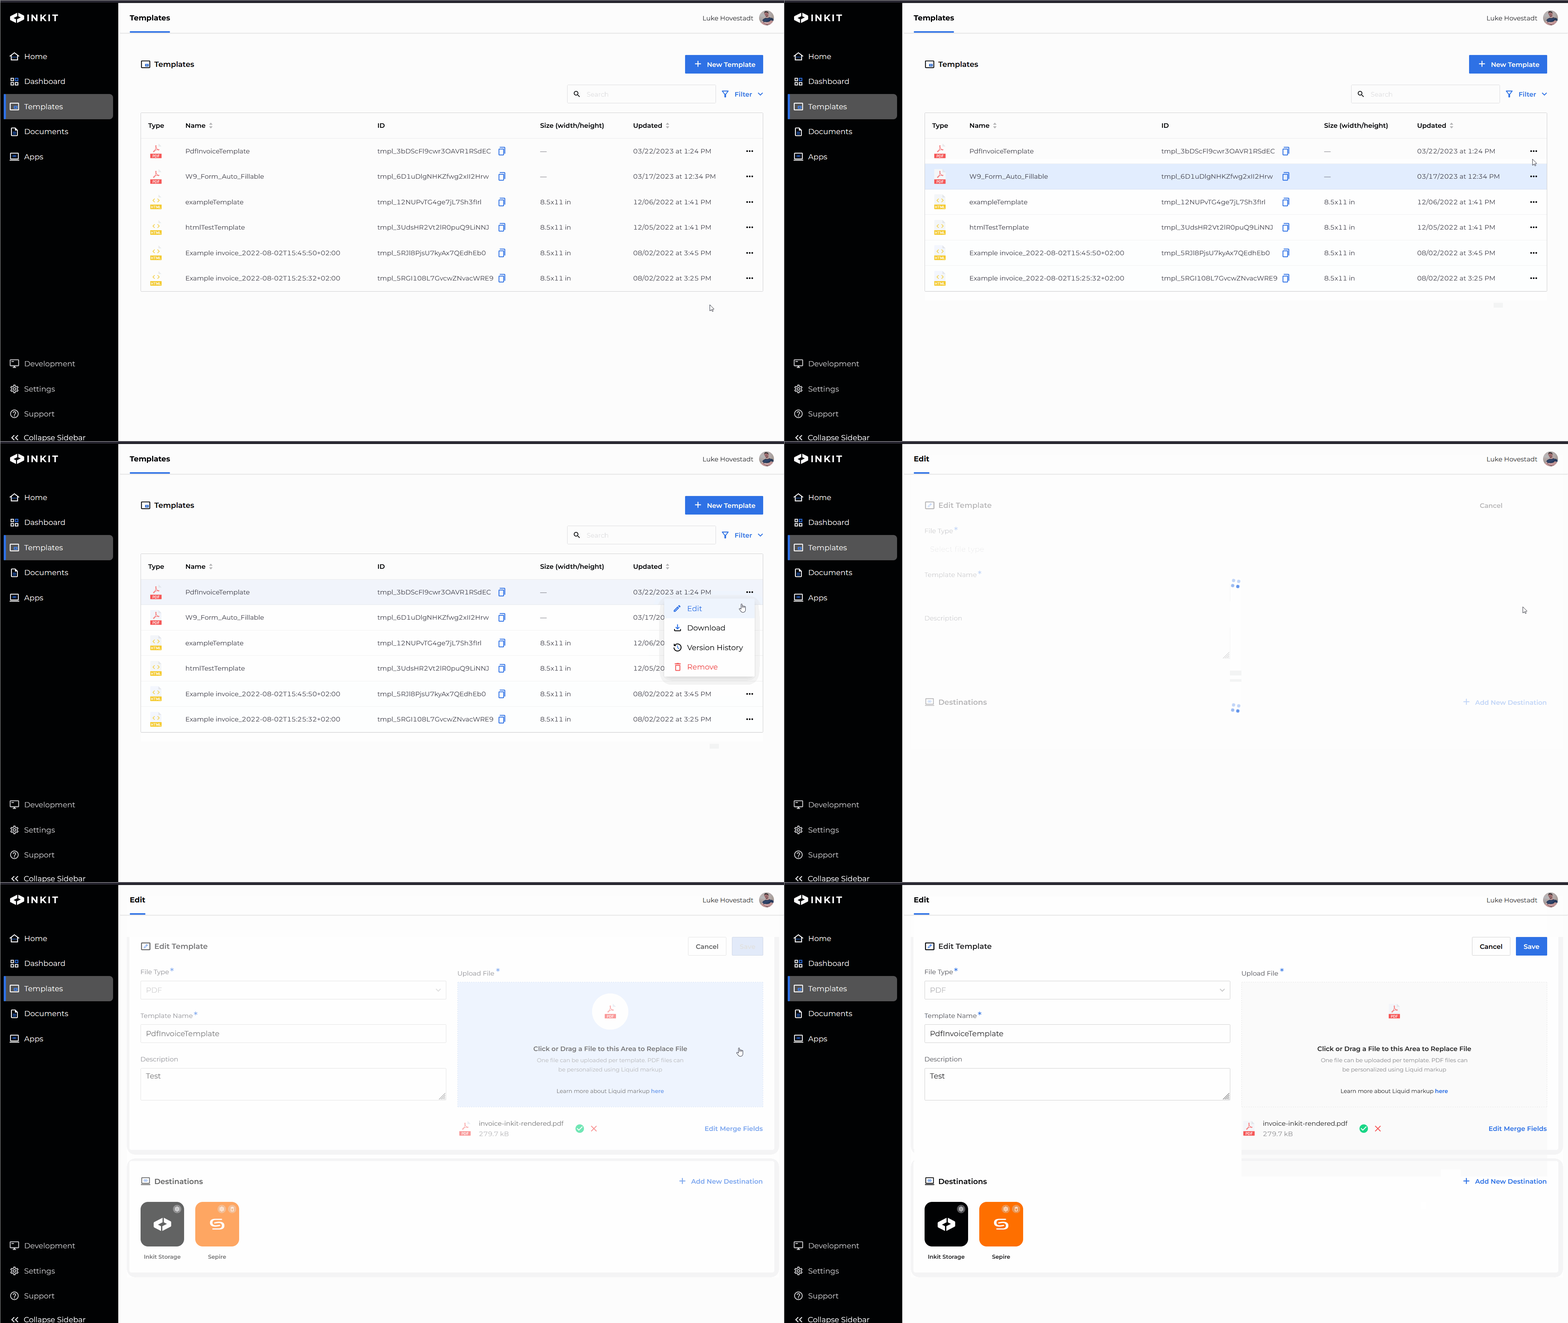
Find the template you want to add a new version for and press the three dots at the end of the item row ( "..." ).

You can now edit the template as you wish.
In this case, we are working with a .pdf form. We're going to upload a new version of this form.
In the case of a .docx template, you can upload the new version of your template in the same way.
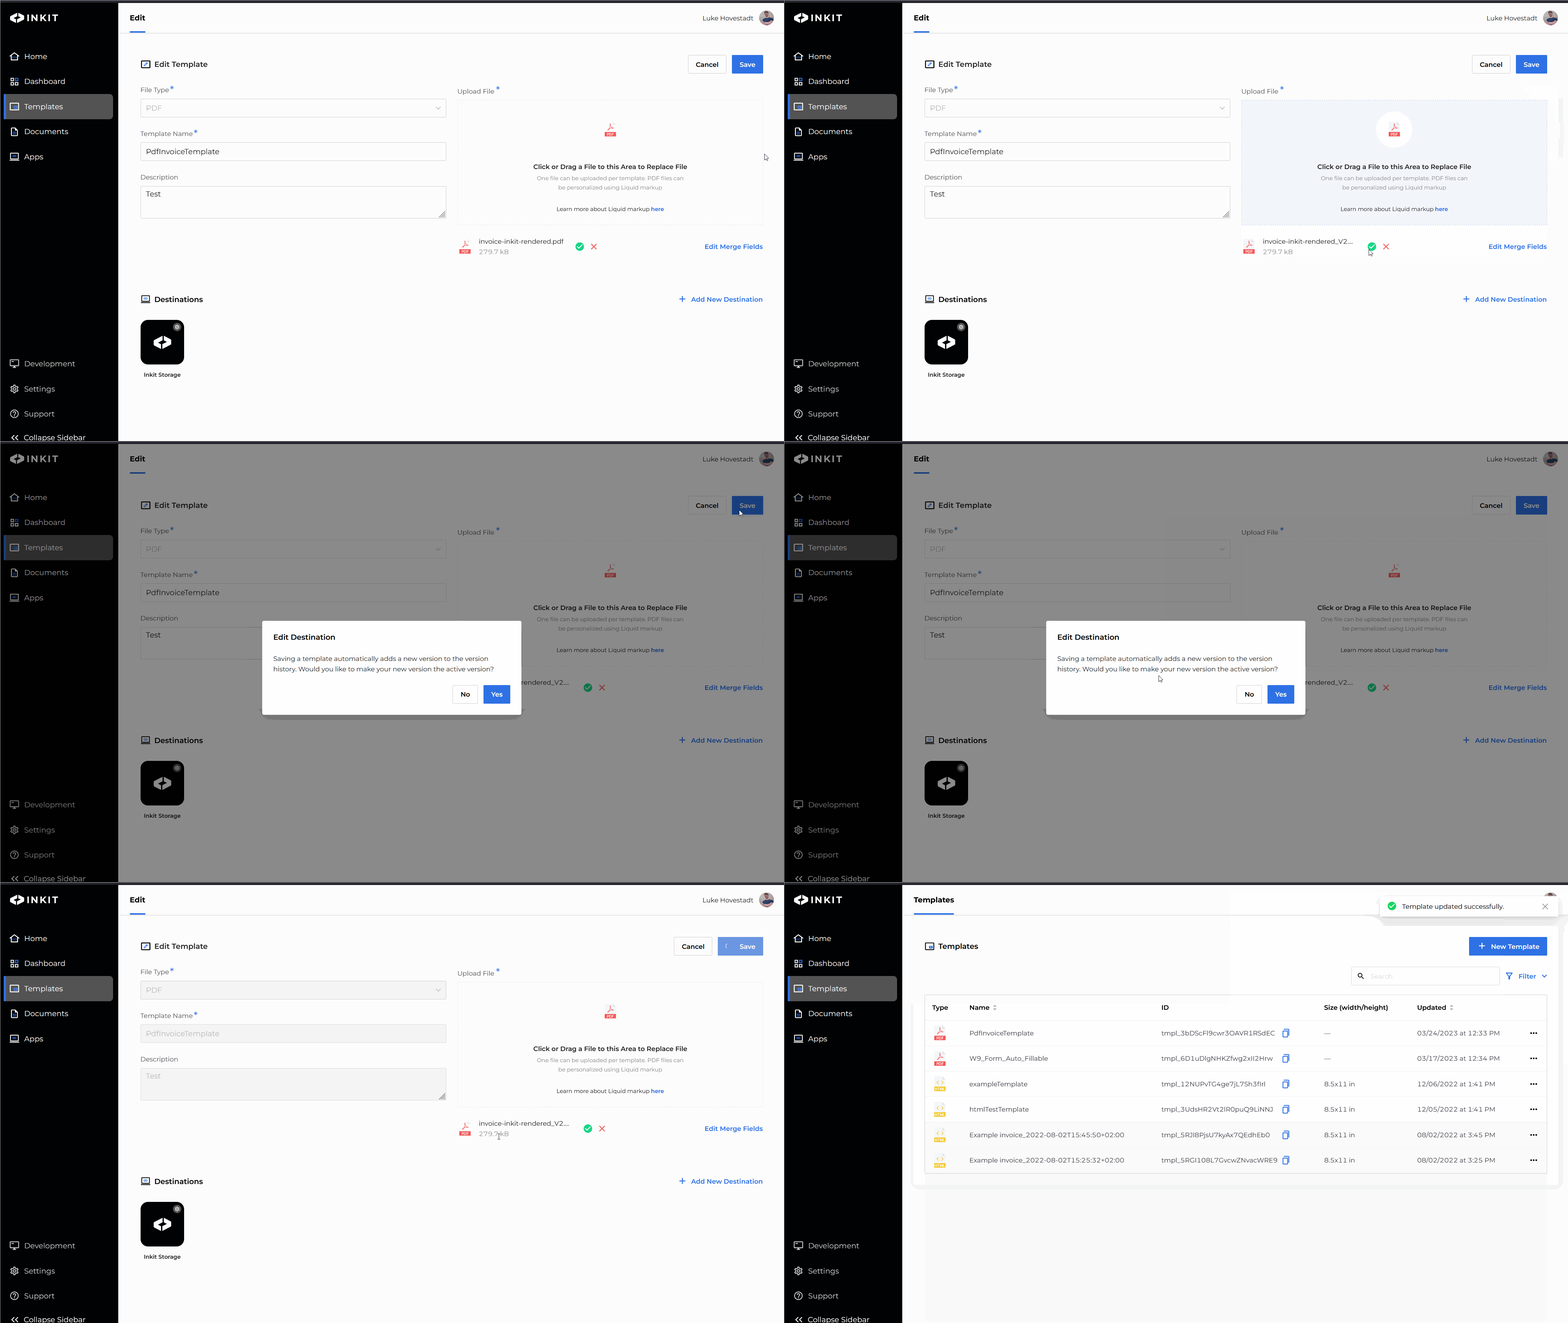
We are uploading a new file called "invoice-inkit-rendered_V2", as a demonstration of how this works.

As you can see, after drag-and-dropping the file onto the template editing screen, we are able to save a new version.
Previously existing merge-fields are carried over to the new template.
Note: You can add or remove the merge fields of the template before saving if you like.
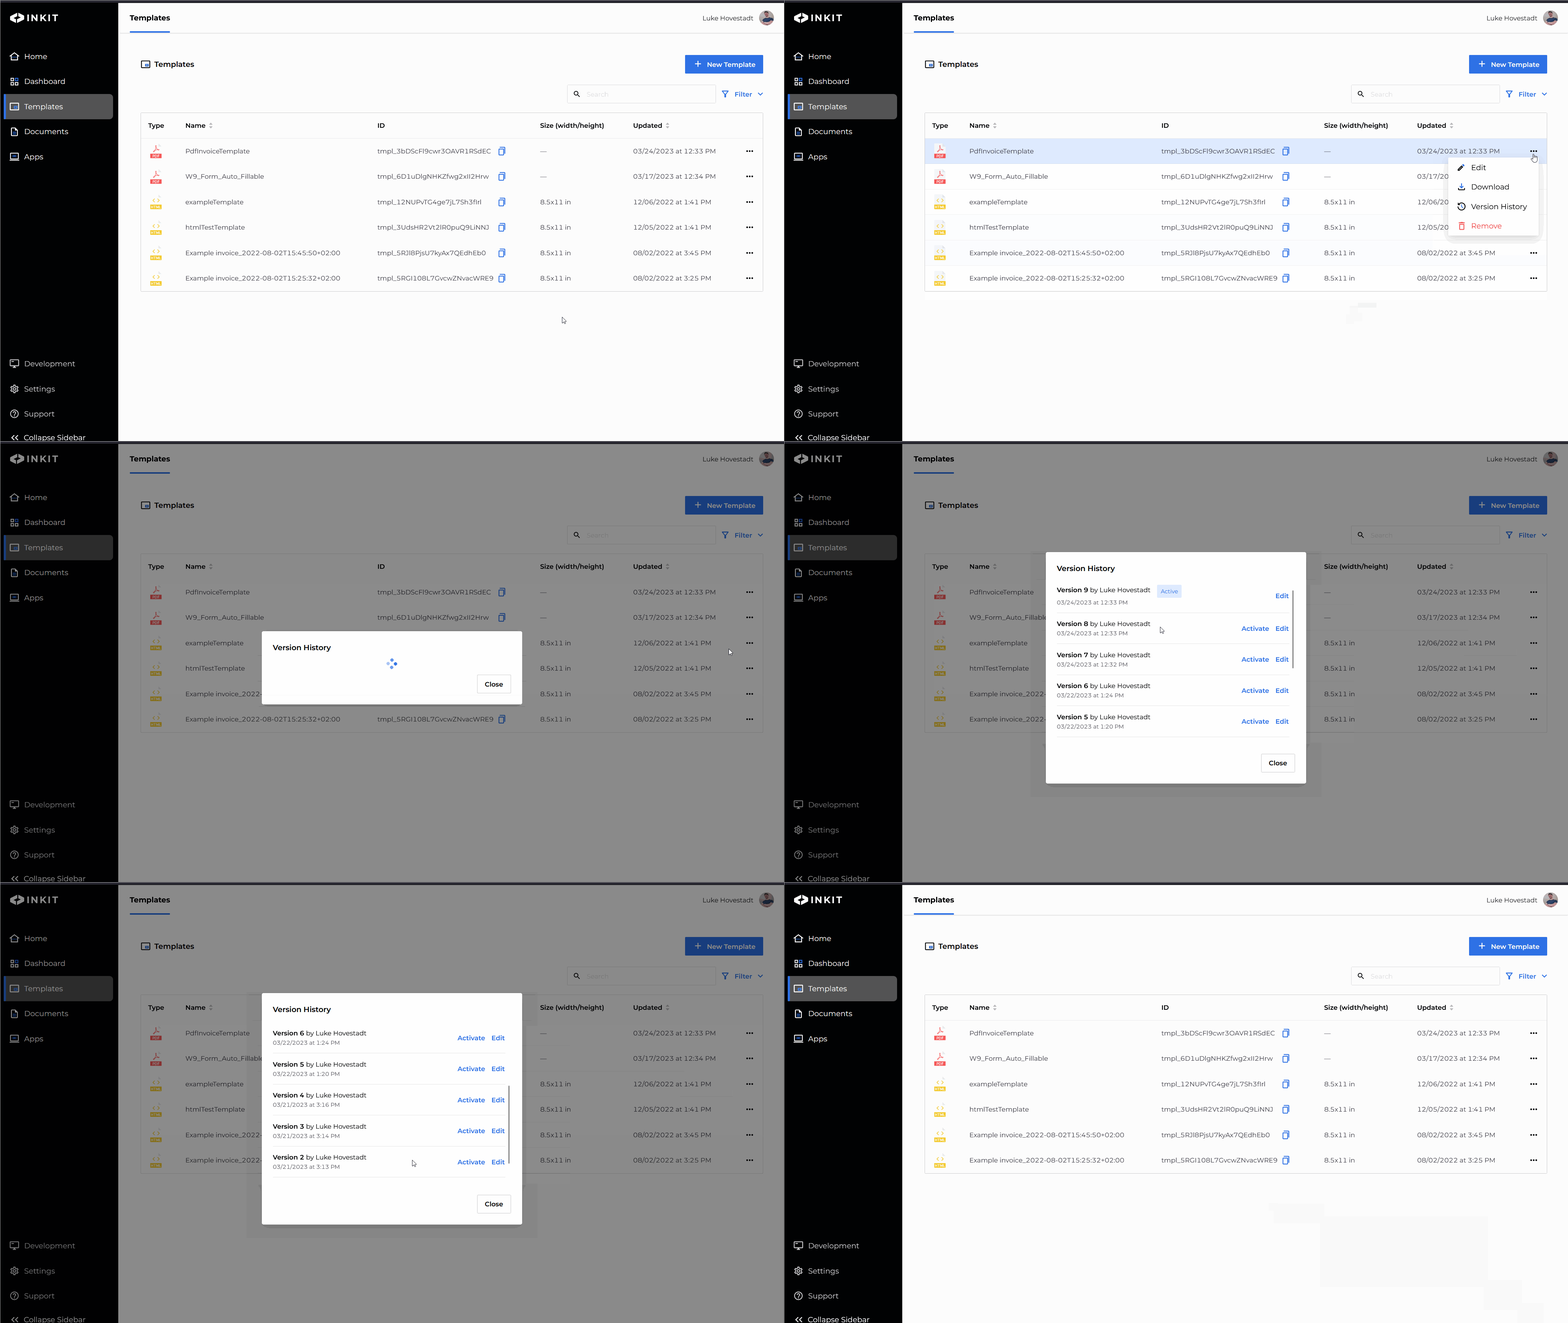
You can open the version history screen similarly as you opened the template editing screen. Click on the three dots ("...") of your template and press on "Version History"

In the version history screen you can choose which version you want to have active. You can also edit specific versions.
This is the end of this documentation article.
Updated about 1 month ago