Hubspot to Inkit integration guide
How to integrate Hubspot with Inkit for automated document creation and mailing
To integrate Inkit with Hubspot, first create a Hubspot account with a plan that allows for integrations.
Installing the Inkit App
In the Inkit web app, turn on the HubSpot integration in the API settings. Then, click on the HubSpot icon on the right-hand-side of the template and grab the endpoint.
Make sure to check the request signature box.
Click here to open a new tab to the Inkit listing on HubSpot. Press request to install.
Create a Workflow with Inkit
In Hubspot, hover over the "Automation" tab in the navbar and click on "Workflows" in the dropdown.
Create a new automation a relevant name and create the webhook.
- Make sure your request is a POST request.
- Include the endpoint URL you retrieved from within the Inkit.io webapp:
Example: https://internal.inkit.io/integrations/hubspot/9098f2cea8af41f4ac4d8724d9c818af/webhook/5a2fe48dcea5424ba364f334b33d9762
- Add any follow-up actions after the mailing if you like.
- And lastly, pick the object fields you want to include in your request.
Your automation will look something like the following:
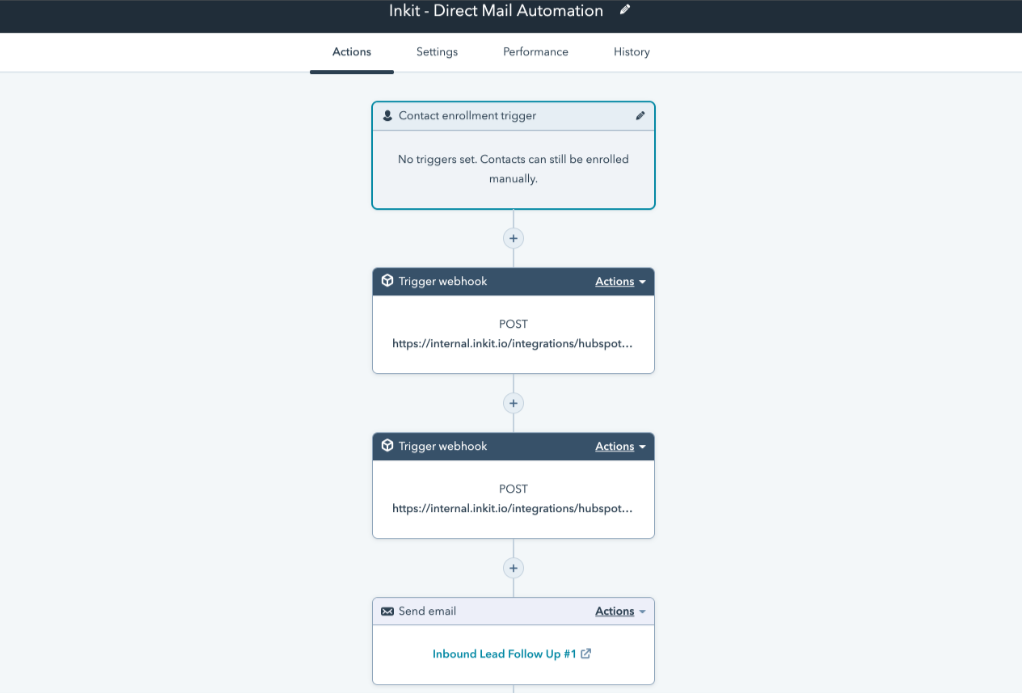
Expected Data
The fields you must include in your webhook API requests are the ones you've included in your template. You may choose to make a template with a customer address, first name, and maybe a phone number. In that case, you would have to include these variables in your request.
You should now have what you need to successfully integrate with Inkit via your HubSpot environment.
Thank you for reading this guide.
Updated 7 months ago