

Create a role
A role groups permissions that can be assigned to users. Review the roles already available under Manage organization → Users → Roles before creating a new one. Role names and permission sets can differ across organizations.
Creating a role
- Open the account menu and select Manage organization → Users → Roles.
- Select Add Role.
- Enter a Name and, optionally, a Description explaining who should use the role.
- Select the permissions required for that job. The dialog groups them by area, including documents, templates, workflows, Studio, and settings. Available capabilities depend on your environment.
- Select Create.
- Assign the role to users. Creating the role alone does not assign it.
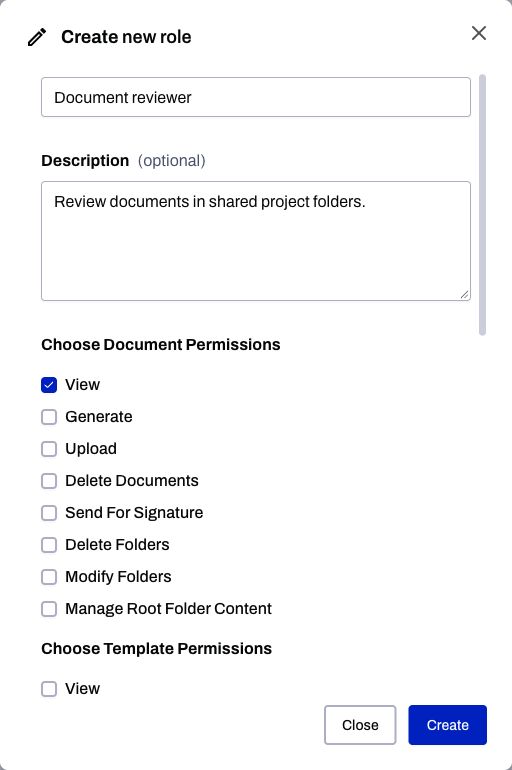
Local demonstration using production application code and fictional data.
| Task | Where to review it |
|---|---|
| Change the role's name or description | Role actions → Edit |
| Review the operations it allows | Role actions → Permissions |
| Review its members | Role actions → Users |
| Review its folder access | Role actions → Folders, where available |
Admin roleThe built-in Admin role has different controls from ordinary roles. Its edit, permissions, folder, and delete actions are not exposed in the same way. Do not assume that a permission table from another organization describes your roles.
See Editing a role and Permissions in Inkit.
See also: current walkthrough.
Updated 18 days ago
Did this page help you?