Authentication
reading time 5 minutes
<div class="ink-cat-header"> To successfully authenticate, send the token header with your request. </div>

<div class="ink-hr"> </div>

Here's an example of the header with a key:value pair. You must provide this in your JSON request if you want to authenticate with the Inkit API.

<Table align={["left","left"]}>
  <thead>
    <tr>
      <th>
        Key
      </th>

      <th>
        Value
      </th>
    </tr>
  </thead>

  <tbody>
    <tr>
      <td>
        Authorization
      </td>

      <td>
        Inkit `{api-key}`
      </td>
    </tr>
  </tbody>
</Table>

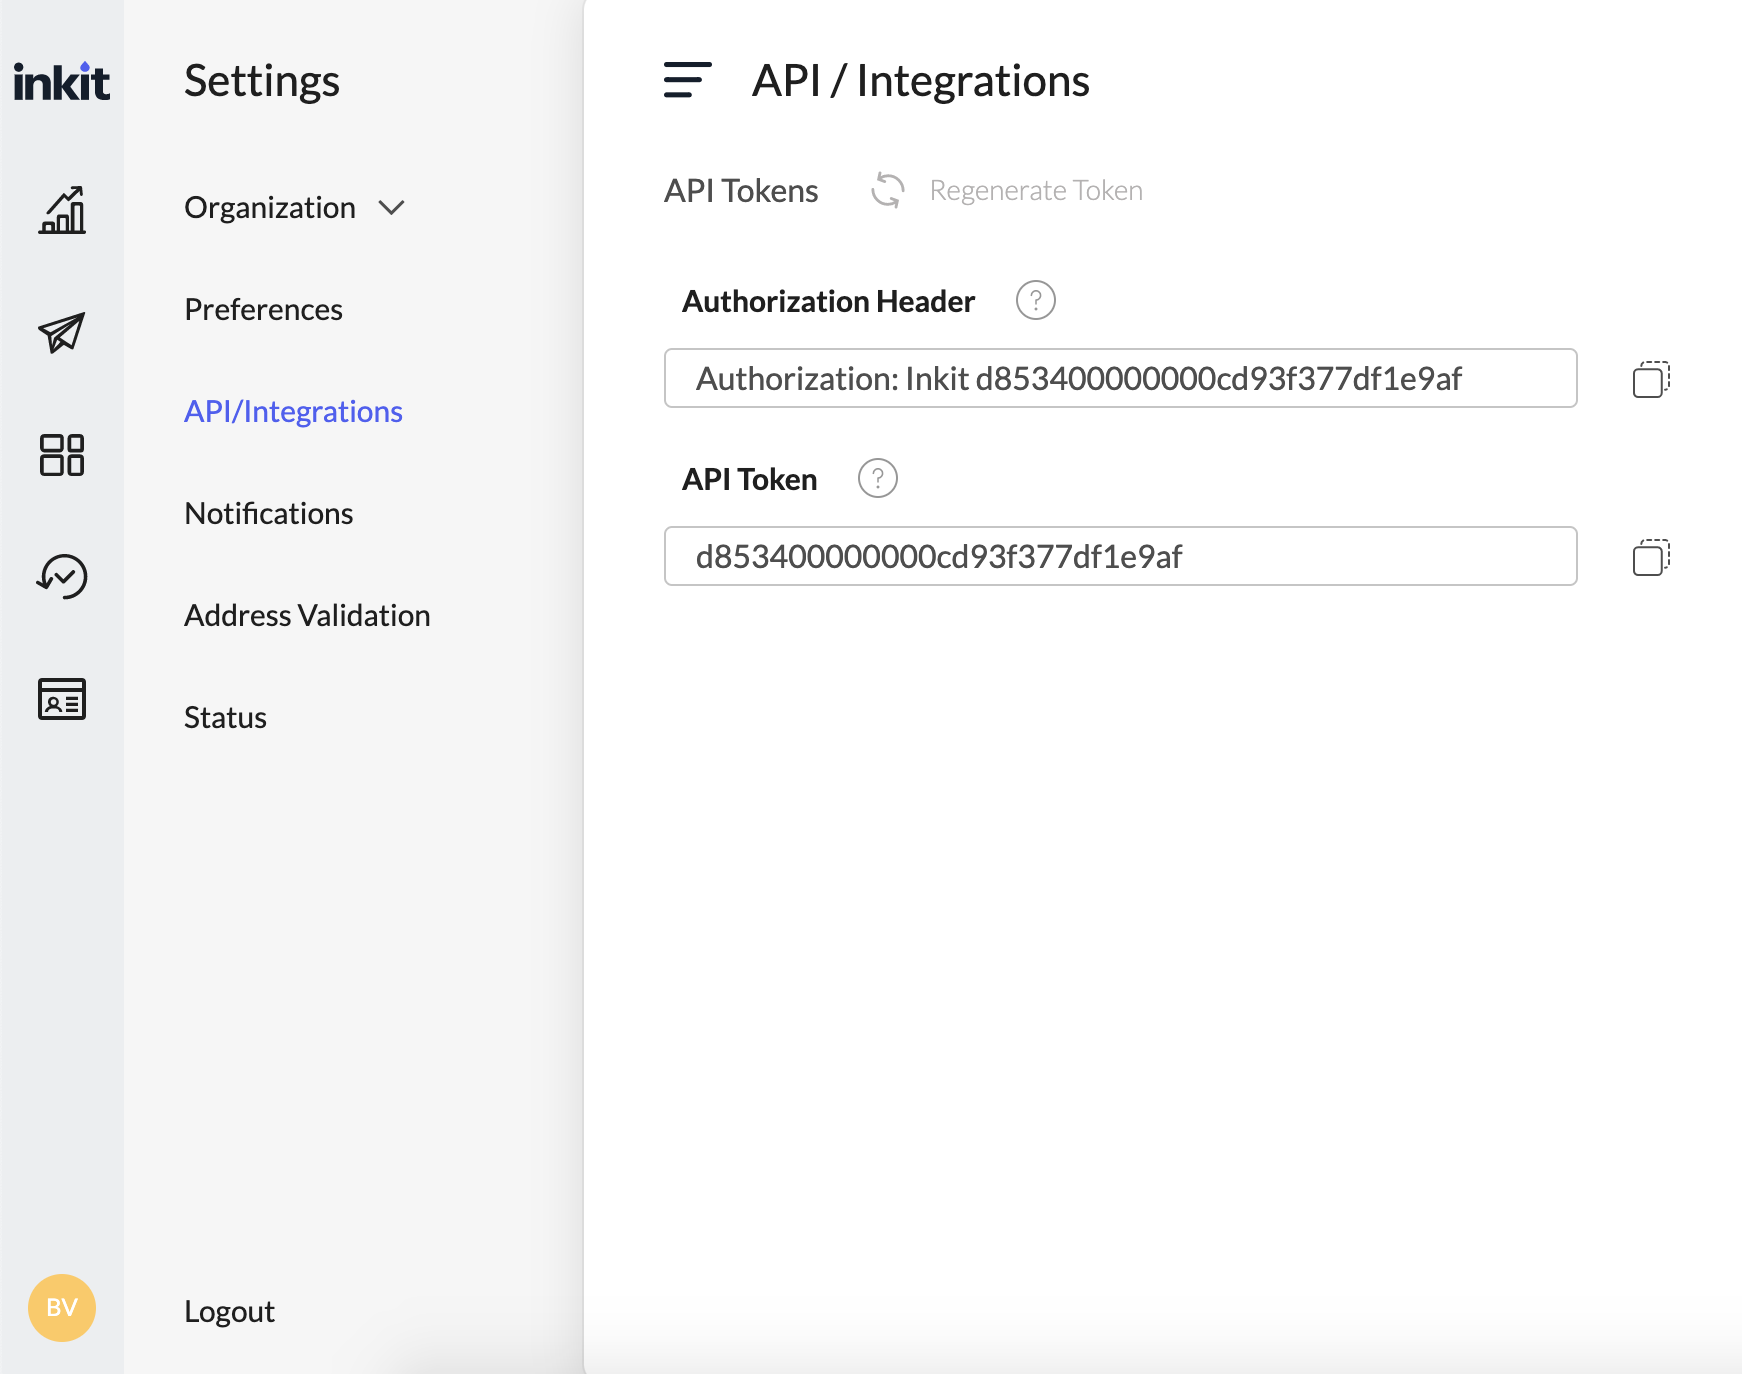
> ❗️ You need to replace <i> `{api-key}` </i> with an actual API key, which can be found under the Inkit Dashboard App settings.

Here is another authentication example, but with cURL.

```curl
# With shell, you can just pass the correct header with each request
curl "api_endpoint_here"
  -H "Authorization: Inkit {api-key}"
How to find the API key or token in the App?
Go to Settings -> API/Integrations and copy Authorization header by clicking on Copy icon.

Questions?
We're happy to help get your code set up or answer questions you might have.
Search our documentation, check the help center, or connect with our sales team. Ask our support team ([email protected]) questions if you run into any technical roadblocks.
Updated 5 months ago
What’s Next