Automatically place a generated document into a folder
This documentation article shows you how to auto-place a document in a folder you specify.
As a prerequisite, you must have created a template before.
Moreover, you must have created a folder already.
If you have not done either or one of them, then you can learn how to in the "Read more about" section.
Read more about:
- How to make a folder you can place documents in after generating them
- How to create a template you can generate a type of document with many times
Place generated documents in a folder you specify
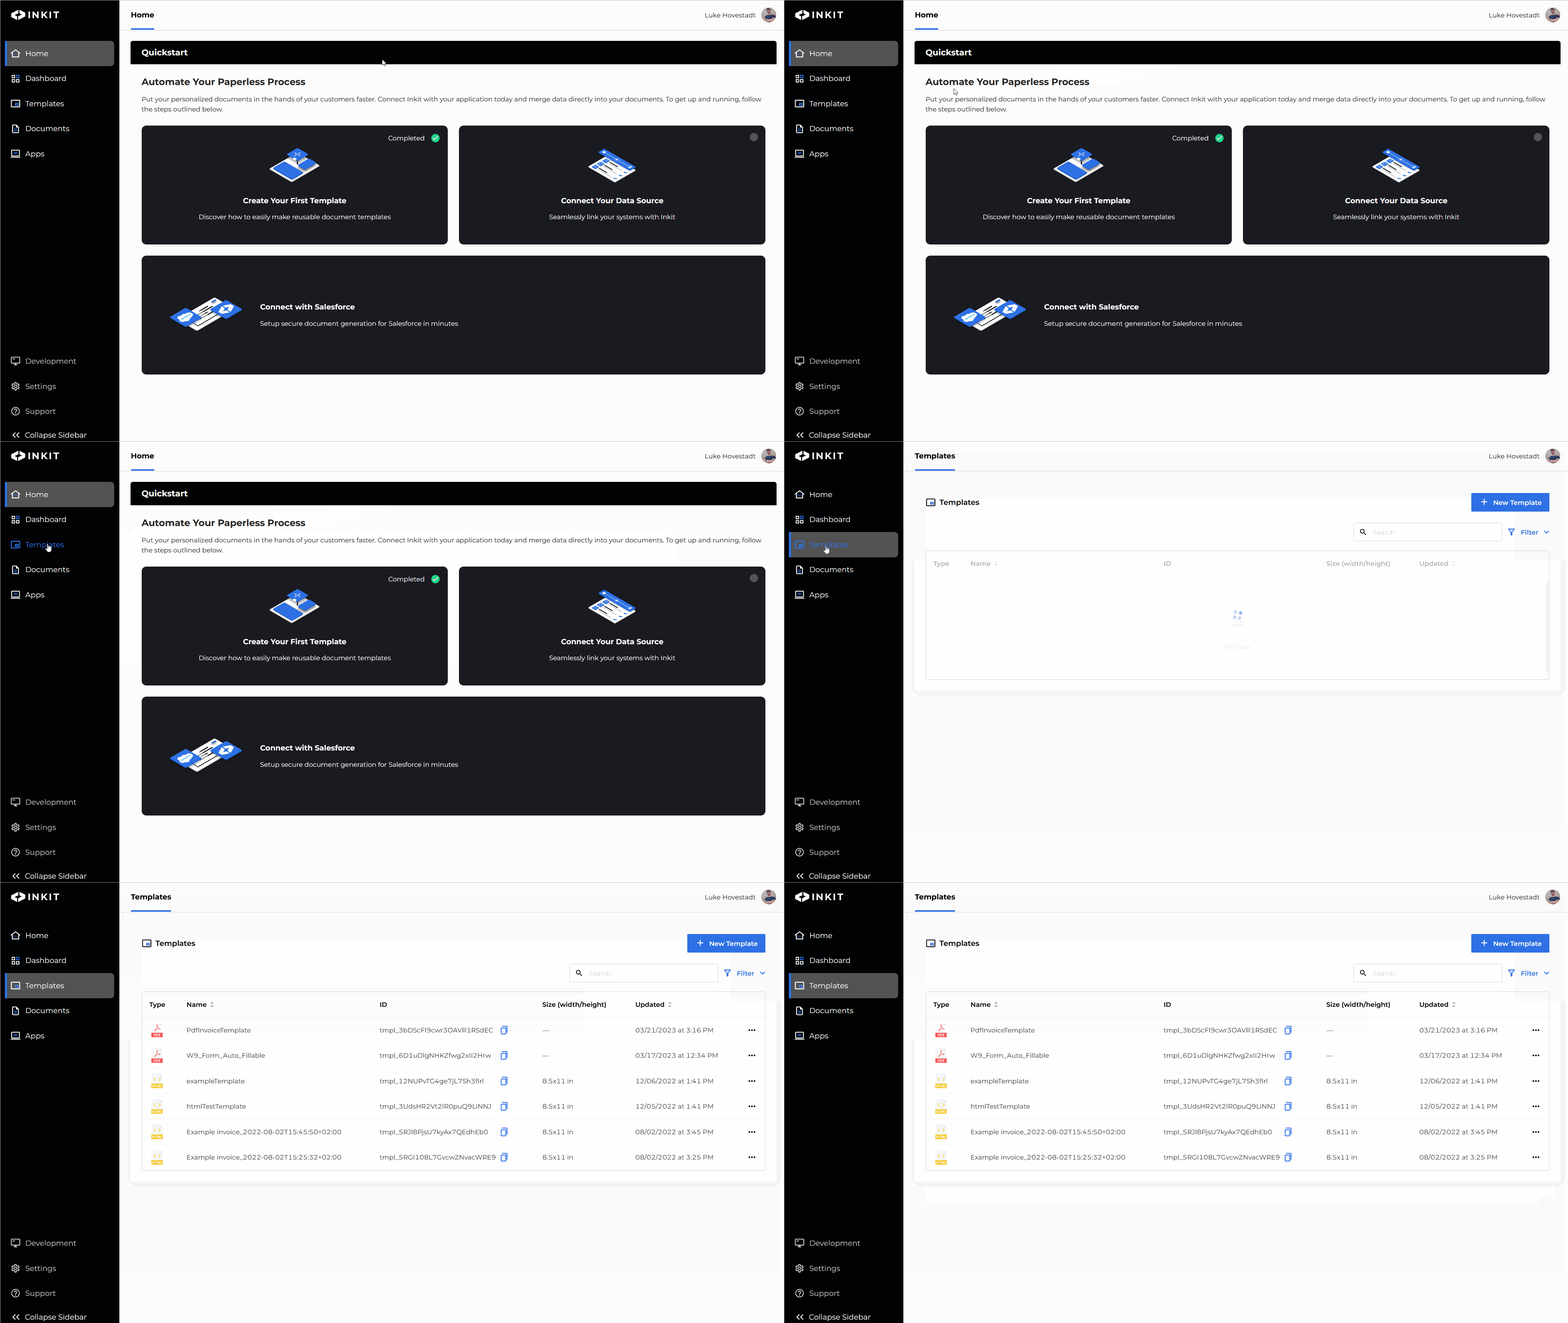
Login to your Inkit environment at https://www.app.inkit.com and browse to the "Templates" tab.

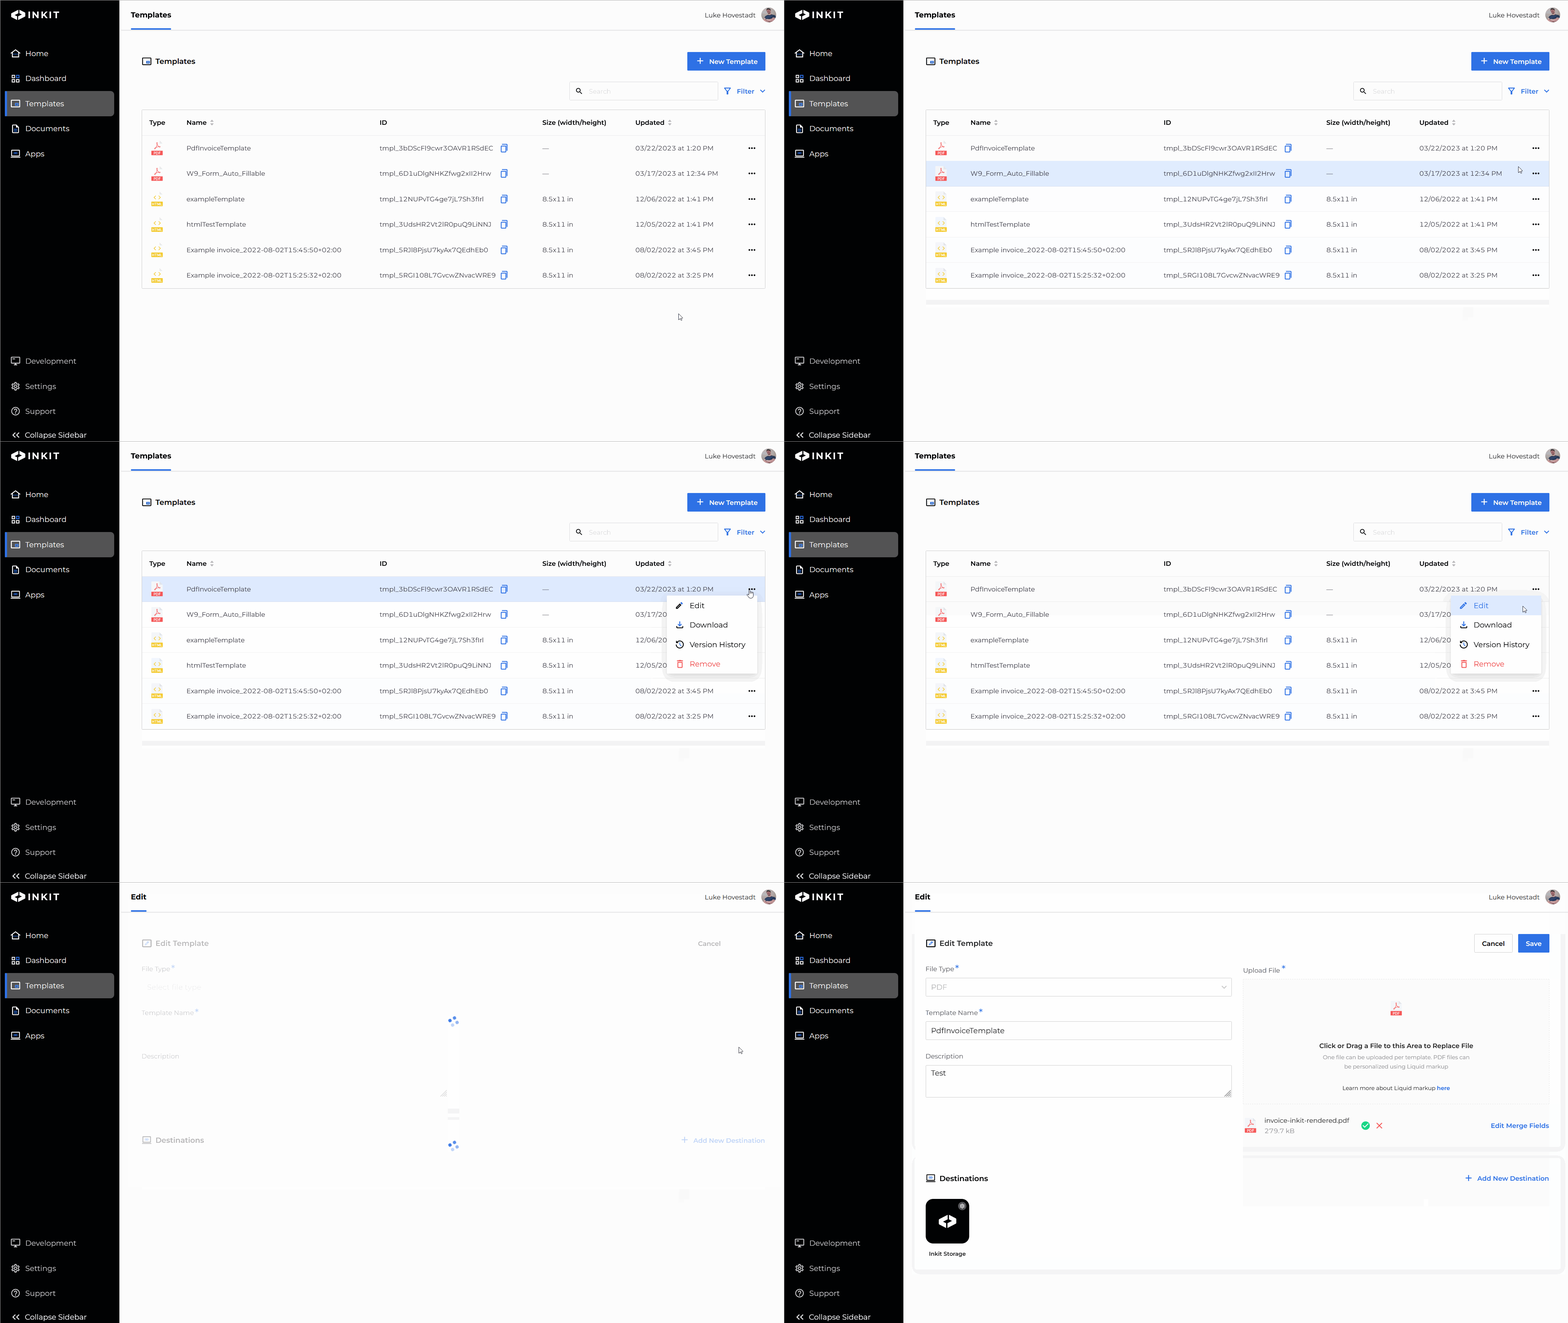
Find the template you want to edit and click on the three dots ( "...") at the right hand side of the line item. Press on "Edit" from the drop-down menu.

Near the bottom of the template editing screen, you will see a section called "Destinations" and a tile with the name "Inkit Storage" underneath.
Click on the gear icon of the Inkit Storage tile.
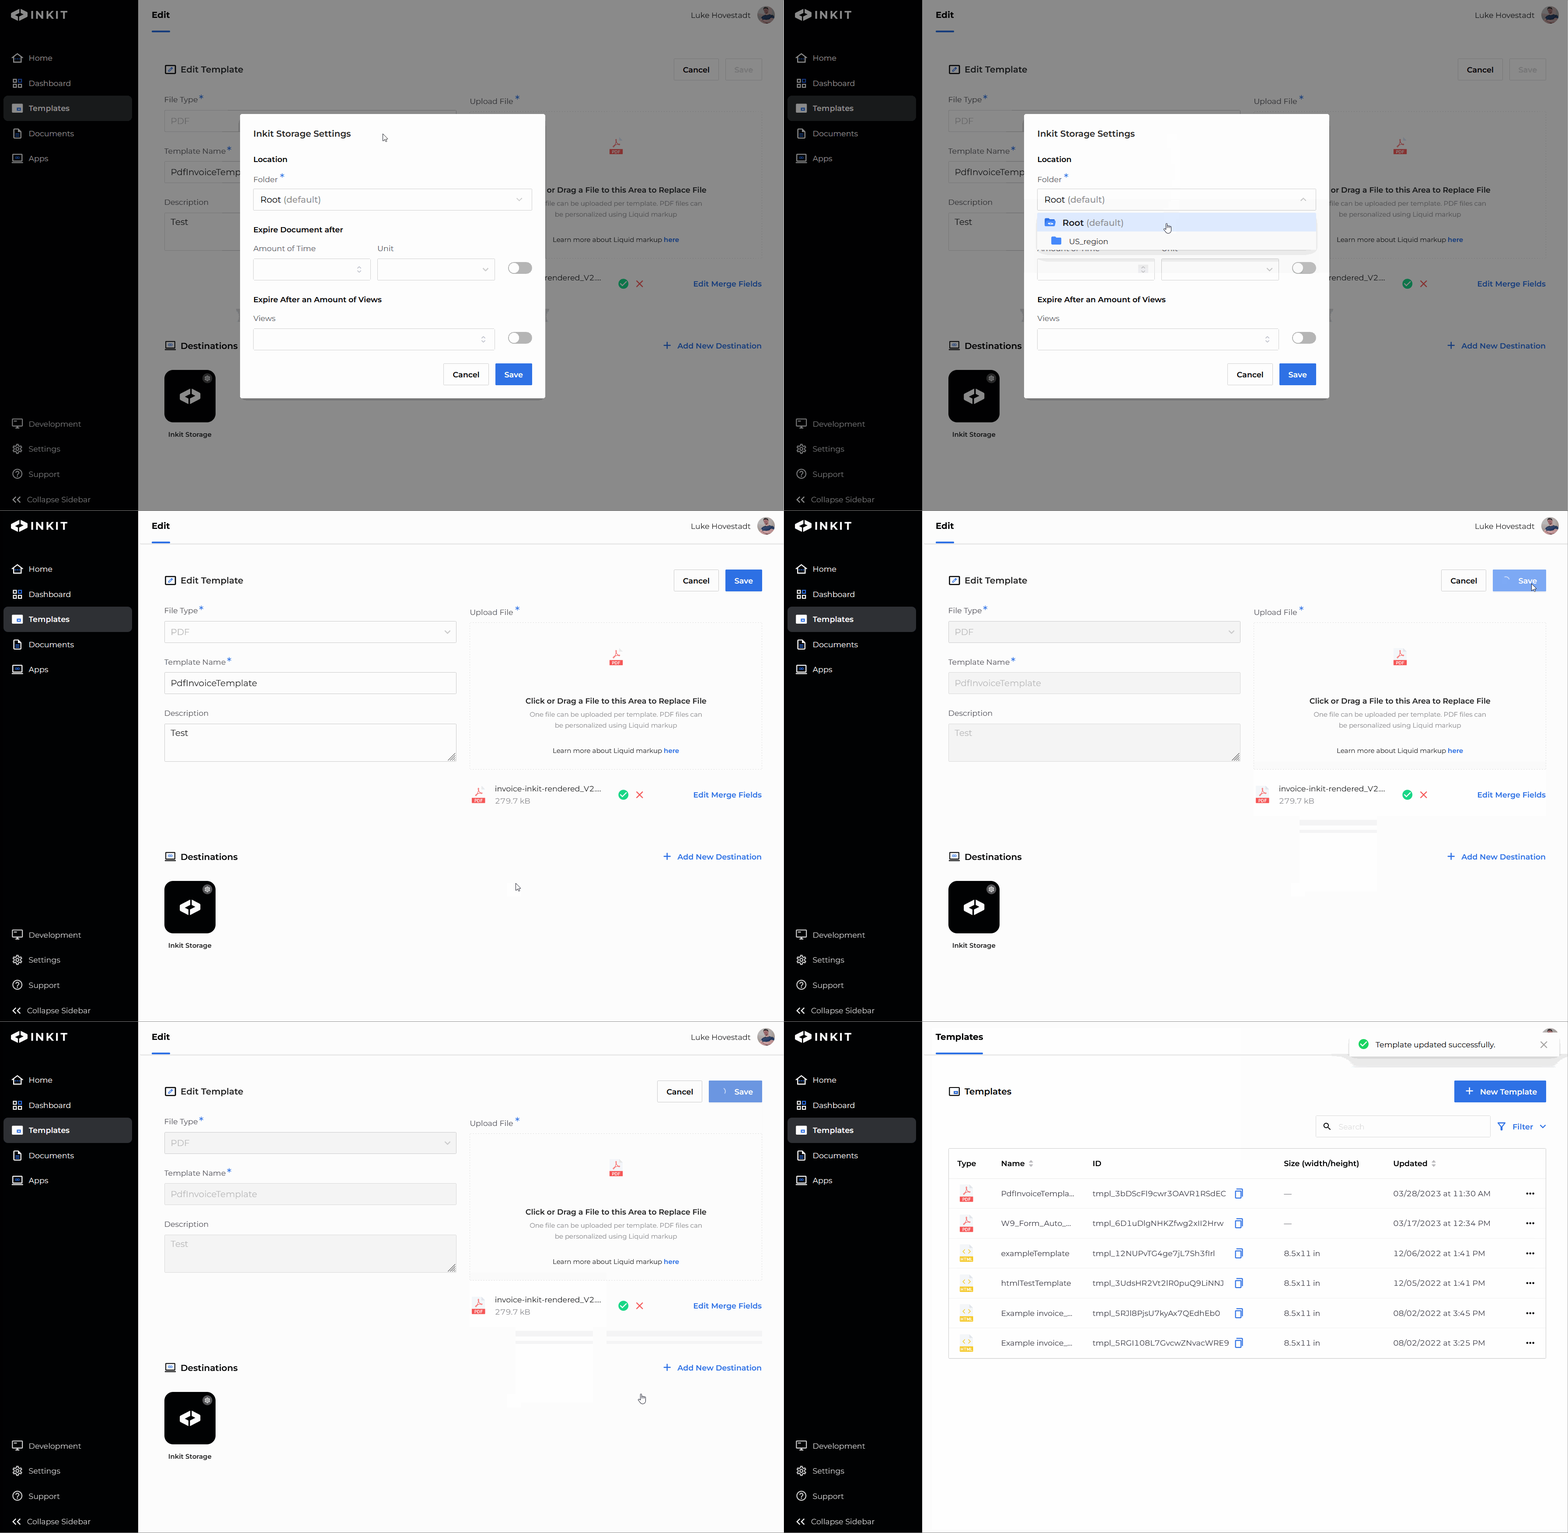
You now see a pop-up menu where you can specify folder you want to place generated documents into.
The default folder is the "Root". This is the location every document will be placed into unless otherwise specified.
For this example, we will choose the folder to "US_region." A folder we made previously in another documentation article.
Make sure to press save twice . Once in the folder destination menu and then in the template editing menu.

Note: Documents only generated by this template will be placed in your selected folder. Not documents generated from other templates.
Updated 3 months ago